
I’m sure I’m not the only one using tomato cages, or garden fencing, to protect plants and new sprouts in the garden and yard. Rather they’re protecting from animals, grand kids, or an inattentive mower, they can sometimes stay put most of the summer. That’s what made me think of a large garden cloche; if you’re going to look at it for months, why not make it more attractive? And, no one else will have one like it … that’s always a bonus, right?
My garden cloche design got a jump start when I stumbled upon a pair of wire planter baskets at a local thrift shop for a dollar. The wire spacing on them was similar to a discarded air conditioner guard I had tucked away at home.
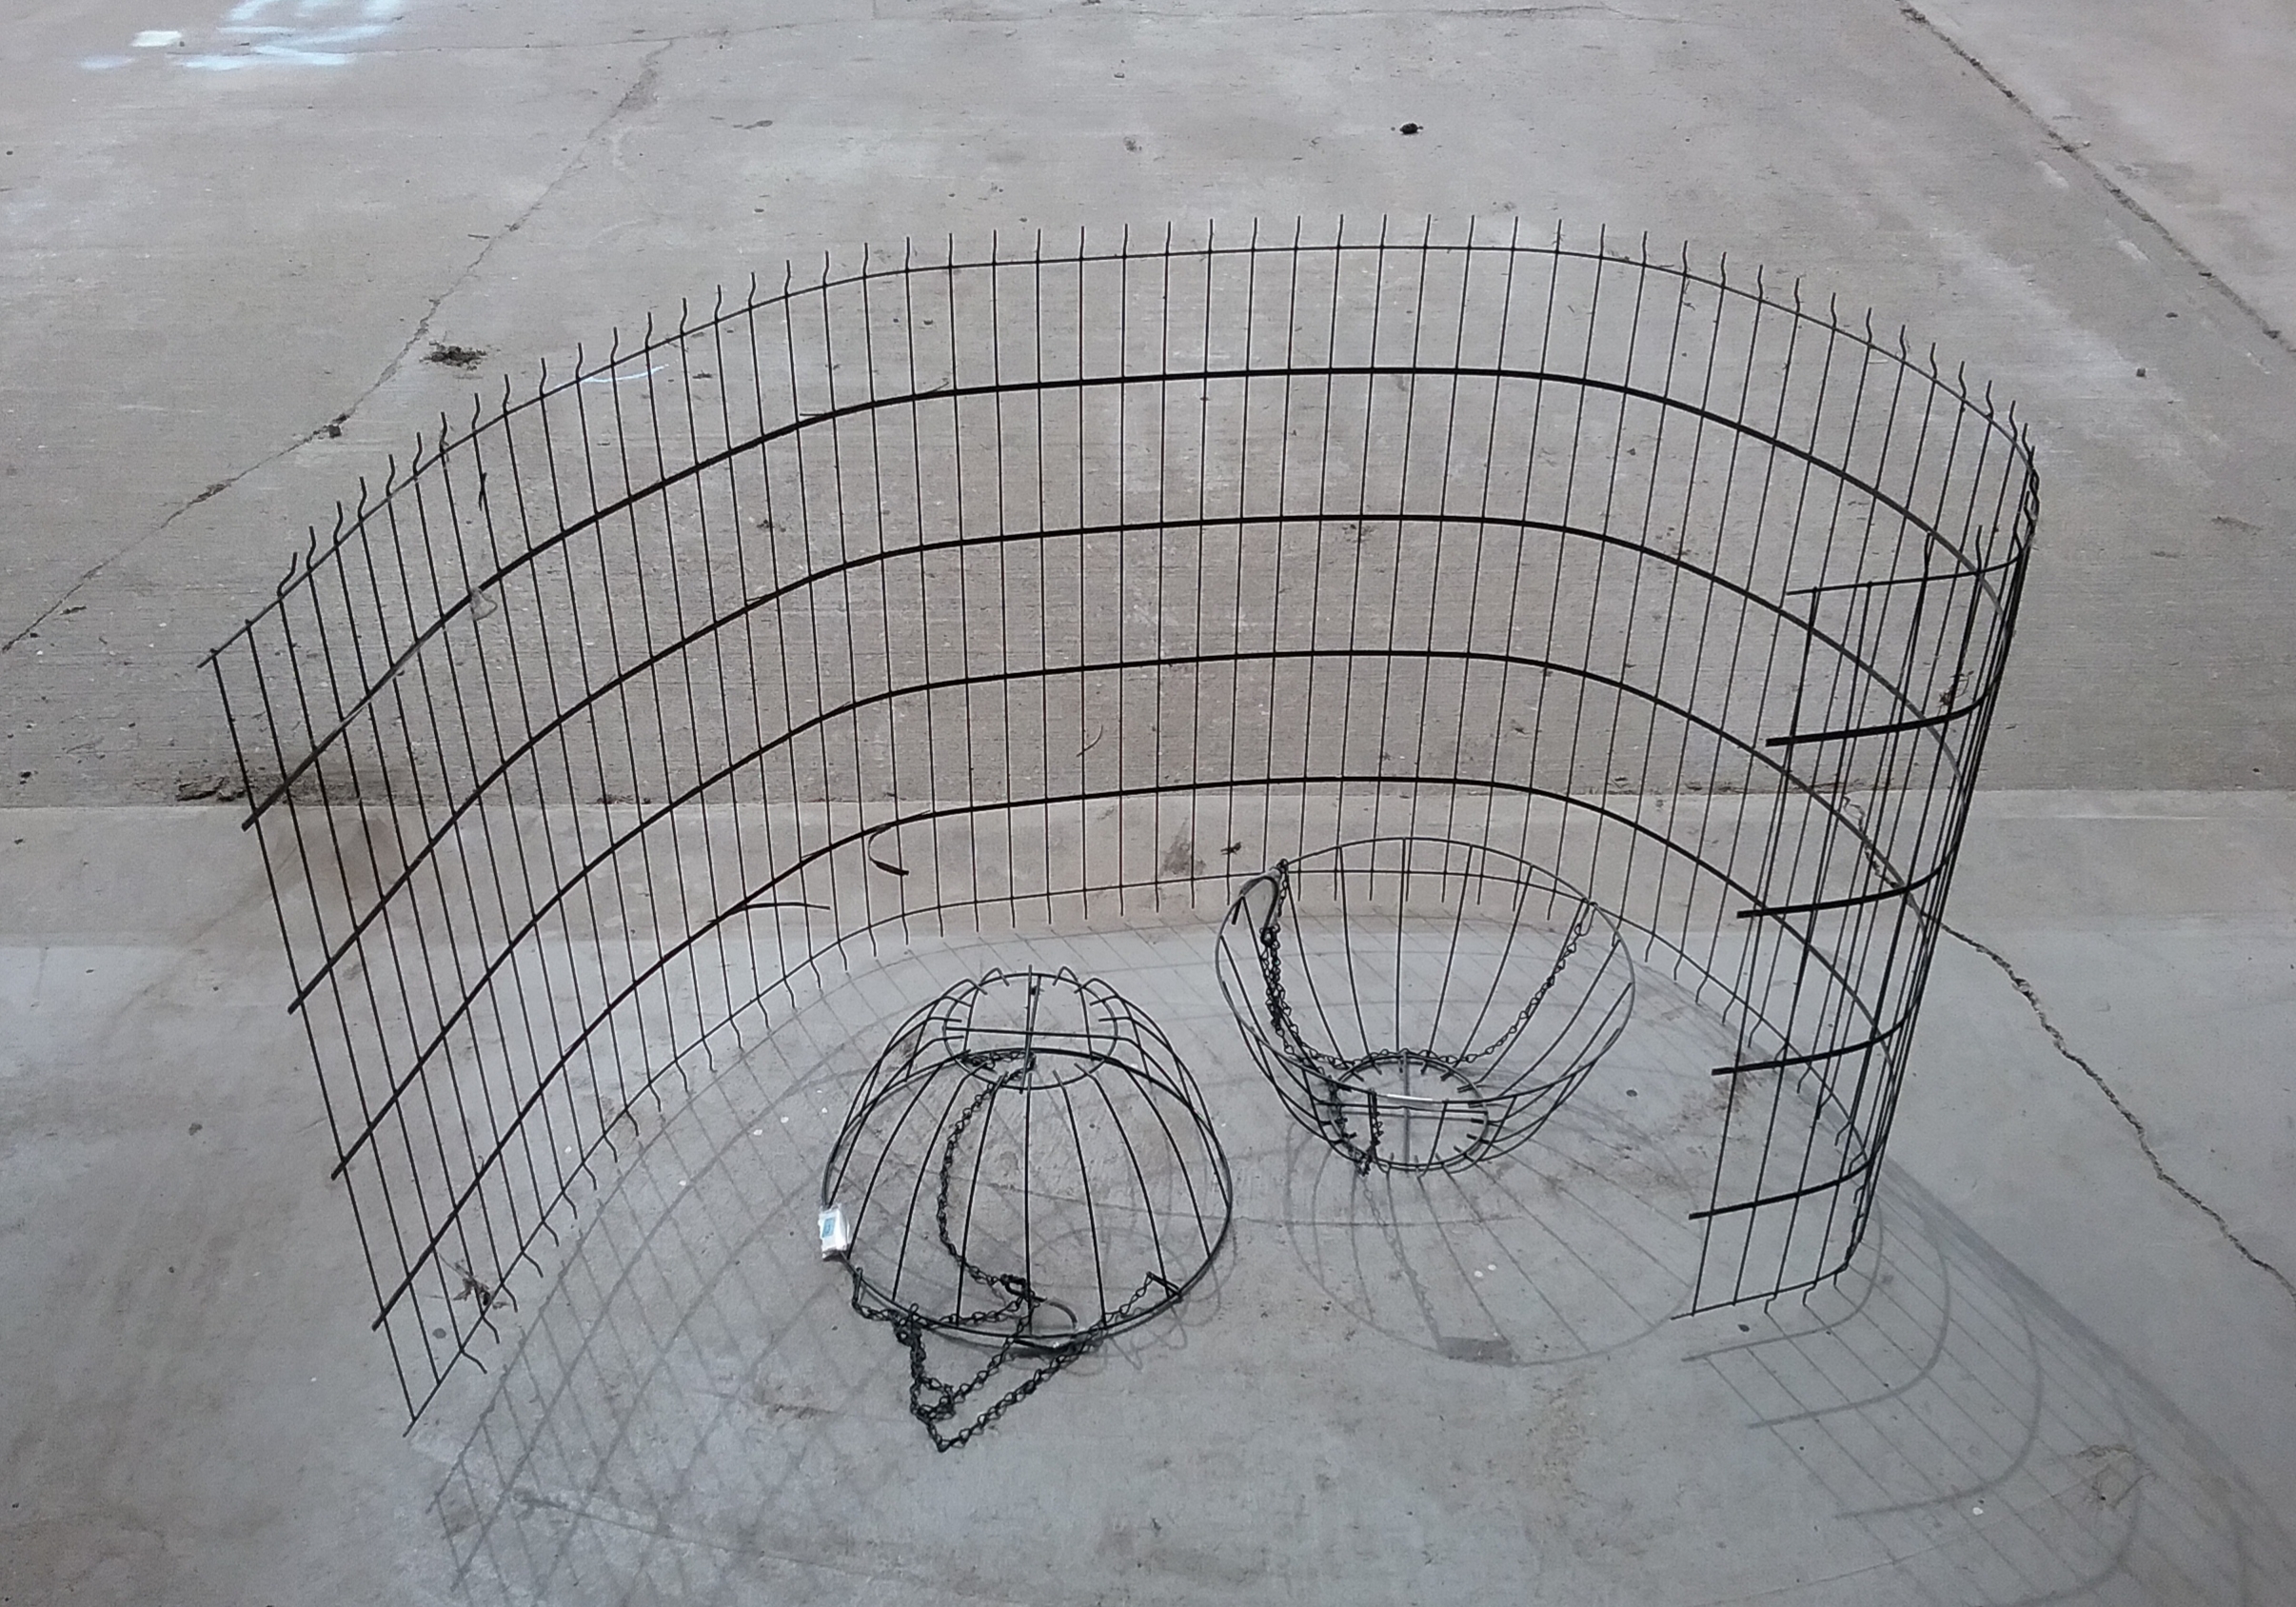
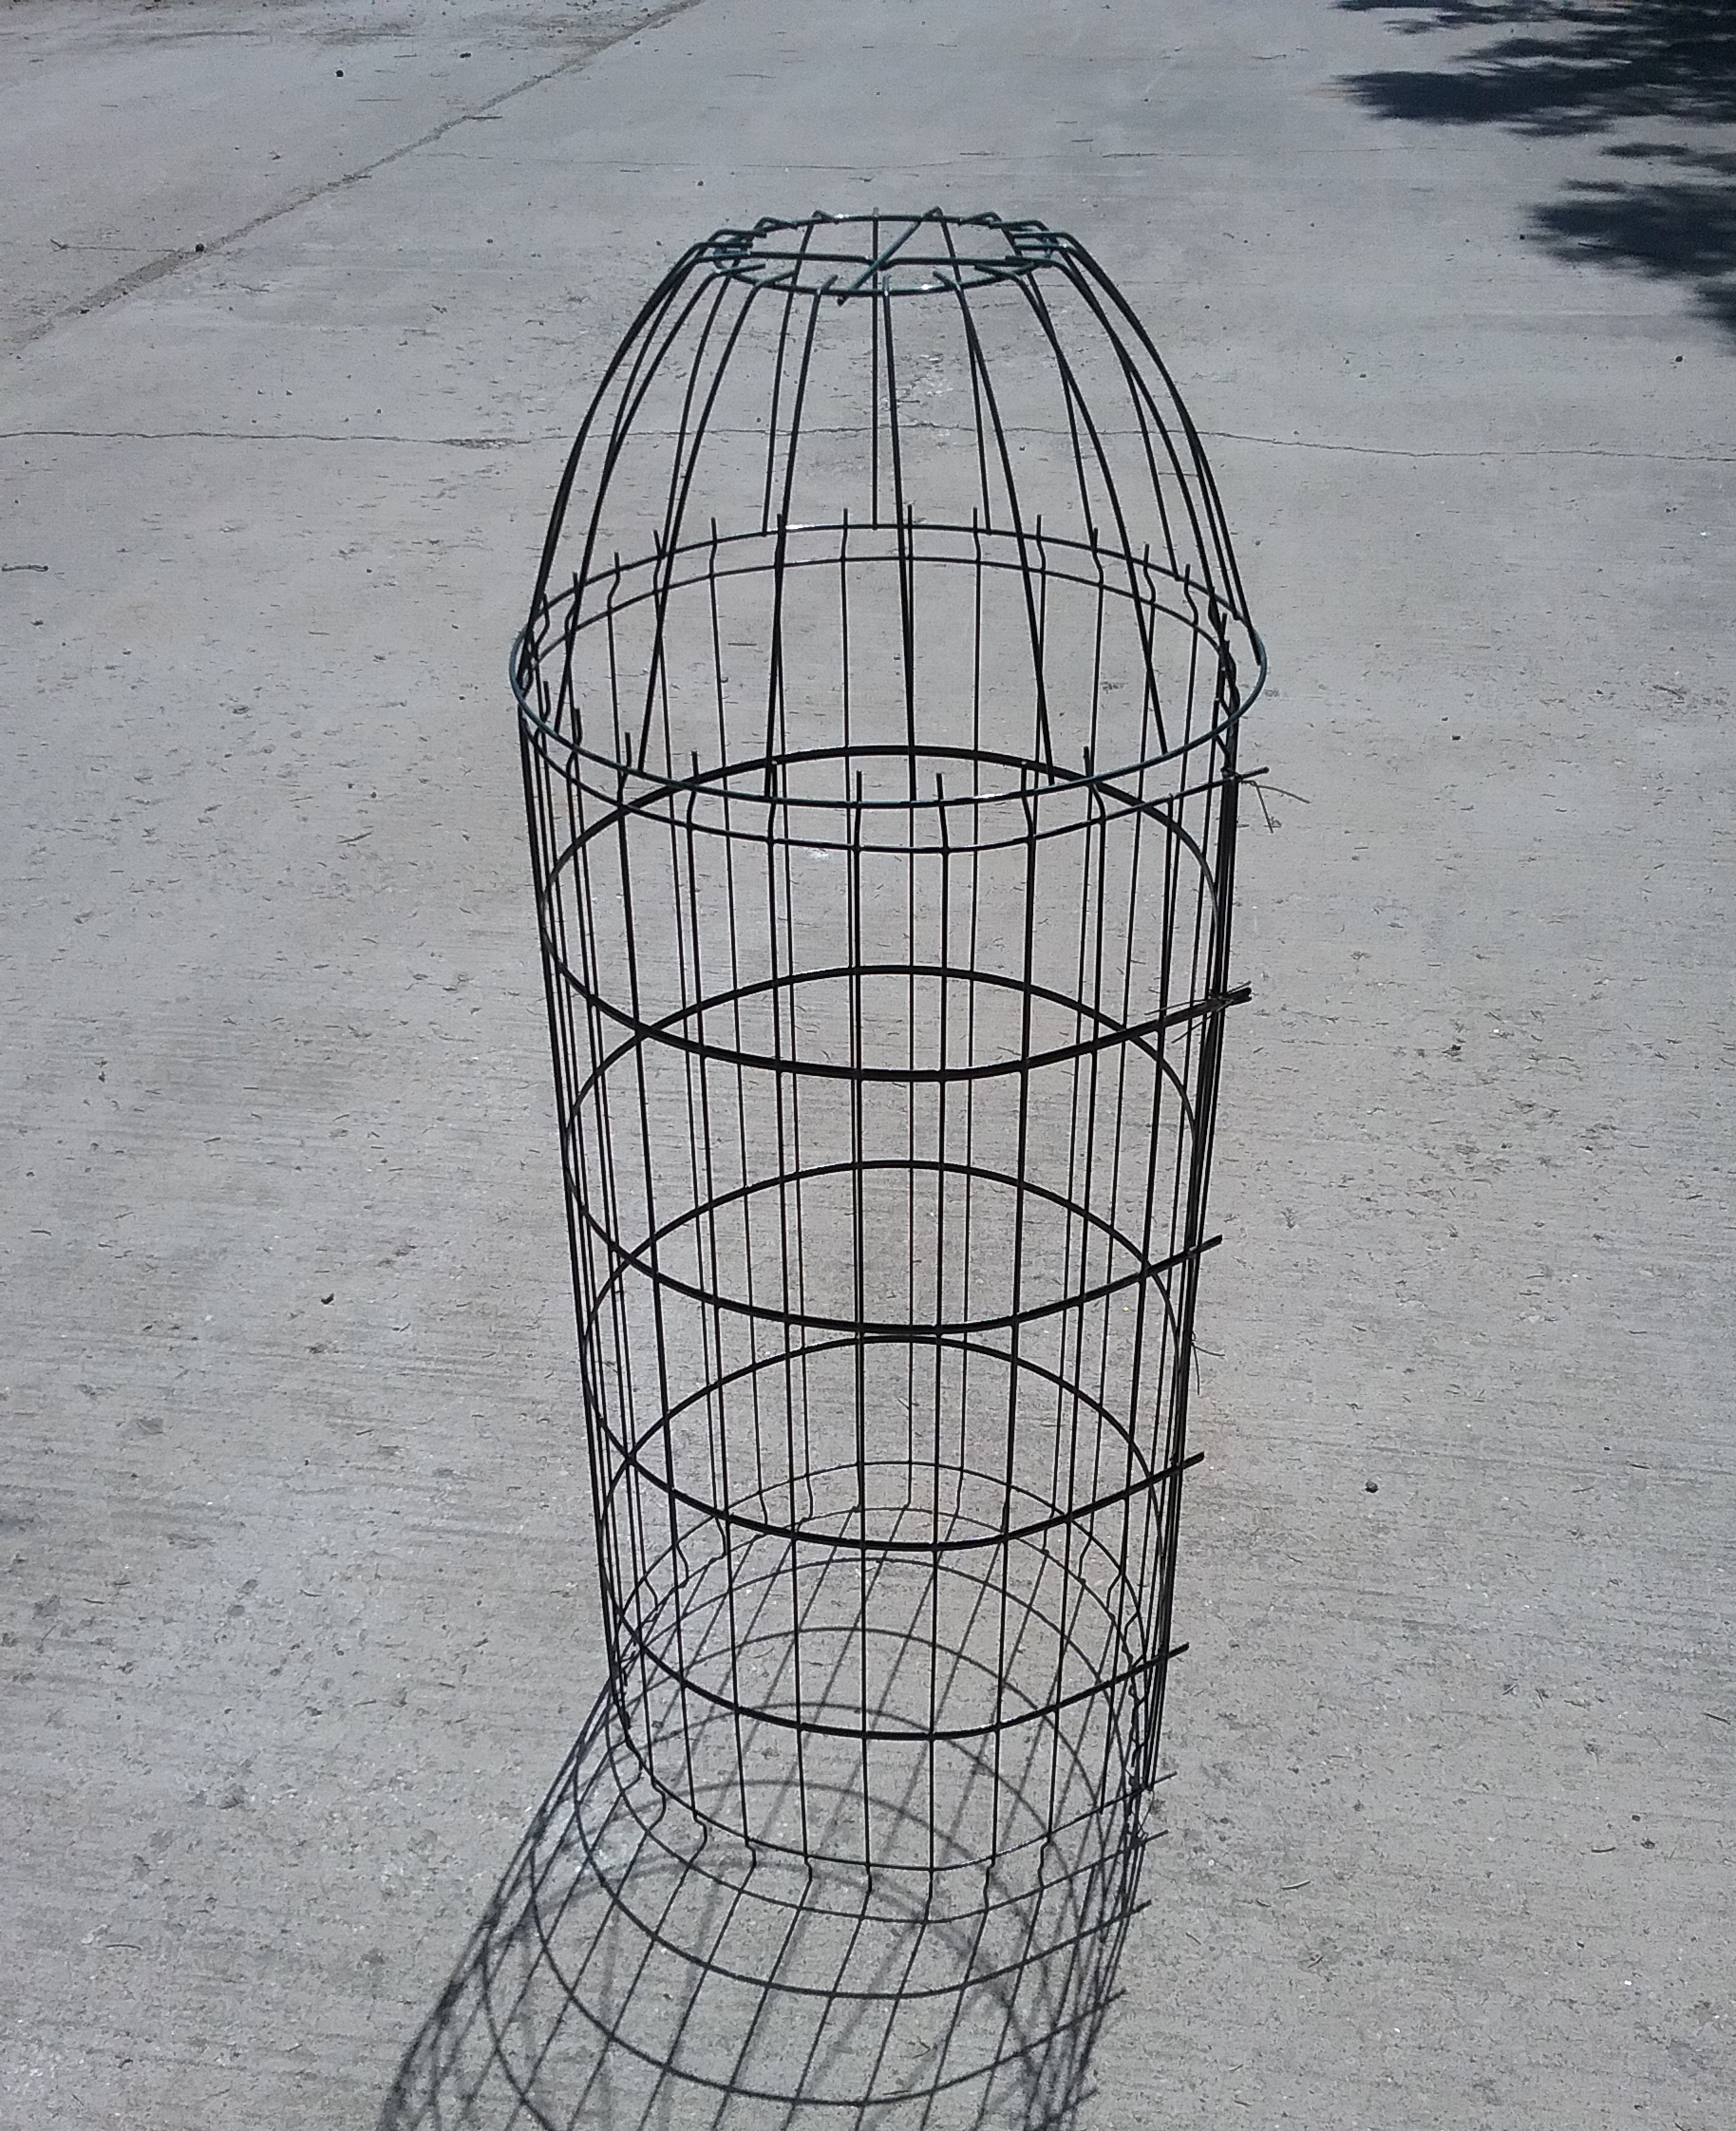
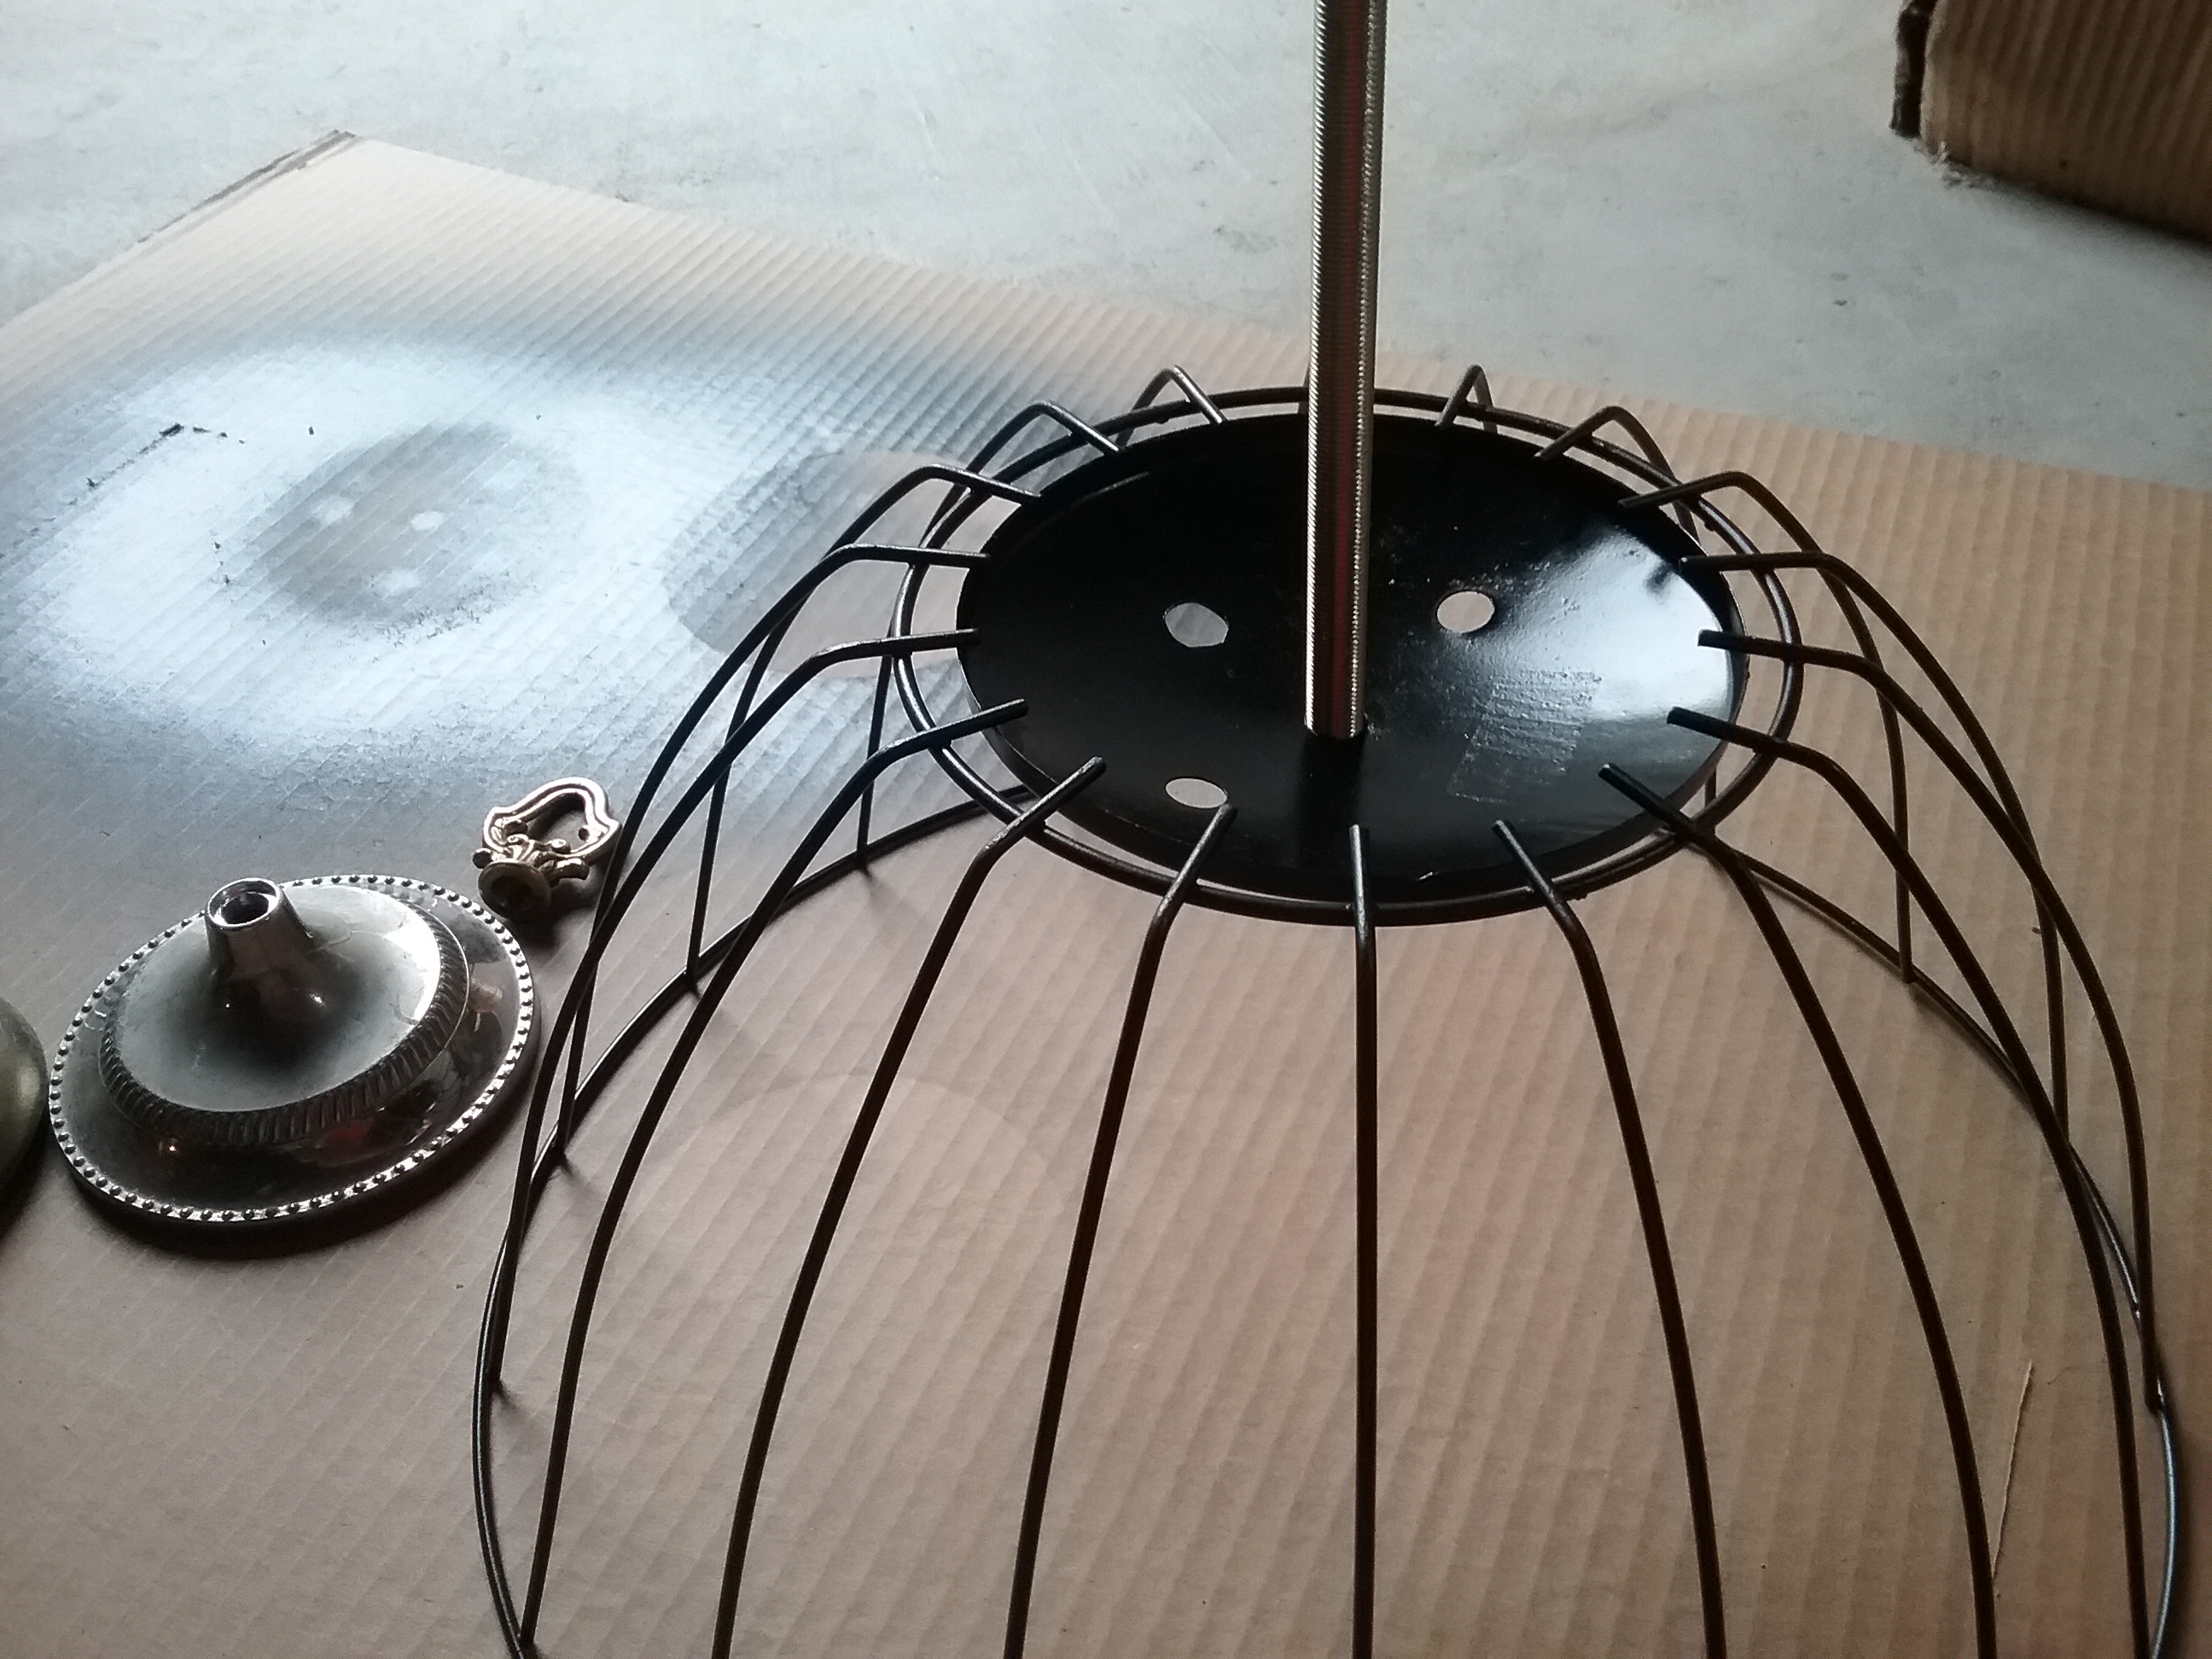
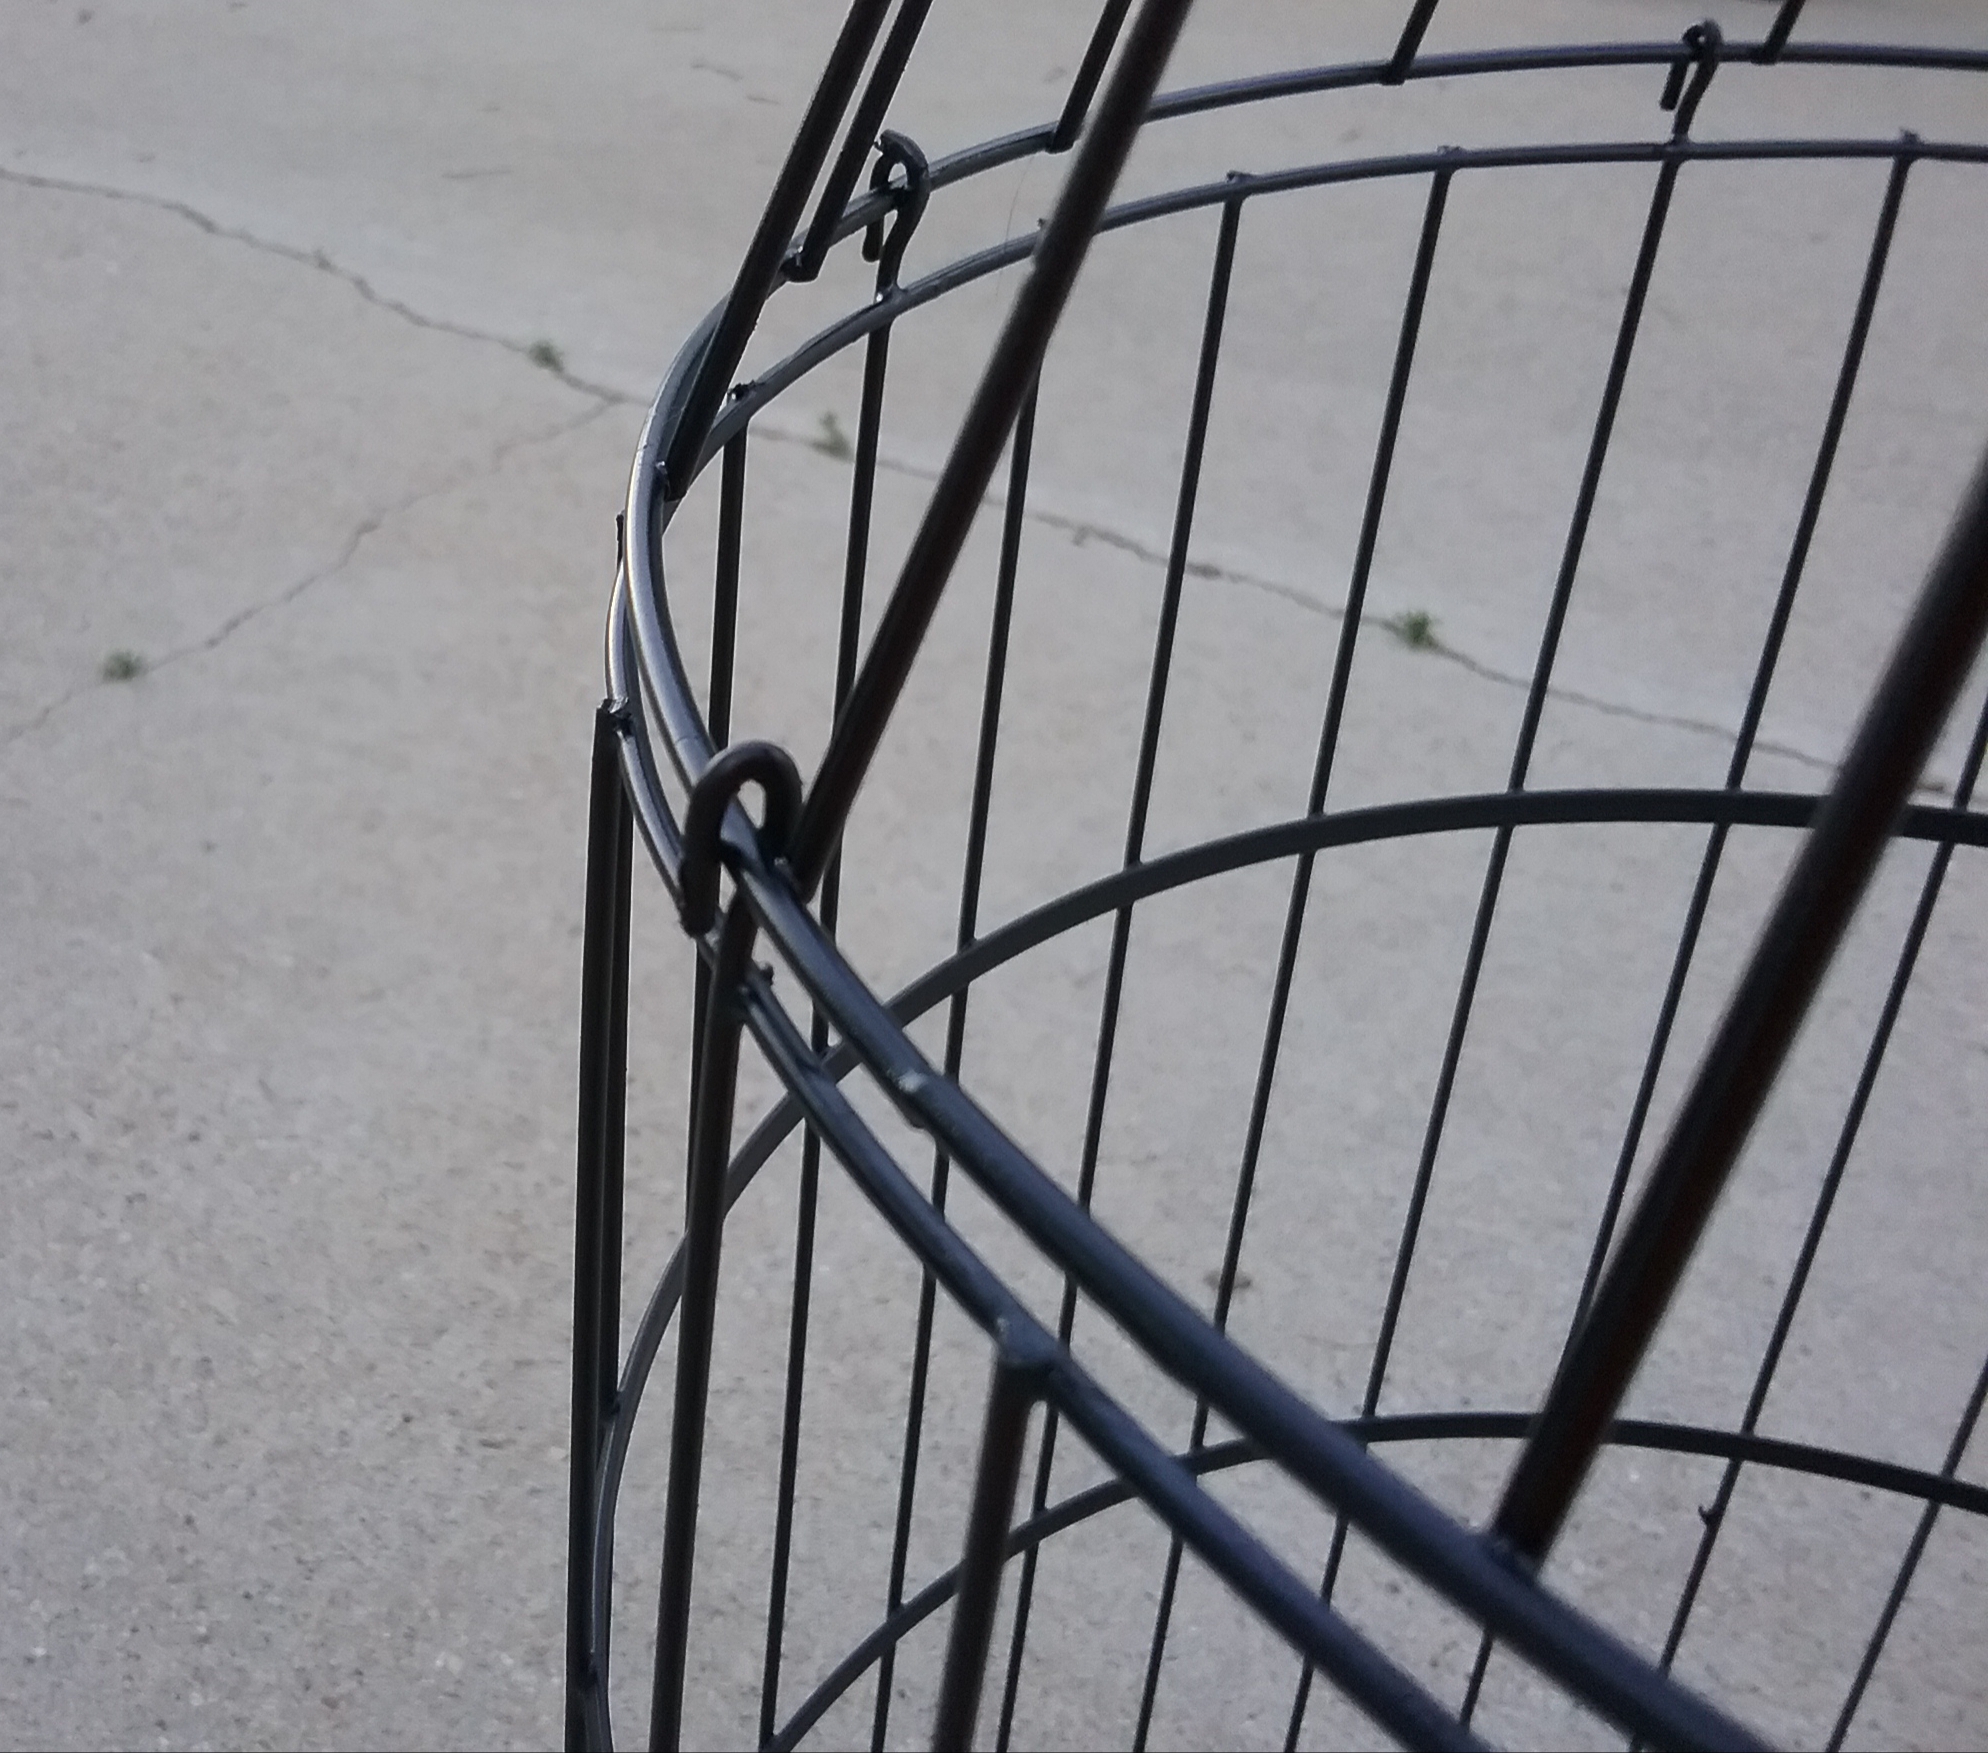
I quickly realized I could not bend and shape the steel AC guard to match the 14″dia. of the planter basket with just my hands. After searching around, I finally found an old milk can of that size to roll, wrap, and shape it around. I used bolt cutters to cut the length of guard needed, then connected the ends together by wrapping the entire length of the seam with thin wire, crisscrossing the wire at the intersections, for a smooth seam and firm connection. Cut the wires from bottom ring, leaving prongs to push into the ground.


Cut and remove the crossbars from the bottom of the basket. Once I cut them in the center, they just snapped off.

Spray both of the wire pieces black with an exterior paint recommended for metal. Let dry completely.


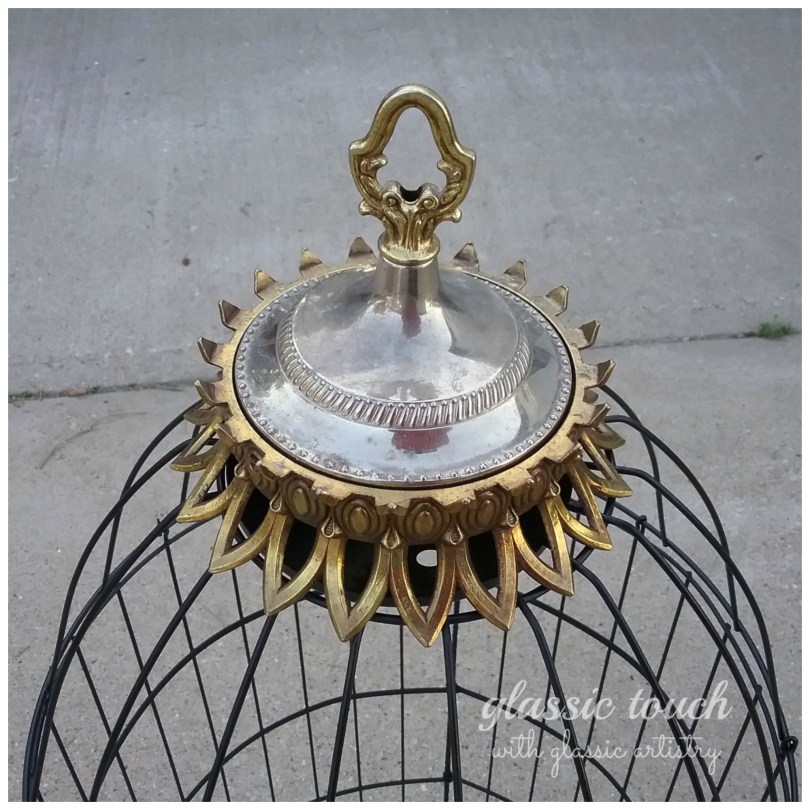
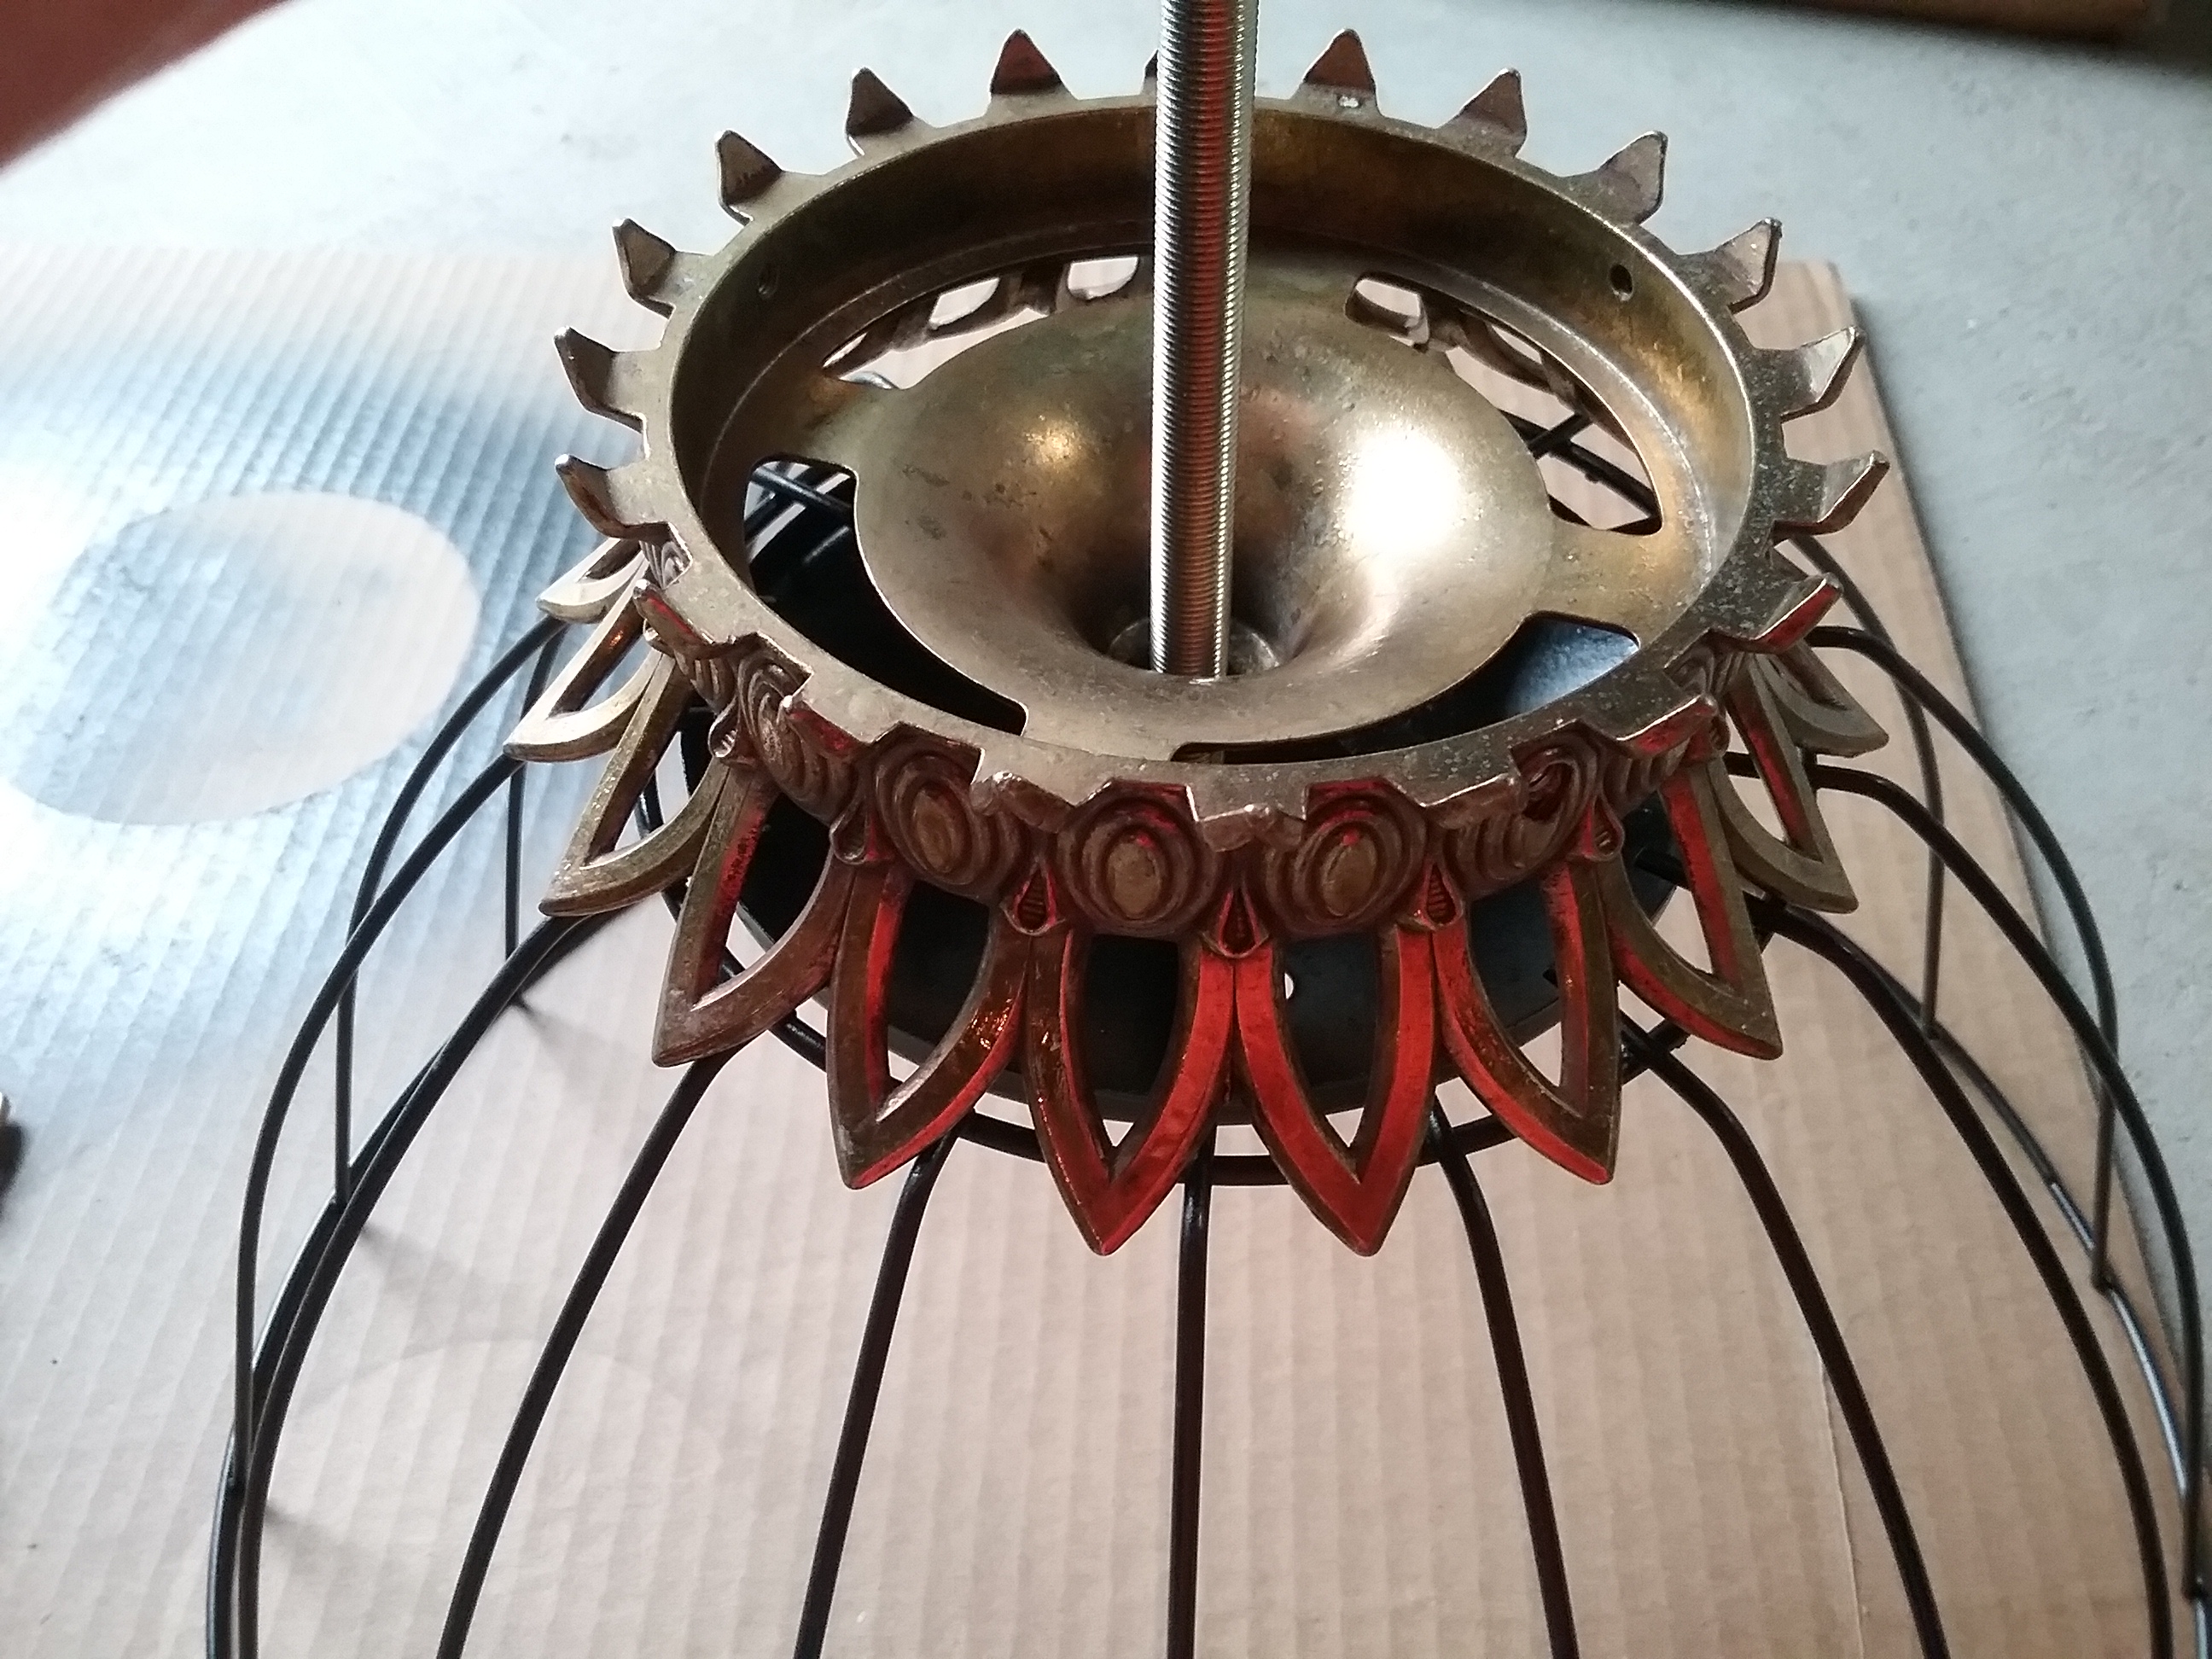
I gathered some odd lamp pieces and a short piece of threaded rod to stack and build a large finial to adorn the top of the upturned basket. One lamp piece (the base piece) will need to fit nicely inside the basket below where the crossbars were.
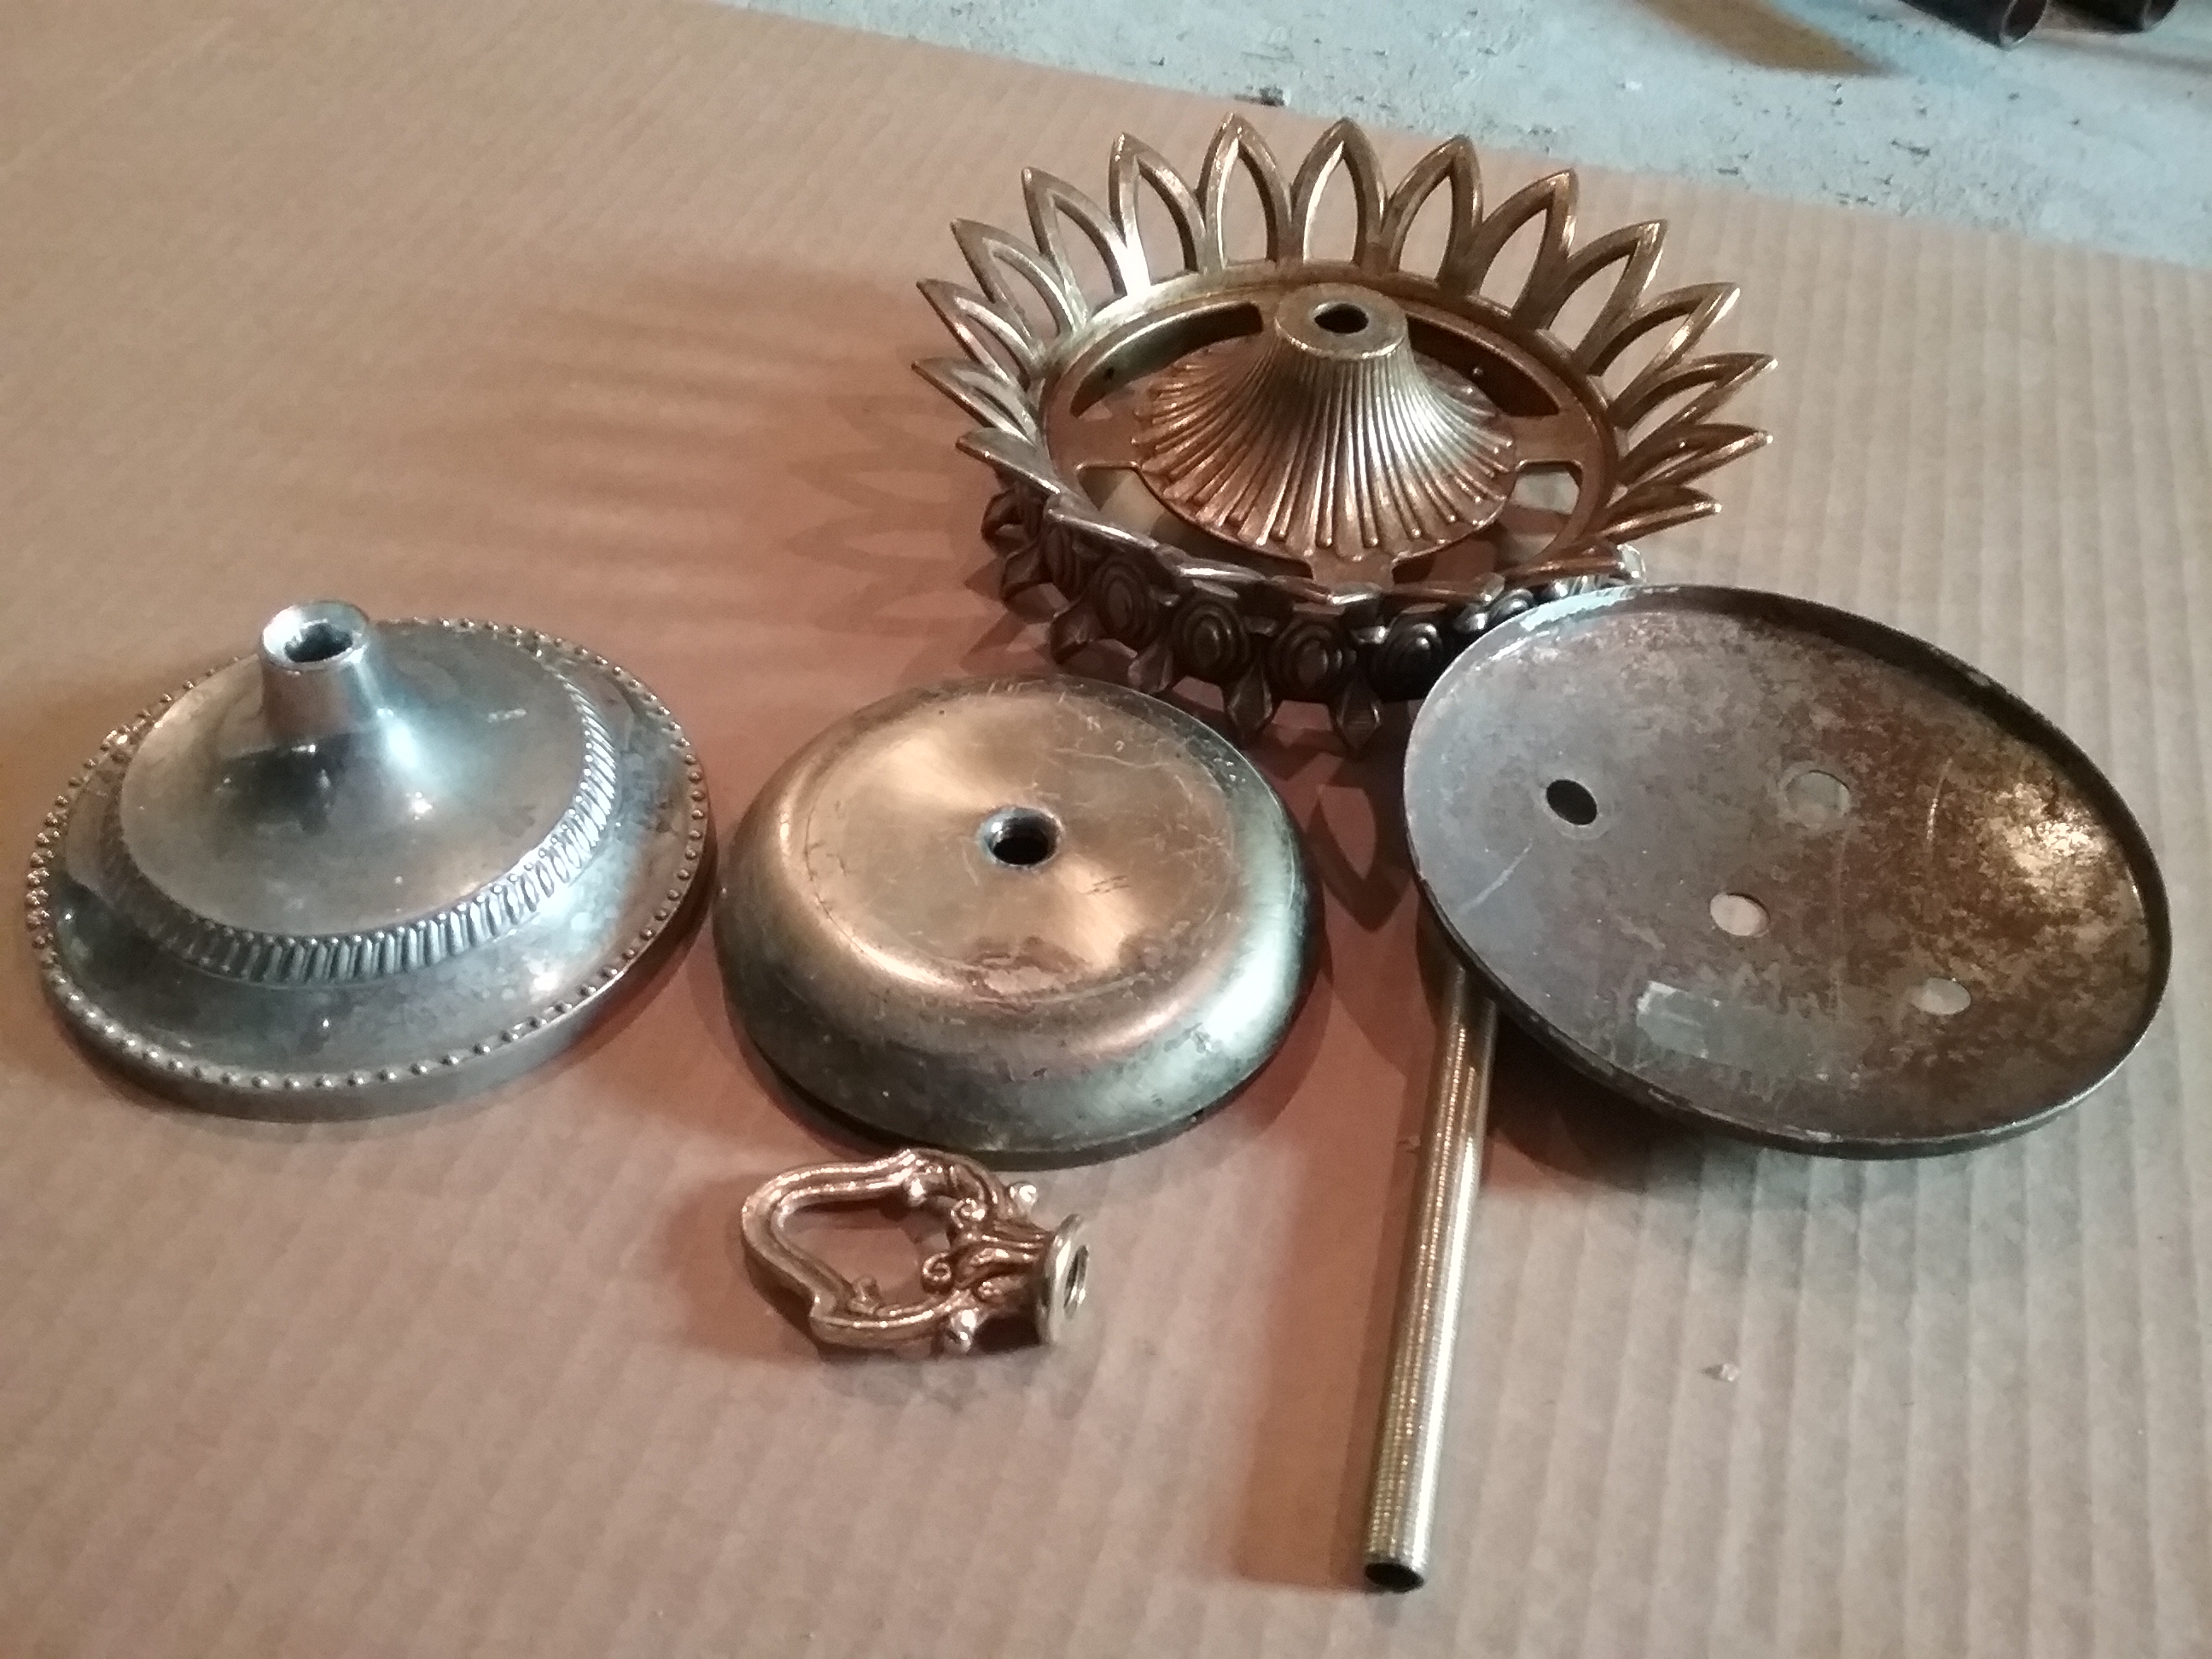
Spray paint the base lamp pieces black, let dry.
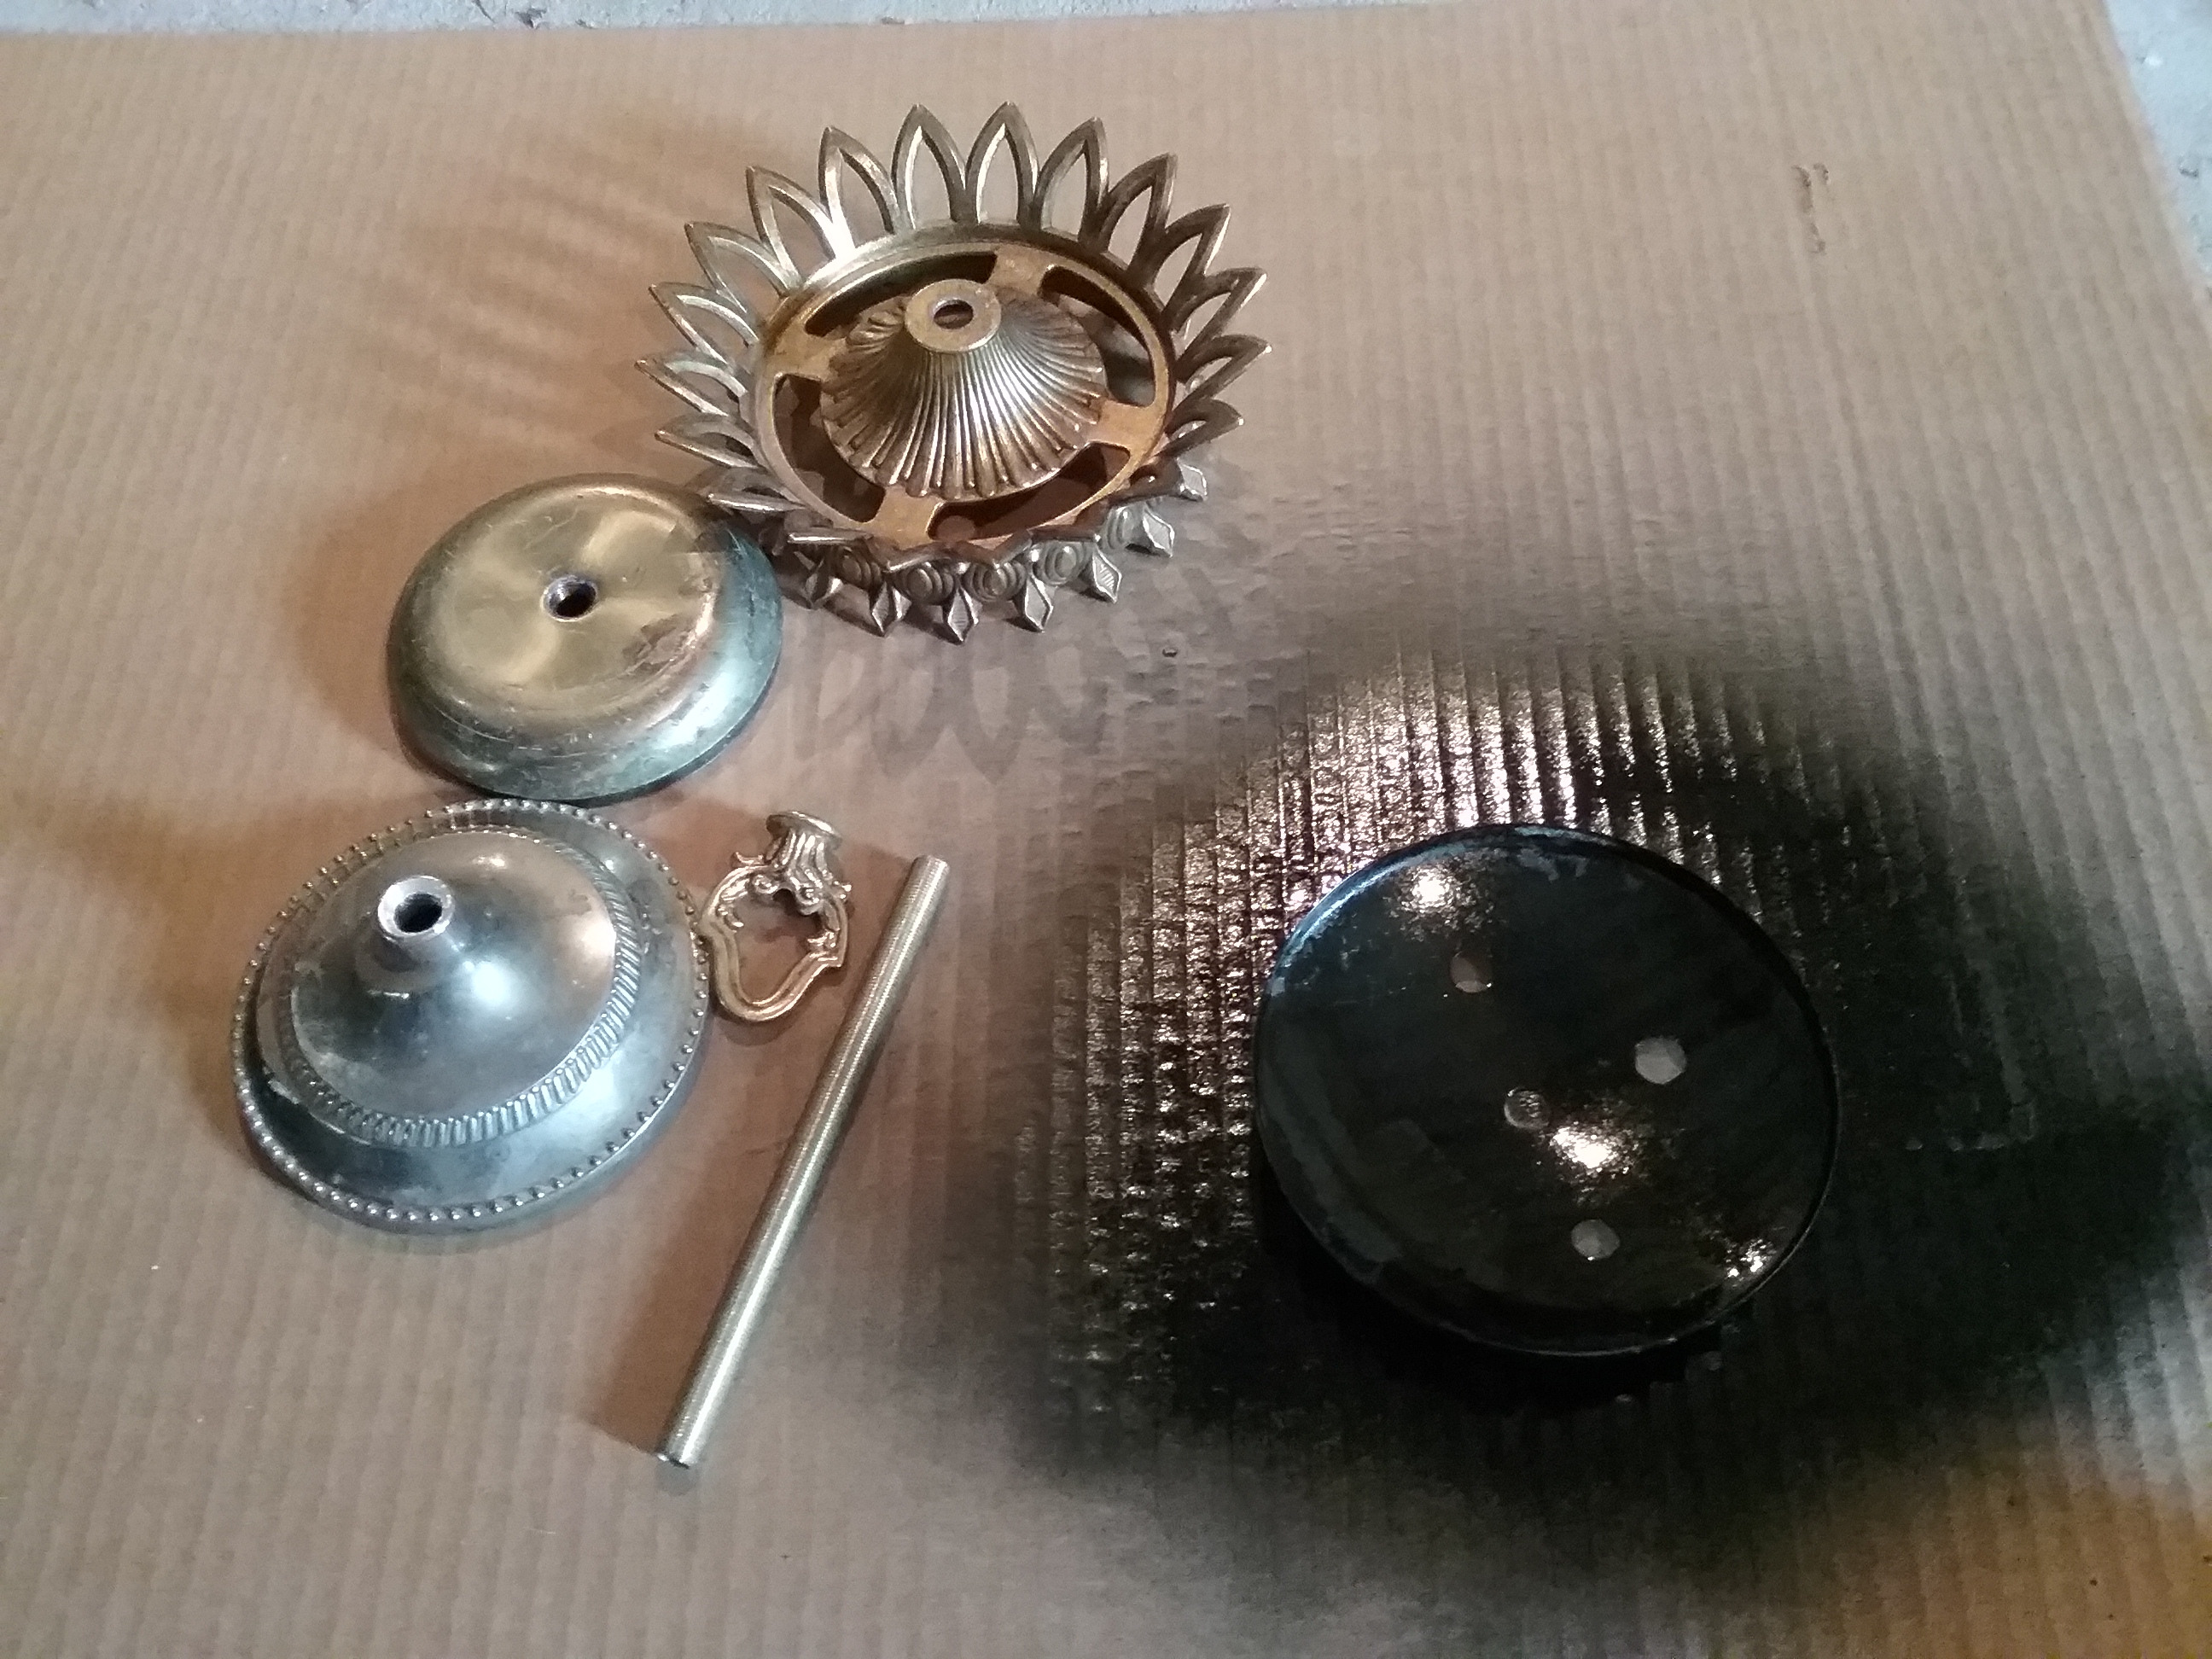
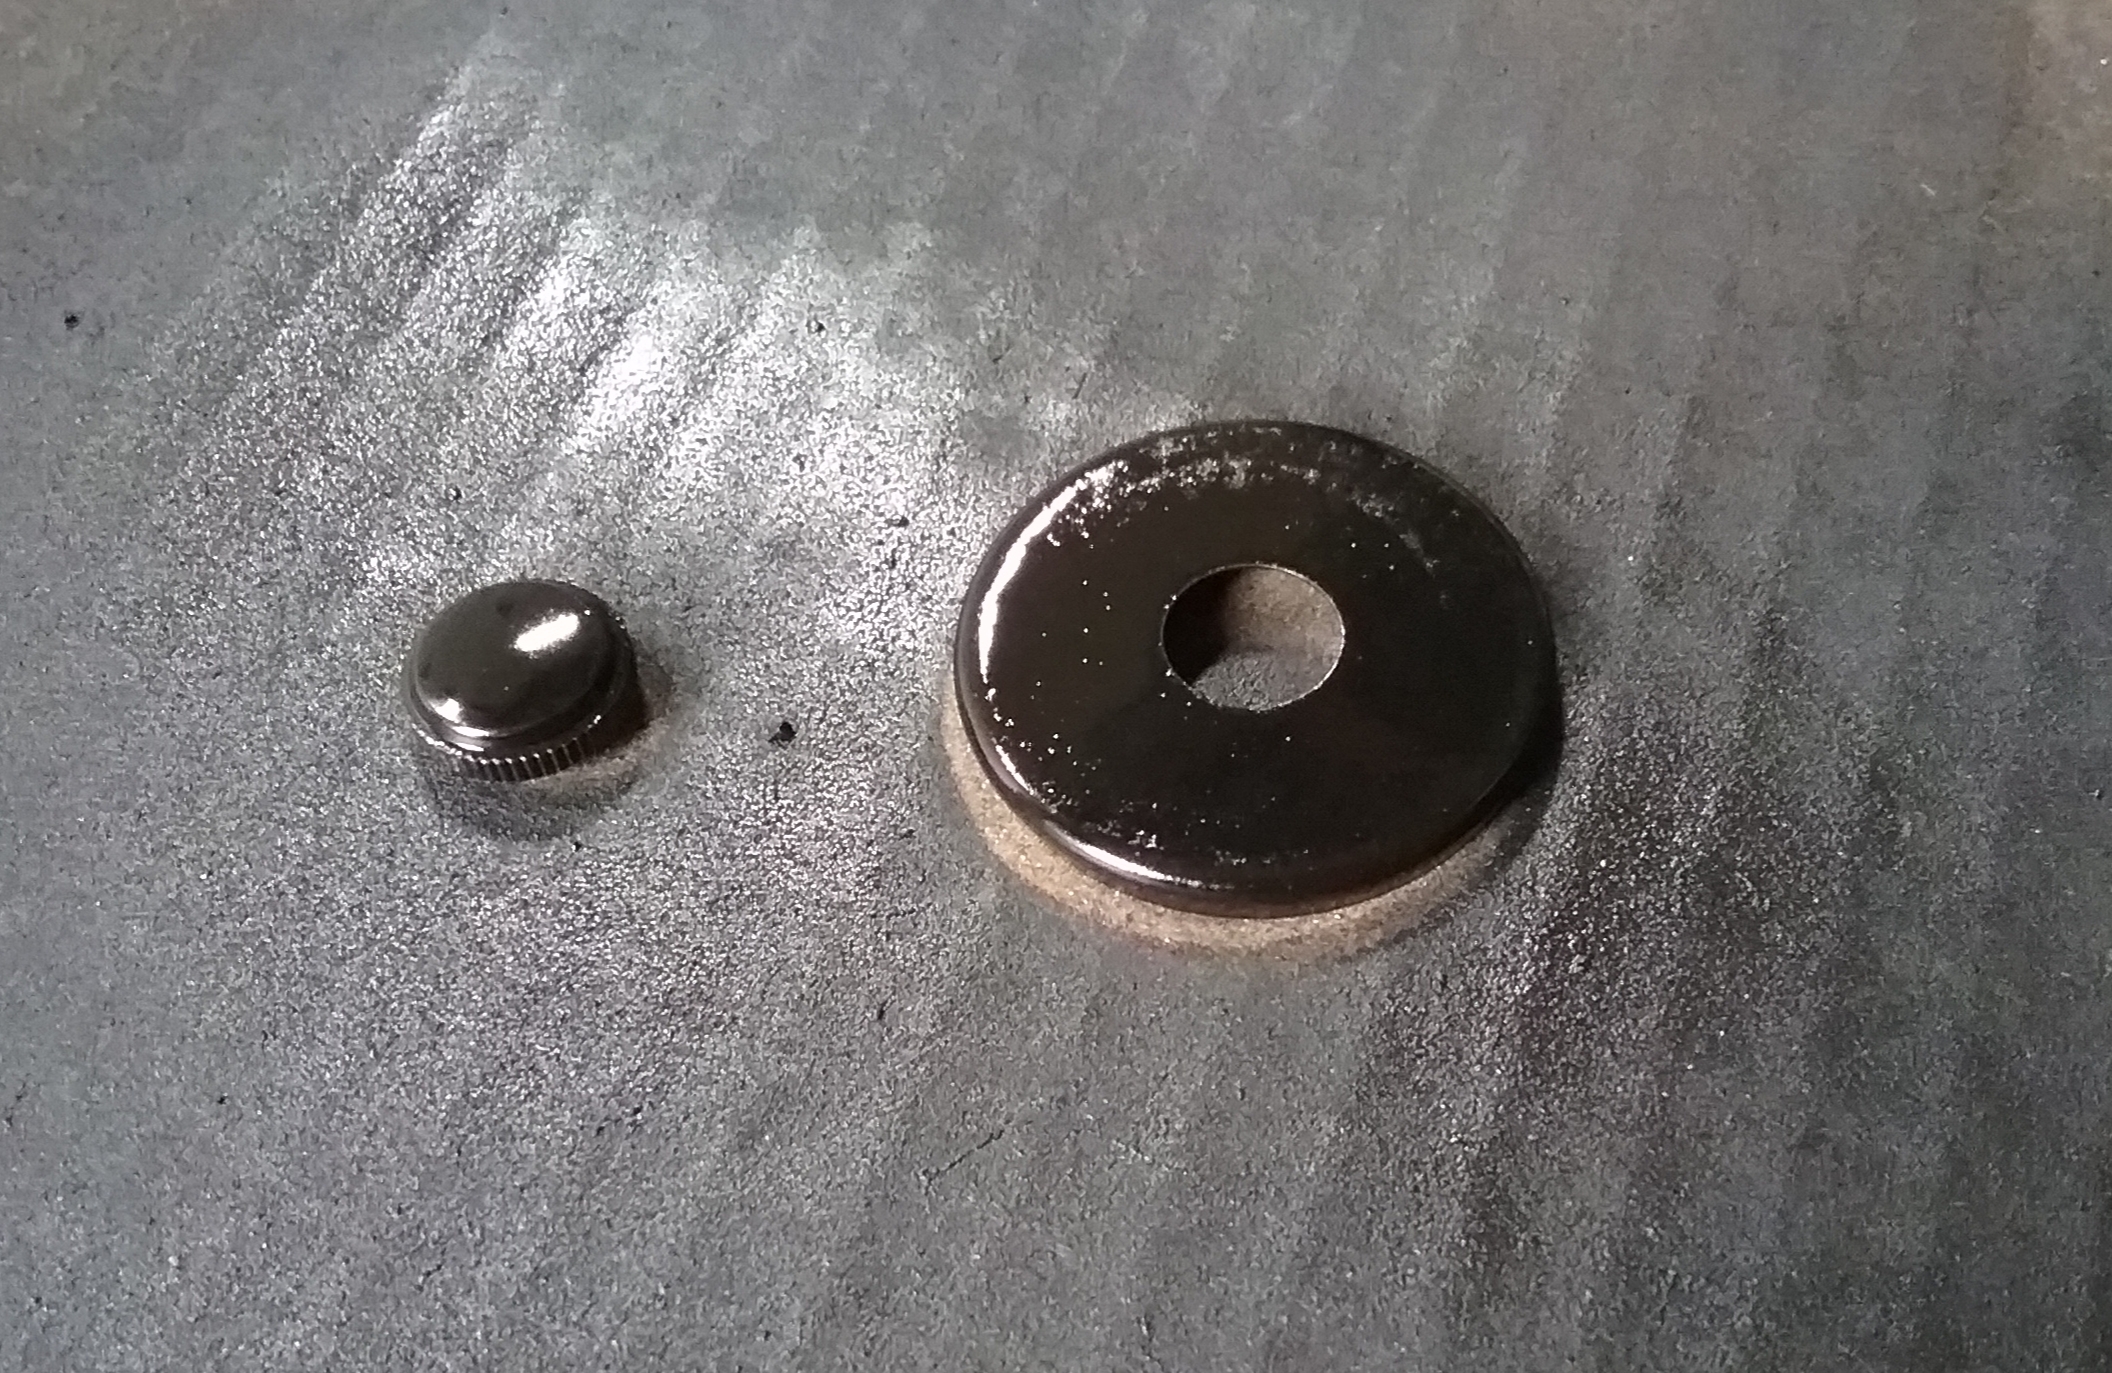
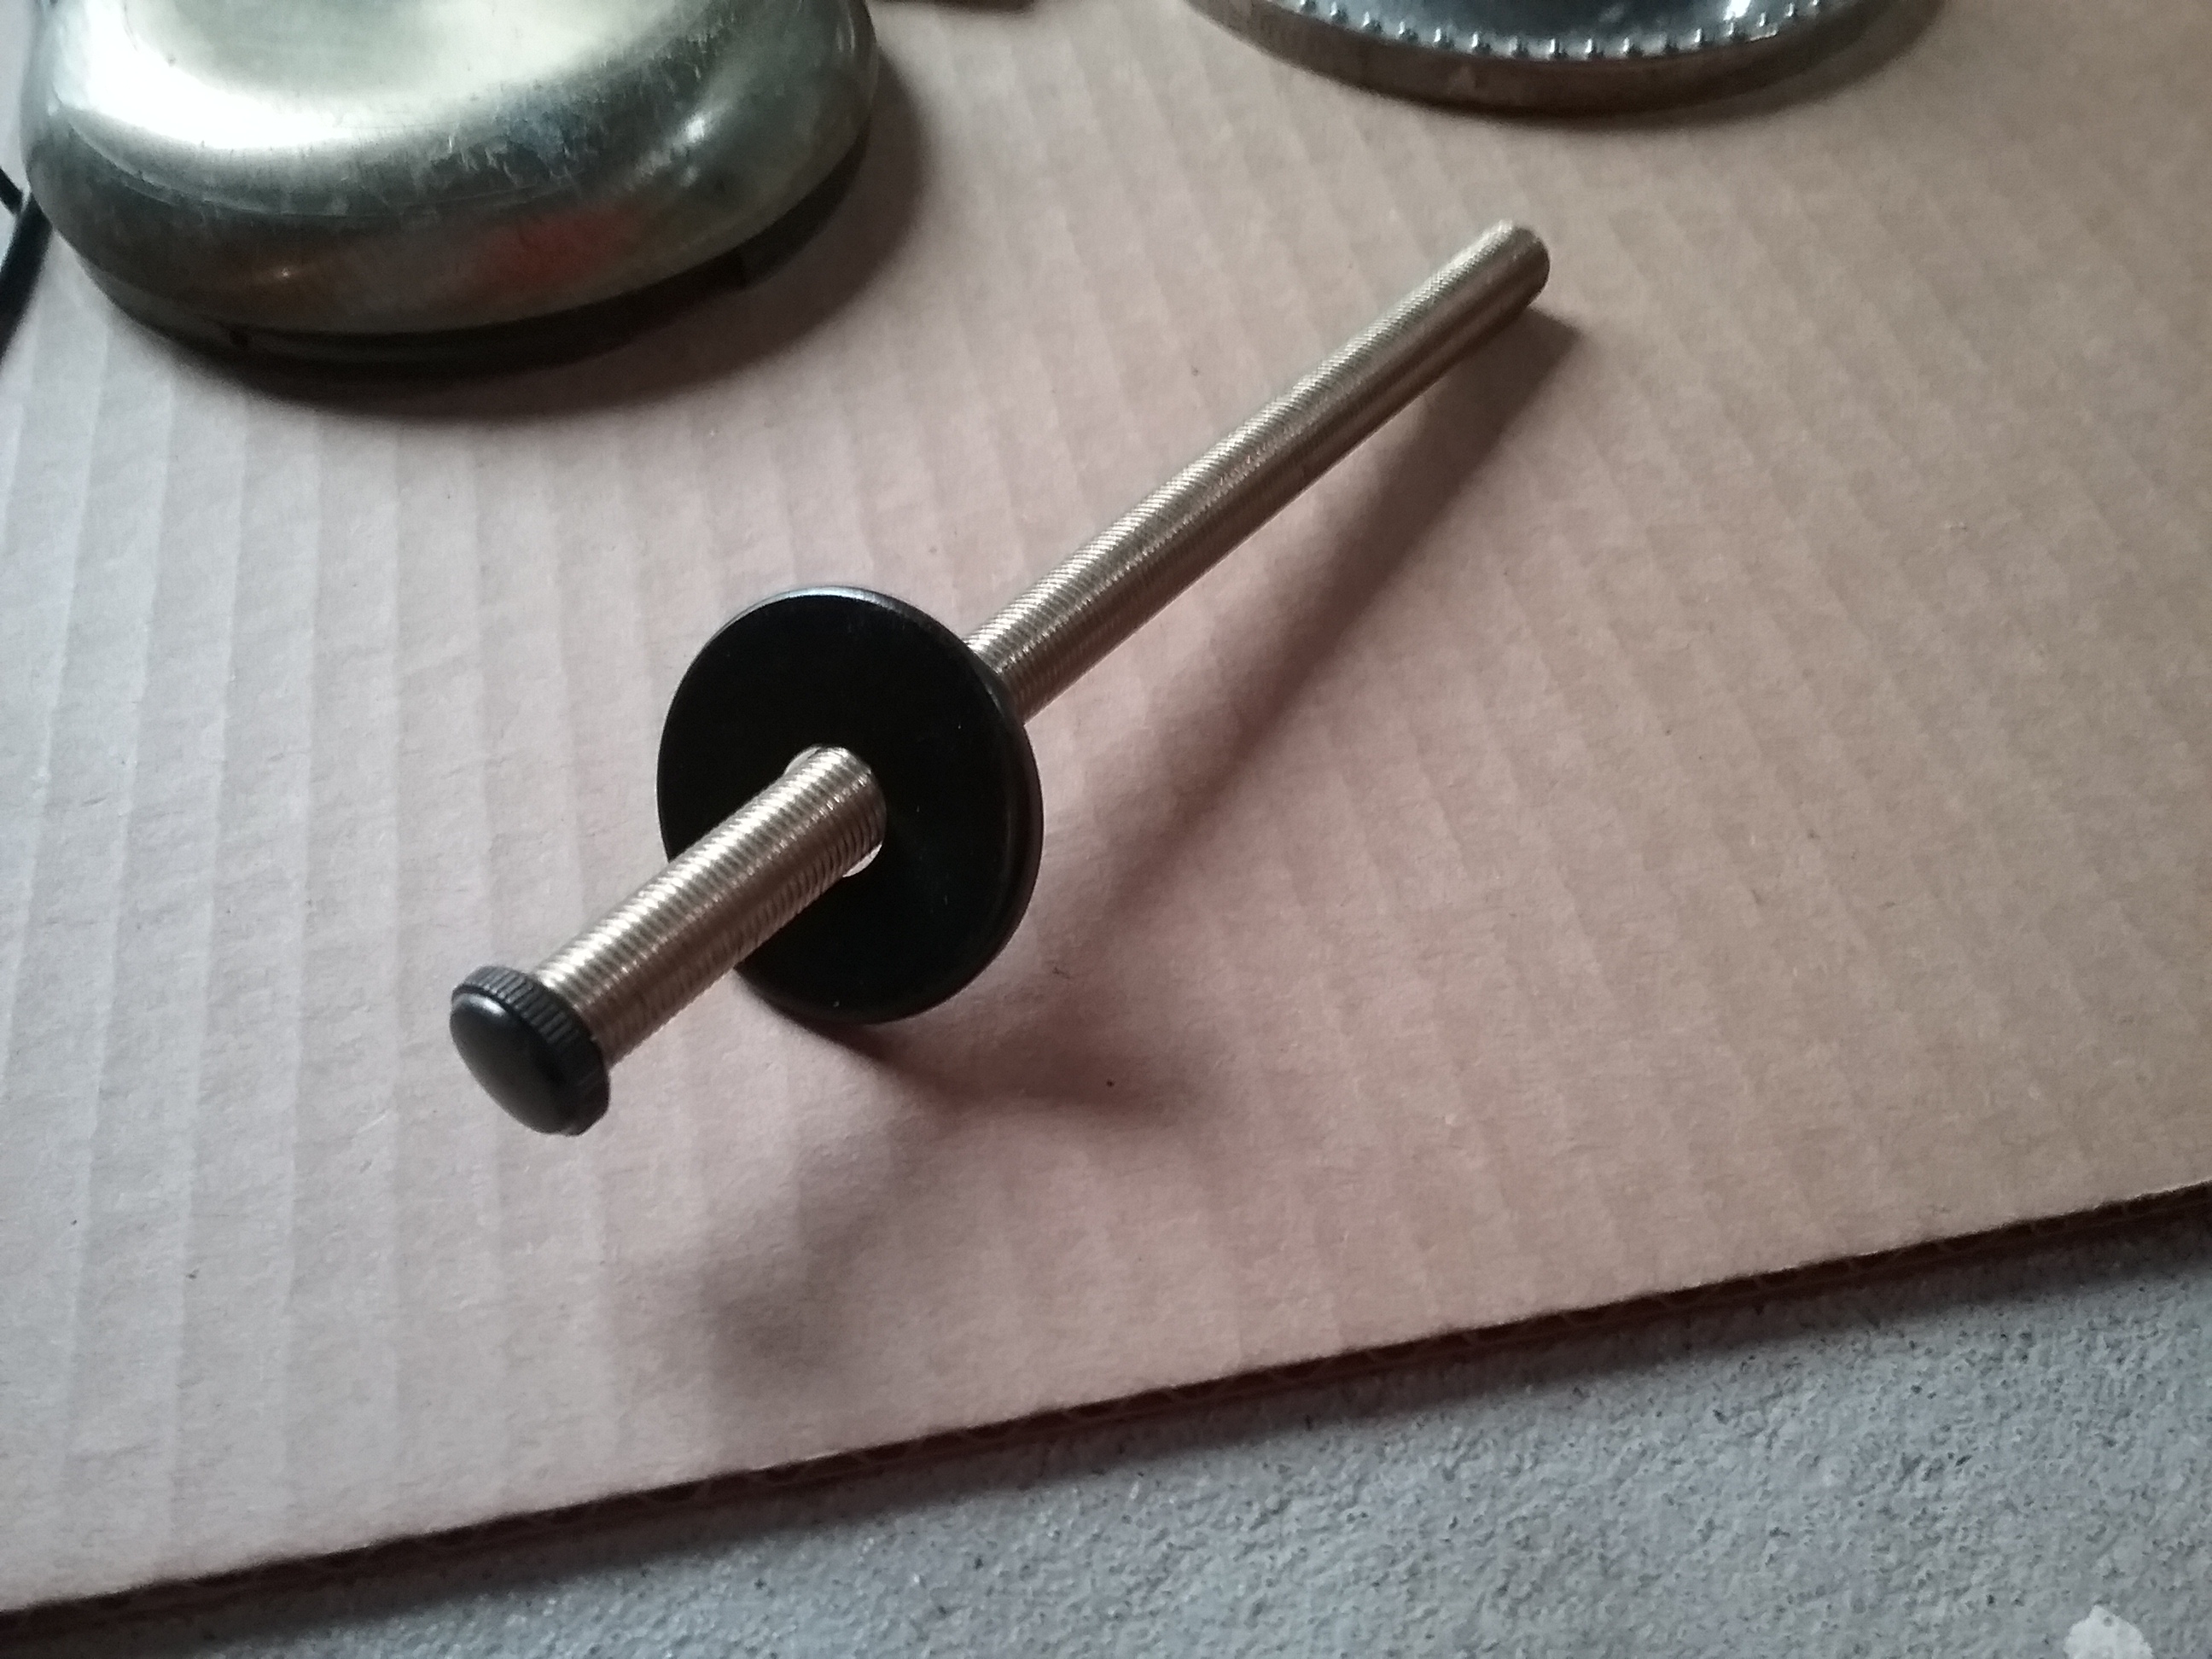
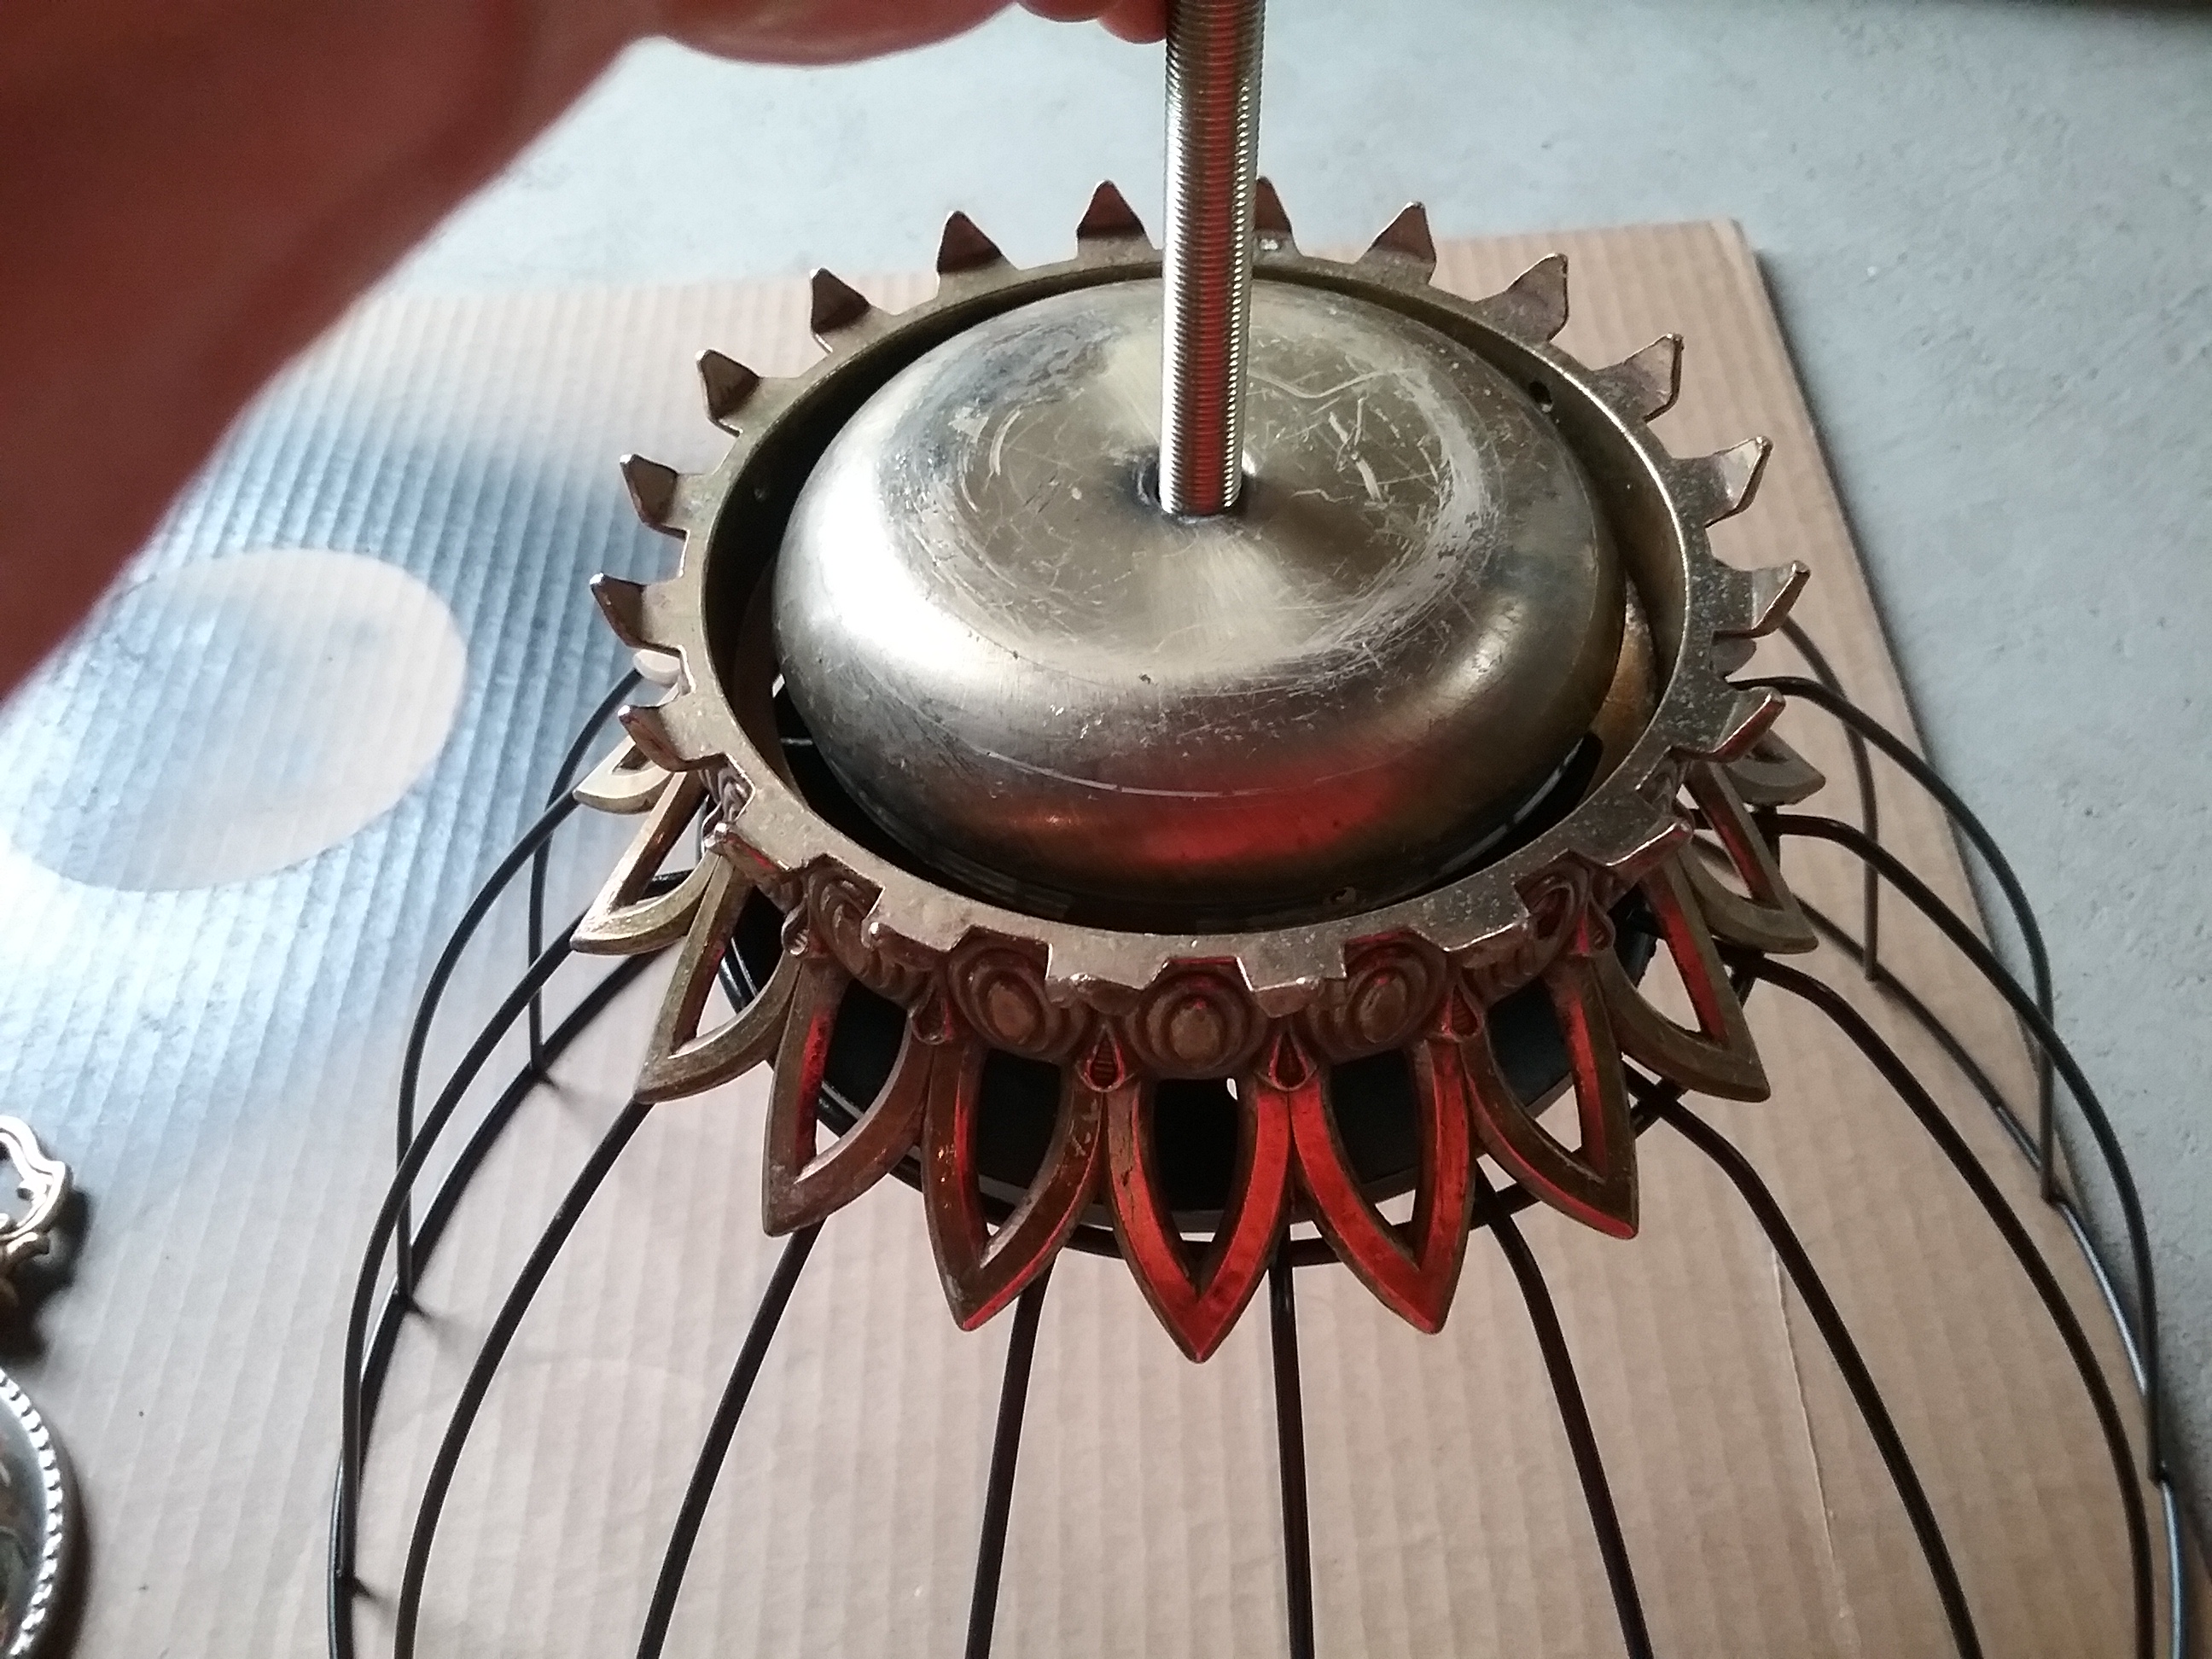
Beginning with the painted base pieces on the threaded rod, stack and build the lamp pieces. Leaving room for a small finial, use tape to mark where the threaded rod will need to be cut. Remove the rod to cut, restack the pieces, add a dab of E6000 to the tip of the rod, and twist the small finial on to tighten your pieces together firmly.
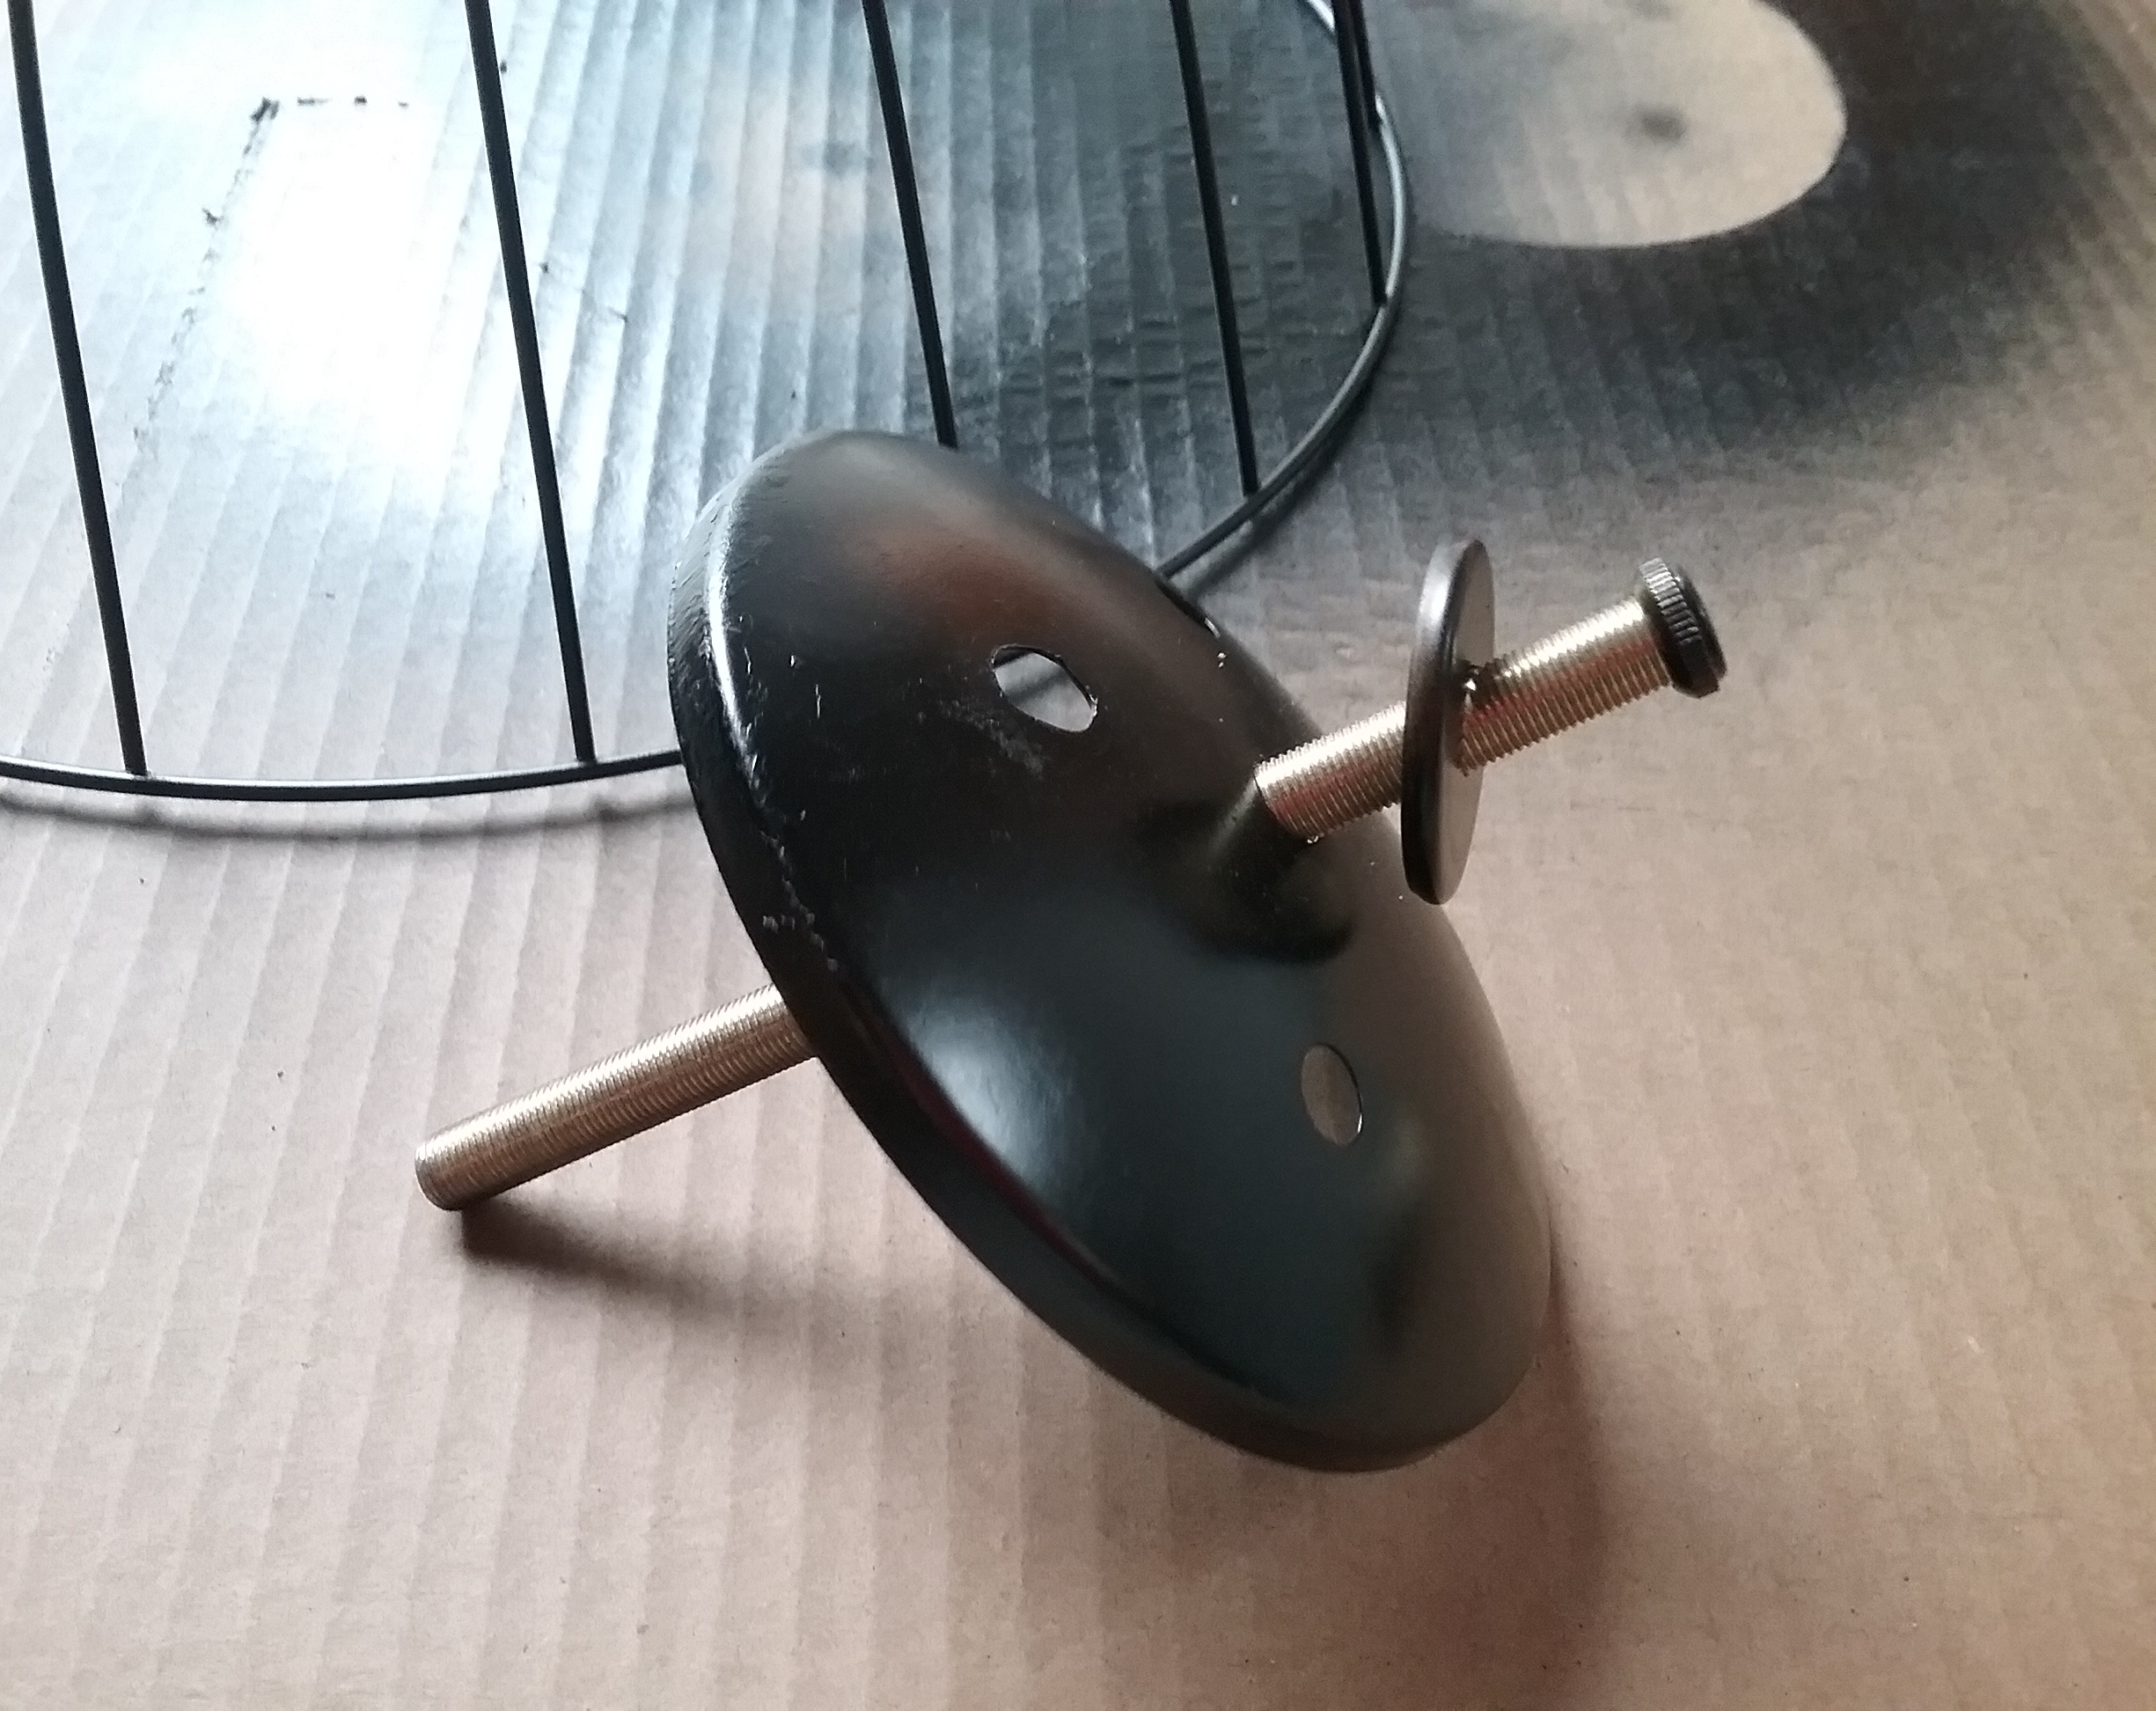

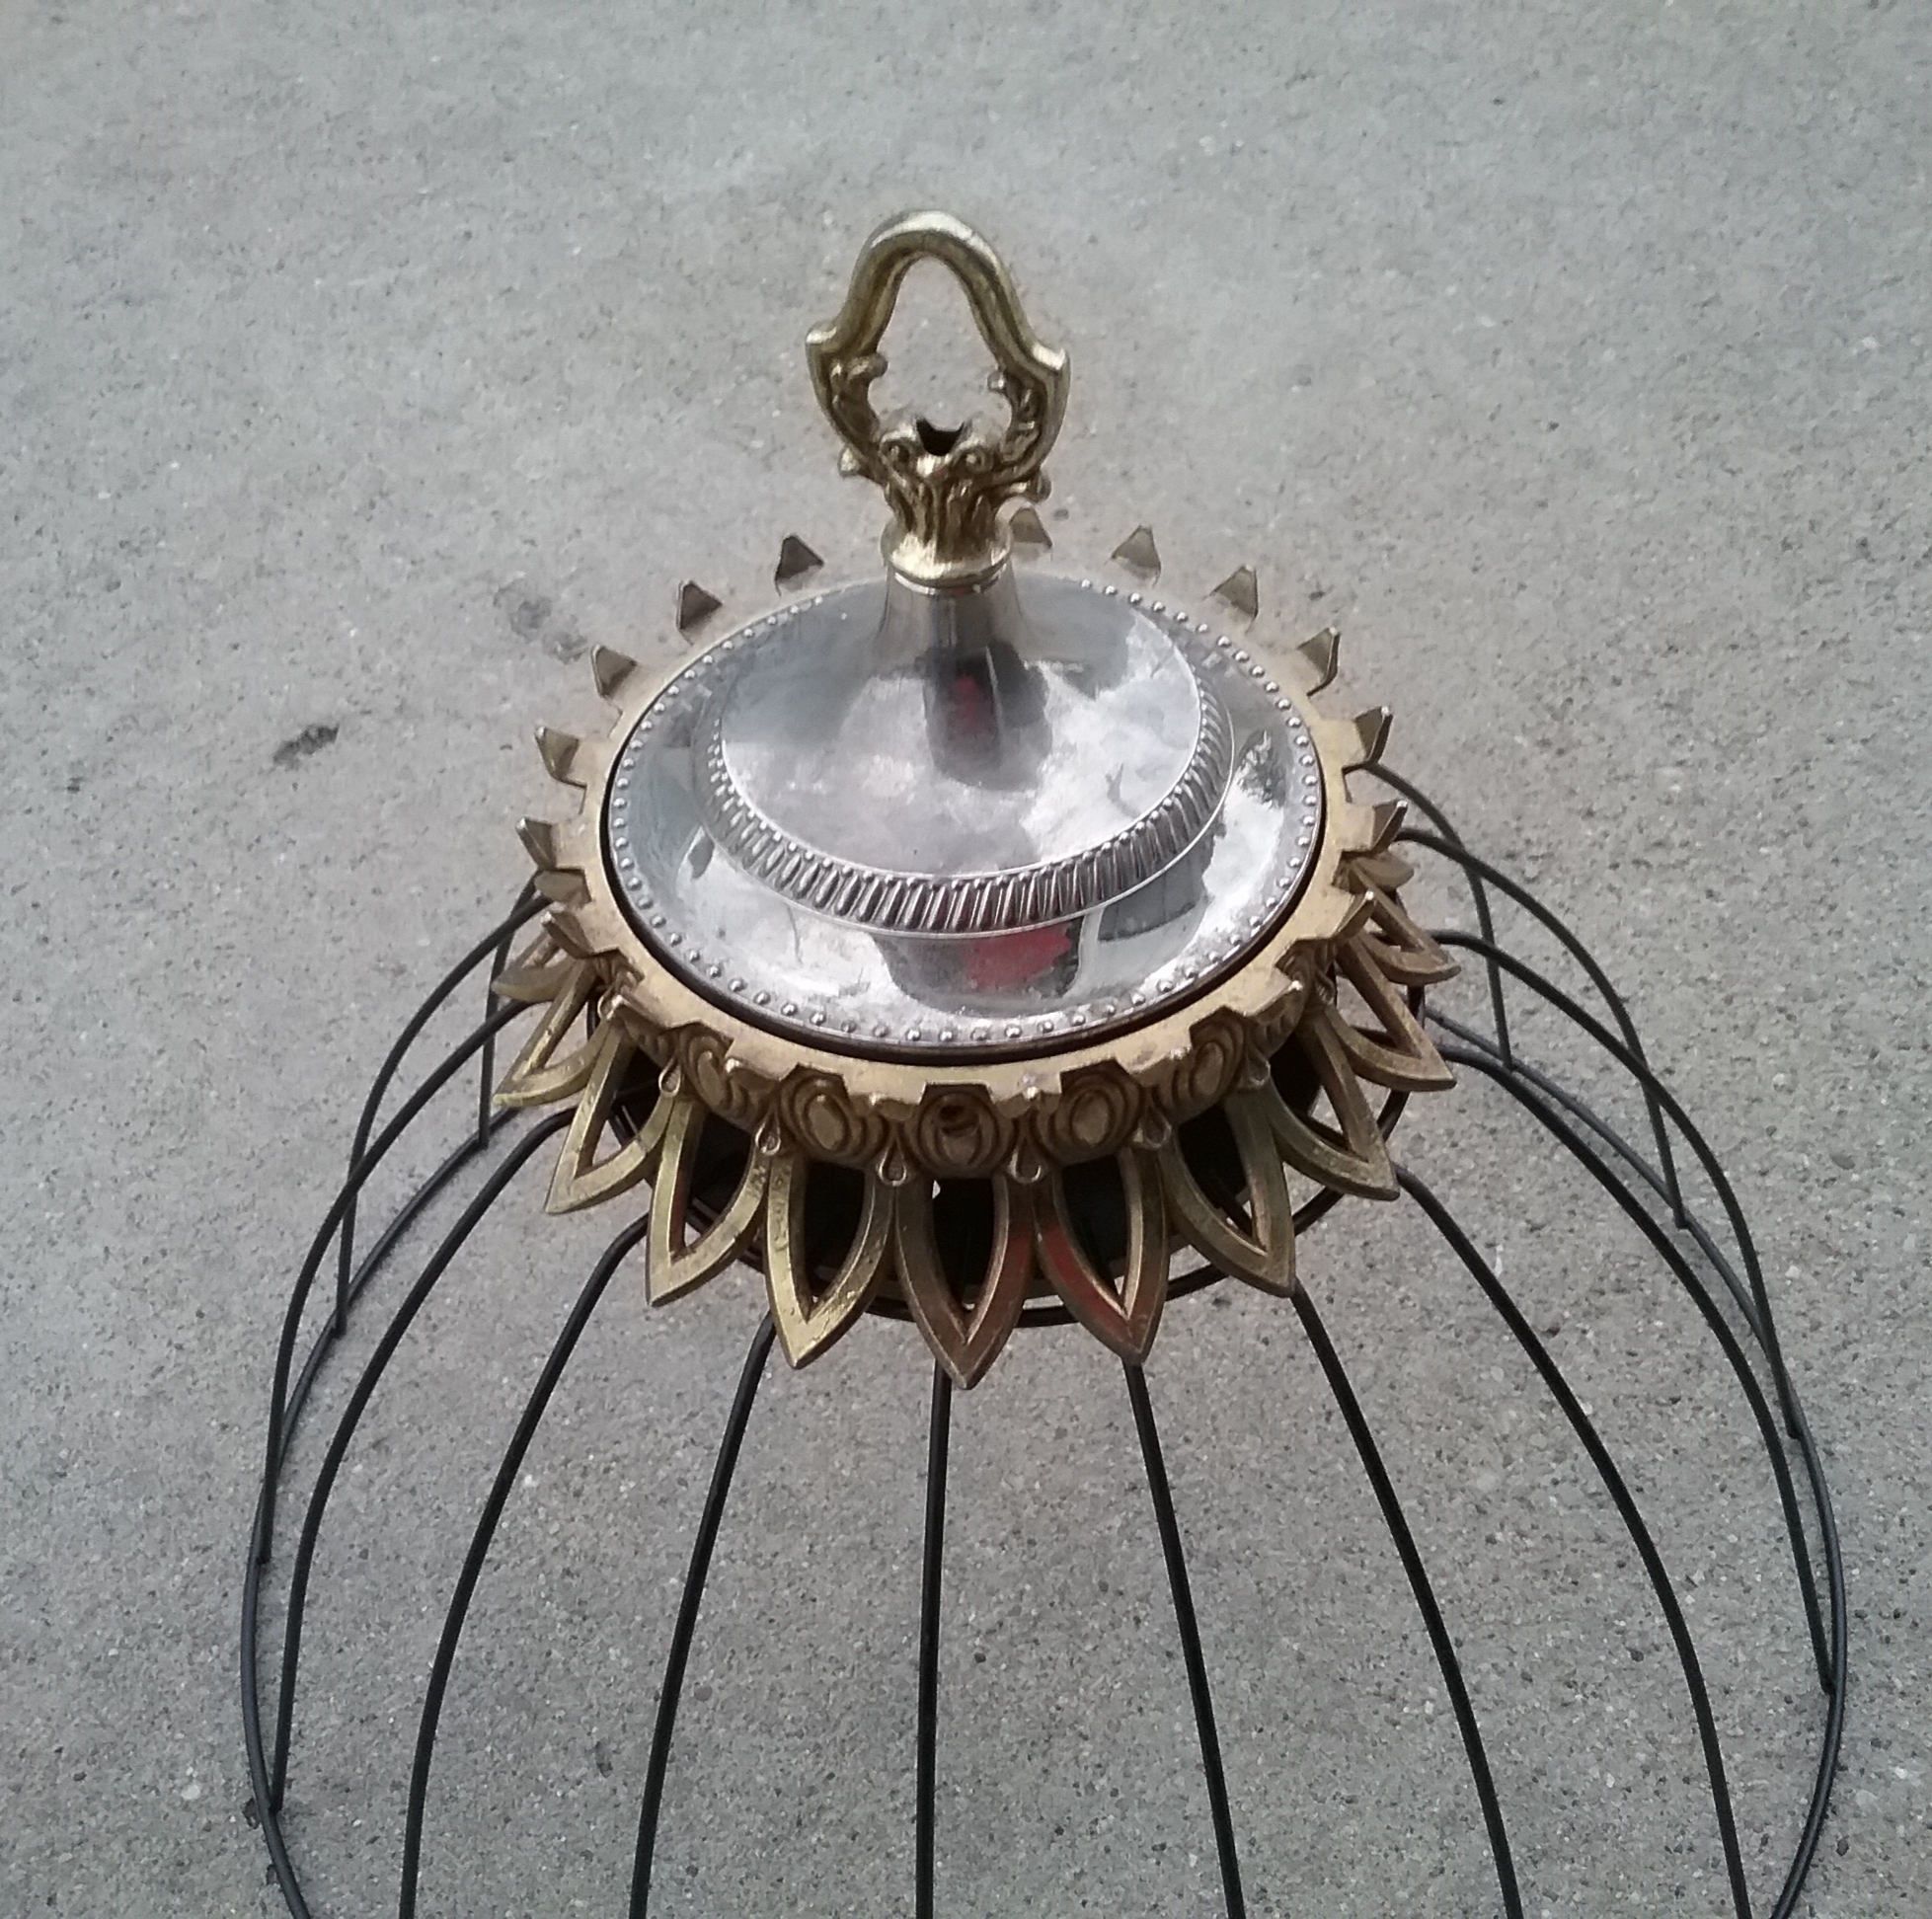
Cut back all but 6 or 7 of the wires on the top ring of the AC guard, these will be used to bend over the wire ring of the basket and hold it in place. Touch up the cut wires with black spray paint. Attach the basket to the top and its ready for the garden.

Kind of gives the garden a little majestic touch, don’t you think?

That’s amazing ,a piece of art and great tutorial. This just blew me away. Love it.
LikeLiked by 2 people
Thank You Inga!
LikeLike
Such a nice compliment, Thank You Inga!
LikeLike
I found this through Hometalk and did quite understand what you did with the tall piece until I came here. SO IN LOVE WITH THIS! I think it was a lot of work but the finished product totally wowed me! Nice work and I love it in the garden!
LikeLiked by 2 people
Thank you mcgypsy!
LikeLike
Beautiful!!! Gotta try this!
LikeLiked by 2 people
Thank You Debbie!
LikeLike
no kidding this is freaking fantastic and I don’t usually go ballistic over garden art but I would put ten of these in my yard (if someone else made them for me ha ha )
LikeLiked by 2 people
Thanks so much Chris!
LikeLike
Love this project! Great way to protect plants from over zealous deer. It looks horrible with just the wire cages. This also would look great in a large container for climbing plants like morning glory. Thanks for sharing!
LikeLiked by 2 people
Thank You for the compliment Lorin and also for the likes and follow. I found some very interesting posts on your blog too. My mom always pointed out plants to me and my siblings when we were in the timber as kids. Now, along with crafting and designing, my daughters and I enjoy prairie walks and learning about edible and healing wildflowers. I’ll be following you!
LikeLiked by 1 person
Awesome!! It’s gorgeous!!
LikeLiked by 2 people
Thanks so much Donna!
LikeLike
It is lovely. Makes a beatiful sight in the garden. You could also just use the top half, and make some sort of light.
LikeLiked by 2 people
Thank You Lily!
LikeLike
Beautiful! Wish I had your lamp parts stash! Keep up the good work.
LikeLiked by 2 people
Thanks so much Mary! It seems lamp pieces have really gotten under my skin; they are so much fun! My stash is getting a low, I need to hit up some flea markets and thrift stores to replenish. 🙂
LikeLike
Beautiful, i will try to make it.
LikeLiked by 1 person
[…] glassictouch.com/…, #httpsglassictouchcom20180702gardenclochediytutorial […]
LikeLiked by 1 person
[…] Source: glassictouch.com […]
LikeLiked by 1 person
Thank You so much for sharing and including my project in your article. I love all the succulents in the birdcage planters, they’re beautiful!
LikeLike
I LOVE 💕 this!!
I have all the fodder to make several of these!
I think that I will stake them down well, to keep the critters from moving them.
Thanks! You just made my day!!!!
LikeLiked by 1 person
Thank You! I hope they work well for you. Please feel free to share photos in the comments; would love to see them. Good Luck with your project!
LikeLike