Fun Christmas Craft DIY

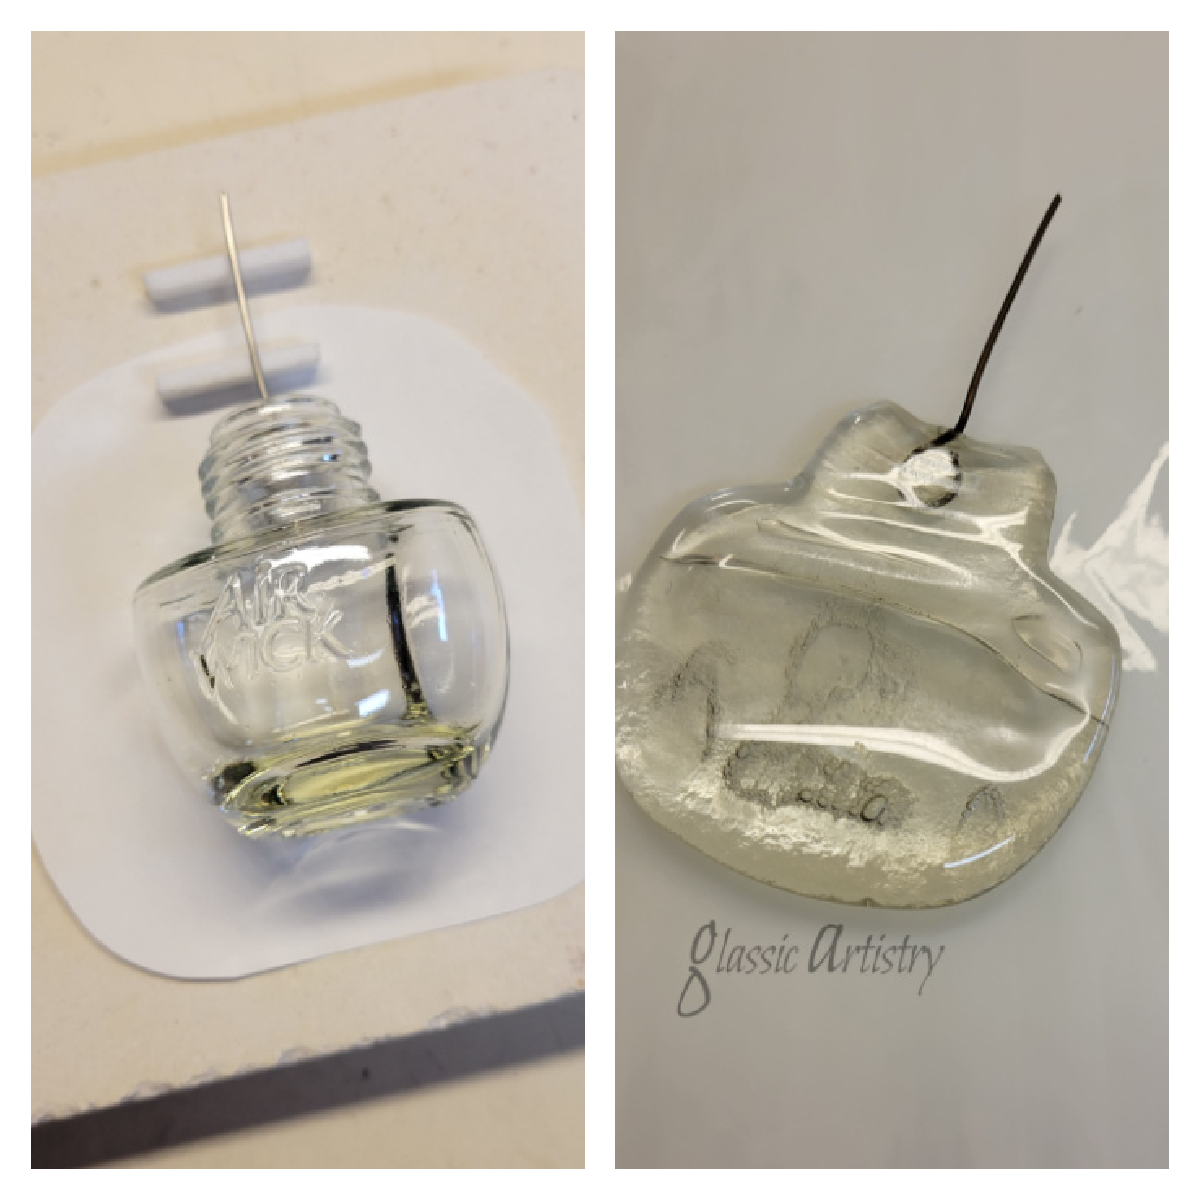
Happy New Year Greetings!  I wanted to share a little after Christmas fun before saying goodbye to 2024. It was inspired by many similar ideas posted on Pinterest and an experimental, kiln melted, bottle piece I was saving. Remember this awkward looking piece from a previous post? https://glassictouch.com/2023/10/01/recycled-bottle-kiln-play-diy/

Jute twine was used as a hanger, but wanting a thinner, natural looking string to hang my items with, I soaked white cotton string in coffee.

I found this project easier to do while the stick was hanging on a nail, but laying it on a flat surface would work as well.

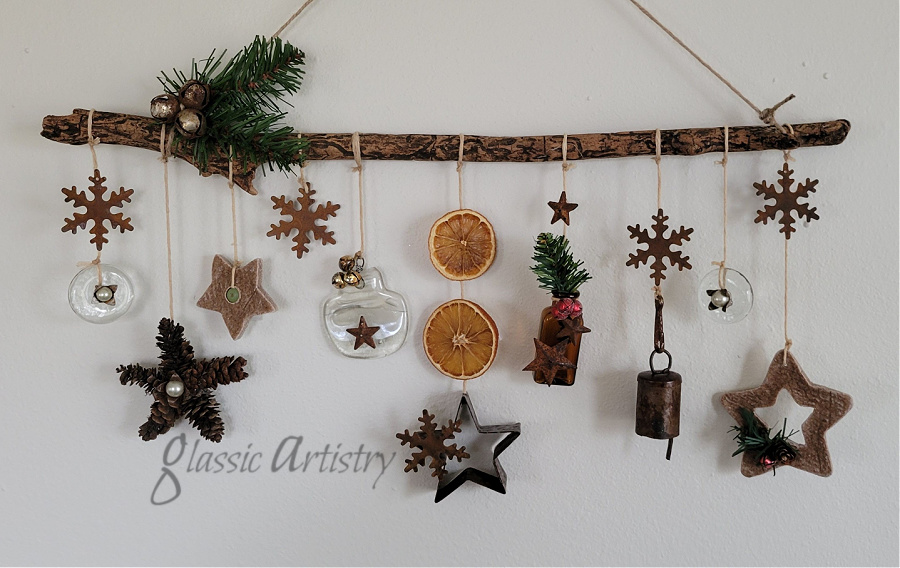
After gathering a variety of pieces from my rusty/crafting stash, and sanding/staining an old stick that was approximately 21” long, bits and pieces were put together to tie on. 

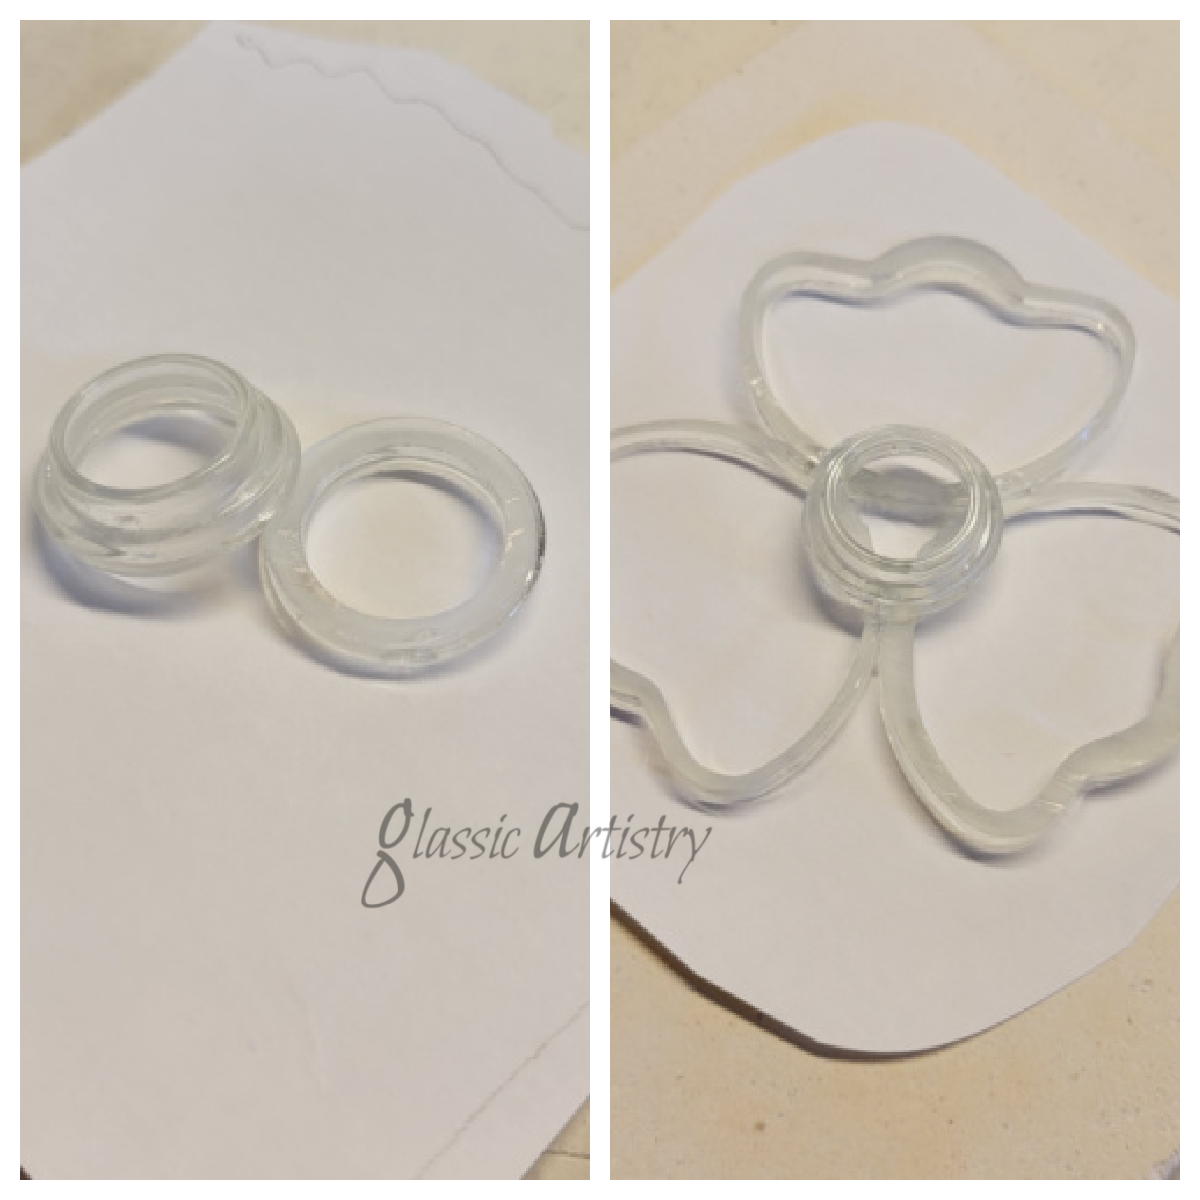
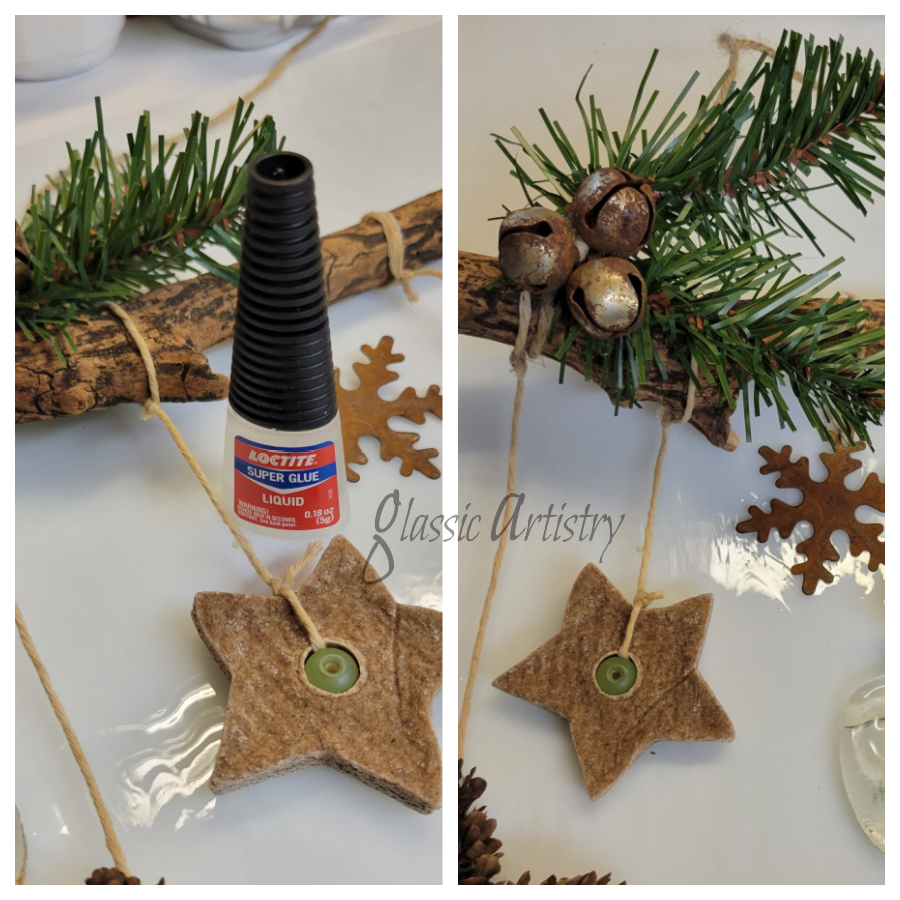
Along with the melted bottle I used clear glass donuts, mini pinecones, star cookie cutter, stars, cinnamon ornaments that were made several years ago, small brown bottle, bells, dried orange slices, metal snowflakes cut from a rusty garland, and faux greenery.  The small pearl embellishment in the center of the glass donuts were made by gluing a pearl in a small opened up bell.

When finished, I put a drop of super glue on every knot for reinforcement.

I absolutely loved this project. So much fun! There’s never ending ways you can do it.  Can you imagine a big long one, maybe hanging over a couch at Christmas time? And think of all the seasonal themes; I’m already thinking hearts!  

Comment, like and share if you wish. I’ll be back with more in 2025!

Recycled Bottle Kiln Play DIY

Playtime!

It was time to do something with a small bucket of AirWick bottles I had saved. I was tempted to toss them, but couldn’t do it without at least experimenting with a few in the kiln. 

I’ve only had time to play with two, but I like what’s happening so far.  I thought it would be fun to share just in case it could spur imagination or interest with other warm glass or recycled glass friends out there somewhere. 

I like to do my experimenting in a small tabletop kiln with a window in the lid. It’s not digital.  It has a dial with high, medium, and low, so there is no firing schedule; I just go slow. I use the same type of kiln for all my Christmas ornaments too.

I didn’t expect anything earth shattering, but wanted to see how the bottle flattened before doing anything else. A high temp wire hanger was propped in the opening of the bottle before firing it to about 1600 degrees, just in case it would miraculously round up as a nice glob and the wording melted away. It didn’t, lol.  I flipped it over and fired it again the same way and the wording was still there. 

The wording finally disappeared after I flipped and fired it a third time.  Surprising, it ended up as an uneven clear glob that I plan to use in a rustic Christmas decoration later.

The second bottle was cut into slices with a glass saw to see what could be arranged with them.

Several pieces were laid out to resemble a flower. I thought the bottle opening slice was too tall for the flower center, so it was sliced again.

Wanting to maintain its shape and texture, I watched it closely and shut the kiln off at about 1650 – 1700 degrees. I did a quick flash to 1100 degrees, then let it cool completely.

So, what do you think? You can be honest, I have thick skin, lol.

It’s a bit unusual, thin, fragile, and almost weightless, but I like the results. I think it has great possibilities for mixed media or wall art projects. Add some wire, color with glass paints, or even use it as a base and layer over it. I better make a couple more just to be prepared if an idea strikes me. You never know.

I’ll keep experimenting though, there’s extra pieces and more bottles. Stay Well and Be Happy Friends!

Saving Summer Colors

So, I did something this summer I hadn’t planned to do. I debated whether to blog it or not, but decided I would just in case they are used in a future project and there was a question about where the materials came from.

I recently found a bunch of textile art supplies/materials I had squirreled away and they’ve got me itchin’ to do some mixed media and make wall art for my home. I’m back to saving scraps of paper and other bits so I have an array to play with this winter. 

After a couple years of nursing my garden perennials, they are finally spreading out and filling in spaces. I was admiring all their colors as I mowed around the garden last month when the idea hit me that I should do something with all that pretty. 

My first thought was pressing them, which I did in some old books. Then I remembered a dying class my daughter and I attended several years ago that used plants on silk scarves. The silk was wrapped, moistened, and put in a lidded container for 8 weeks; it was a long process.

I skimmed through a couple of YouTube videos and discovered they could be processed in a steamer and that was more to my liking. 

Before going further, please keep in mind that I do not claim to be an expert or even experienced in this field.  This was done clearly for my own enjoyment. 

I made a makeshift steamer out of scrap pieces from my husband’s salvage pile. His salvage business sure does come in handy for me. He keeps it pretty well cleaned up and out of here so I have to look it over and grab quick. 

My steamer – 

Using white vinegar in a spray bottle, I misted pieces of an old T-shirt and a cotton flour dish towel before laying out the flowers and leaves. 

Salt was lightly sprinkled over the flowers along with a heavier sprinkle of alum. 

Just for the heck of it, I did another light mist of vinegar too, before rolling them up and tying them tightly.  I couldn’t find my white string so raffia was used. 

I dampened them lightly with water before steaming, covered, for 2 hours; then left them to cool to room temperature before untying, peeling off the wet flower pieces and giving them a good shaking out.

I tried tying one in a cinnamon roll shape.

While skimming YouTube, I noticed someone had rolled paper with the fabric to dye too, how cool is that?  I had thin brown paper so I gave it a try. I love the results. I can see doing more of something like this.

 I let the fabric dry completely before washing on a delicate cold cycle, and dried them in the dryer with an old towel to keep them separated. 

I’m sure some pieces of these will be pressed before using them, and others will be kept at the ready for more distressing, stitching, painting, stamping, etc.; whatever is needed.

That’s all for now I guess. The day is getting away from me and I have to get back to my glass work.

Hope you all have a great week ahead friends. Stay Happy and Healthy!