Wine Bottle Apothecary Jar DIY Tutorial

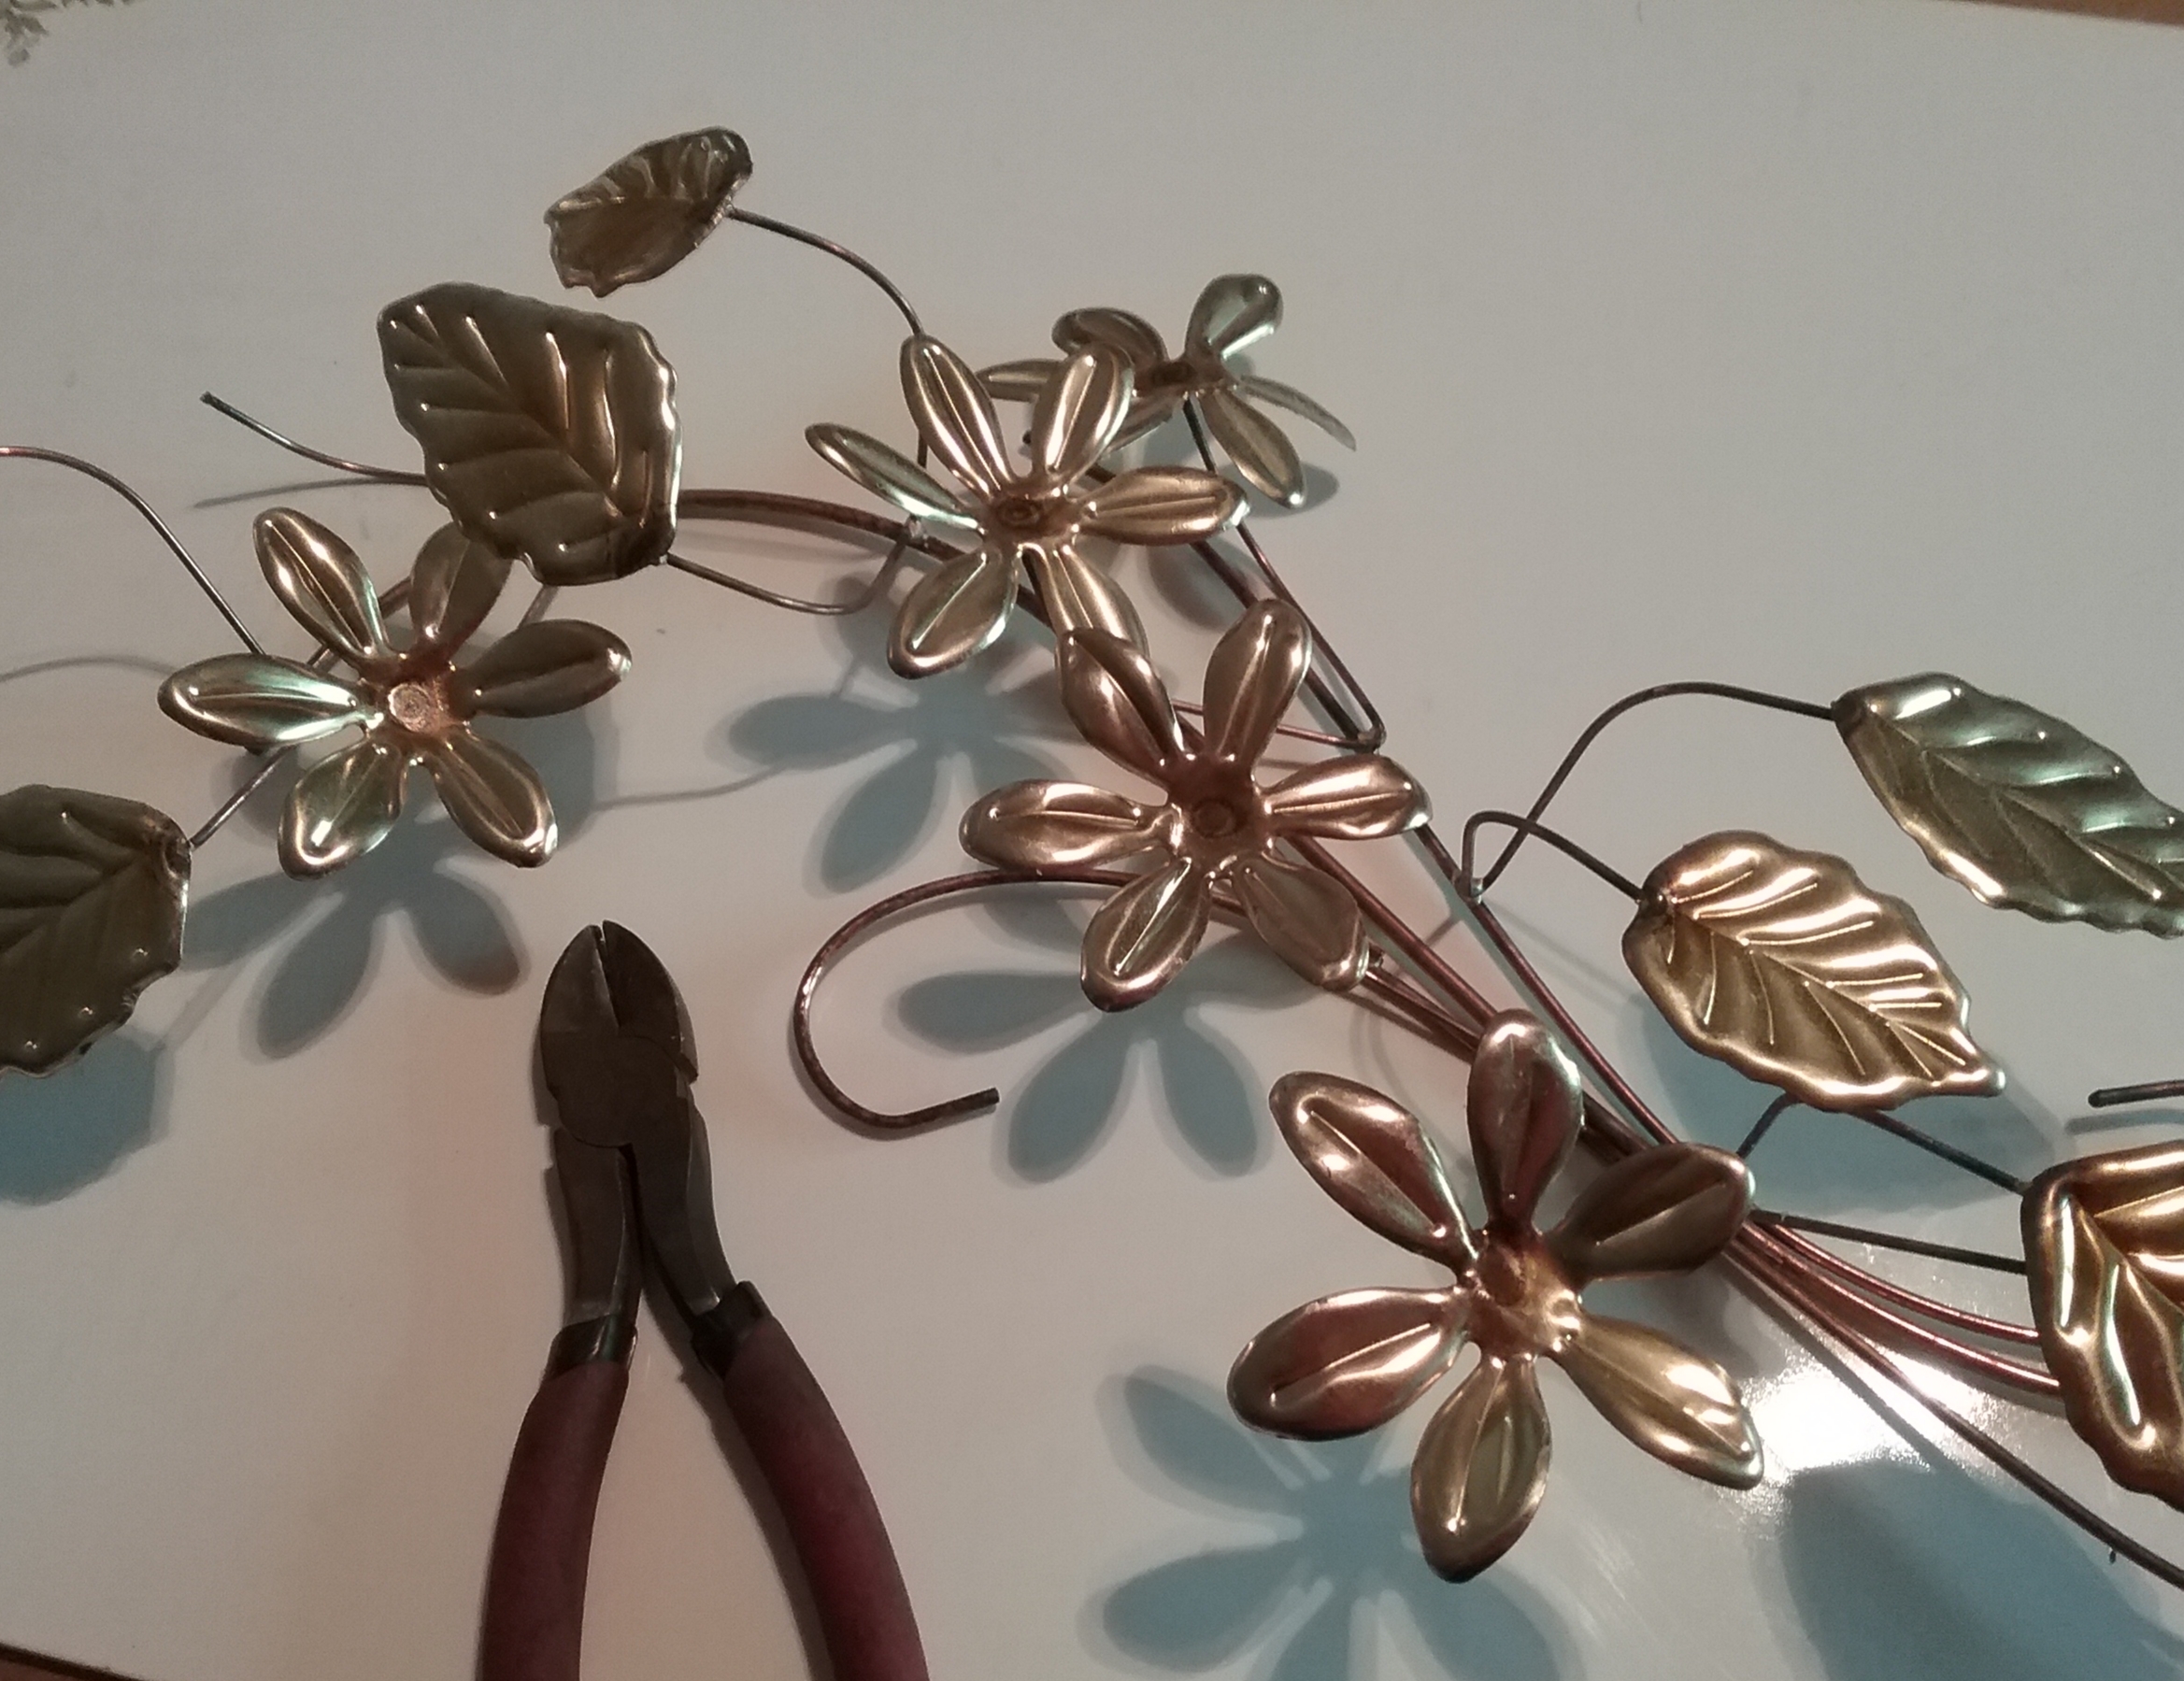
The amount of stuff in my garage is crazy!  Something’s got to give. I used three bottles in this current project and sent about 50 to the recycle bin. No more, I’m not keeping any more unless it’s something really unique.  After all, wine bottles are not that hard to come by.  A few boxes of wire and salvaged pieces were given the boot.  But, I couldn’t part with more than a baggie full when it came to sorting through my lamp parts, small bits and pieces, and odds and ends.  They make up the brainstorming center of one of my favorite creative spaces. I could spend many happy hours playing and creating with all those wonderful little pieces.  They’ve been used in so many of my projects, including this one.  

So, here we go.  A bottle cutter or wet saw will be needed. I used the Creator’s Bottle Cutter, but have had great success with the Ephrem’s Bottle Cutter too.  Both are easy to use and have instructions included. The Ephrem’s Bottle Cutter is less expensive and needs to be attached to a board before using.

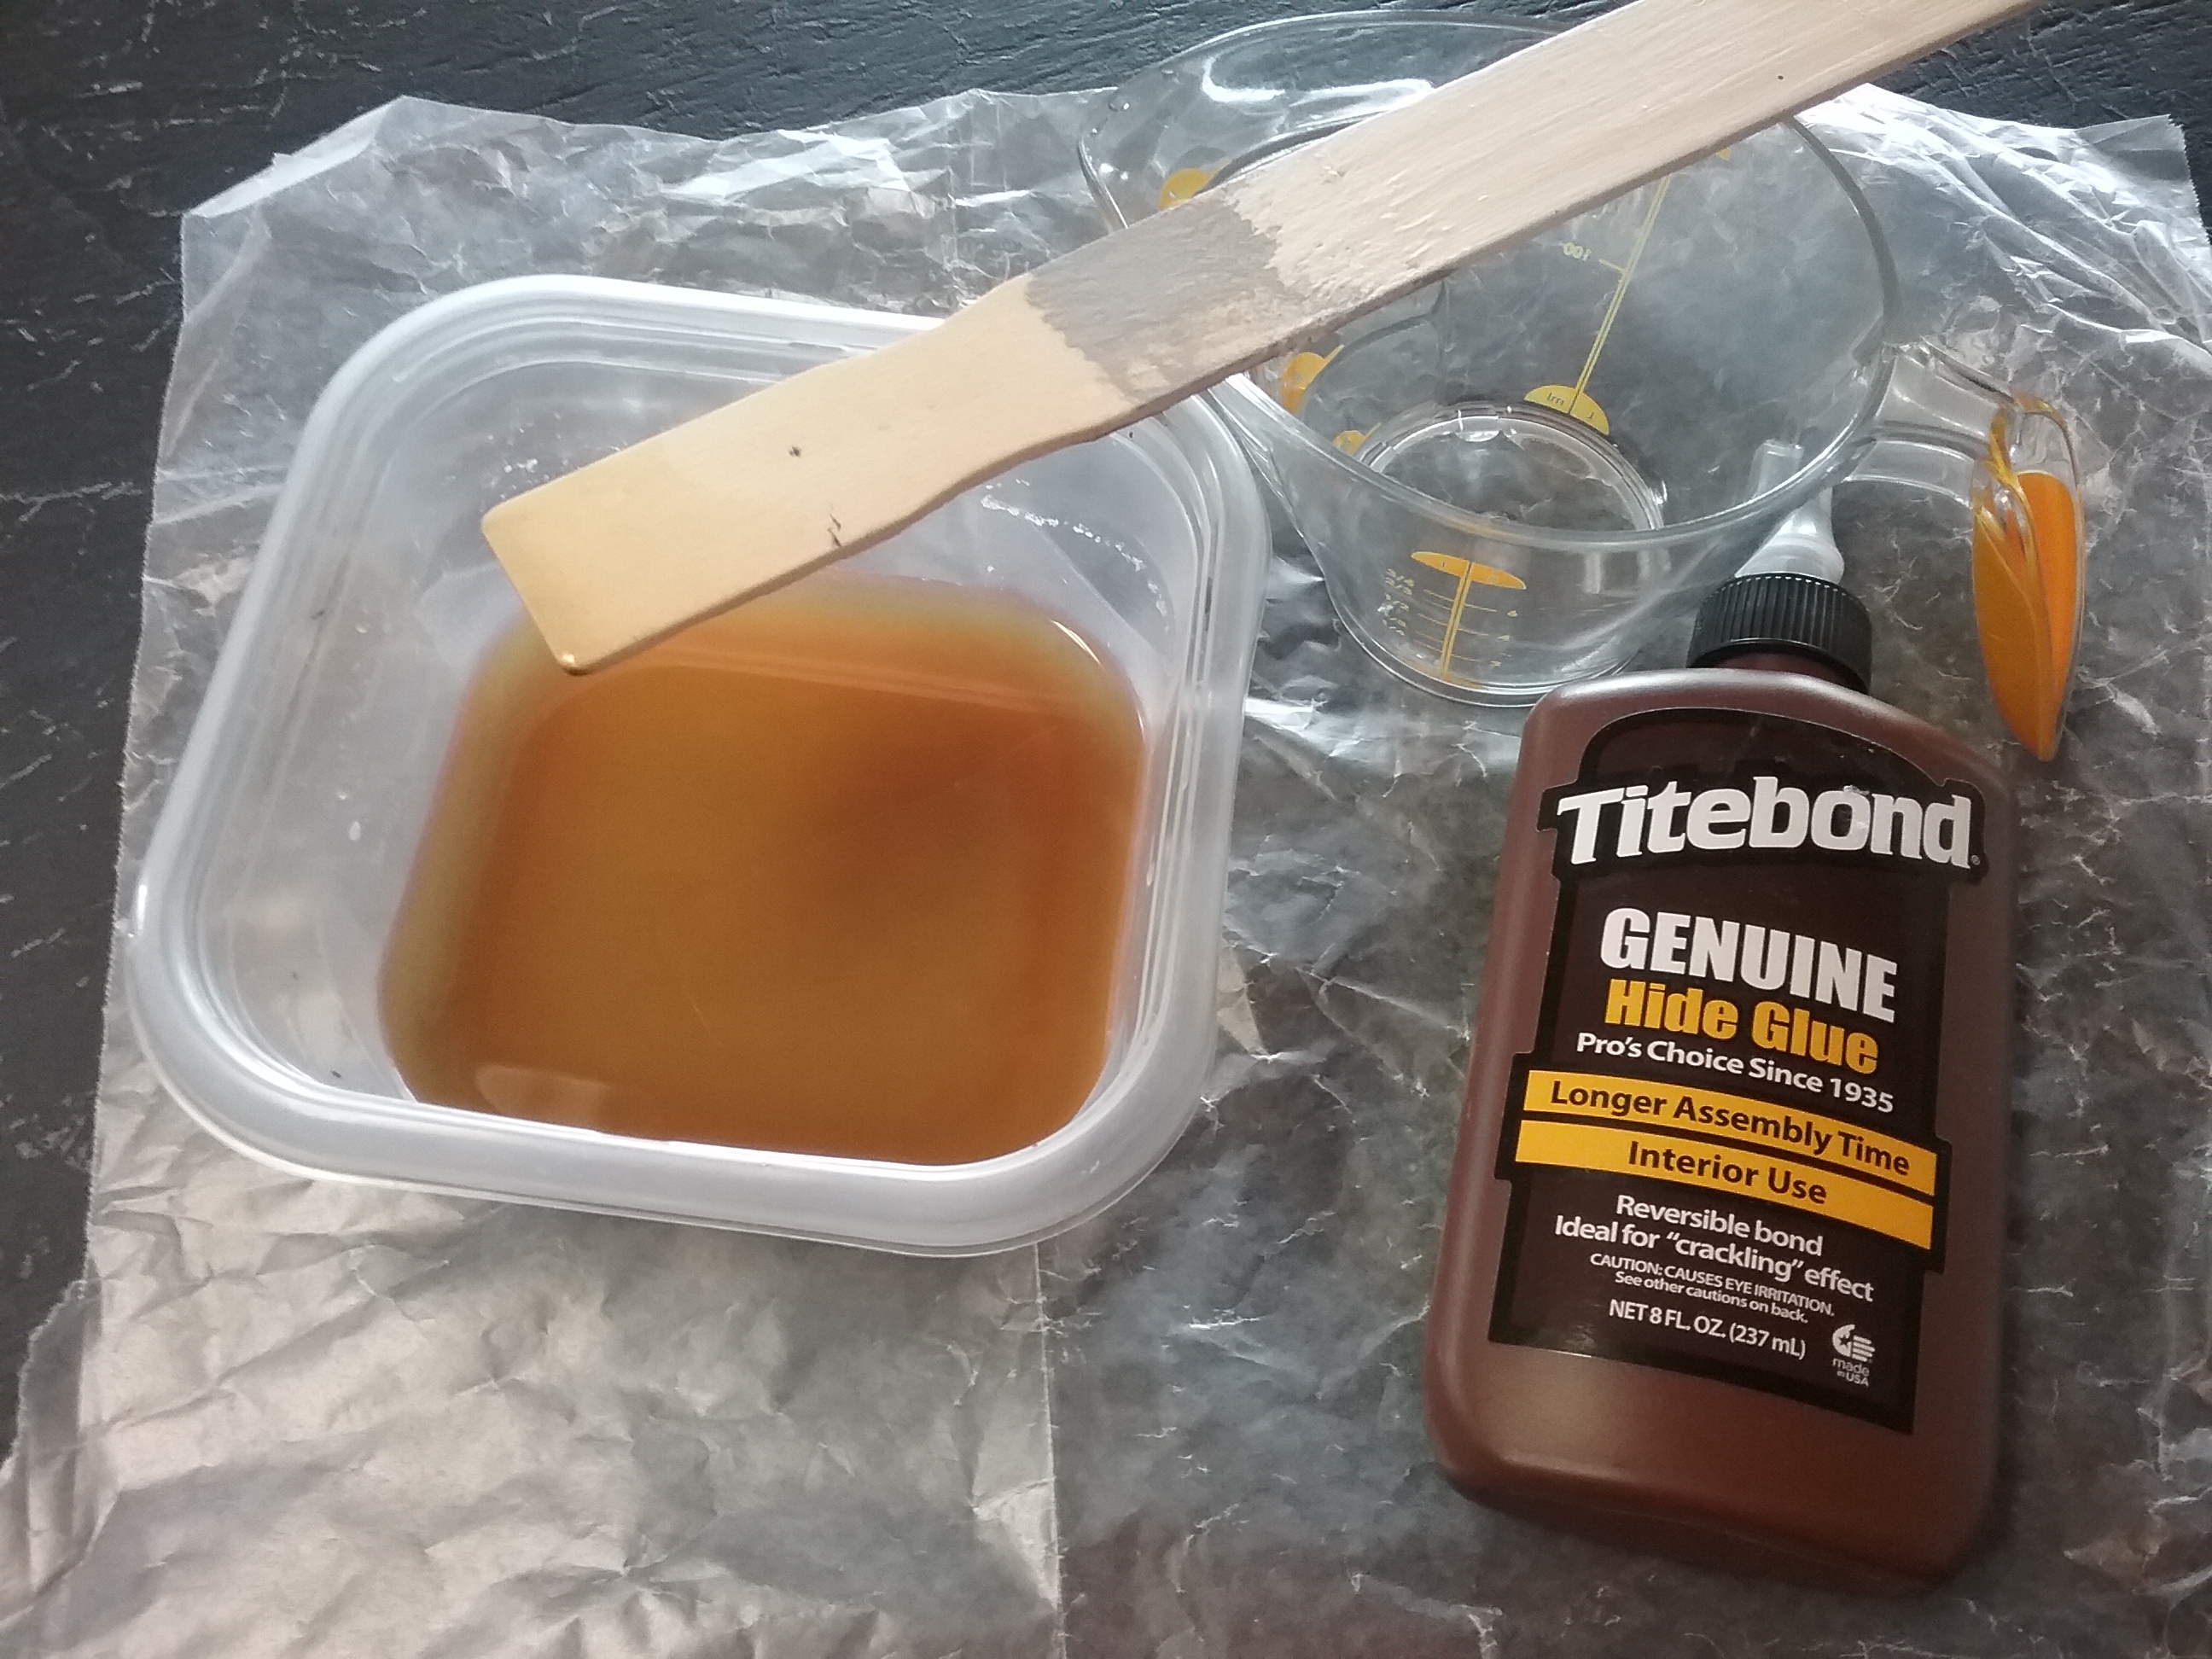
Place the bottle in the cutter.  With even pressure while turning, score the cut line on the bottle.  Rotate the score line about ¼” over a candle flame for about a minute.  Holding the bottle at the top and bottom, plunge it into a bucket of ice water to easily snap apart.  Sand the cut edges with 150 grit emery cloth to smooth and remove the sharp edges.  

I don’t often share pictures of my messy places, but here’s that brainstorming center I mentioned a little earlier.  I know, it’s a little out of hand, huh?  But, it’s so much fun having a lot of options when in a creative mood. 

20200815_143948 (1)

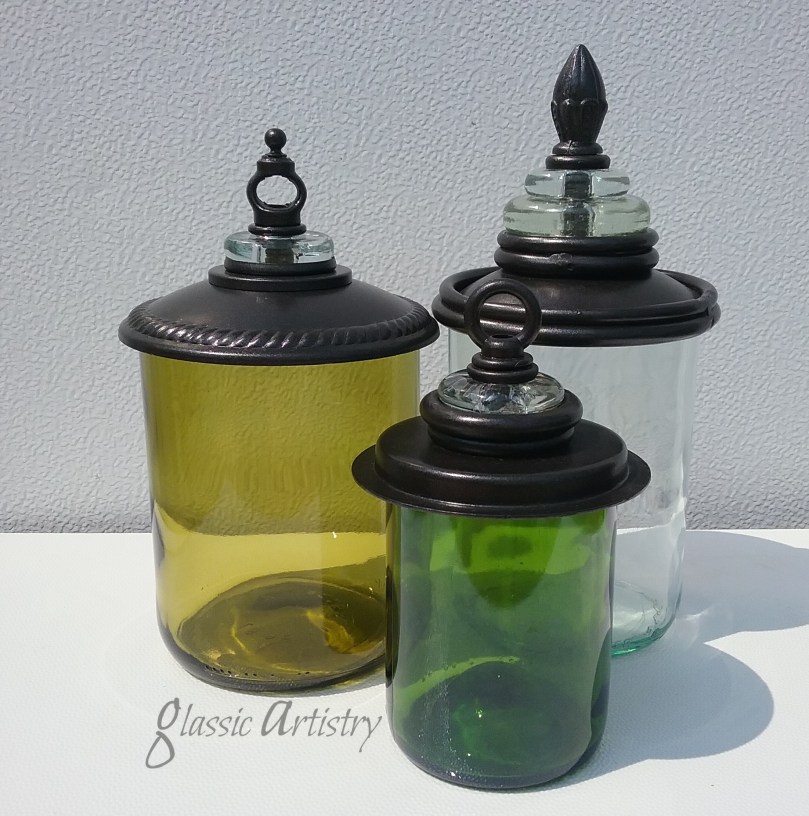
I had parted out a pair of bent candlesticks my sister found for me at a garage sale.  They were a steal at fifty cents each and chock full of some beautiful heavy glass donuts. I was able to use the top and base also. The rod was cut out, and my husband used a die grinder to remove some excess solder. A die grinder isn’t hard to use, I just don’t like the noise or the flying sparks it makes.

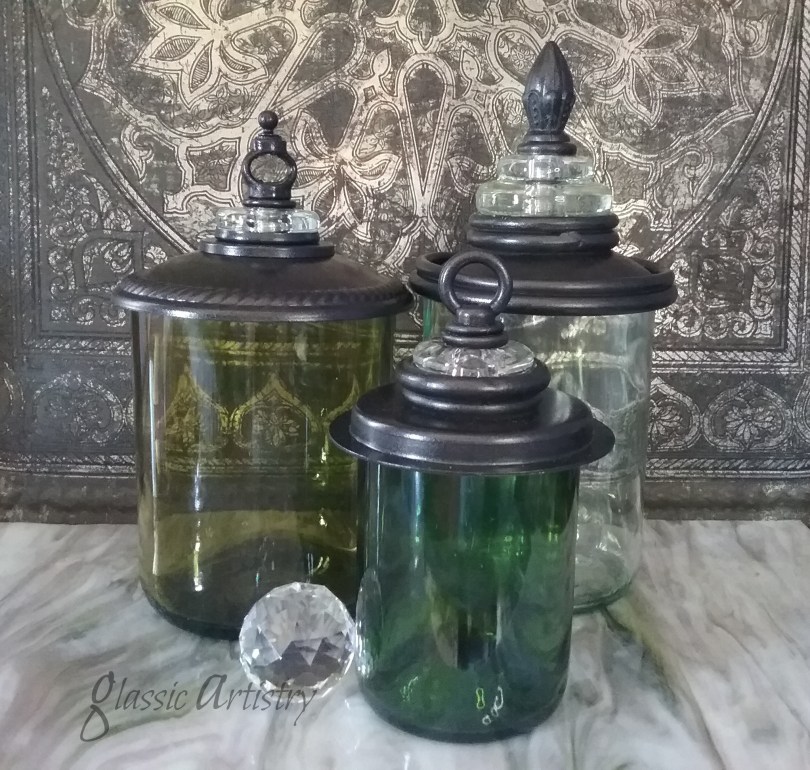
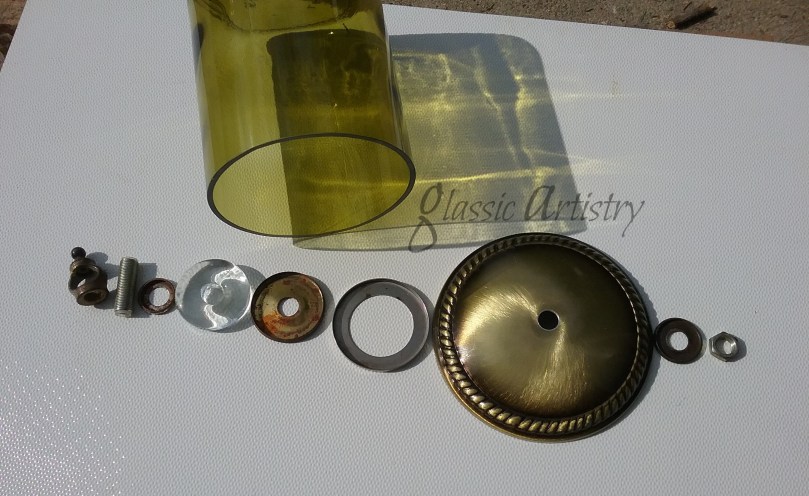
I liked the idea of using a glass donut on each jar to make them look like they belonged together if they were displayed as a set. I stacked and played around with pieces to fit the donuts and the jar openings until I was happy with what I had.  When making pieces like this, I like to take pictures of them laid out in the order they were stacked so I can remember how they go back together after the painting process.

20200821_205205 (1)

20200821_204920 (1)

20200821_205311 (1)

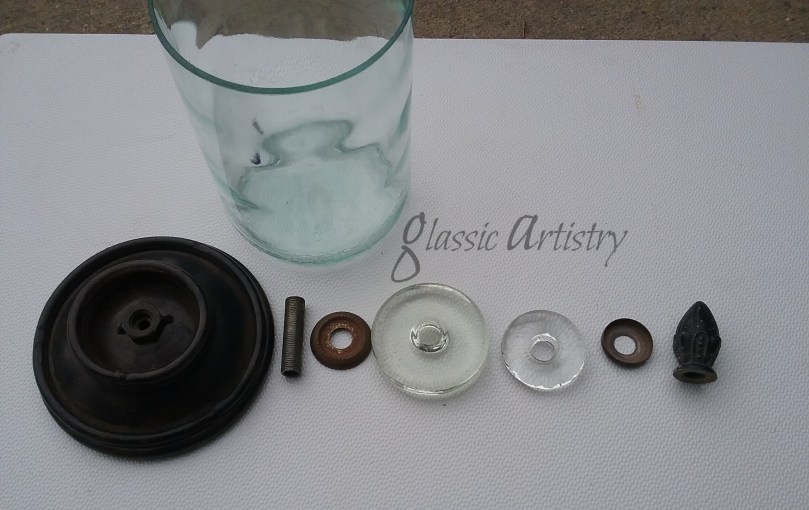
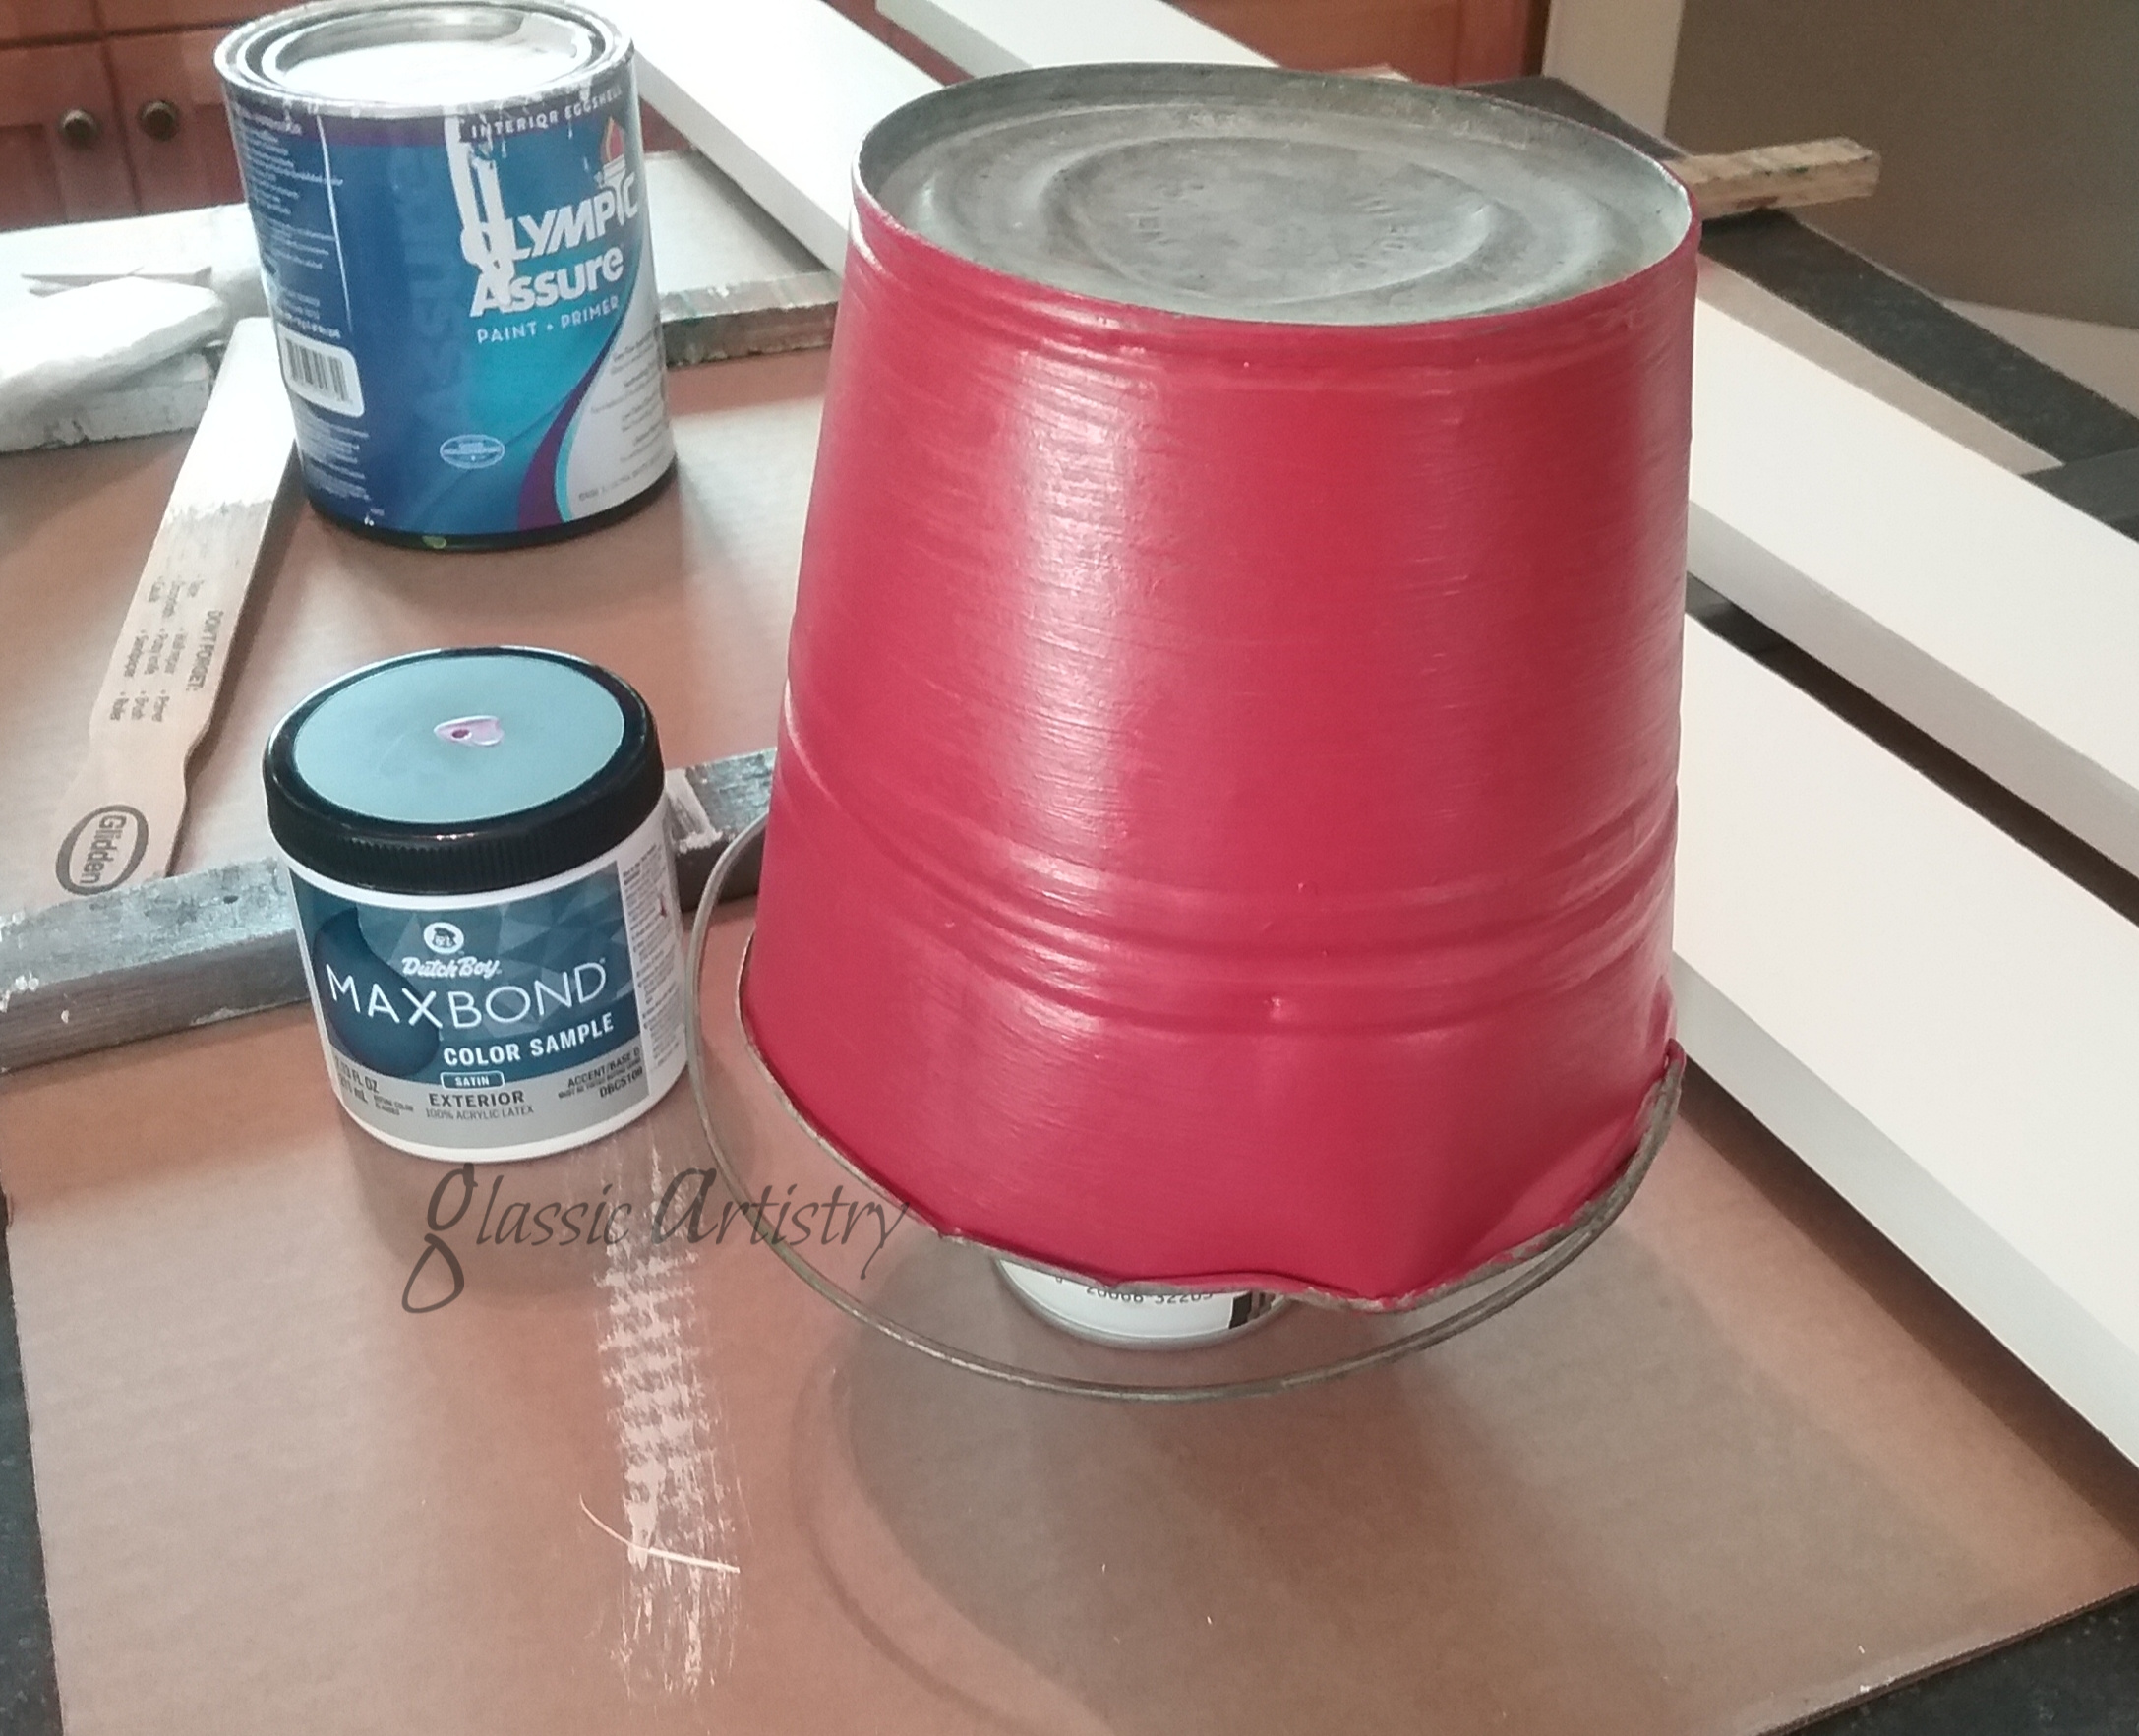
Clean the metal pieces and buff them with #0000 steel wool before painting.  Prime and paint.  I used an Oil Rubbed Bronze finish.

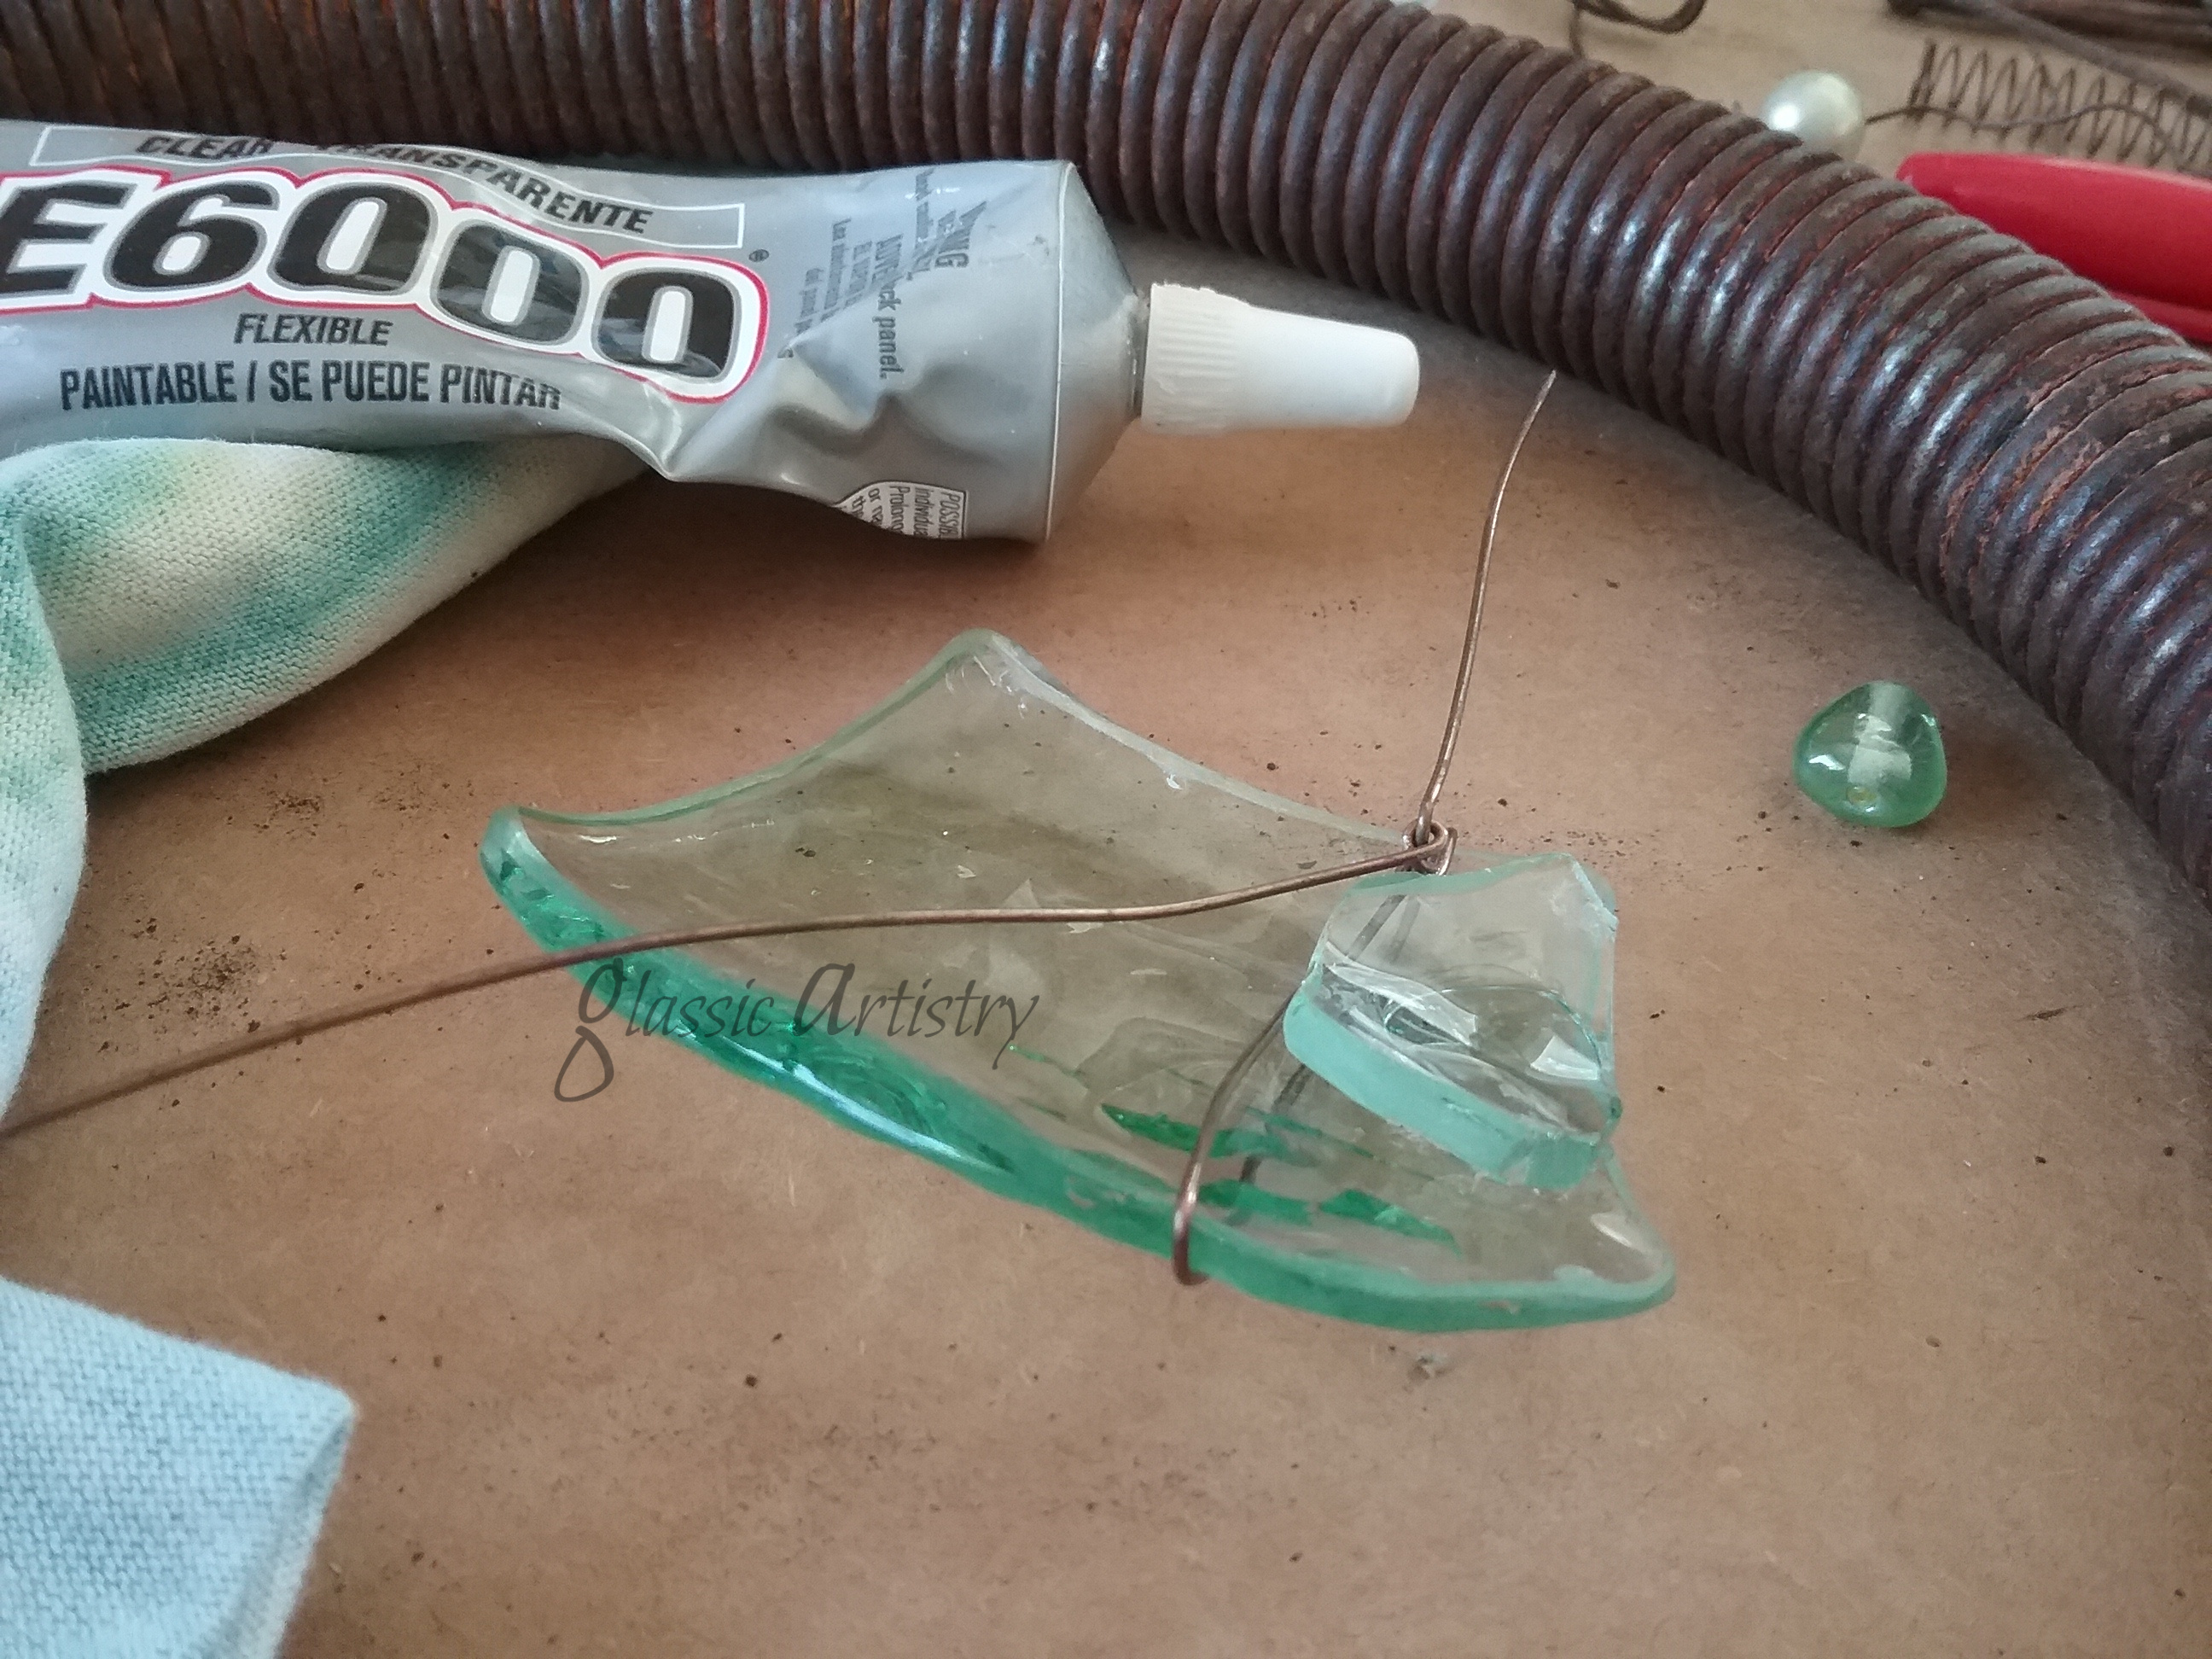
I was able to use a short piece of threaded rod for the two larger lids and they screwed together really slick.  E6000 was used to glue the small lid together.  It was stacked and glued in small steps, letting the glue dry in between steps, so it would stay straight. When using glue, scratch away a small area of paint on both surfaces where glue will touch.

20200824_134056 (1)

I noticed a flat bottomed glass globe while I was working.  What the heck, why not put a lid on it too? 

20200821_205904 (1)

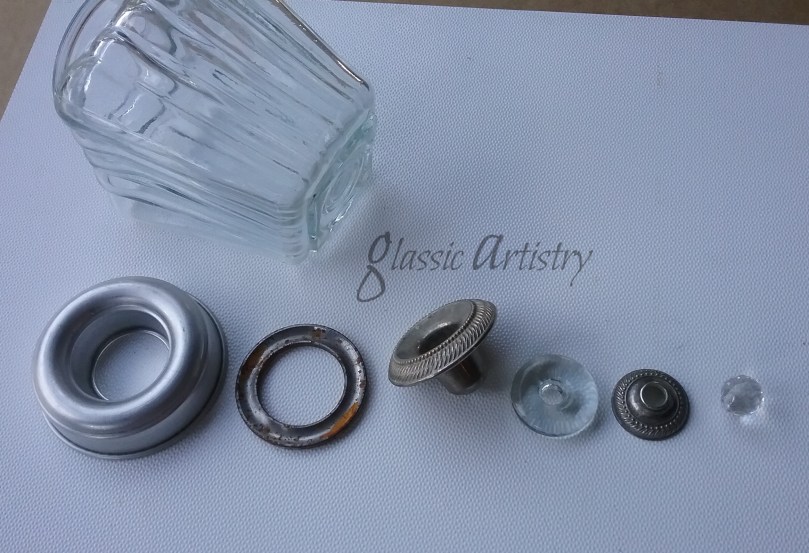
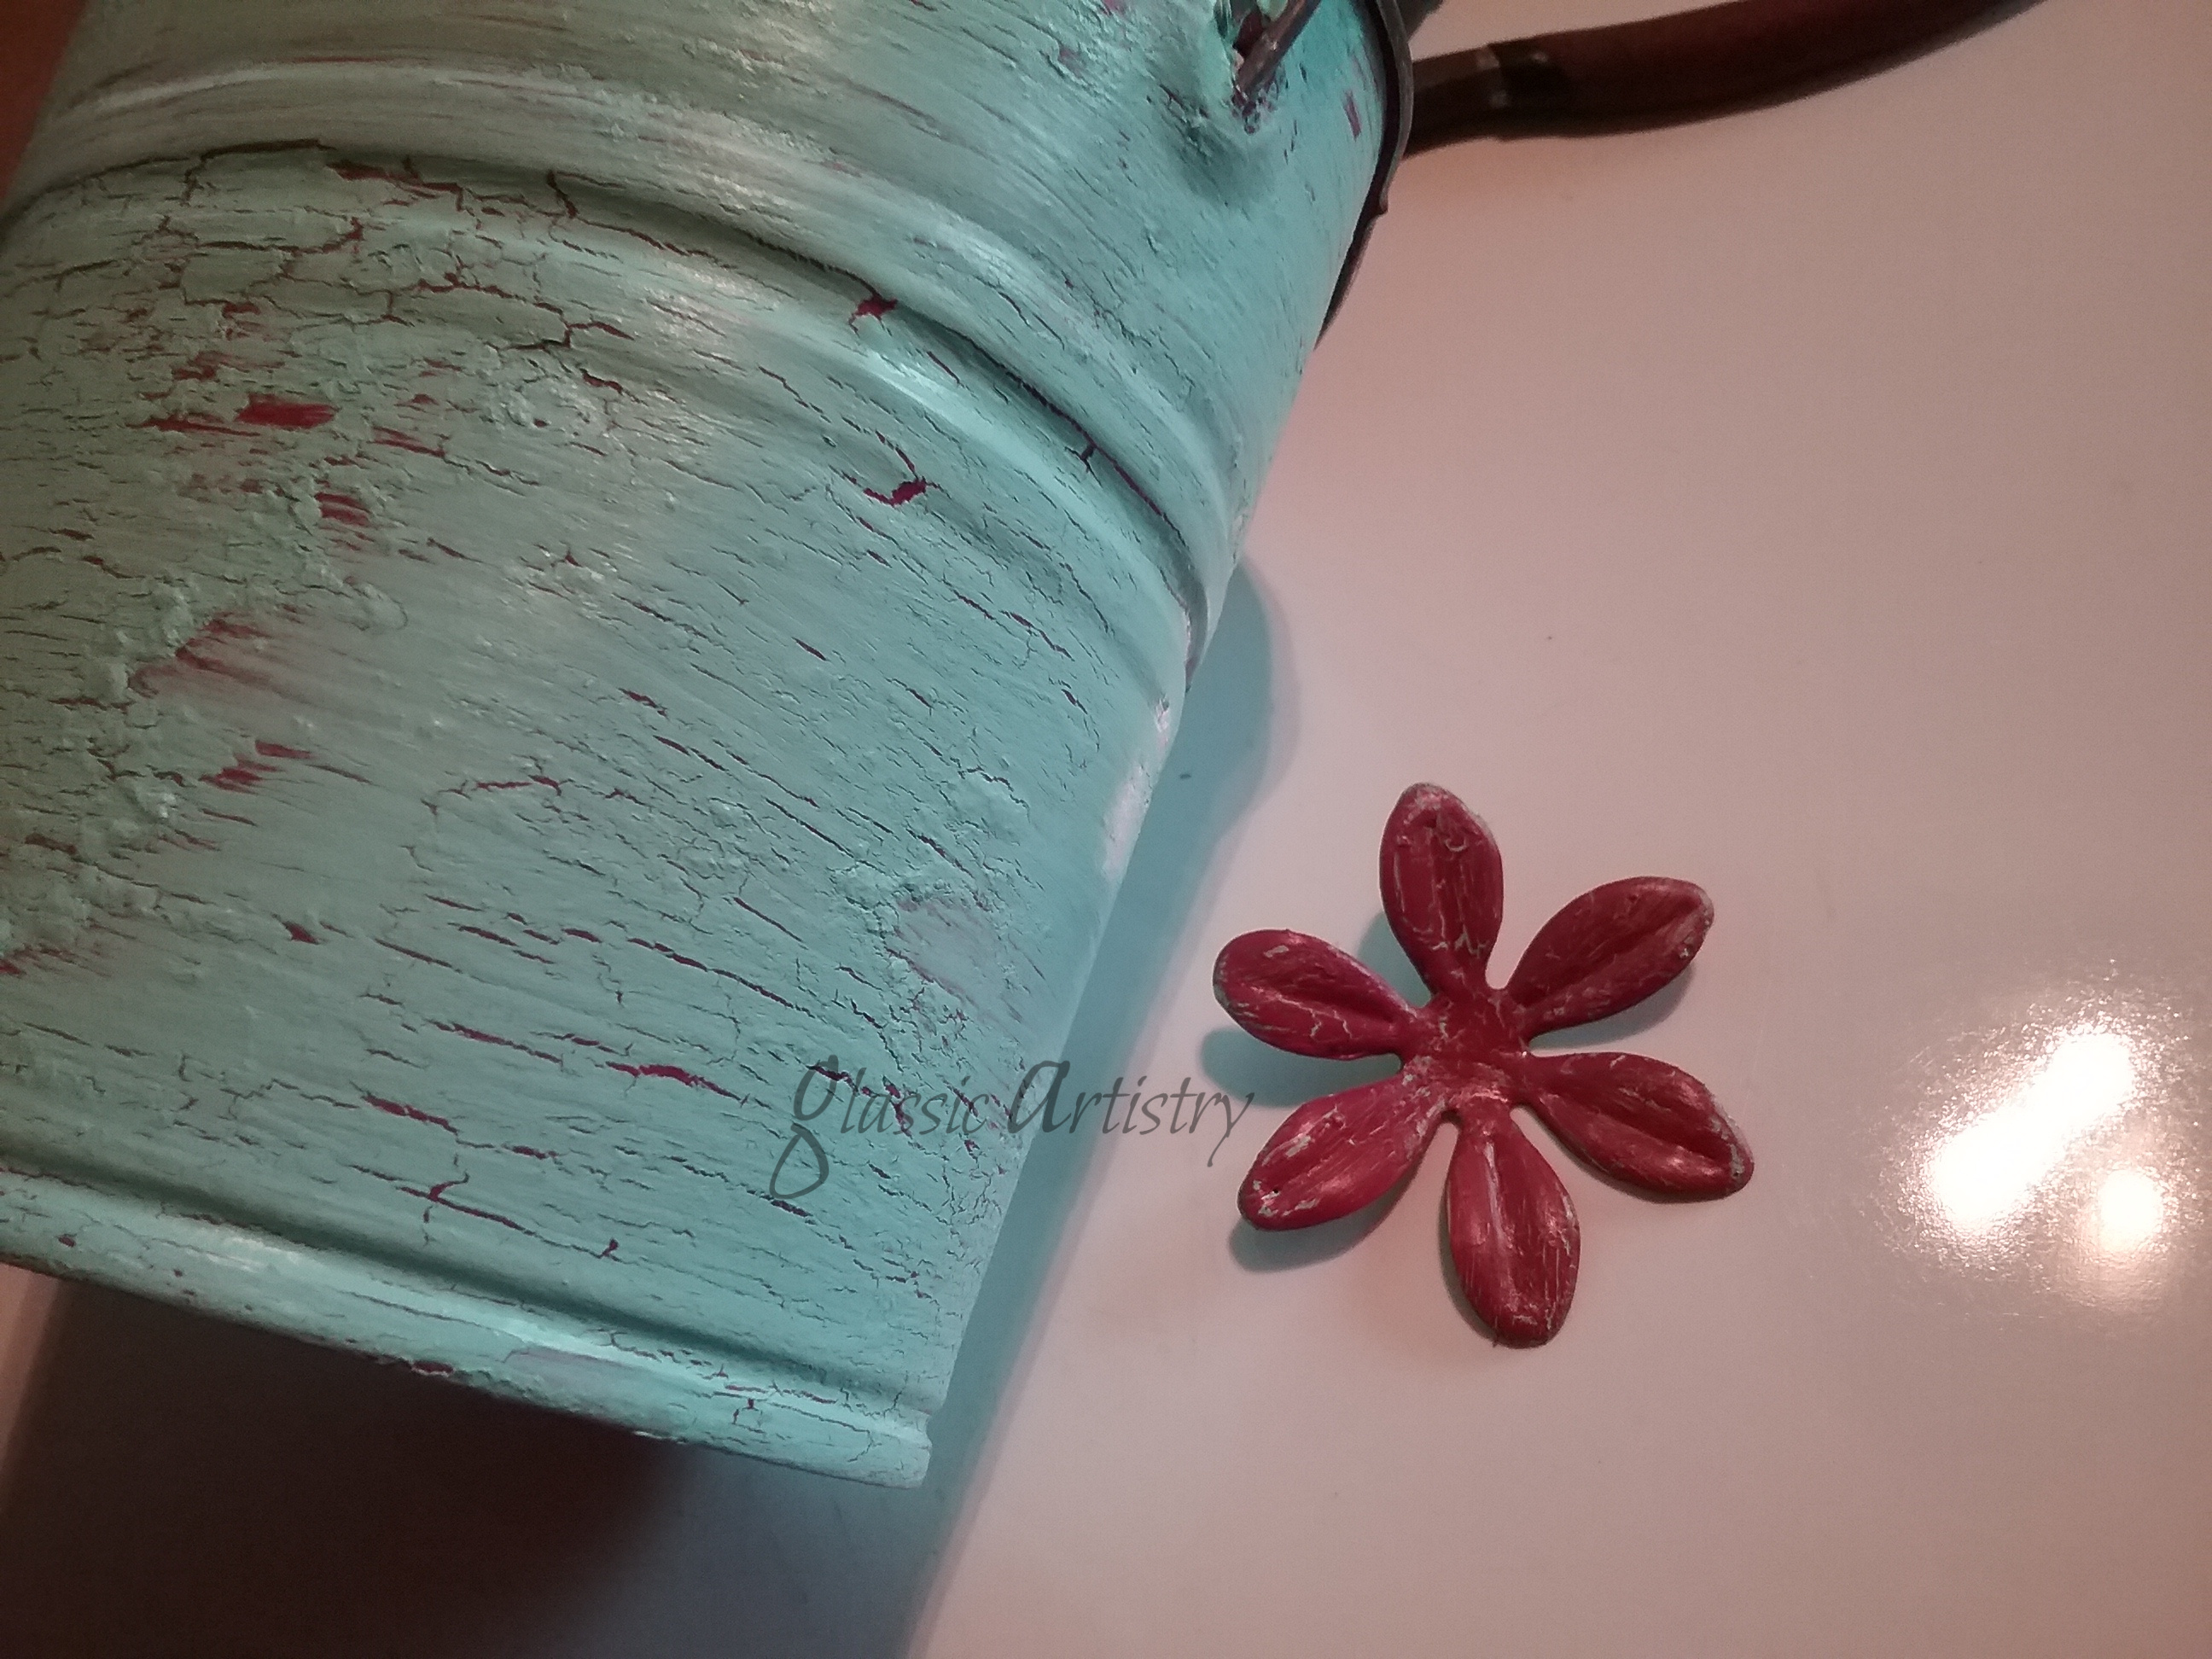
After priming I used a Silver Hammered Metal finish on this one.  When dry, I sprayed a light coat of Silver Looking Glass Paint, and then buffed it lightly with #0000 steel wool after the paint was thoroughly dry.  It was glued together. Don’t forget to scrape paint away where the glue will touch.  Sometimes glues can soften or eat through paint and not adhere properly. 

All I have for now.  Thank You so much for visiting my blog. Please feel free to share my posts with your friends, re-purposing helps keep things out of our landfills. 

I’ve started working on some Fall Sunflower decor to share soon; hope you come back to join me.

20200827_120241 (1)Take Care and Stay Healthy!

Quirky Coconut Suet Feeders DIY Tutorial

I knew I’d be making suet feeders someday after buying our curious grand kids a coconut to sample over a year ago.

I’d never made a coconut feeder, but thought it would be a lot of fun to play around with some scraps from my salvage stash and make something quirky to hang in our front yard tree.

The shells were already dried and had holes, so once I gathered some old springs and wire pieces they went together pretty quick.

I had planned on shaping wire into hangers, but found two wire pieces that had been cut from the top of old lamp shades and popped them into the holes instead.  

Wanting to provide some sort of a perch, I cut the small end off a bed spring, and wired it in with the wire arms of the hanger. 

For suet, I melted a pound of lard (use lard/shortening or fat that will stay solid at room temp) in a saucepan over low heat.  After the lard was melted, I removed it from the heat and stirred in 2 C birdseed, a handful of raisins, ½ C breadcrumbs, and ½ C unsalted peanuts.  Let it cool.

To ready the shells for suet, the outside hole openings were covered with tape, and for a little added measure, the inside holes were plugged with peanut butter. 

Wadded newspaper was used to keep the shell halves level in a shallow pan. 

Fill the shells with cooled suet and let them sit until the suet solidifies.

A super easy hanger was made by attaching a 2” metal ring to a 5” spring, and some bling on a jump ring to catch a little bird’s eye.  

Bring on the birds!


Recycled Tin Can Wreath DIY Tutorial

This rusty, country style wreath may not be everyone’s cup of tea, but it looks right at home in my rural garden, so I’m sharing it just for fun!

While going through old garden magazines last year, I caught just a glimpse of the side of a tin can wreath hanging in the picture of a garden, so of course I felt the need to make one. I threw a bunch of dog food cans in a tub of water to soak outside for a few weeks and start the rusting process.

After dumping the cans to dry, I creased them in the center with the side of my foot, and drilled a ½” hole through them.

I used twenty eight, 22 oz. cans for my wreath, and a 5 ft. length of heavy fencing wire. Cans are heavy, my wreath still sagged a bit, but the fencing wire helped it hold a circular shape. 

A small loop was bent in one end of the wire to hold the cans as they were threaded on.  I did a pattern of three as I threaded .. two with the crease one way, them flipped the third, but they can be put on any way you want. 


After all the cans were threaded on, the wire was cut close to the end, a hook was shaped to go into the loop, and squeezed tight.

That’s it, easy peasy.  

My wreath has been hanging in the garage for the last year, out of sight, out of mind, until now.   An awesome find of a big bird nest, dislodged from one of our pines during a recent thunderstorm, prompted me to adorn my wreath with Mother Nature and hang it in the garden.  A step out to the gravel road provided a few stones for makeshift eggs; a little surprise for my four year old granddaughter when she sneaks a peek … she’ll be delighted!

can wreath 2


Rustic Garden Wreath DIY Tutorial

I love the look of rustic art in the garden, don’t you? Being a collector of lots of glass things, wire scraps, rusty junk, and all kinds of tidbits, I’m excited when I can gather some of my pieces that all work together, and make something eye pleasing for mine.

With salvaged art, there’s no rules, right or wrong, that’s the fun of it. Just do what works best for you.

Duplicating the items I used is not feasible, I know, but, I wanted to share some tips and tricks I used in hopes of spurring inspiration for fellow creatives. 

I asked my husband to save a pile of heavy springs when they showed up as salvage last fall.  I’ve walked past them 100’s of times and always had the same thought; I’m gonna make a wreath out of one of those someday.  I knew there was a metal flower collecting dust in the garage that would look great on one, I just never got going on it. 


Recently, I was breaking down some bottles for other projects when the idea of glass leaves popped into my head… that was it, now it was time to make a wreath.

Tackling the heavy spring was the first step. It was about 30 inches long and wouldn’t hold a circular shape on it’s own.  A length of heavy fencing wire was shaped into a circle and inserted inside the spring for support. The ends of the fencing wire were hooked together and squeezed tight to secure.

The funky ends were cut off of the spring.  With the help of a screwdriver, a scrap piece of wire was wedged into the first end rings of the spring so they could be held open for wiring the ends together flush.


The barbed wire stem was cut from the flower,  For added interest, a short, chunky spring was wired into the center of the flower.  A long wire was used for this step so it could go through the flower and be used to wire the flower on later.


Pieces of a Captain Morgan bottle were used for leaves.  I smoothed the edges of the glass with a glass grinder, but a piece of emery cloth, or a Dremel tool with a diamond grinding bit will work too.

Arrange the leaves and flower on the wreath, covering the wired spring ends.  After deciding placement, wire the leaves on first with a thin pliable wire, then the flower, covering the wired ends of the leaves. 

Take advantage of any small curves in the glass leaves to help hold the wrapped wires tightly.  As an added precaution I glued chunks of glass, or washers, near my wires to prevent any slipping.  Washers can also be glued between the spring and flower/leaf arrangement to tighten or brace an area.

The ends of my heavy wire leaf shapes were difficult to bend.  I opted to attach a thin wire on one end of them, then thread it through under the flower and between other wires.  Secure the wire to the other end of the leaf shape. Arrange and tighten until snug.

Before finishing up, I decided to add another glass leaf, used E6000 to add a couple interesting rusty bits, and tuck in one of my salvaged art blooms.


I do believe, this is just what that little corner of my garden needed!


Salvaged Art Blooms DIY Tutorial

A new glassical idea …

Sometimes a project will lay untouched because its lacking that little something more, and I can’t find just the right thing.  That was the case with a garden wreath I had started over a month ago. But, finally after sifting through old jewelry and my basket of rusty stuff, I discovered a way to make some cute little blooms that would work beautifully in many instances.

It all started with a handful of small Christmas bells….

20190721_100644

Curious to see what one would look like, and thinking it might resemble petals, I bent back the top .. and there was that big beautiful center just waiting to be filled with something pretty.

open bell

Pearls and glass beads were glued in with E6000.

bell with pearls

20190721_102013

After the glue was dry, the petals were rolled back slightly and shaped with round pointed pliers. 

A wire stem was inserted through the small metal loop on the bottom the bell, and squeezed tight.  Some loops were brittle from rust, which made them fragile. I pre-shaped my wires before inserting them to avoid any unnecessary pressure, or twisting, on the loop.

bell on wire

A rusty star shape was glued to the bottom of the large mauve bead, and chosen for my project.  It’s done now and will be ready to share with you in a few days.pink bead bell


The pearl flowers have really grabbed my attention. I adore them, and already have something special in mind for them. 🙂

pearl bells

These little blooms have me looking at all my little scrap bits and pieces a little differently now as I sort through them ..  there’s a lot of possibilities out there.  

baubles

Have a wonderful day, I’ll be back soon!


Little Upcycled Bucket DIY Tutorial

Well, I’d say its about time I found my way back to my blog!  Its been a year, way too long!

Such a long break was never planned.  Initially, my sister, who was newly retired last year, and I, began going to a lot of flea markets and sales last spring. I think we’re guilty of having had so much fun hanging out, and shopping for awesome stuff, that we didn’t leave much time for creating.  Before I knew it, it was time to start working on fused glass Christmas ornaments. which kept me busy until after the first of the year, and then it was time to make inventory for a June vintage market event.  Anyway, I’m back, and ready to get back in the groove of making things!

Several new pieces were made for the market we participated in.  I’ll post some pictures of them later, but first, I’d like to begin by sharing a favorite … an upcycled, little, bent galvanized bucket that was almost headed to the scrap yard.  I’ve just fallen in love with it, and it was so easy.  All it took was two sample sized colors of exterior water based paint, hide glue or crackle medium, J-B Weld, a small metal flower, one button, and a fan (opt).  I’m impatient, the fan speeds up drying times.

Just a little note about crackle mediums before we get started.  They are readily available in just about all home improvement and craft stores, and easy to use.  Hide glue is my choice for crackling.  You can find it in hardware stores for around $9.  Always painting something, I usually have some mixed and ready to use.

For a crackle medium, mix 1/2 C hide glue with 1/3 C of very hot water, stirring well.  Store unused medium in an airtight container.  As a rule, the thinner the crackle medium, the thinner the cracks.  If bigger cracks are wanted, use less hot water.  Regardless, the mixture will be watery thin, and splatter easily.  Make sure your floor and work area are protected well.  Crackling is a lot of fun, but can be touchy.  It doesn’t like to be re-brushed as you put it on, single strokes are needed. If you’ve never tried it before, you may want to play around with it on scrap wood first to get the feel for it, or catch a video on YouTube.

After giving the bucket a good wash, it was wiped down with a little rubbing alcohol to remove any oils left on it’s surface.  I began with a base coat of red, let dry.

Next, the crackle glue.  Let the crackle glue dry until it is still slightly sticky to the touch, approximately 45 minutes, sooner with a fan.  Top with light blue paint, let dry completely.

Sprigs of metal flowers are something I keep my eye out for at garage sales and flea markets.  Their flowers and leaves are easily snipped off to incorporate in crafting projects.

Lightly burnish the metal flower with steel wool before painting.  I used the light blue as a base color, and the red as the top coat, with crackle in between.

J-B Weld is a two part epoxy, and a wonderful product.  Please read and follow the manufacturer’s directions on the package.  Per directions, the surfaces to be glued must be free of paint.

After deciding the placement of the flower, I scratched a small circle of paint off of the bucket, and also made sure the bottom of the flower was paint free.  I used a wooden skewer to stir a small amount of epoxy together on wax paper, and let it rest about five minutes to set up a little.

With the bucket on it’s side, I laid a small mound of epoxy over the cleared area, then sit the flower on, propping it in place to dry for 24 hours.

  jb weld

After the epoxy was completely dry, a metal button was added to the center of the flower with a small dab of E6000.  I finished with a spray of clear sealer, which is optional.

What do you think?  I had garden art in mind as it was being made, but now, I think it would be cuter than the dickens lined with a red and white checkered napkin and holding tableware at a barbecue!

Hope we are all blessed with sunshine and beautiful weather for the upcoming holiday.  Have a safe and Happy 4th of July!


Vintage Style Wooden Decorative Brackets DIY Tutorial

I’m still working like mad to get ready for the upcoming June 2nd Vintage Market. It’s been crazy around here trying get ready in such a short period of time. I’m very excited to go though, and hope all the hard work pays off.
I came up with a new bracket idea to take to the market, and also offer in varied sizes and designs, in my shop “out behind the house” this summer. Chicken wire inserts were added to give them just the right touch for some fun vintage farmstyle/country decorating. They take a little time, but I think they are worth the effort.
I traced my bracket pattern on to 1/2″ plywood. The plywood was only finished on one side, so the pattern was traced 2 face up, 2 face down, making sure the grain was running the same direction on all, then cut out with a scroll or band saw.


The insert pattern was centered and traced on each bracket.

Drill several large holes inside the drawn lines of the insert tracing. Cut the insert openings out with a scroll saw. I found it easier to connect some of the holes first, removing small chunks of wood from the center, then get a clean cut on the traced lines.

Sand to smooth all the rough edges before painting with exterior primer and paint so they can be used indoors or out.
Cut two pieces of chicken wire to extend over and cover the insert area, matching the pattern in the wire.
With a bracket finished side down, place the wire over the insert opening. Brush a little paint on the wire that extends on to the wood. Flatten the painted wire with a hammer. Staple the wire to the wood. Flatten the staples with a hammer so they are as flat as possible.


Apply some wood glue, and cover it with a matching bracket, finished side up. Clamp together tightly to dry. My brackets were large. I ended up using twice the amount of clamps that are shown in the picture below. It looked like some sort of a torture device when I sit it down to dry. Make sure to wipe away any glue that squeezes out when tightening the clamps.


After the brackets are dry, they can be sanded to smooth any uneven edges, and touched up with paint.

The brackets are done and can be used at this point, or, the outside edge can be trimmed with 1/4″ thick wood strips, which is how I choose to finish this pair before repainting.


So, what do you think? Think they’ll catch someone’s eye at the market?