Rustic Sunflower Fall Wreath DIY and A Bit More

Oh, how I love spending long, fun filled Fall days full of junk jaunts and tag sales with my daughters and sisters.  With all the virus concerns, we’ve not been out to any all summer, but are hoping to get masked up and maybe squeeze one in next month.  While poking around in my overloaded garage, sorting and tossing, I’m discovering a lot of treasures from our past outings, recalling the plans for them, and remembering some of the crazy times we had. 

One such past find was a pair of metal sunflower candleholders; perfect for Fall decor.  It really makes my day when I find a treasure like this to bring home, repurpose, and play with. When I found them, I knew right away I’d be filling the center with something.

The small round legs popped off easily with pliers.  The leaves were removed with bolt cutters, and saved. To build up height in the centers, a small circle of ½” plywood was glued into each one.  I wanted some shine to show through the translucent glass nuggets I would be using, so I cut circles from a discarded piece of antiqued mirror to glue over the plywood. Small circles of thin metal could also be used in place of the mirror. Different sizes of amber, brown, and clear glass nuggets were glued to the mirror, leaving a small space around each one. After letting the glue dry 24 hours, the nuggets were grouted with sanded grout.  I mixed a small amount of brown paint with my black grout to get the color I wanted.  Let grout dry overnight before sealing.

Searching through my stashes, I found an awesome piece of rusted steel wire and some beautiful green and gold blown glass grape bunches.  The wire,  I pulled from a salvage pile last year, and the grapes were found in an antique mall in Texas several years ago. They had broken leaves, and I paid a bit more than I would usually do, but they were so darned pretty.  And now, I’m really glad I did.

Not being one for flowery, frilly things, the wire piece worked perfectly for my taste; I could use the twisted wire knot to take the place of a bow.  

With 22ga, thin black wire, the flower was wired on first, then the leaves, and grapes.  I added some rusty springs to give it just a little bit more. 

I love the versatility of projects like this.  These sunflowers can be attached to just about anything, and used indoors, or out.  I did a little playing around with some other ideas too, and thought I’d share them just for fun.  You’ll have to let me know what you think ..

Keep it simple.  Paint a couple metal leaves to add around a flower; attach it to a chalkboard, or a welcome sign.

 A wire wreath is big enough for the pair. No ribbon for a wreath bow?  Cut strips of fiberglass window screening and loop one.  There’s easy bow instructions on YouTube.

How about a mailbox cover?  A metal nail strip was stitched to wire hardware cloth and shaped in an arch.  Hold it in place underneath with mini bungee cords.  

For an open porch, I think a small arrangement with a sunflower and raffia would look great too, tied around the neck of a milk can filled with tall florals, or ornamental grasses; but I didn’t have time, a porch, or florals to get that put together. 🙂

A wide variety of small, inexpensive metal and glass pieces can usually be found at garage sales, and tag sales, so keep an eye out if you like repurposing and working with salvaged materials.  It’s good to get in the practice of looking at a piece and taking it apart in your mind to see how it’s parts can be used in other ways before carting it home.

Please feel free to comment, or share my post if you like. Take Care and Stay Healthy. 

Recycled Tin Can Wreath DIY Tutorial

This rusty, country style wreath may not be everyone’s cup of tea, but it looks right at home in my rural garden, so I’m sharing it just for fun!

While going through old garden magazines last year, I caught just a glimpse of the side of a tin can wreath hanging in the picture of a garden, so of course I felt the need to make one. I threw a bunch of dog food cans in a tub of water to soak outside for a few weeks and start the rusting process.

After dumping the cans to dry, I creased them in the center with the side of my foot, and drilled a ½” hole through them.

I used twenty eight, 22 oz. cans for my wreath, and a 5 ft. length of heavy fencing wire. Cans are heavy, my wreath still sagged a bit, but the fencing wire helped it hold a circular shape. 

A small loop was bent in one end of the wire to hold the cans as they were threaded on.  I did a pattern of three as I threaded .. two with the crease one way, them flipped the third, but they can be put on any way you want. 


After all the cans were threaded on, the wire was cut close to the end, a hook was shaped to go into the loop, and squeezed tight.

That’s it, easy peasy.  

My wreath has been hanging in the garage for the last year, out of sight, out of mind, until now.   An awesome find of a big bird nest, dislodged from one of our pines during a recent thunderstorm, prompted me to adorn my wreath with Mother Nature and hang it in the garden.  A step out to the gravel road provided a few stones for makeshift eggs; a little surprise for my four year old granddaughter when she sneaks a peek … she’ll be delighted!

can wreath 2


Show Stopper Shadow Box DIY

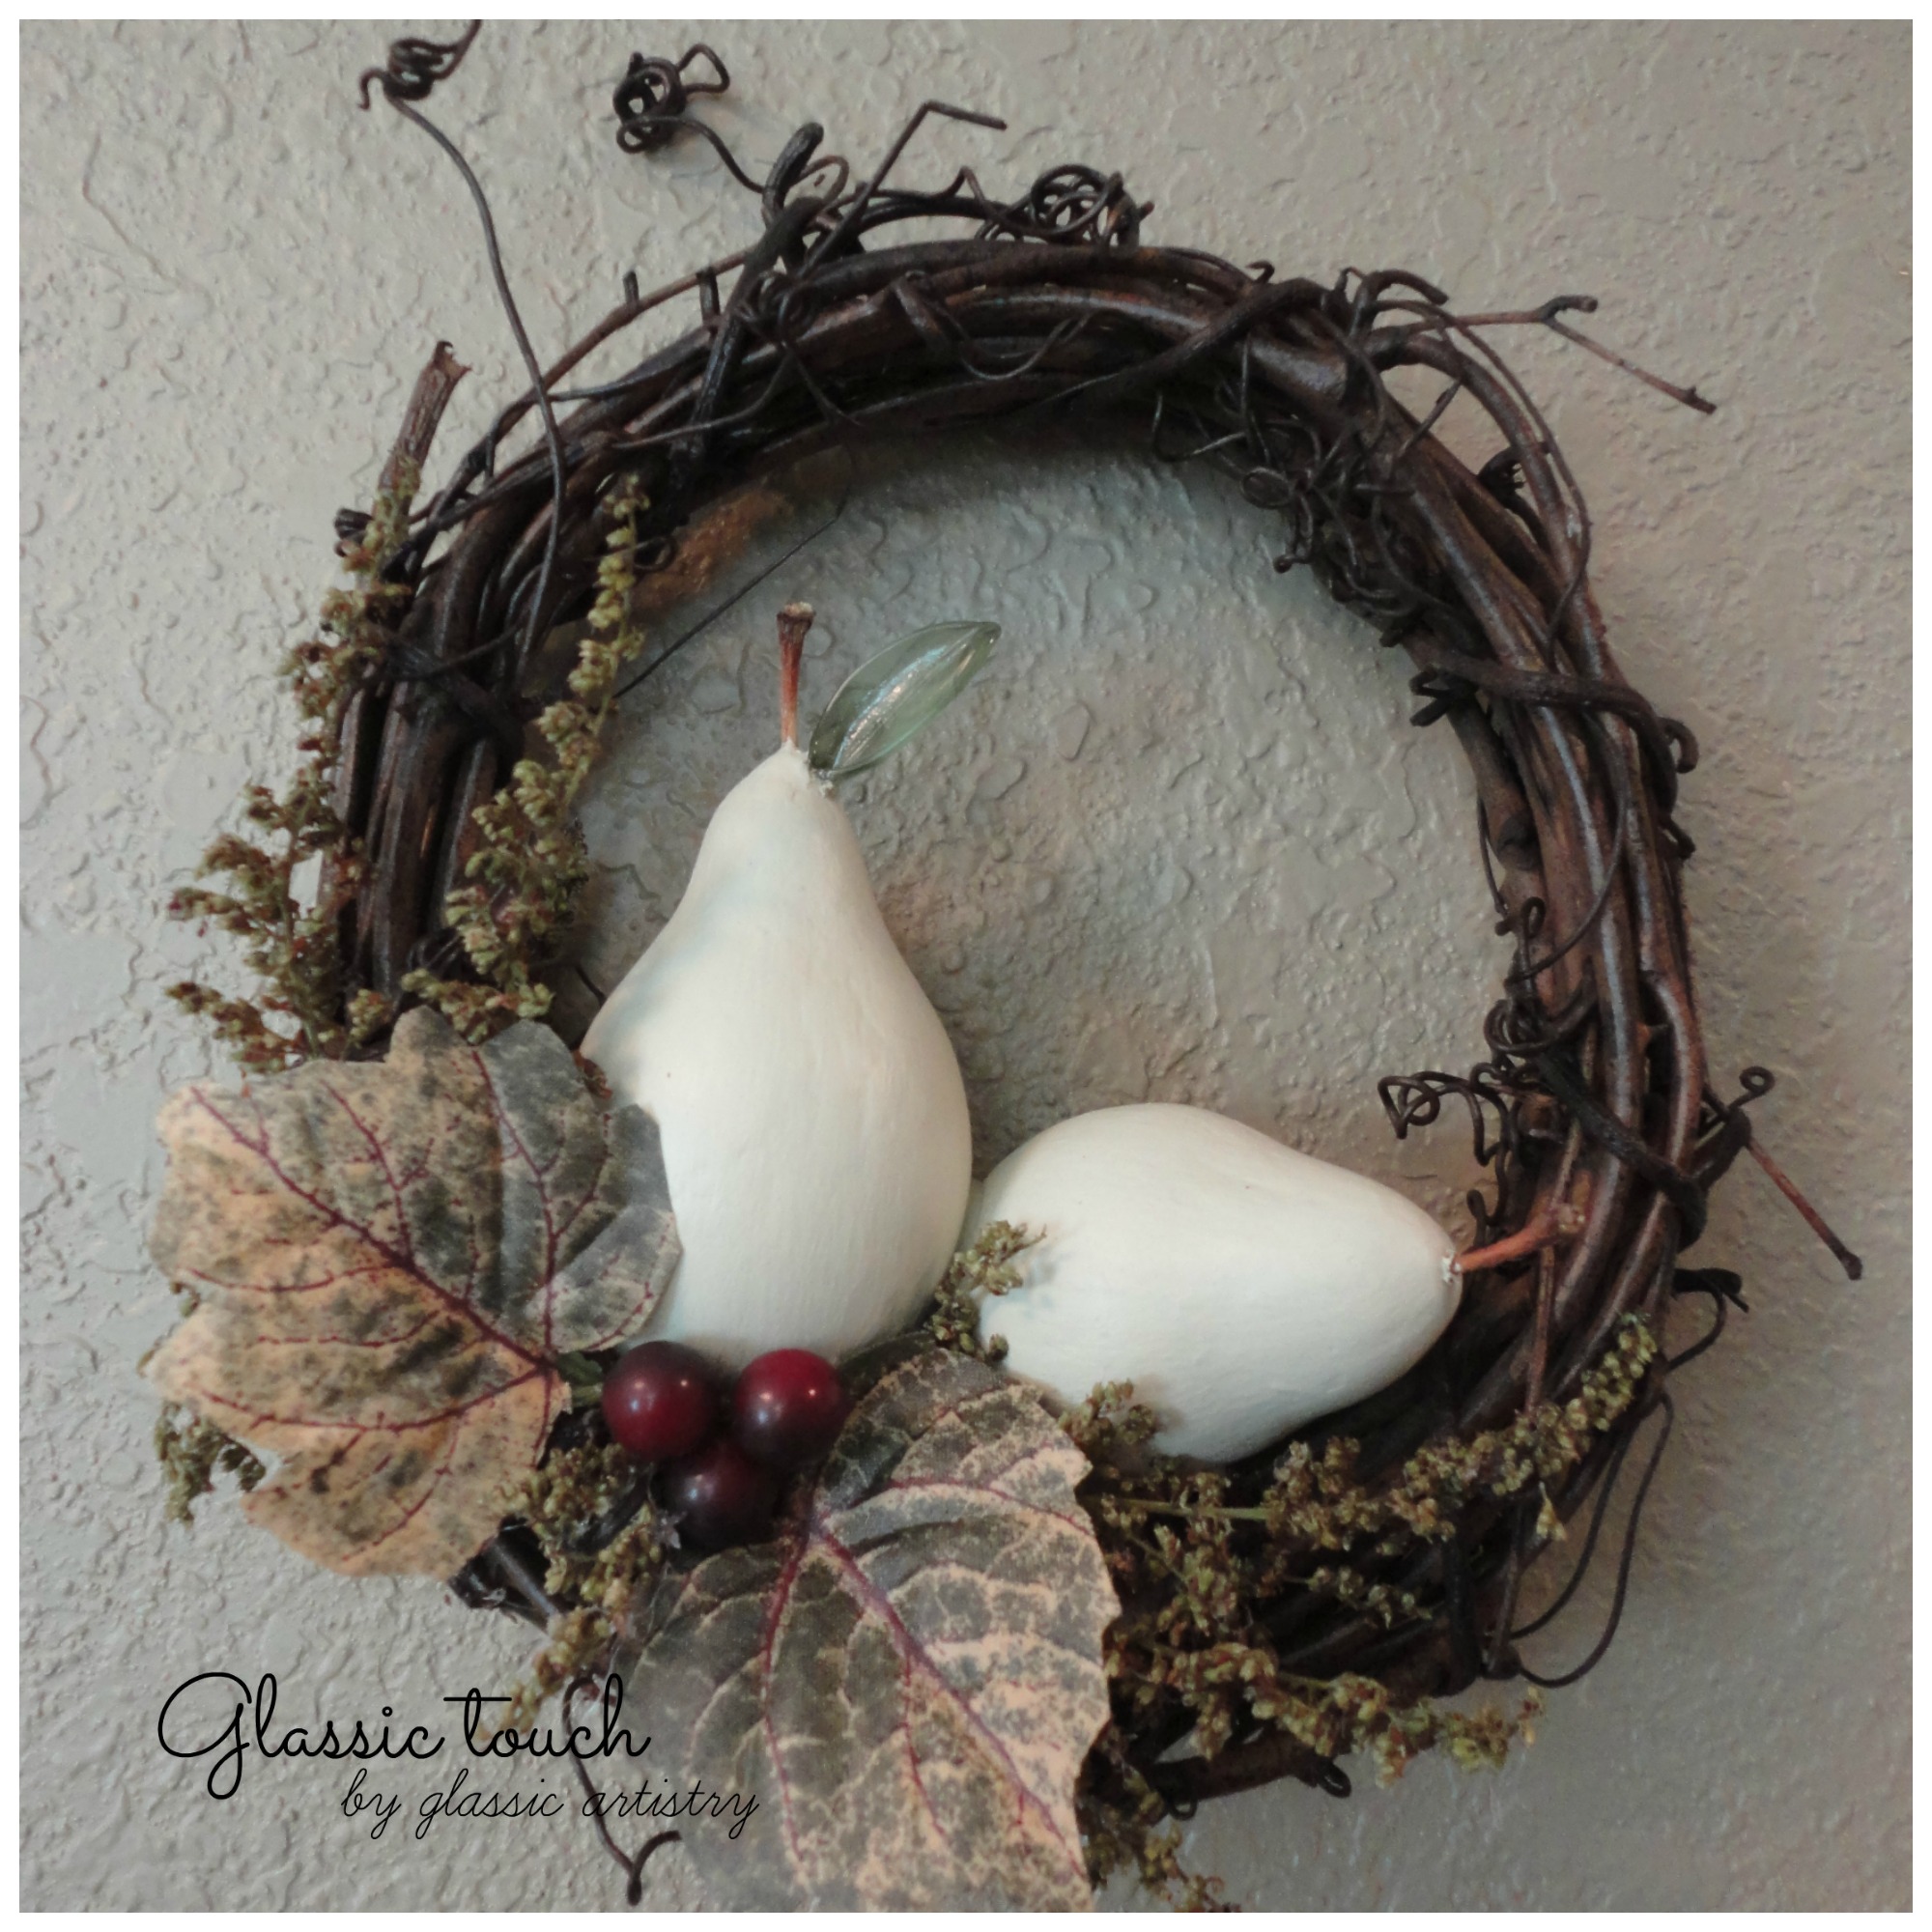
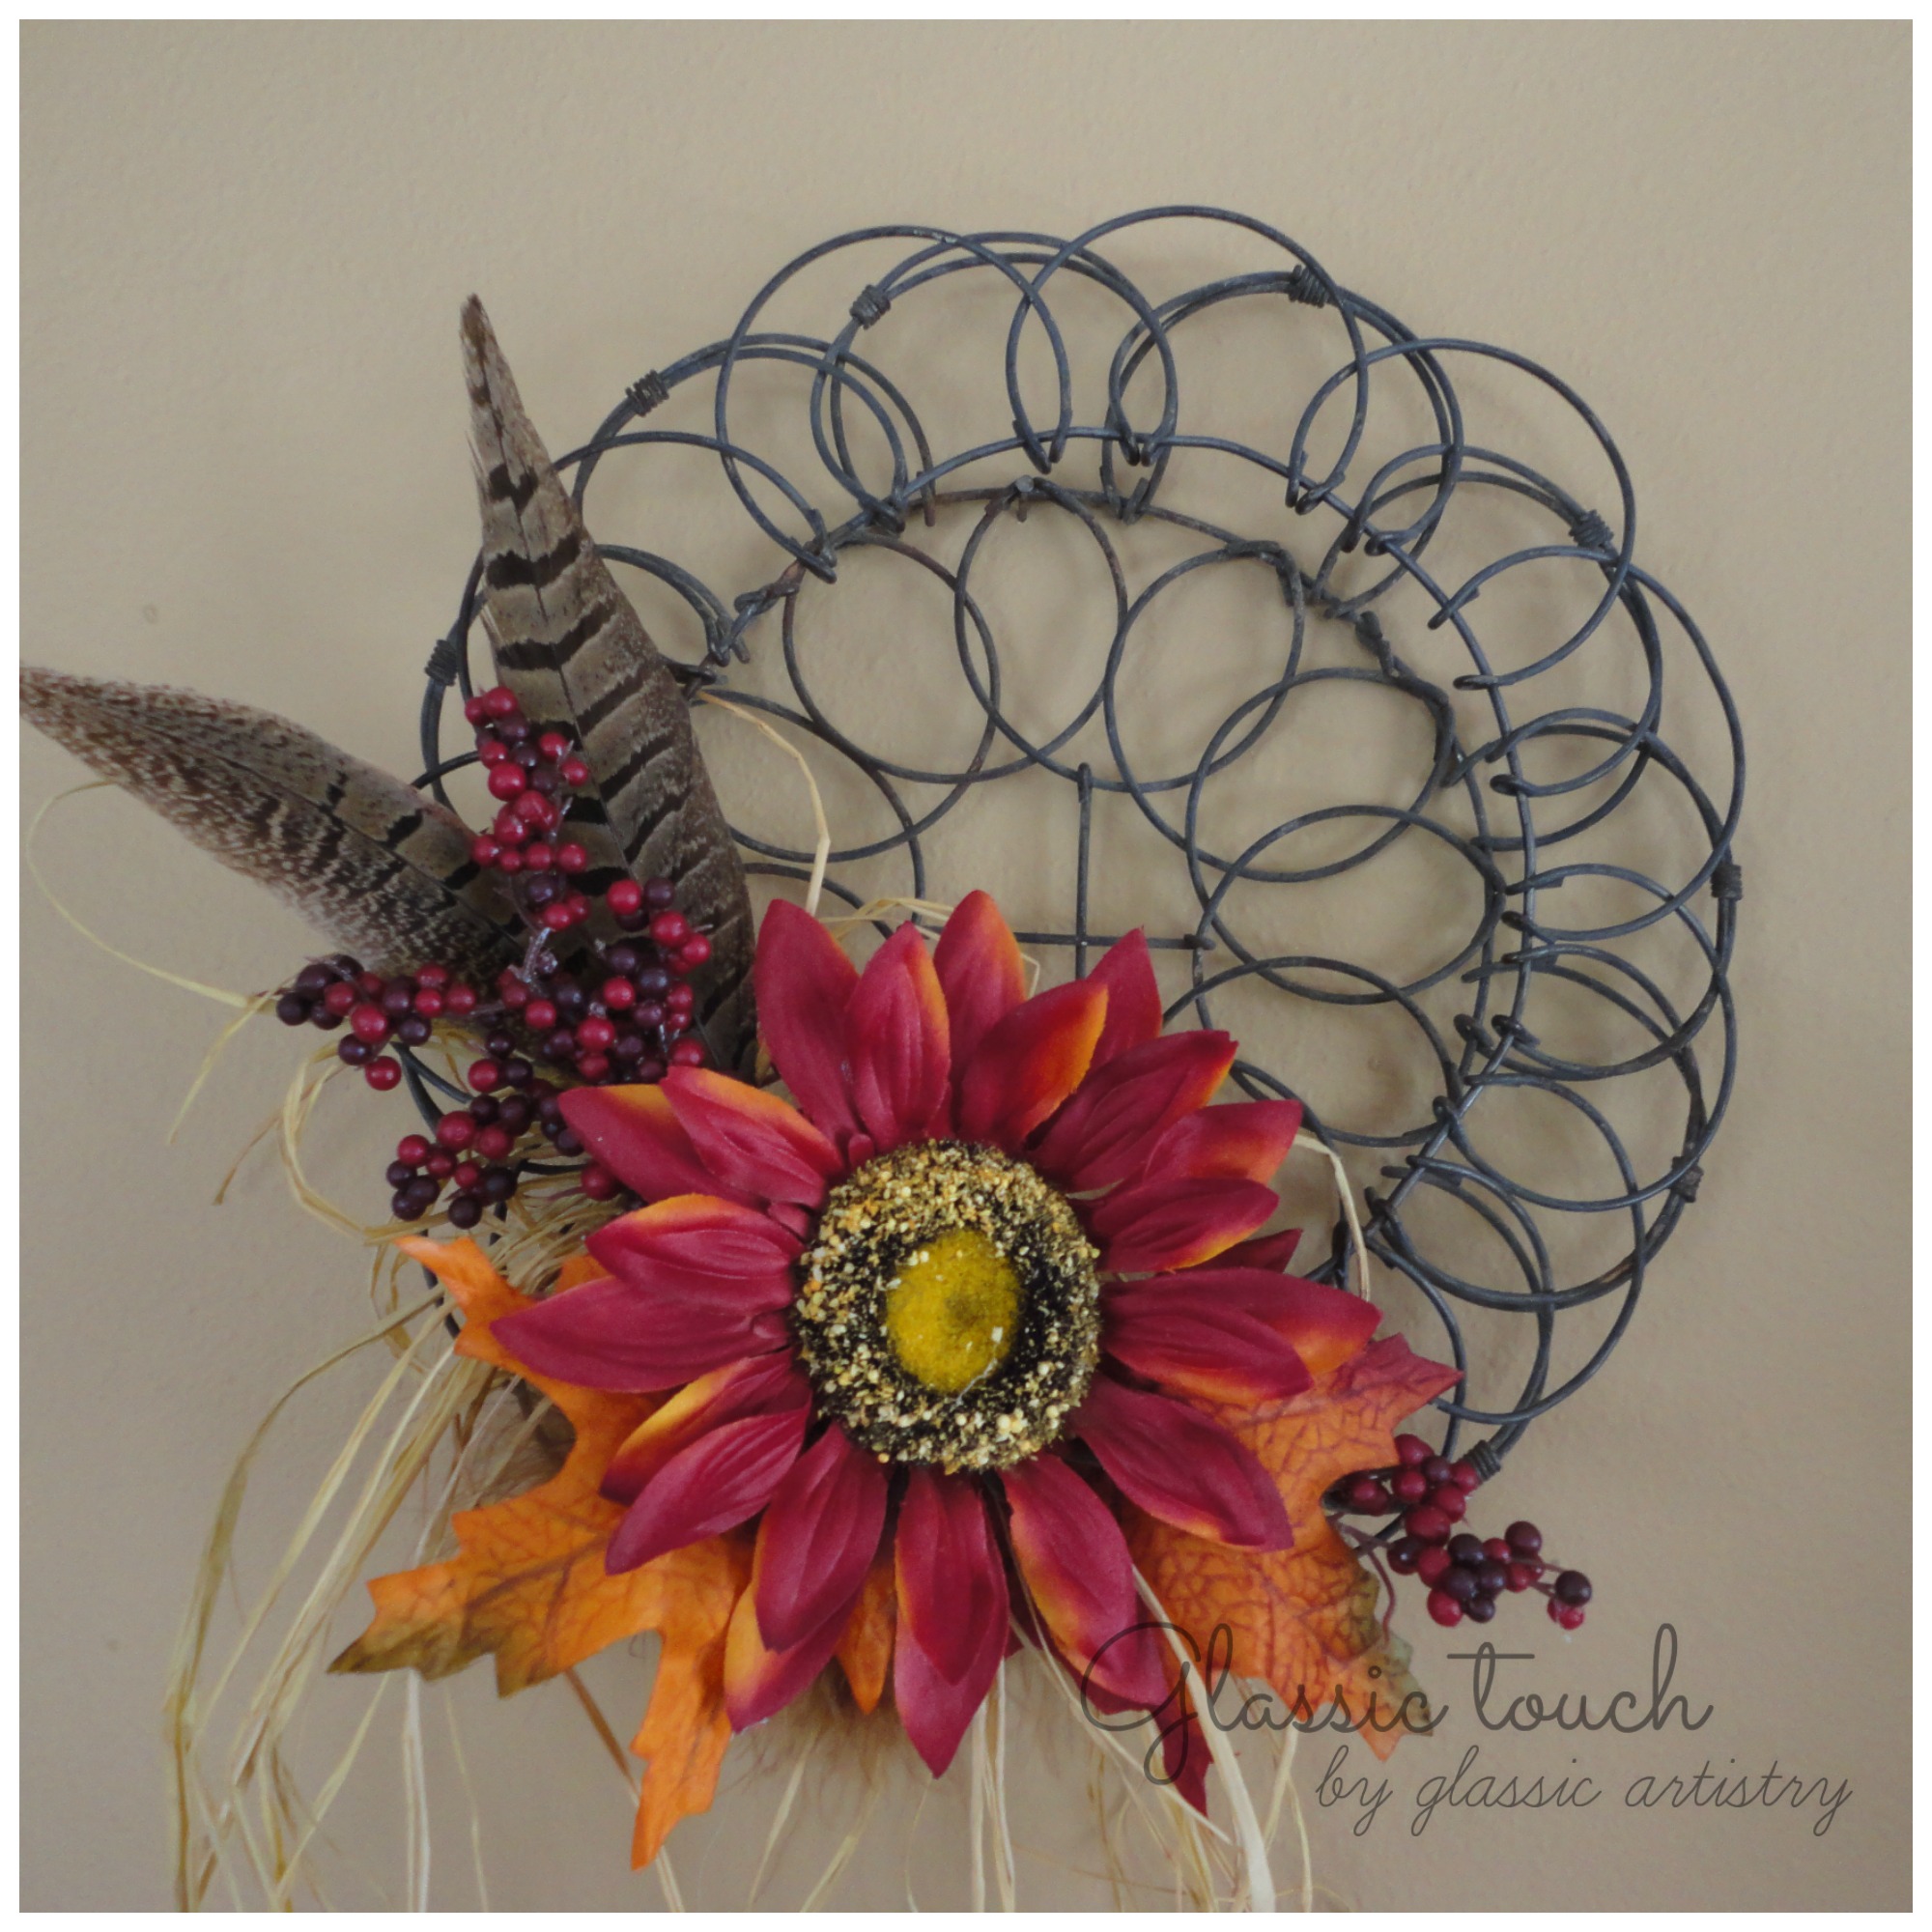
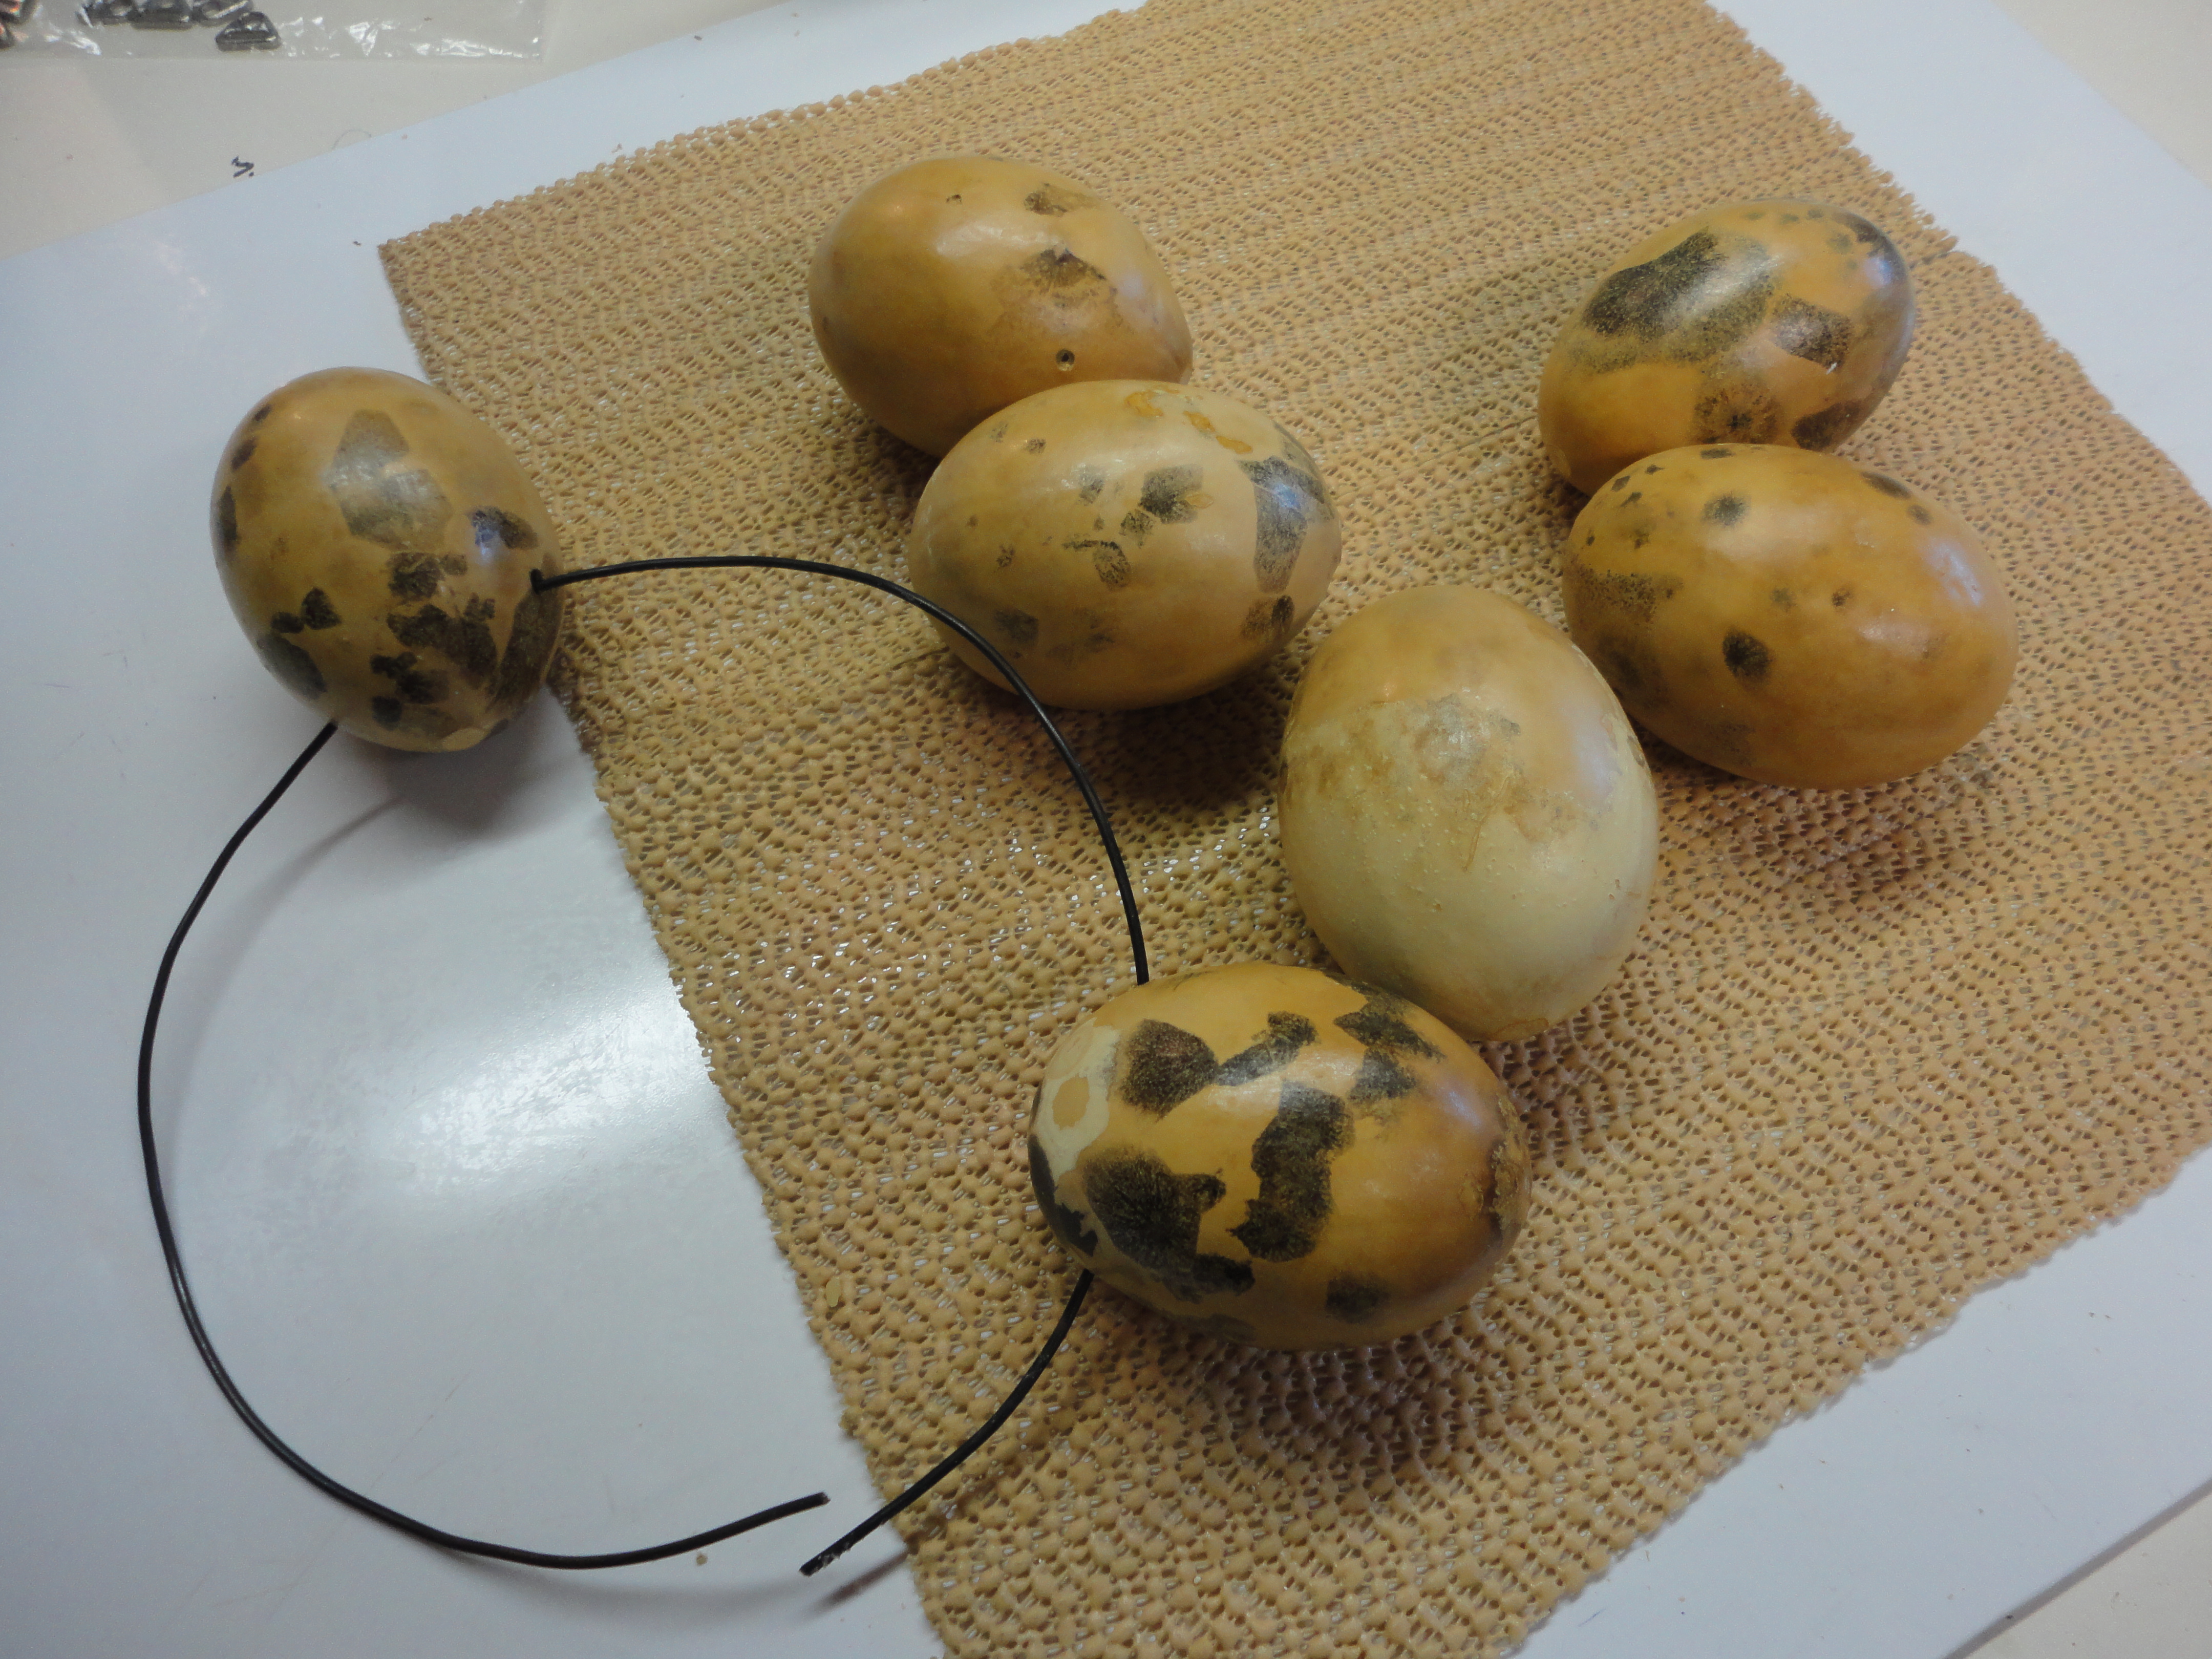
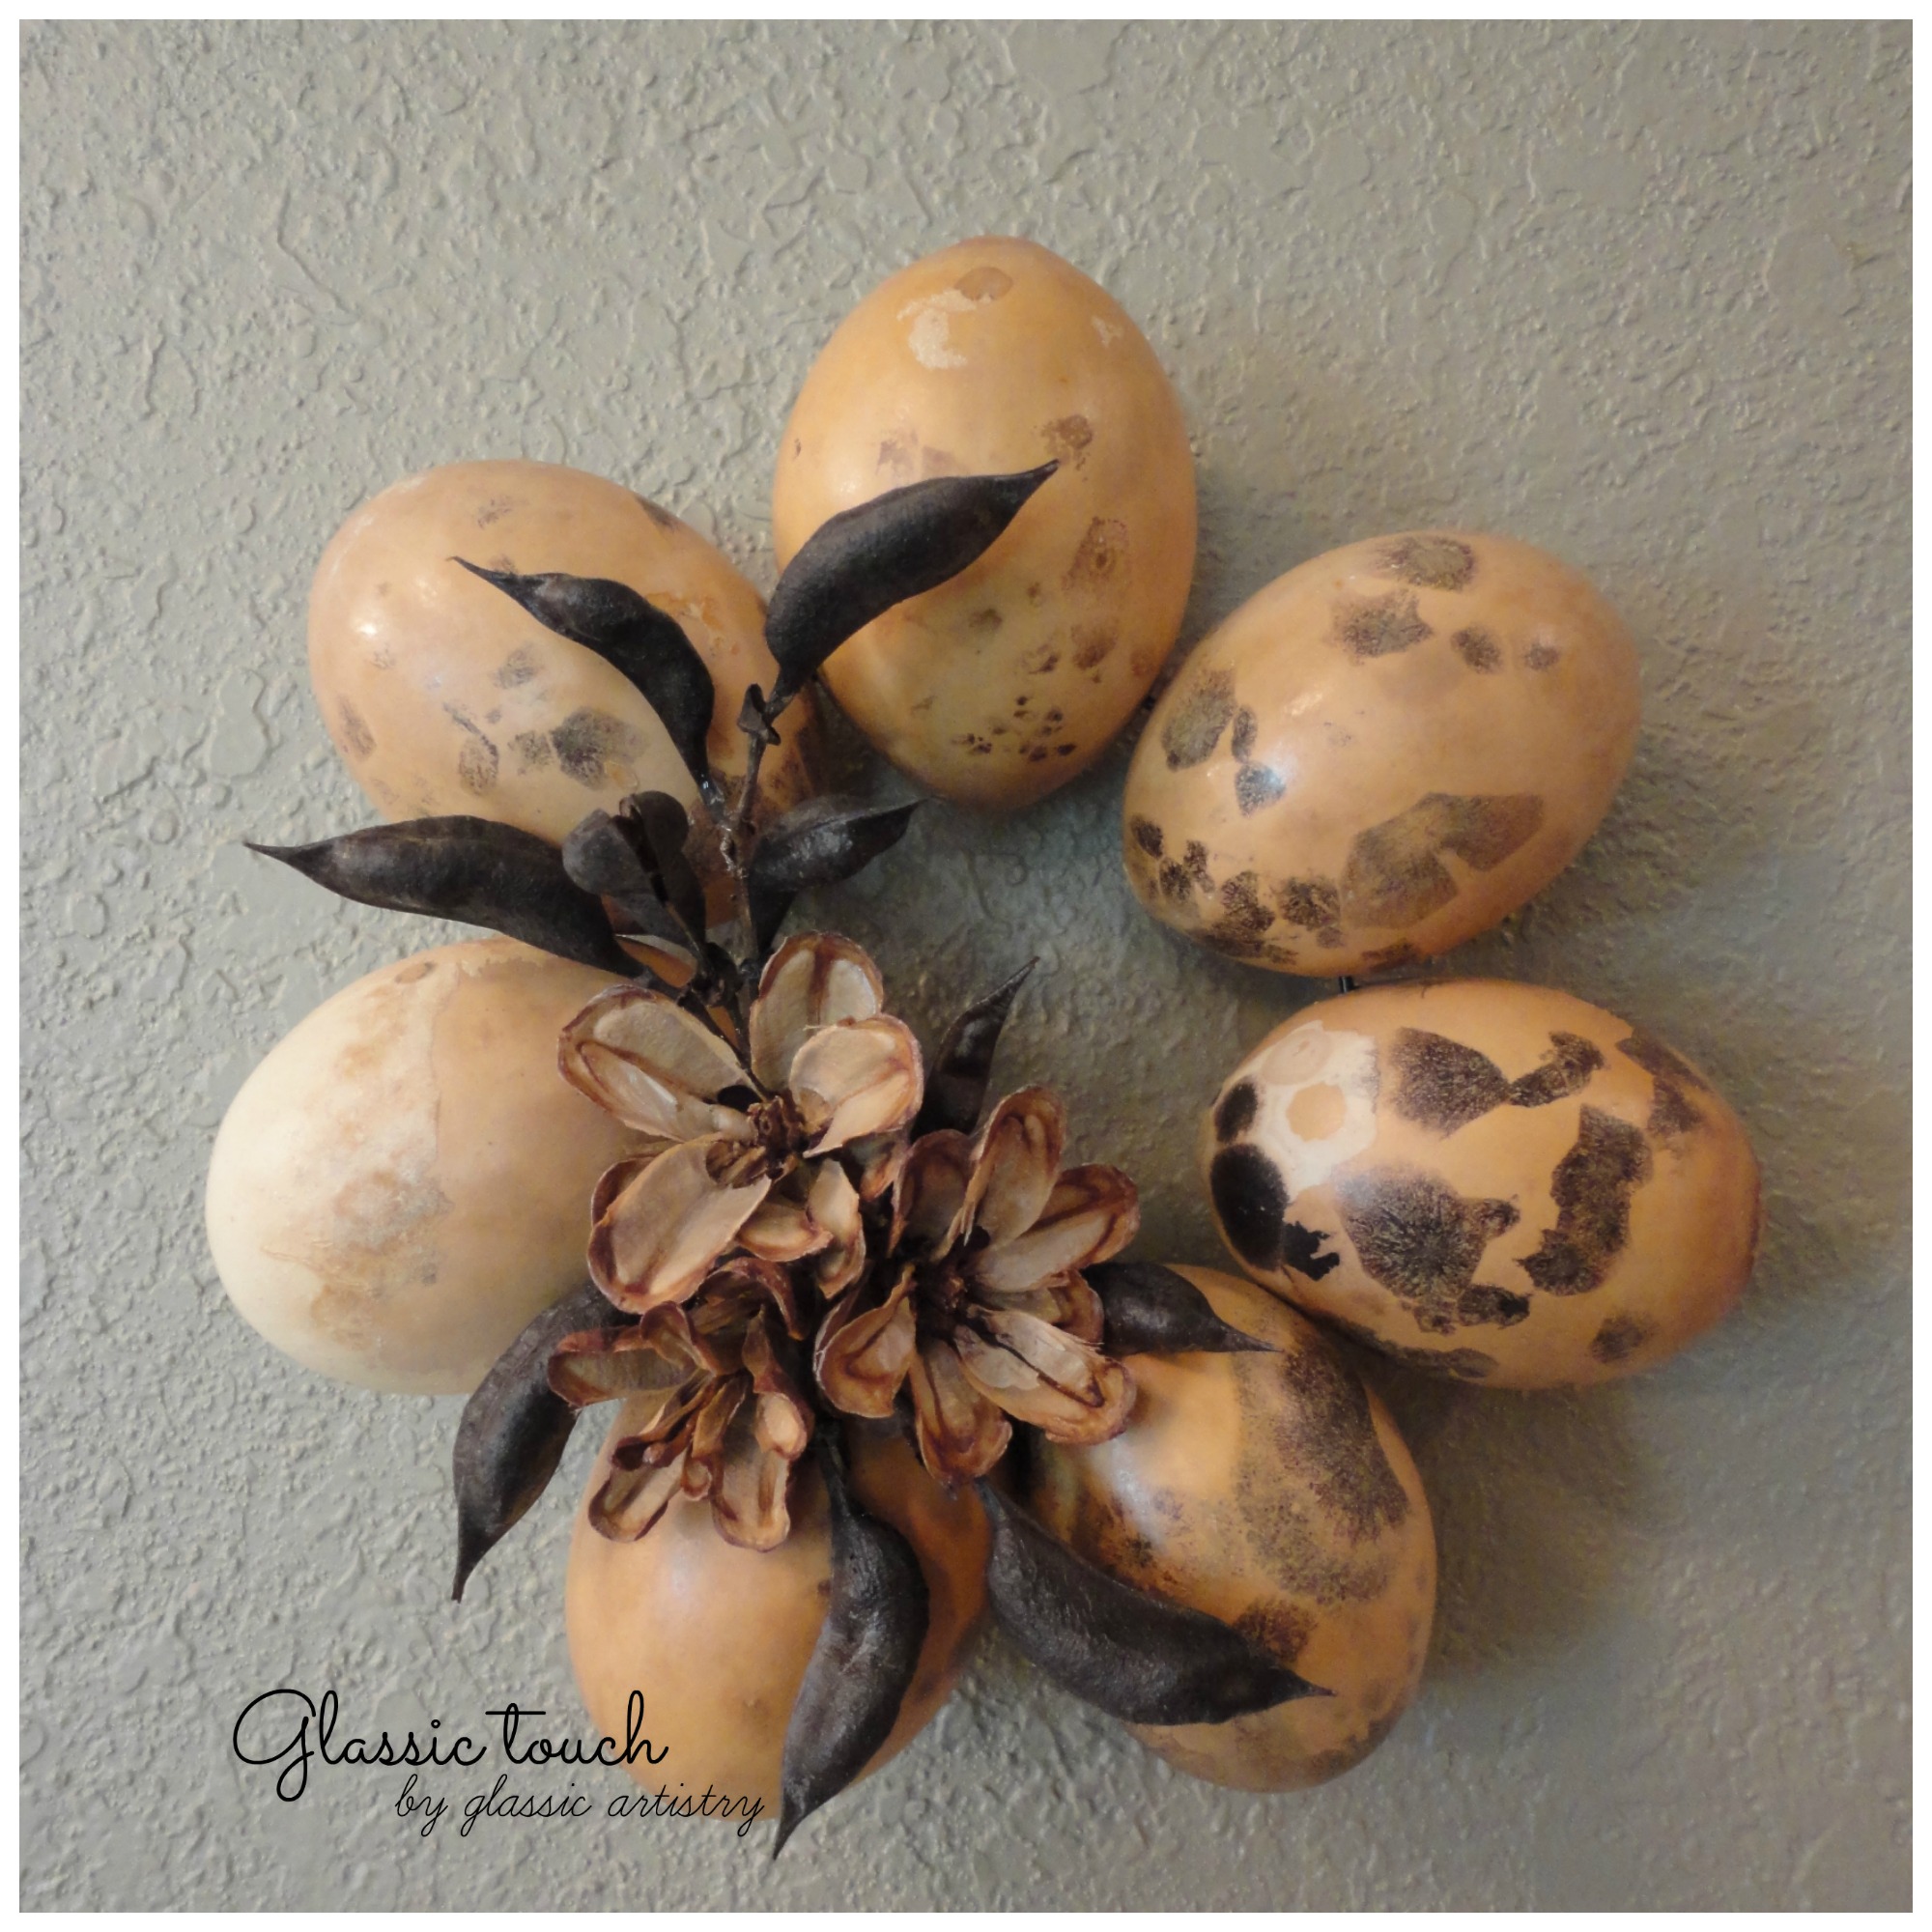
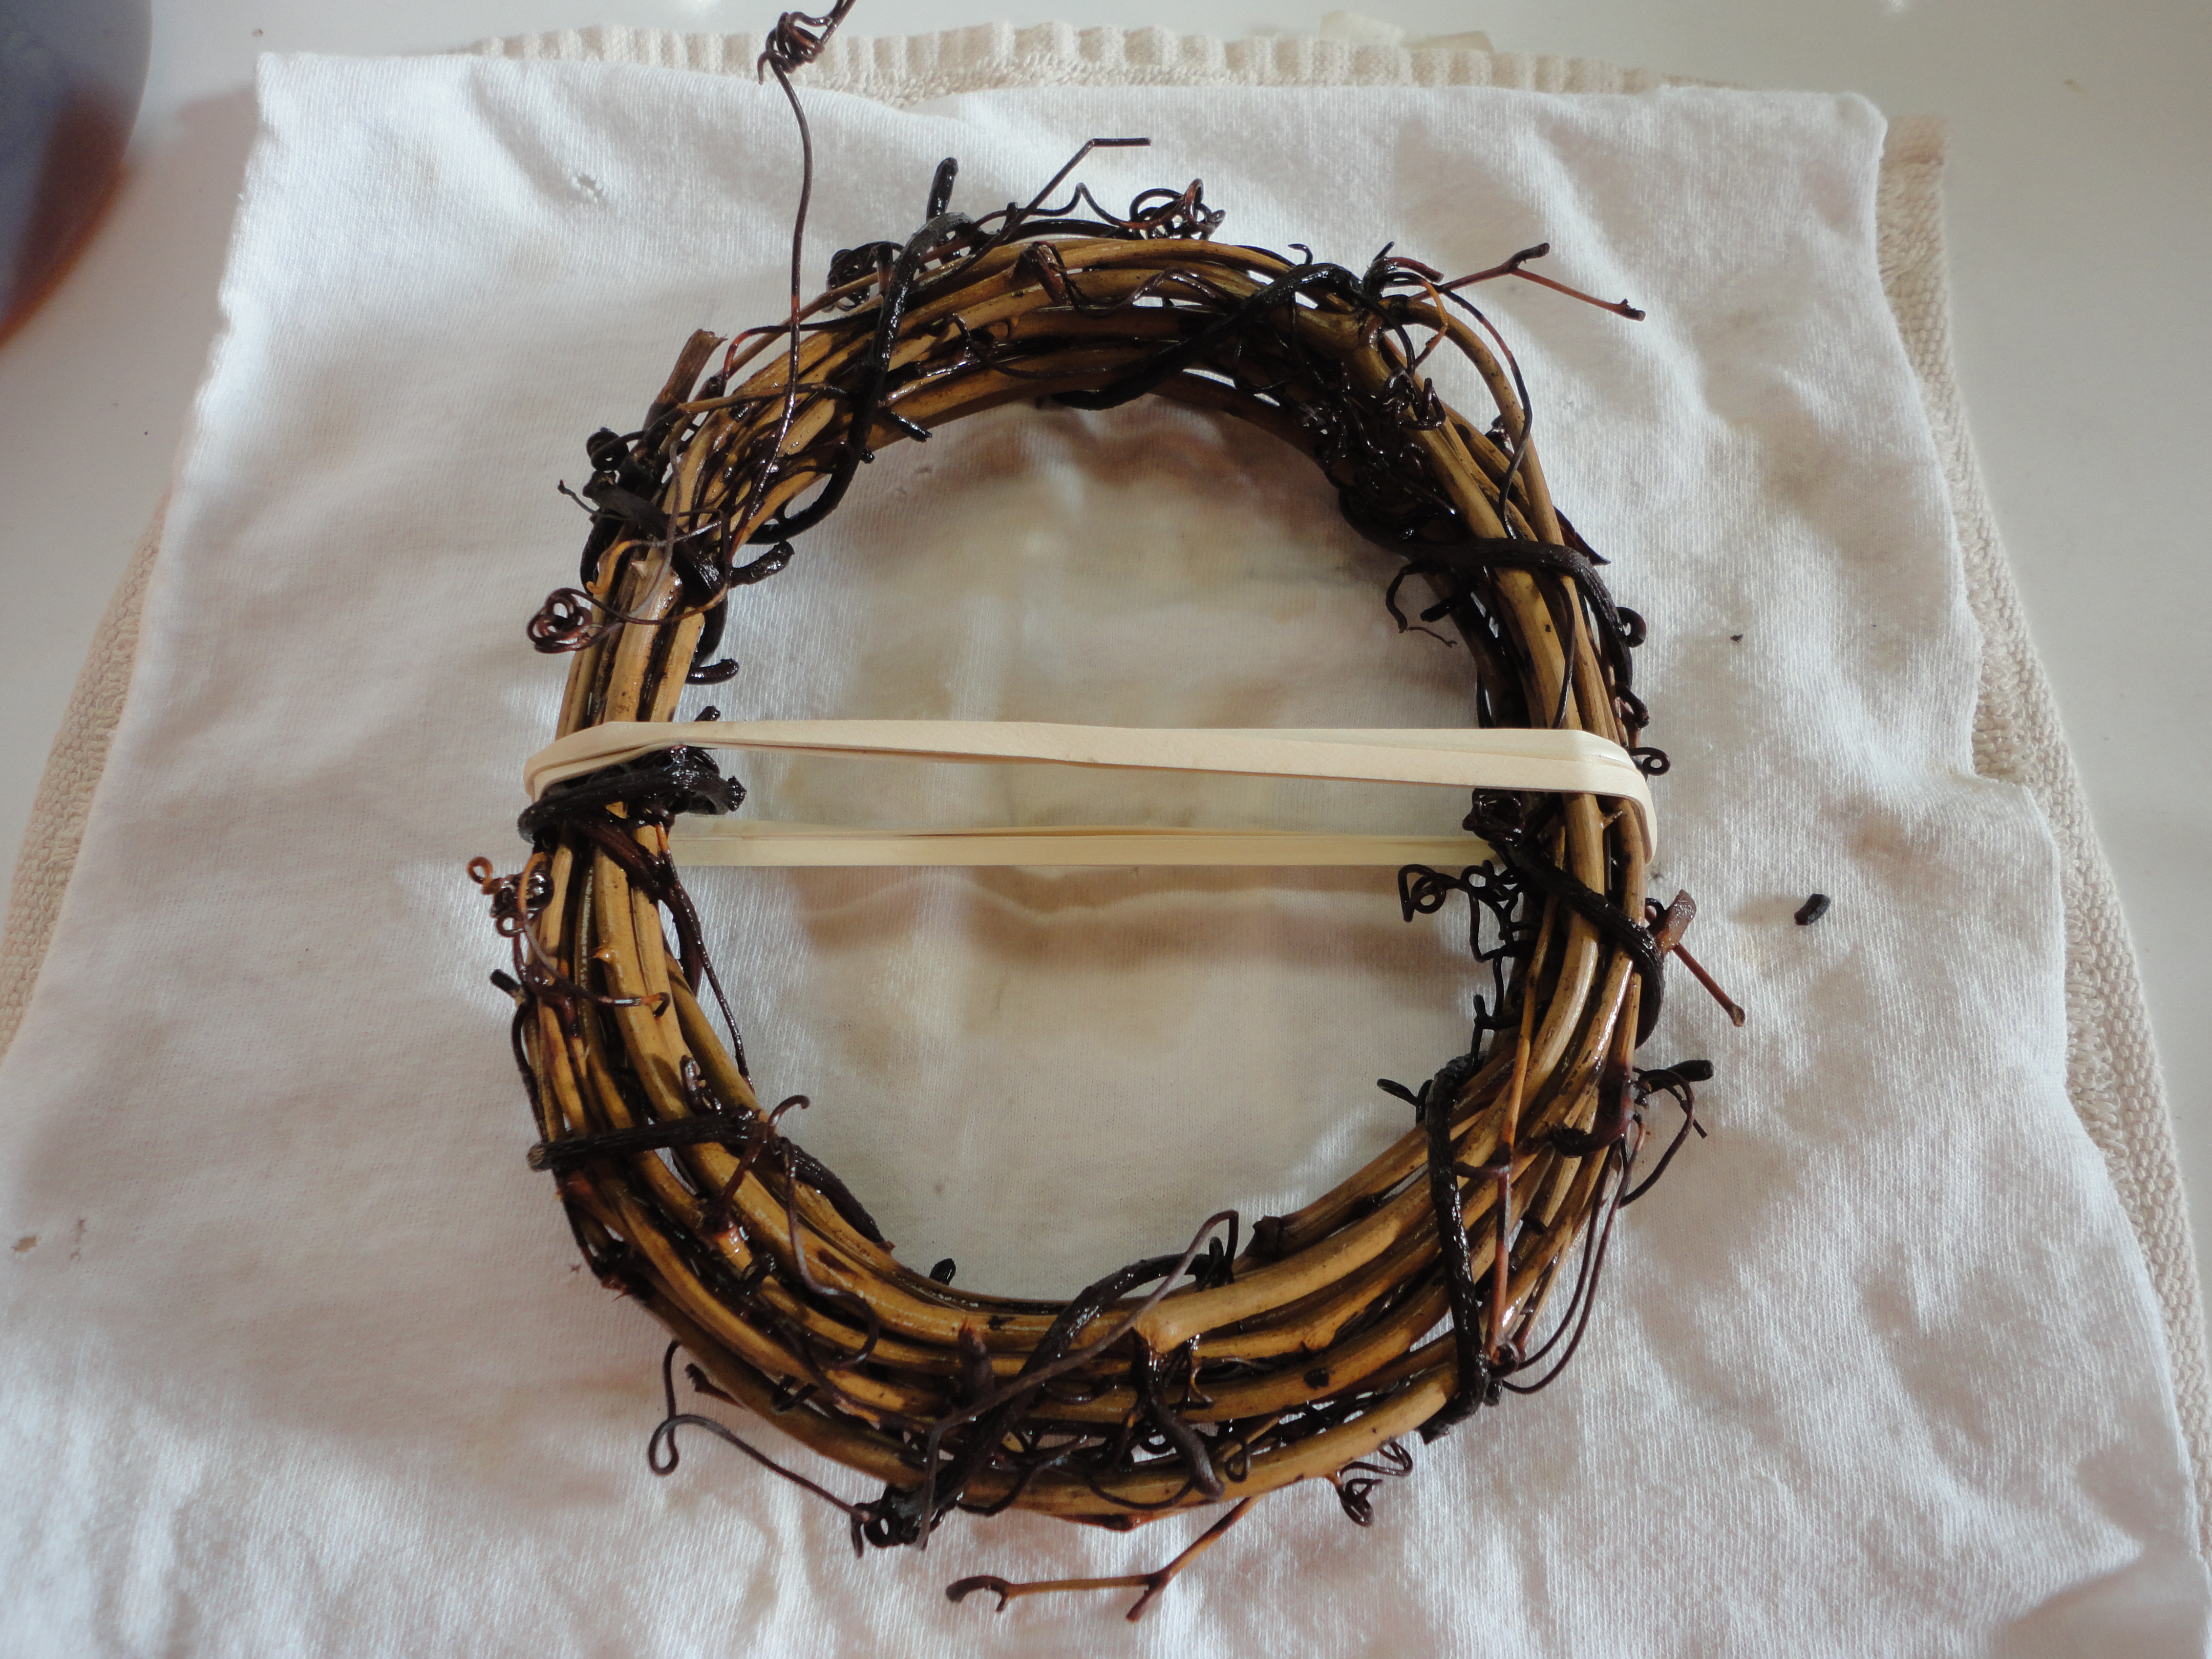
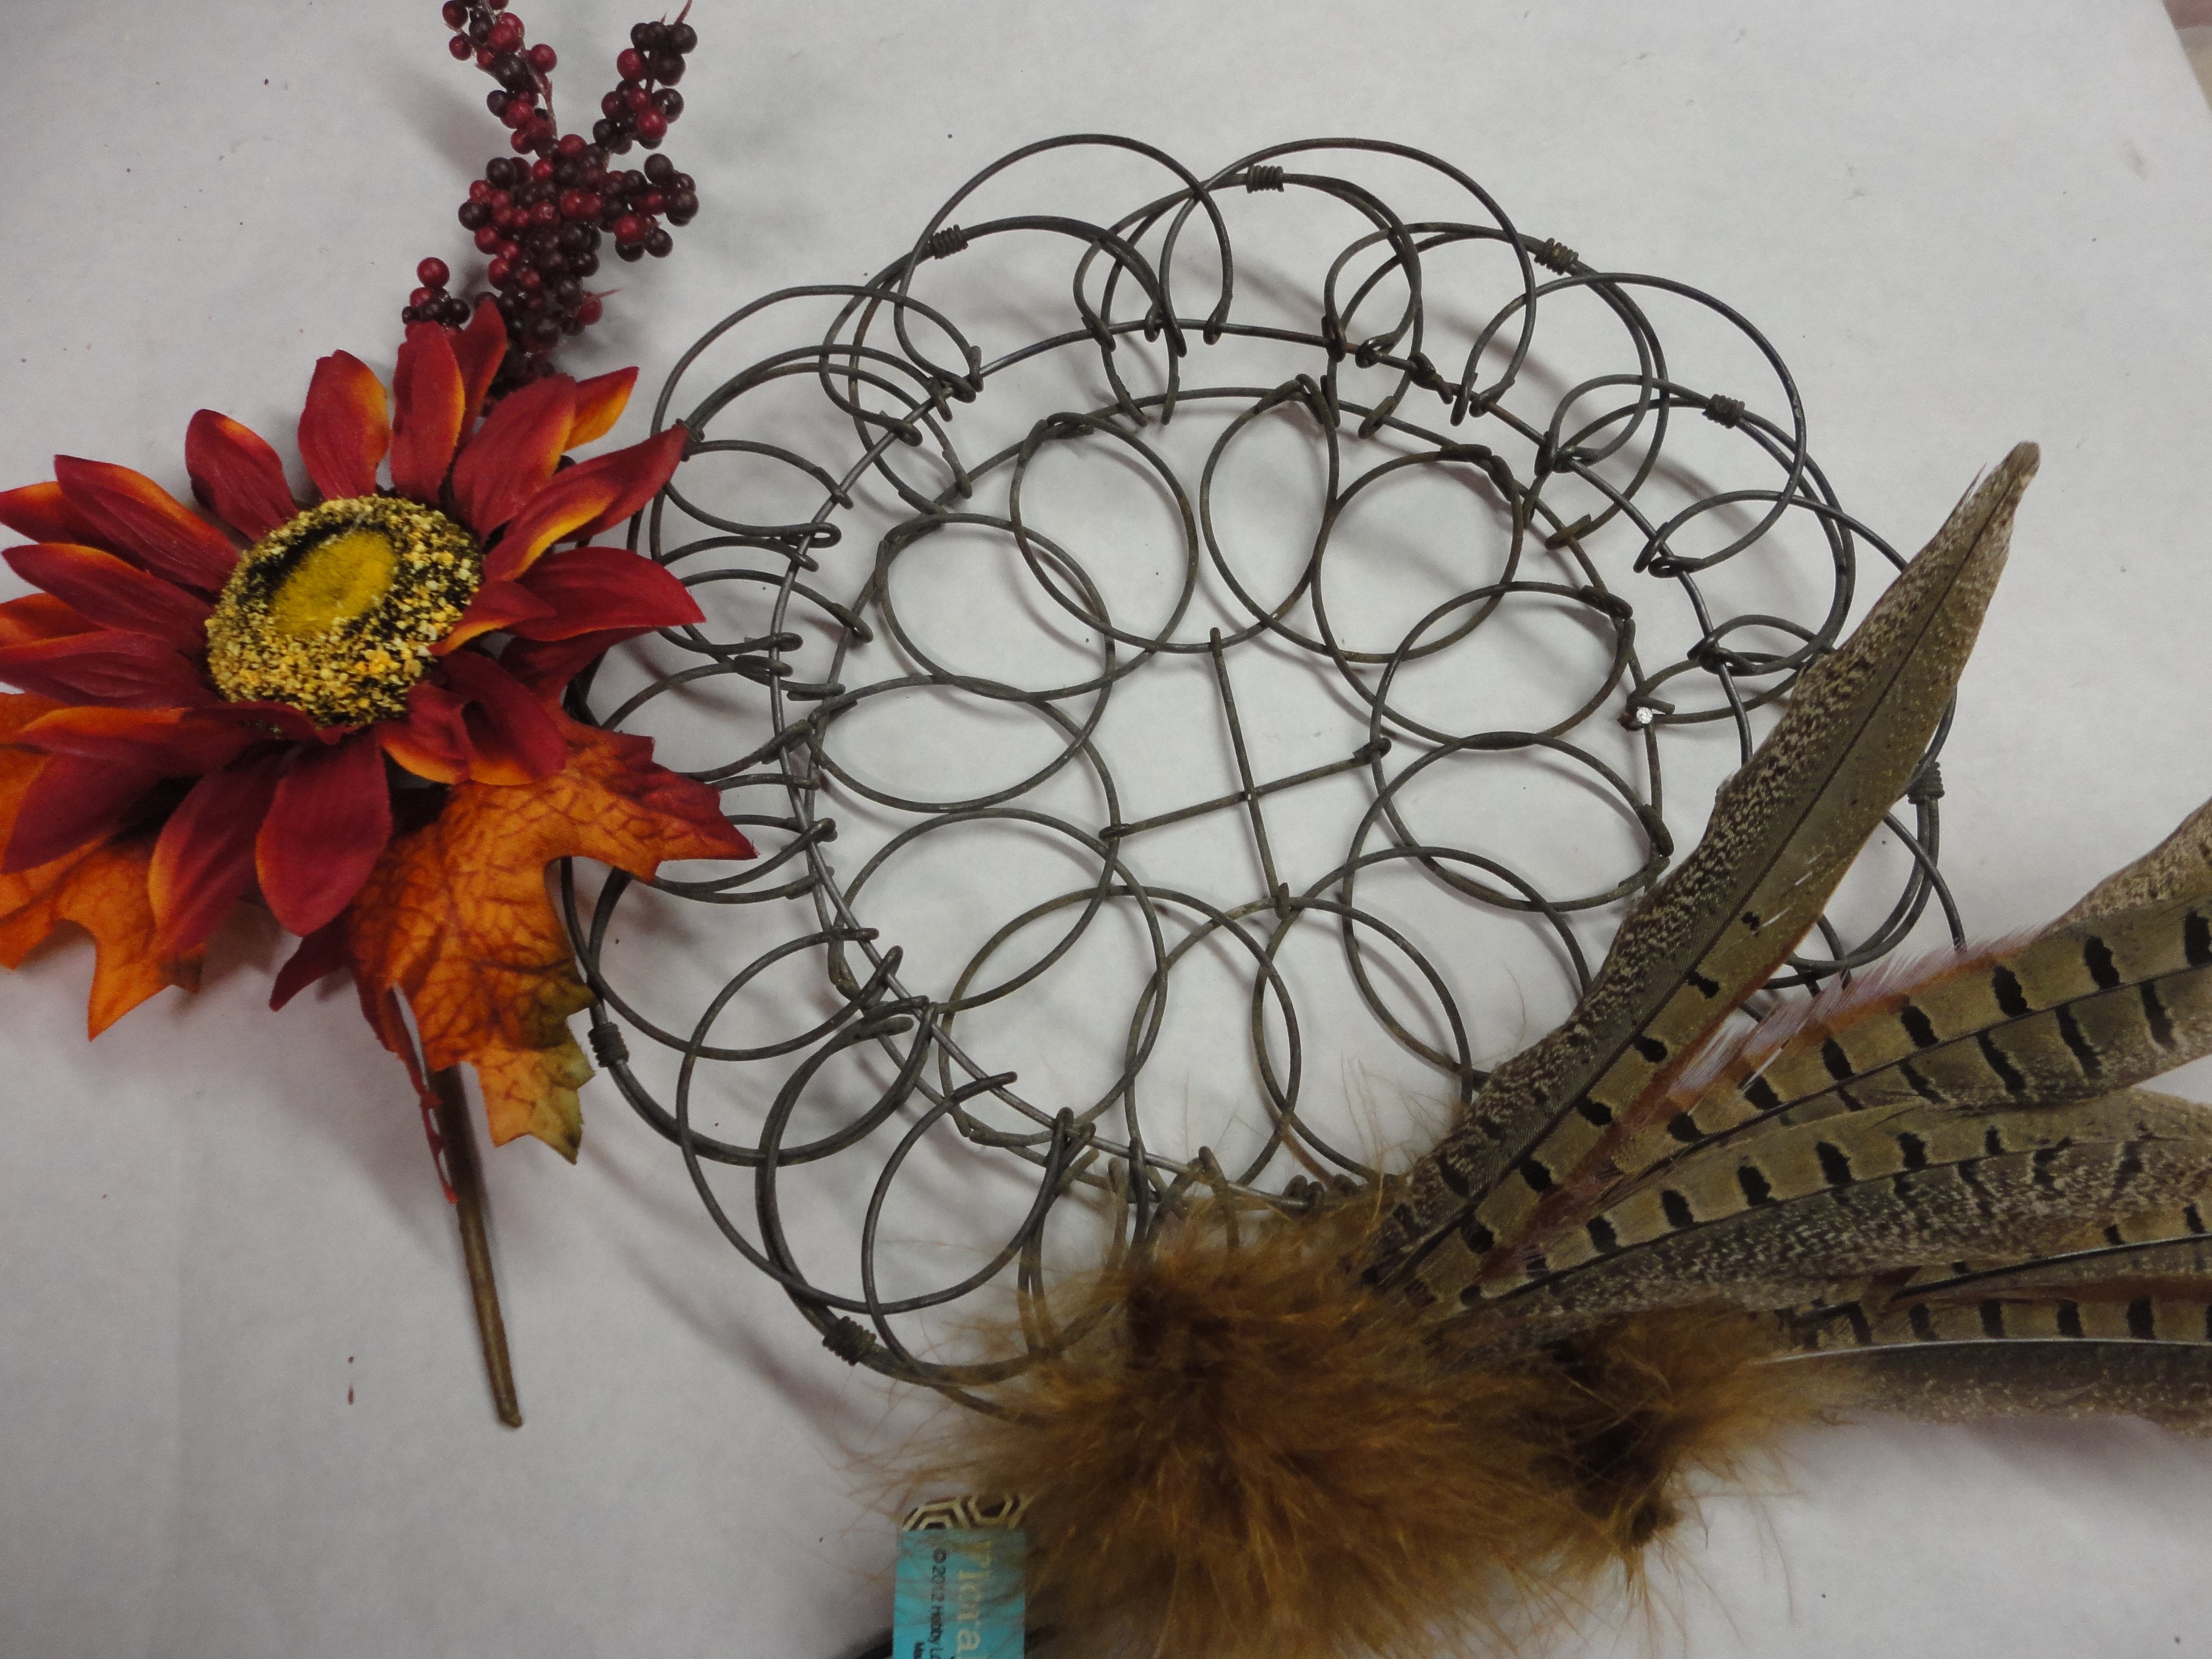
This project actually began last November when I was looking for a storage box for the pear gourd wreath shown in my October 2015 blog post. The dried flowers were pretty fragile and I was a little leary about packing it away. That’s when I thought of a shadow box. Why not frame it as wall art?  I could make a box .. something eclectic… maybe a combination of scrapbook paper and aged mirror.

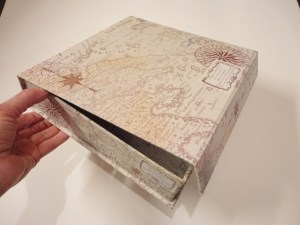
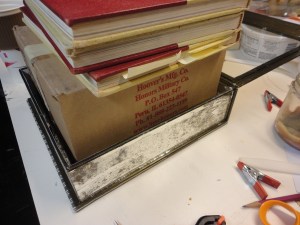
The biggest dilemma was finding a suitable box. Who knew finding a 10 x 10 x 2.5 inch box, with a lid, would be so hard?  I was even willing to buy a fancy box of chocolates, had the box been right. Sometimes, I get a bit antsy when I’m itching to do a project and can’t find just that certain thing I think I need. But, I’ve learned that a little patience goes a long way, and if I just wait, something always seems to show up.

My daughter and I were checking out the clearance aisles at Burlington Coat Factory last month. I wasn’t really shopping for anything, just entertaining my toddler granddaughter in the cart, when I saw a pile of magnetic clasped boxes on the shelf.  So unexpected, and more than PERFECT!  A clasp option would make the box easily accessible to switch out whenever you wanted.   I was reenergized, this was going to be fun!

DSC09455

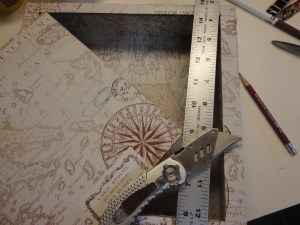
With the clasp at the bottom, I measured in 5/8″ from the top and bottom of the lid, and 3/4″ on each side, to cut out a frame opening. Cut nice straight lines by running a sharp utility knife along a ruler’s edge. Seal the box with gesso. Let dry.

DSC00251  DSC00263

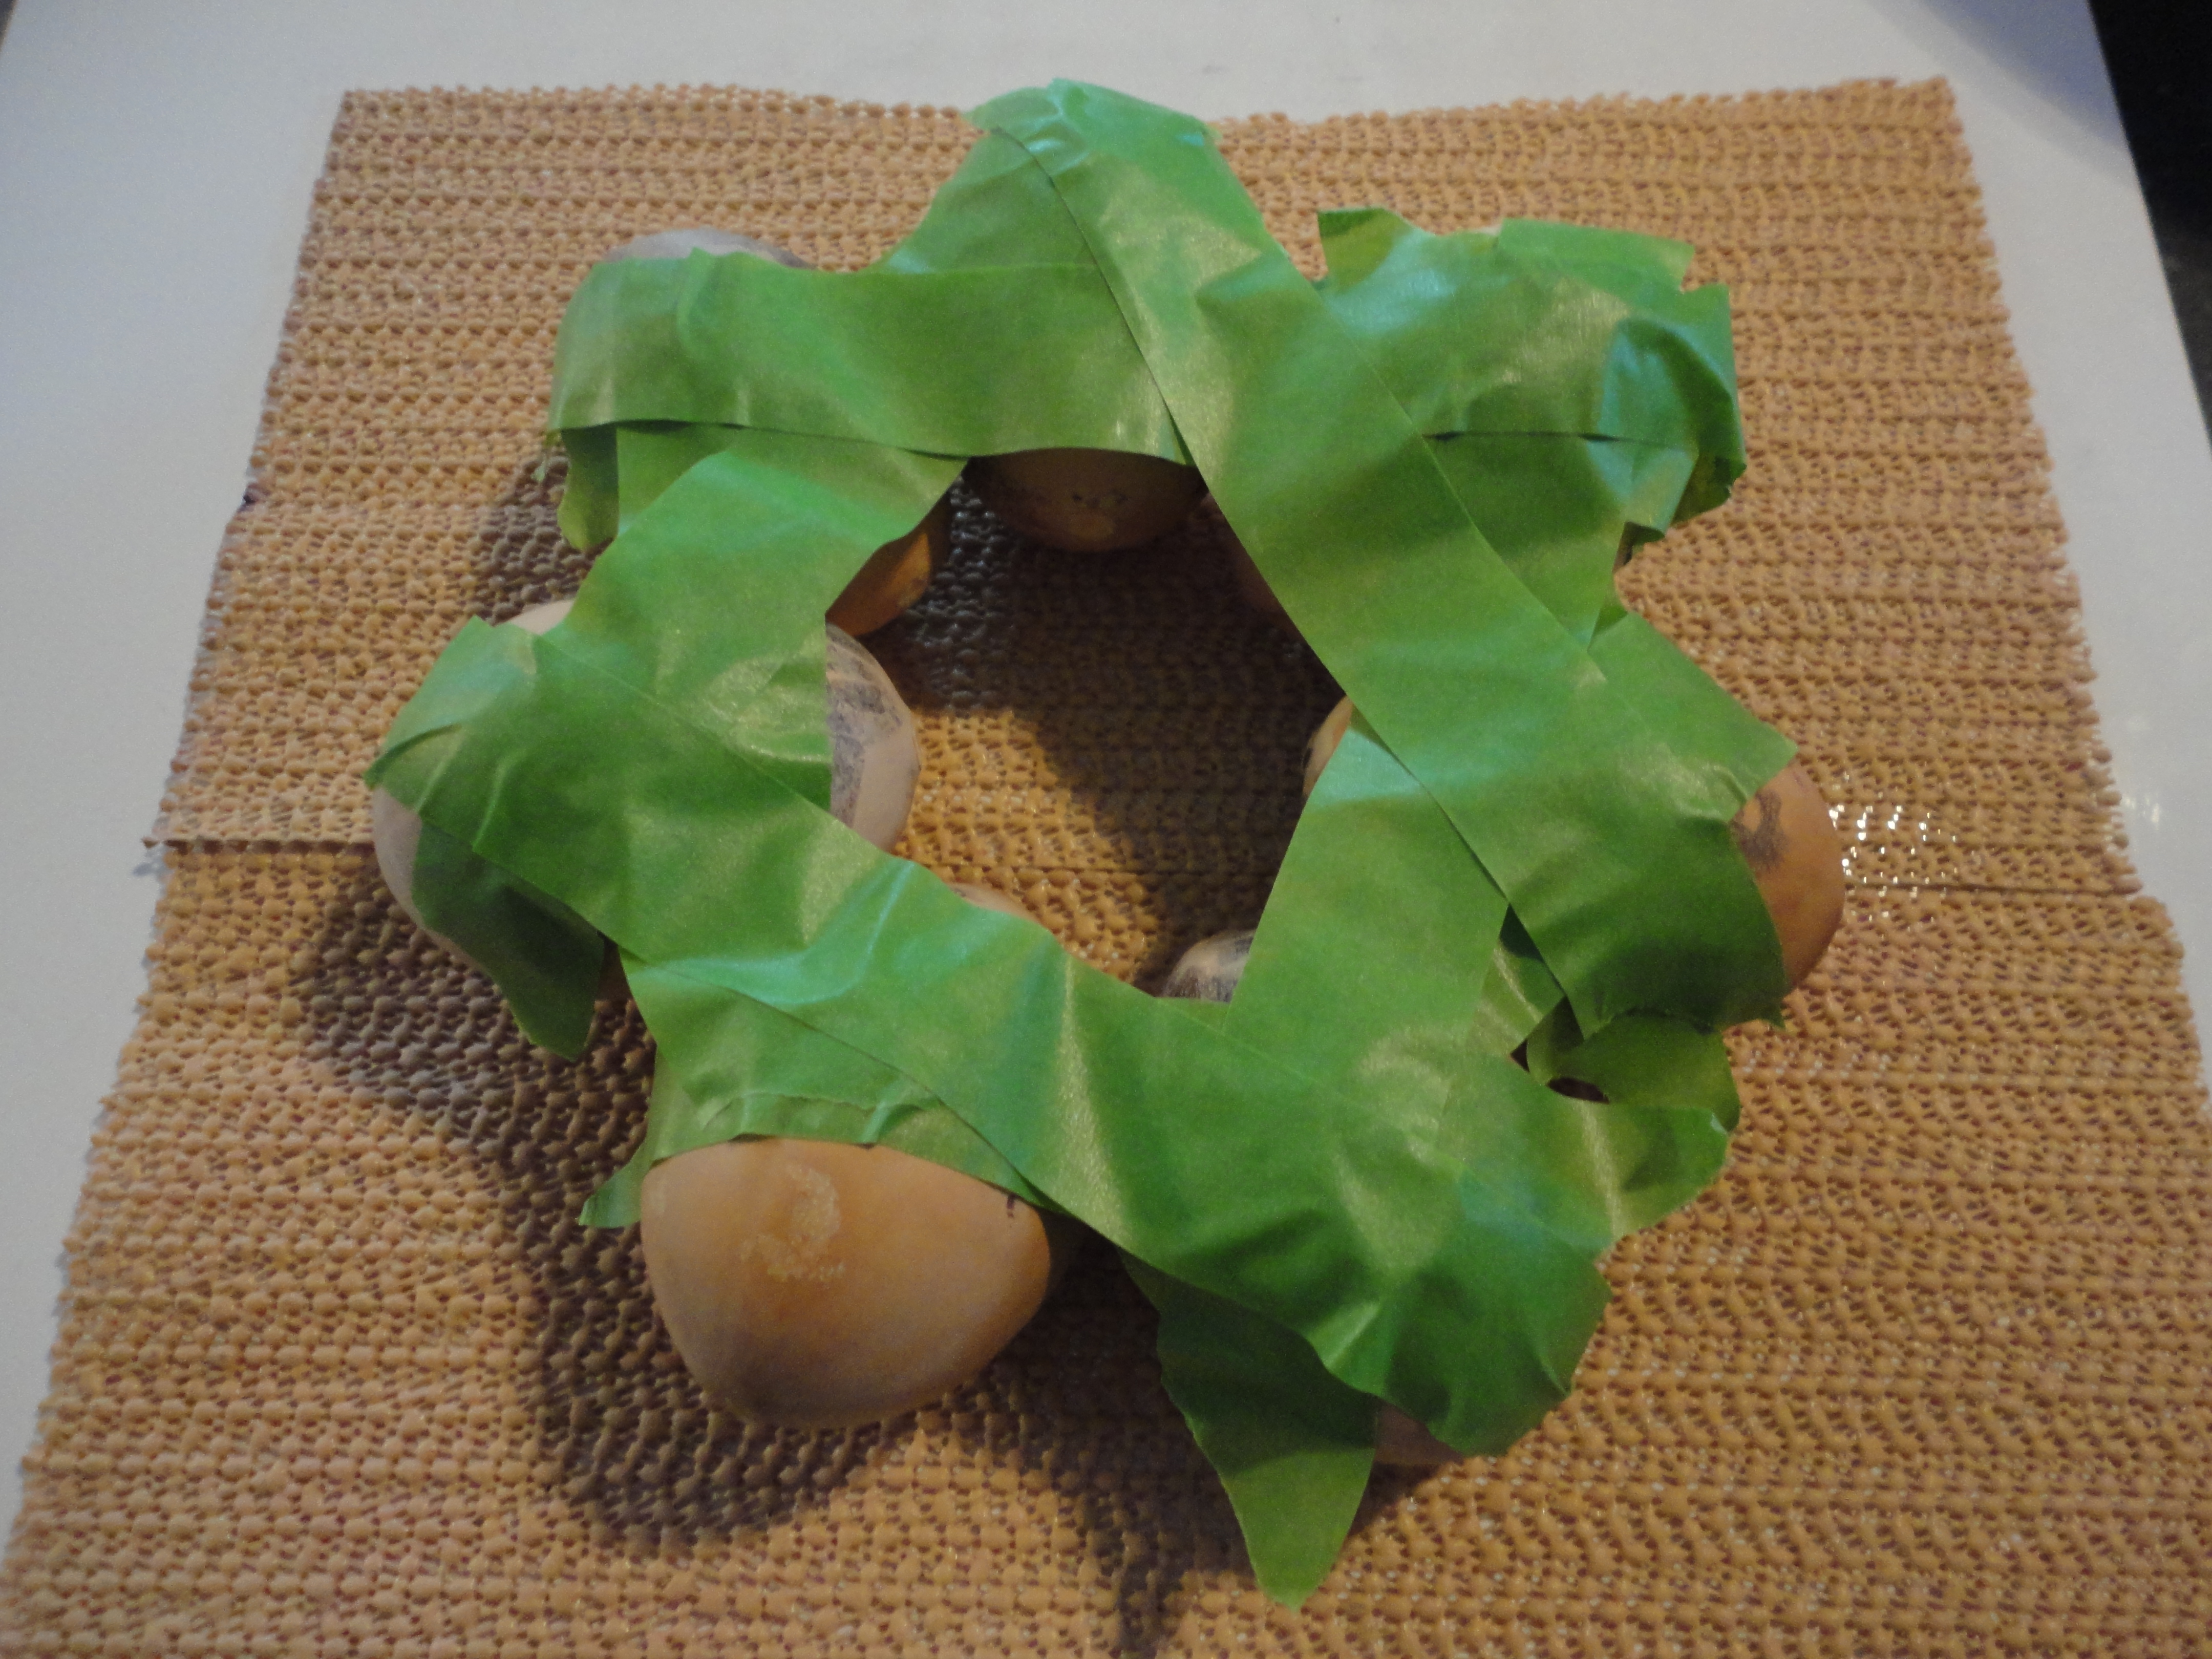
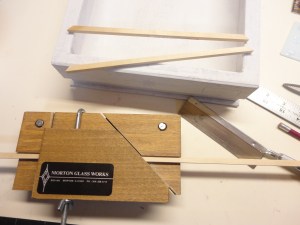
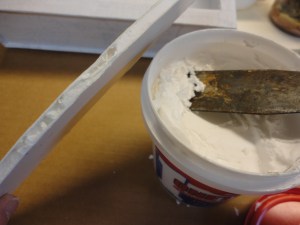
A 1/4″ sq. craft stick was mitered for the frame opening.

DSC00271

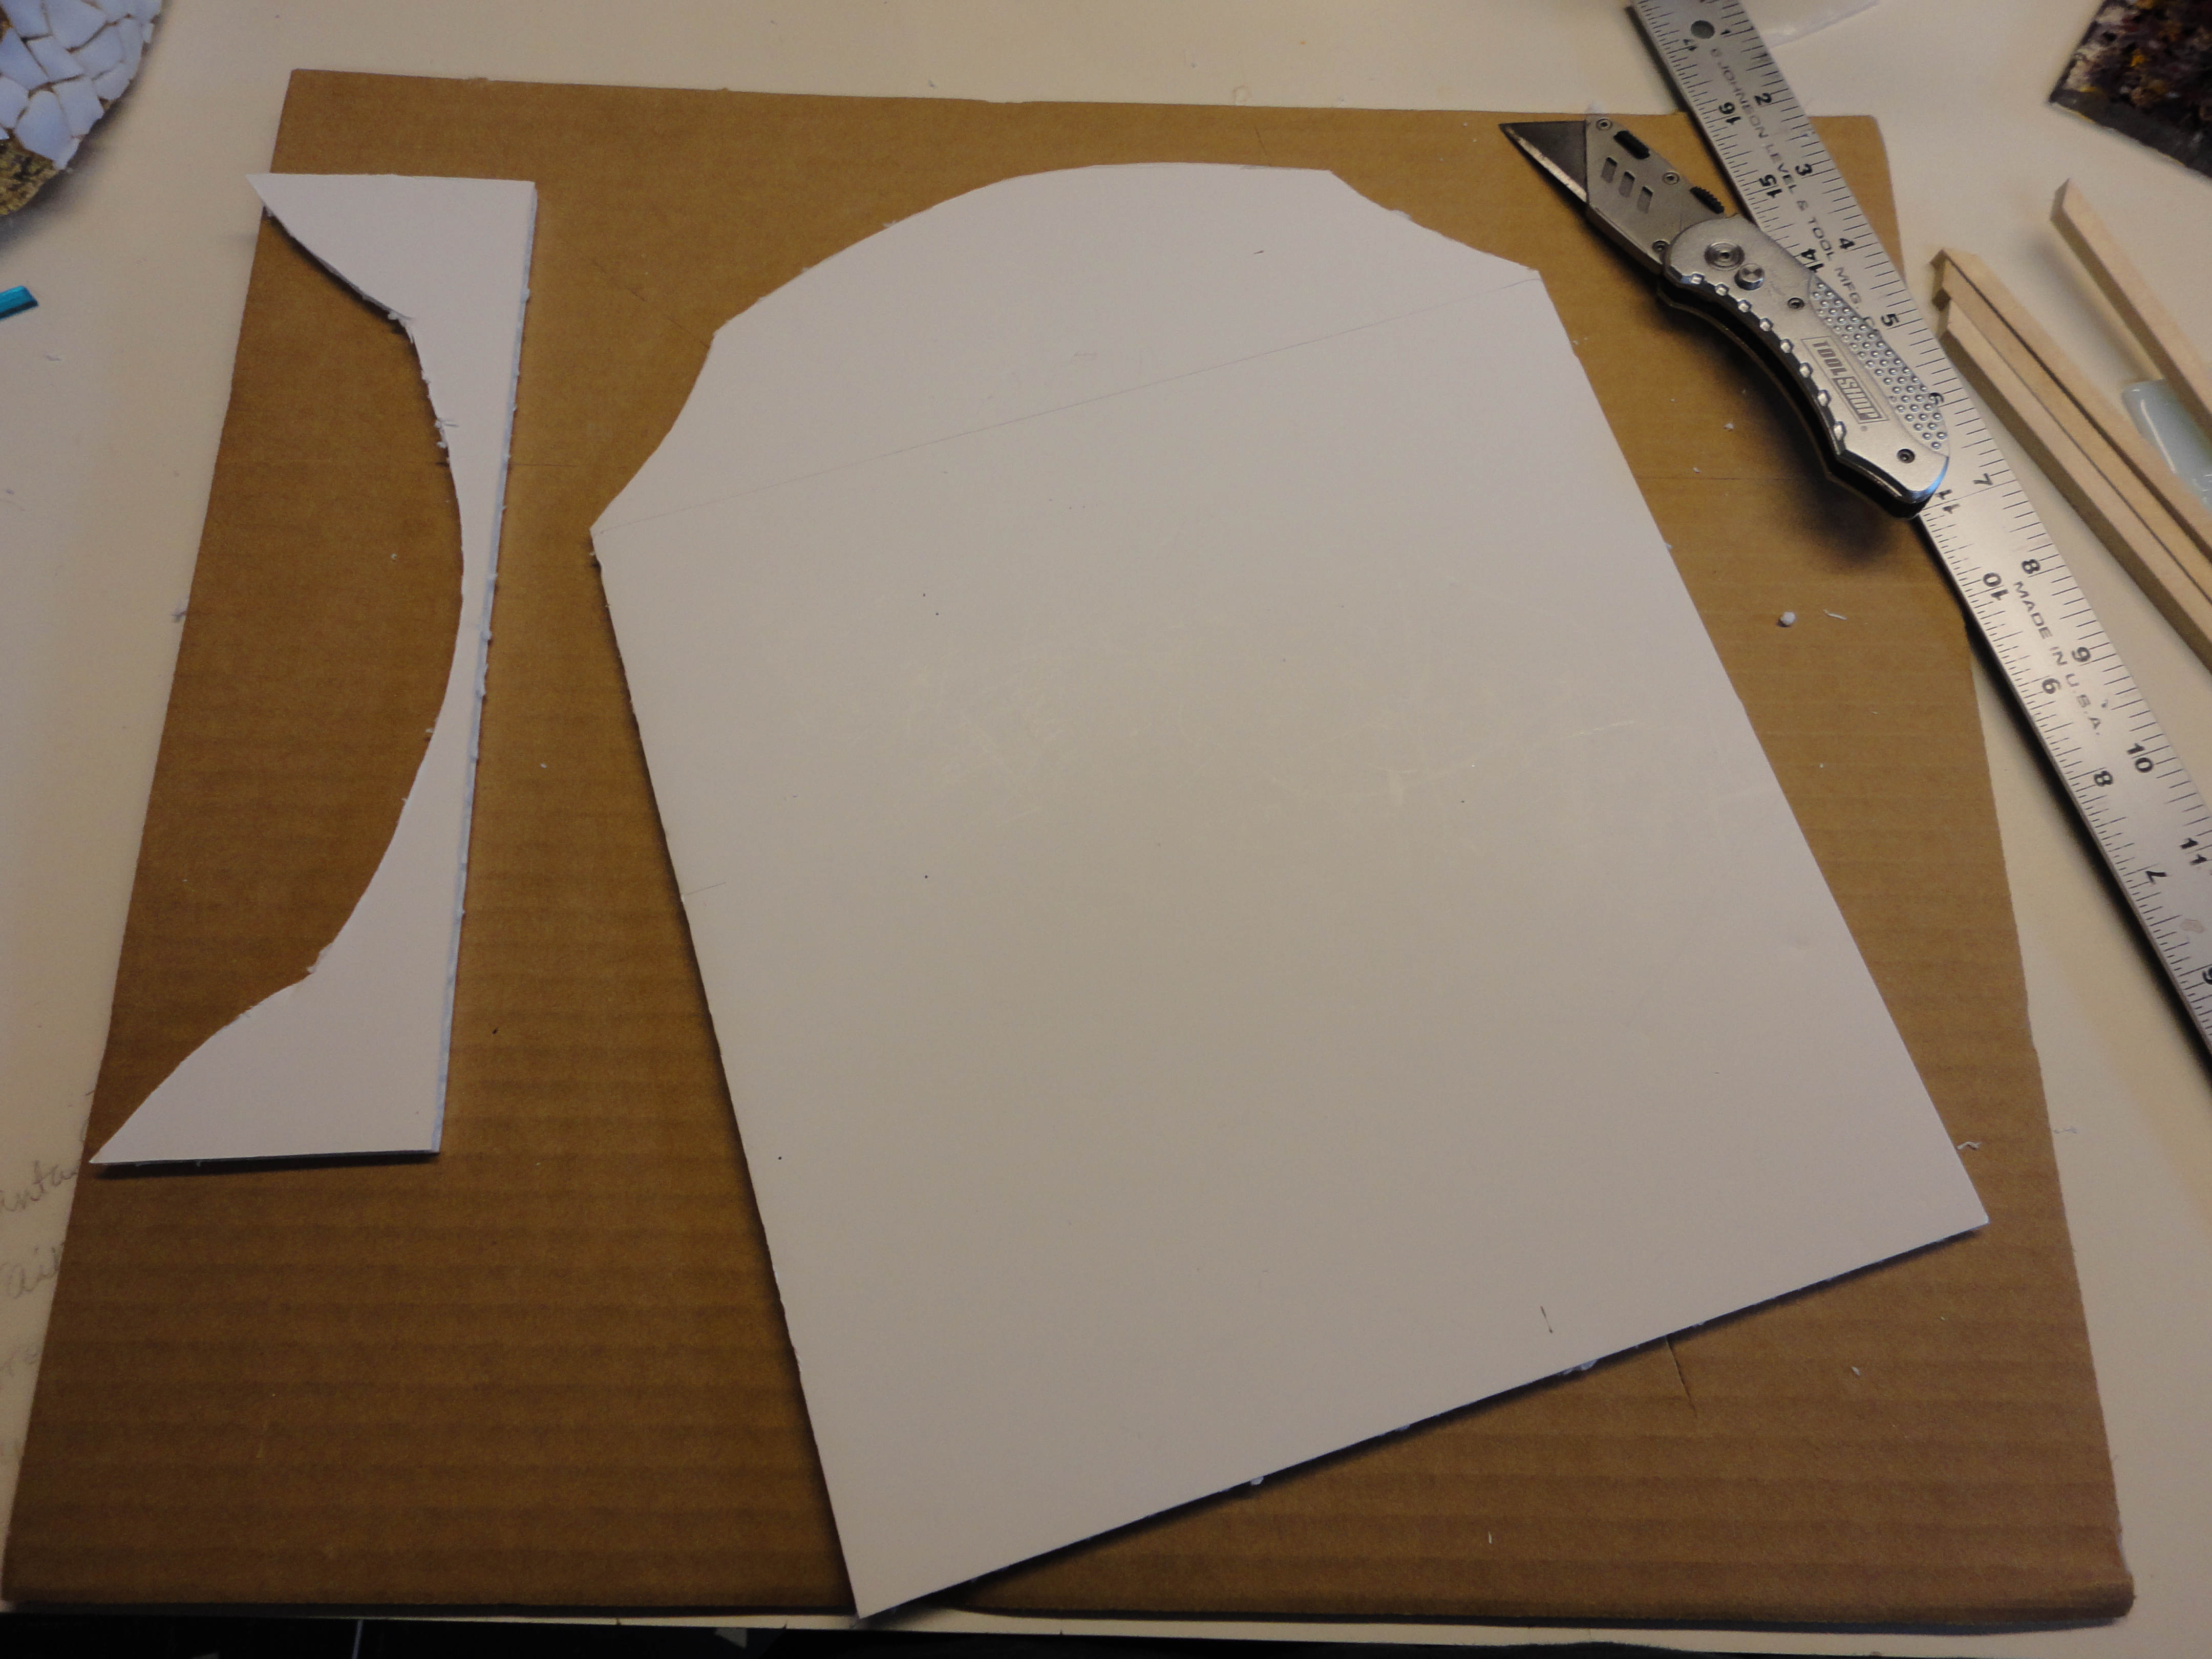
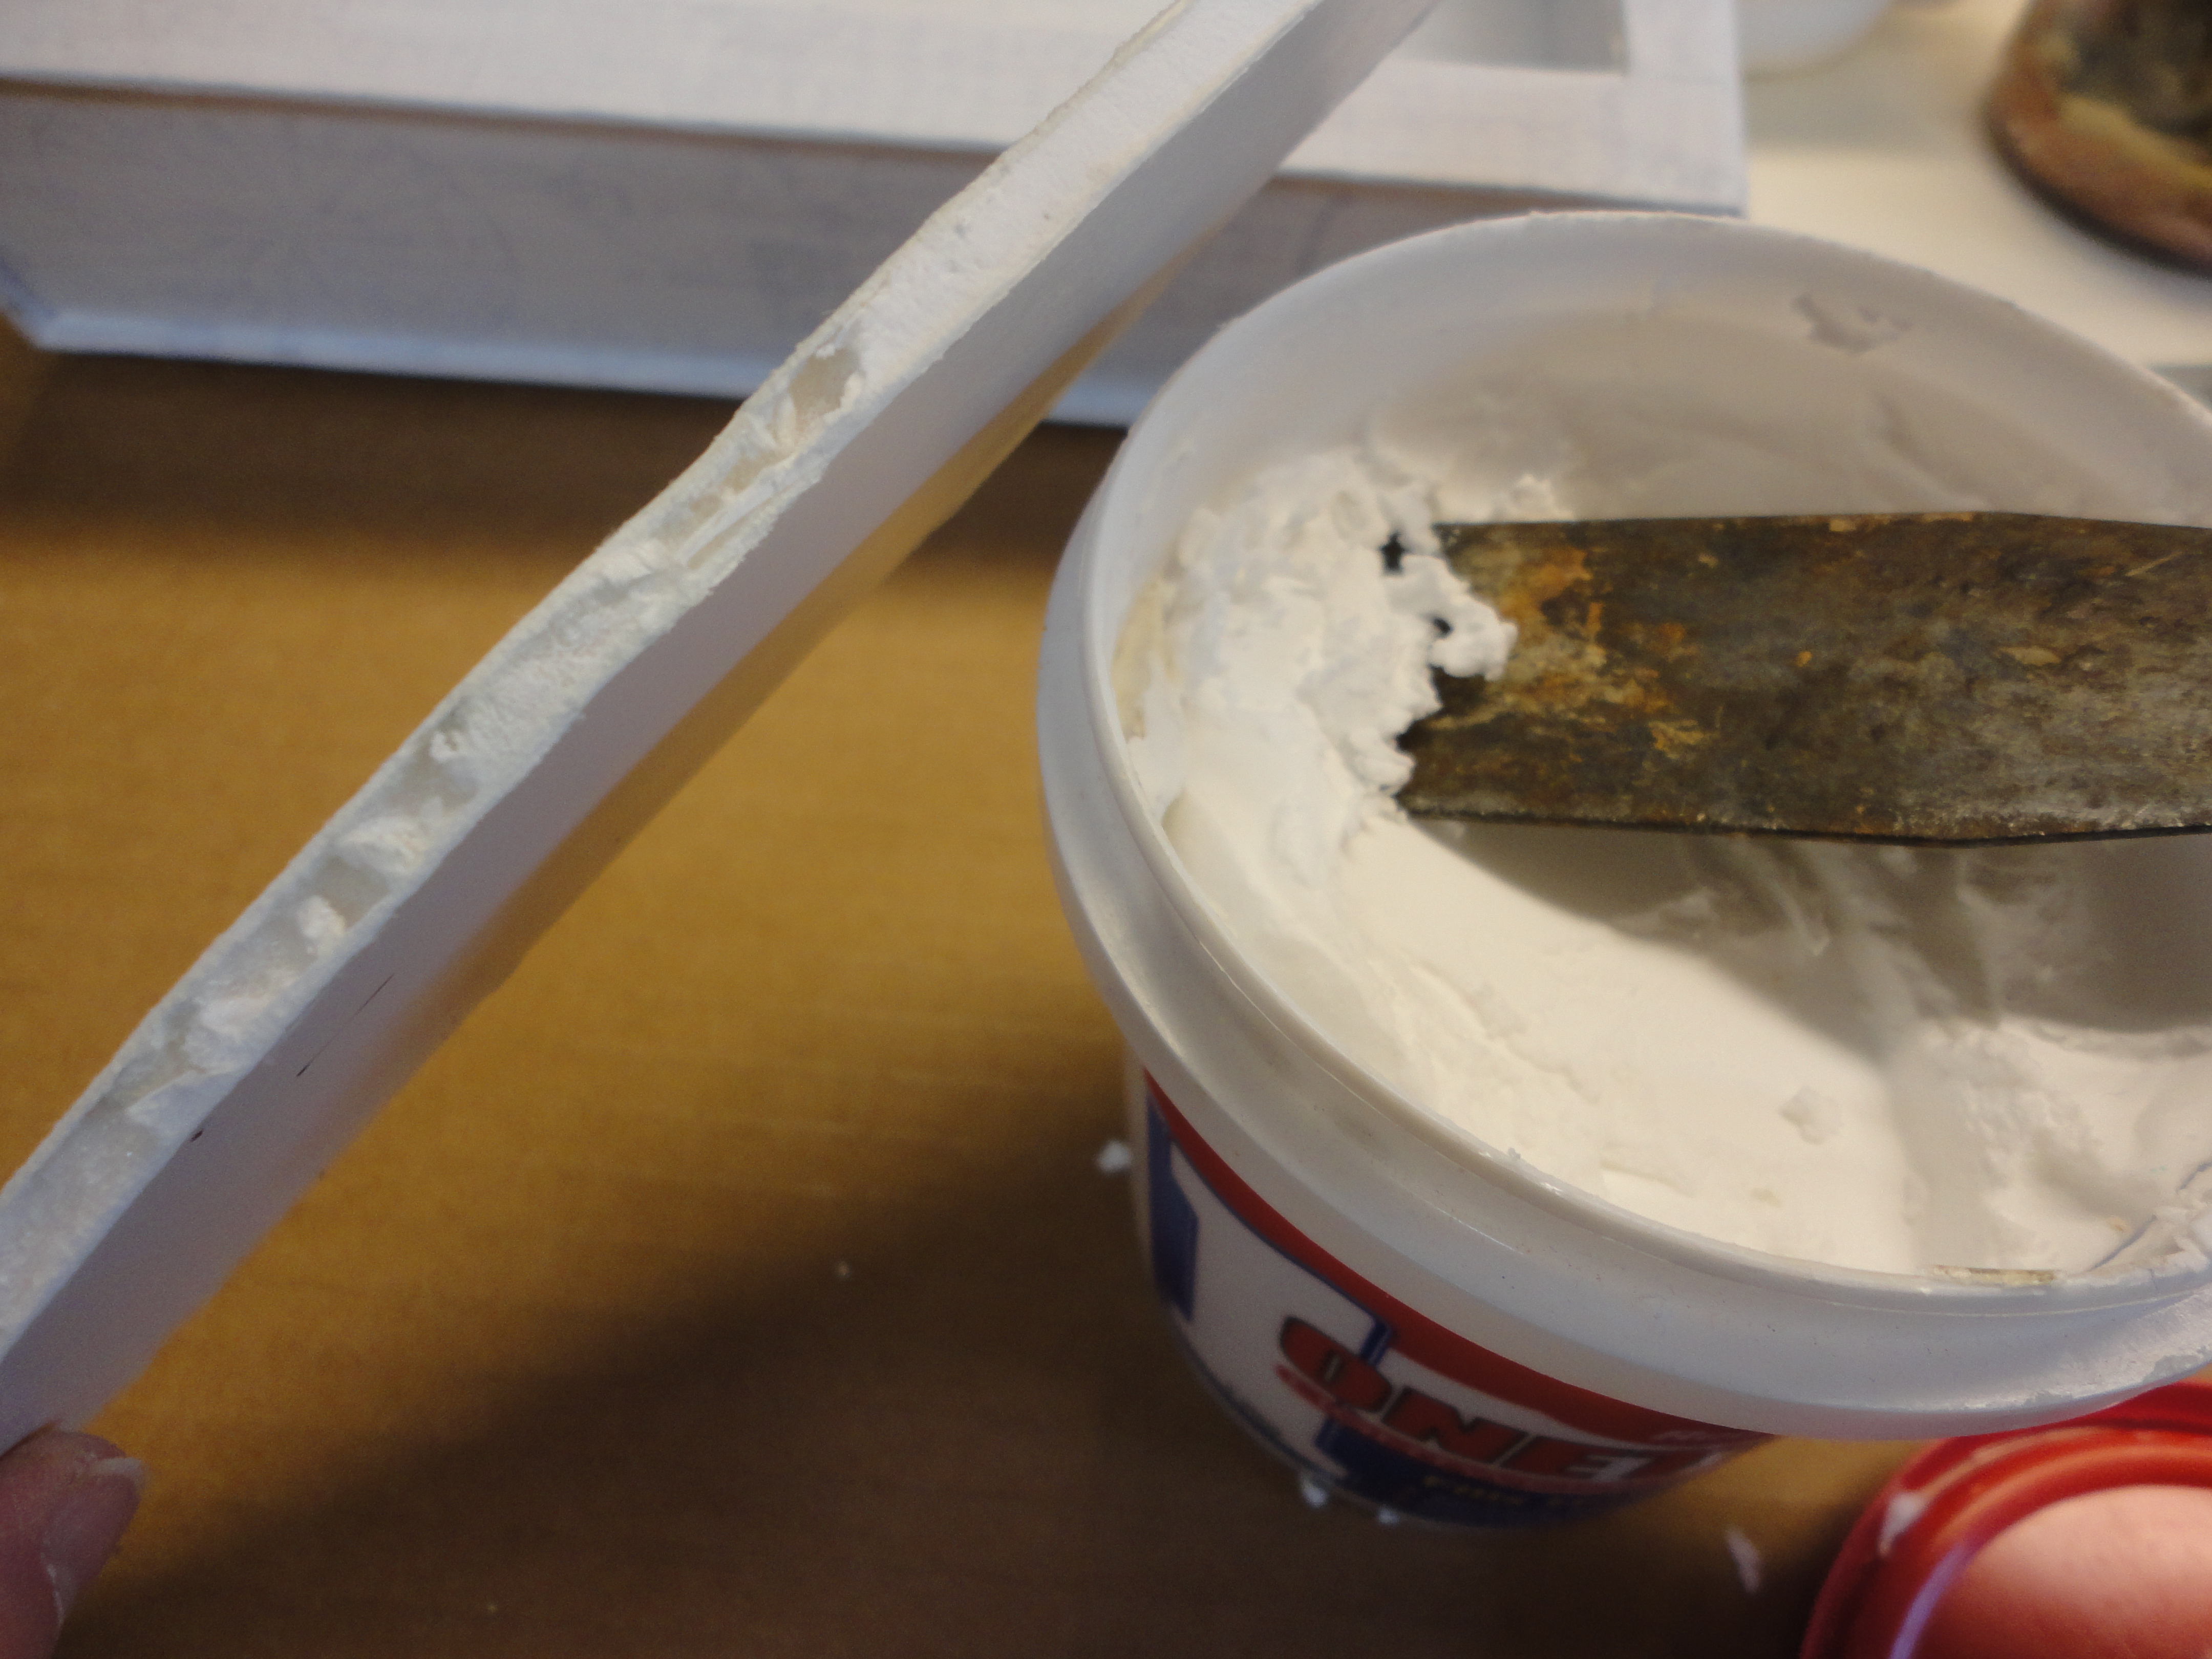
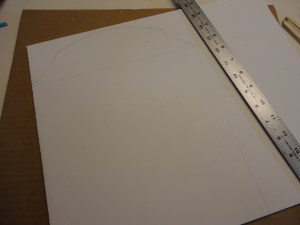
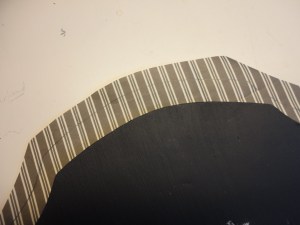
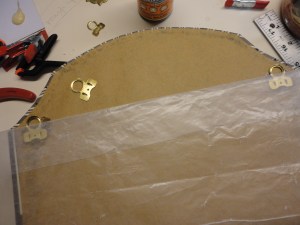
Trace the box on a piece of foam core board, and draw an arch at the top. Lie flat, on padding or cardboard, and cut out with a utility knife. Fill in rough edges of foam board with lightweight spackling. When dry, sand lightly to smooth. Seal board with gesso. Let dry well.

DSC00295  DSC00300  DSC00289

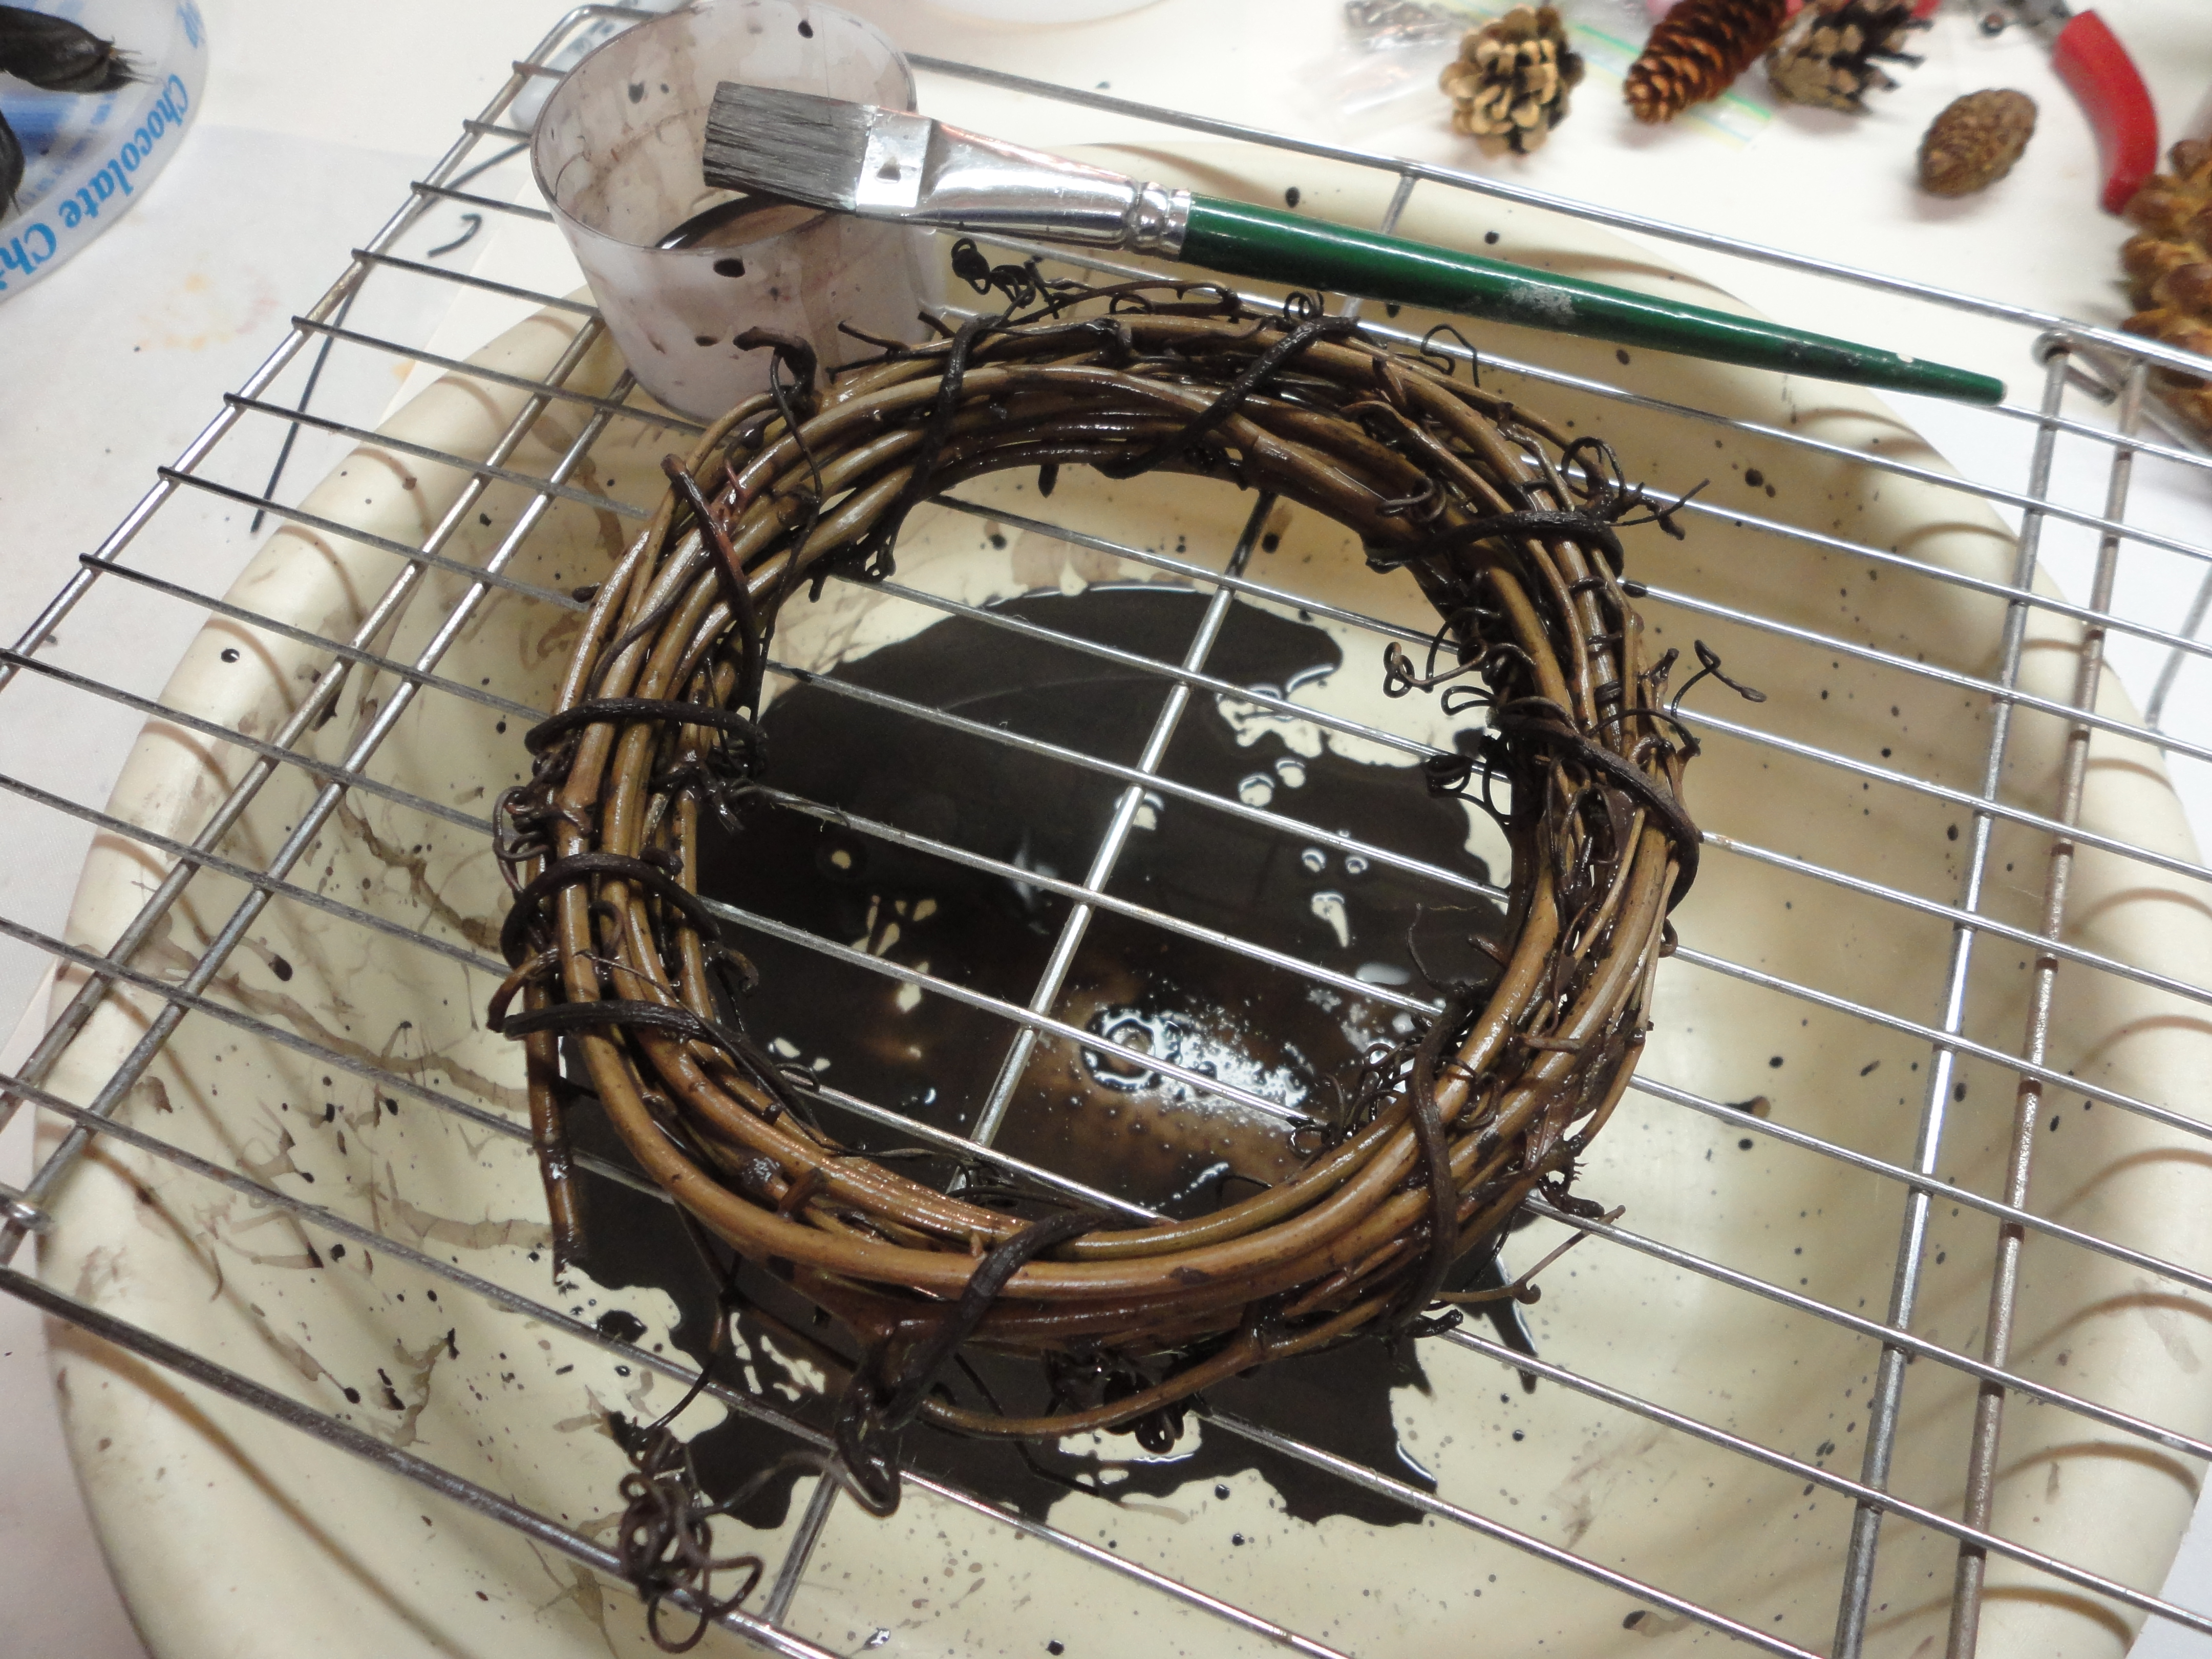
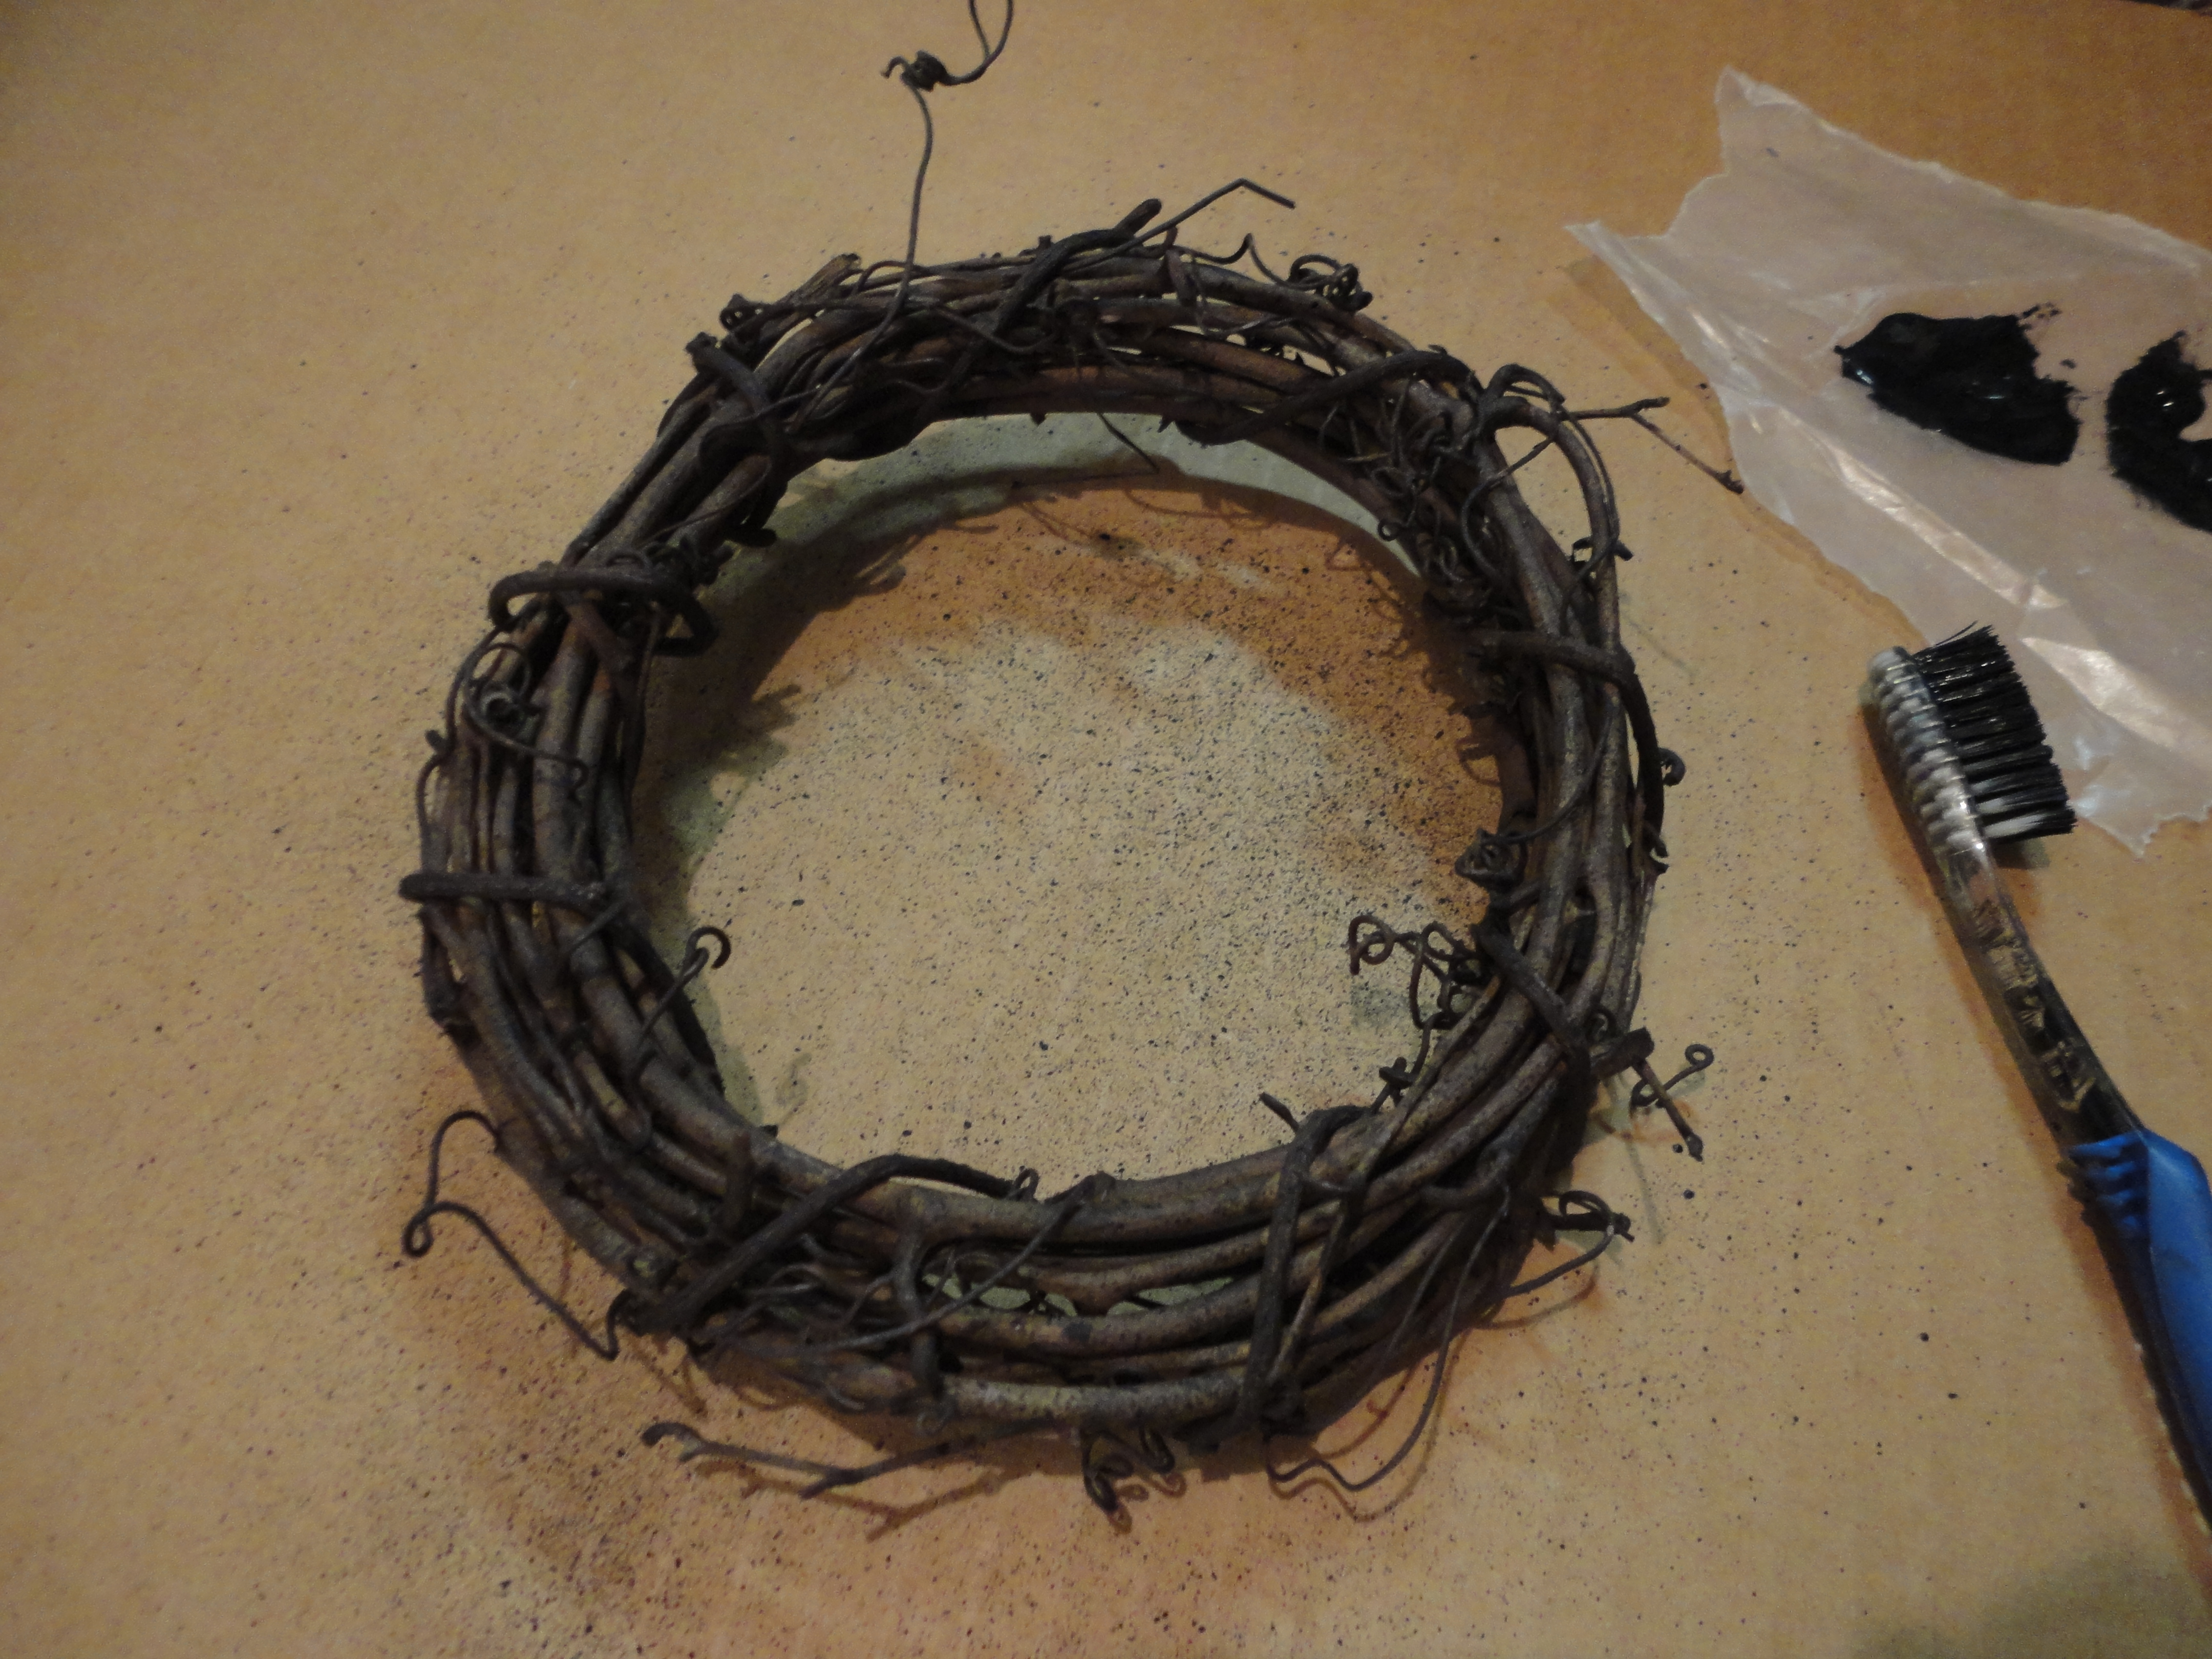
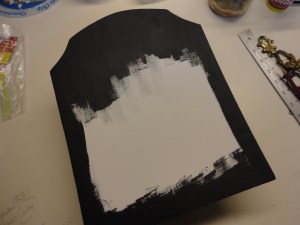
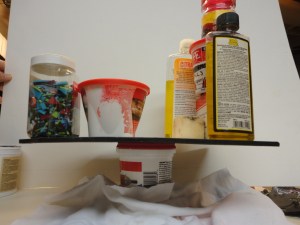
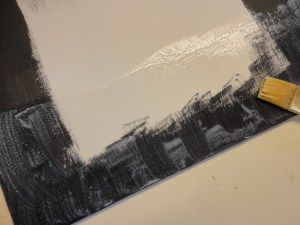
Paint the box, frame pieces, and foam board with black primer or craft paint. No need to paint where the box and foam board will be glued together. The second picture, below, may look a little strange, but the foam board will curl when painted.  I laid mine over a container, weighing each end down, past center, to dry. Once dry, I turned it over, laid it flat on my worktable, and weighed it down to flatten again. Trust me, please, it works.

DSC00316  DSC00368

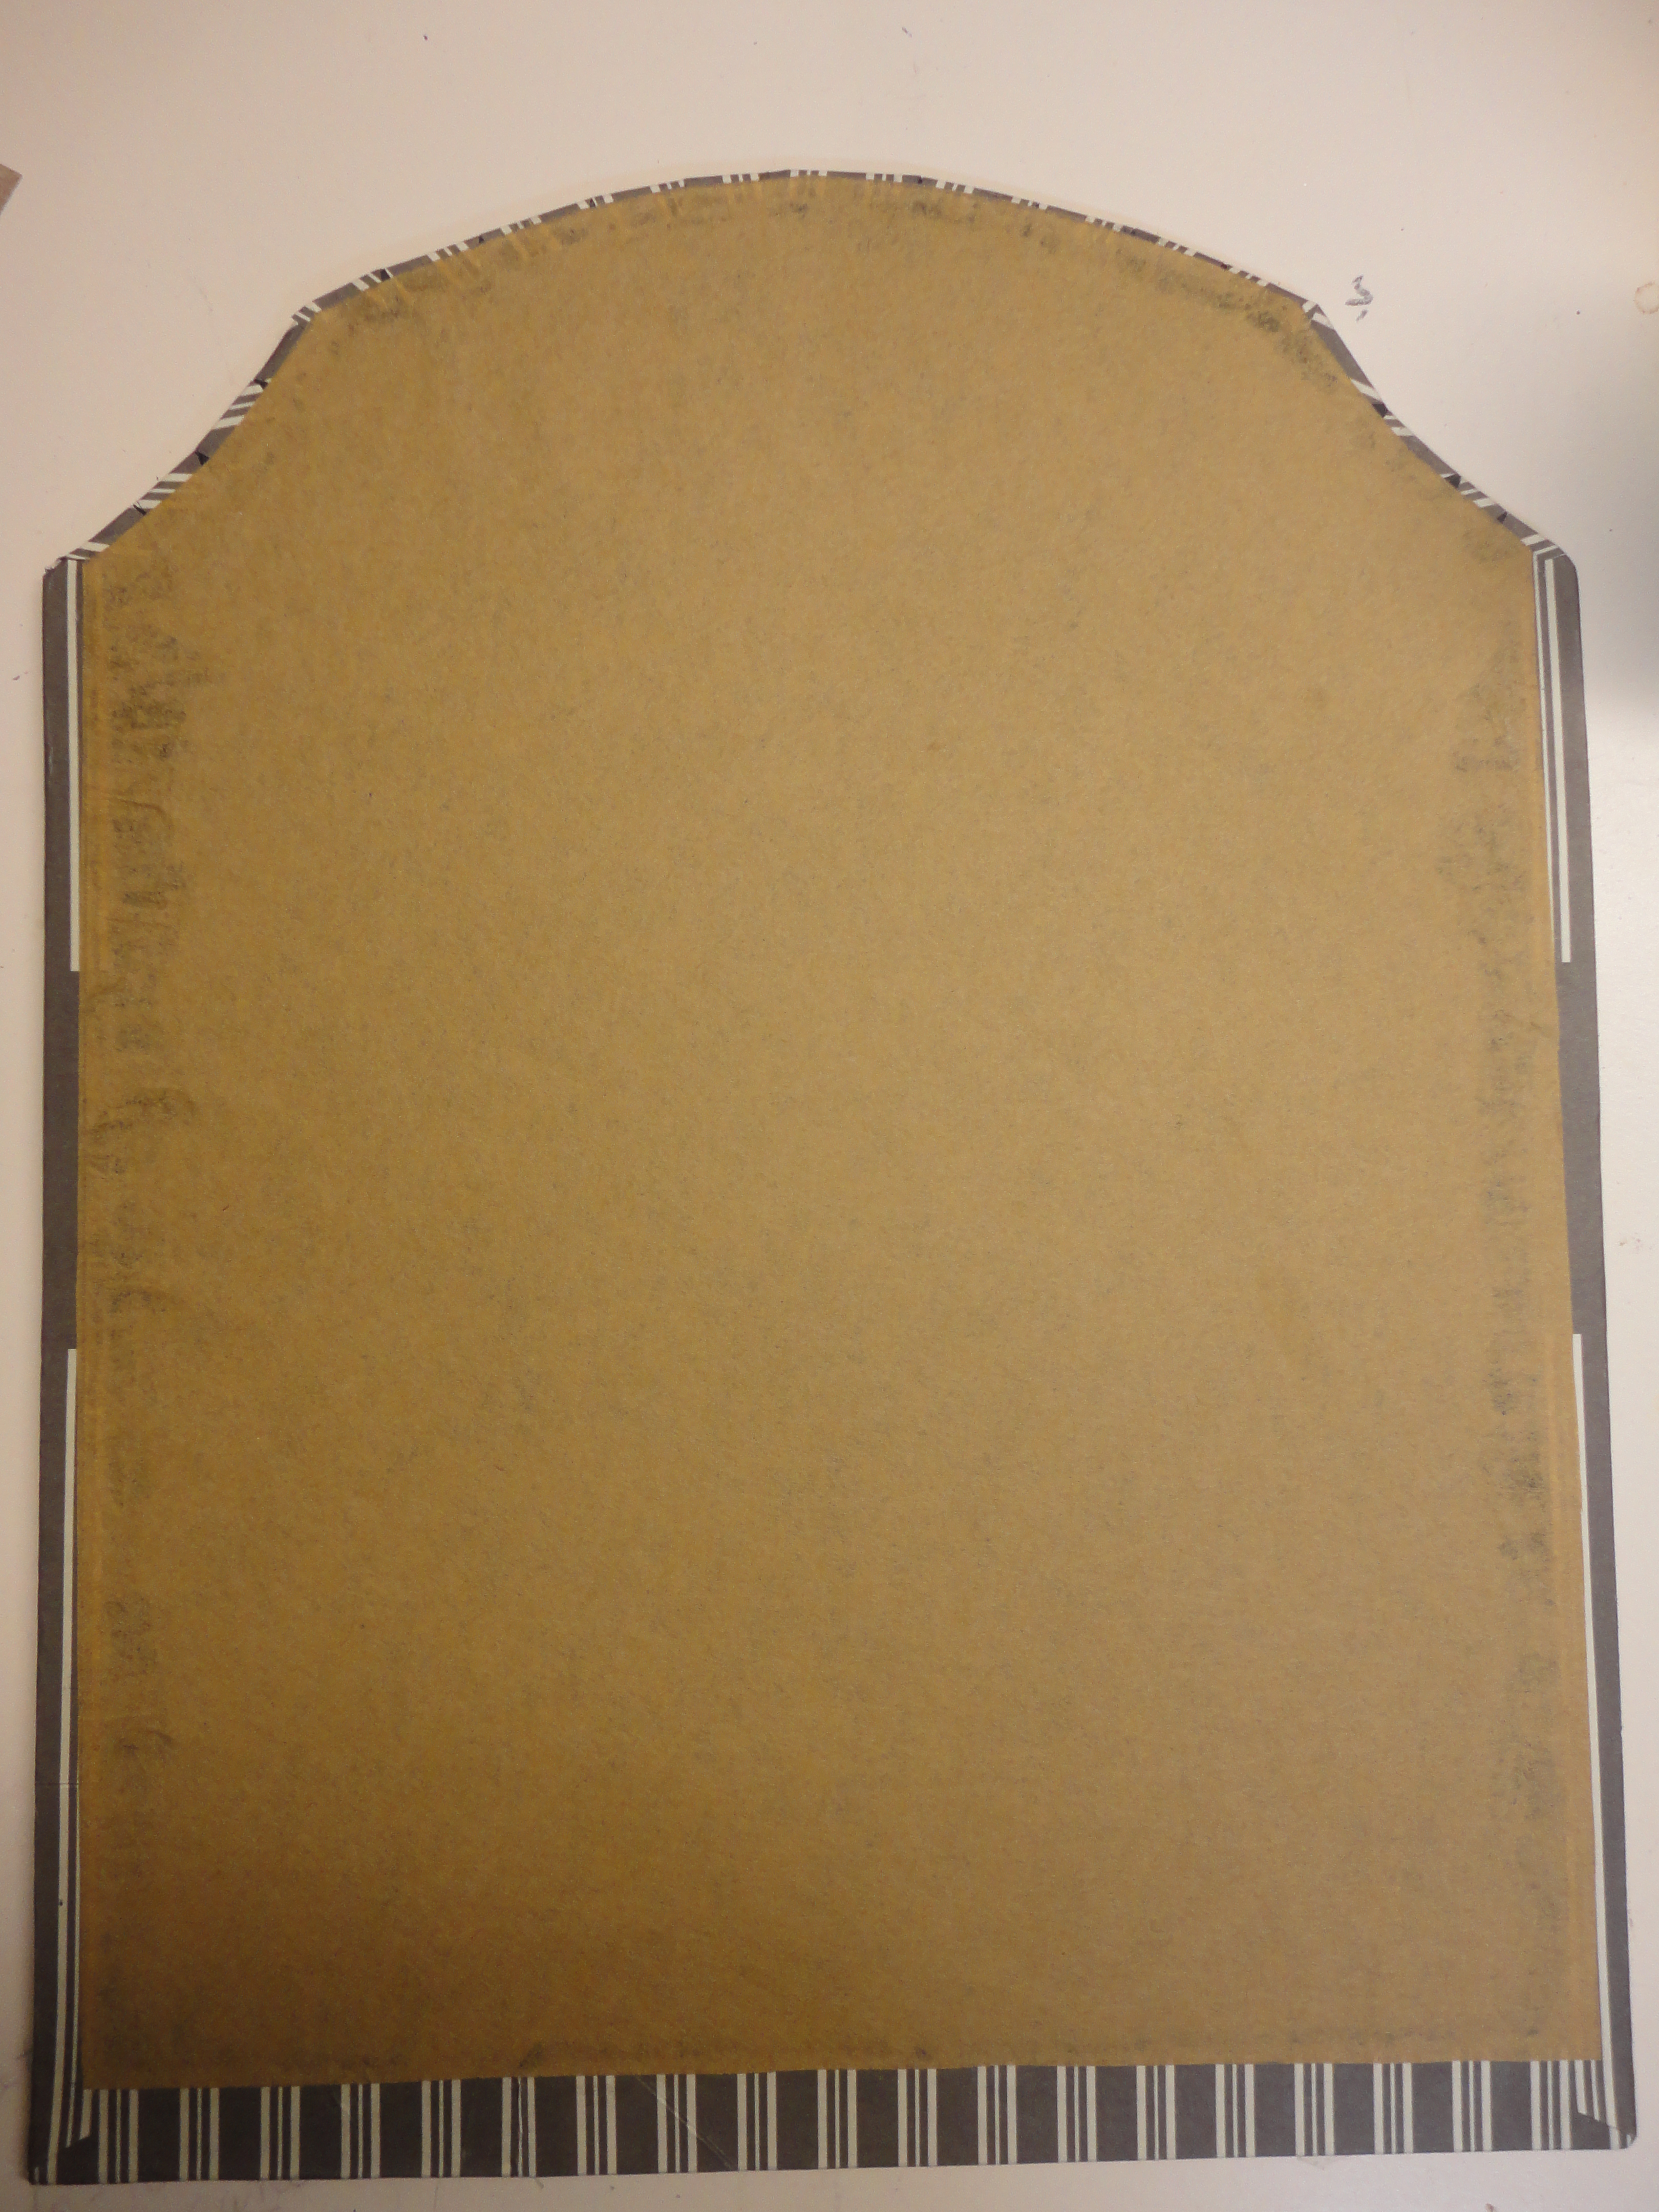
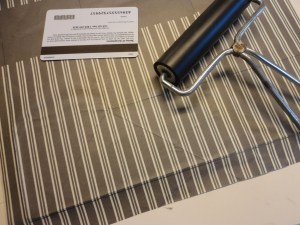
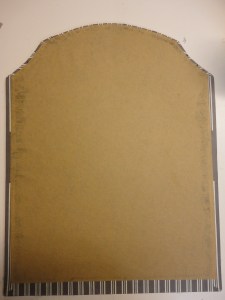
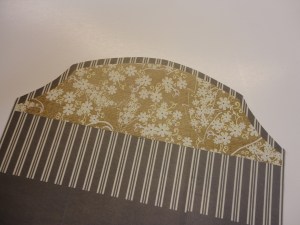
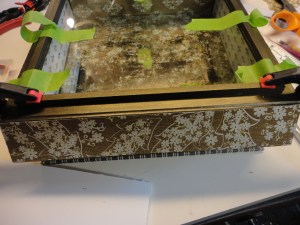
I knew I had been saving a cool, striped C.J. Banks clothing sack for a reason. After smoothing it out with a warm iron, it covered the long foam board with no seams.

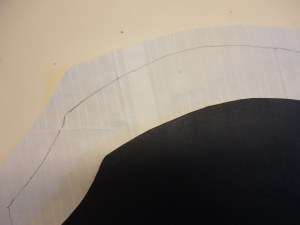
Place the foam board on top of the striped paper to center the stripes, and trace it with a pencil. Hold the paper up to a bright window, face down, and retrace your line on the back of the paper. This pattern line will help keep your stripes centered when gluing. Cut your pattern out larger, away from the line about 1 1/2″. Do not cut on the traced line.

DSC00389  DSC00394

Paper may stretch when wet. Wanting to achieve the smoothest surface possible, I glued and dried small sections at a time, using a plastic gift card and brayer to work out air bubbles.

Lay foam board face up. Beginning at the bottom, brush on a light, even coat of thinned white glue, going up about 3 or 4 inches. Turn the glued foam board over, and position it face down on the backside of the striped paper, within the retraced pattern line. Press it firmly in place, turn it back over, face up, and smooth out air bubbles. Weigh down to dry. Continue to glue until covered.

DSC00395  DSC00397  DSC00402

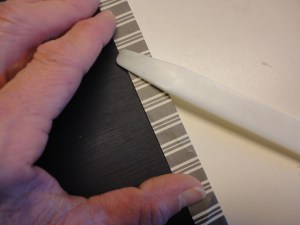
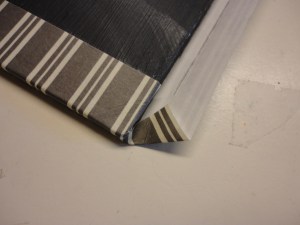
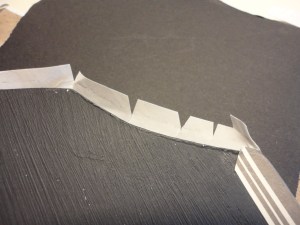
Use a fid, or paper folding tool, to wrap paper tightly around edges before gluing. Trim away excess paper for neat corners, and cut some darts around the arch. Glue and weigh down to dry. Glue may seep at edges, as a precaution lay a sheet of wax paper over the glued area before weighing down. A piece of light weight brown paper was added for a finished look.

DSC00415    DSC00424 DSC00437  DSC00452

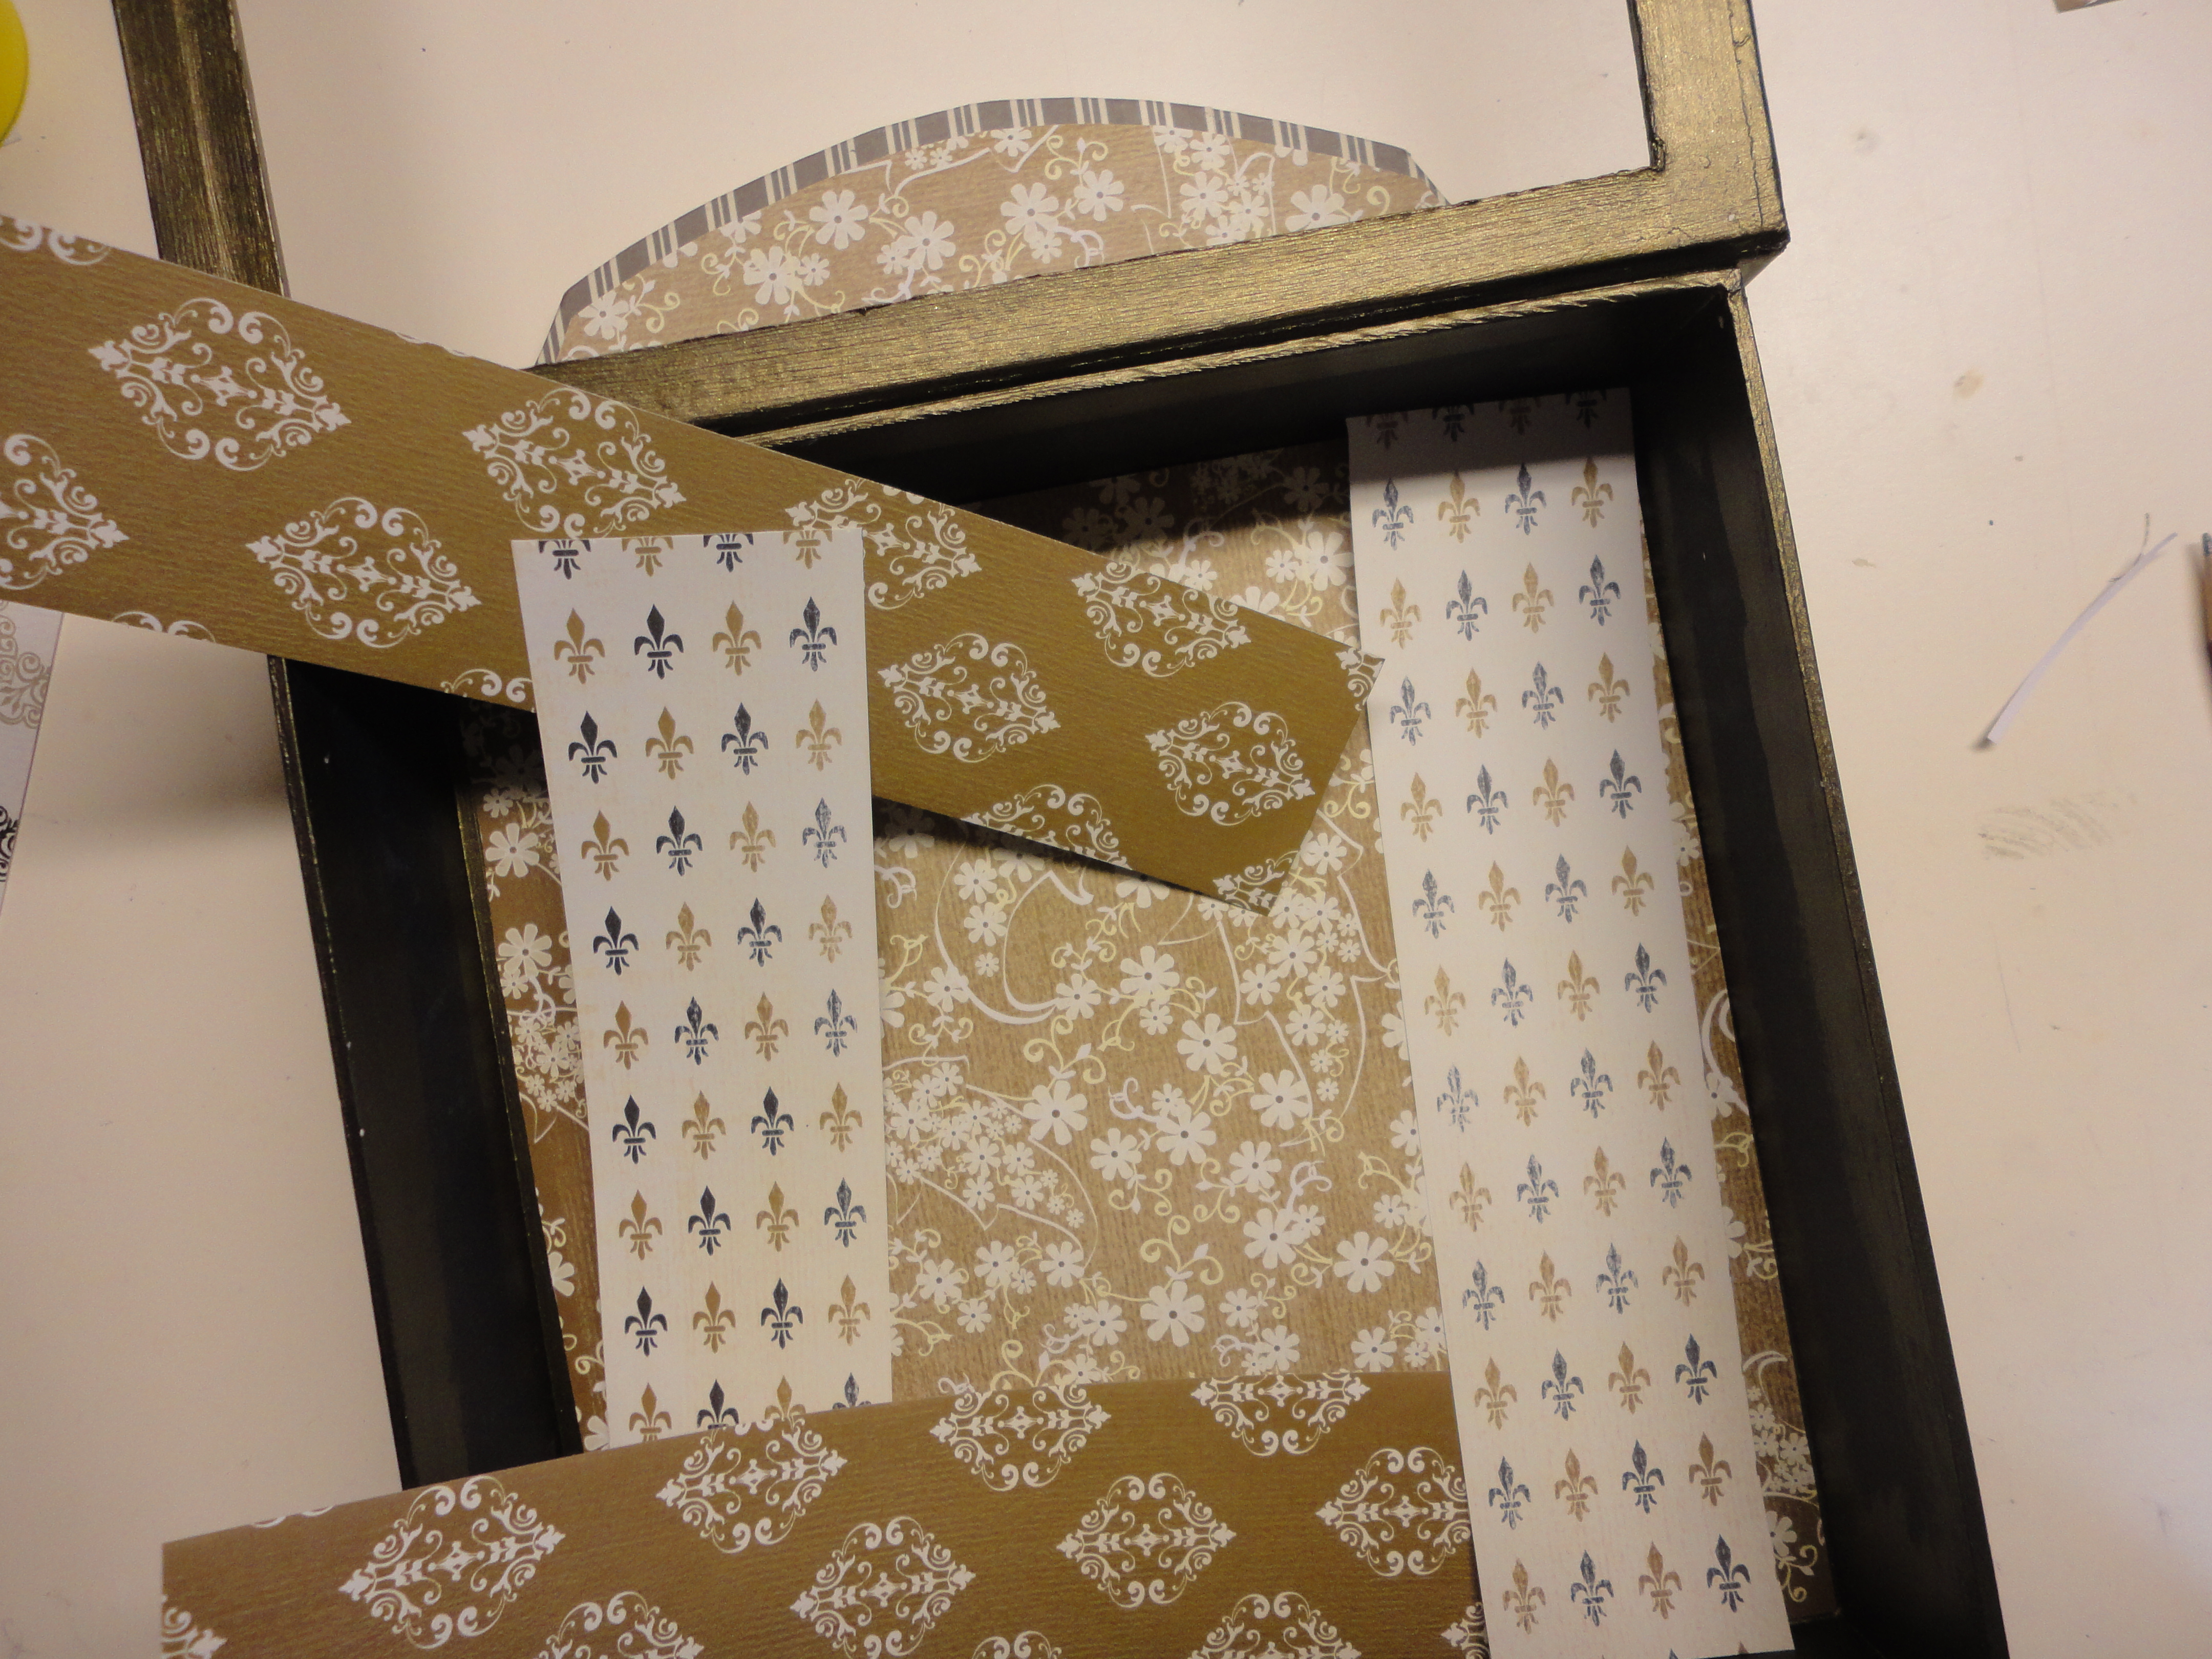
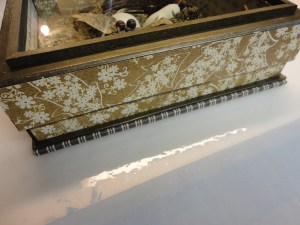
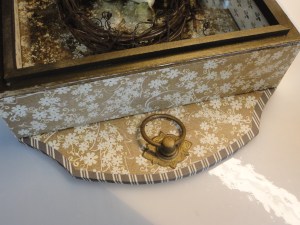
Fortunately for me, my youngest daughter downsized recently, and stored a treasure trove of scrapbooking paper in my basement. I chose three patterns I felt would compliment each other and my wreath. Pieces were cut to the appropriate sizes to cover the surfaces of the box.

A little black and metallic gold craft paint was mixed together to match the papers. The mixture over the black base paint almost created an olive green tinge, an added plus!  I painted the front and back of the lid, the folds of the lid, all corners, edges, and frame pieces.

DSC00512  DSC00476  DSC00487

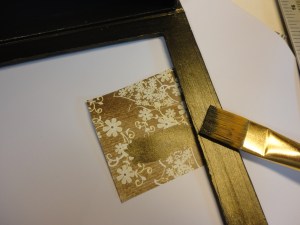
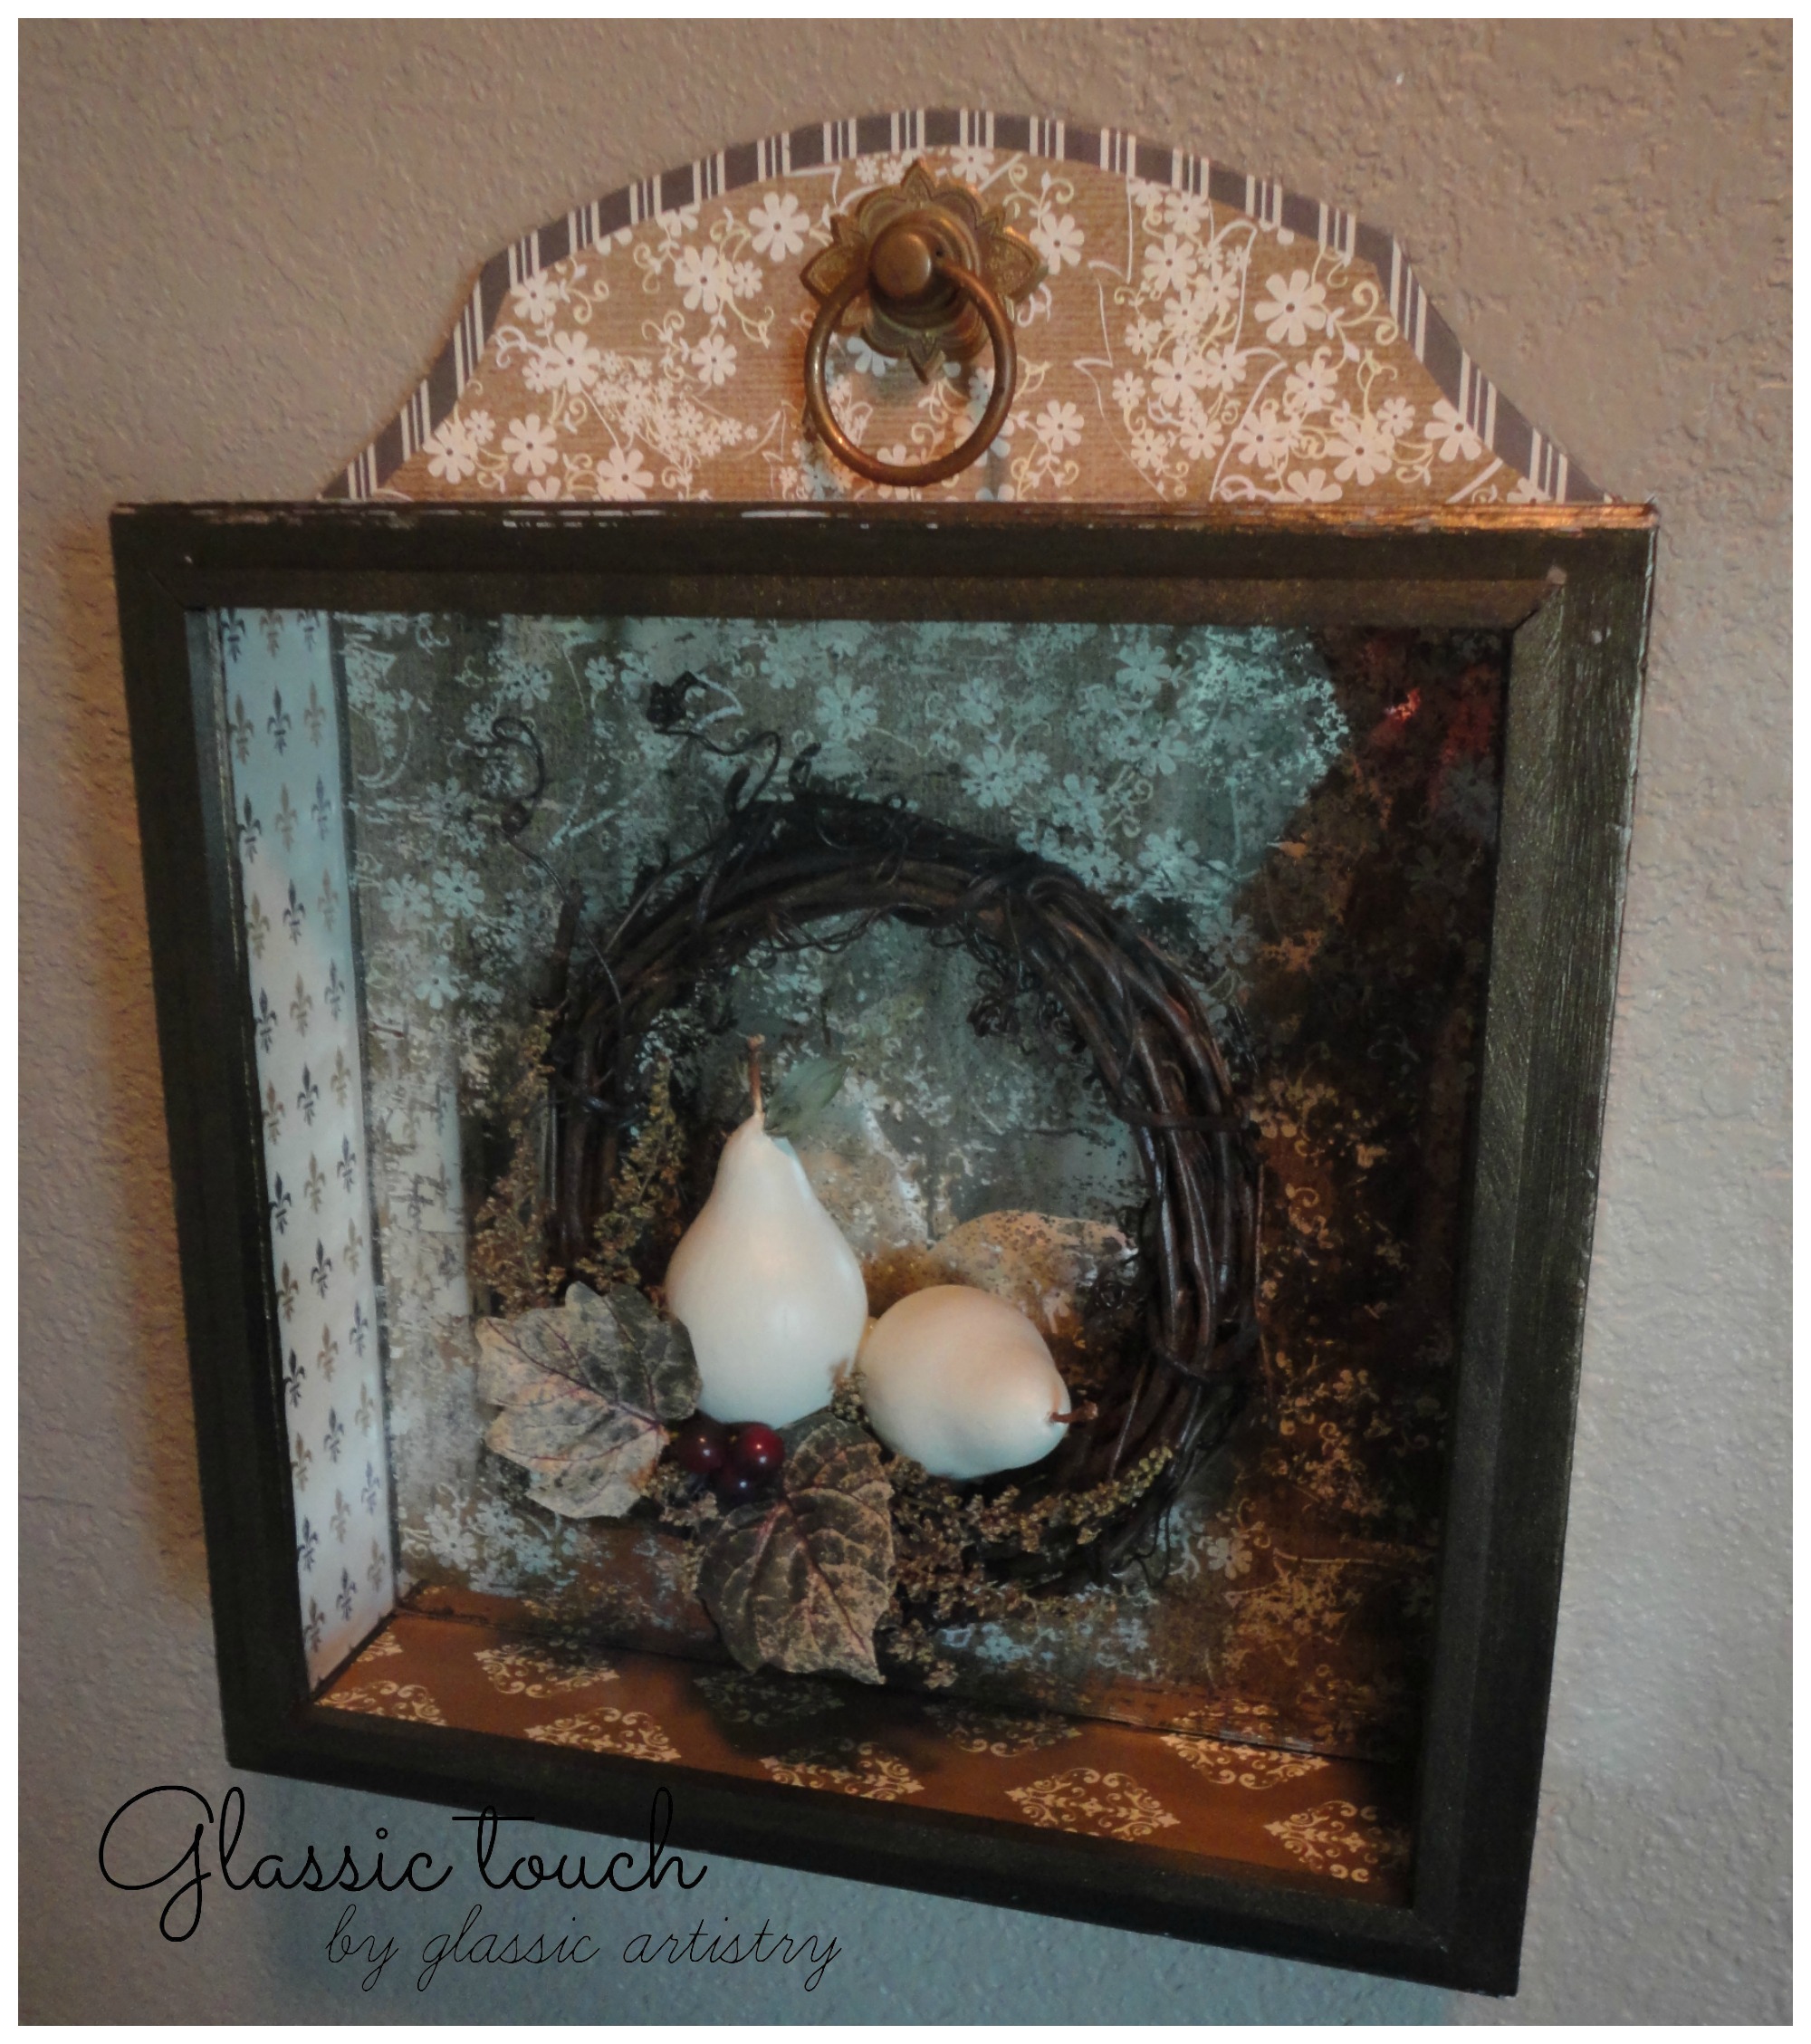
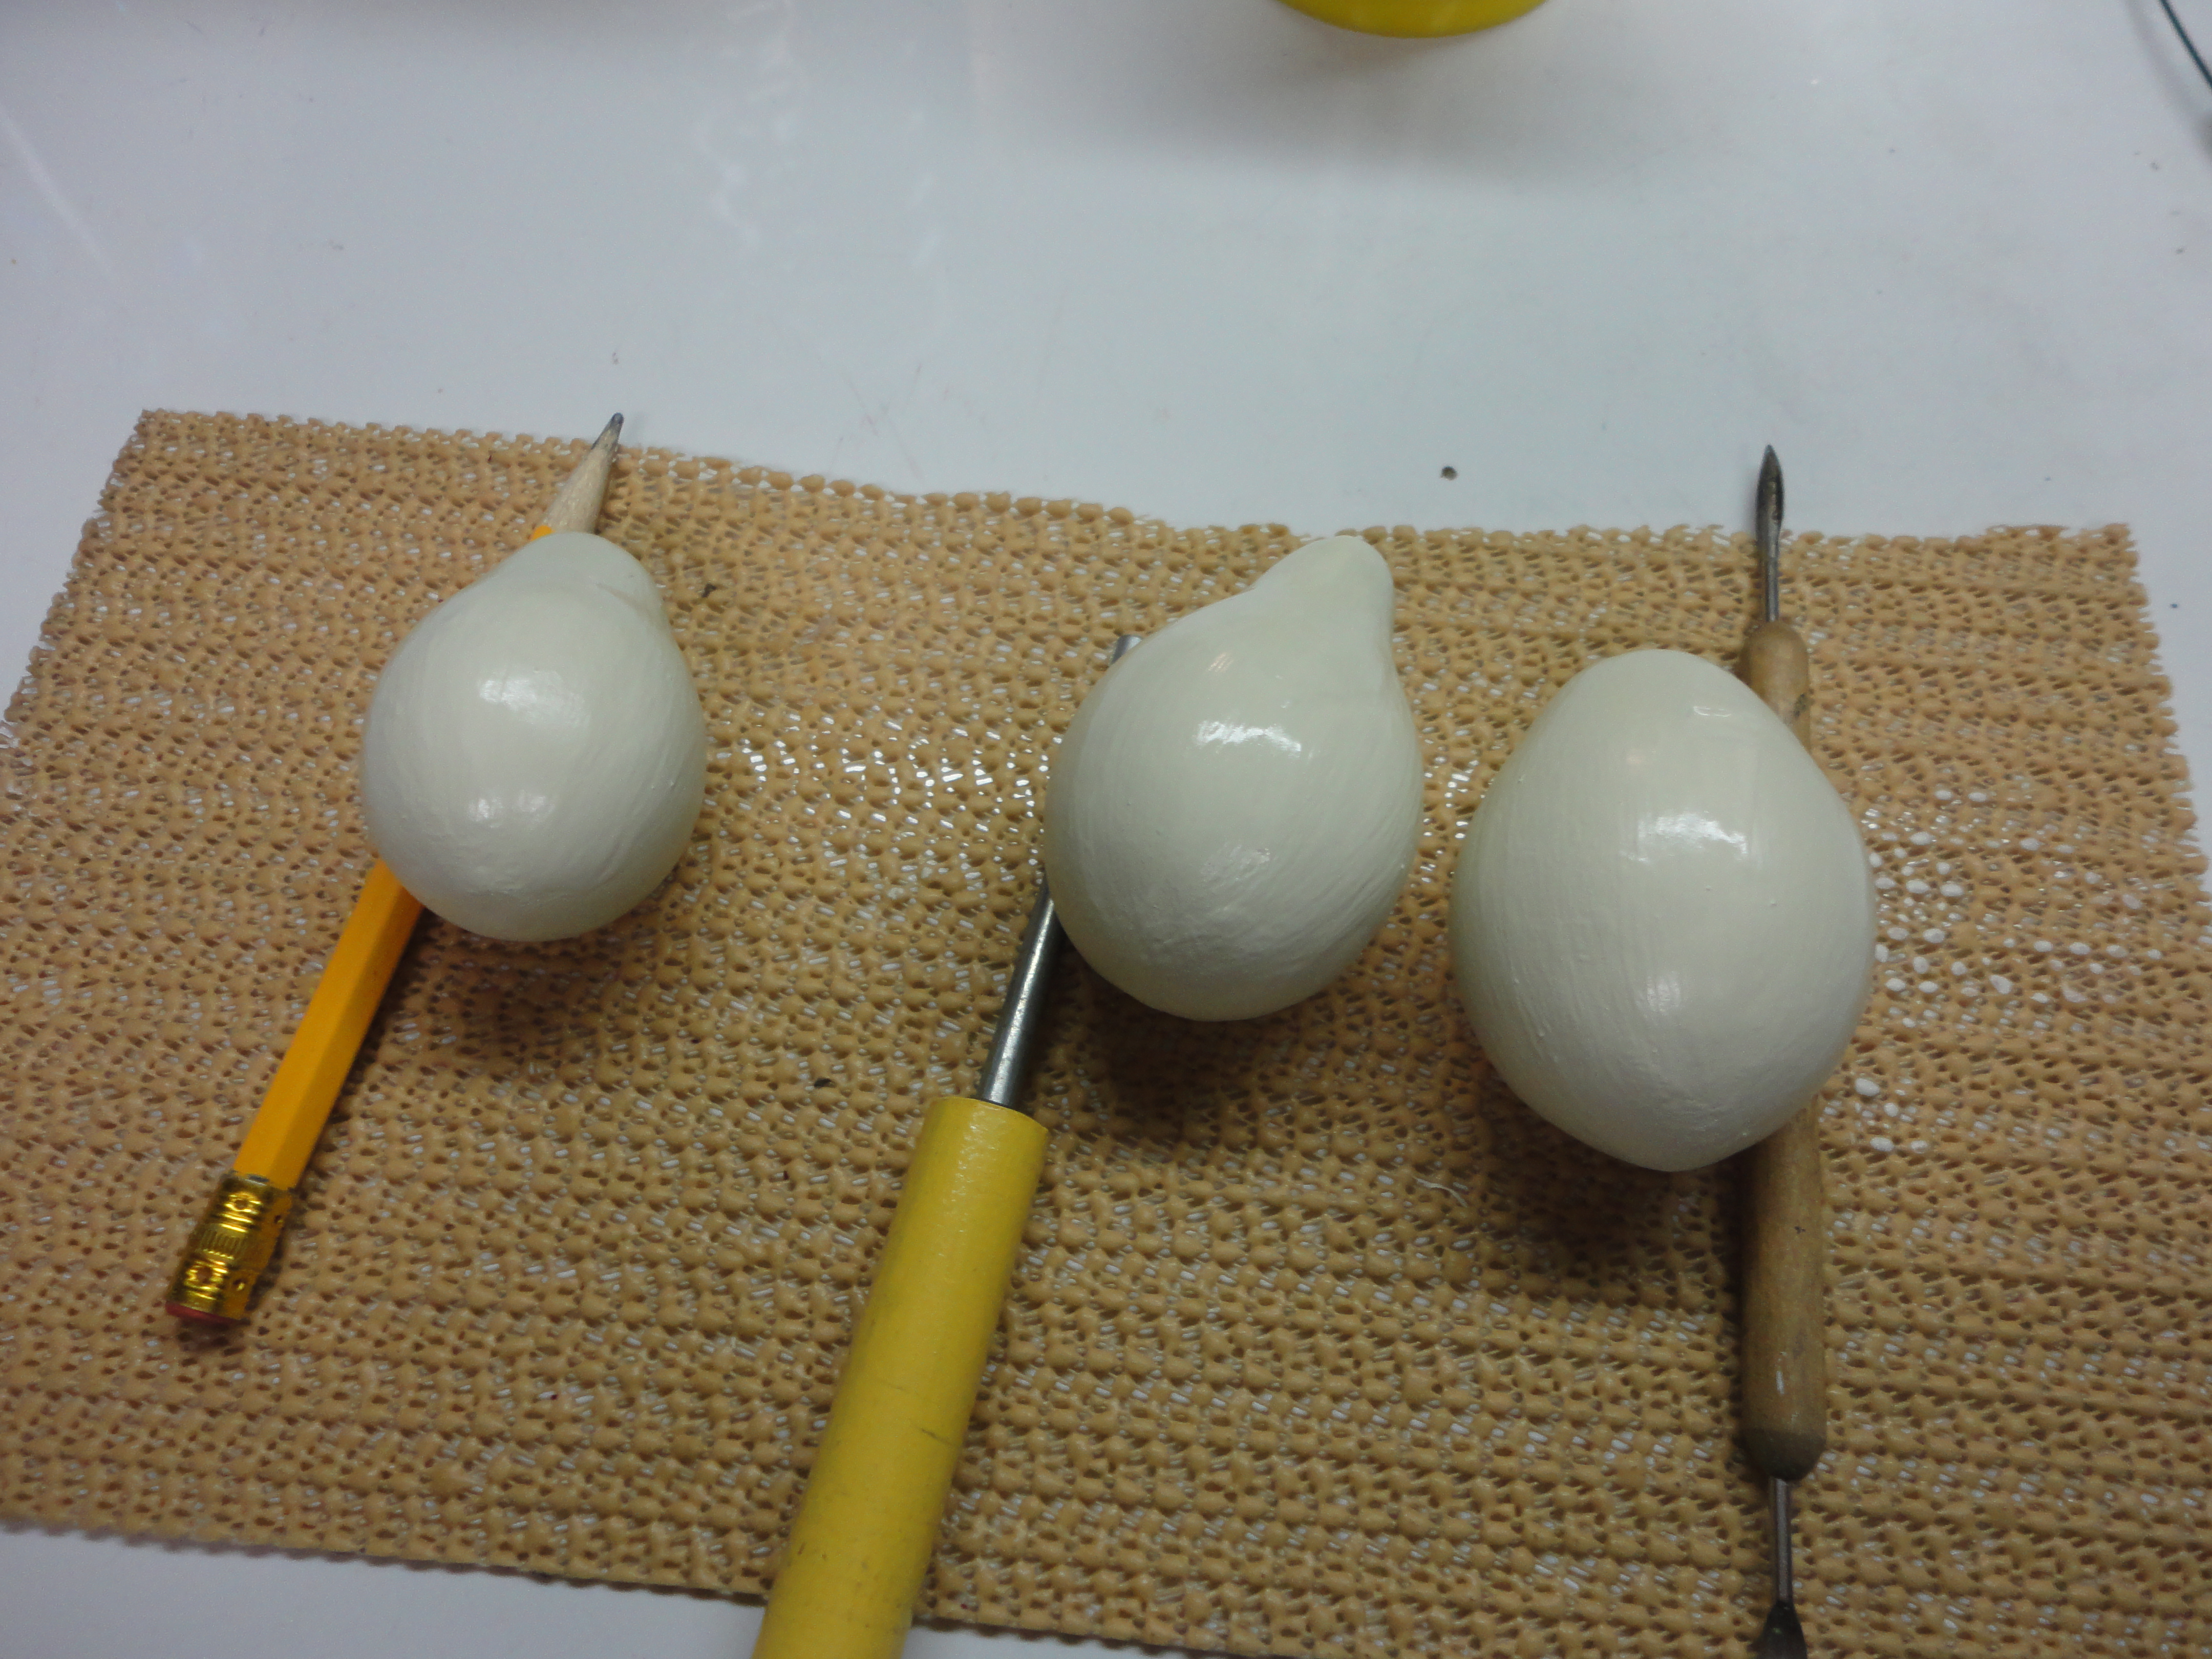
I love the look of aged mirror. I had a few pieces I had aged, with some of the backing completely gone, and thought bits of the decorative paper would look awesome peeking through them. I cut two pieces for the outer sides and a square for the inside.

The paper pieces were glued on with a thin layer of white glue. After they were smoothed and air bubble free, I clamped the mirror pieces and spare foam board pieces over them to ensure they would dry flat and stay smooth. Glue the paper accent on the arch and weigh down to dry.

DSC00523  DSC00538  DSC00537

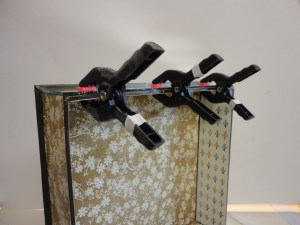
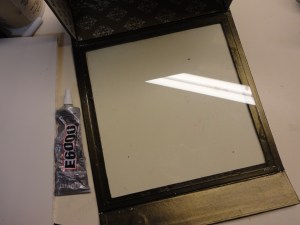
Cut a thin piece of clear glass for the frame opening. Stand the box on it’s top and fold lid down flat. Position the glass on the inside of the lid, covering the opening. Slowly, lower the box down over the glass to make sure it fits inside the box and doesn’t hinder closing. Use small dabs of E6000 to glue the glass in place. Be careful not to use too much glue or it will seep to the front and you’ll have some cleaning to do. For cushion, and to help even out weight, lay a couple pieces of foam board across the glass before weighing with books to dry.  I squeezed small dabs of E6000 on the backside corners and edges of my mirror pieces, and clamped them on the papered sides while the glass was drying.

DSC00549  DSC00552  DSC00564

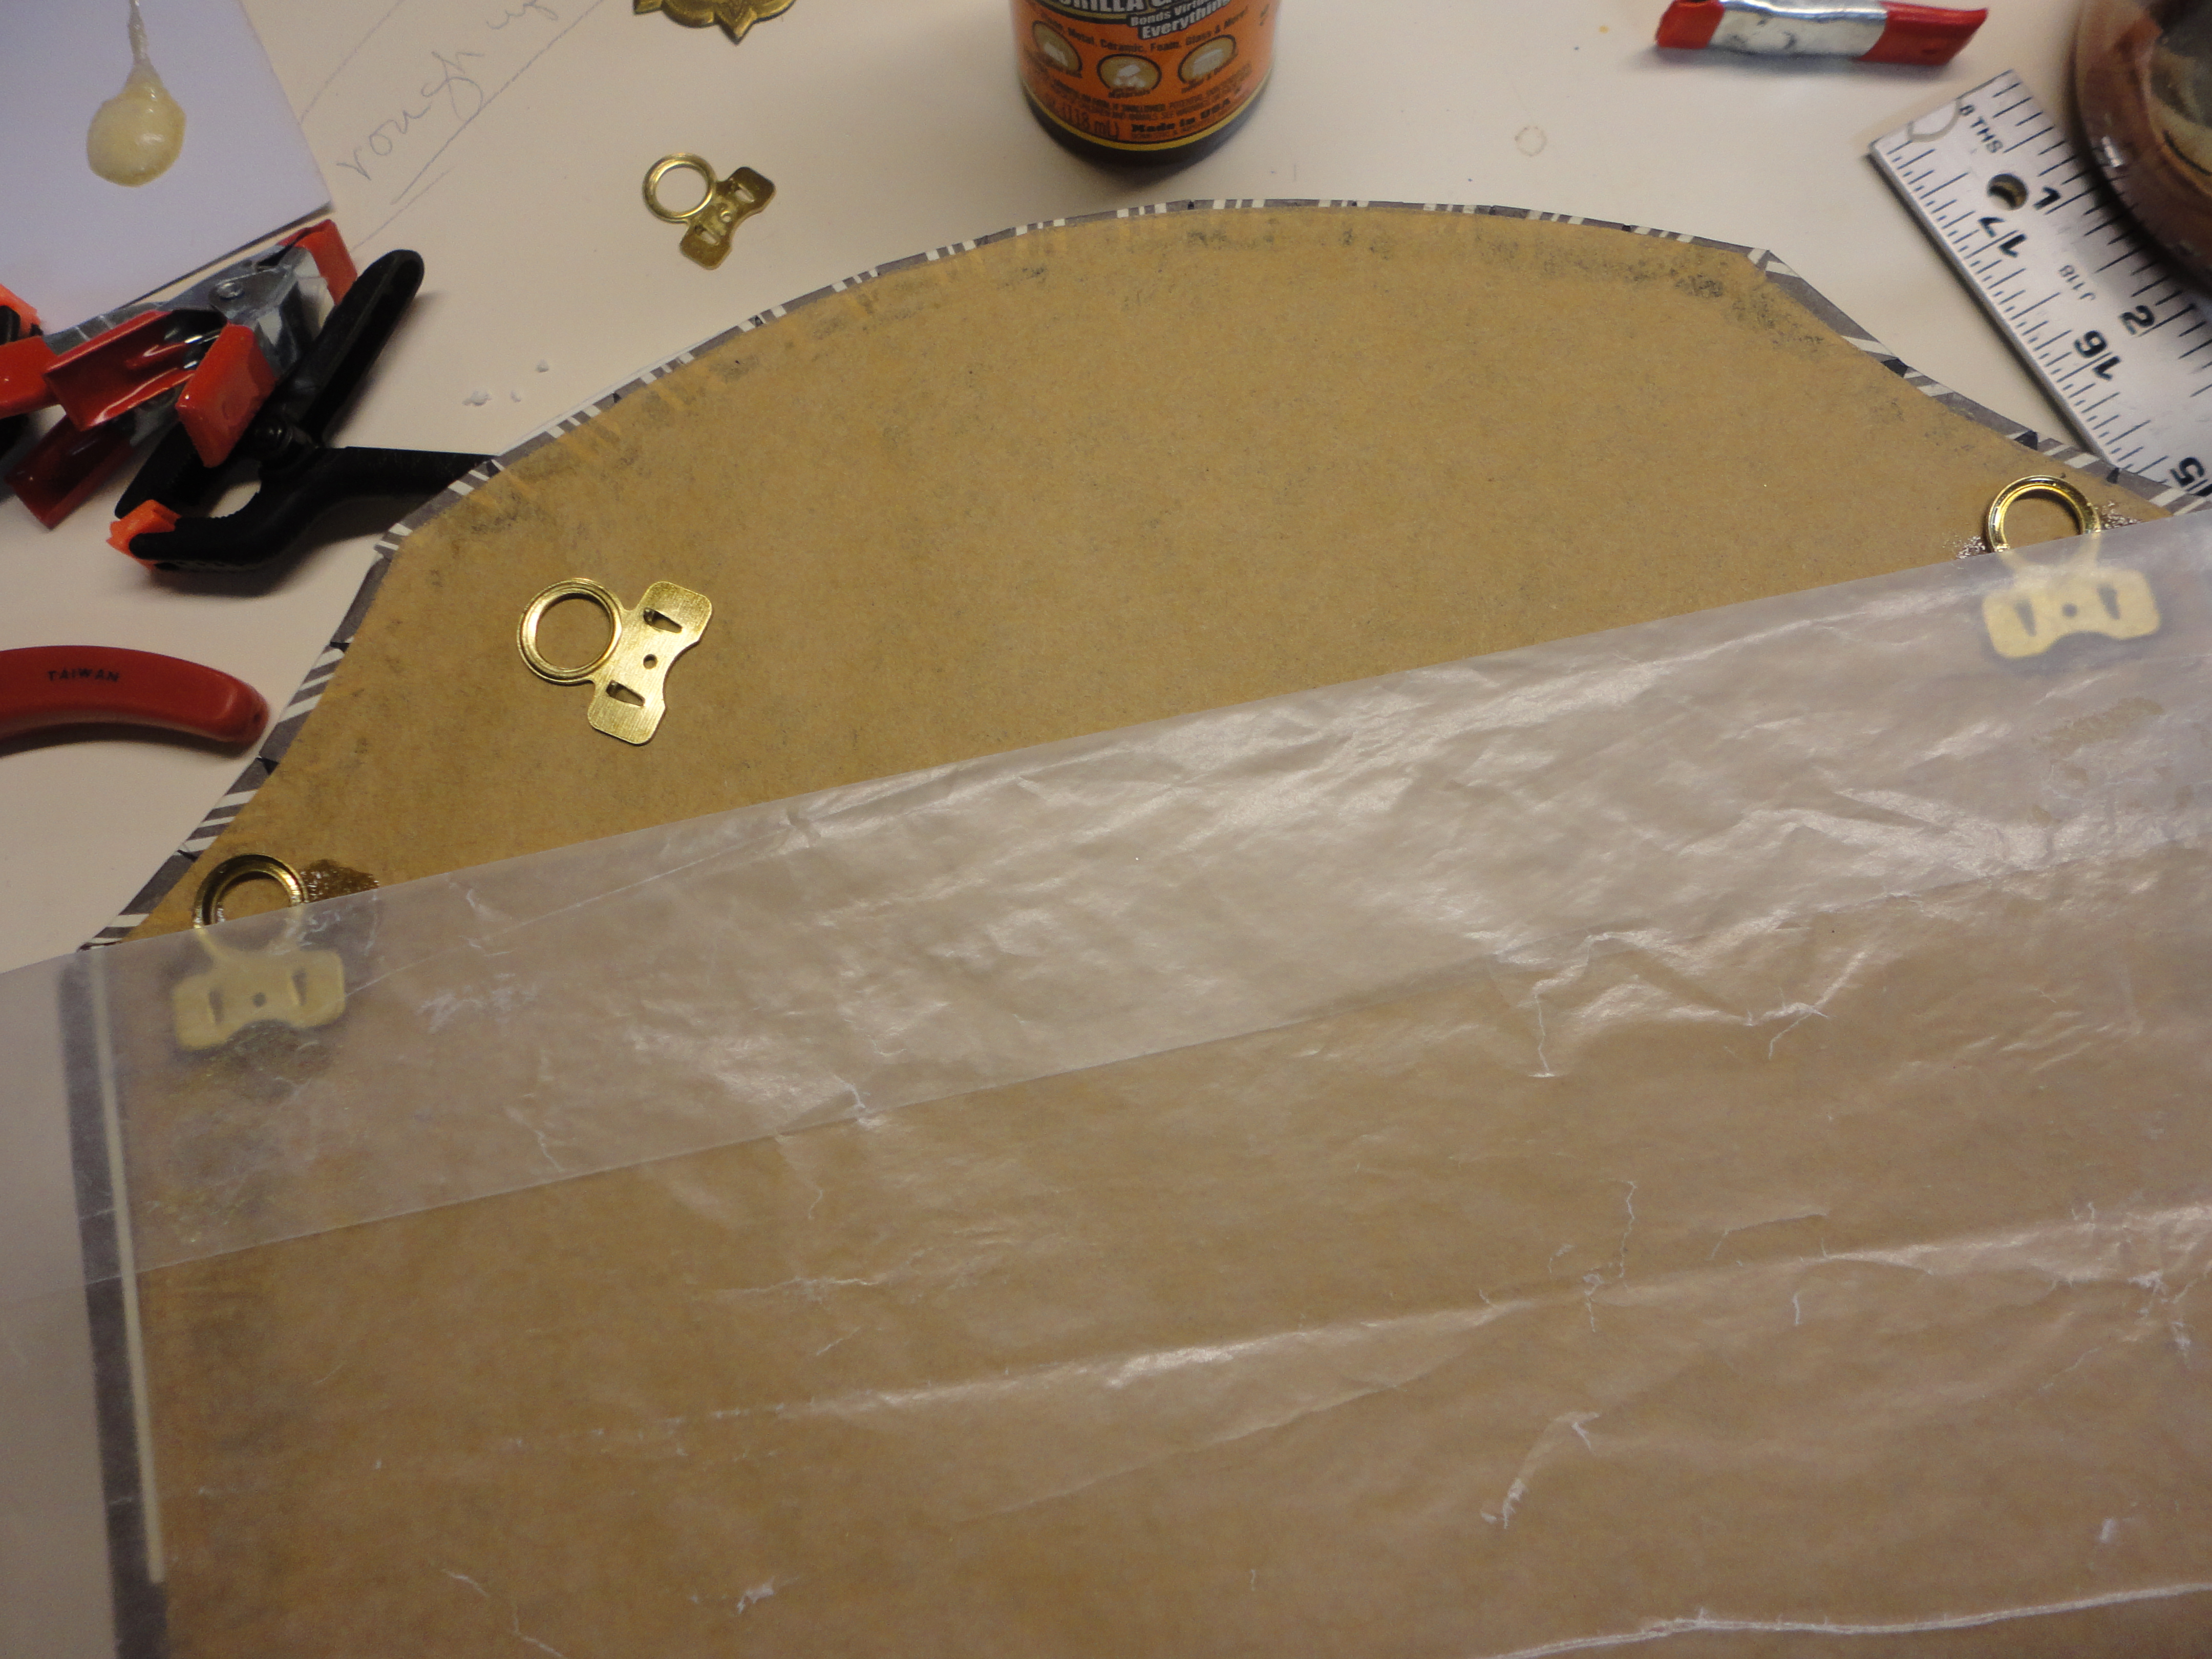
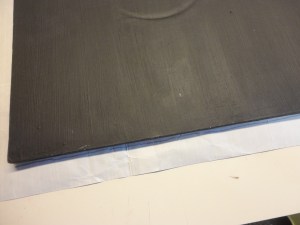
Gorilla Glue was used to adhere the foam board to the back of the box. Gorilla Glue swells as it dries, be careful not to apply it too close to the edge, it will seep out and get ugly.  Apply it to the backside of the box, in a thin line, at least 1/2″ away from the edge, and a few swirls in the center. Remembering to keep the clasp at the bottom, position the box very near the bottom of the striped foam board piece, leaving about 1/16″ of the stripes showing.

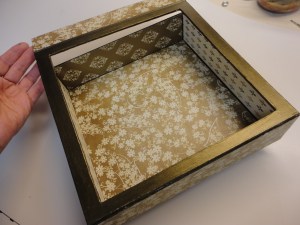
Squeeze small dabs of E6000, on the backside corners and edges of the square mirror piece and glue it to the inside of the box. Weigh it all down to dry. I found a smaller box that fit in, on top of the mirror, then weighed the box down. Let dry overnight.

DSC00589

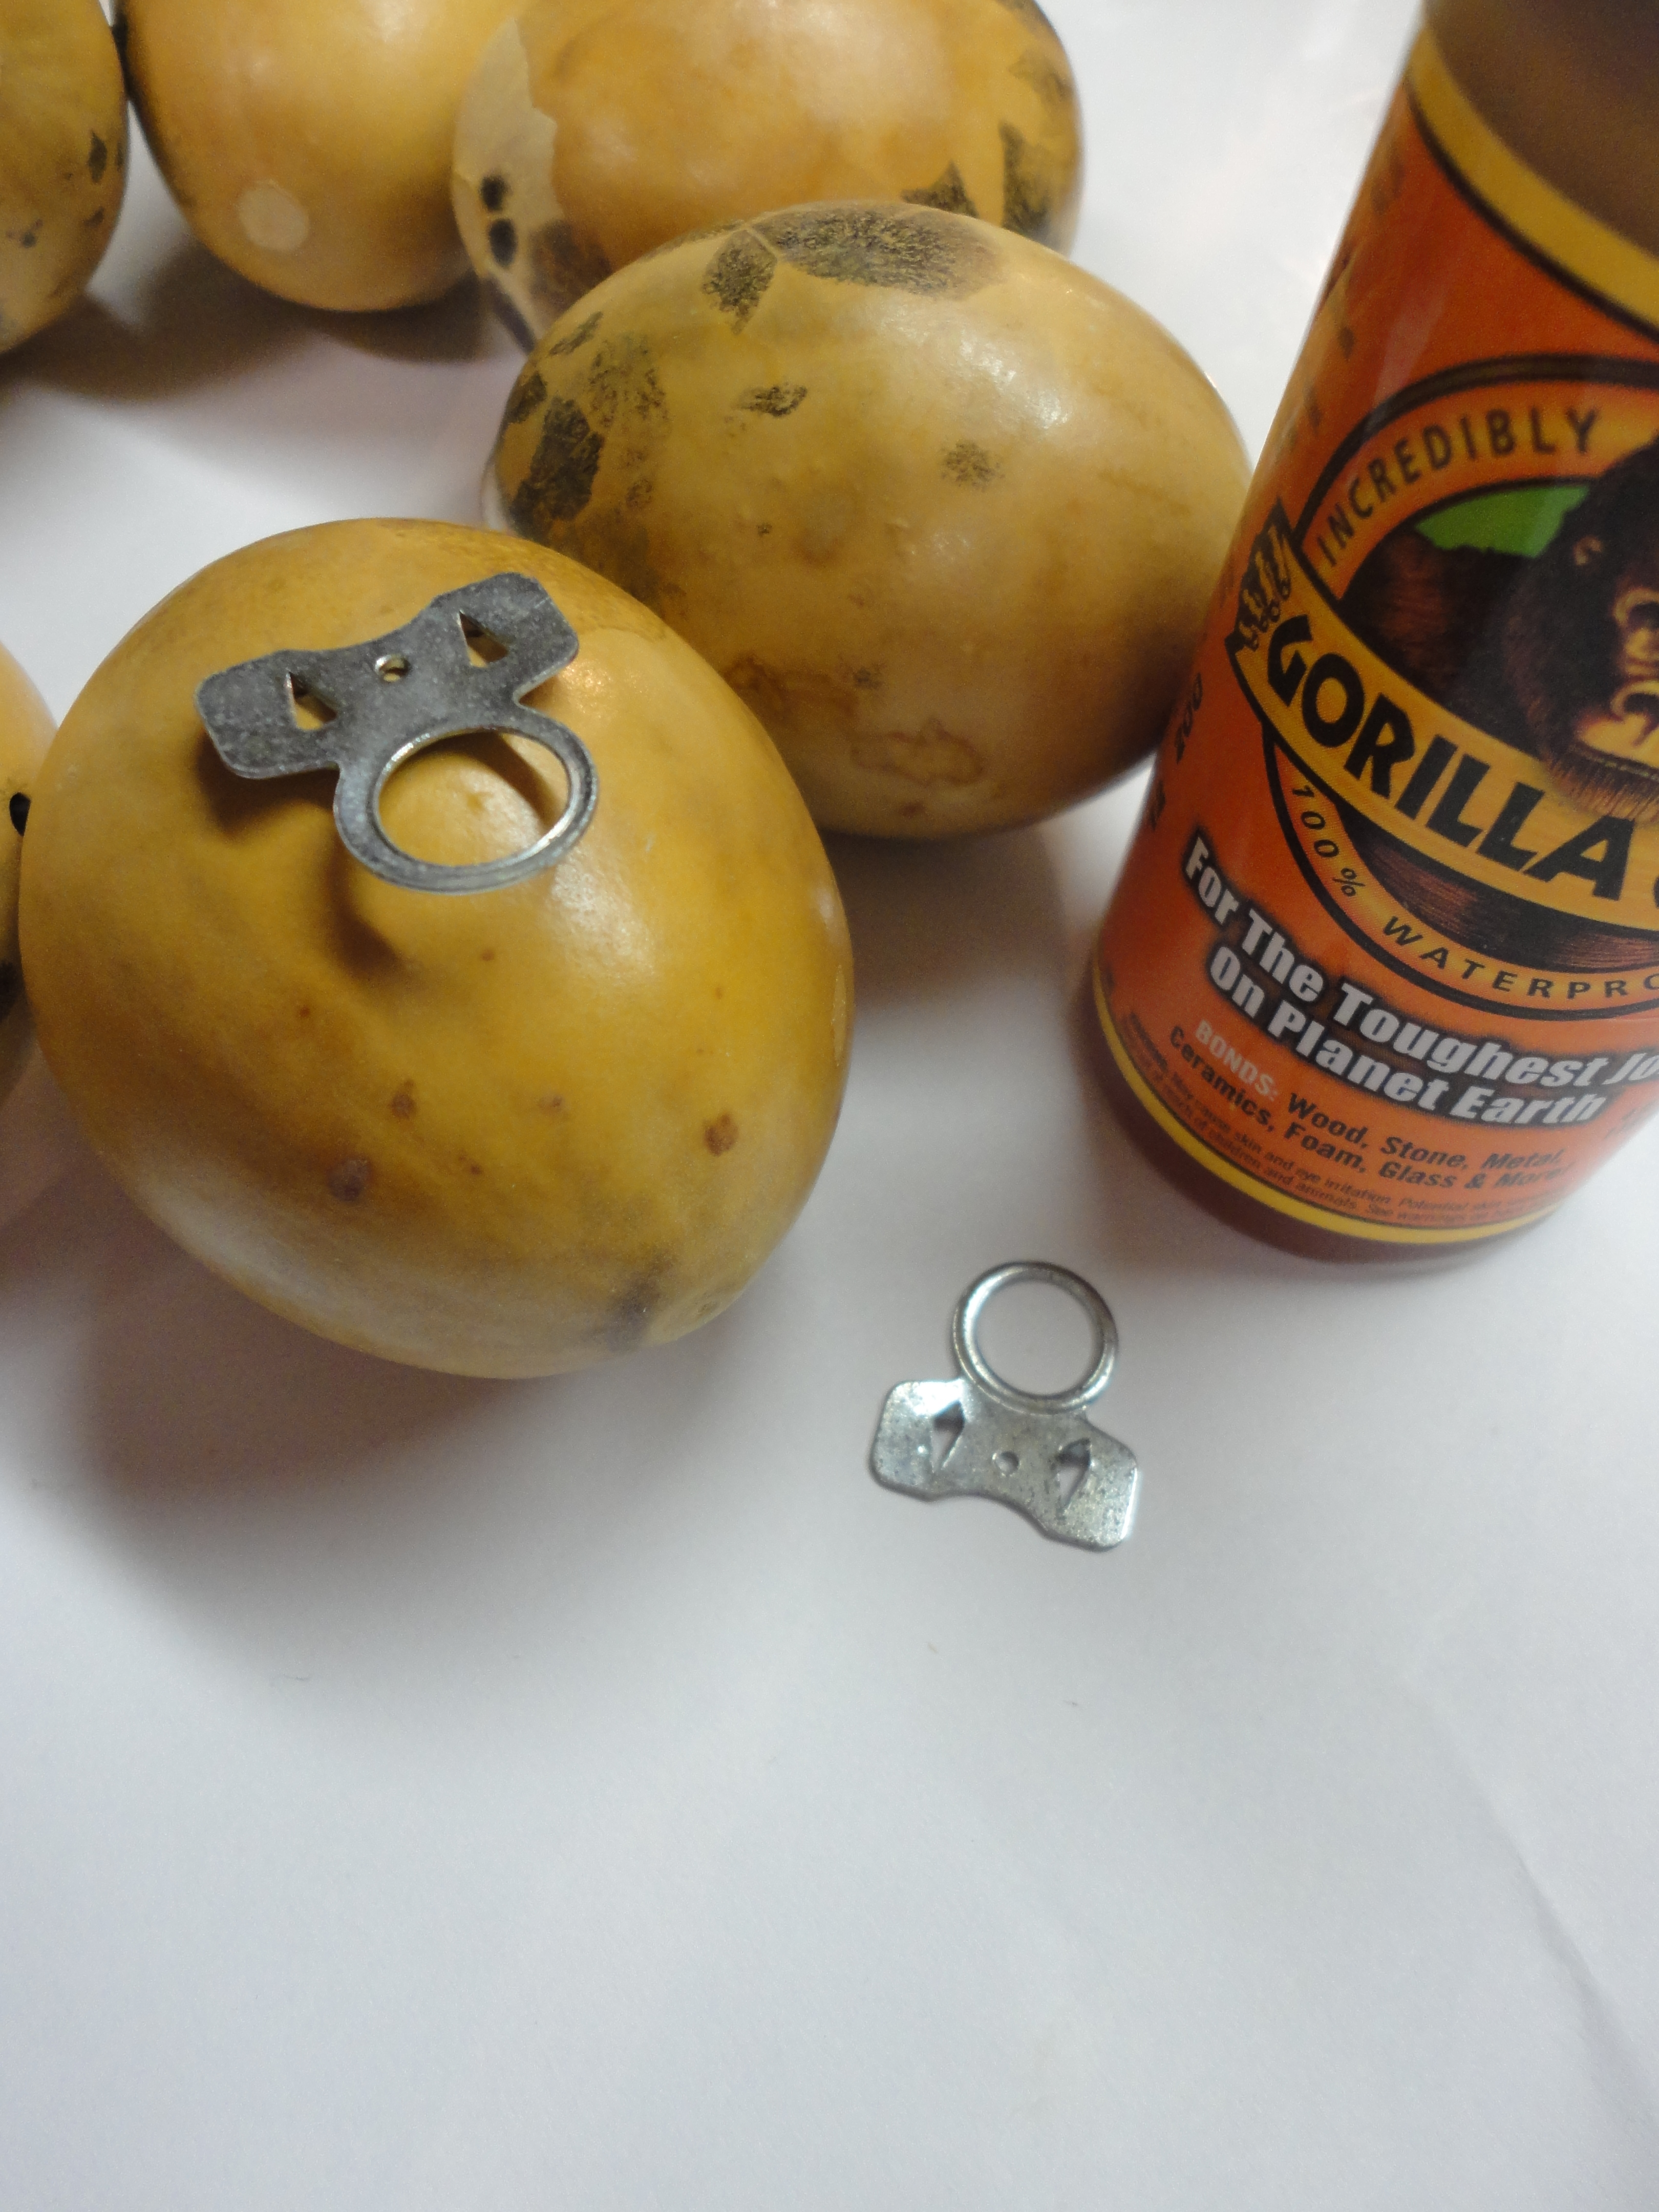
I’m going to rely heavily on Gorilla Glue to hold prong hooks for hanging.  I bent the tops of the hangers out a little, before gluing, to accommodate a nail head. A sheet of wax paper was laid over the glued areas, before weighing it down to dry, so nothing got stuck and damaged the brown paper.

The frame pieces were held in place with painter’s tape. I removed them, one at a time, brushed on thinned glue, and clamped them down to dry. They shifted easily, so I waited until one was secure before moving to the next. You may have to touch up a little paint where you used painter’s tape.

DSC00596  DSC00606

To complete the look, an old drawer pull was added to snazzy up the arch.

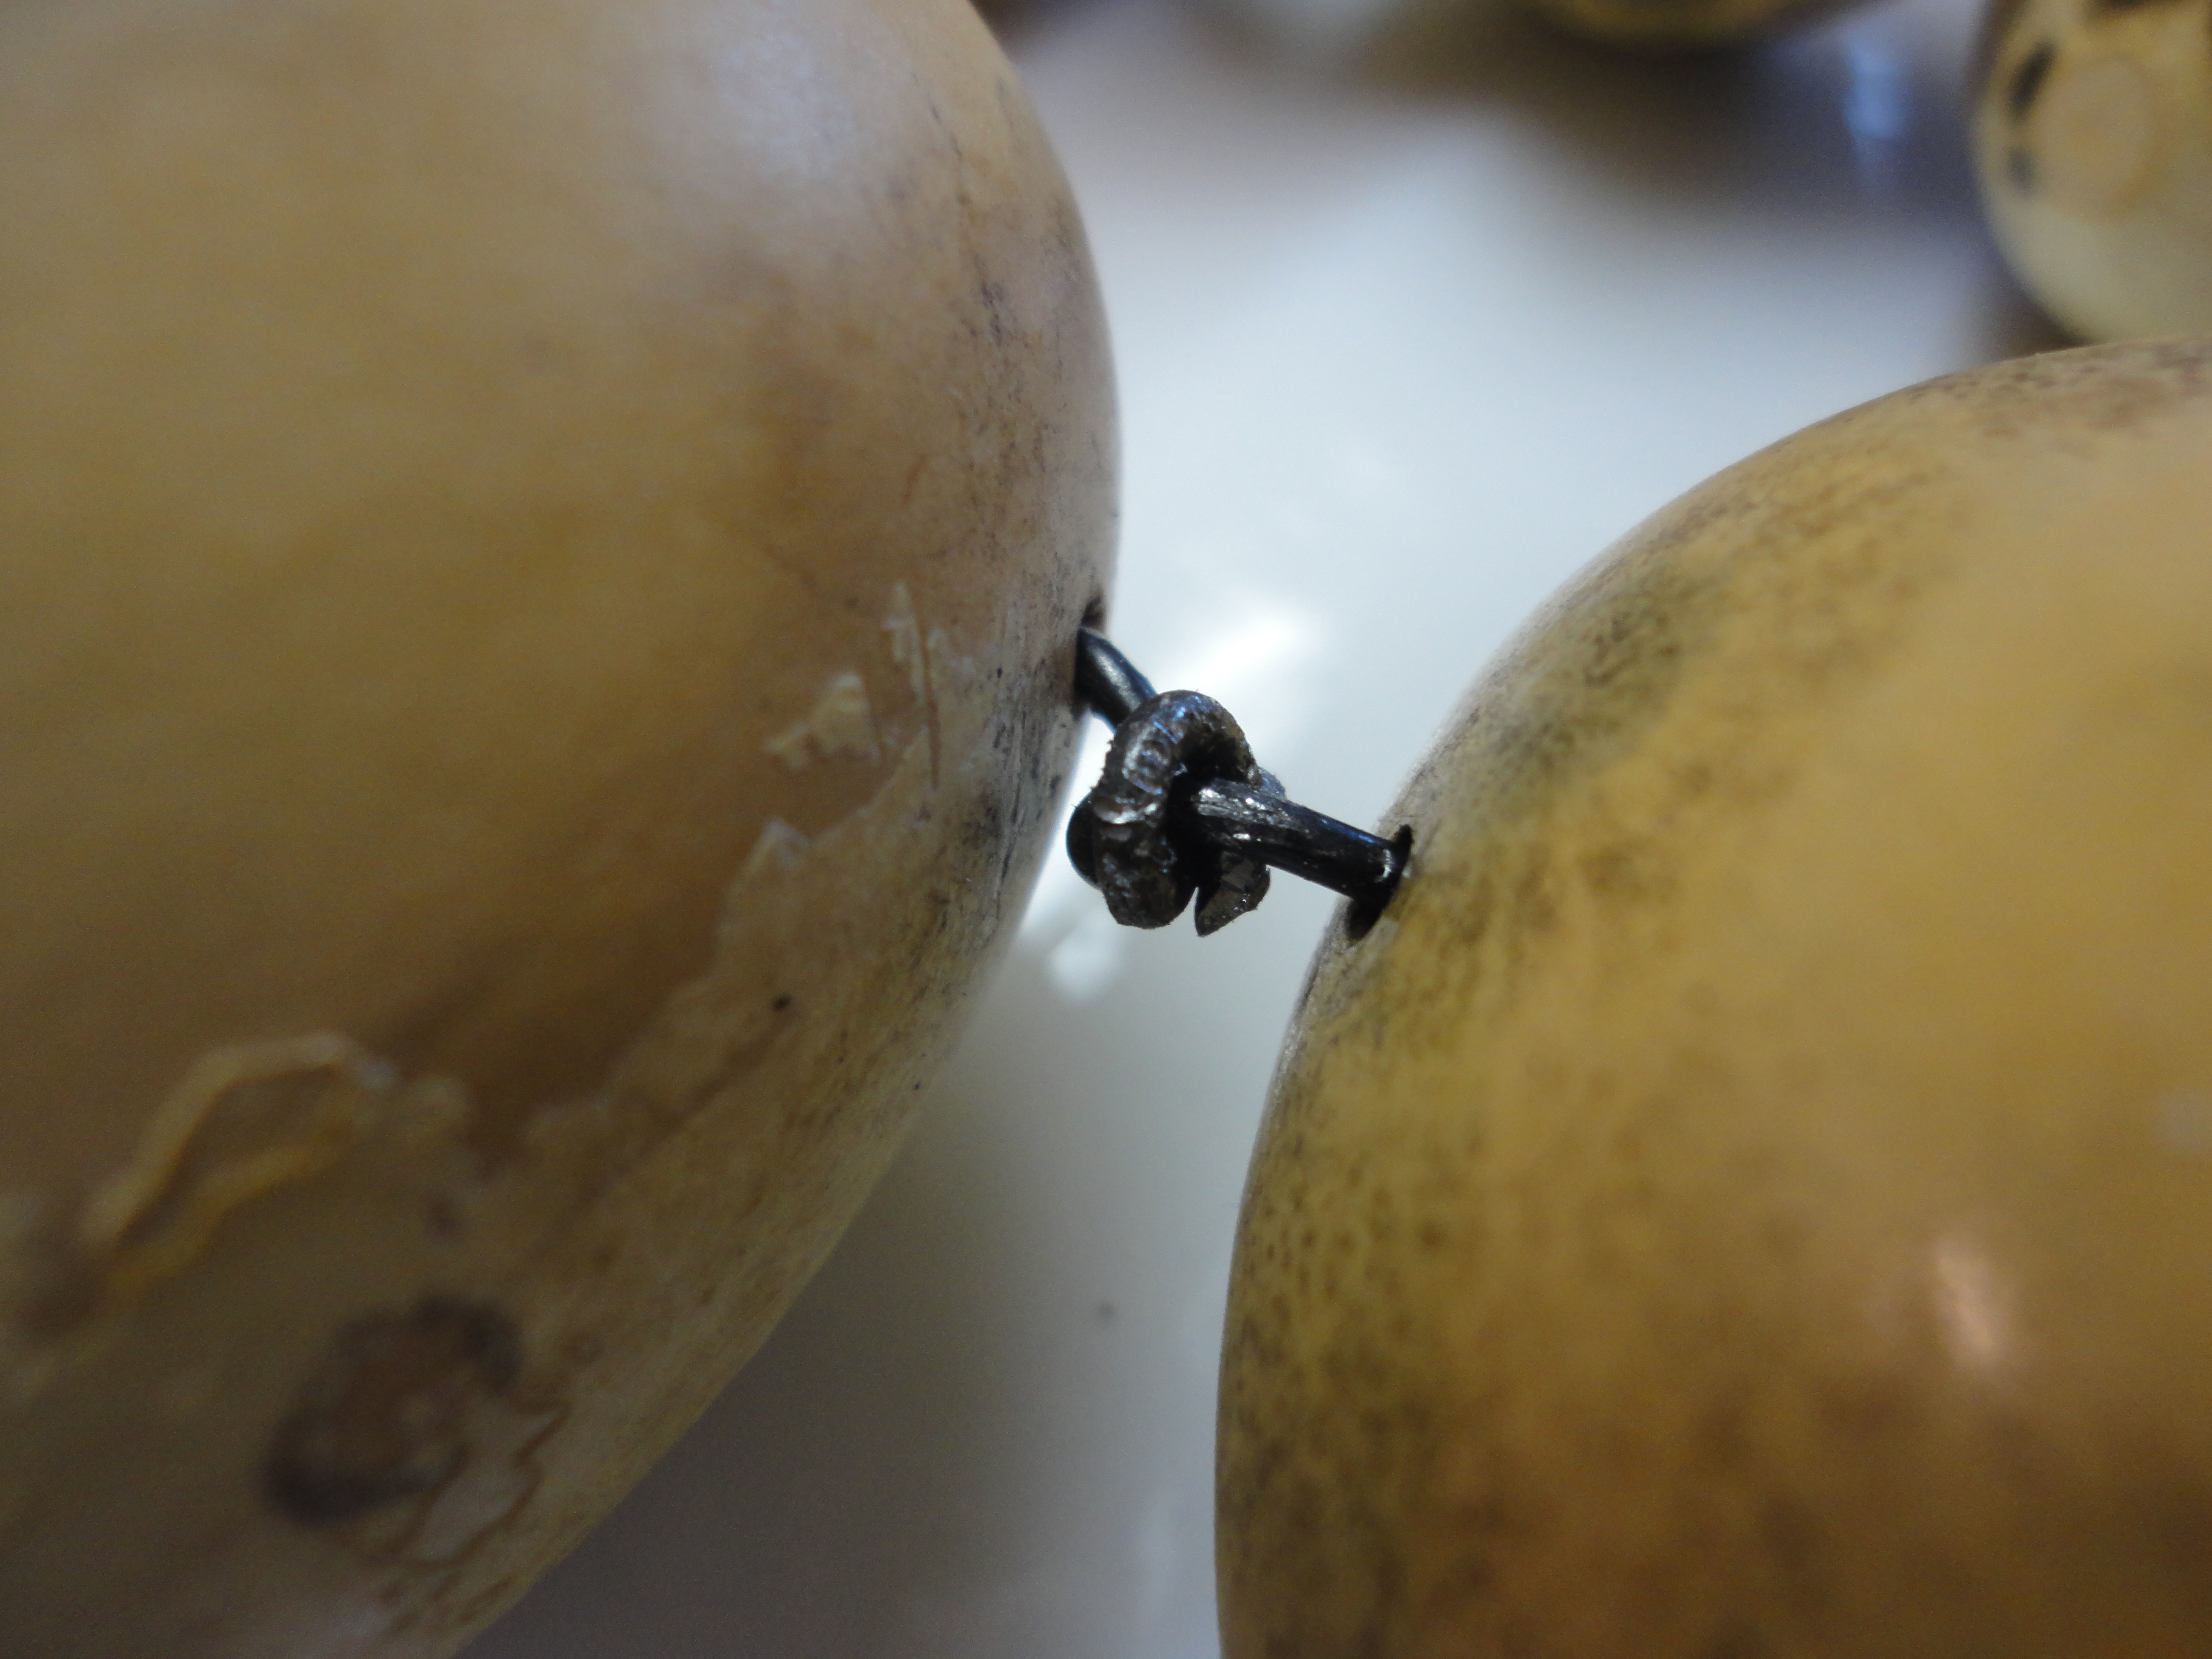
The wreath was laid in the box, with small dabs of E6000 in a few places on it’s backside, where it touched the mirror, and left to dry overnight.

860 watermark   771 watermark   DSC00682 DSC00687

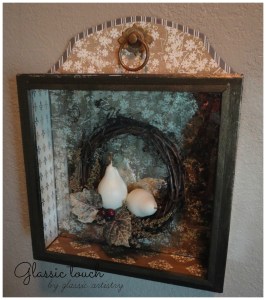
I’m pretty sure that shadow box making has just nudged it’s way onto my favorites list. I think the hanging element can be improved with a little more forethought, but, I am so pleased with the way this project turned out.  Although it was time consuming with all the gluing and drying, I believe it was worth it. Any time you can learn a little, have fun, and have something to show for it, is time well spent!  Don’t you agree?


A Little Something For Fall!

We’ve had a couple very windy days, but, there’s no complaining about the excellent Iowa harvest weather we’ve been enjoying so far this month.

Windy conditions can play havoc on seasonal yard decorations, however.  With the exception of pumpkins and gourds, I’ve wired and tied things down, to still see them blown across the yard, or disappear all together.  So now, I opt to add a bit more seasonal flair with small wreaths inside my home.

An abundant crop of egg gourds, dried, and stored in my basement, has been on my mind a lot since summer.  I’ve been wanting to make something with them for a long time.  I got to thinking that, some of them, a few of my favorite things, and what Mother Nature had to offer, would make for some pretty fall décor.  Simple and inexpensive, just my style!

8284 watermark8235 watermark8204 watermark

I’ve never been able to decorate a wreath when its lying on a flat surface.  I like to hang a prepared wreath on a paper covered board, and work on it at eye level.

Gourd Wreath – Choose seven egg gourds of similar size and shape.  Soak overnight in bleach water and scrub clean.  (A small plastic basket, used for holding baby bottle rings and nipples in a dishwasher, works great for this step.  It will hold the gourds and its easy to weigh down under the water).  Dry gourds. Wax and buff with Briwax or any furniture wax. On a non-skid surface, arrange the gourds in a circle, and secure together with painter’s tape.  Gently turn them over and mark with pencil where they meet each other.  Remove the gourds from the tape, one at a time, drill holes with a Dremel and 3/32″ bit, then replace gourd on tape.  When done drilling, turn gourds face up and remove tape.

DSC07859 DSC07863 DSC07871

Measure and estimate the diameter of the wire ring you will need.  Pre-shape a length of 16 gauge wire around a container of the same diameter.   Mine was about 3 1/2″.

String gourds on to the wire.  Cut off excess wire and twist ends together.  Turn over, face down, and attach a push-in hanger with Gorilla Glue.  Let dry.

DSC07887 DSC07934 DSC07940

With side-cutters, cut a few long, bleached pinecones, to form flowers.  Spray pinecone pieces and False Baptisia pods with Clear Matte Sealer.  Attach the prettiest pinecone pieces with hot glue.  Embellish with pods.

DSC080508285 watermark

Pear Wreath – I like pears and couldn’t resist when I found smaller egg gourds that resembled their shape.  Always remember to soak and scrub the gourds.

I mixed a small amount of white and green wall paints for the palest of green color.  For a special touch, I used a small slender glass leaf I had, but, you could trim down an artificial leaf, or use no leaf.

After soaking a 6″ grapevine wreath overnight, slide two thick rubber bands around it’s center to form a more oval shape.  Let dry 24 hours. While the wreath dries, give the gourds 2 or 3 coats of paint, one side at a time, and sanding lightly between coats.  Be careful, they like to roll!

DSC07924 DSC08004

Cut the rubber bands from the dry wreath and lay it on a wire rack, over a bowl.  Water down a small amount of dark brown craft paint and lightly brush it over the wreath.  Let dry.  Speckle the wreath, lightly, with black craft paint.  Let dry and seal with Clear Matt Spray.

DSC07969 DSC08163

Using a Dremel, I drilled a small hole to accommodate the base of my leaf, and glued it in with a small dot of hot glue. Spackling was used to fill in around the leaf.  Once dry, it was sanded smooth and repainted.  Small indentations were drilled in the top of the gourds to hot glue apple stems in place.  Touch up paint around the stems.

After gluing the pears on the wreath, two leaves and some berries, saved from past projects, were added.  The pretty green, dried Astilbe, tucked in and around, was cut from the bush outside my backdoor.

8237 watermark

Egg Basket Wreath – I have a thing for collapsible wire egg baskets, they’re cute!  And, so easy to decorate!  I found a flower sprig and feather sprigs for 50% off last month … a total of $3.00, YEAH!  I cut and reconfigured my flower sprig a little, but you needn’t.  Simply arrange your sprigs the way you like them, cutting off the long stems if needed, and add a raffia bow for a quick colorful wreath!

DSC08155 8204 watermark