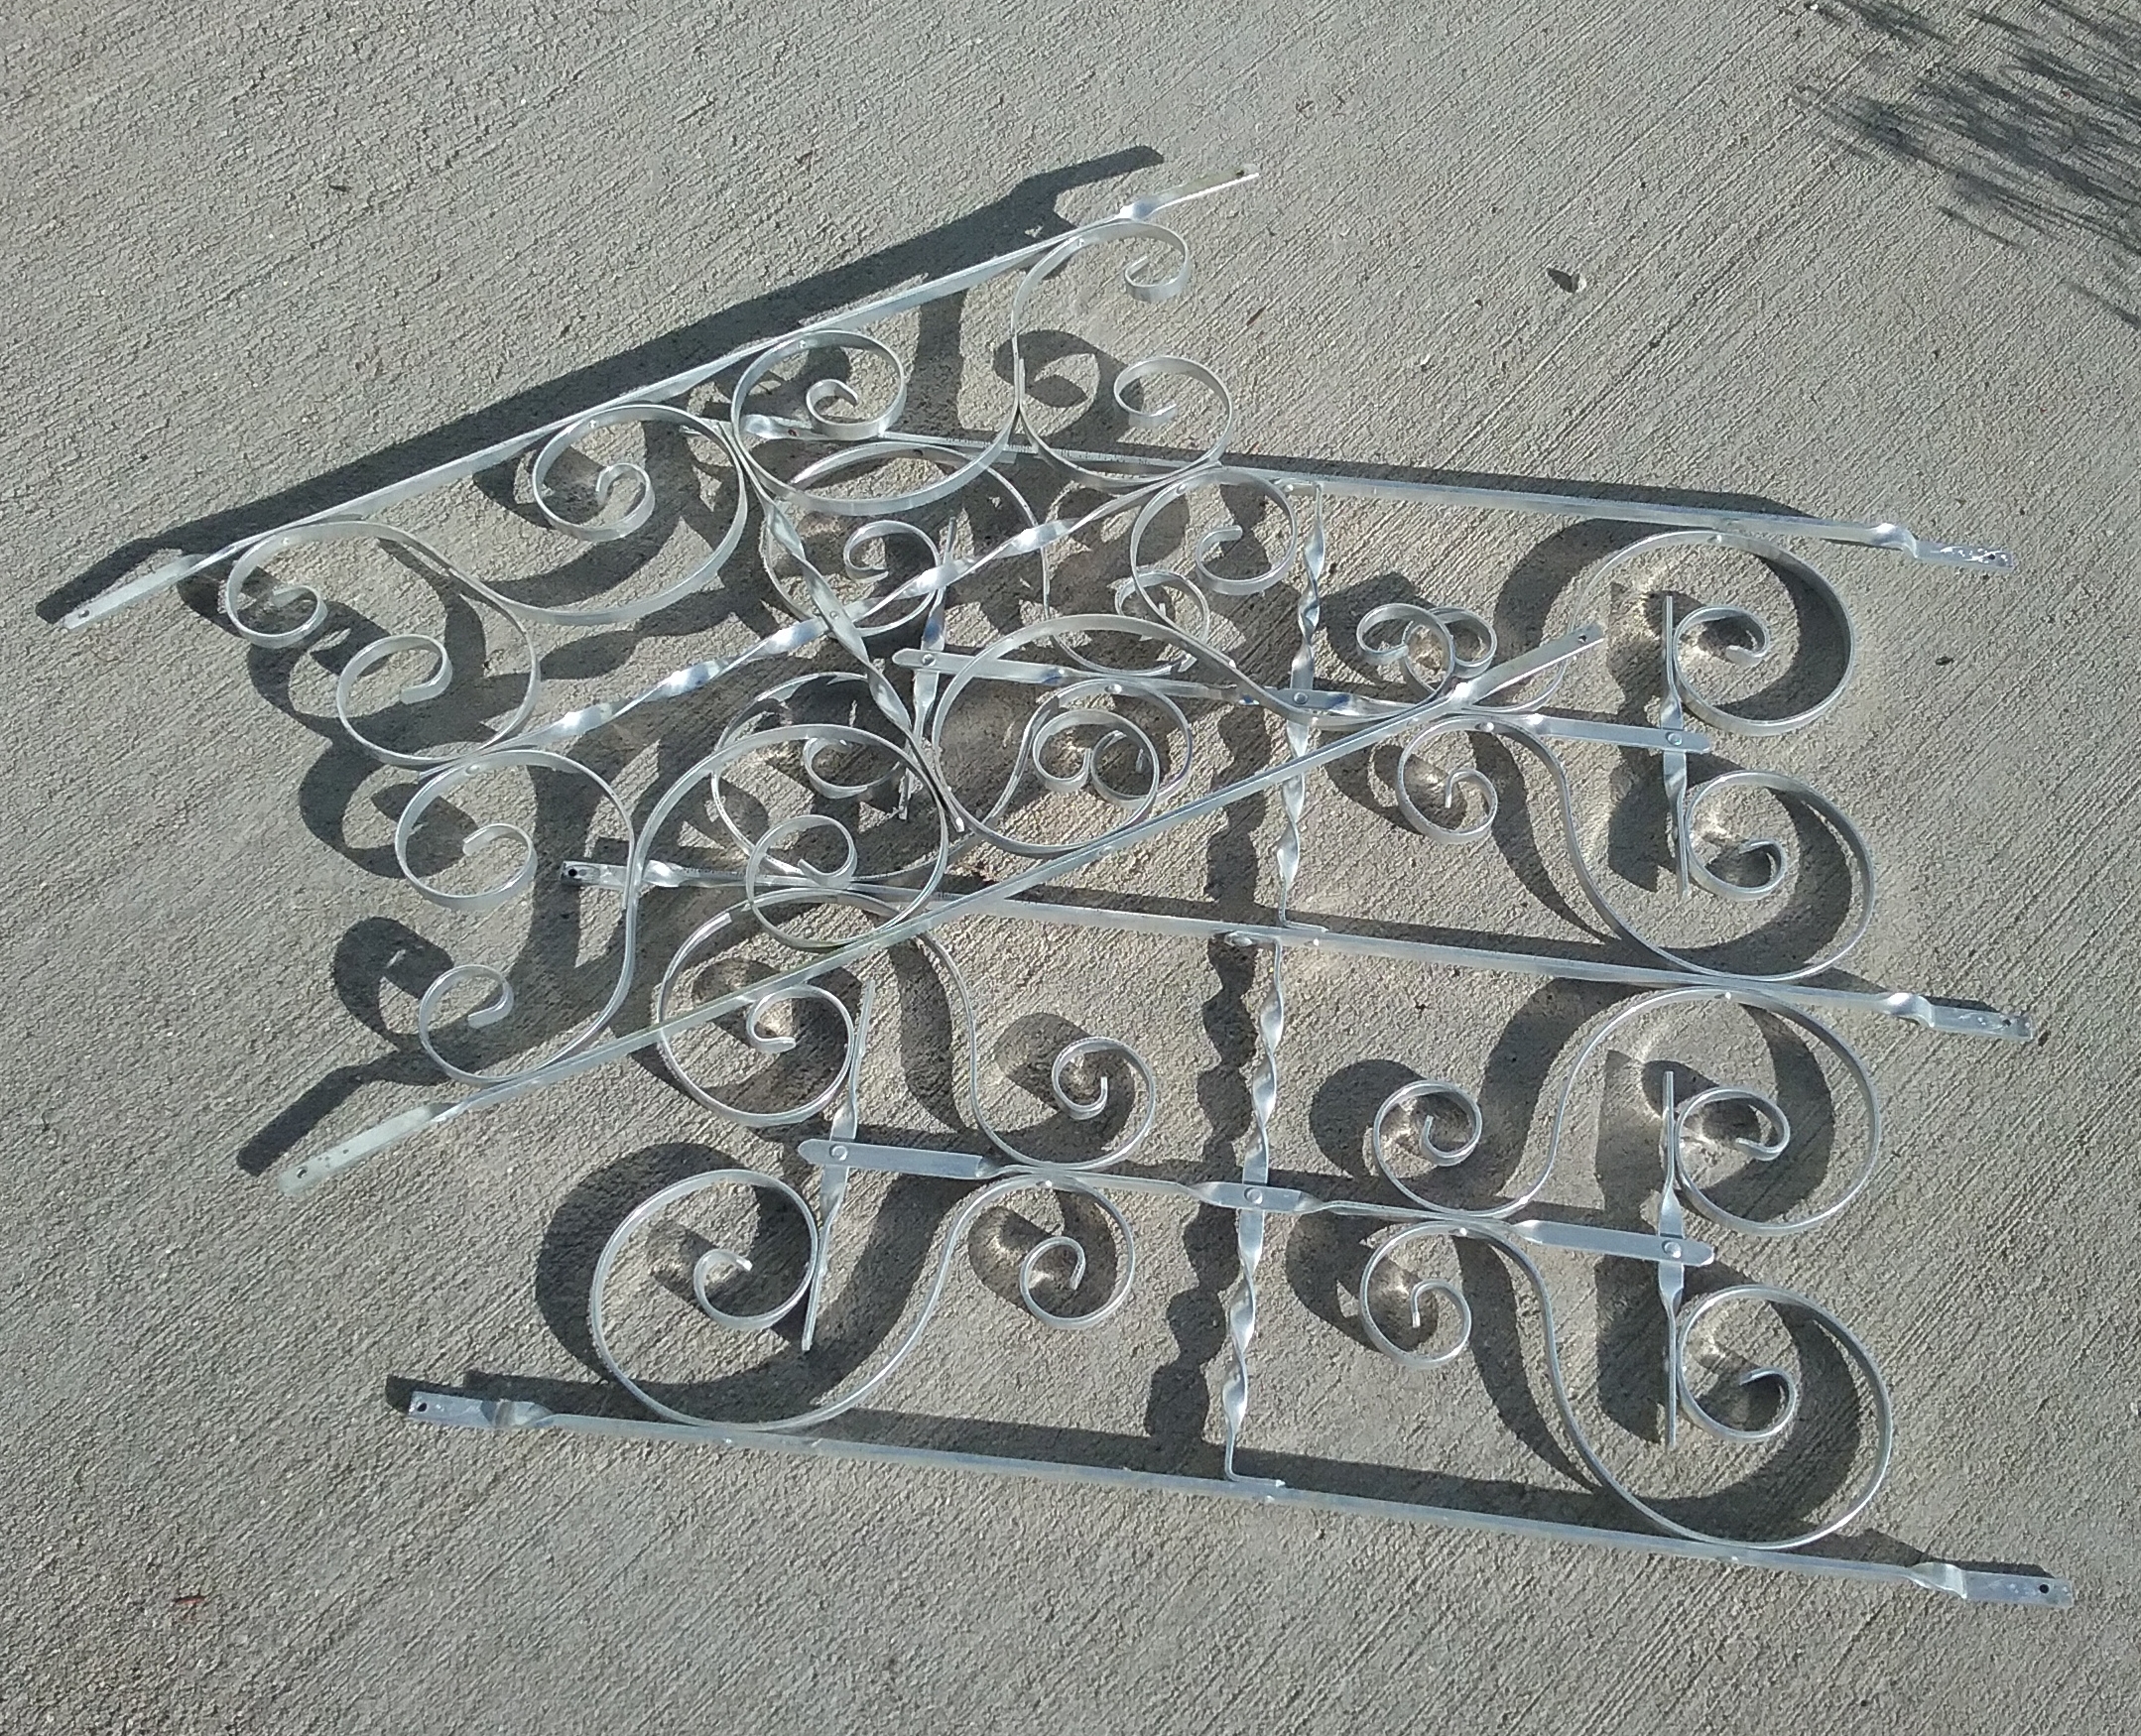
Aluminum screen guards – look at all those pretty scrolls! You may want to keep your eyes open for these my repurposing friends, they’re a treasure, and have so many possibilities, used whole or cut into smaller pieces. I’ve had a small pile of them hoarded in my garage for sometime now and recently pulled them out when I was making for the market event last month.

My first thought was to cut them into separate scroll pieces and make brackets by trimming them with thin wood pieces as in the finishing step of my last post. I haven’t found time to follow through on that yet, but did get them used in a couple other ways.
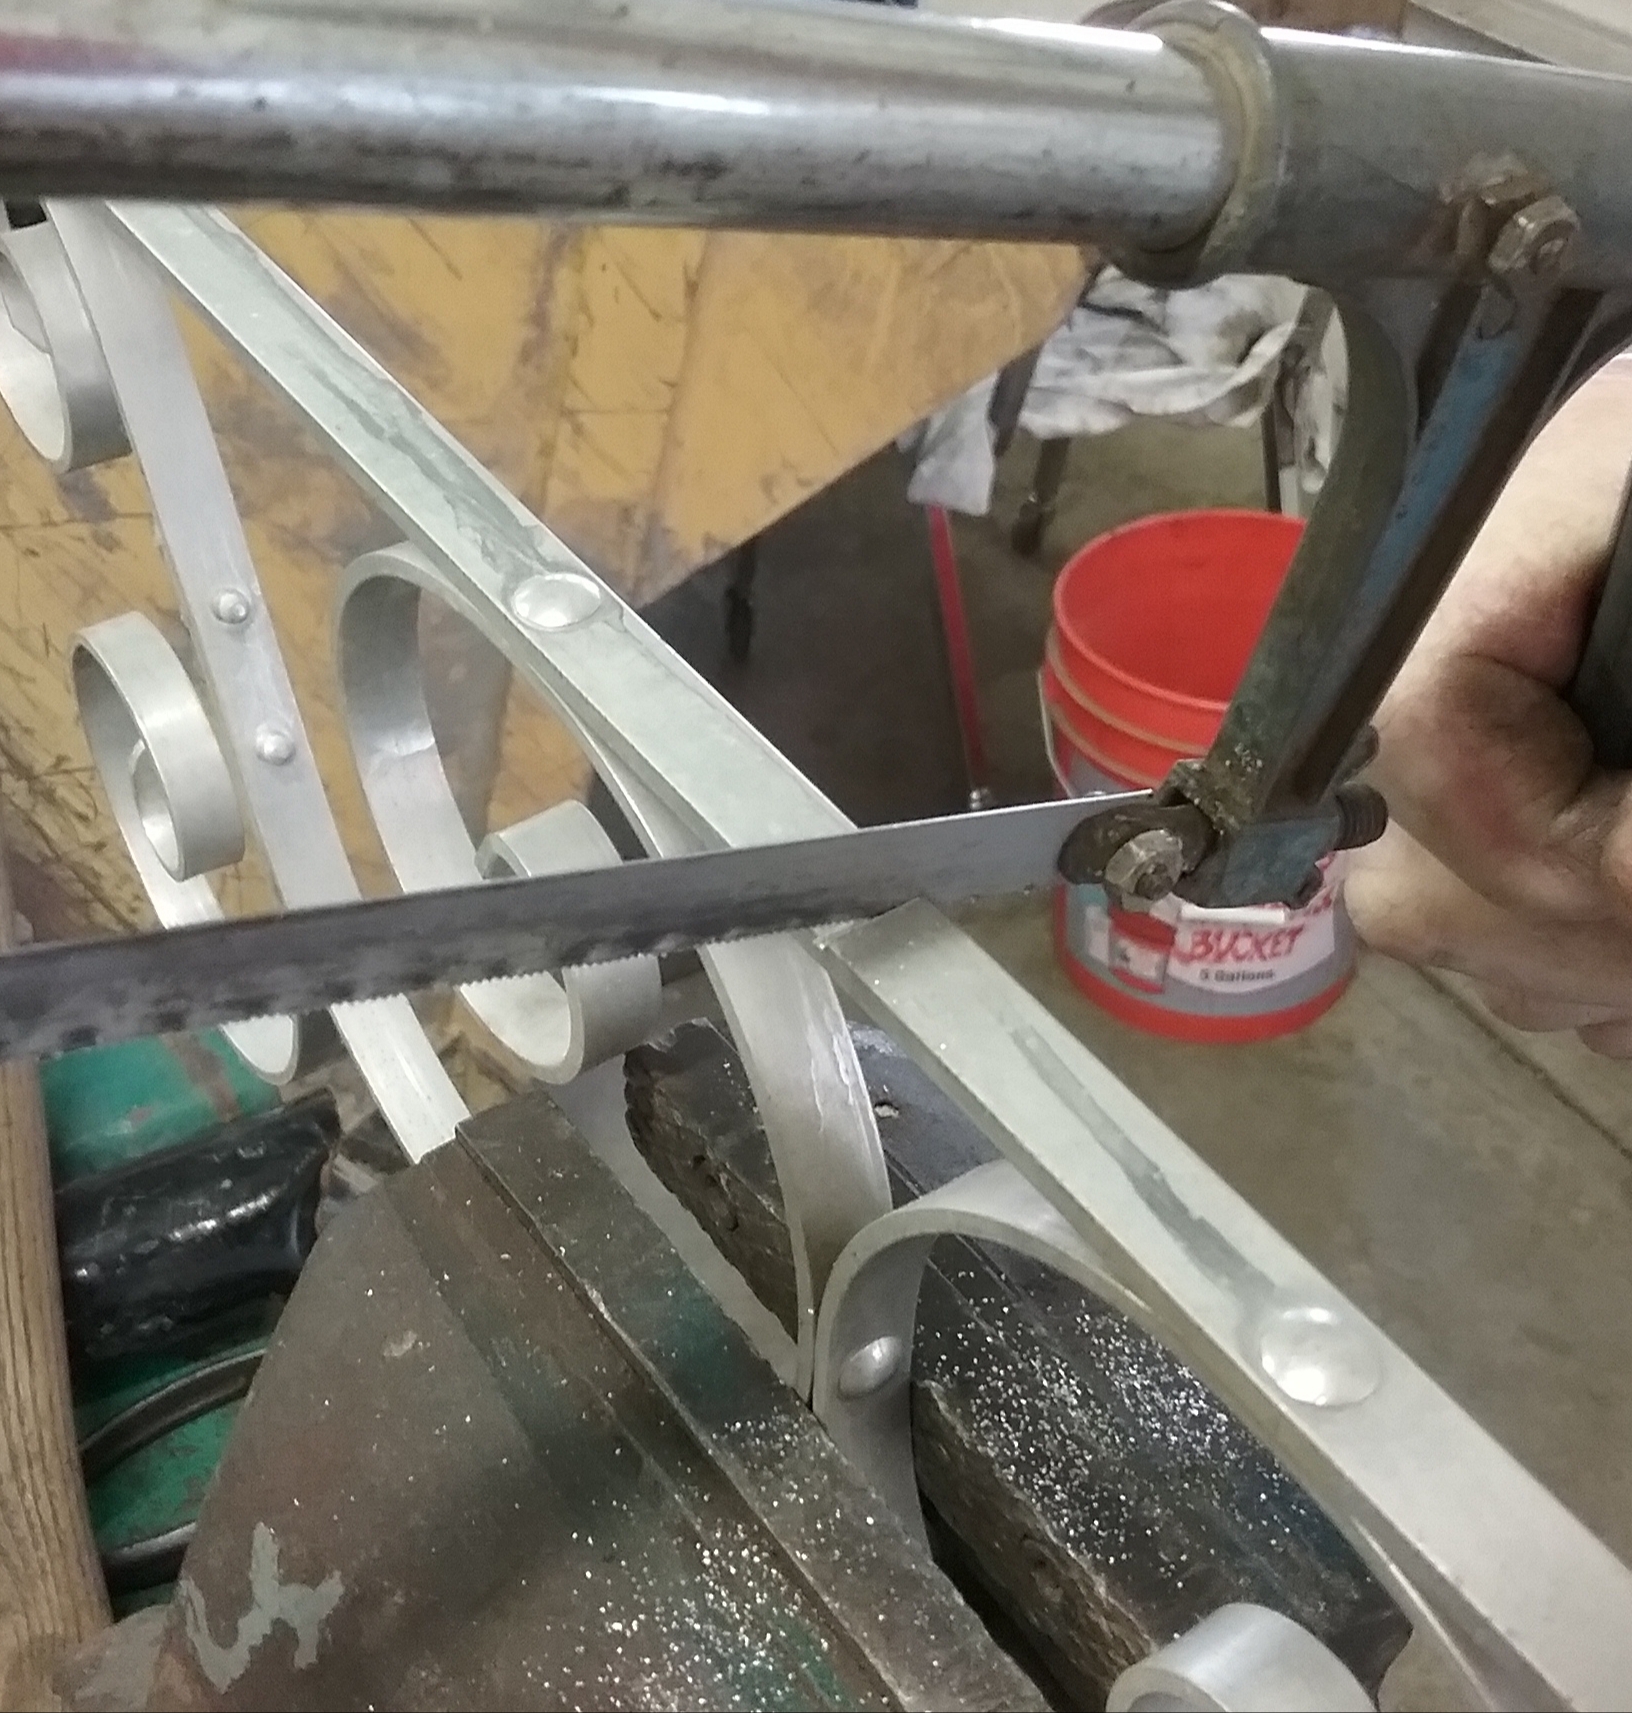
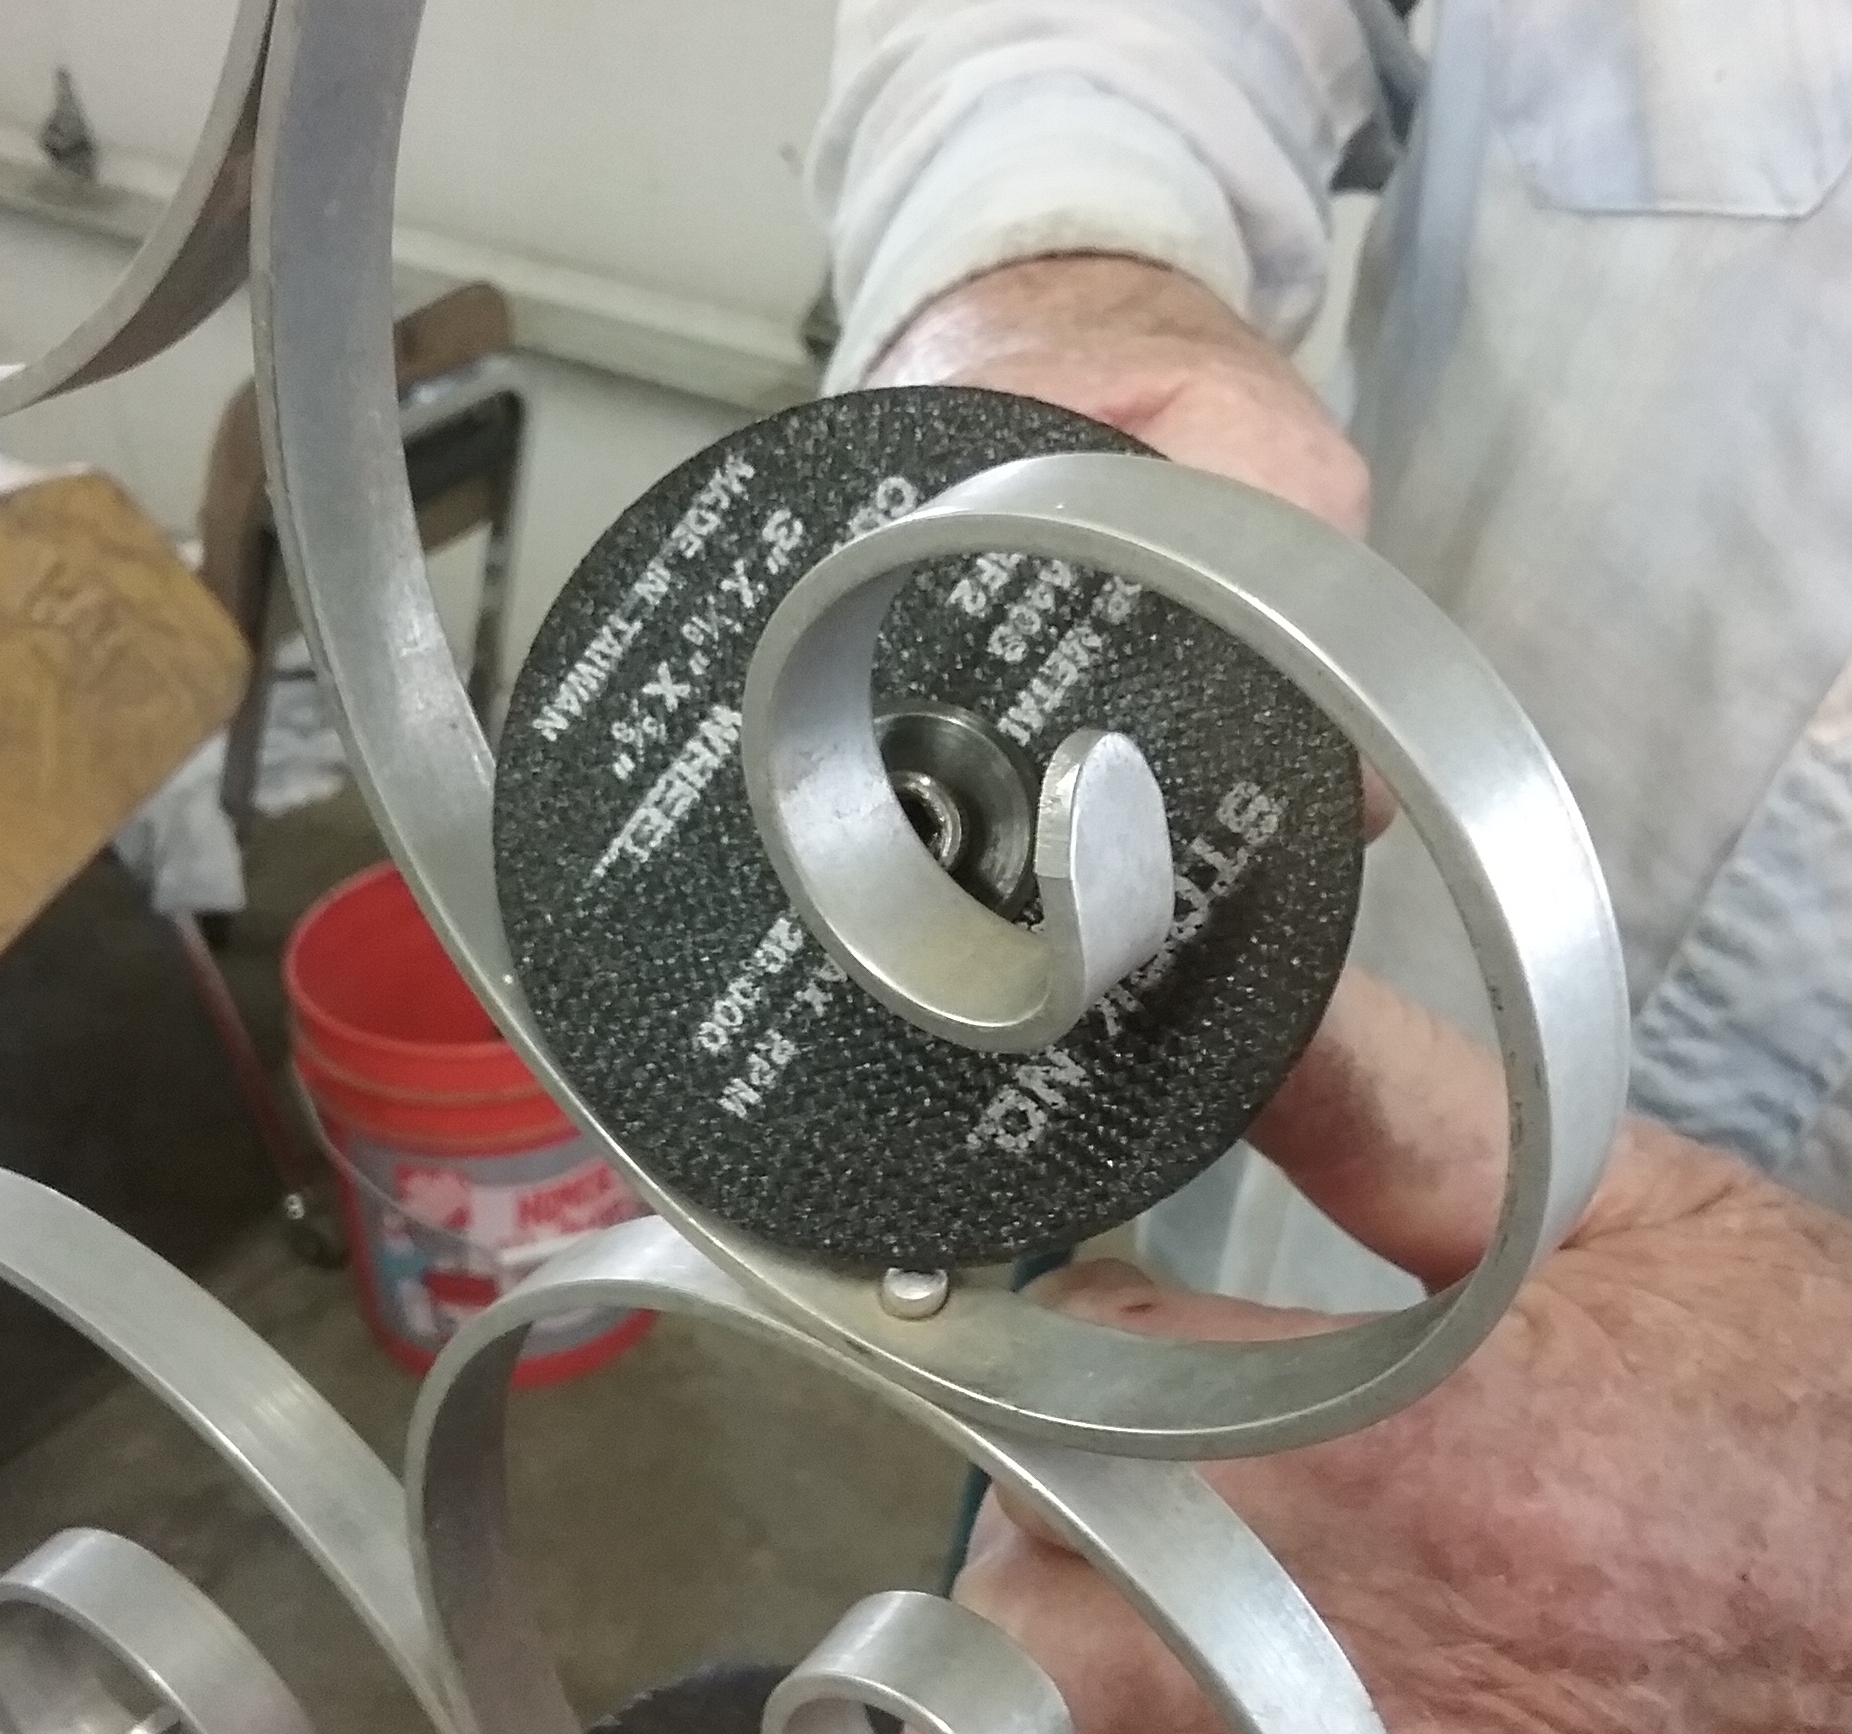
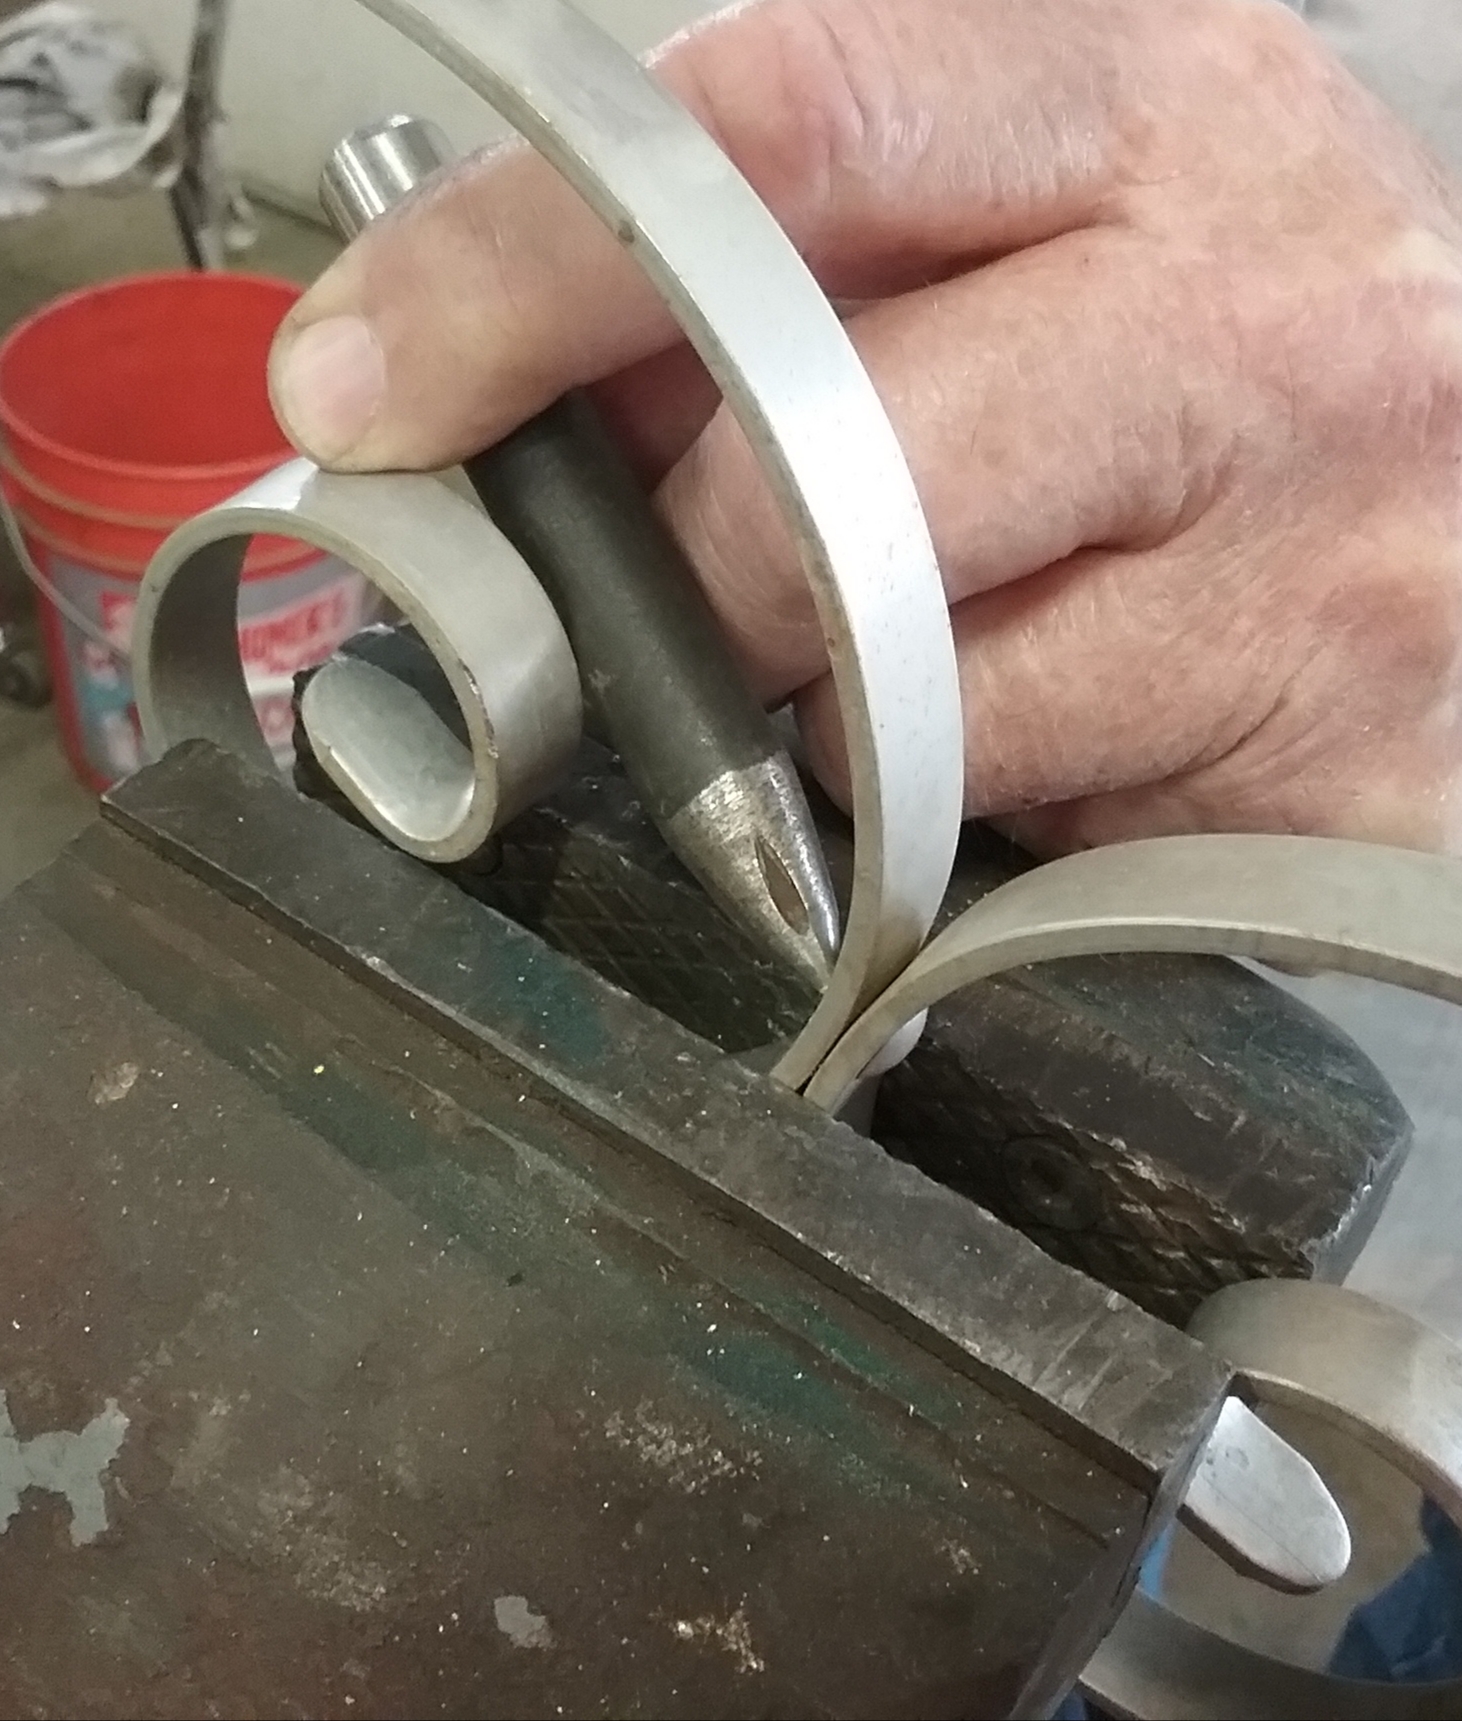
For pieces, we used a hack saw to cut the guard in half before grinding off the head of the rivets with a cutting wheel on a die grinder. Thank goodness my husband is much handier with a cutting wheel than I am. He got the job done smoothly and didn’t leave hardly any marks on the aluminum. After grinding, tap the rivet out with a punch if needed.


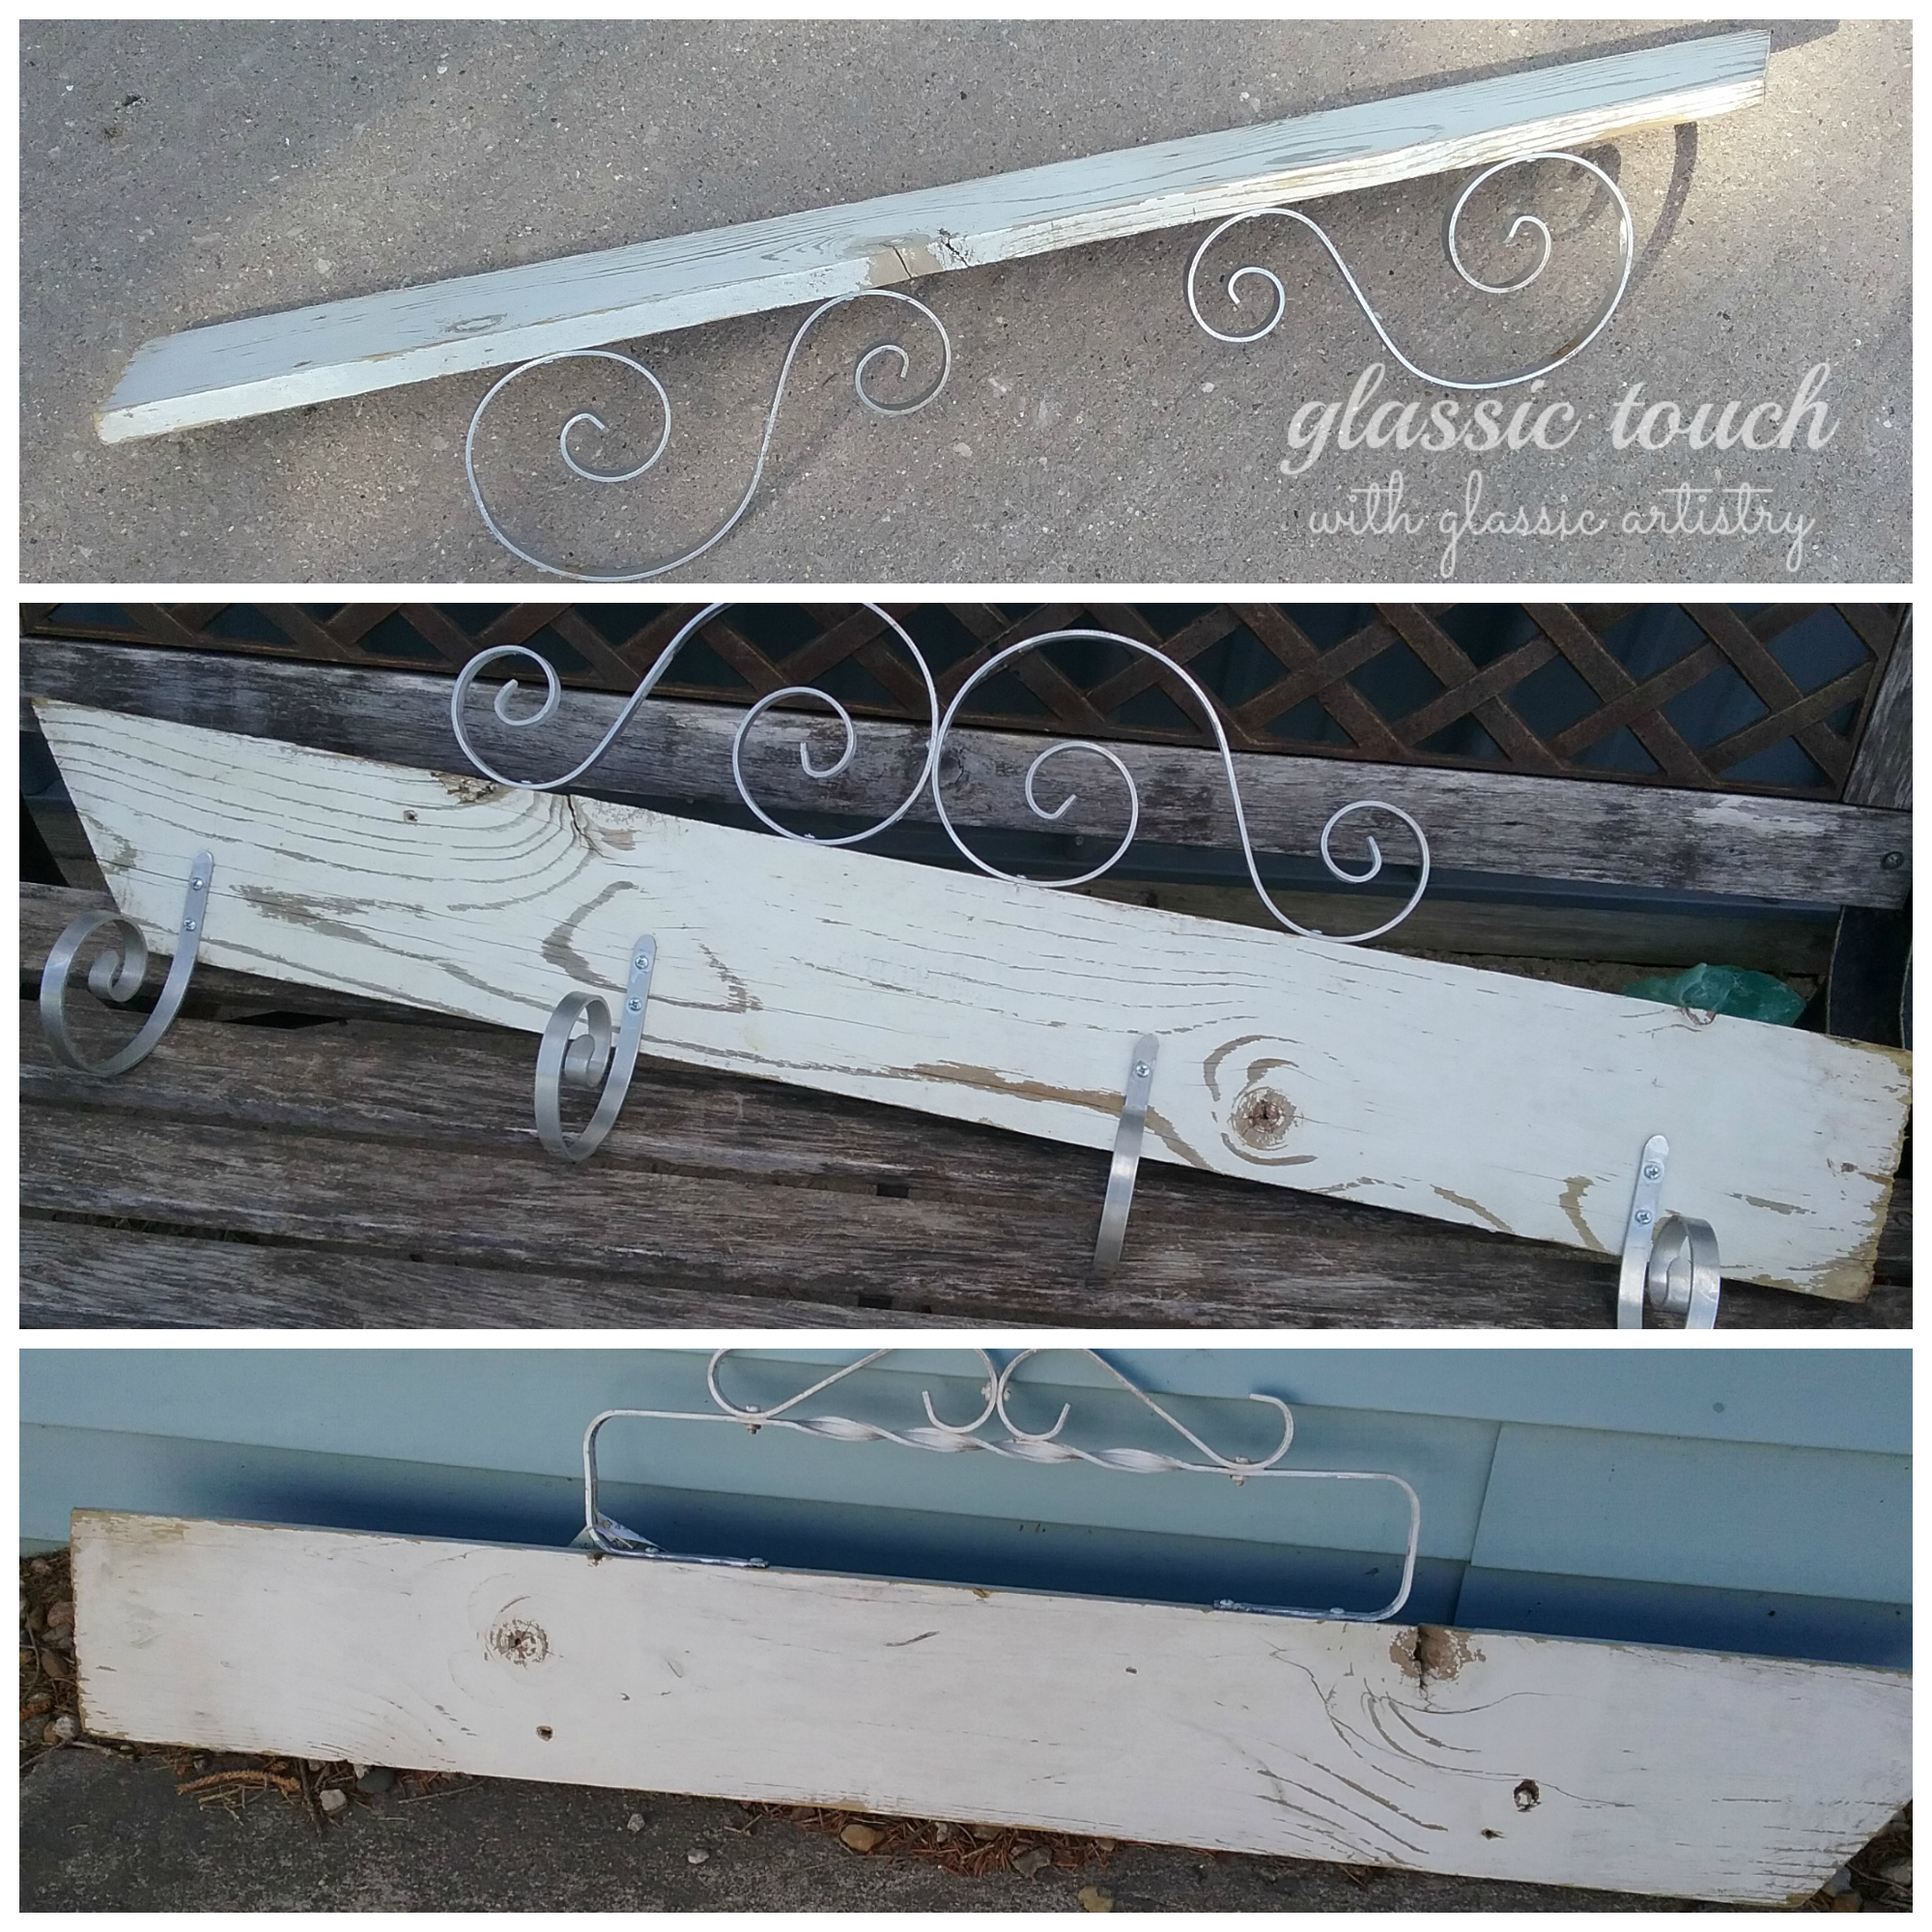
Scroll pieces were attached with small wood screws, in the holes already provided, to quickly dress up old boards for indoor/outdoor decor. If more holes are needed, I would suggest using a drill press. The one with the hooks is my favorite. The top board can be hung with the scrolls up or down, away or against the wall. The scroll piece on the bottom board is from an old mailbox; wouldn’t it be fun to personalize?

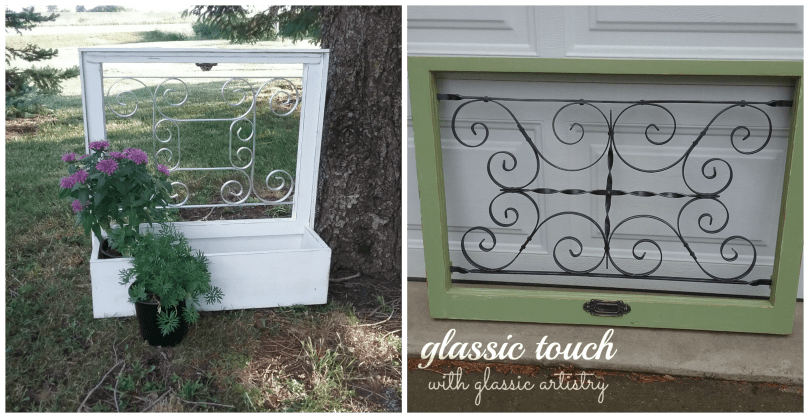
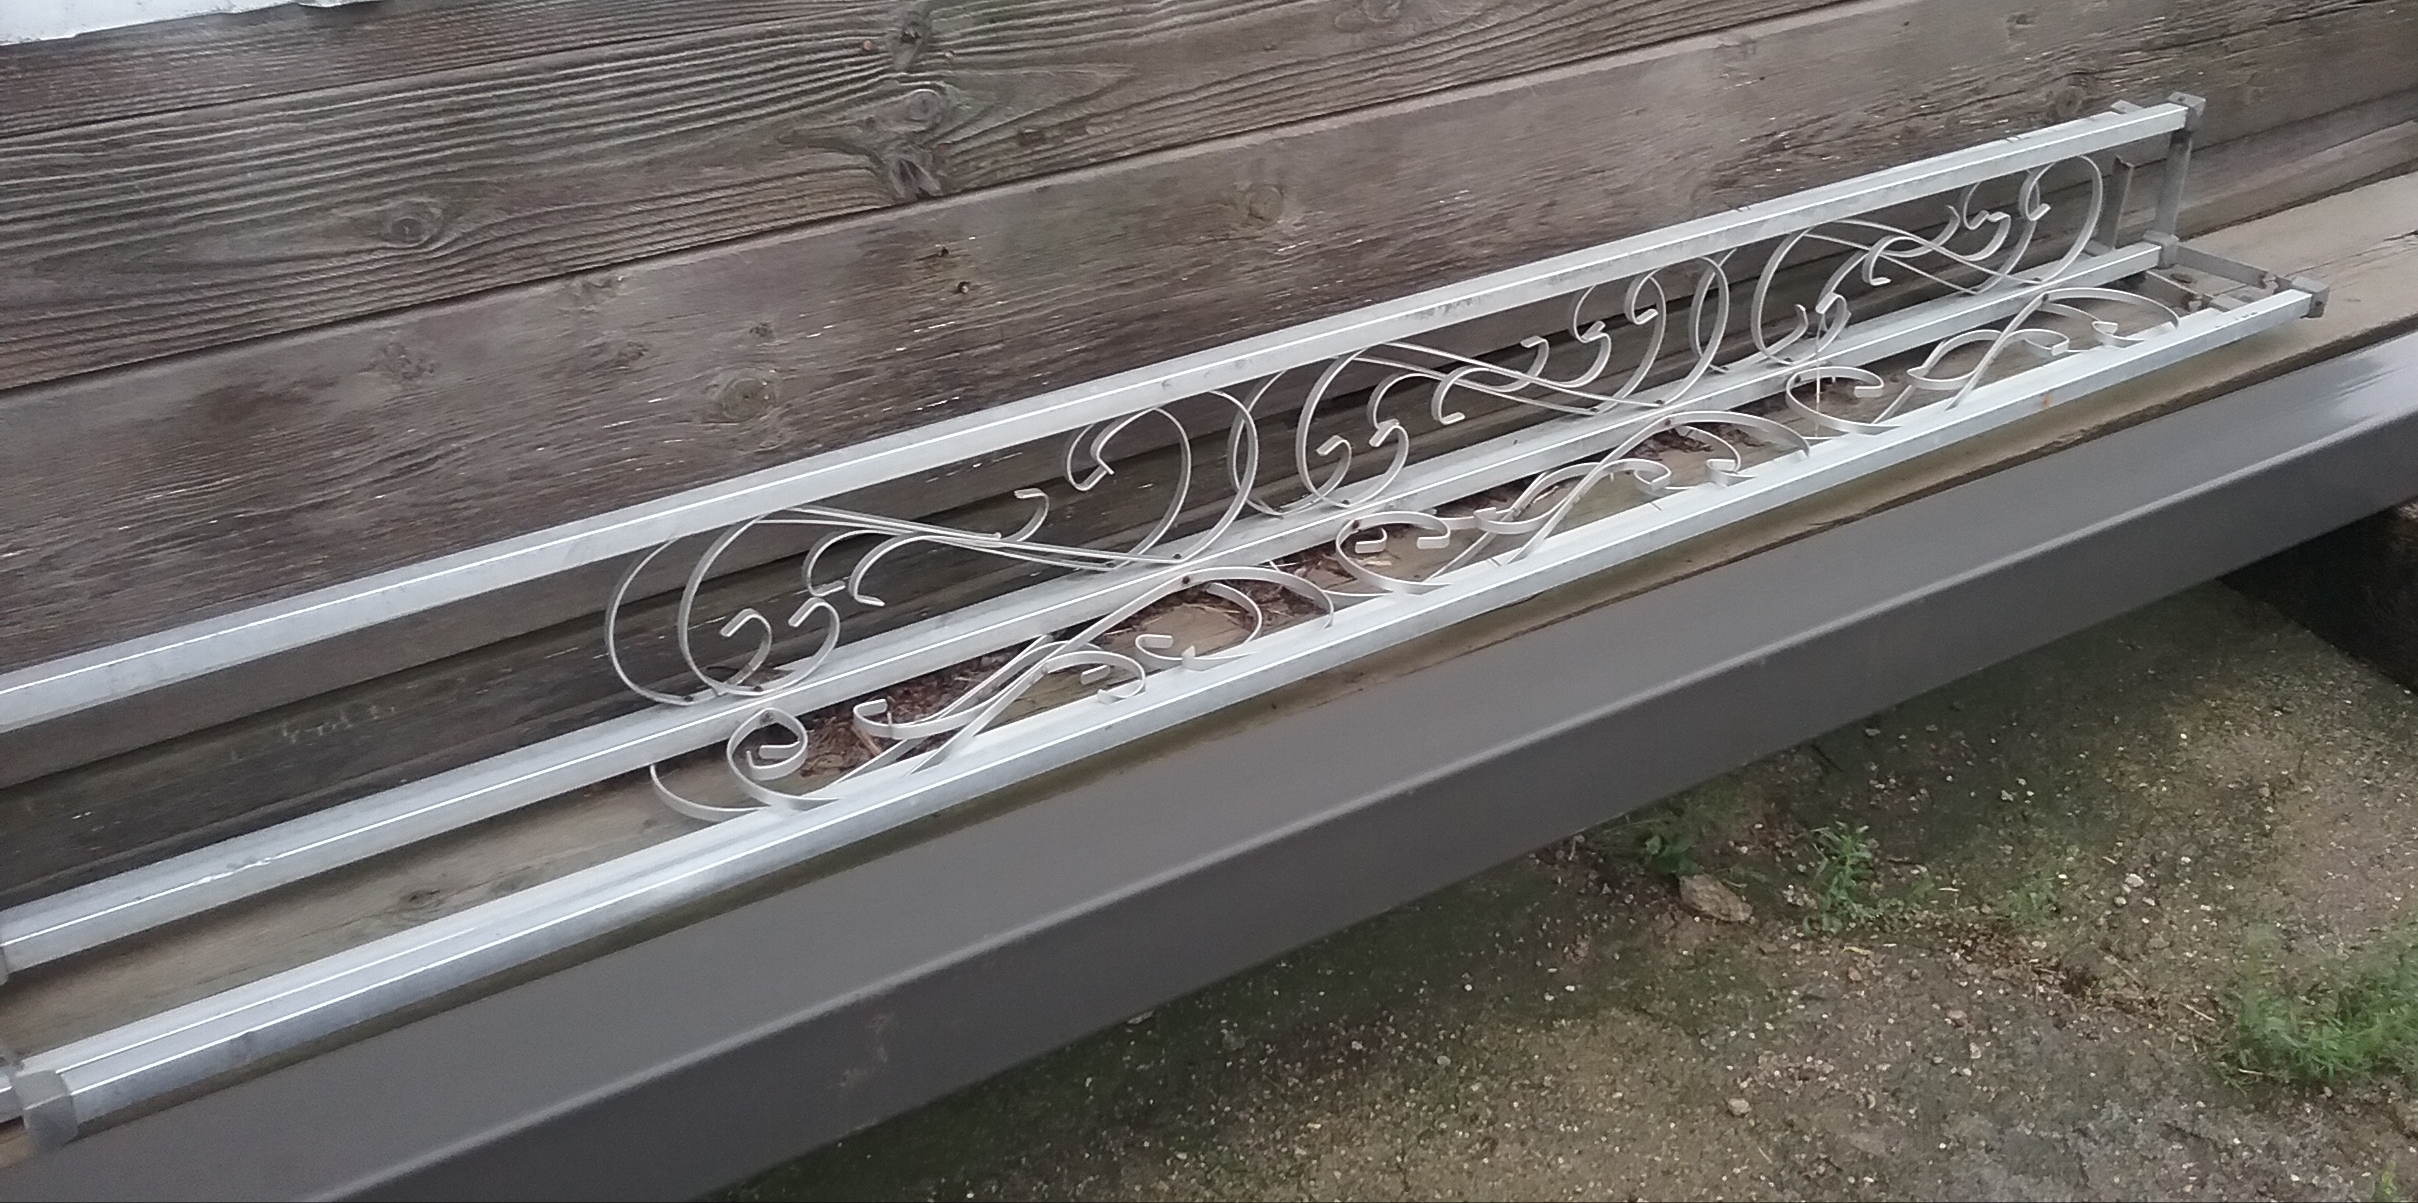
Two guards, with their side ends cut off, fit nicely into a couple empty window panes to make a flower box and decorative wall panel. To achieve an iron finish, one guard was first spray painted with Rust-oleum gray hammered paint, let dry, brushed with a black glaze, then burnished with #1 steel wool. The aluminum guard pieces each ran a different direction on these two projects. With no rule of thumb to follow on how to secure them, I did what was easiest for me. E6000 was used to glue short lengths of 1/4″ wood into the notch of the flower box guard, held tightly in place with tape until completely dry, then painted.


A notch was cut from a very thin piece of wood to fit over the painted guard on the wall panel, glued and nailed in place with a brad nailer, then touched up with paint.


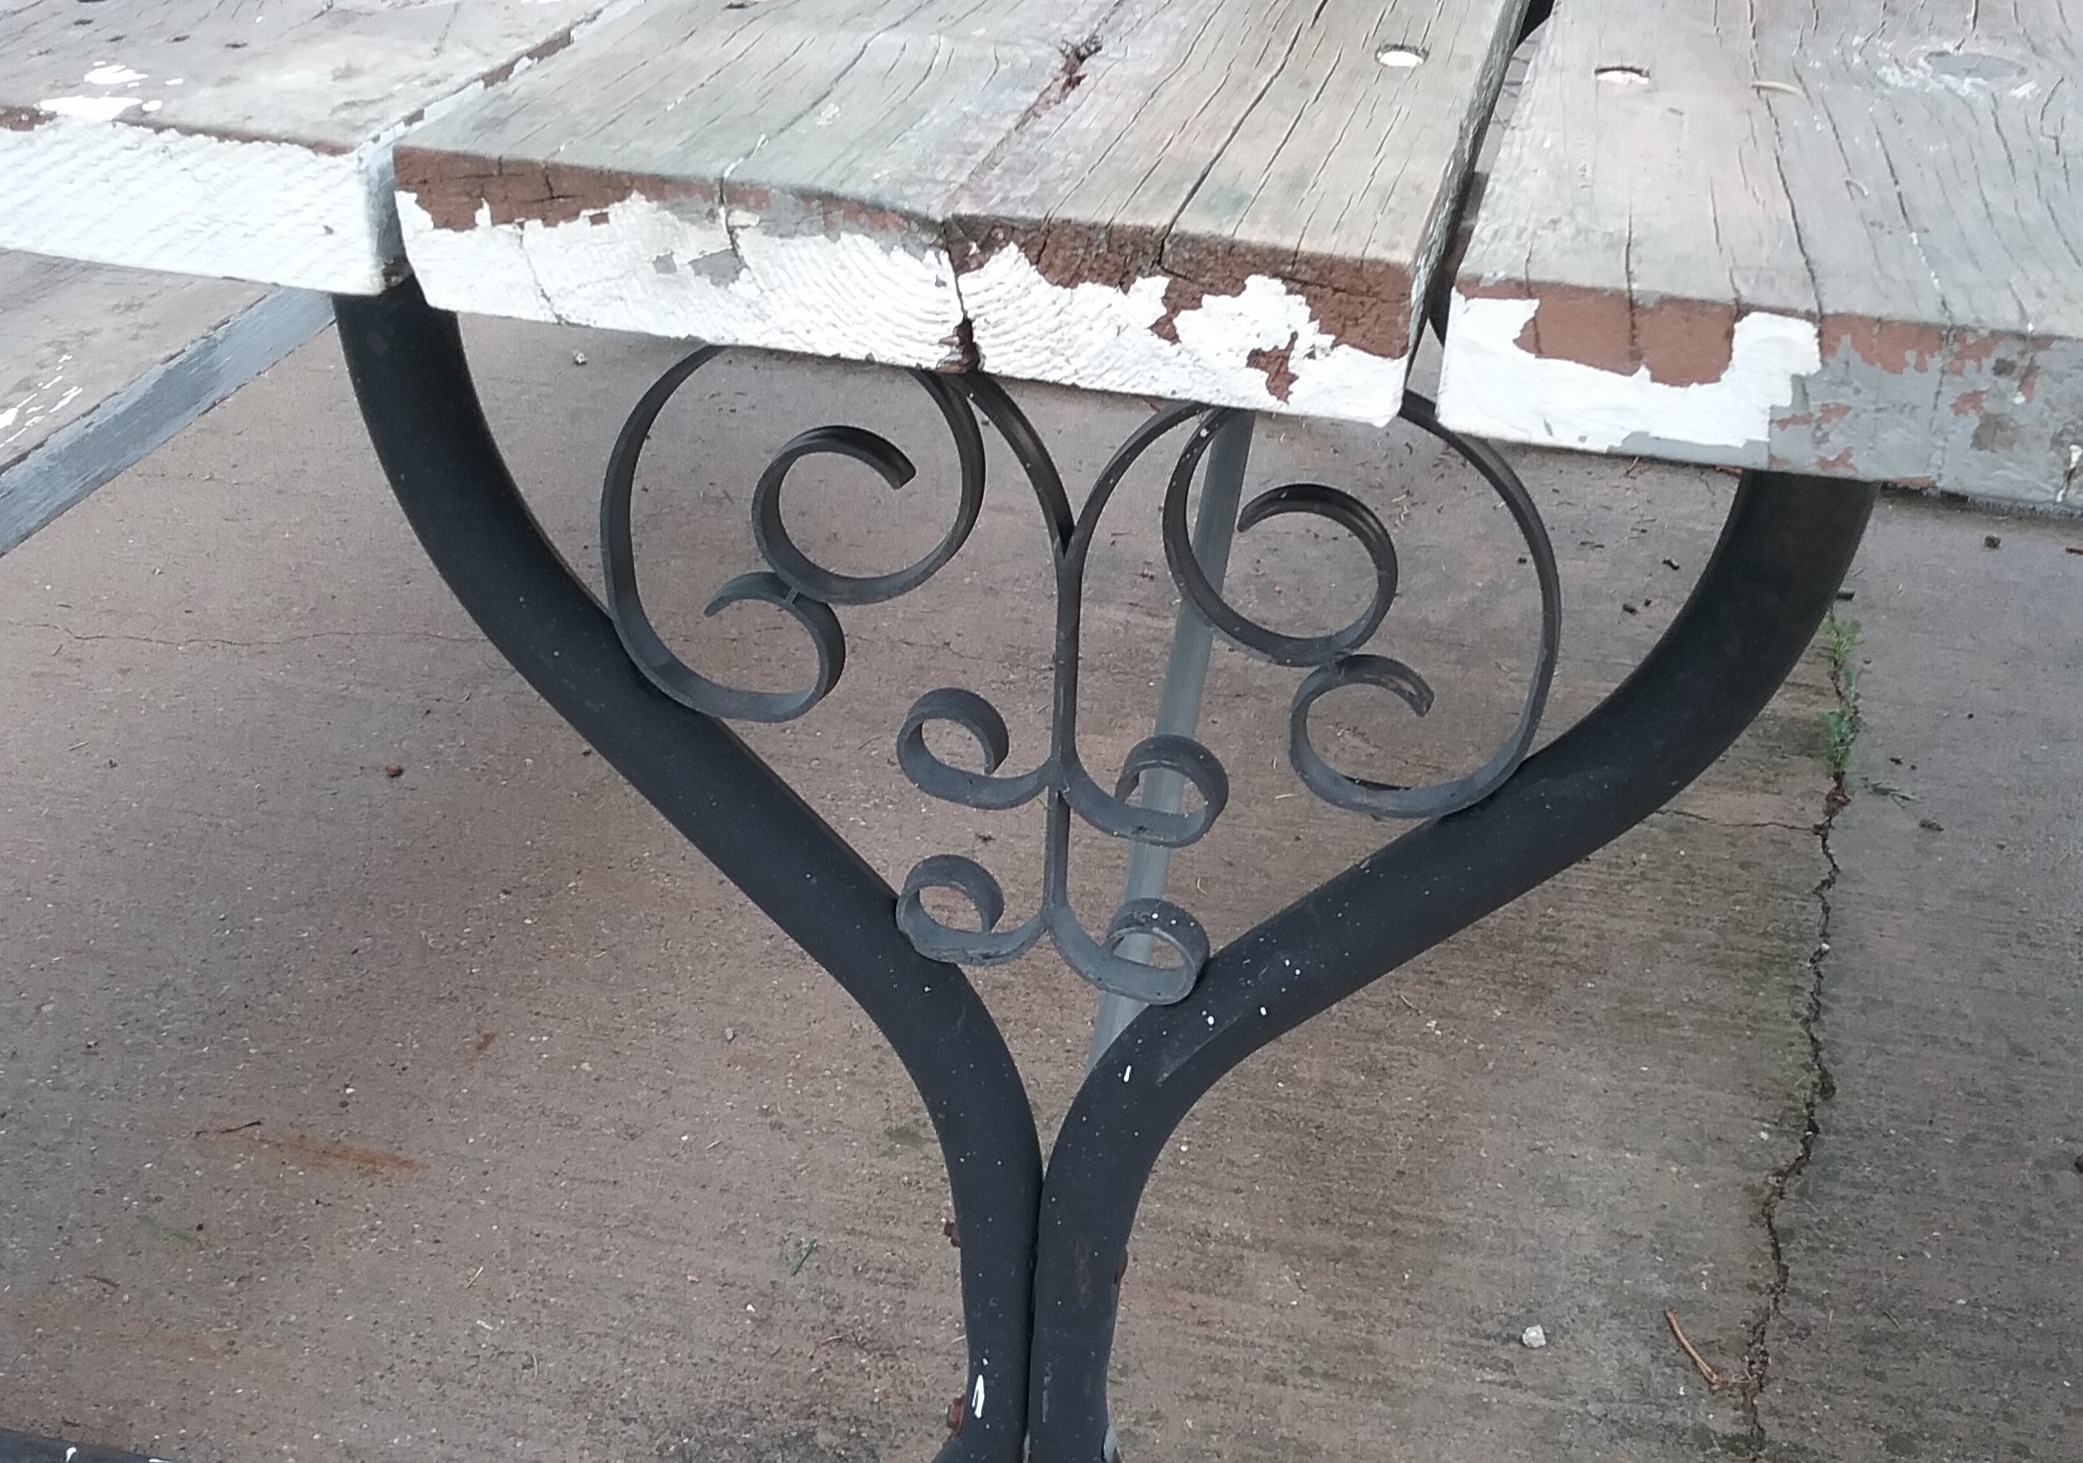
Anyone eager to go scroll hunting yet? I know I’ll be toting home more if I come across them while out gathering this summer. Don’t limit your search to door guards, give those old picnic tables and awning legs a good look over too!


I’ll be back with an update on those brackets ……..