With the summer dates on the calendar filling in almost quicker than I can write them down, I’ve had to kick my garage clearing project into a higher gear. A tag sale is being planned at my home toward the end of May so there’s going to be a lot of crazy going on here for the next 2 ½ weeks. Fun crazy!
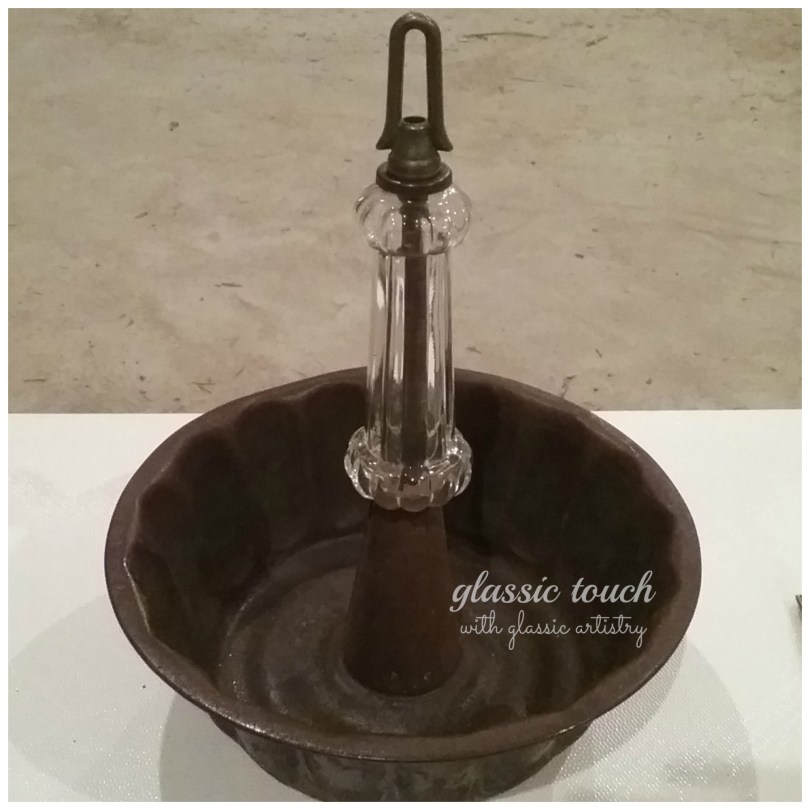
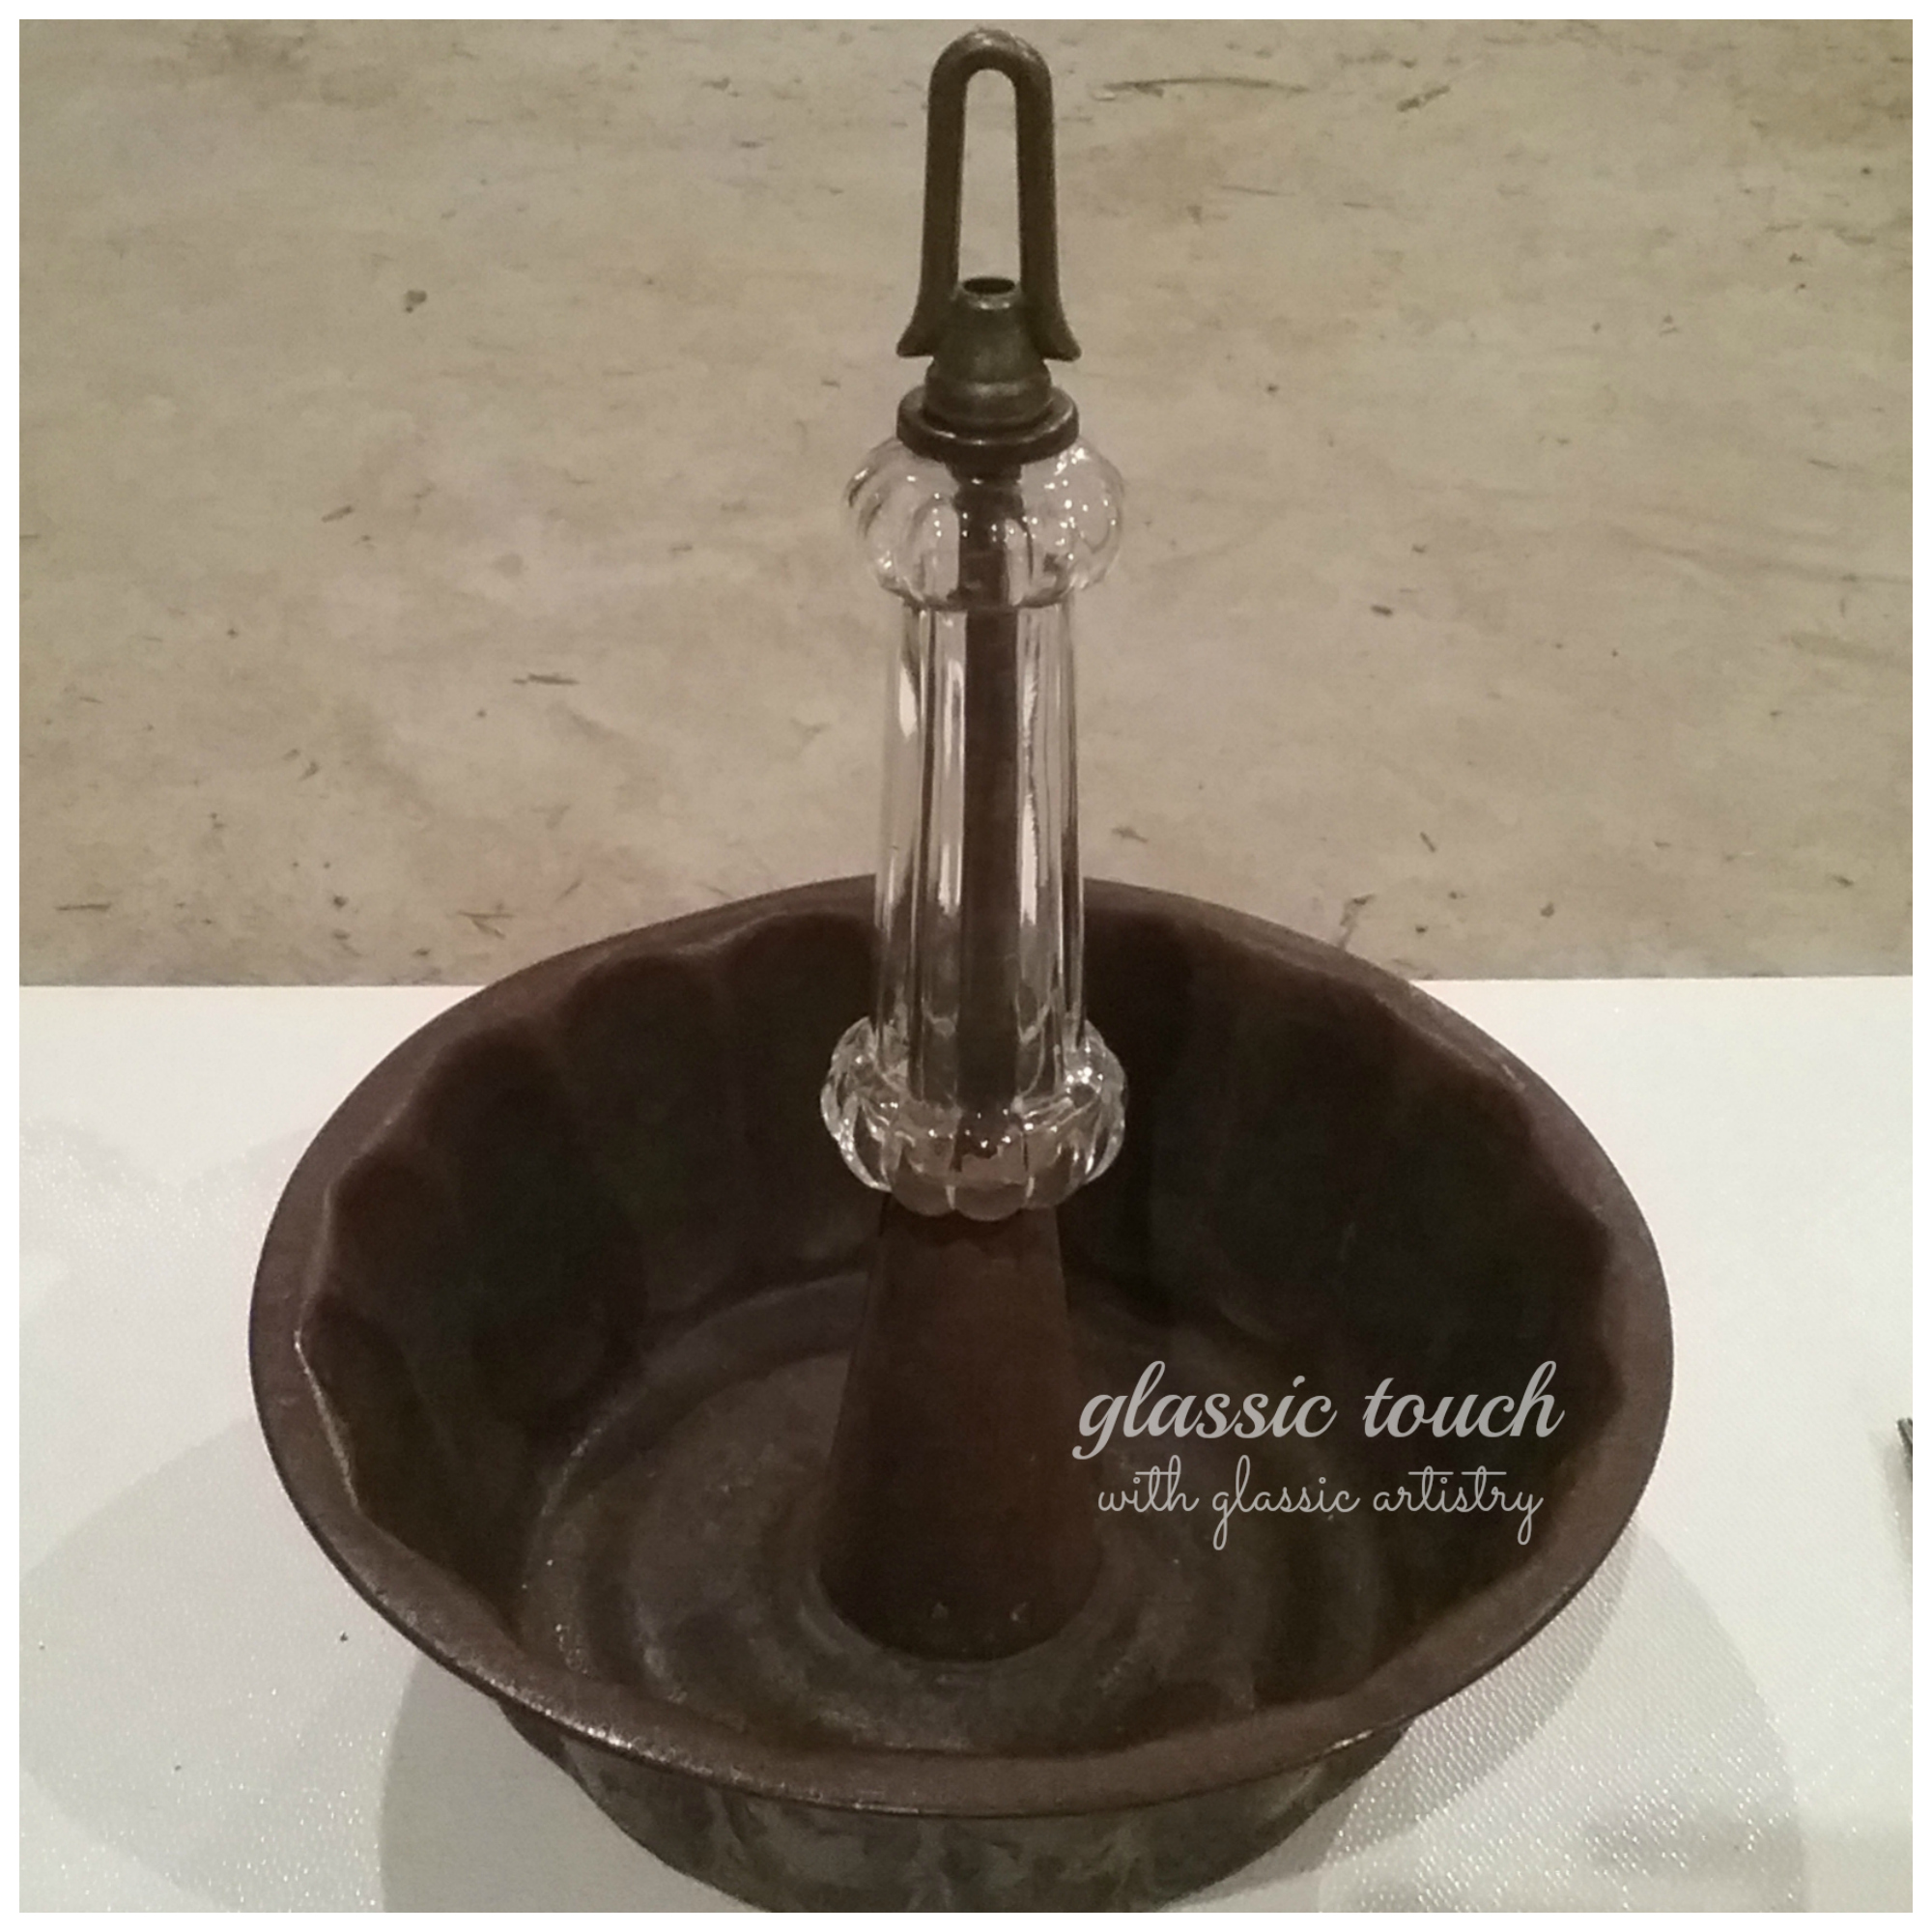
But first, I wanted to put up a quick post on a newly finished display tray created from a vintage springform baking pan, a brown ceramic insulator, metal lamp ring, wooden finial, and a zinc Ball canning lid stacked on a short length of ⅜” threaded rod. It may seem like an odd assortment of pieces, but the different materials melded together beautifully.
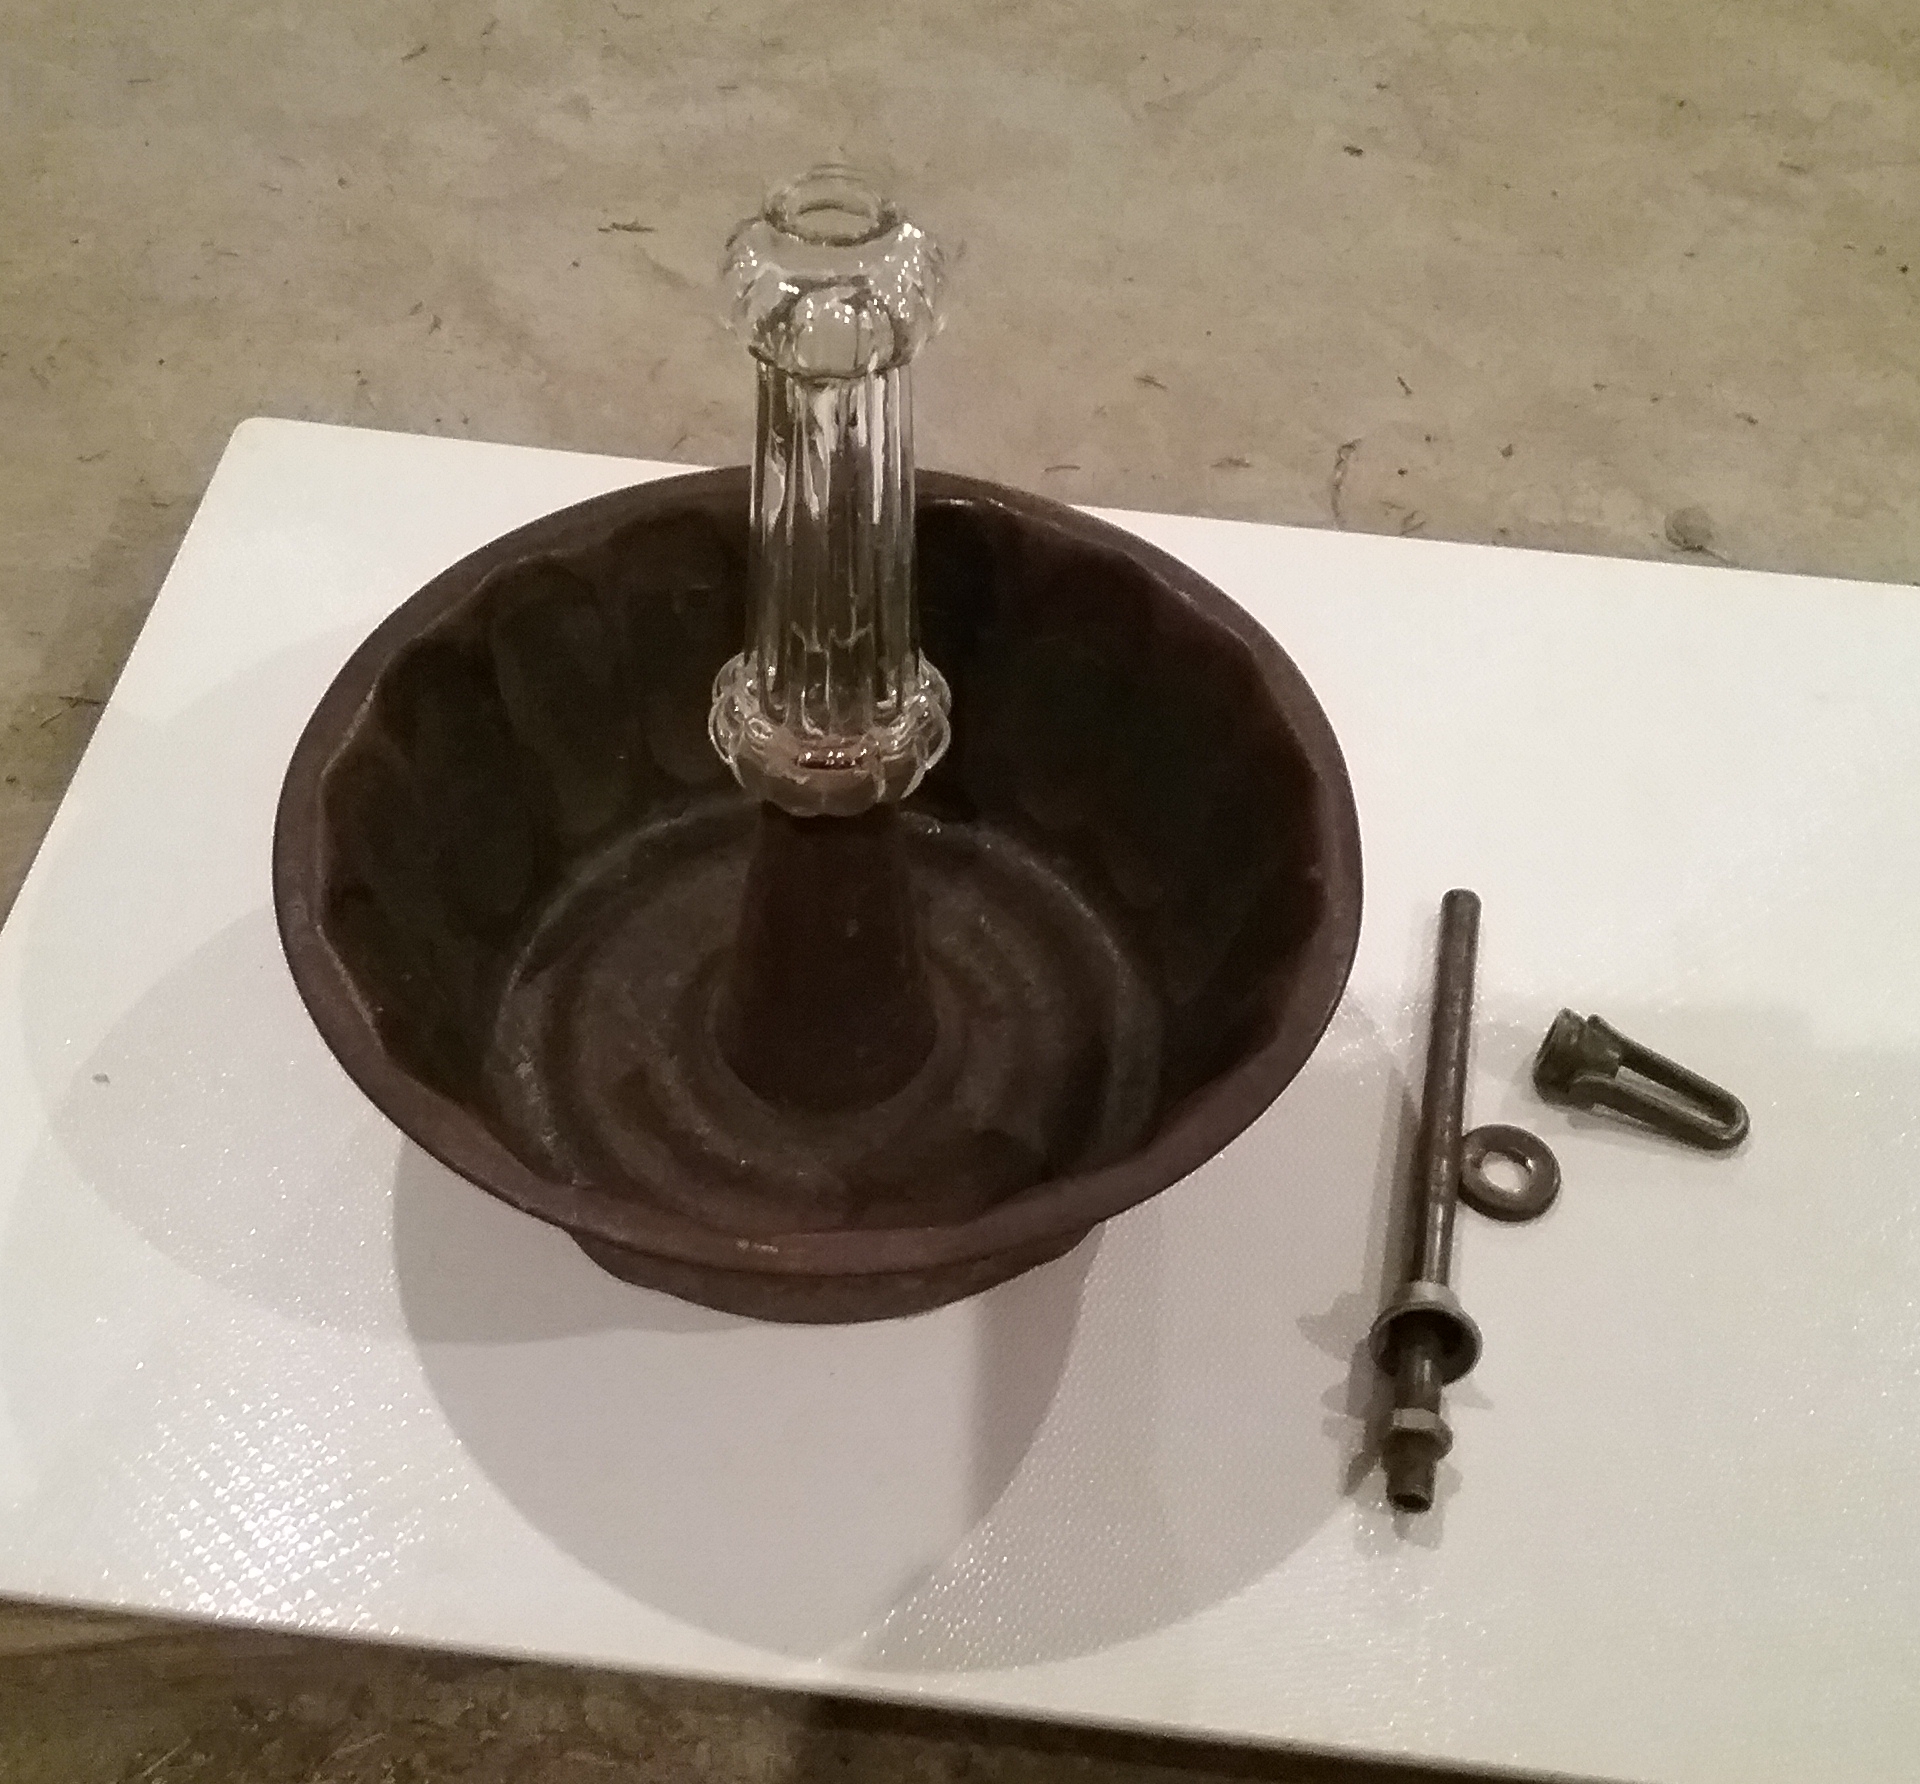
Before starting, a ⅜” hole was drilled in the center of the zinc lid, and a 11/32” hole was drilled in the bottom center of the wooden finial. The hole in the finial is slightly smaller so the threaded rod will fit snugly. An assortment of washers and nuts were found to fit the threaded rod.
As with previous projects, all pieces were cleaned well and waxed before laying them out to be assembled.
The finial was constructed first.
The rounded end of the insulator sits into the pan’s center opening.Insert the rod down through the insulator. Turn the piece upside down, holding the finial firmly. Drop the zinc lid in place over the rod, add washers and the nut; tighten. The insulator may shift as you tighten. If so, loosen the nut and adjust.
The biggest challenge I had with this piece was to find an item that would fit perfectly inside the pan center from the bottom and not slip through. The zinc lid was the solution for me.
The little metal piece on the outside of the pan was bent up slightly so it would not scratch any surfaces.
Would love to know your thoughts. Please feel free to comment and share. Until next time …
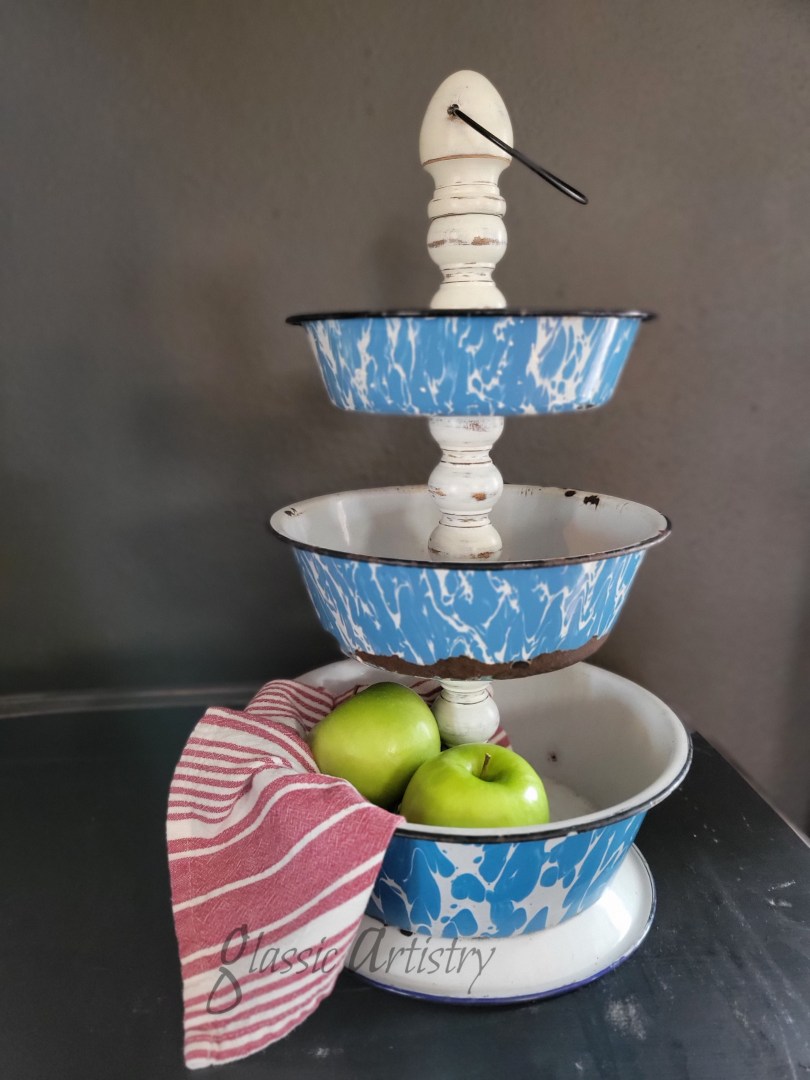
I’m back with my first tiered tray. As mentioned in my previous post, I’m working to clear out old before bringing in new. I would like to use as many of my gathered pieces as possible, so you may be seeing several small projects over the next two months and occasional tag sales at my home to help achieve my goal.
To get started, a collection of three worn enamelware pans were taken to the drill press and 5/16″ holes drilled through their centers. The enamel coating will chip away during drilling. I applied a coat of clear fingernail polish around the drilled holes and any chipped edges of the enamel to prevent any further chipping. A clear sealer could be used for this step too. After the fingernail polish was dry, the enamelware was waxed and buffed.
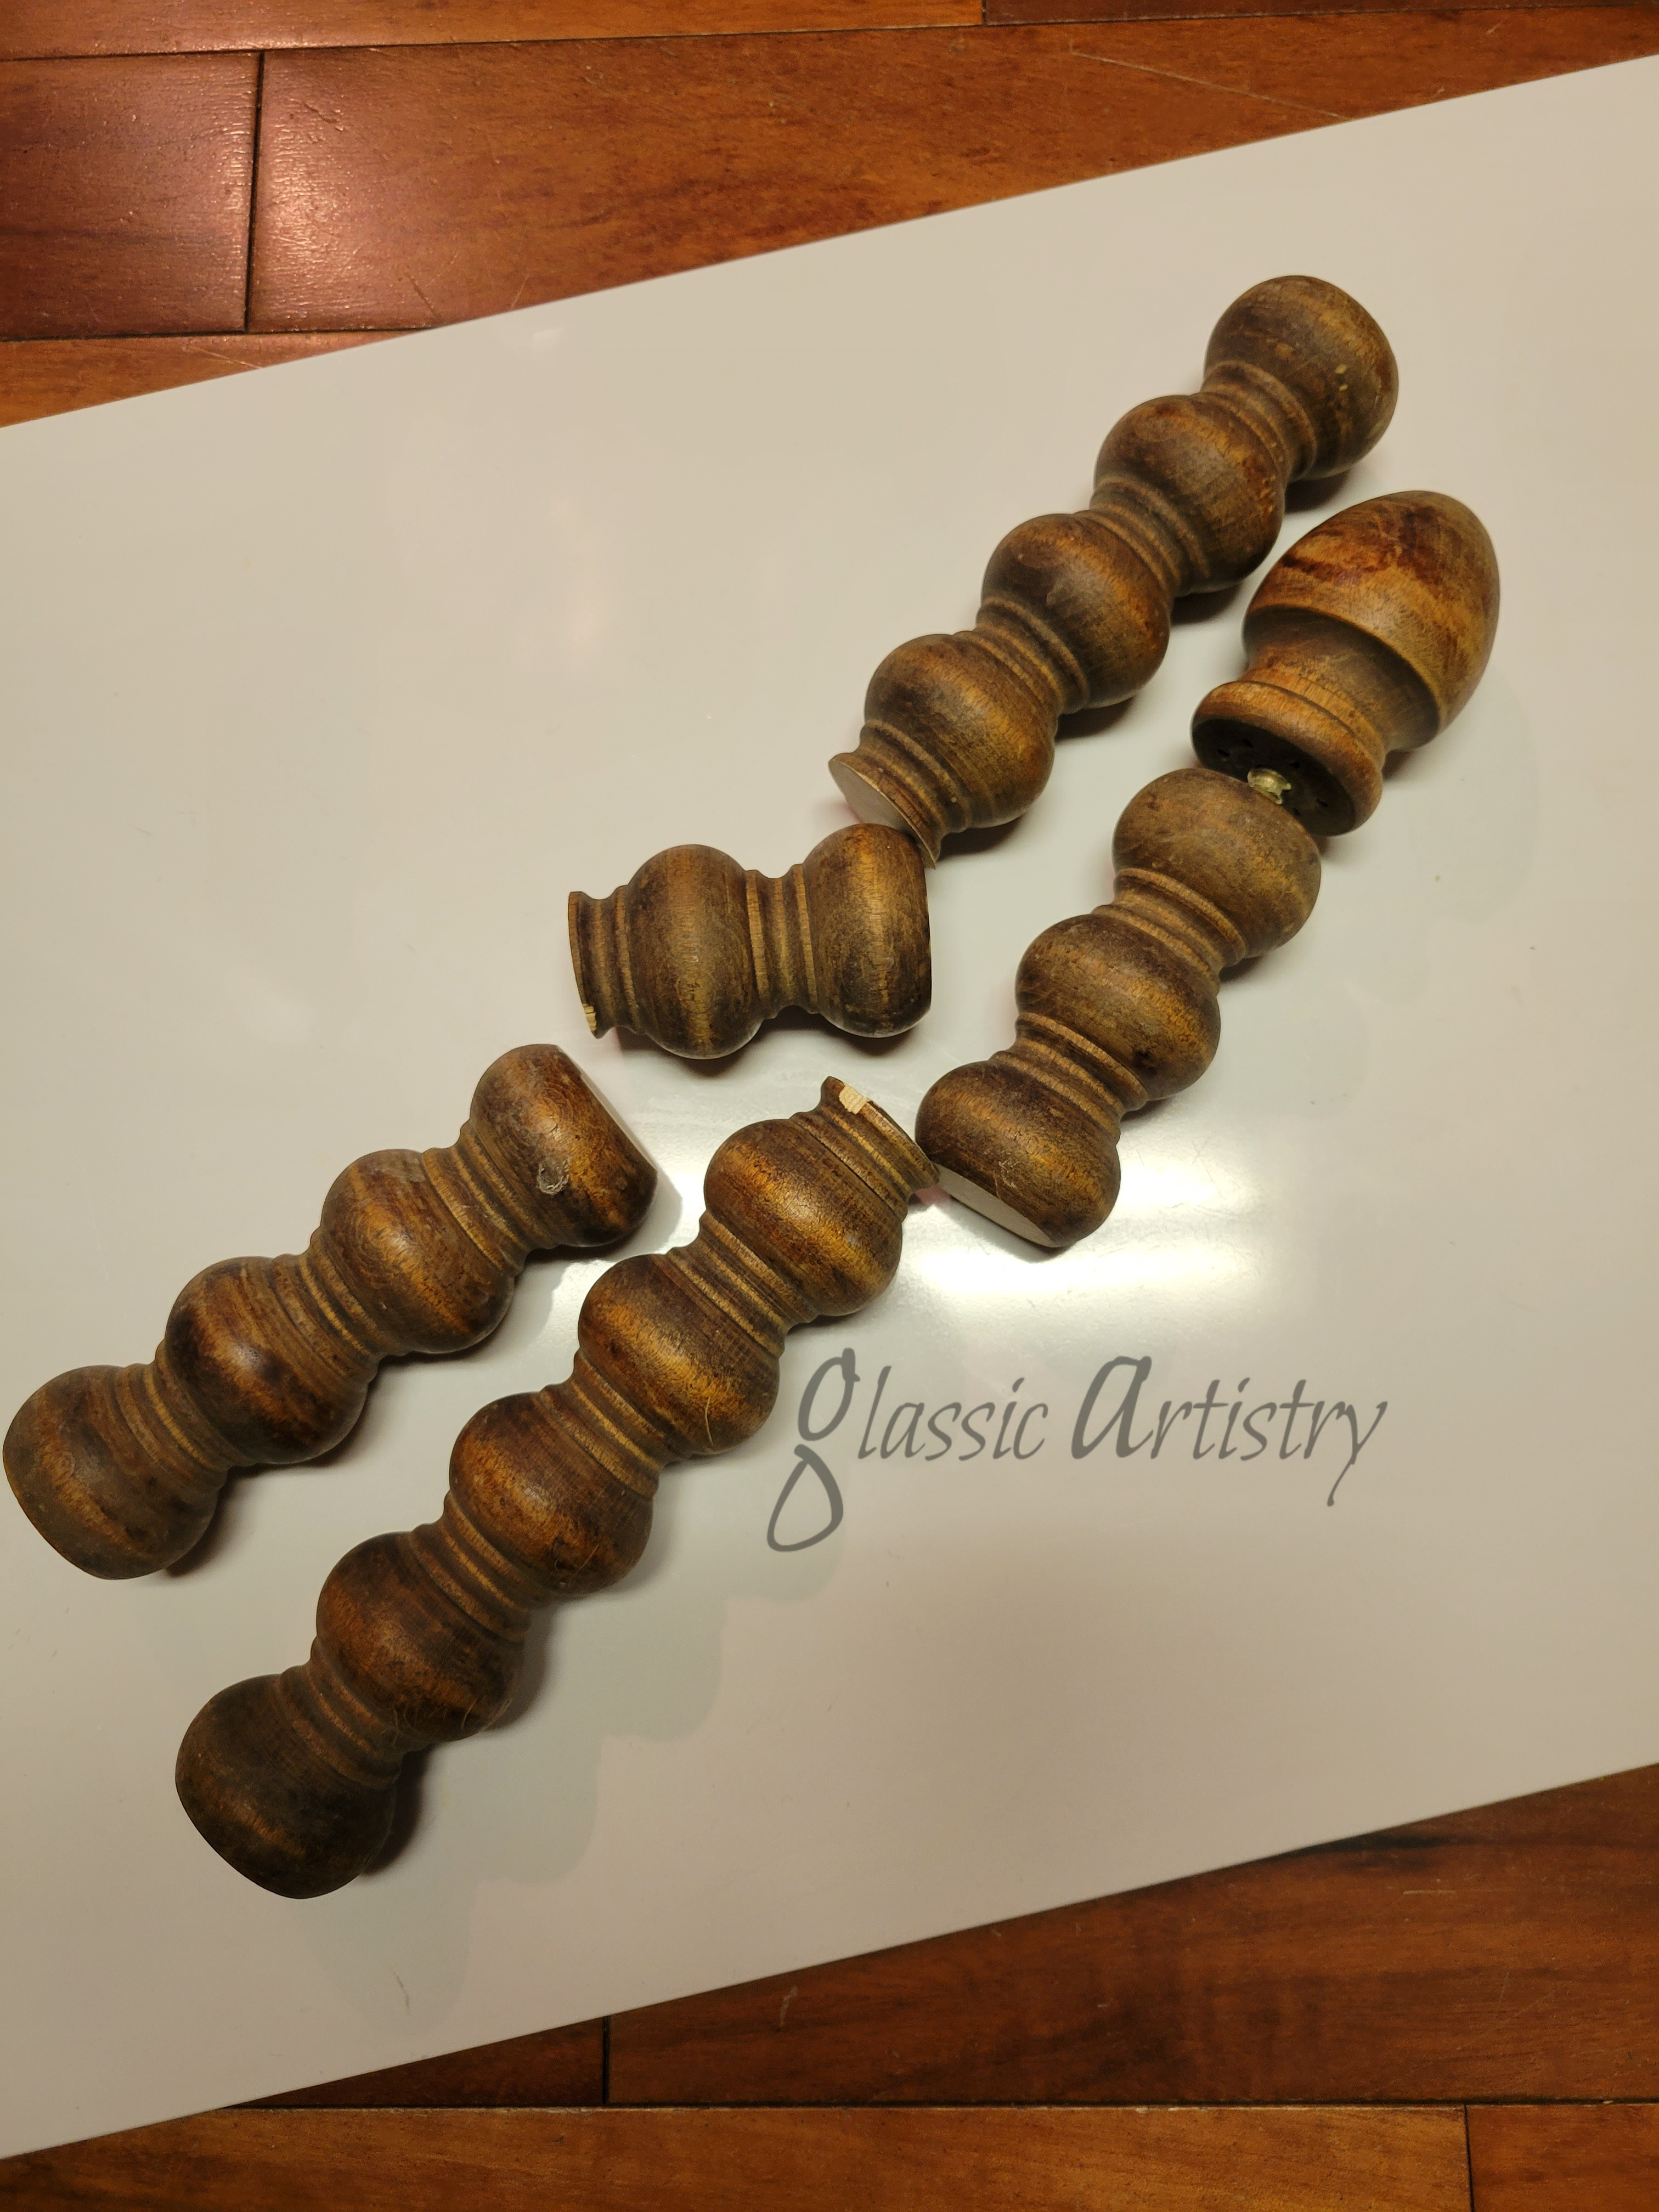
I chose two decorative spindles to use as spacers between the pans. I thought their design worked well, they already had center holes in one end, and one already had a finial; perfect. After cutting them to the lengths desired, they went to the drill press and a hole was drilled through the length of them using the original hole as a guide. They were sanded, painted, and sealed.
A piece of 5/16″ threaded rod was cut to the length needed and a washer and nut found to fit it.
The pieces were slipped on the rod, working from the top down and secured with the washer and nut.
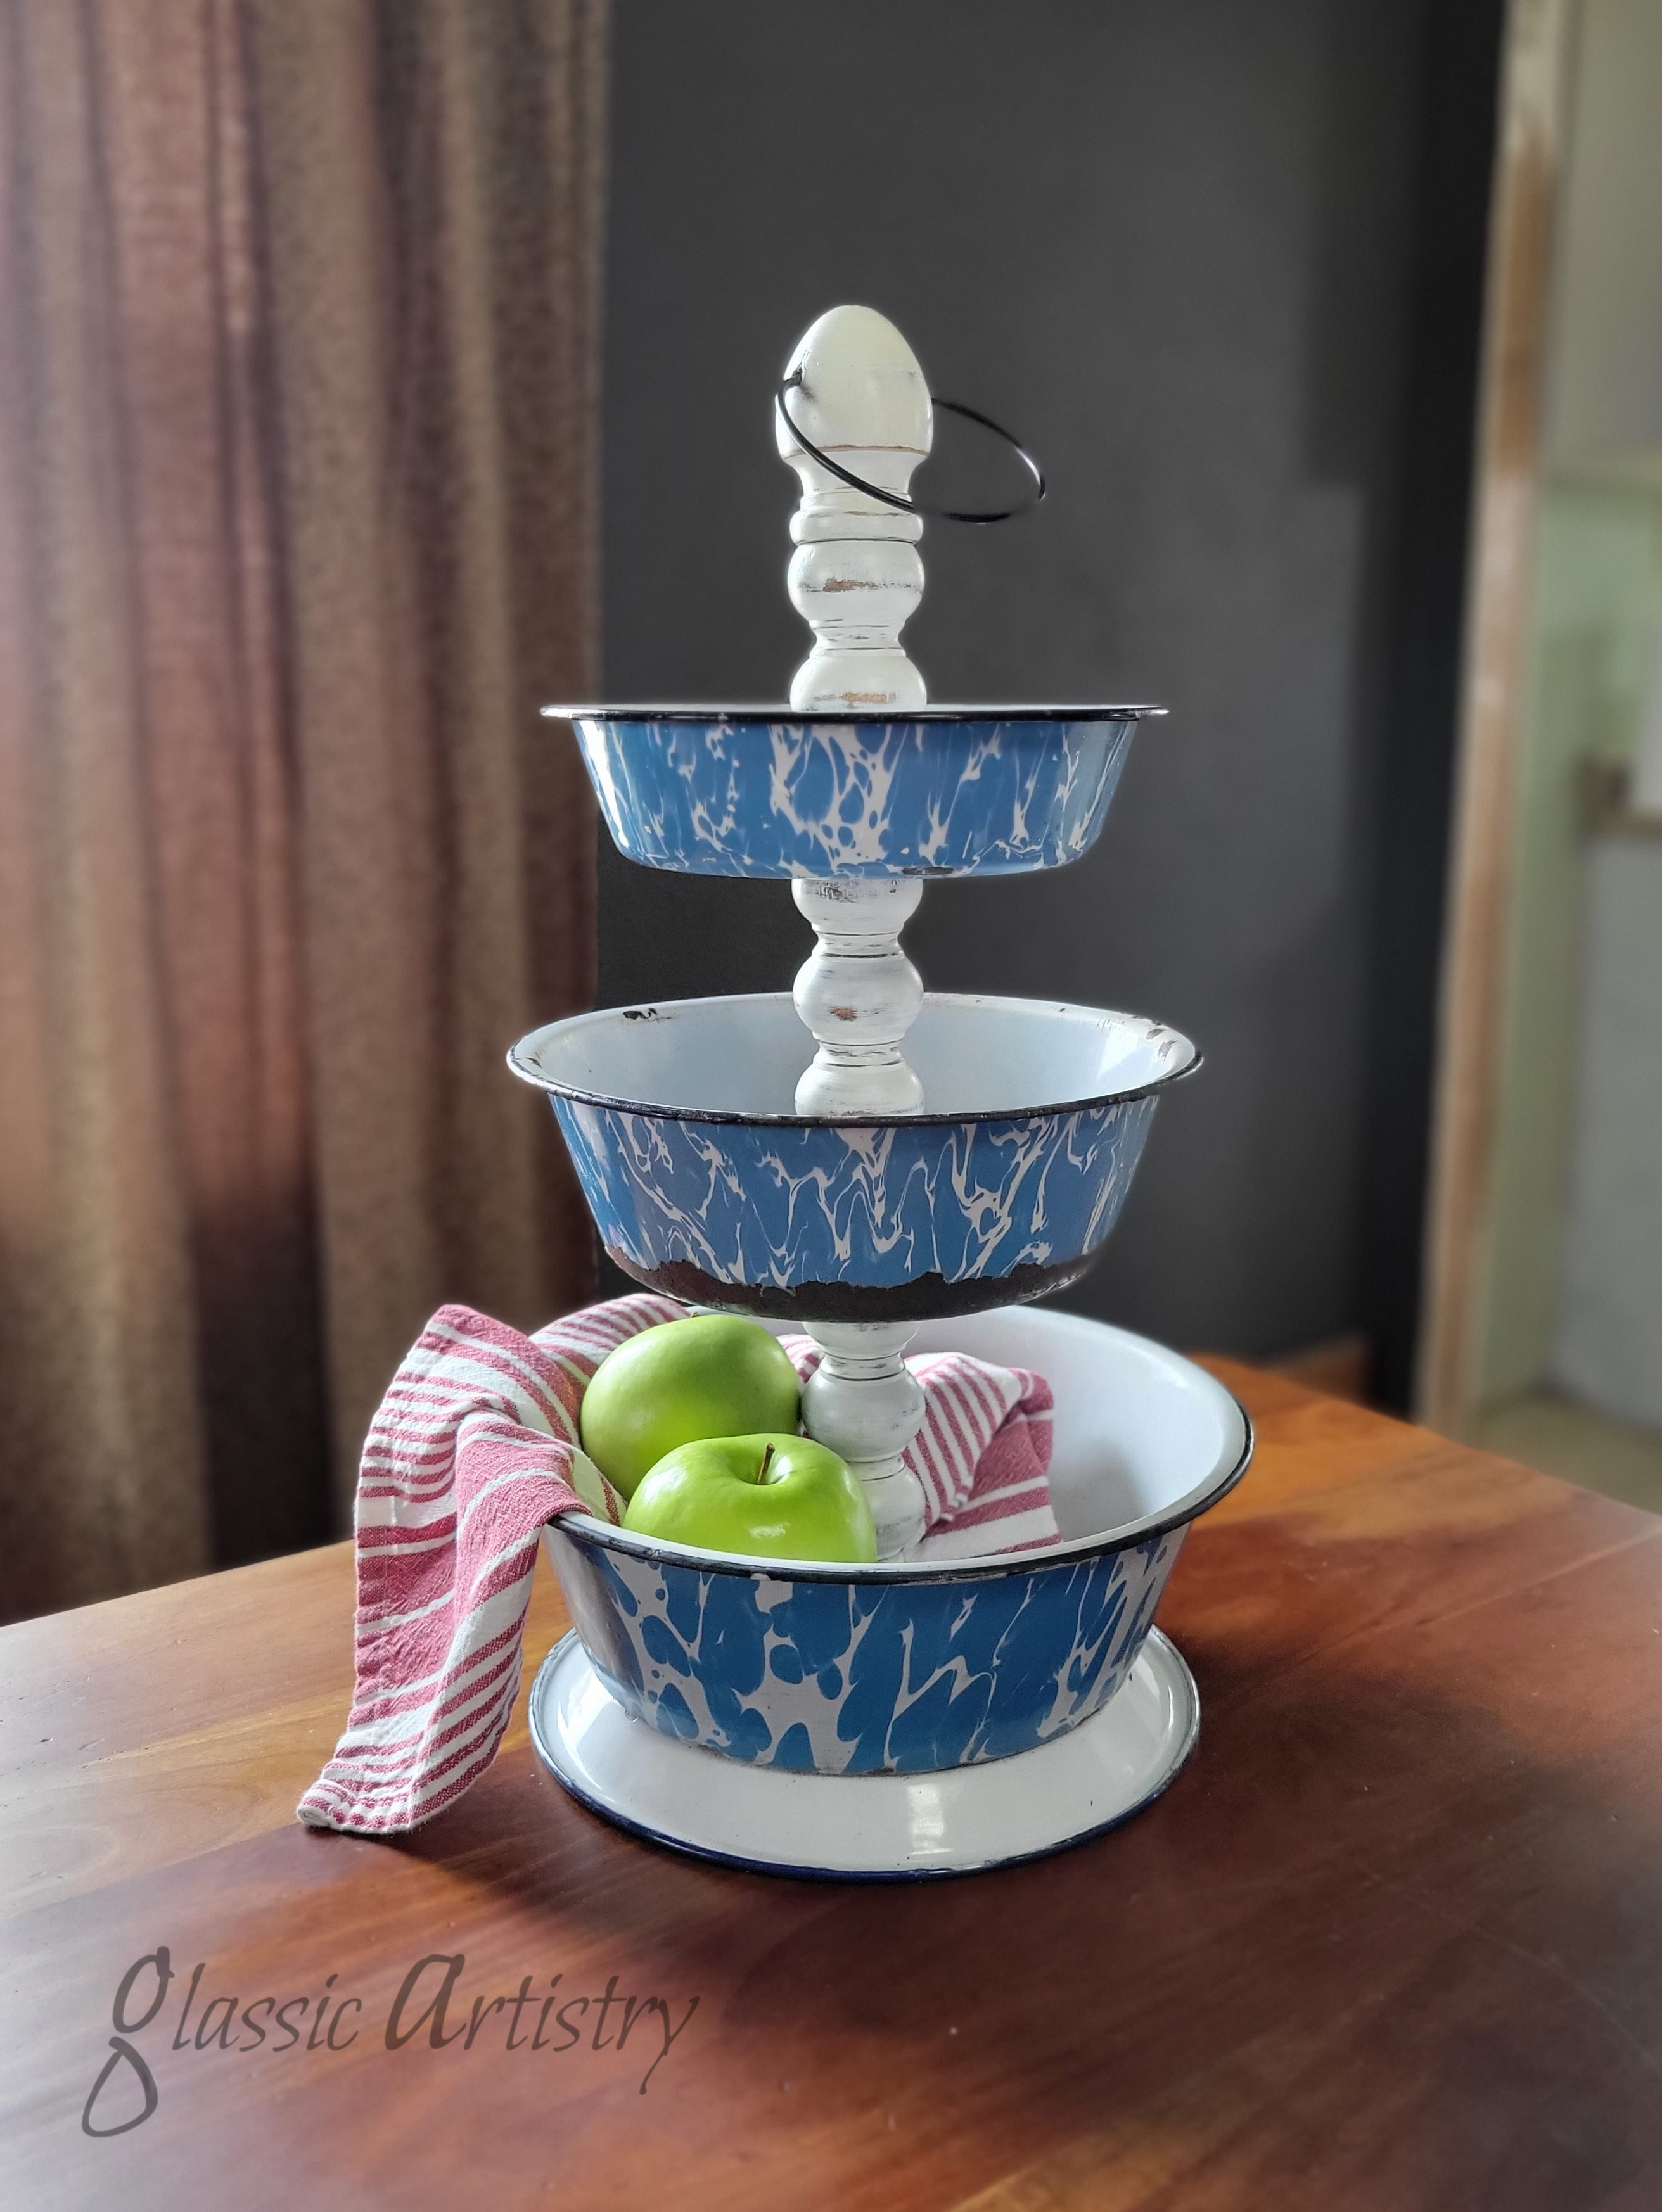
I thought it was finished at this point, but after looking at for a week, I had to add one more detail; a wire ring at the top.
With bolt cutters, a circle was cut from a steel bedspring; sanded, painted, sealed. The tray was taken apart and the finial drilled through at the drill press. The steel ring was almost unbudgeable. I had to hold the finial while my husband stretched the ring enough to get it the holes; its a tight fit.
The tray was reassembled and done! I have my first item for a future tag sale!
Please like, comment, and share as you wish. Keep recycling, repurposing, and upcycling, each small step helps.
Spring break gave me the time needed to complete my latest project.
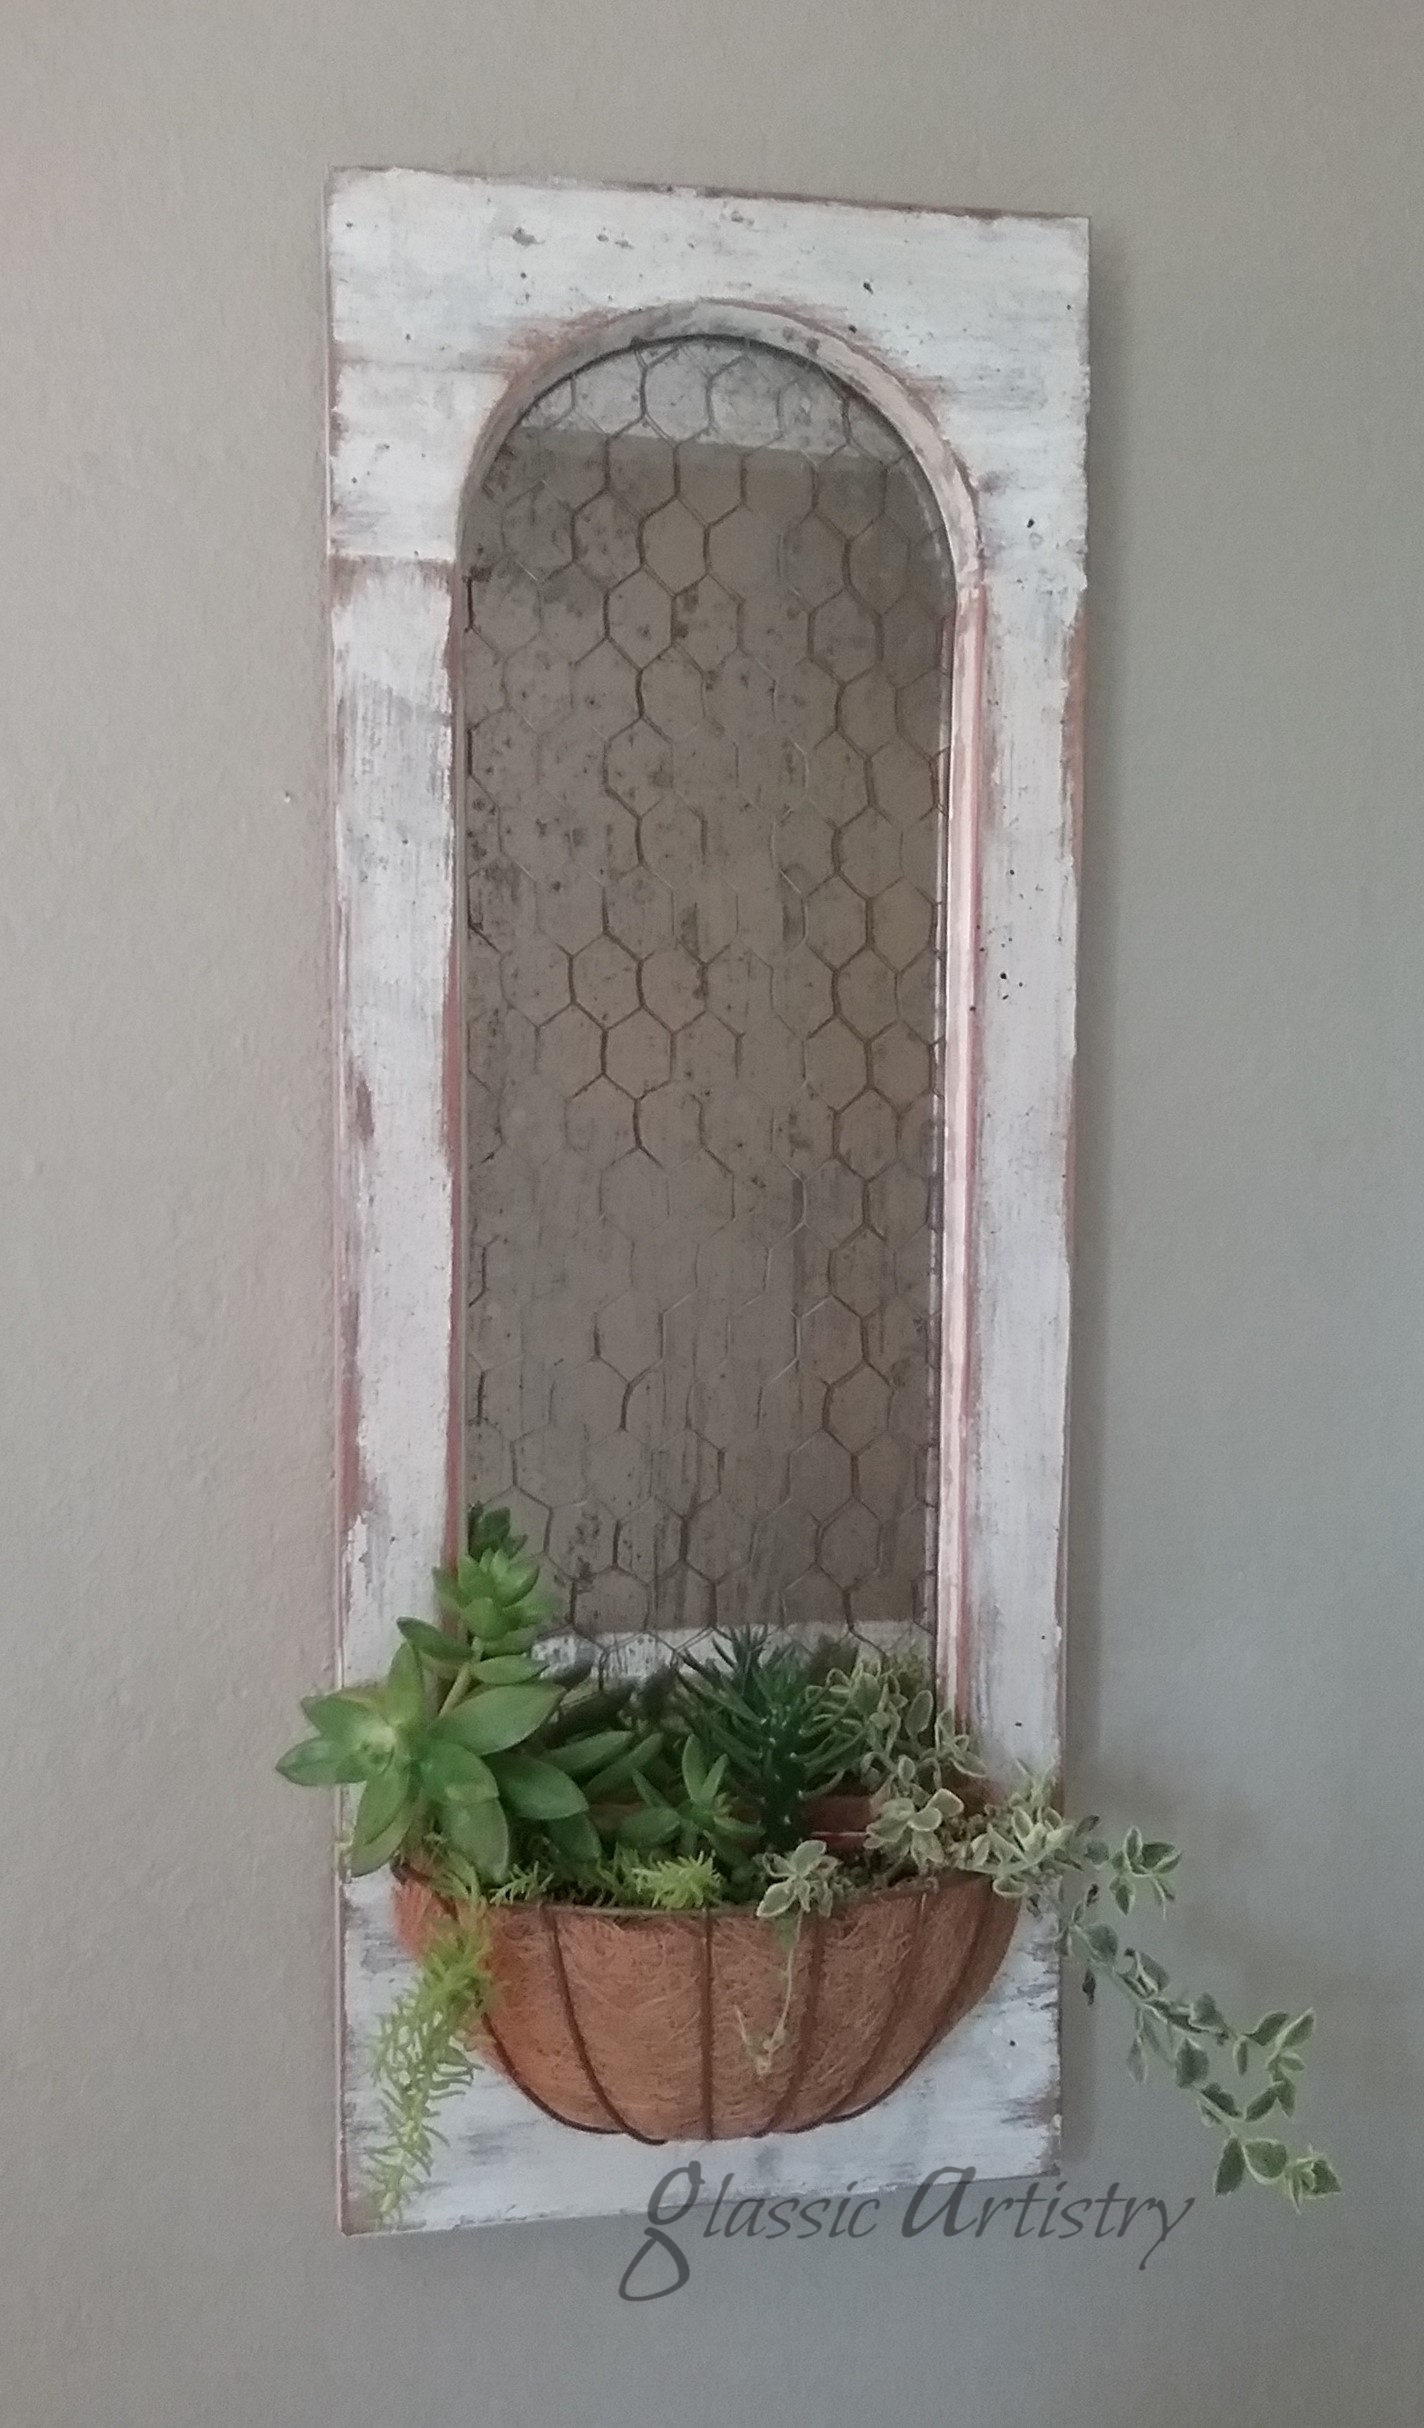
I’m pretty excited about this piece. Not only do I get something for my bathroom wall, I discovered a nifty new way to make a basket that may come in handy in the future.
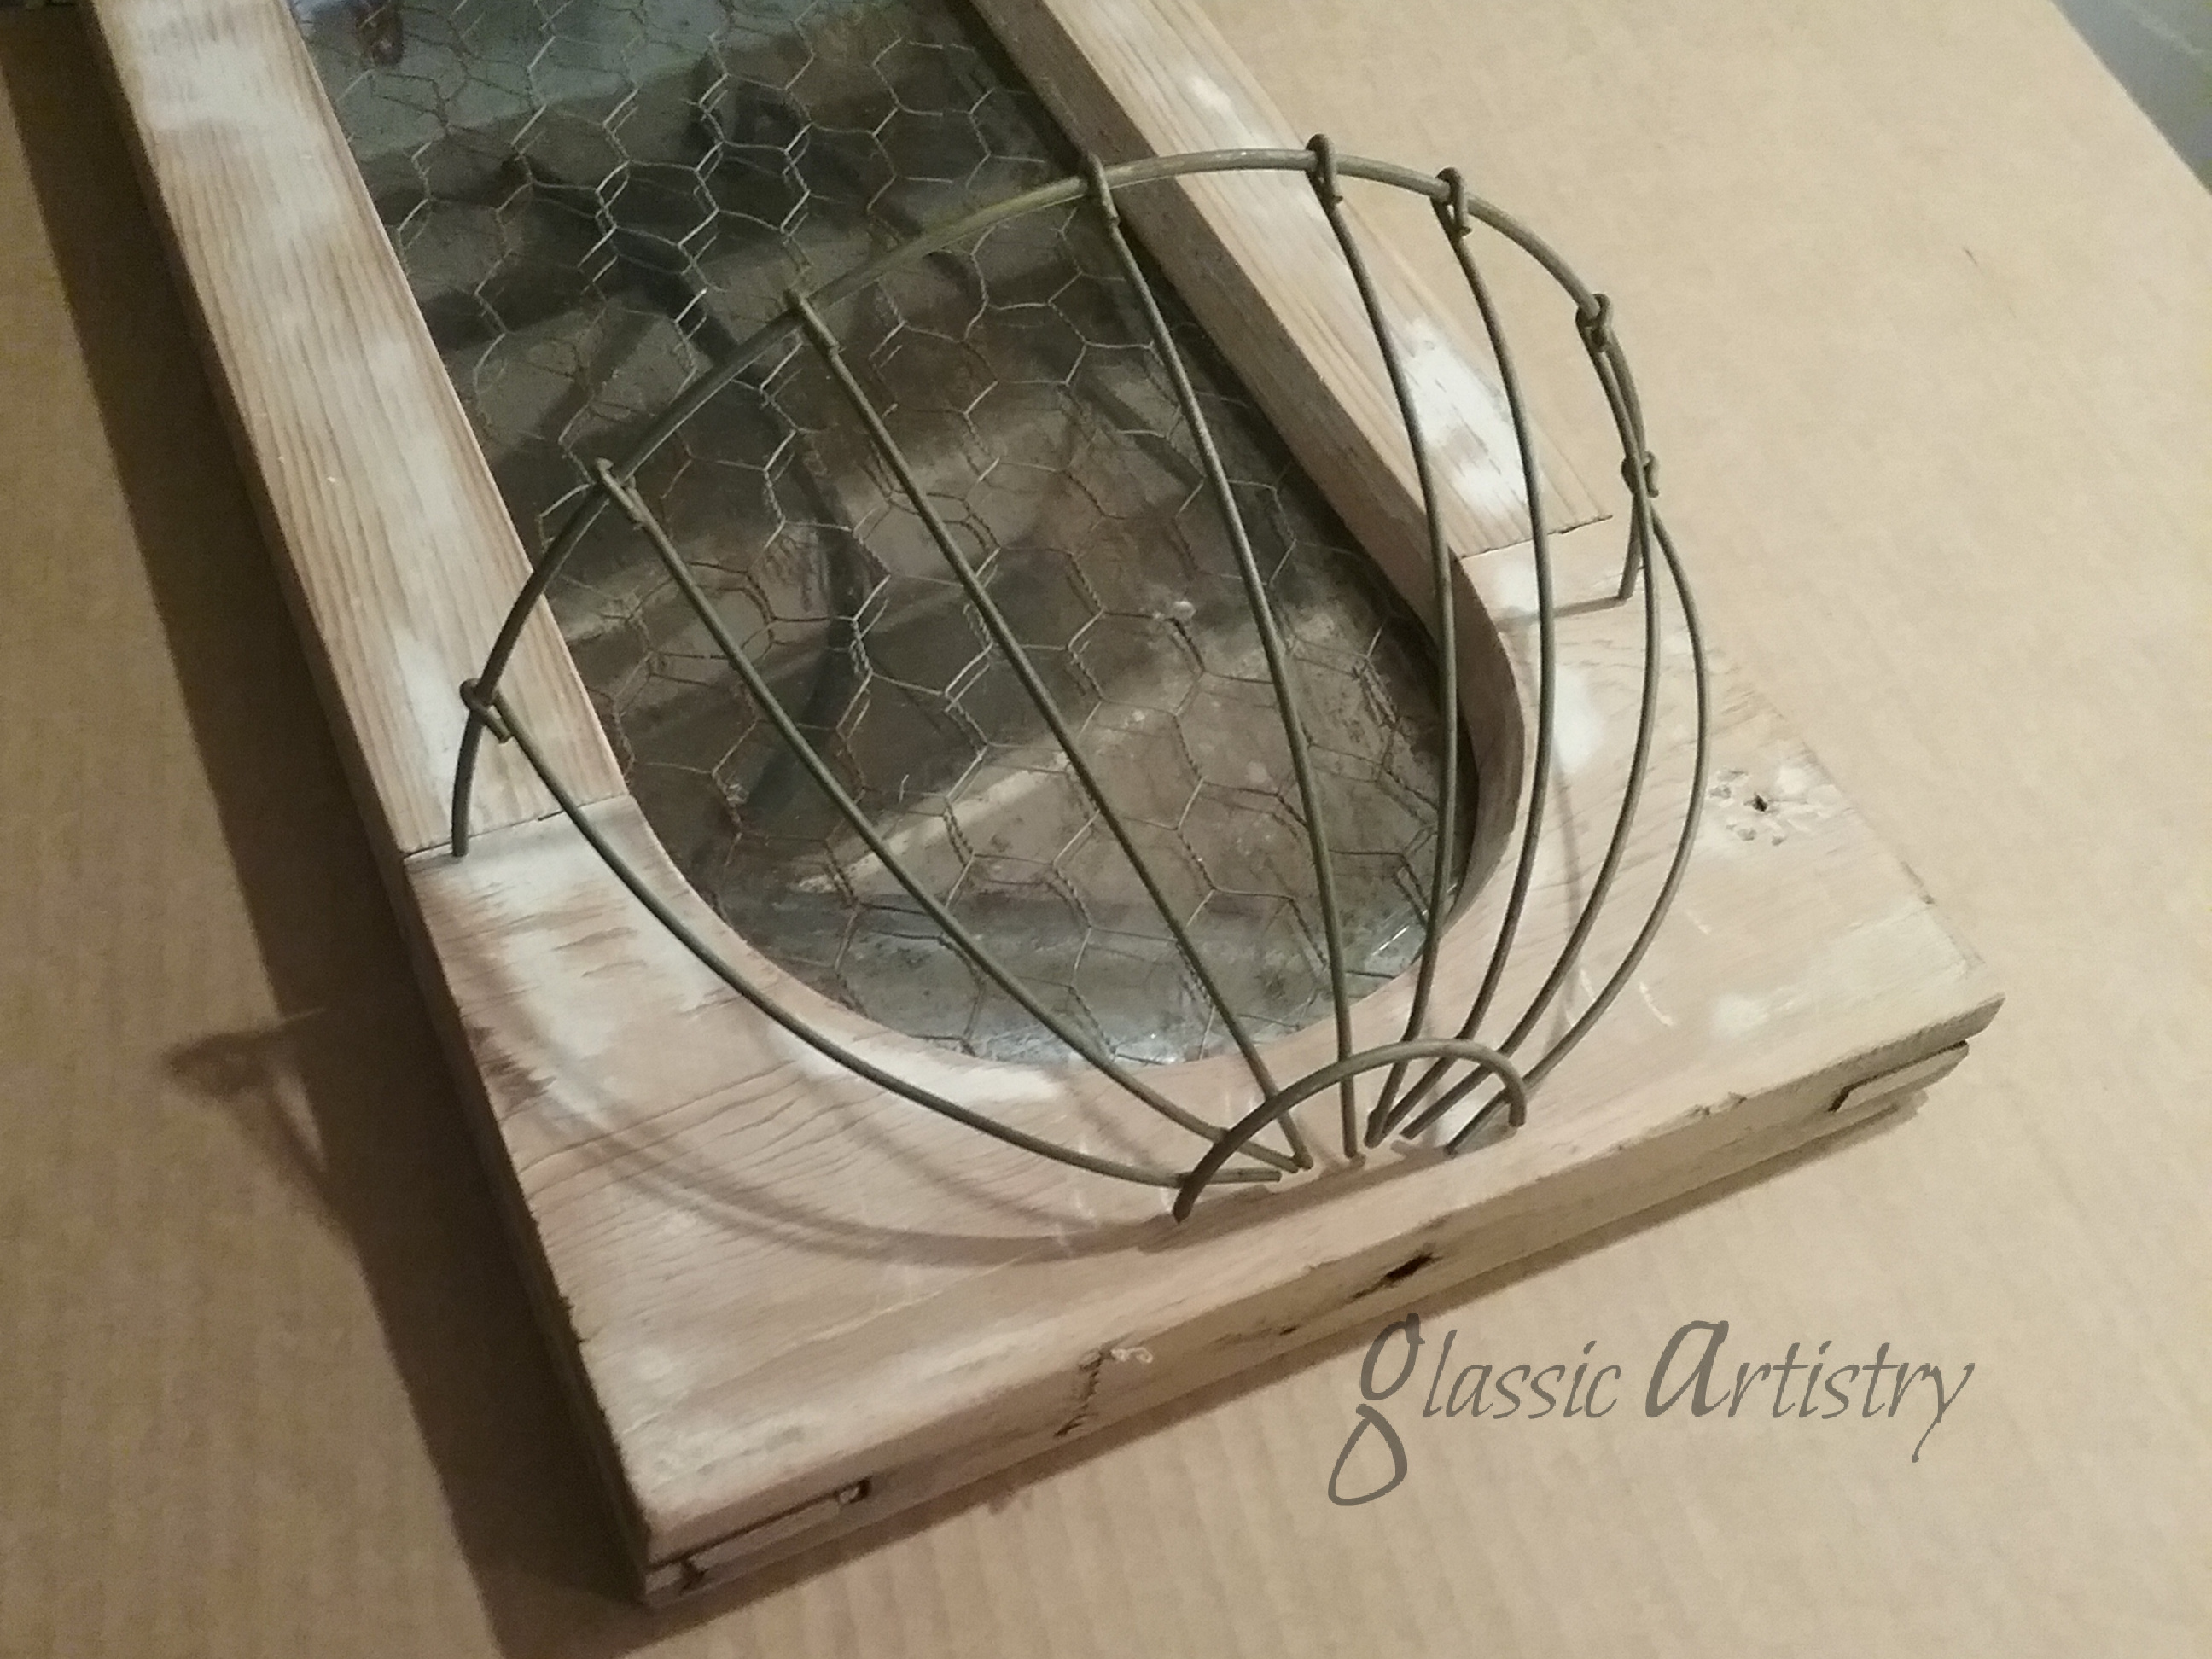
I started with a chunky, long, oval wooden frame purchased at a vintage fair a few years back. It needed a little work to get squared up and made sturdy before a cardboard template could be drawn for the opening.
Tracing the template, I cut and shaped a piece of mirror, a piece of clear glass, and a piece of old chicken wire. The mirror was cut from an unwanted, inexpensive, thin, full length mirror I had in the garage, and luckily I found a large enough piece of clear glass in an old window pane. Another option for this planter would be to use chicken wire alone.
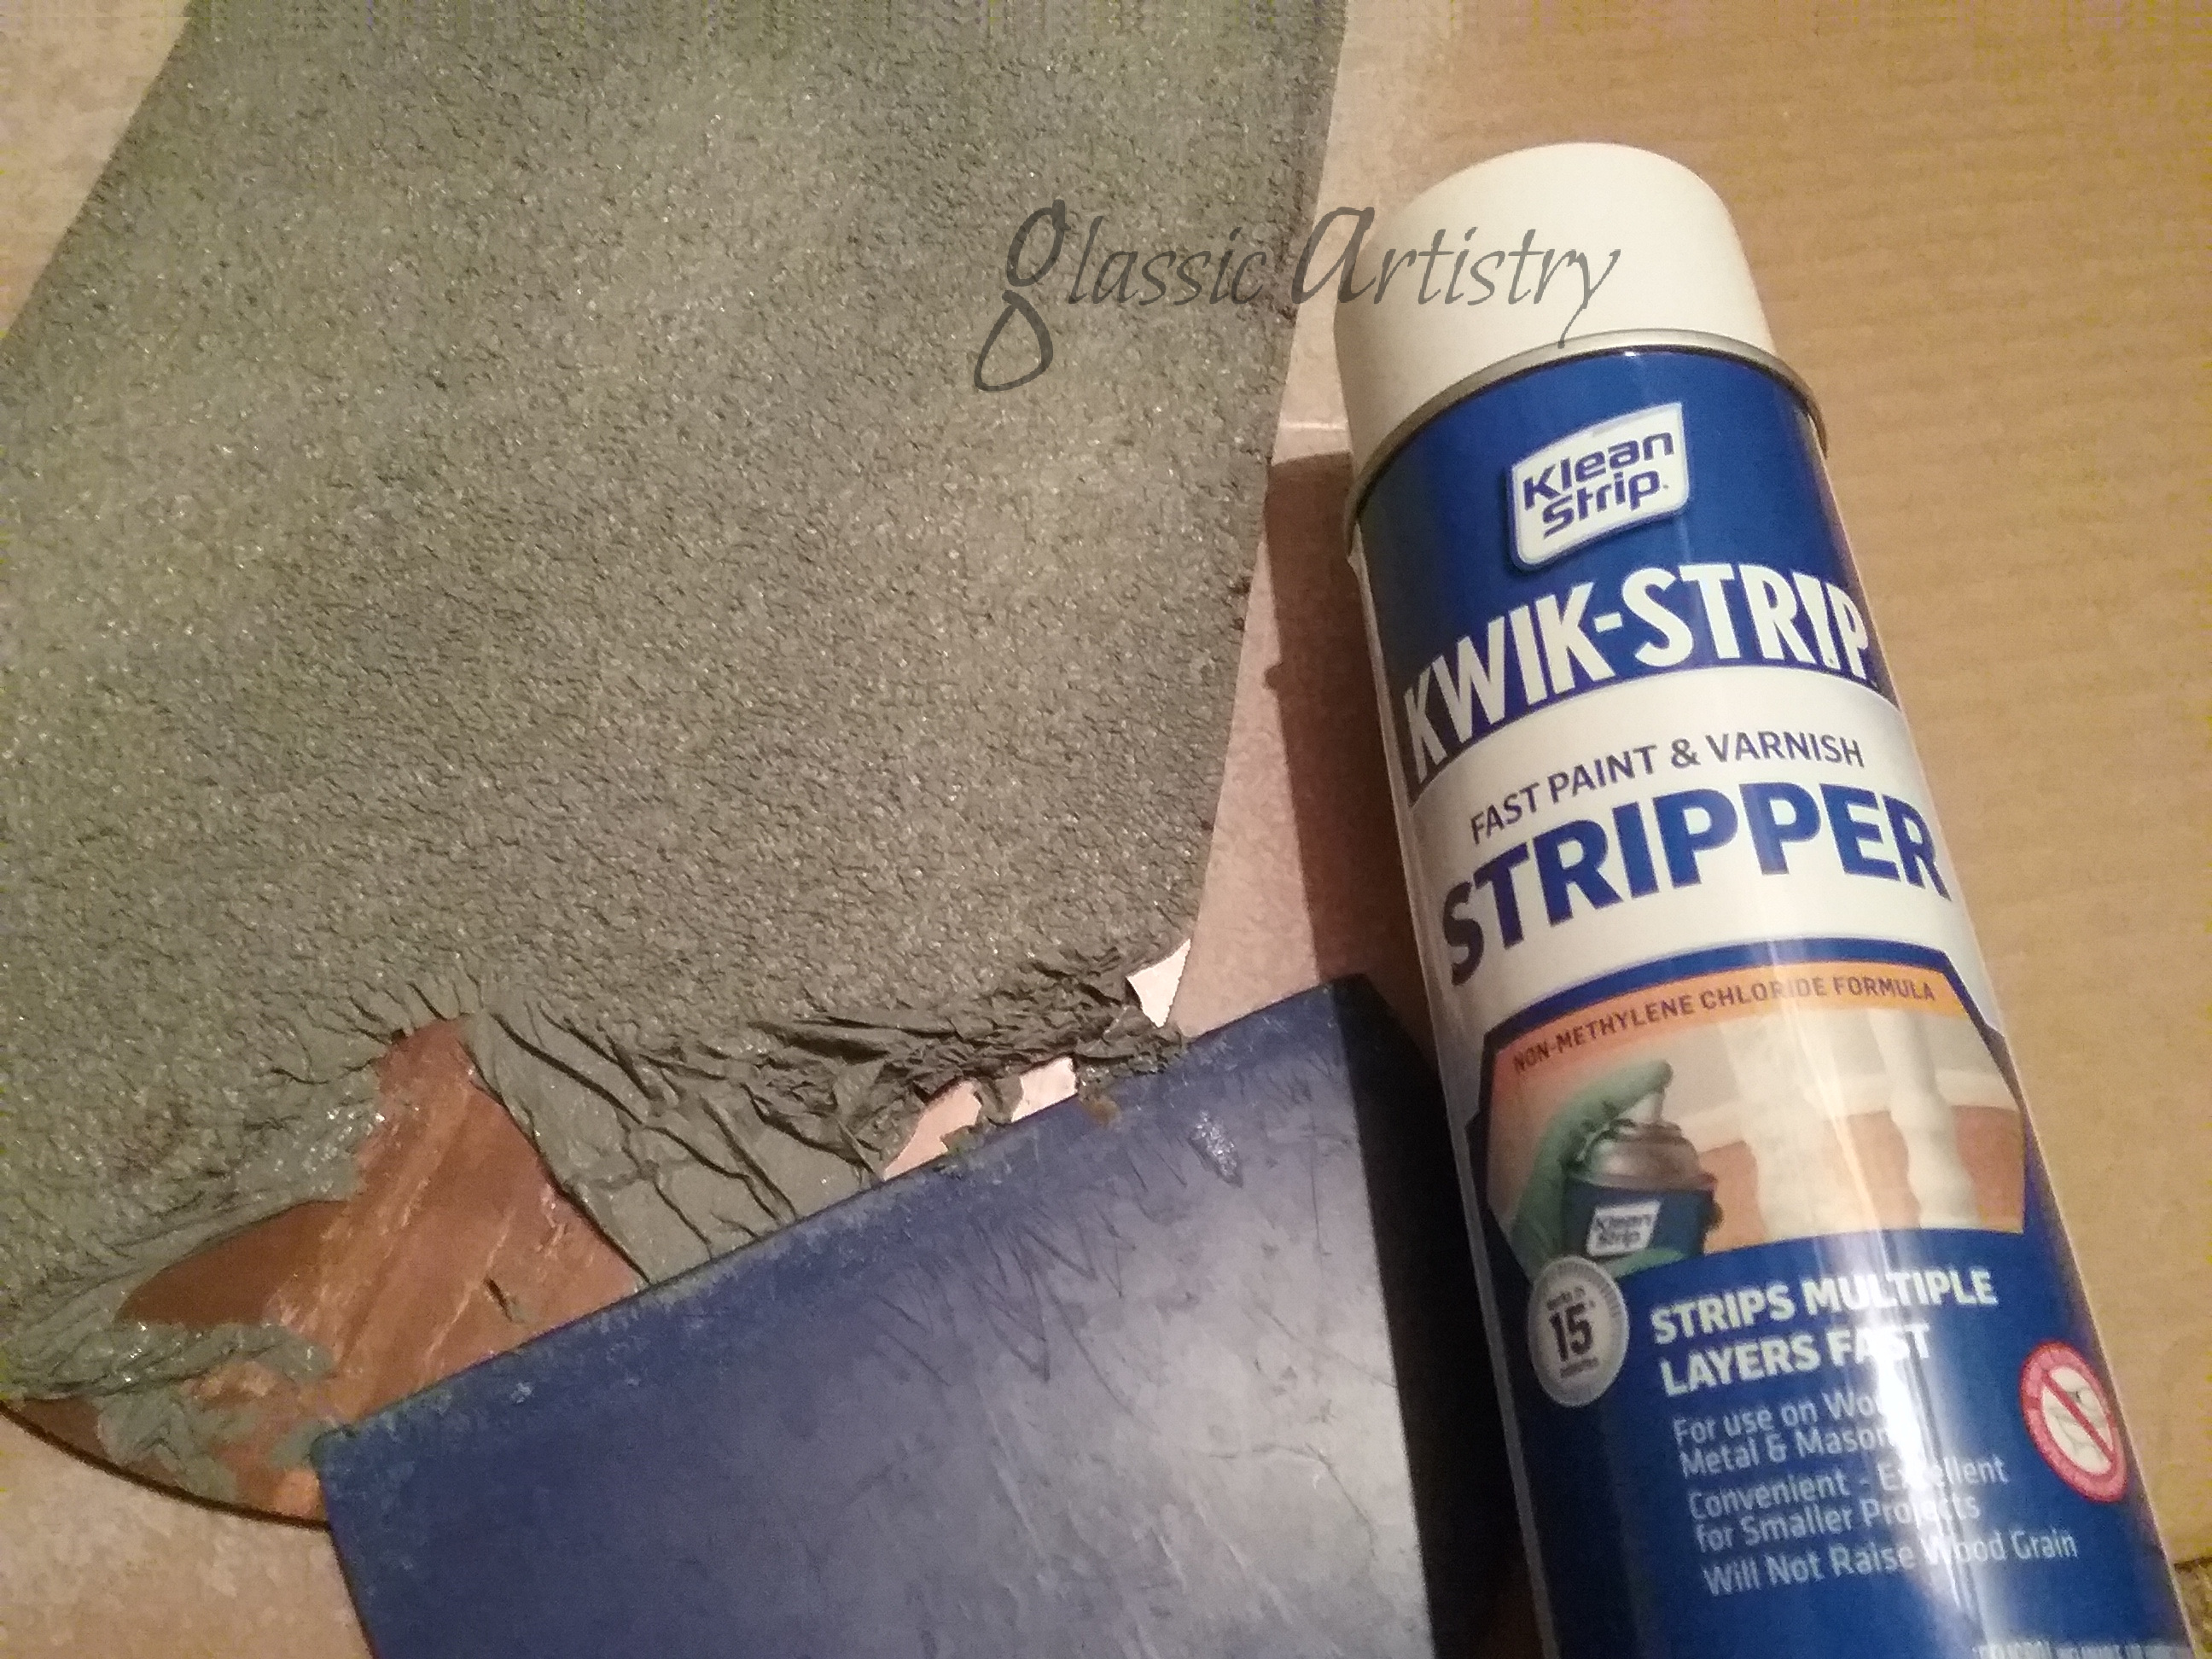
I removed the back of the mirror with a spray stripper, and used a wide plastic putty knife to gently remove it. Spray stripper is pretty awesome; much better than using a brush for this step. Once it was stripped and washed clean, I used bleach to sponge the back lightly in a few places and speckle with a toothbrush splatter. Always protect your eyes and wear gloves when doing something like this. I let the bleach sit for about an hour. After washing off the bleach, you can add black speckling, metallic powders or paint, or vintage papers to show through the mirror, but I left mine plain.
After a few layers of stain, paint, and sanding, the frame was sealed with a coat of clear, satin, water based sealer. After the sealer dried, the cut pieces were inserted in the frame opening, sandwiching the chicken wire between the clear glass and the mirror. Secured with glazier points.
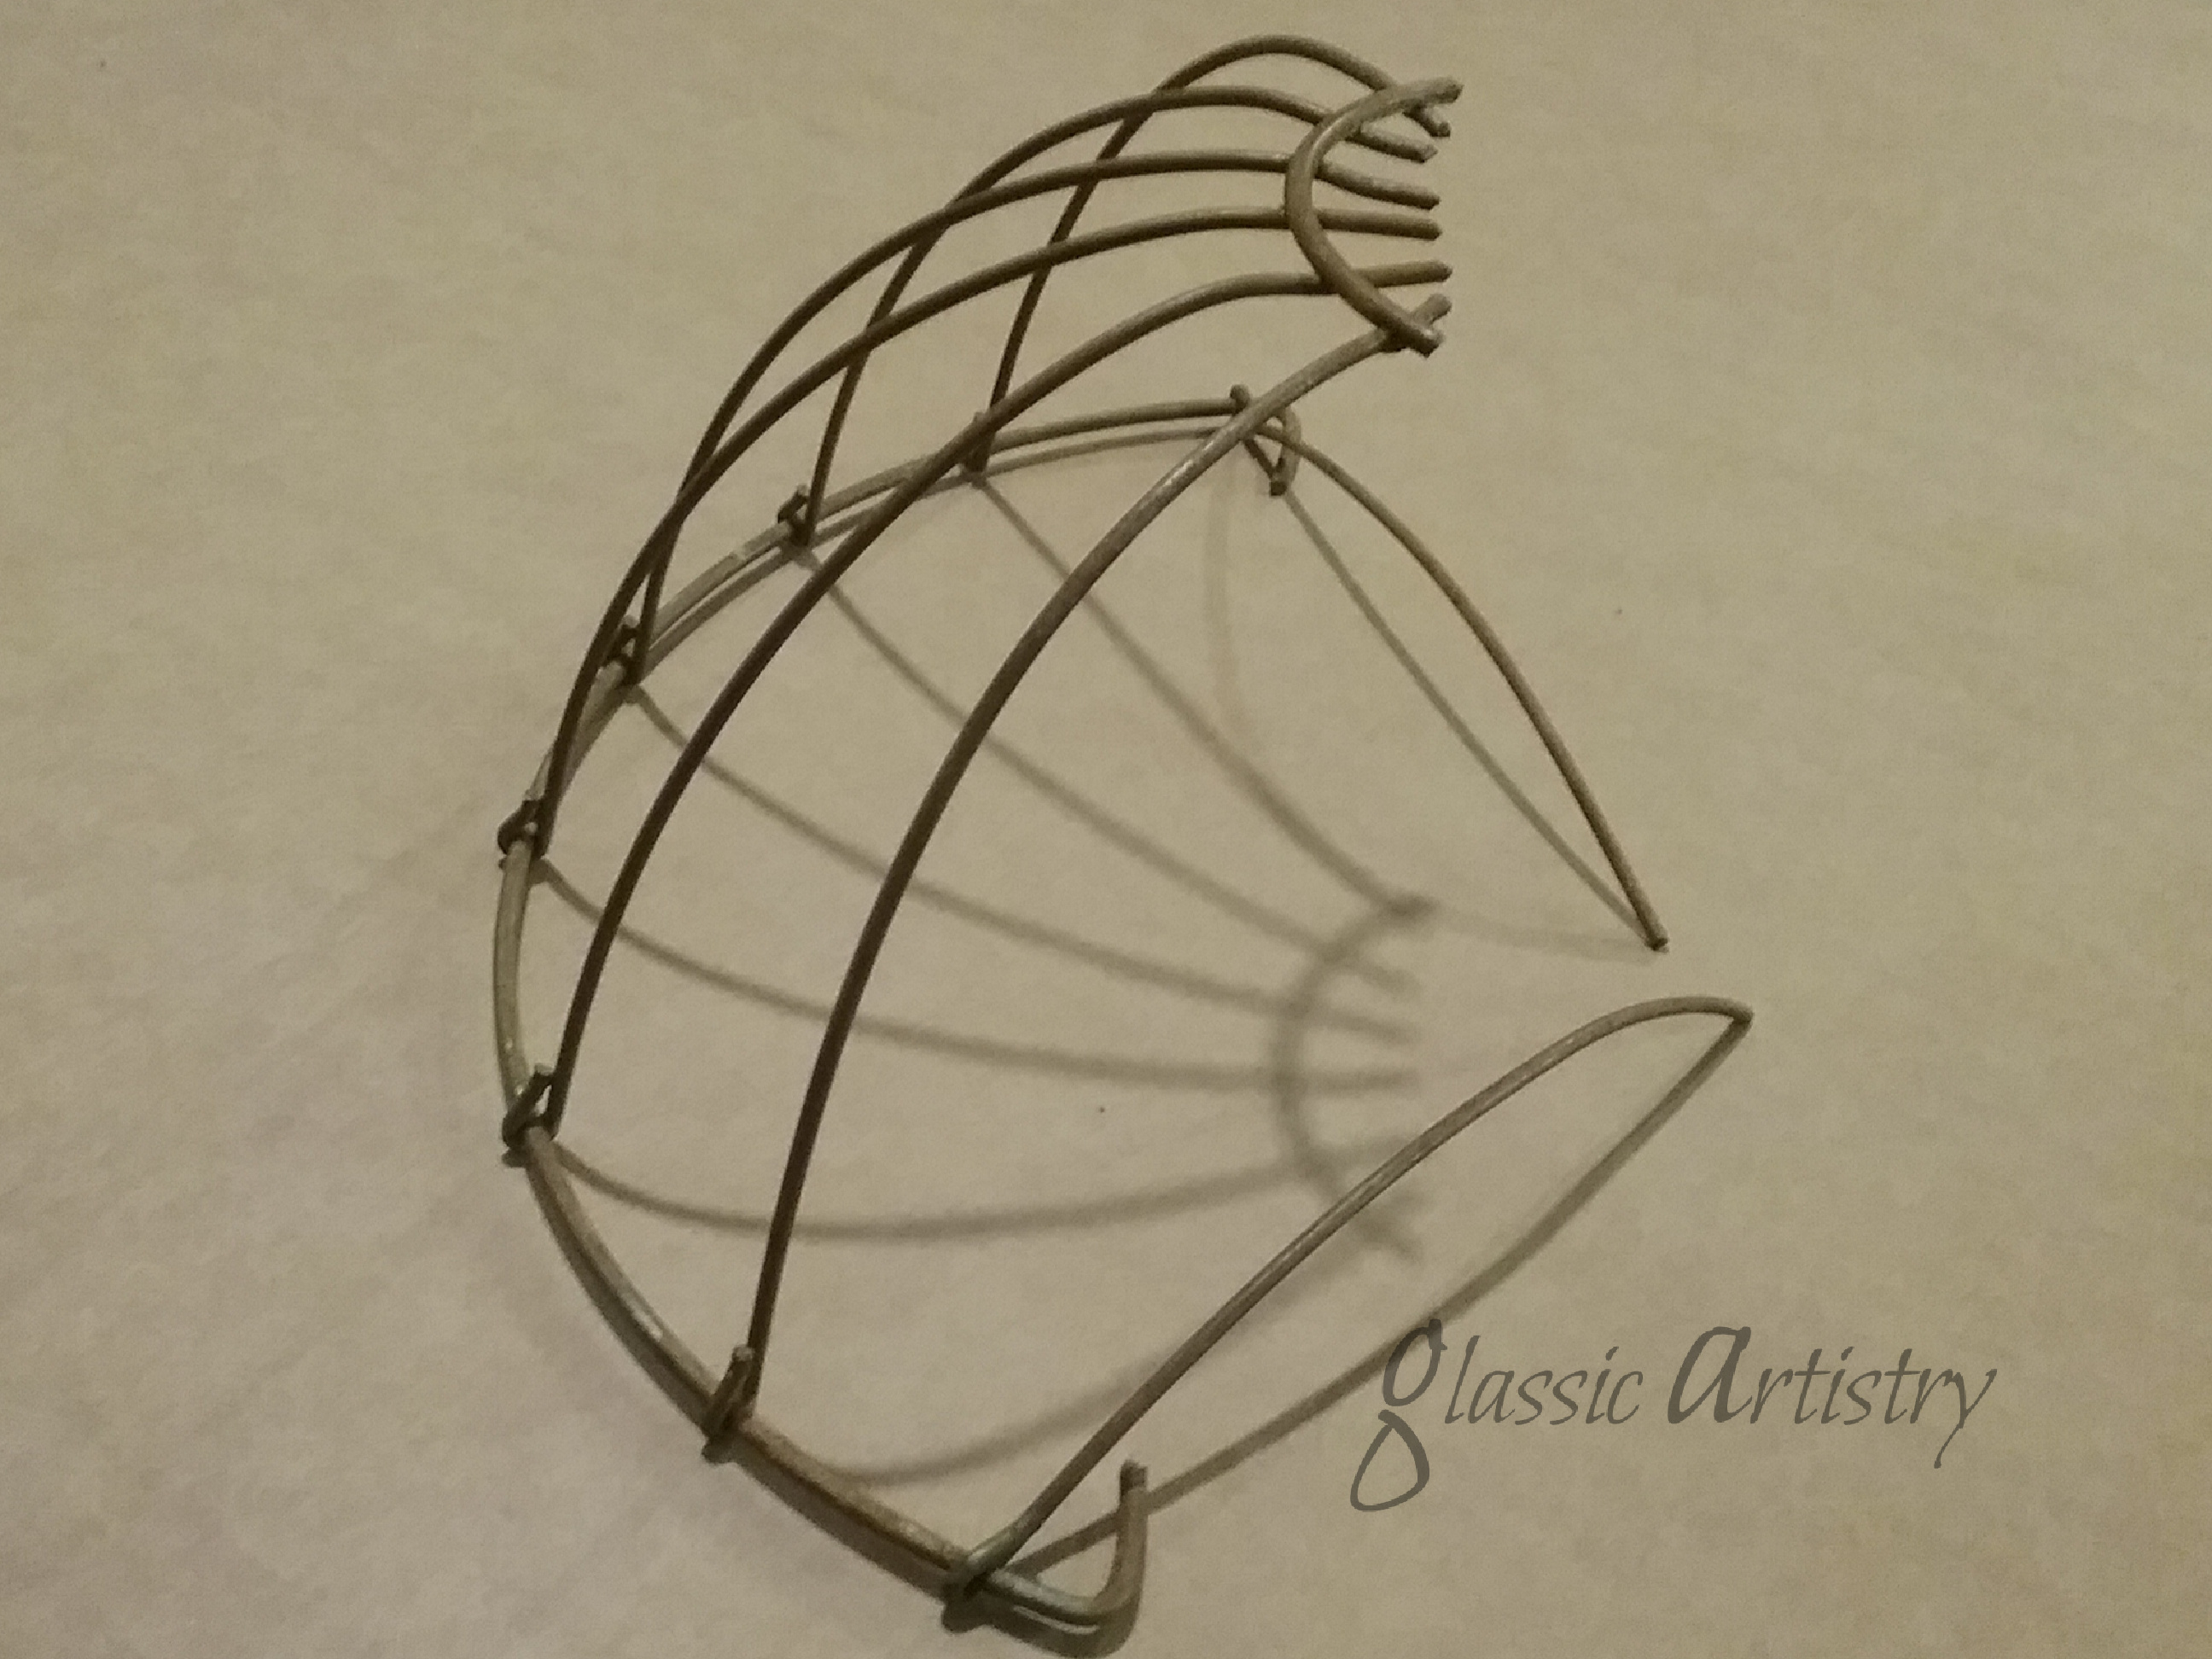
I cut a 10” hanging wire basket in half and laid it on the front of the frame to see what it would look like and figure out where I would need to trim it to fit well. I left extra length on each end of the top rim wire so L shaped corners could be bent. (I had to find a pair of stronger hands to help with bending.) I ended up with two loose side wires and glued them in place to get the shape I wanted. When dry, the glued areas were touched up with a little brown paint.
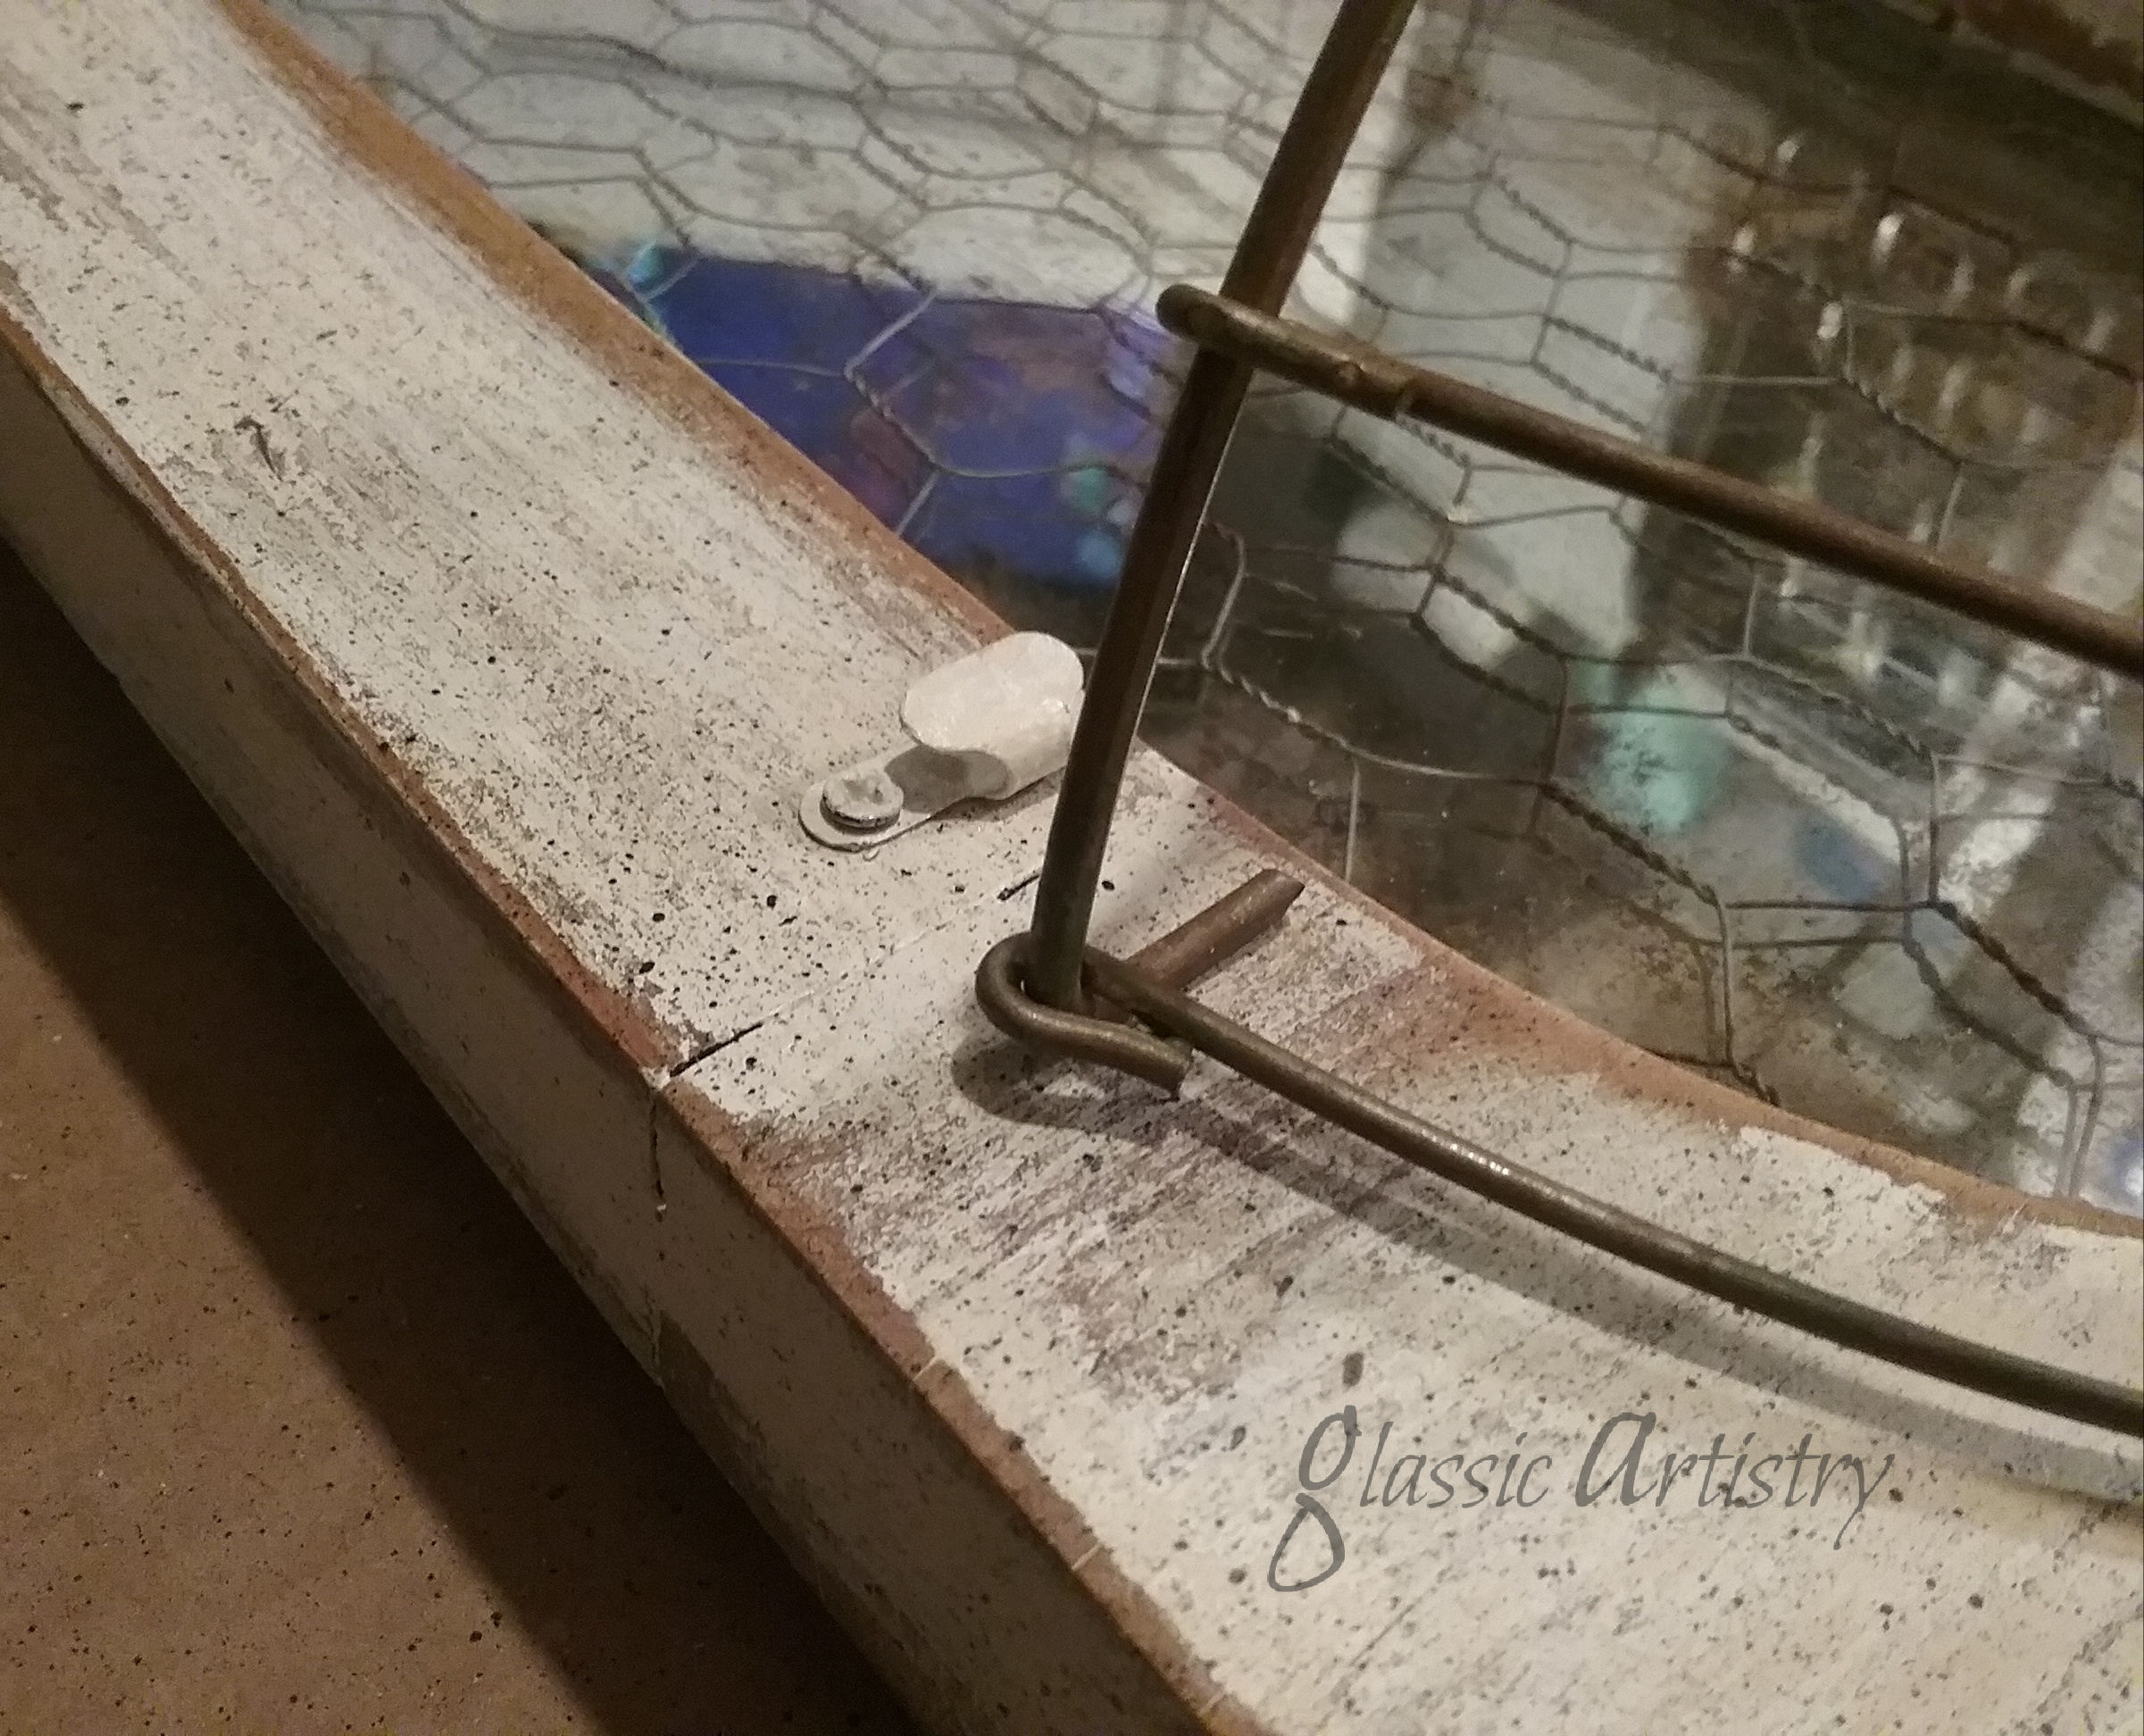
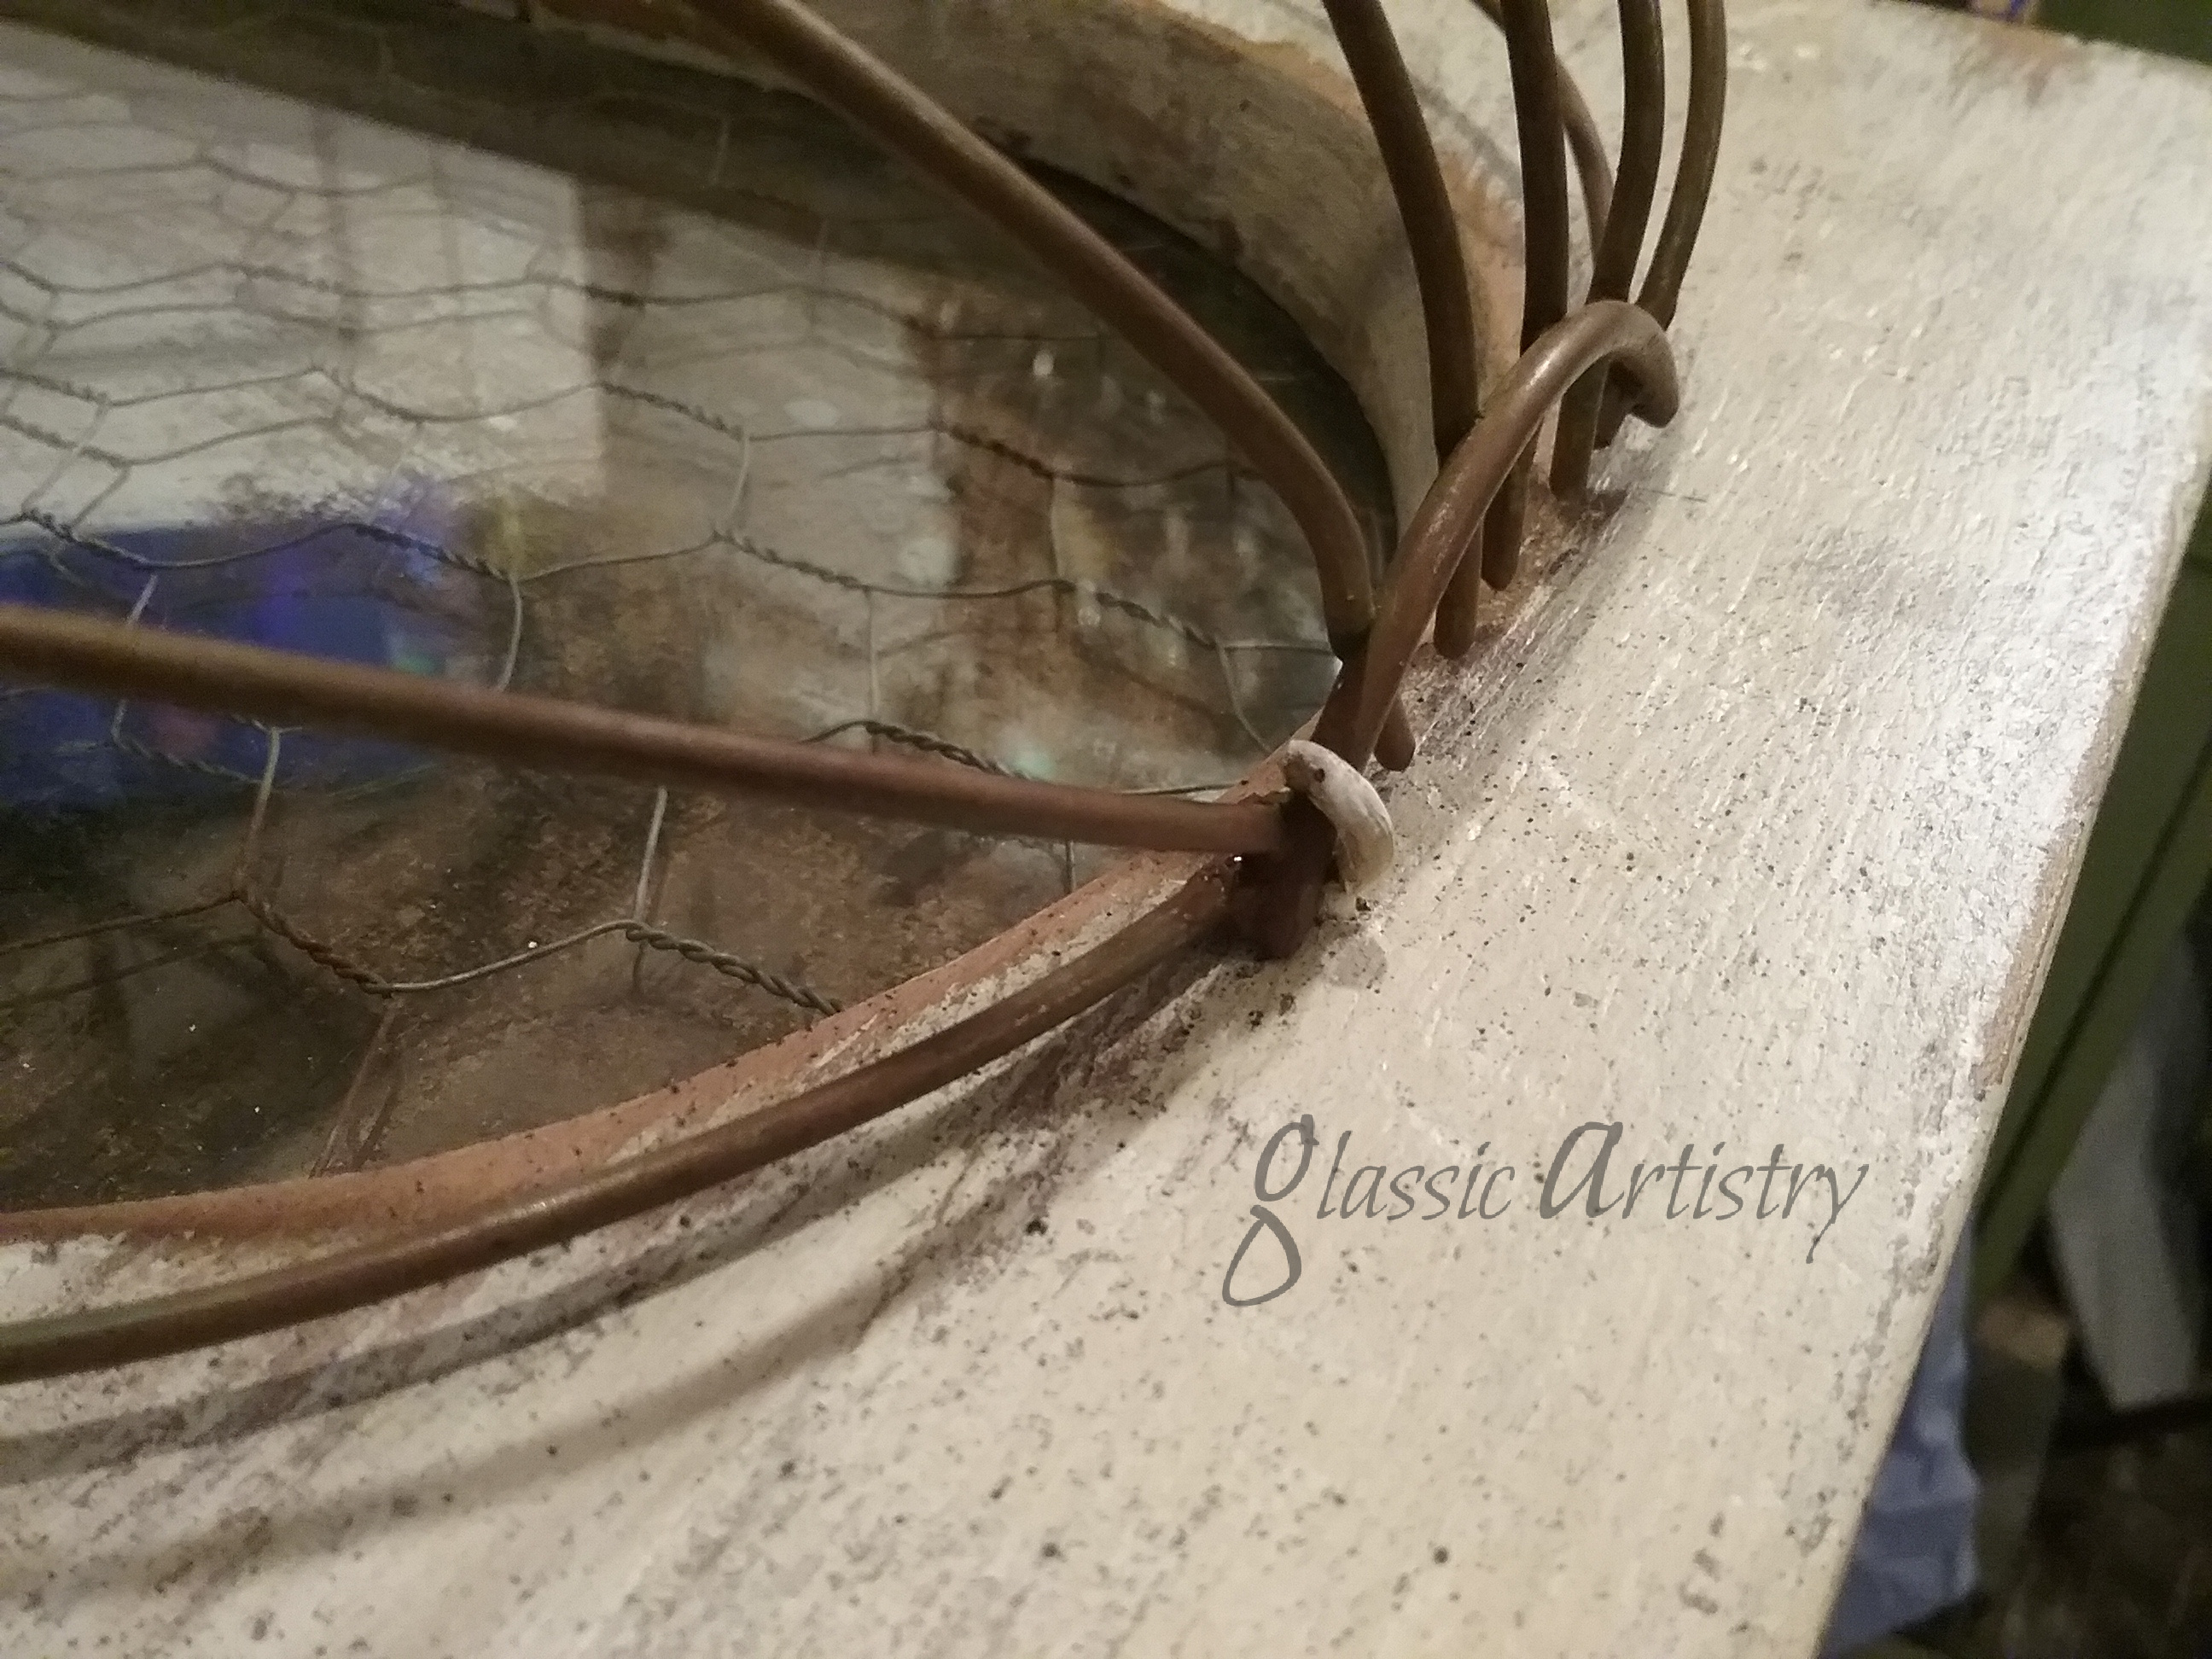
I found some very simple hardware to hang the basket onto the frame. One is just a cut eye hook, but I’m not sure what the other pieces are. I found them among some of my stained glass hangers so they may have come from a glass supply source; I don’t know. If anyone has a clue what they are, please chime in and let readers know. I wouldn’t mind having a few more myself. 🙂
I attached the two brass hangers to the frame first, then hung the basket to mark where the small hook would go under the basket and before drilling a hole. I removed the basket, screwed in the hook, then painted the hardware to match the frame. When the paint was dry, I replaced the basket and hung the frame on the wall to fill.
A fiber planter liner was cut and fitted inside the basket, along with an old deflated ball for a pliable, leak-proof planter. The ball was turned wrong side out before placing it inside the liner and adding succulents.
I’m pretty happy with my new planter. It has kind of an Old World charm and looks right at home hanging above our tiled tub surround. It hangs almost directly across from a large East window, so I’m hoping with the benefit of the mirror it will get plenty of light.
I hope you found something interesting or picked up a few useful tips from my project. Thank You for visiting my blog. Please, let me know what you think. I love hearing from readers, fellow up-cyclers and re-purposers.
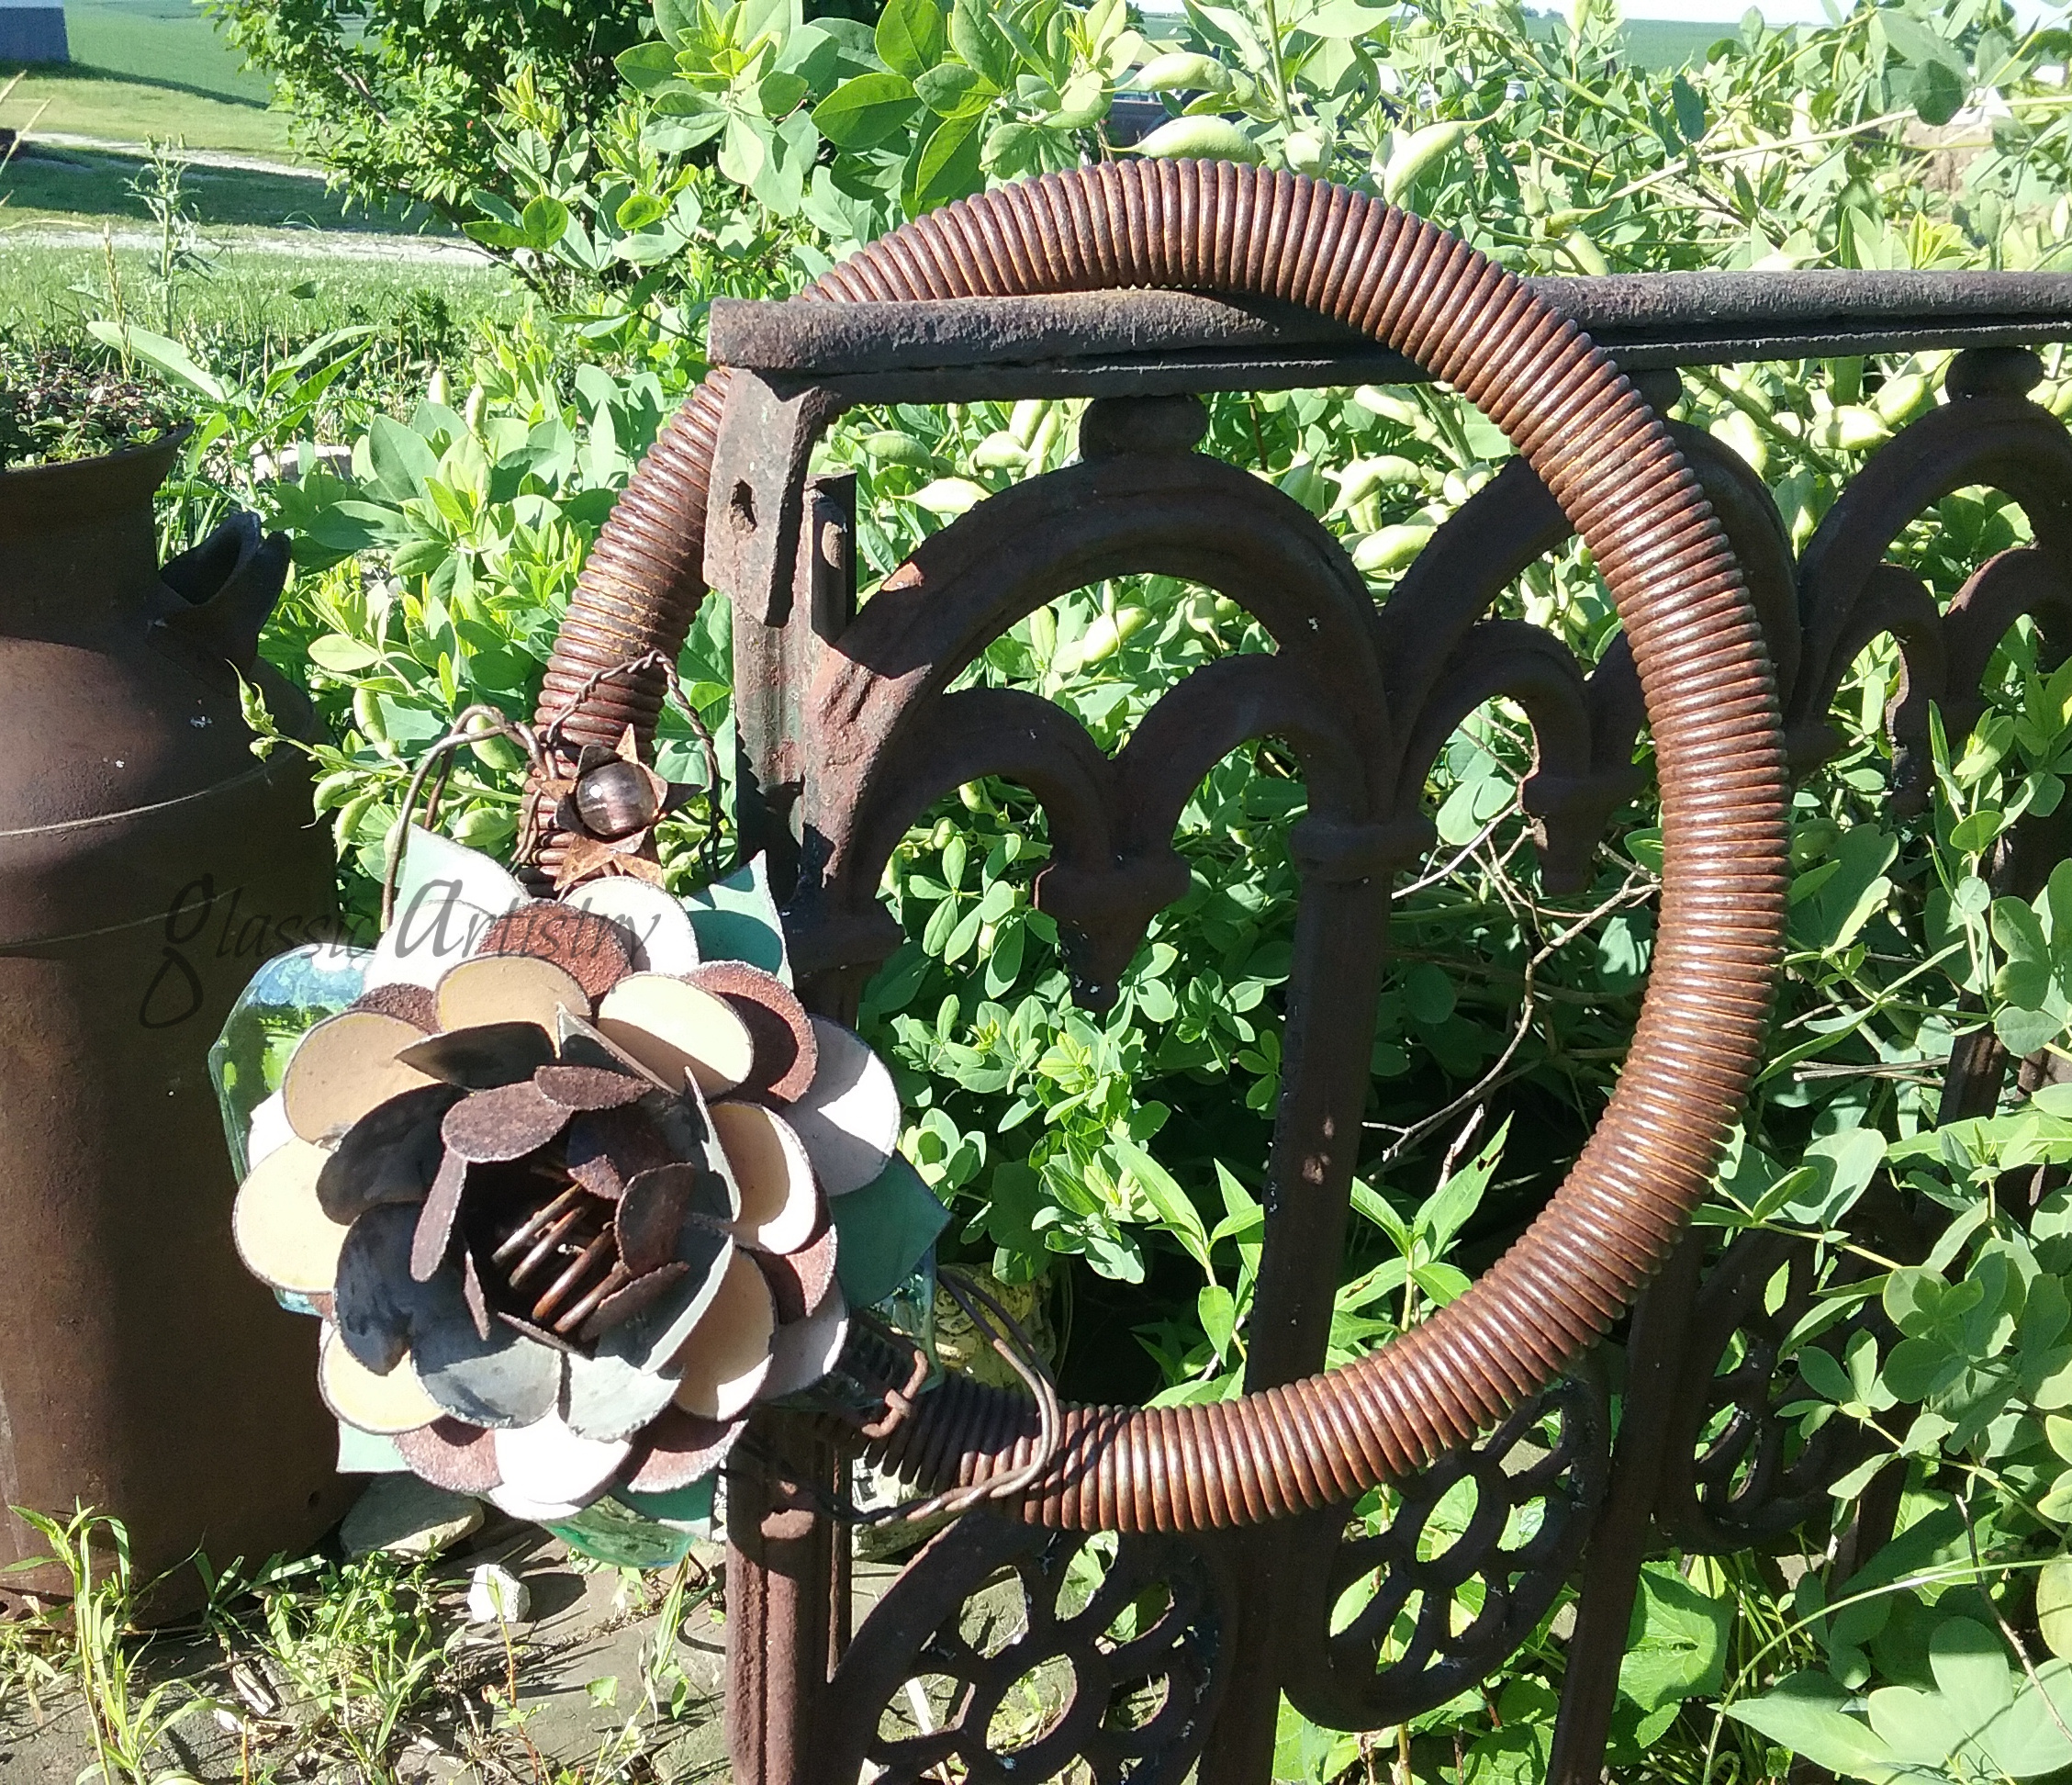
I love the look of rustic art in the garden, don’t you? Being a collector of lots of glass things, wire scraps, rusty junk, and all kinds of tidbits, I’m excited when I can gather some of my pieces that all work together, and make something eye pleasing for mine.
With salvaged art, there’s no rules, right or wrong, that’s the fun of it. Just do what works best for you.
Duplicating the items I used is not feasible, I know, but, I wanted to share some tips and tricks I used in hopes of spurring inspiration for fellow creatives.
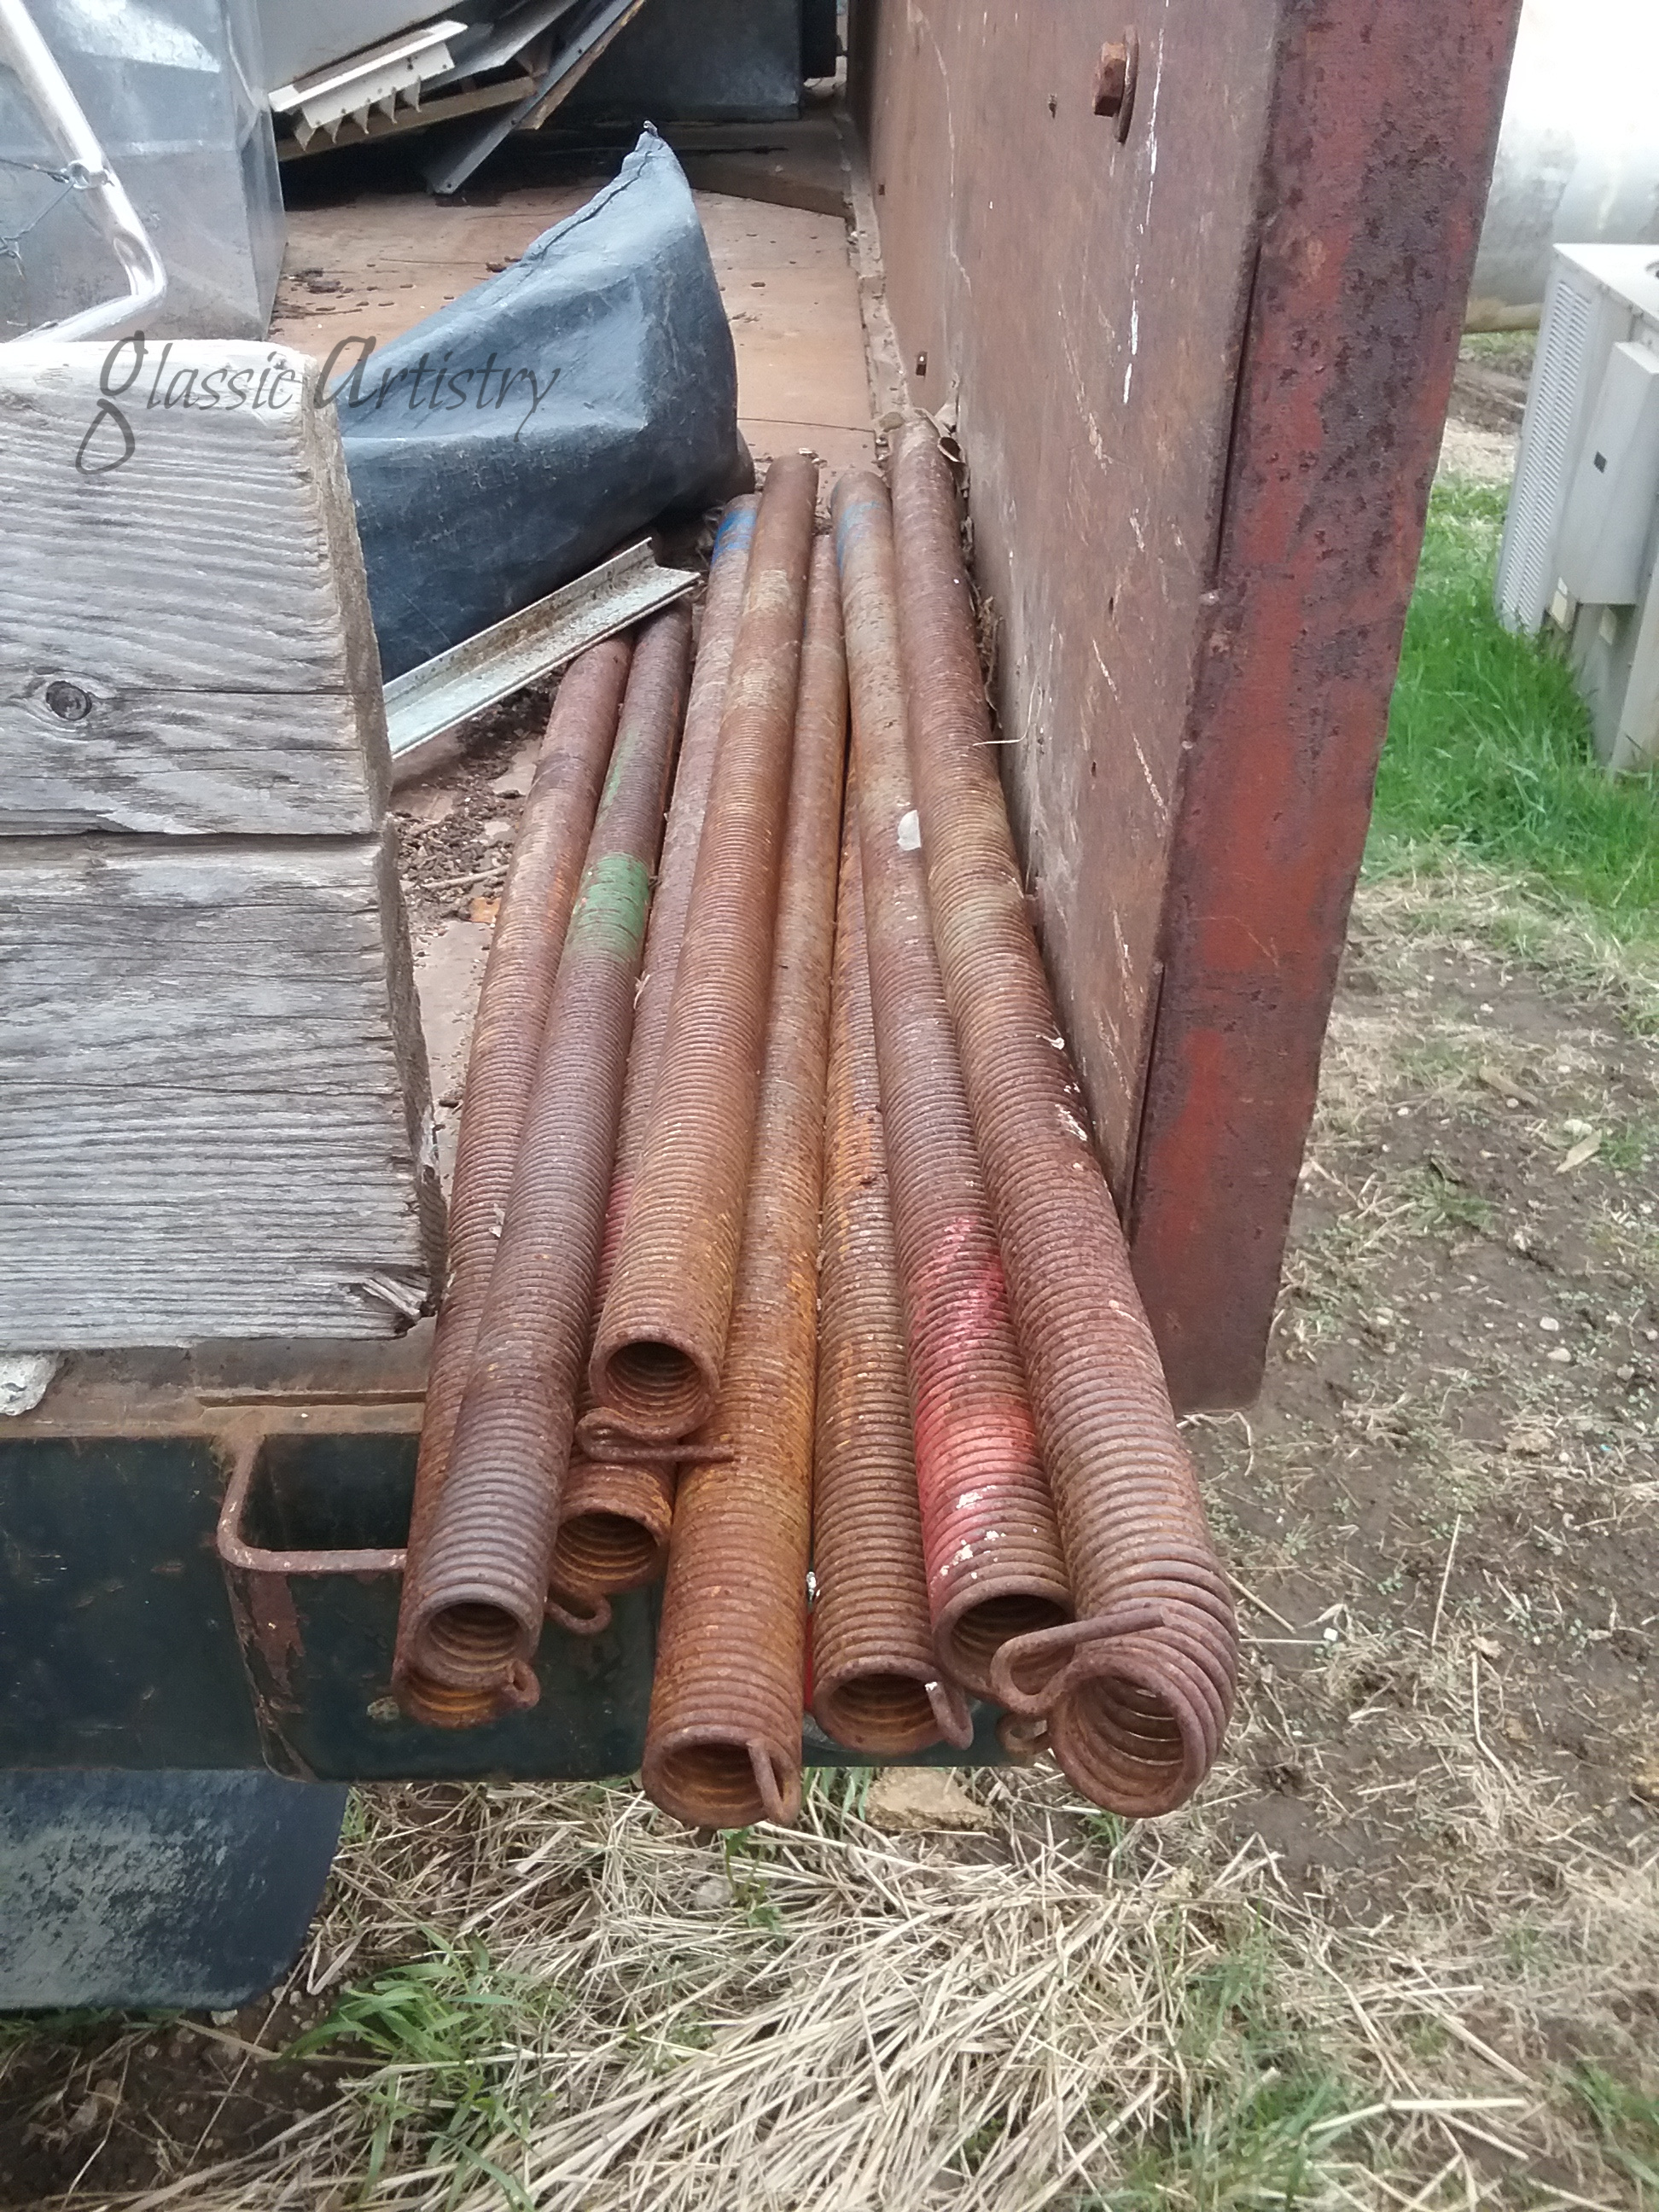
I asked my husband to save a pile of heavy springs when they showed up as salvage last fall. I’ve walked past them 100’s of times and always had the same thought; I’m gonna make a wreath out of one of those someday. I knew there was a metal flower collecting dust in the garage that would look great on one, I just never got going on it.
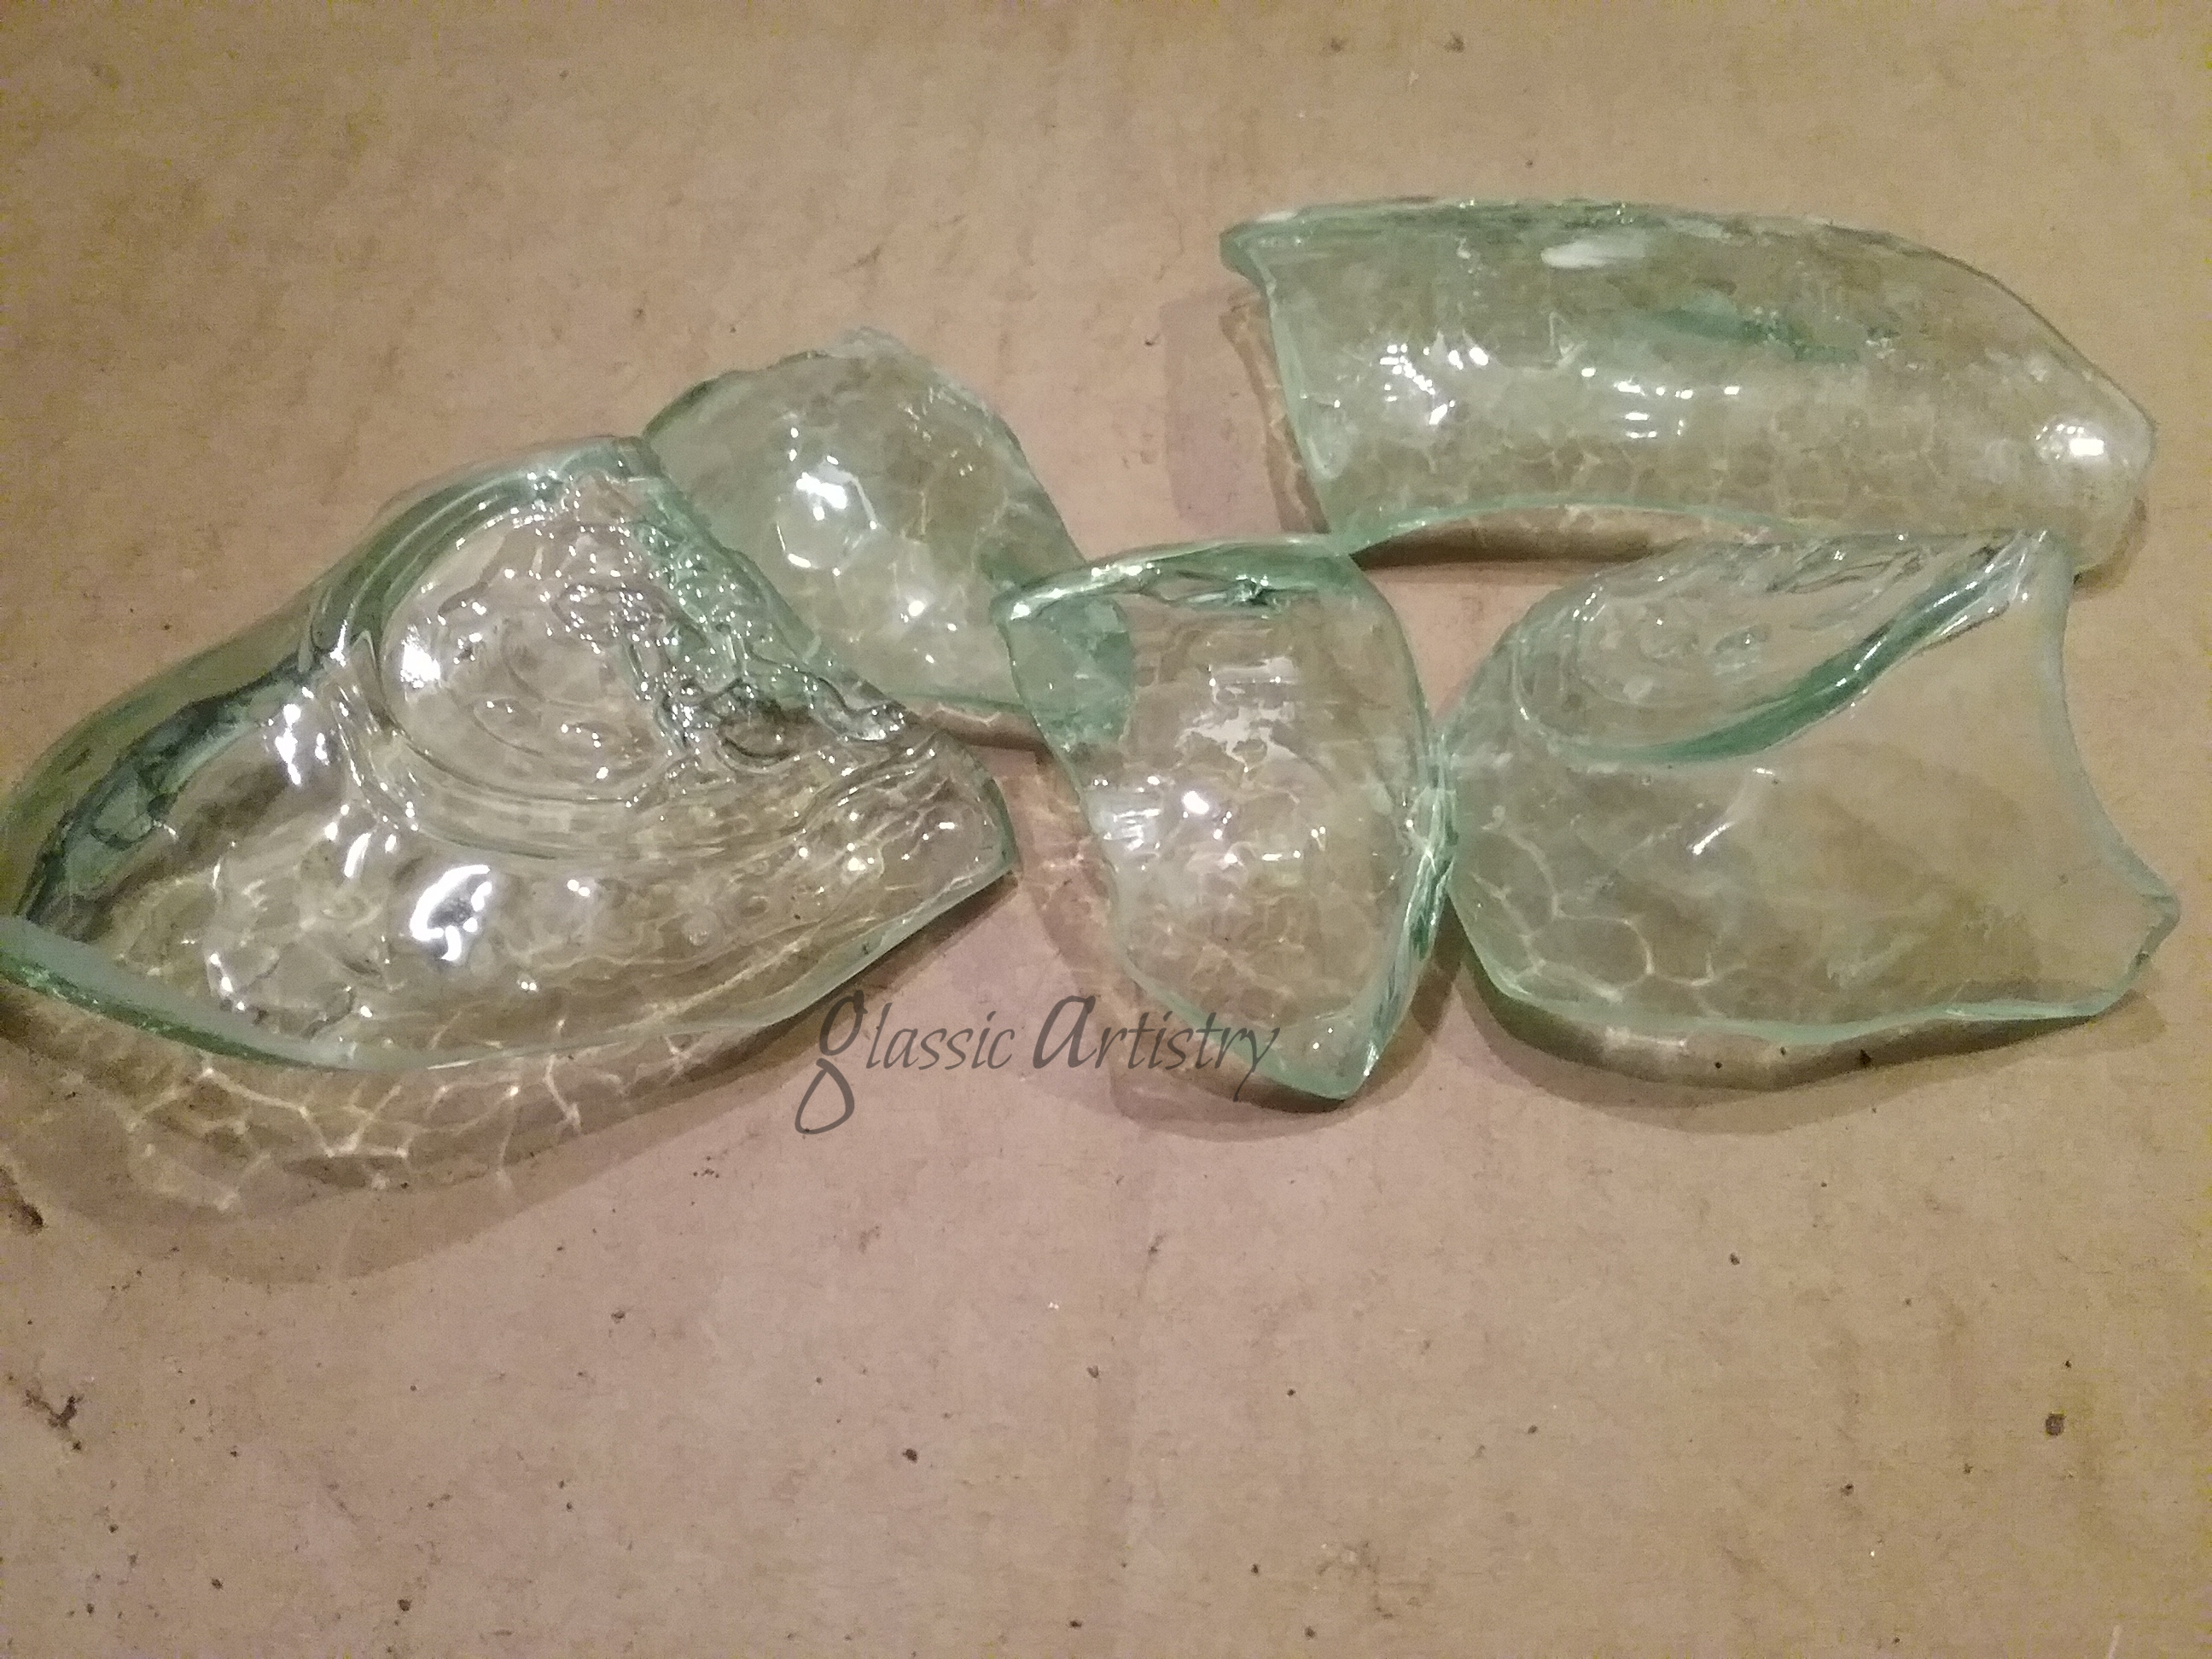
Recently, I was breaking down some bottles for other projects when the idea of glass leaves popped into my head… that was it, now it was time to make a wreath.
Tackling the heavy spring was the first step. It was about 30 inches long and wouldn’t hold a circular shape on it’s own. A length of heavy fencing wire was shaped into a circle and inserted inside the spring for support. The ends of the fencing wire were hooked together and squeezed tight to secure.
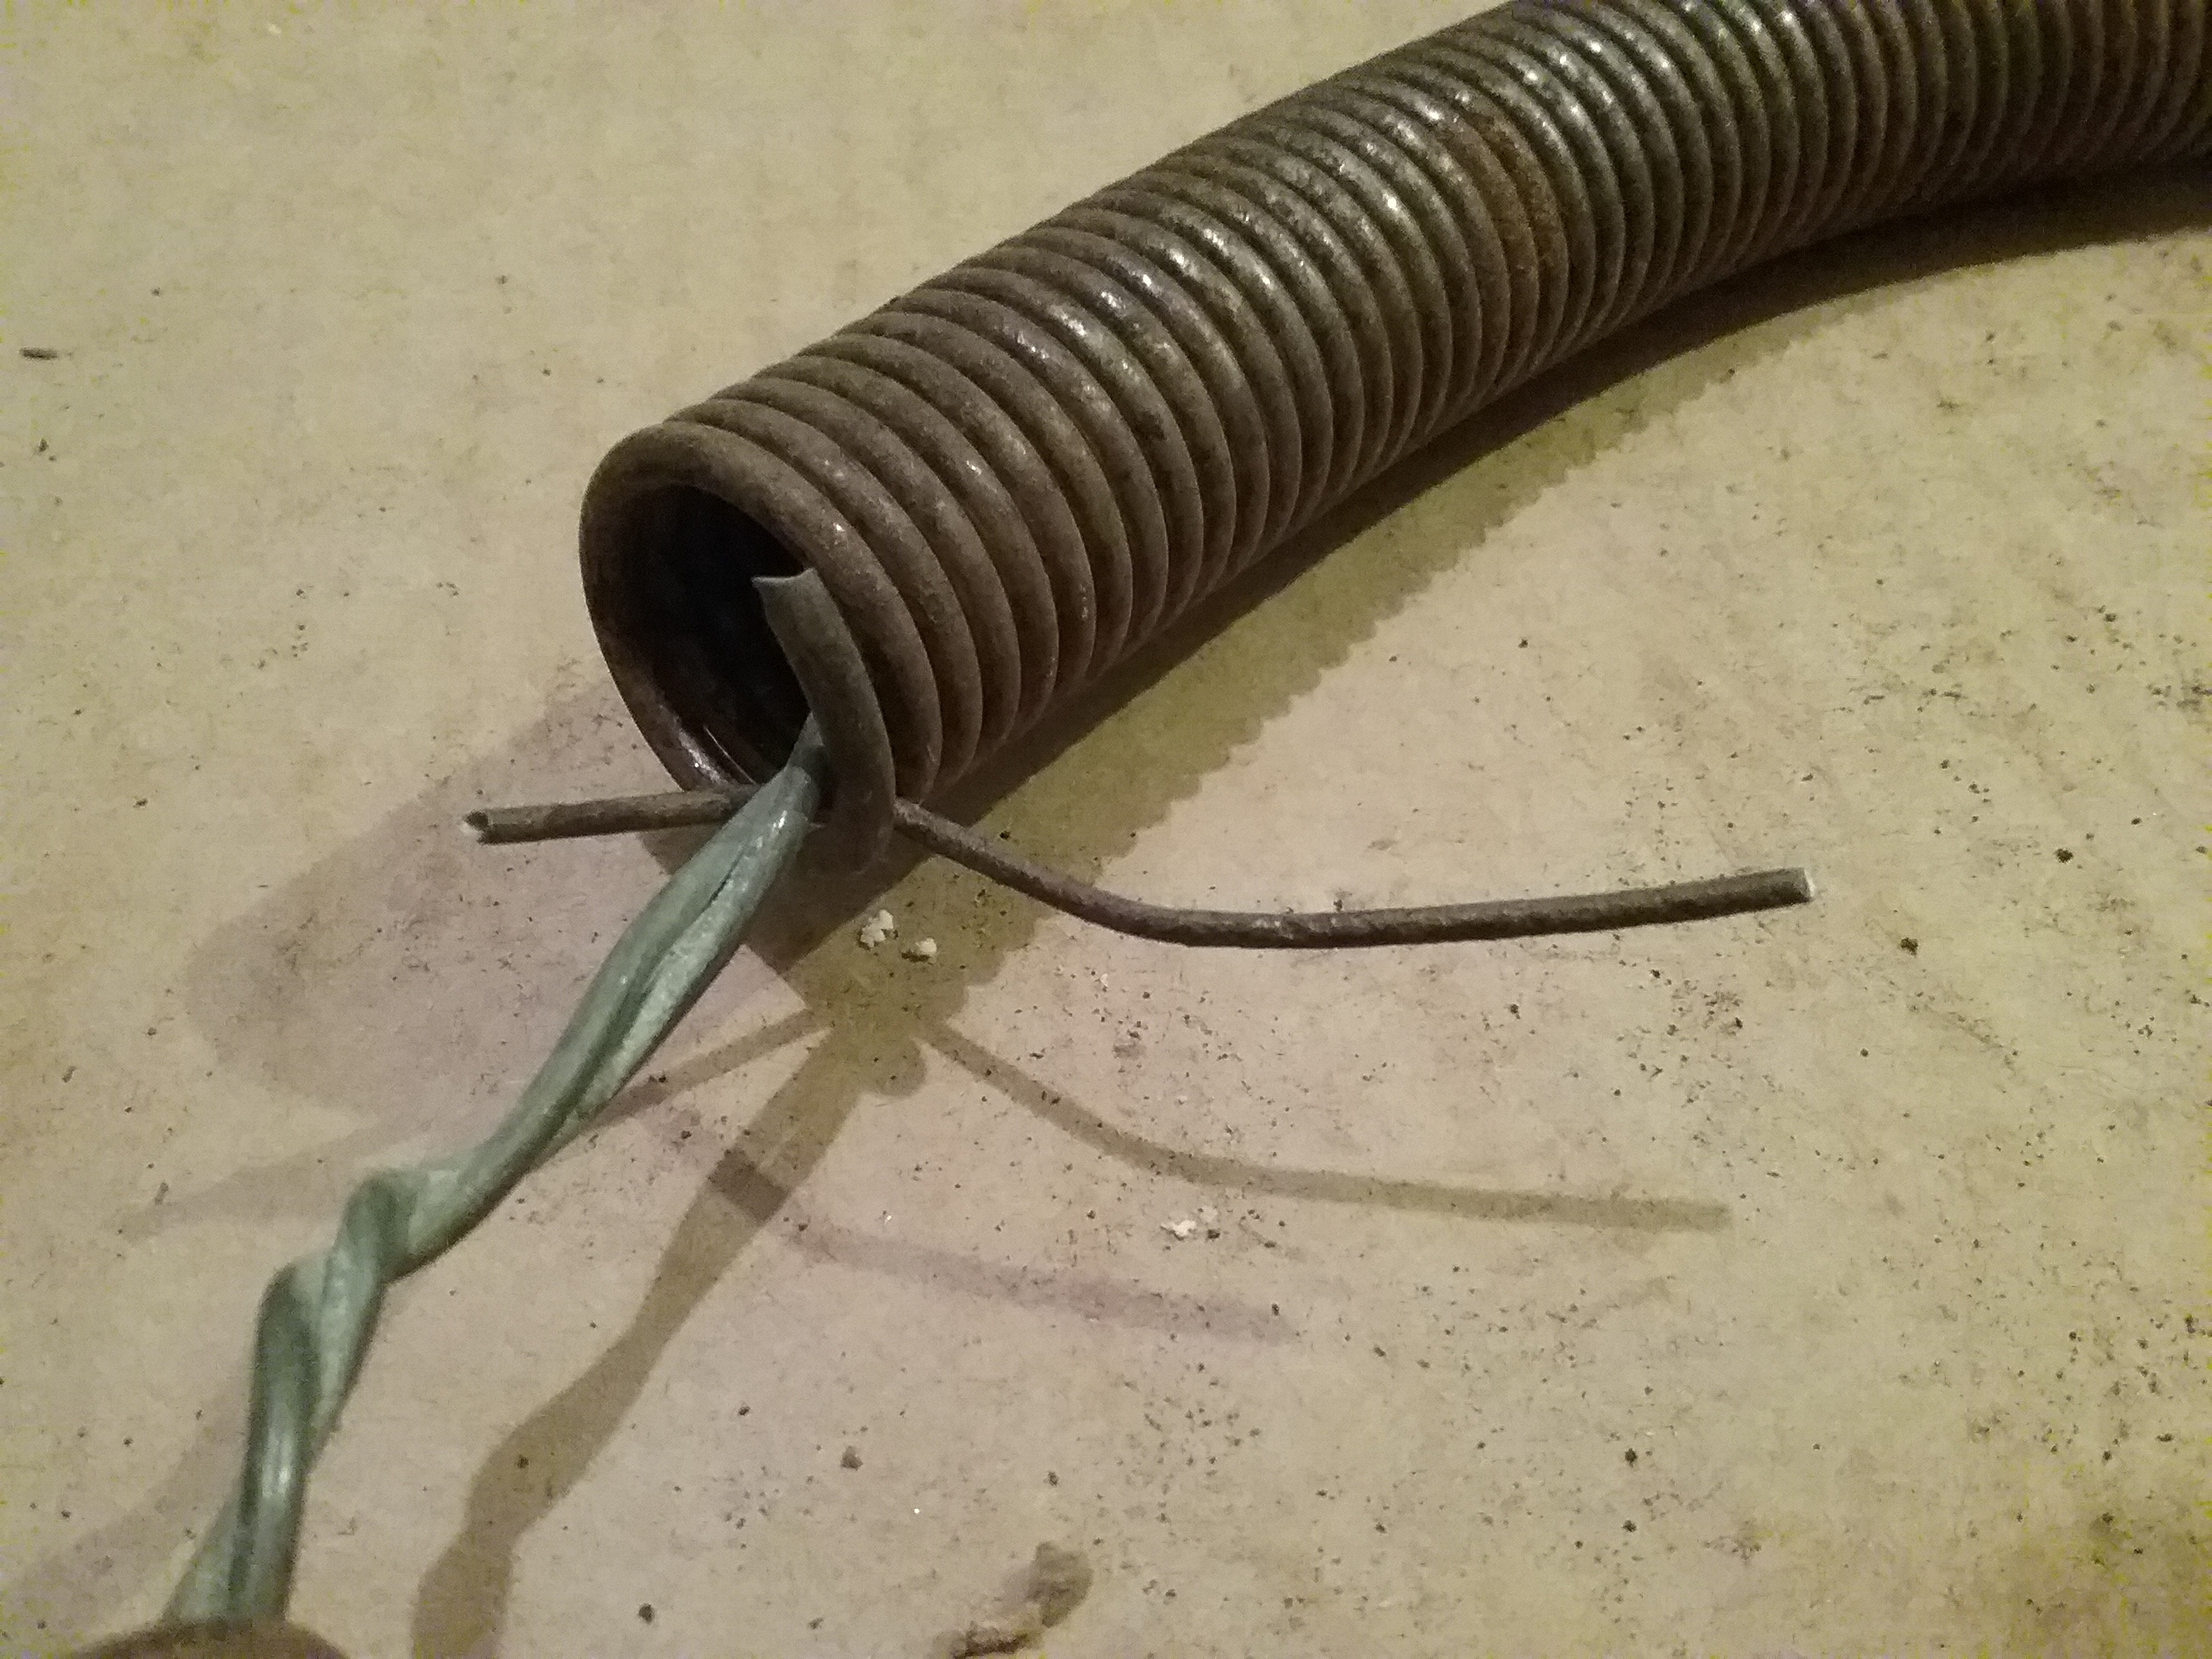
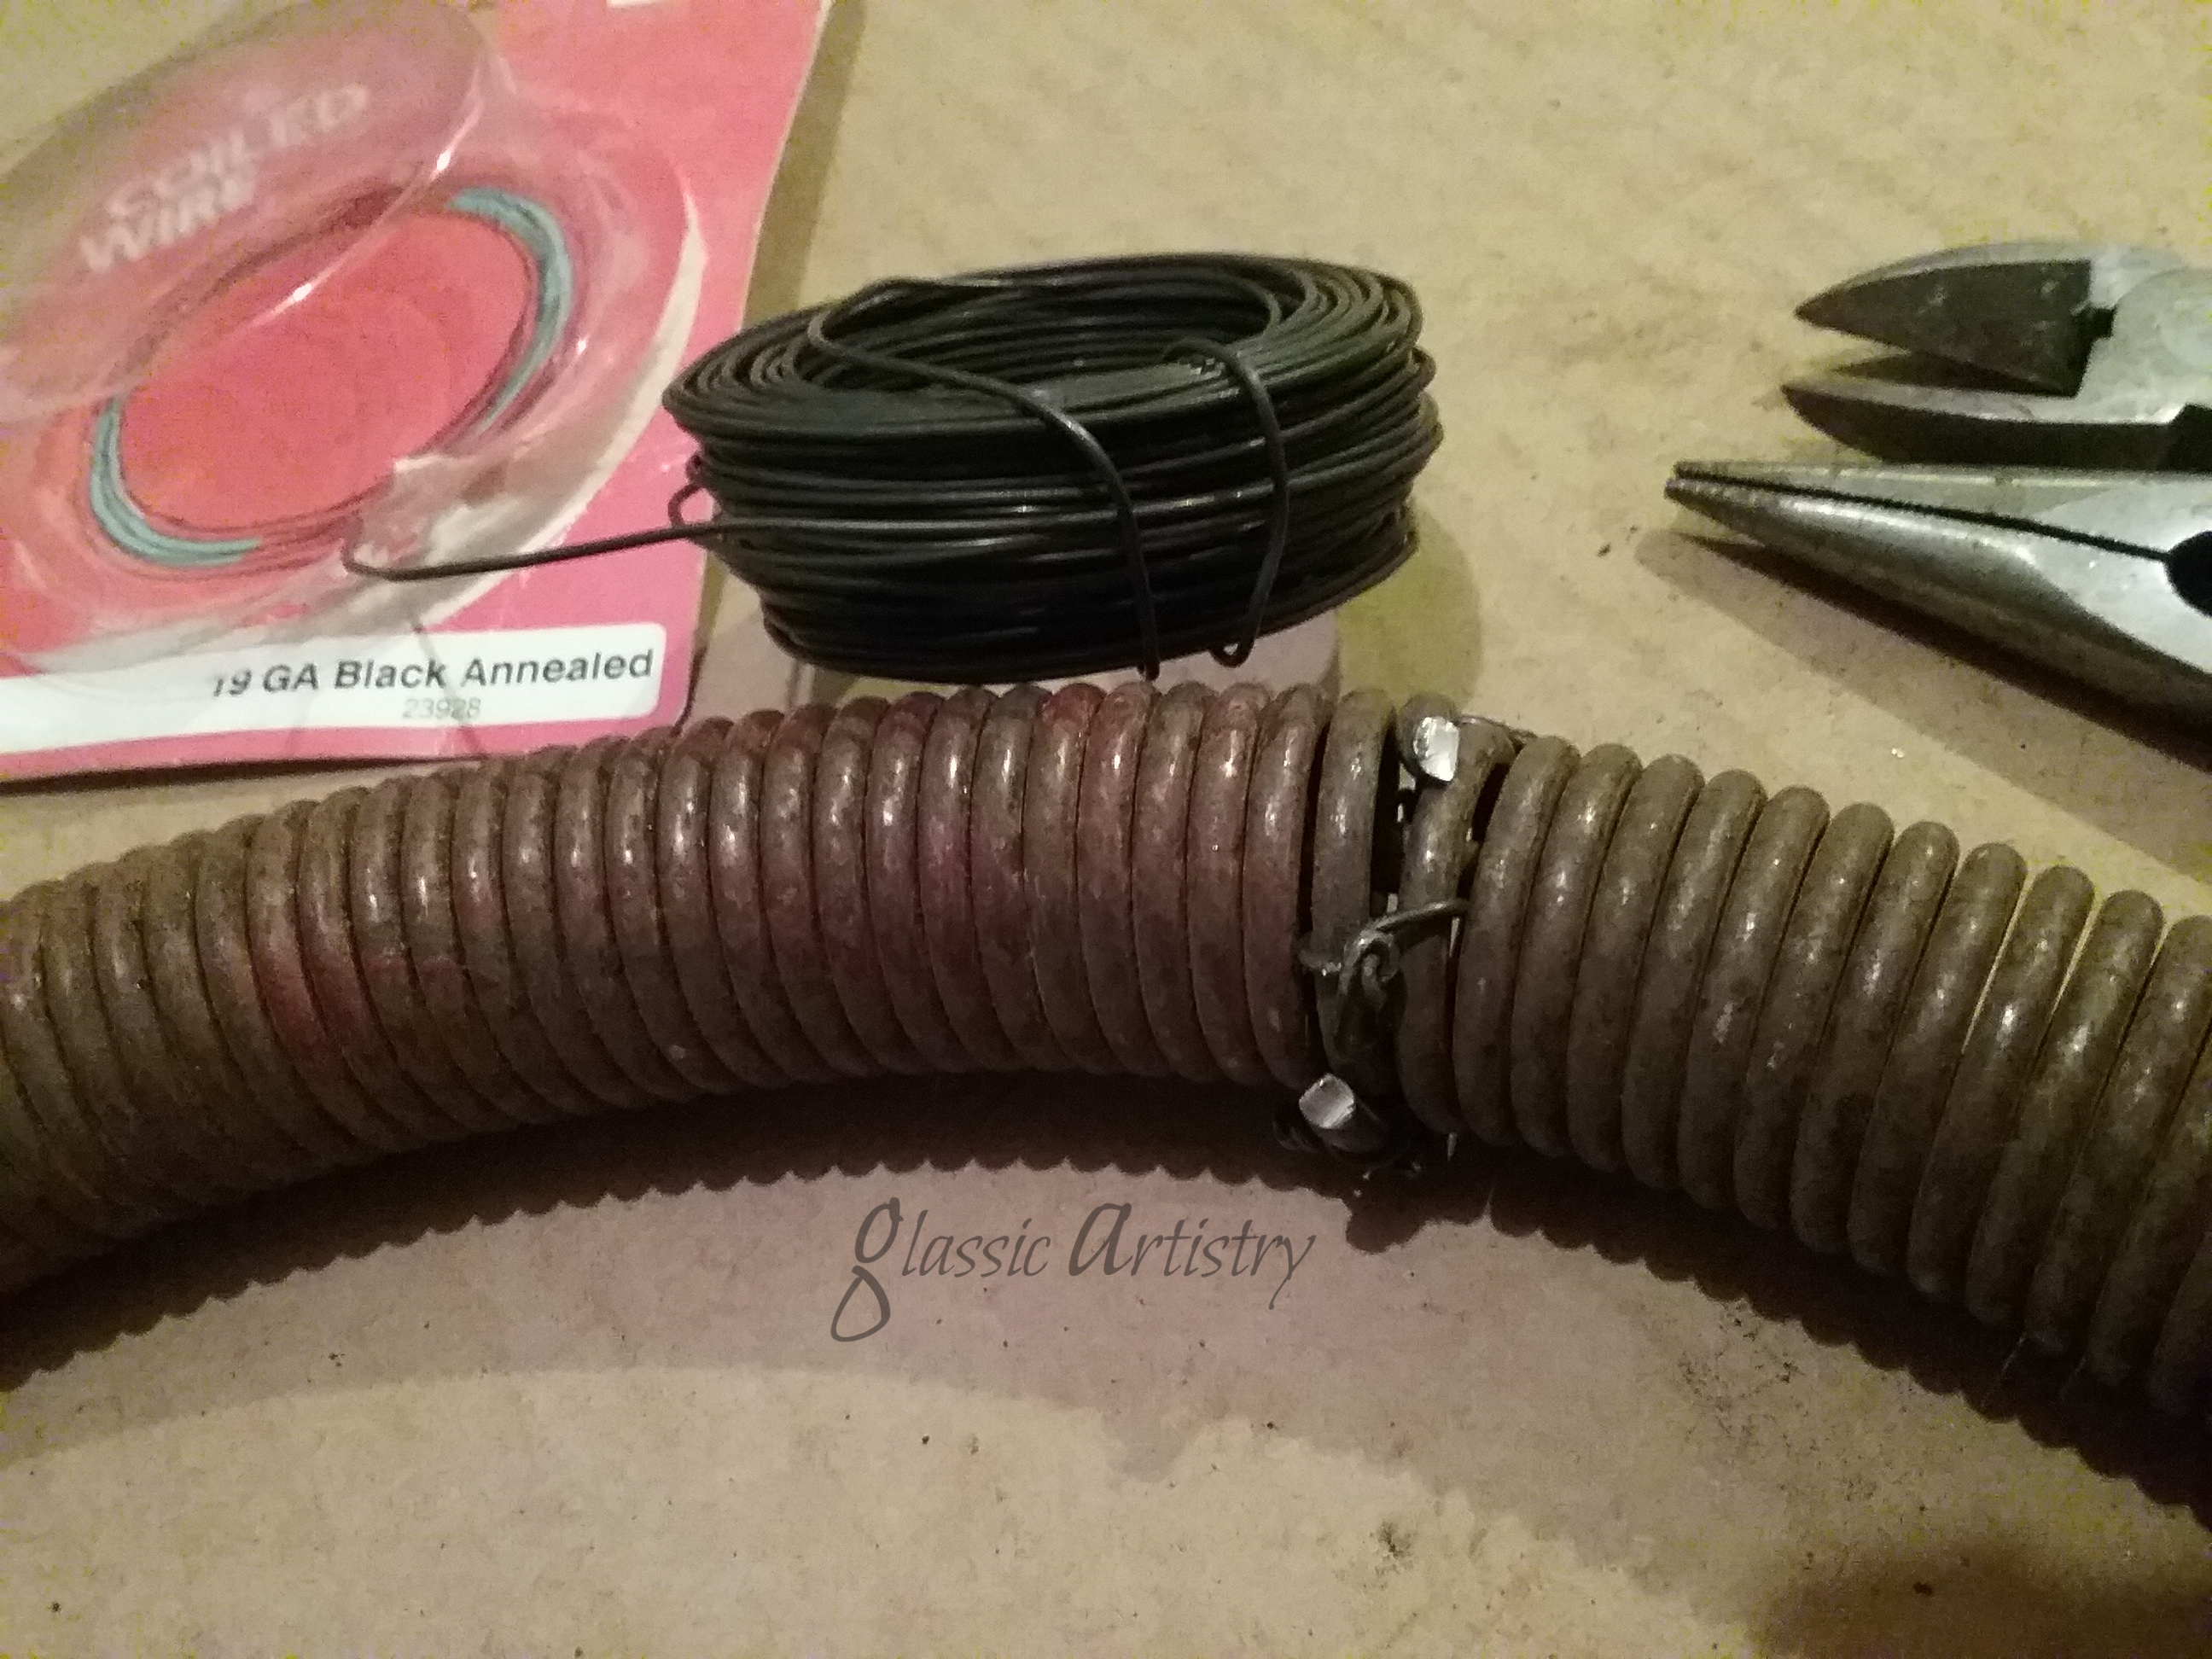
The funky ends were cut off of the spring. With the help of a screwdriver, a scrap piece of wire was wedged into the first end rings of the spring so they could be held open for wiring the ends together flush.
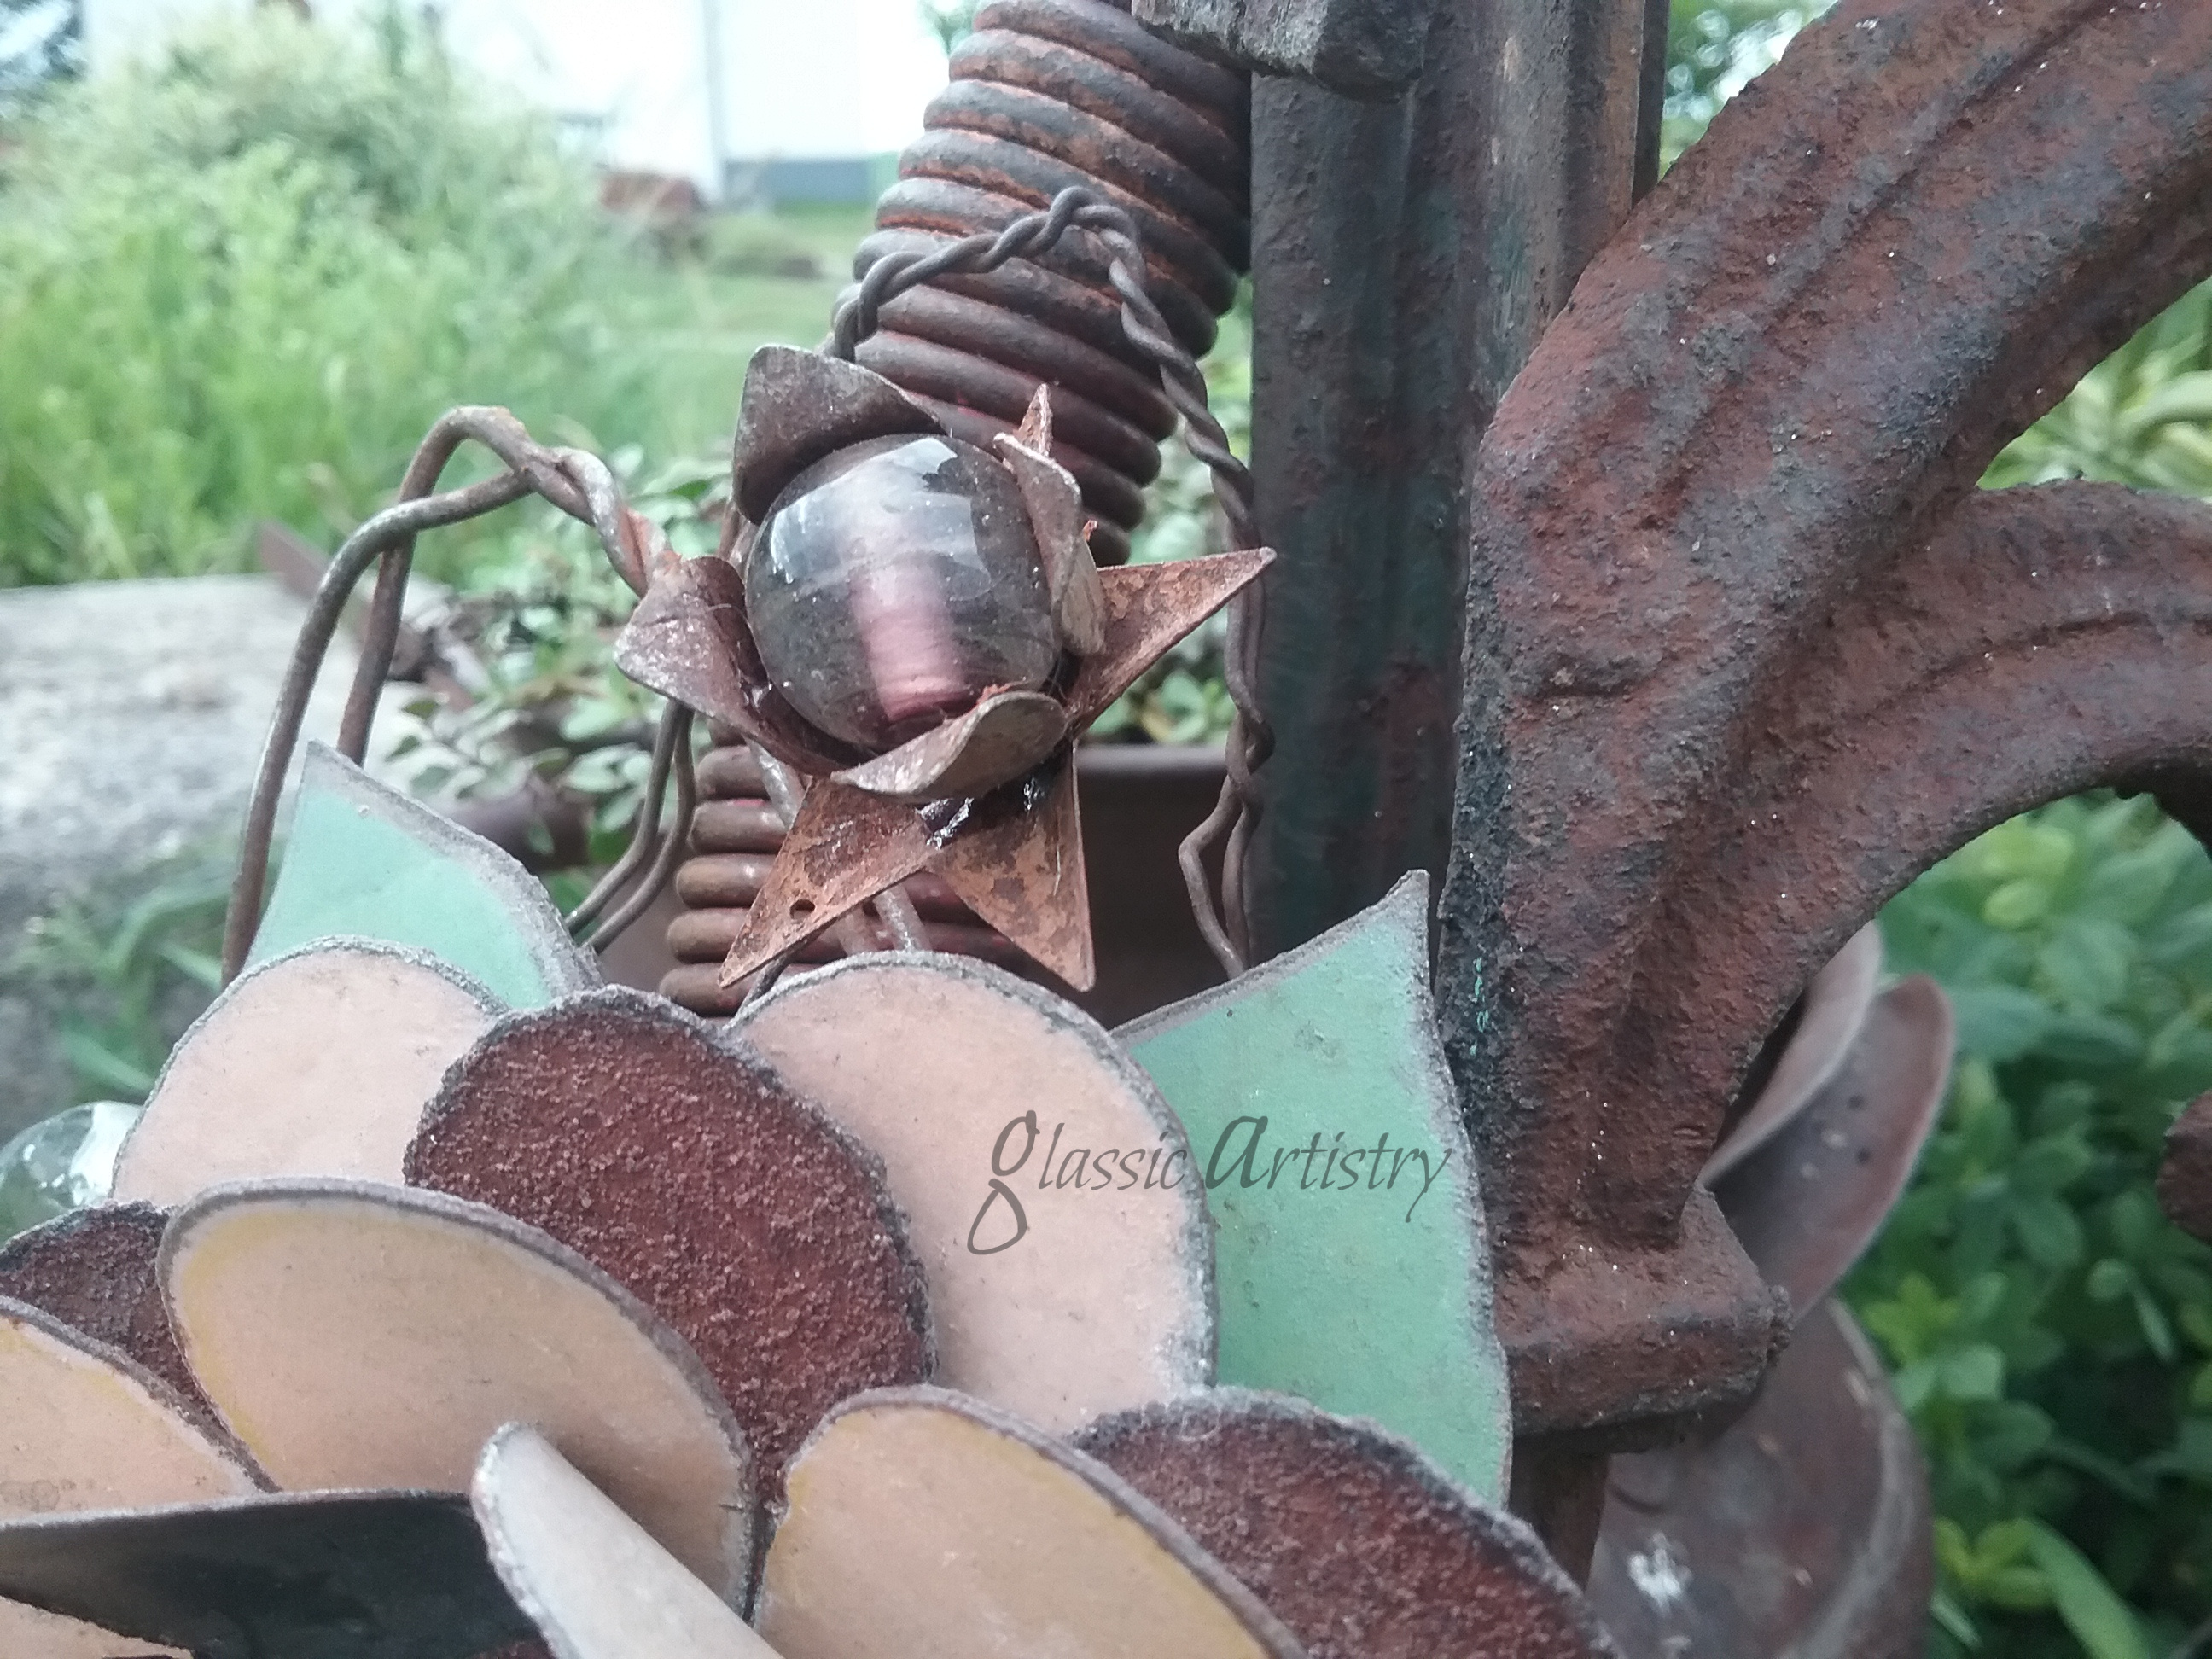
The barbed wire stem was cut from the flower, For added interest, a short, chunky spring was wired into the center of the flower. A long wire was used for this step so it could go through the flower and be used to wire the flower on later.
Pieces of a Captain Morgan bottle were used for leaves. I smoothed the edges of the glass with a glass grinder, but a piece of emery cloth, or a Dremel tool with a diamond grinding bit will work too.
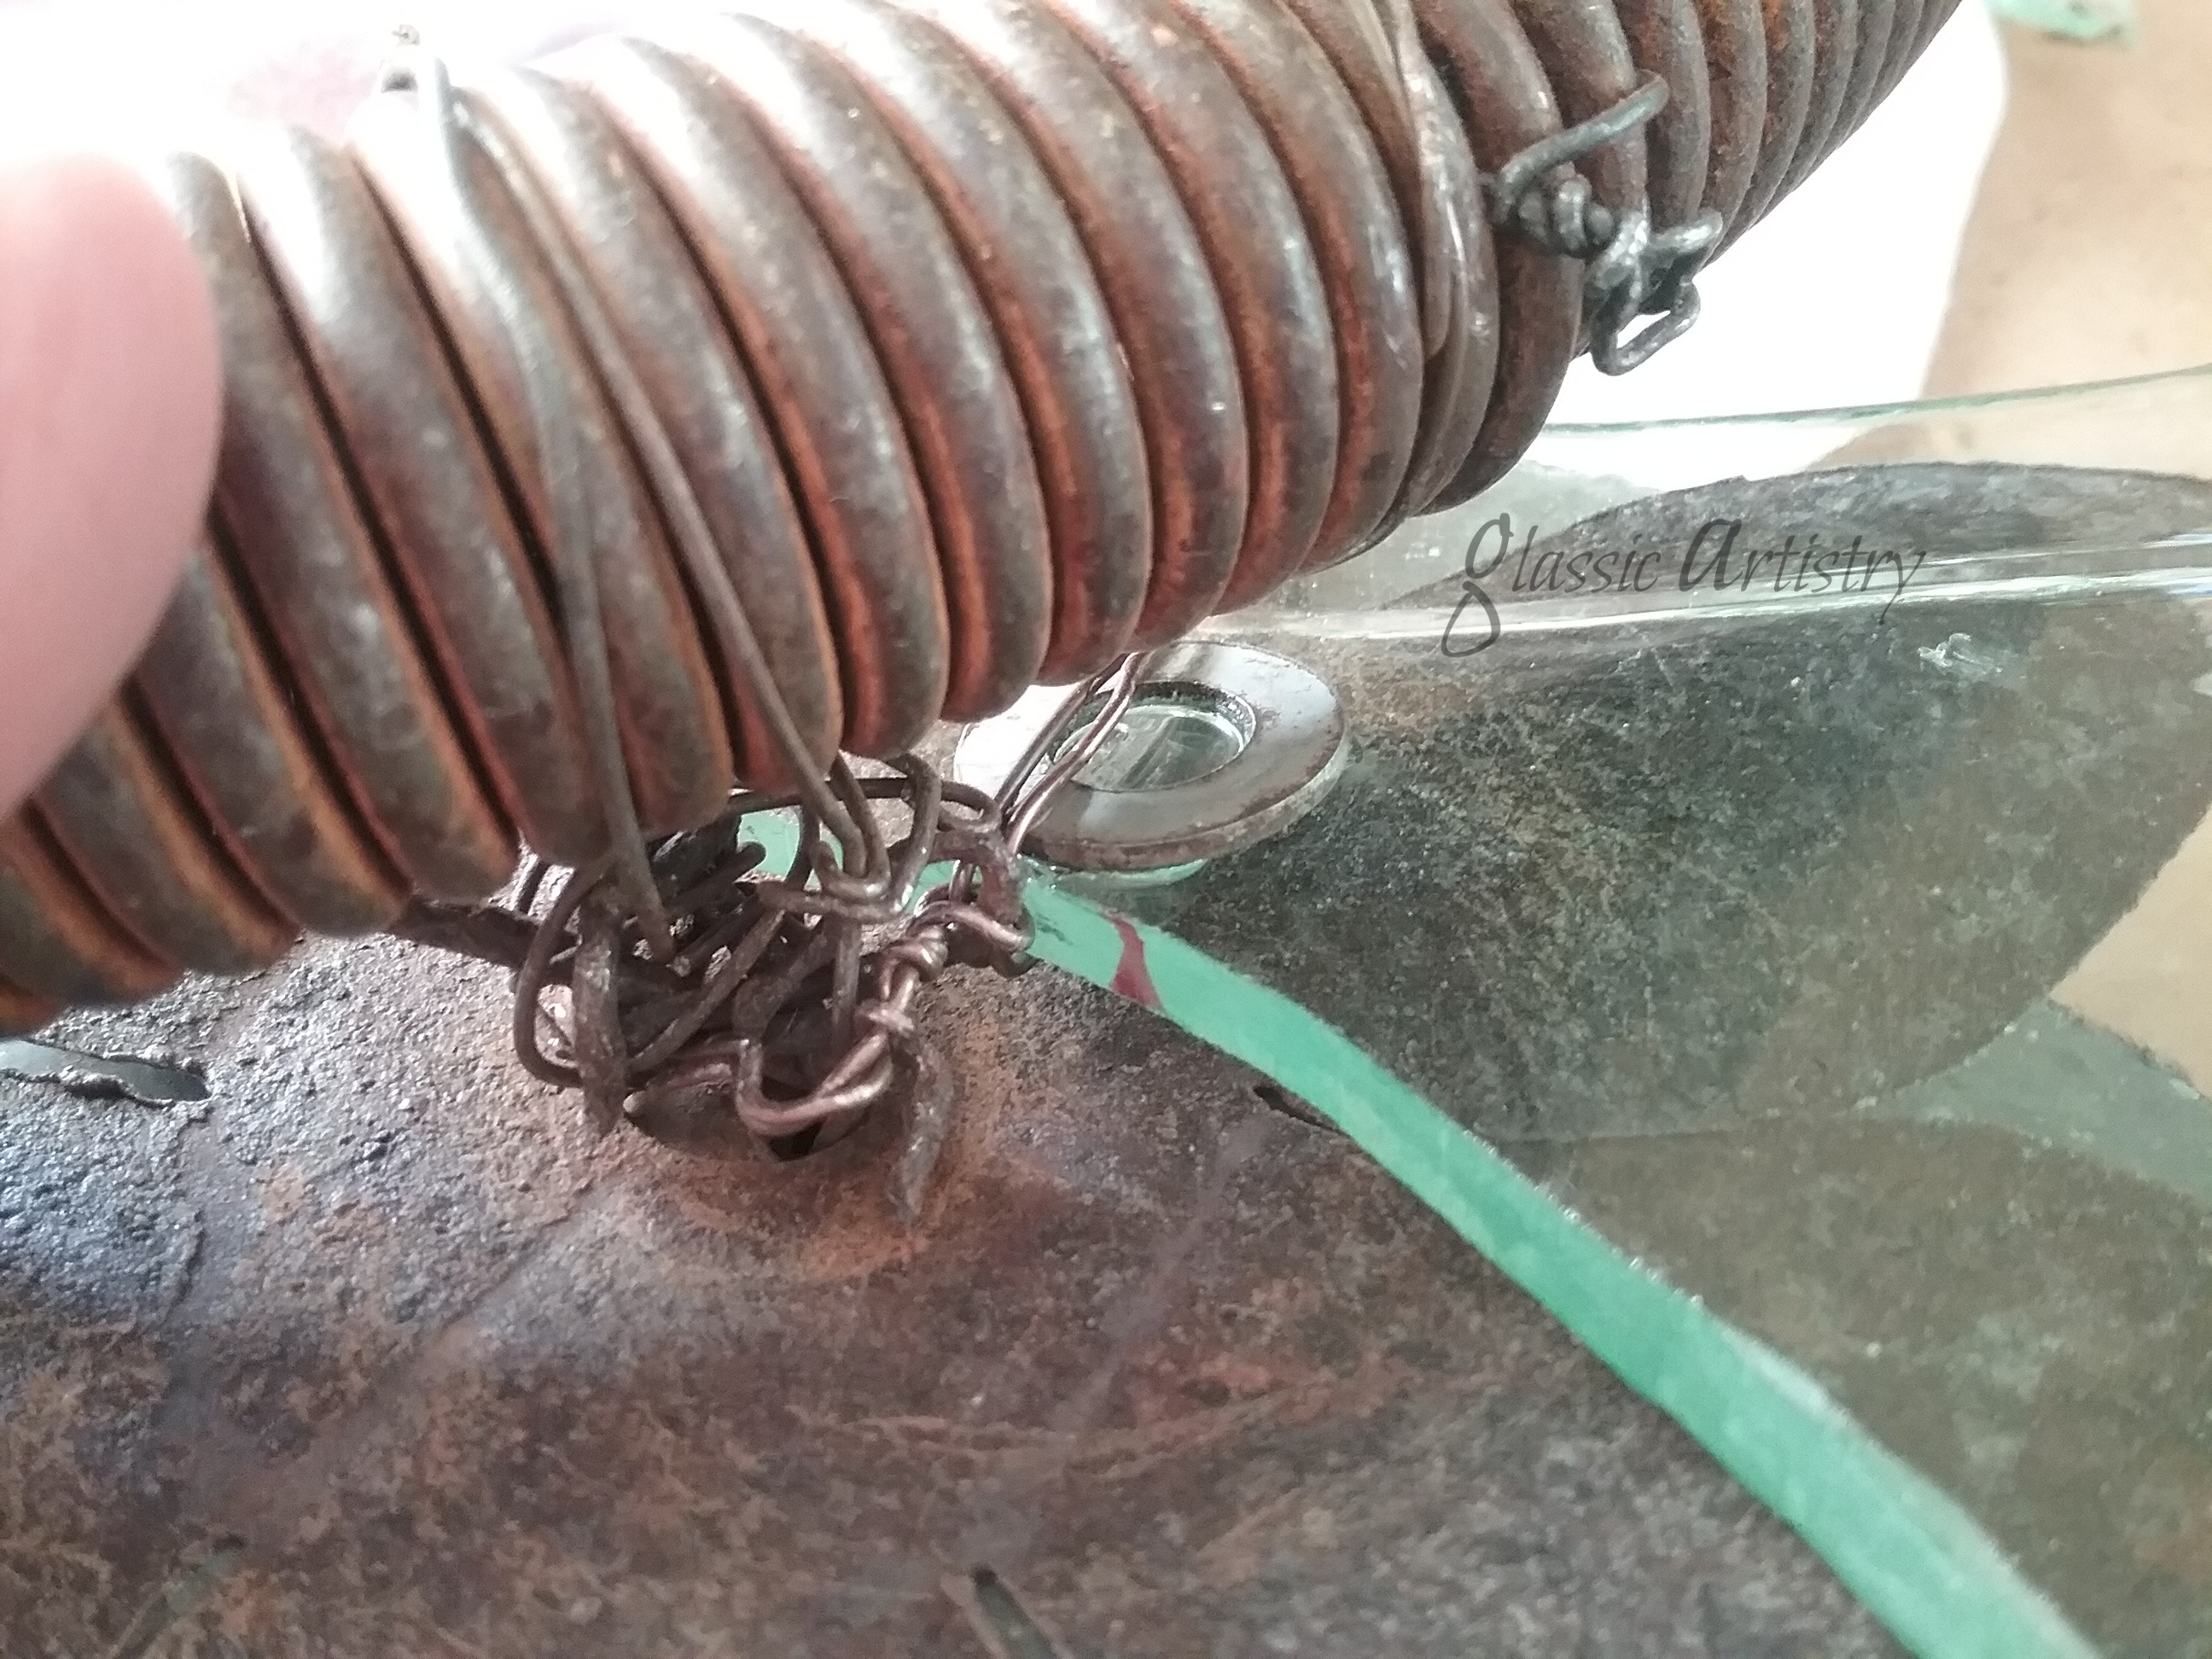
Arrange the leaves and flower on the wreath, covering the wired spring ends. After deciding placement, wire the leaves on first with a thin pliable wire, then the flower, covering the wired ends of the leaves.
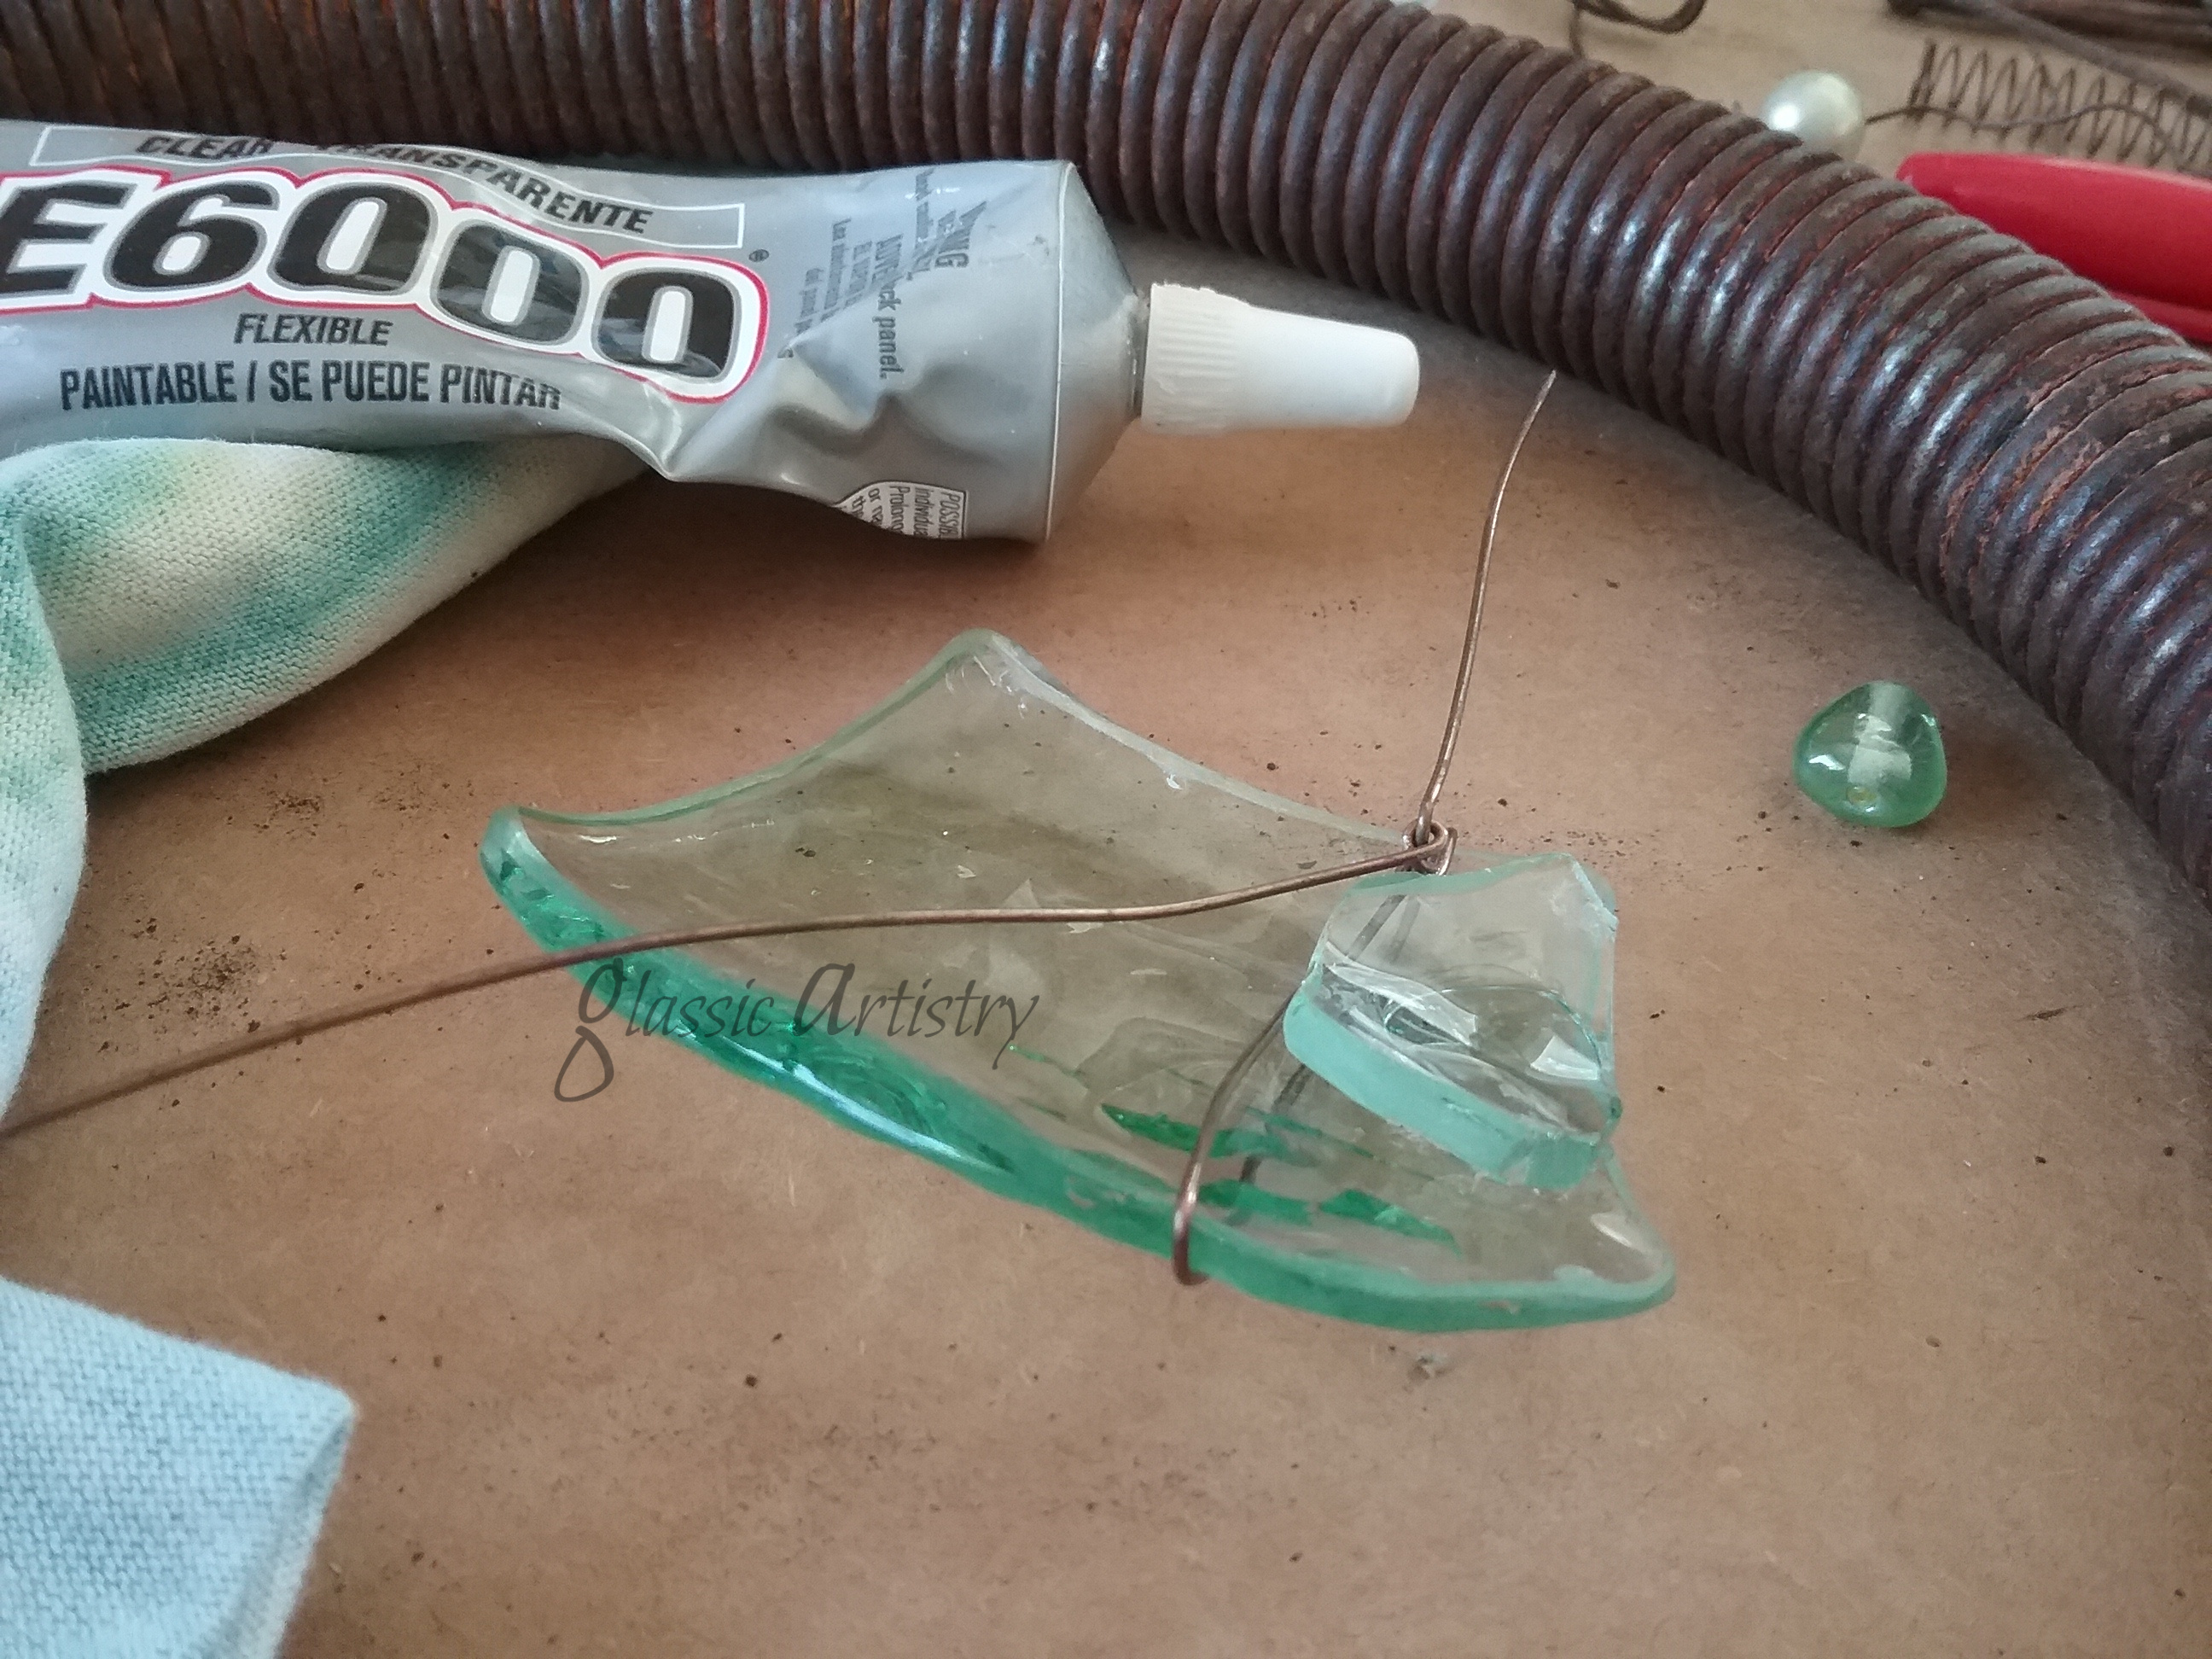
Take advantage of any small curves in the glass leaves to help hold the wrapped wires tightly. As an added precaution I glued chunks of glass, or washers, near my wires to prevent any slipping. Washers can also be glued between the spring and flower/leaf arrangement to tighten or brace an area.
The ends of my heavy wire leaf shapes were difficult to bend. I opted to attach a thin wire on one end of them, then thread it through under the flower and between other wires. Secure the wire to the other end of the leaf shape. Arrange and tighten until snug.
Before finishing up, I decided to add another glass leaf, used E6000 to add a couple interesting rusty bits, and tuck in one of my salvaged art blooms.
I do believe, this is just what that little corner of my garden needed!
I’m still working like mad to get ready for the upcoming June 2nd Vintage Market. It’s been crazy around here trying get ready in such a short period of time. I’m very excited to go though, and hope all the hard work pays off.
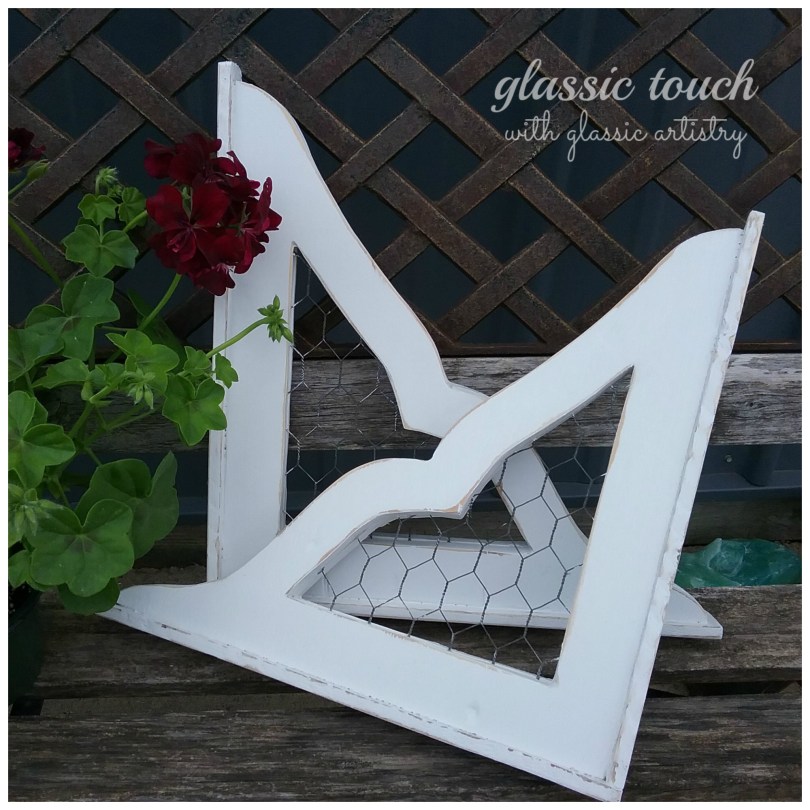
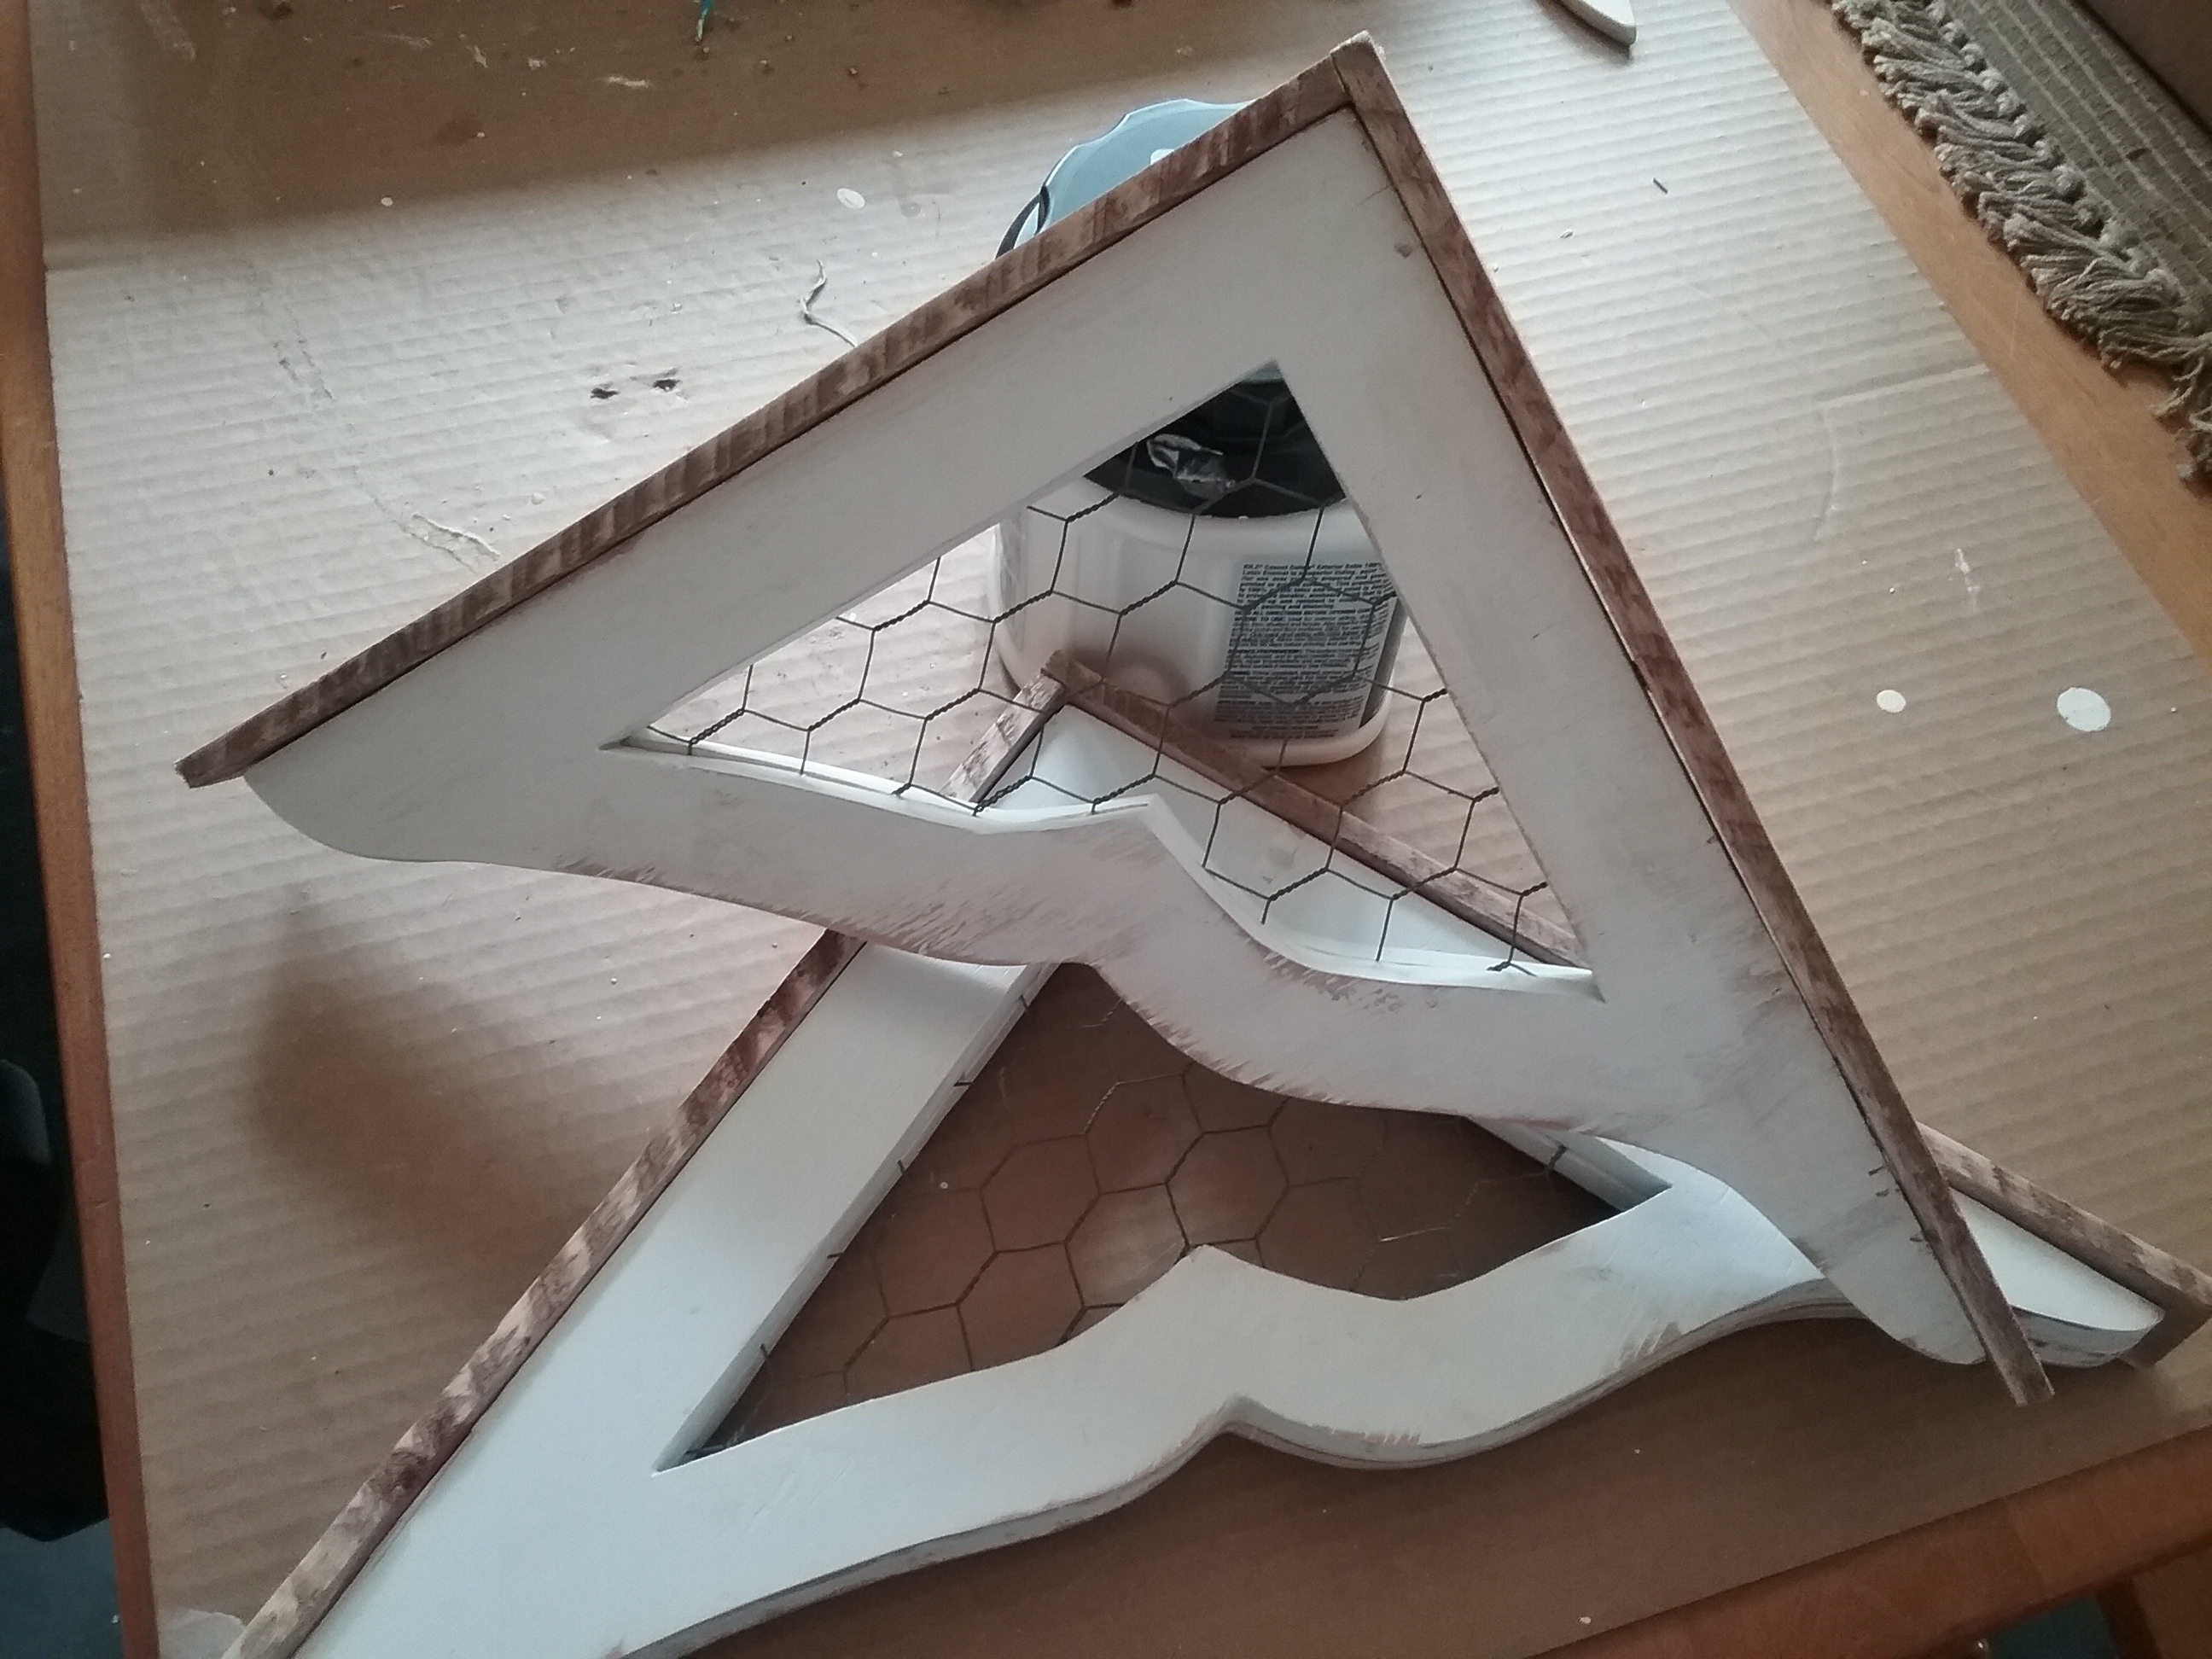
I came up with a new bracket idea to take to the market, and also offer in varied sizes and designs, in my shop “out behind the house” this summer. Chicken wire inserts were added to give them just the right touch for some fun vintage farmstyle/country decorating. They take a little time, but I think they are worth the effort.
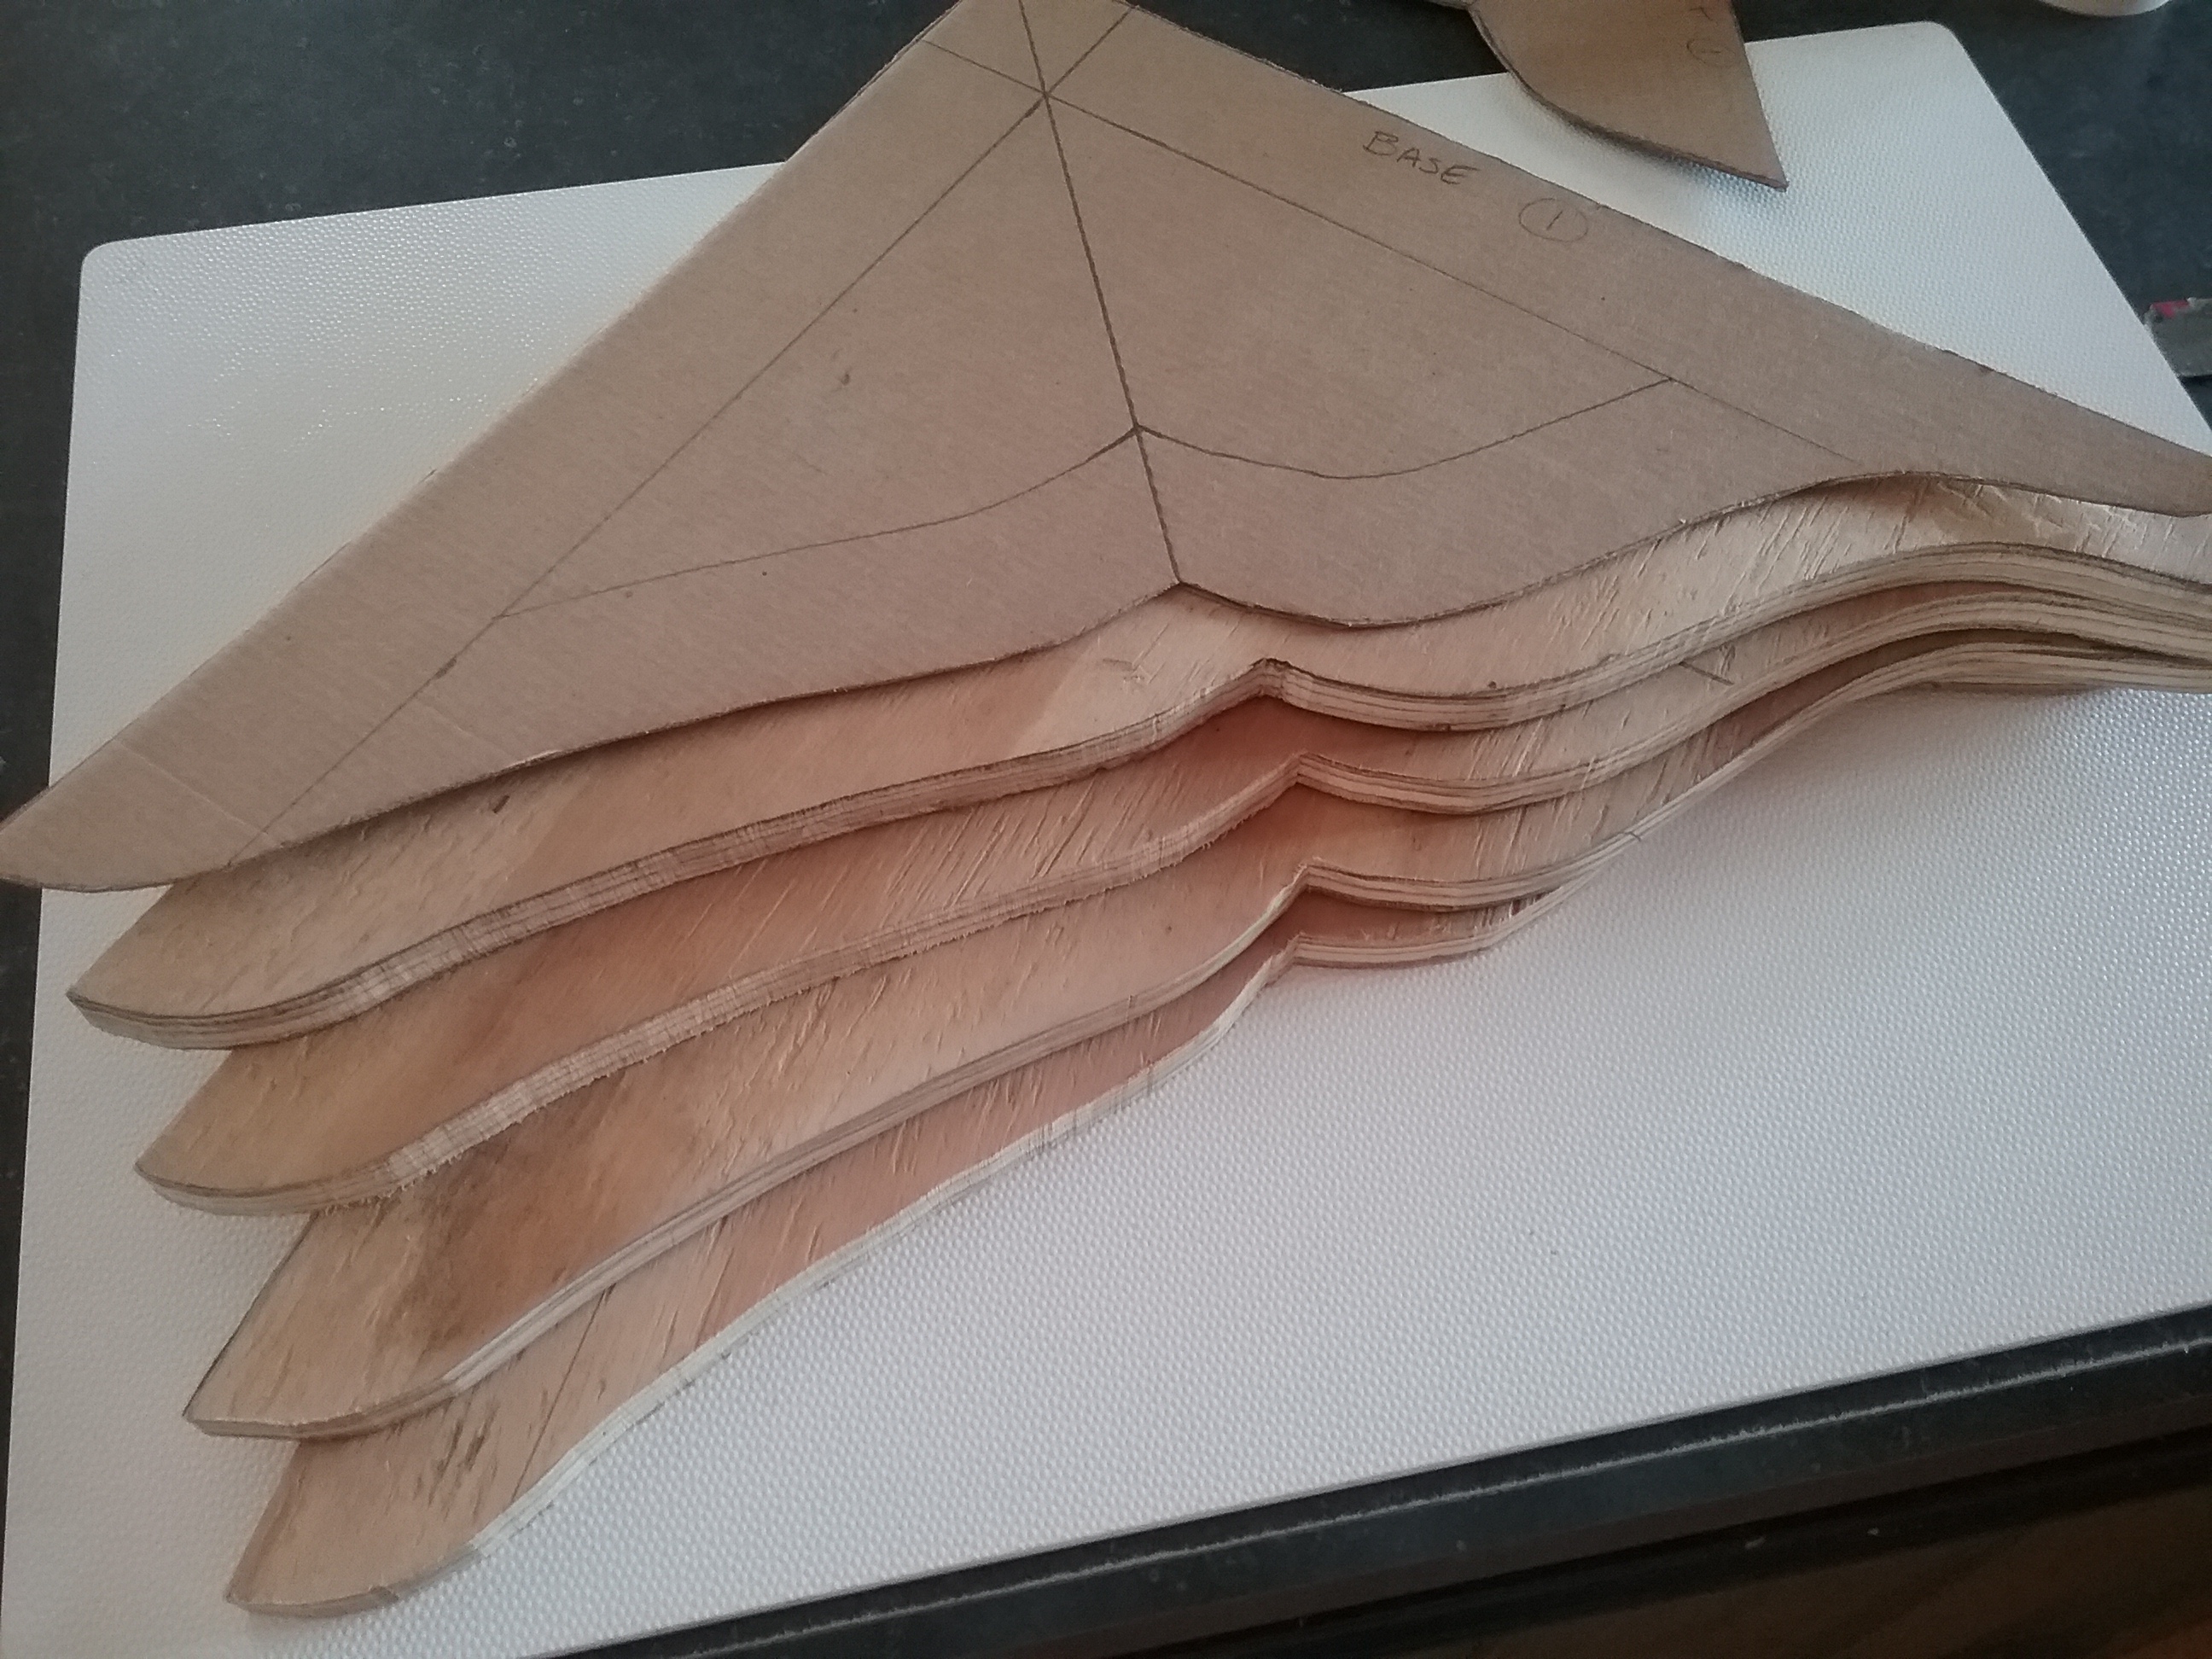
I traced my bracket pattern on to 1/2″ plywood. The plywood was only finished on one side, so the pattern was traced 2 face up, 2 face down, making sure the grain was running the same direction on all, then cut out with a scroll or band saw.
The insert pattern was centered and traced on each bracket.
Drill several large holes inside the drawn lines of the insert tracing. Cut the insert openings out with a scroll saw. I found it easier to connect some of the holes first, removing small chunks of wood from the center, then get a clean cut on the traced lines.
Sand to smooth all the rough edges before painting with exterior primer and paint so they can be used indoors or out.
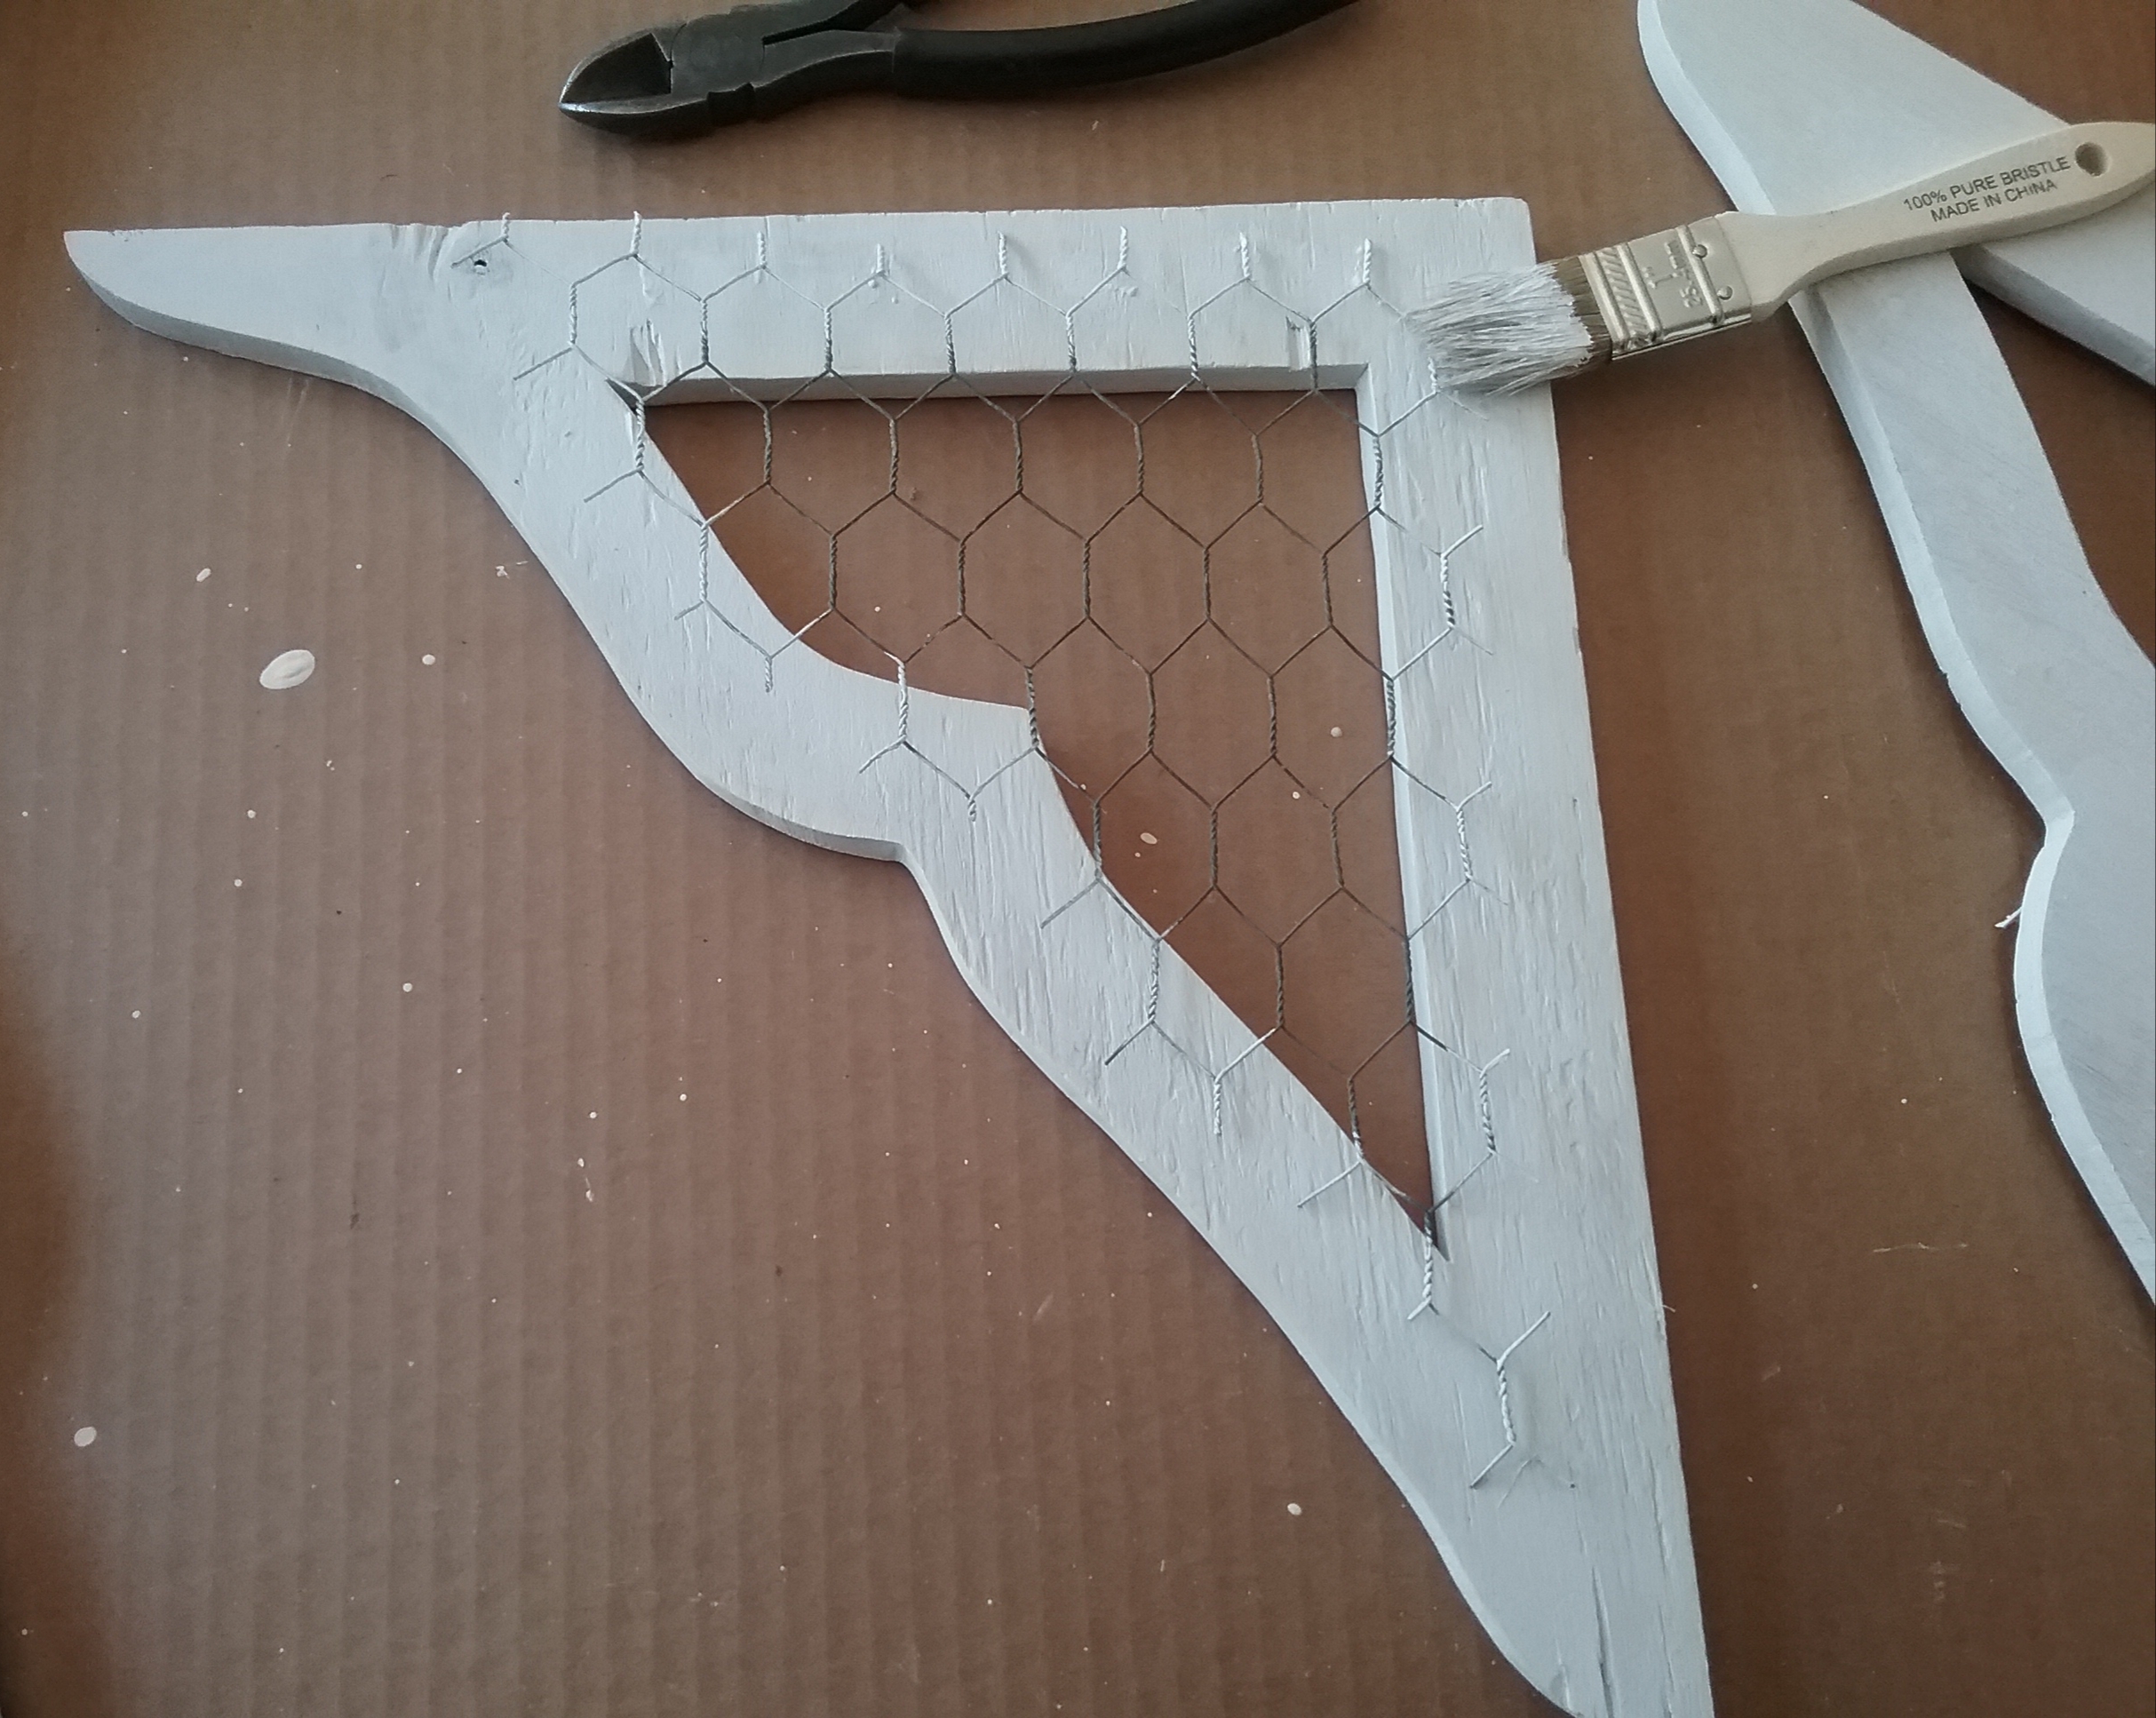
Cut two pieces of chicken wire to extend over and cover the insert area, matching the pattern in the wire.
With a bracket finished side down, place the wire over the insert opening. Brush a little paint on the wire that extends on to the wood. Flatten the painted wire with a hammer. Staple the wire to the wood. Flatten the staples with a hammer so they are as flat as possible.
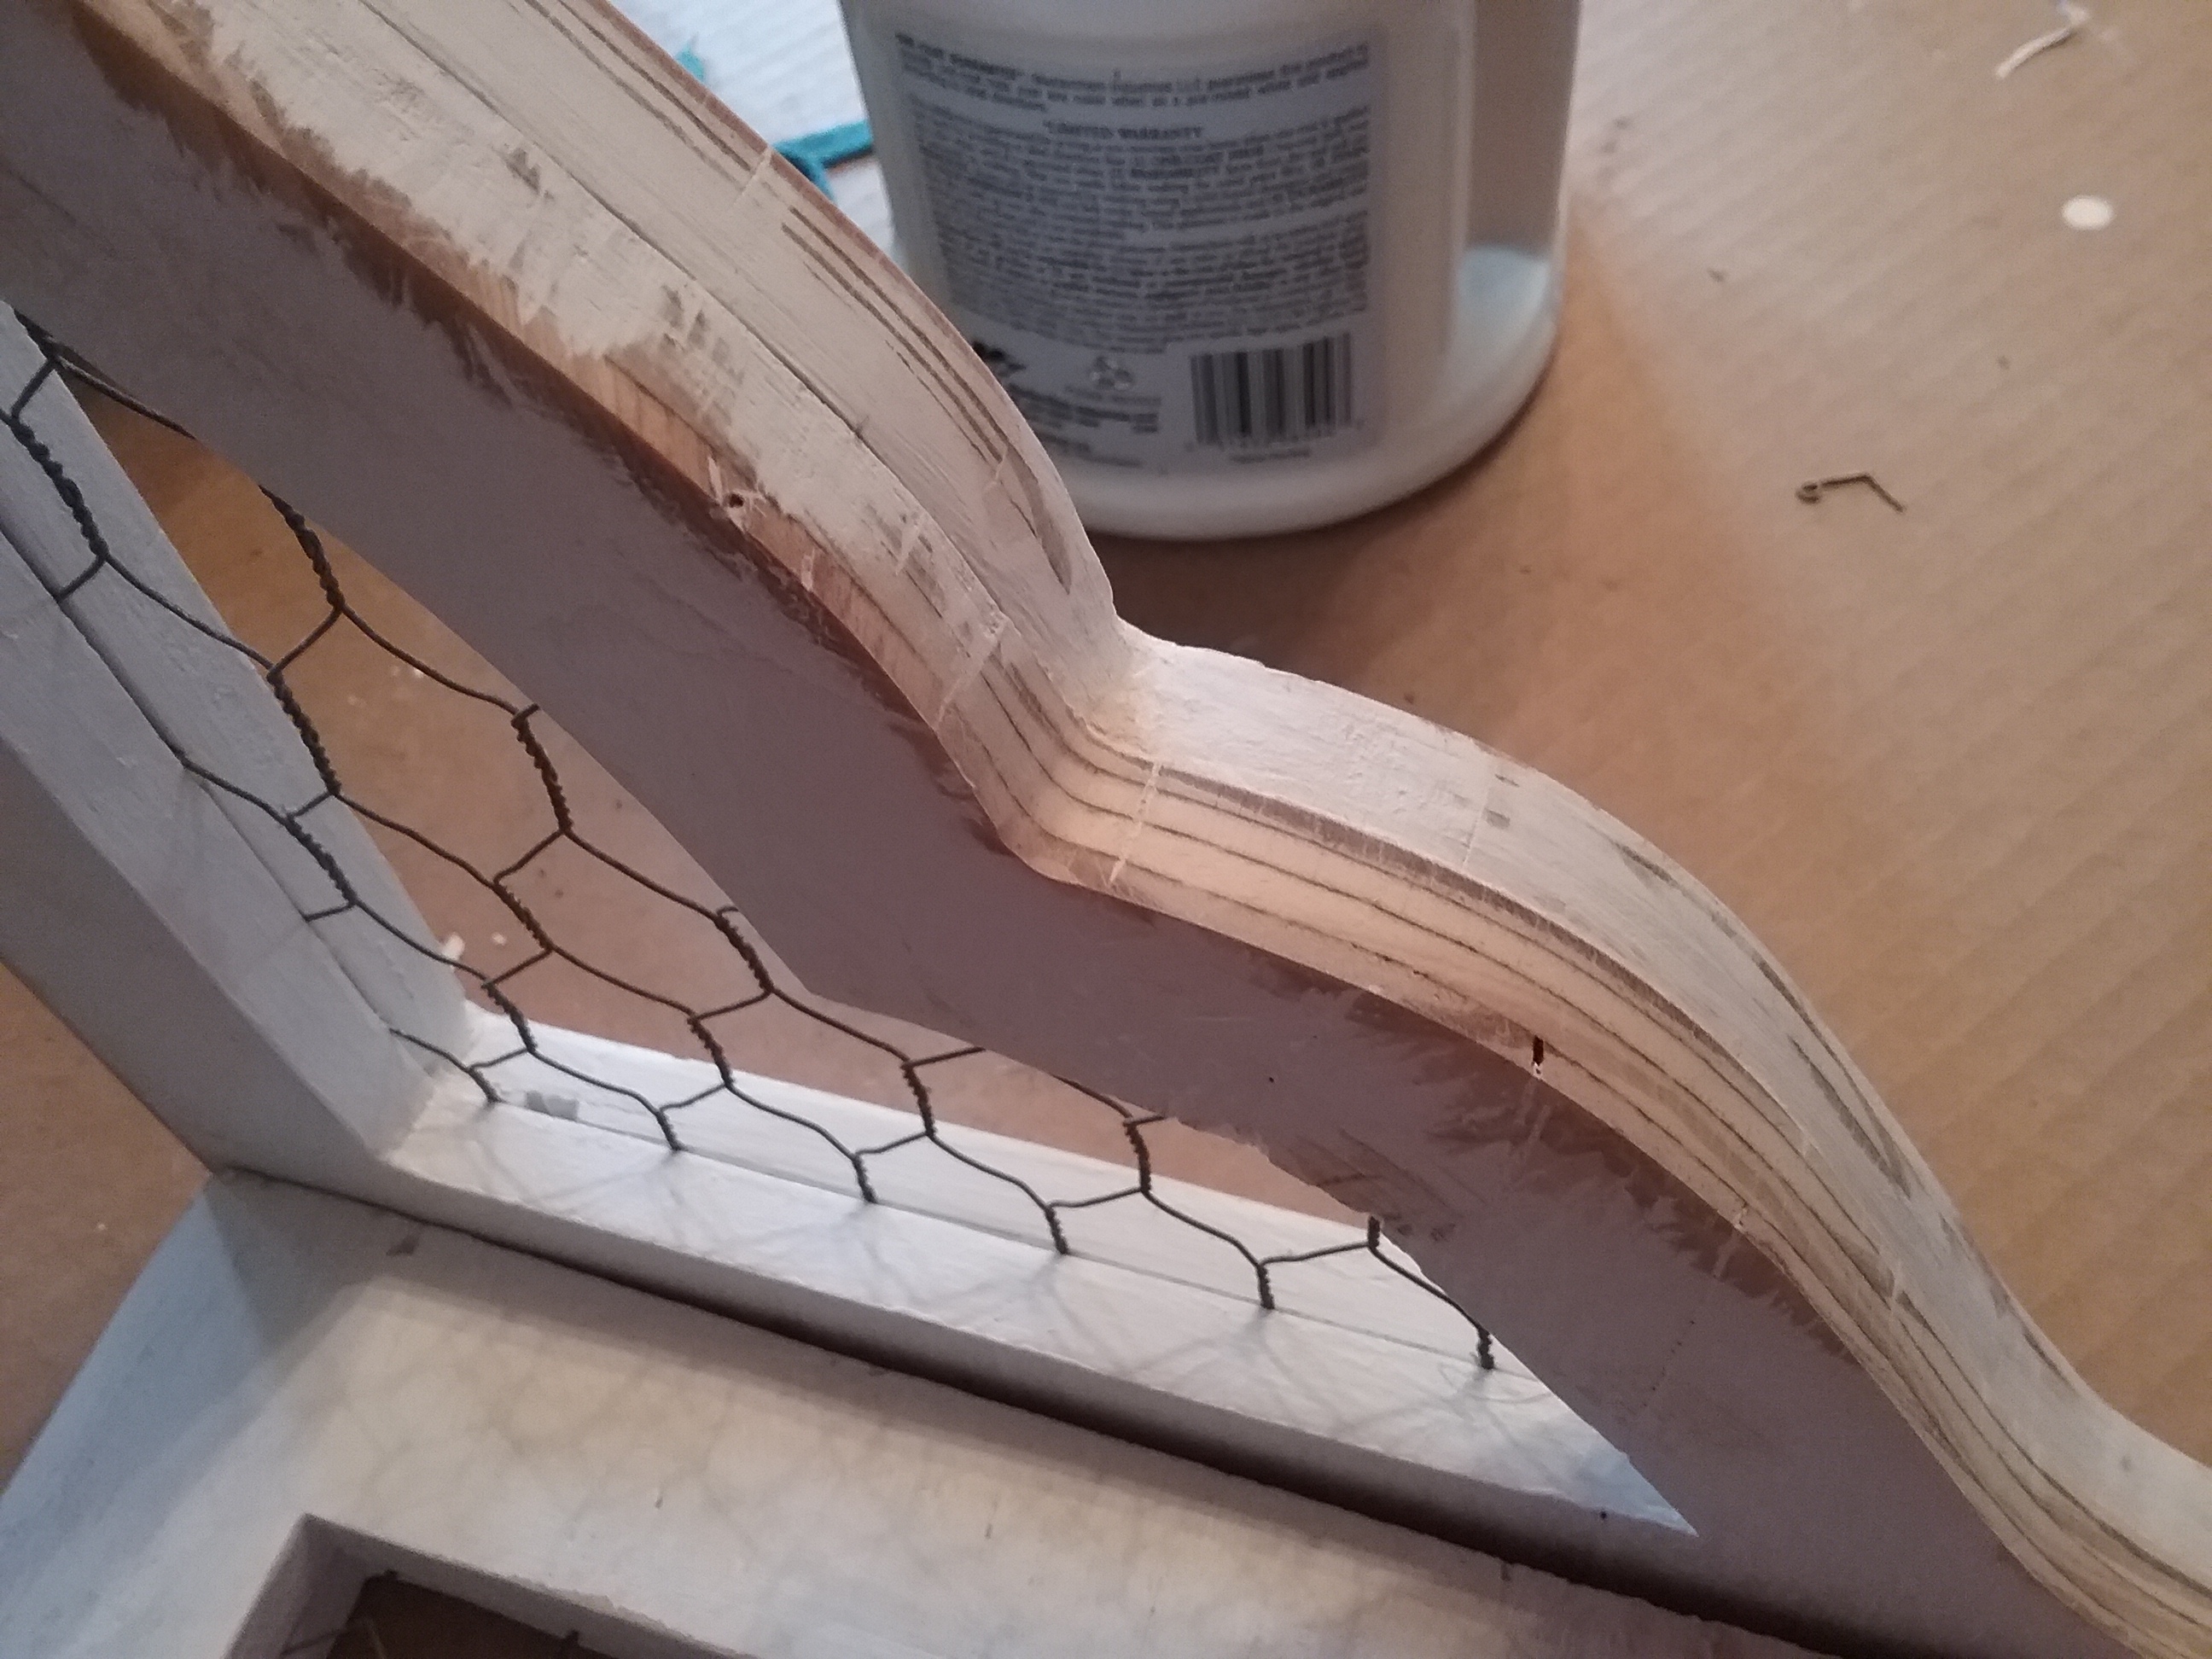
Apply some wood glue, and cover it with a matching bracket, finished side up. Clamp together tightly to dry. My brackets were large. I ended up using twice the amount of clamps that are shown in the picture below. It looked like some sort of a torture device when I sit it down to dry. Make sure to wipe away any glue that squeezes out when tightening the clamps.
After the brackets are dry, they can be sanded to smooth any uneven edges, and touched up with paint.
The brackets are done and can be used at this point, or, the outside edge can be trimmed with 1/4″ thick wood strips, which is how I choose to finish this pair before repainting.
So, what do you think? Think they’ll catch someone’s eye at the market?