Vintage Style Display Tray DIY

With the summer dates on the calendar filling in almost quicker than I can write them down, I’ve had to kick my garage clearing project into a higher gear.  A tag sale is being planned at my home toward the end of May so there’s going to be a lot of crazy going on here for the next 2 ½ weeks.  Fun crazy!

But first, I wanted to put up a quick post on a newly finished display tray created from a vintage springform baking pan, a brown ceramic insulator, metal lamp ring, wooden finial, and a zinc Ball canning lid stacked on a short length of ⅜” threaded rod.  It may seem like an odd assortment of pieces, but the different materials melded together beautifully.

Before starting, a ⅜” hole was drilled in the center of the zinc lid, and a 11/32” hole was drilled in the bottom center of the wooden finial.  The hole in the finial is slightly smaller so the threaded rod will fit snugly. An assortment of washers and nuts were found to fit the threaded rod.

As with previous projects, all pieces were cleaned well and waxed before laying them out to be assembled.

The finial was constructed first.

The rounded end of the insulator sits into the pan’s center opening.
Insert the rod down through the insulator.
Turn the piece upside down, holding the finial firmly. Drop the zinc lid in place over the rod, add washers and the nut; tighten. The insulator may shift as you tighten. If so, loosen the nut and adjust.

The biggest challenge I had with this piece was to find an item that would fit perfectly inside the pan center from the bottom and not slip through. The zinc lid was the solution for me.

The little metal piece on the outside of the pan was bent up slightly so it would not scratch any surfaces.

Would love to know your thoughts. Please feel free to comment and share. Until next time …

Tiered Tray DIY Repurposed Enamelware

I’m back with my first tiered tray. As mentioned in my previous post, I’m working to clear out old before bringing in new. I would like to use as many of my gathered pieces as possible, so you may be seeing several small projects over the next two months and occasional tag sales at my home to help achieve my goal.

To get started, a collection of three worn enamelware pans were taken to the drill press and 5/16″ holes drilled through their centers. The enamel coating will chip away during drilling. I applied a coat of clear fingernail polish around the drilled holes and any chipped edges of the enamel to prevent any further chipping. A clear sealer could be used for this step too. After the fingernail polish was dry, the enamelware was waxed and buffed.

I chose two decorative spindles to use as spacers between the pans. I thought their design worked well, they already had center holes in one end, and one already had a finial; perfect. After cutting them to the lengths desired, they went to the drill press and a hole was drilled through the length of them using the original hole as a guide. They were sanded, painted, and sealed.

A piece of 5/16″ threaded rod was cut to the length needed and a washer and nut found to fit it.

The pieces were slipped on the rod, working from the top down and secured with the washer and nut.

I thought it was finished at this point, but after looking at for a week, I had to add one more detail; a wire ring at the top.

With bolt cutters, a circle was cut from a steel bedspring; sanded, painted, sealed. The tray was taken apart and the finial drilled through at the drill press. The steel ring was almost unbudgeable. I had to hold the finial while my husband stretched the ring enough to get it the holes; its a tight fit.

The tray was reassembled and done! I have my first item for a future tag sale!

Please like, comment, and share as you wish. Keep recycling, repurposing, and upcycling, each small step helps.

Rustic Sunflower Fall Wreath DIY and A Bit More

Oh, how I love spending long, fun filled Fall days full of junk jaunts and tag sales with my daughters and sisters.  With all the virus concerns, we’ve not been out to any all summer, but are hoping to get masked up and maybe squeeze one in next month.  While poking around in my overloaded garage, sorting and tossing, I’m discovering a lot of treasures from our past outings, recalling the plans for them, and remembering some of the crazy times we had. 

One such past find was a pair of metal sunflower candleholders; perfect for Fall decor.  It really makes my day when I find a treasure like this to bring home, repurpose, and play with. When I found them, I knew right away I’d be filling the center with something.

The small round legs popped off easily with pliers.  The leaves were removed with bolt cutters, and saved. To build up height in the centers, a small circle of ½” plywood was glued into each one.  I wanted some shine to show through the translucent glass nuggets I would be using, so I cut circles from a discarded piece of antiqued mirror to glue over the plywood. Small circles of thin metal could also be used in place of the mirror. Different sizes of amber, brown, and clear glass nuggets were glued to the mirror, leaving a small space around each one. After letting the glue dry 24 hours, the nuggets were grouted with sanded grout.  I mixed a small amount of brown paint with my black grout to get the color I wanted.  Let grout dry overnight before sealing.

Searching through my stashes, I found an awesome piece of rusted steel wire and some beautiful green and gold blown glass grape bunches.  The wire,  I pulled from a salvage pile last year, and the grapes were found in an antique mall in Texas several years ago. They had broken leaves, and I paid a bit more than I would usually do, but they were so darned pretty.  And now, I’m really glad I did.

Not being one for flowery, frilly things, the wire piece worked perfectly for my taste; I could use the twisted wire knot to take the place of a bow.  

With 22ga, thin black wire, the flower was wired on first, then the leaves, and grapes.  I added some rusty springs to give it just a little bit more. 

I love the versatility of projects like this.  These sunflowers can be attached to just about anything, and used indoors, or out.  I did a little playing around with some other ideas too, and thought I’d share them just for fun.  You’ll have to let me know what you think ..

Keep it simple.  Paint a couple metal leaves to add around a flower; attach it to a chalkboard, or a welcome sign.

 A wire wreath is big enough for the pair. No ribbon for a wreath bow?  Cut strips of fiberglass window screening and loop one.  There’s easy bow instructions on YouTube.

How about a mailbox cover?  A metal nail strip was stitched to wire hardware cloth and shaped in an arch.  Hold it in place underneath with mini bungee cords.  

For an open porch, I think a small arrangement with a sunflower and raffia would look great too, tied around the neck of a milk can filled with tall florals, or ornamental grasses; but I didn’t have time, a porch, or florals to get that put together. 🙂

A wide variety of small, inexpensive metal and glass pieces can usually be found at garage sales, and tag sales, so keep an eye out if you like repurposing and working with salvaged materials.  It’s good to get in the practice of looking at a piece and taking it apart in your mind to see how it’s parts can be used in other ways before carting it home.

Please feel free to comment, or share my post if you like. Take Care and Stay Healthy. 

Little Upcycled Bucket DIY Tutorial

Well, I’d say its about time I found my way back to my blog!  Its been a year, way too long!

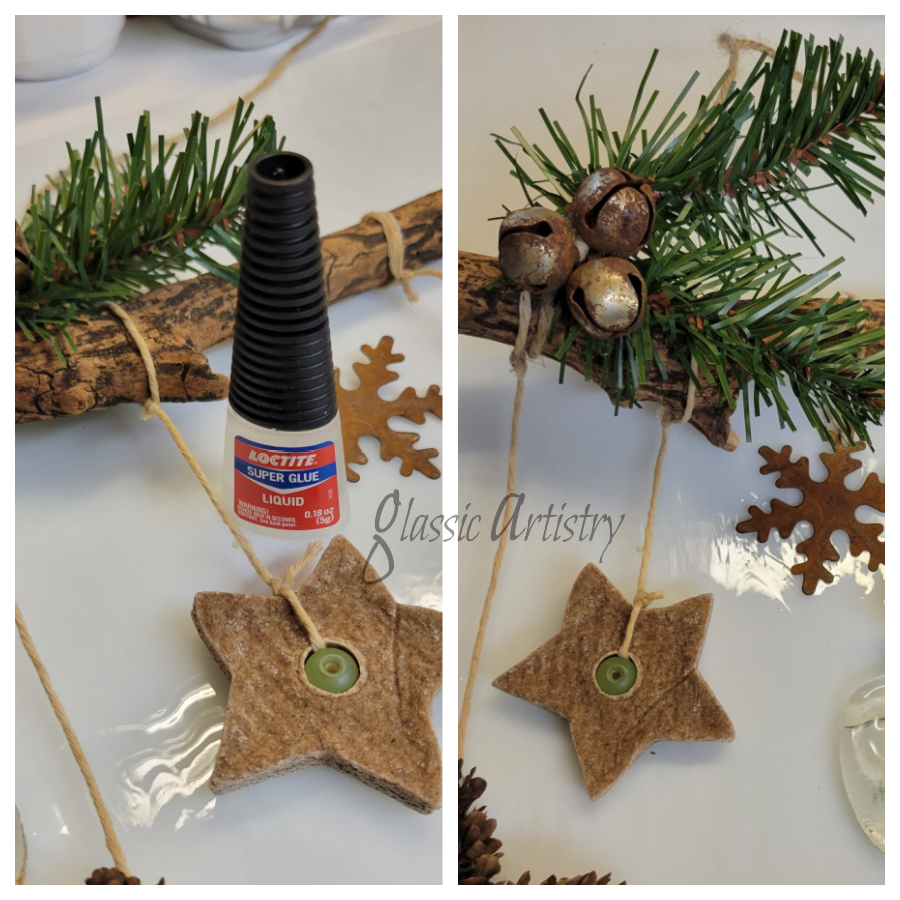
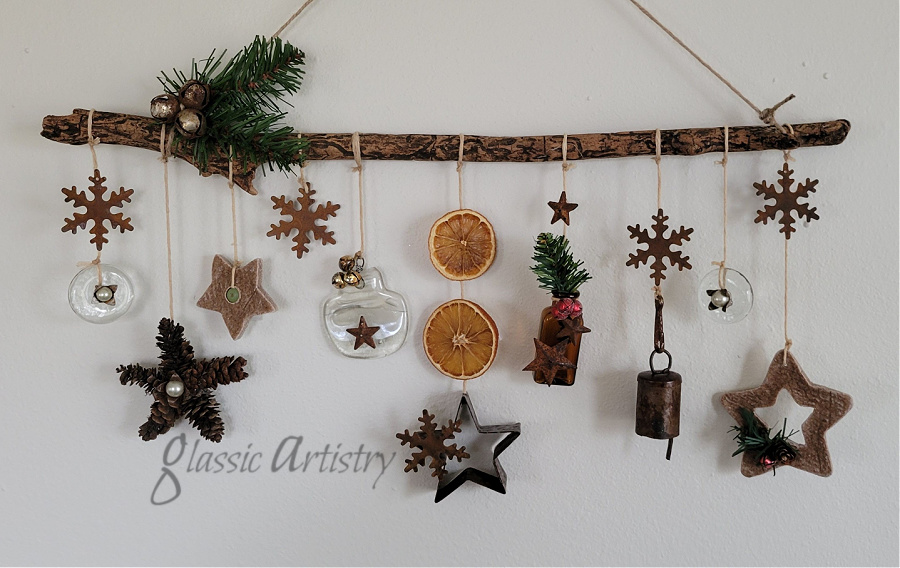
Such a long break was never planned.  Initially, my sister, who was newly retired last year, and I, began going to a lot of flea markets and sales last spring. I think we’re guilty of having had so much fun hanging out, and shopping for awesome stuff, that we didn’t leave much time for creating.  Before I knew it, it was time to start working on fused glass Christmas ornaments. which kept me busy until after the first of the year, and then it was time to make inventory for a June vintage market event.  Anyway, I’m back, and ready to get back in the groove of making things!

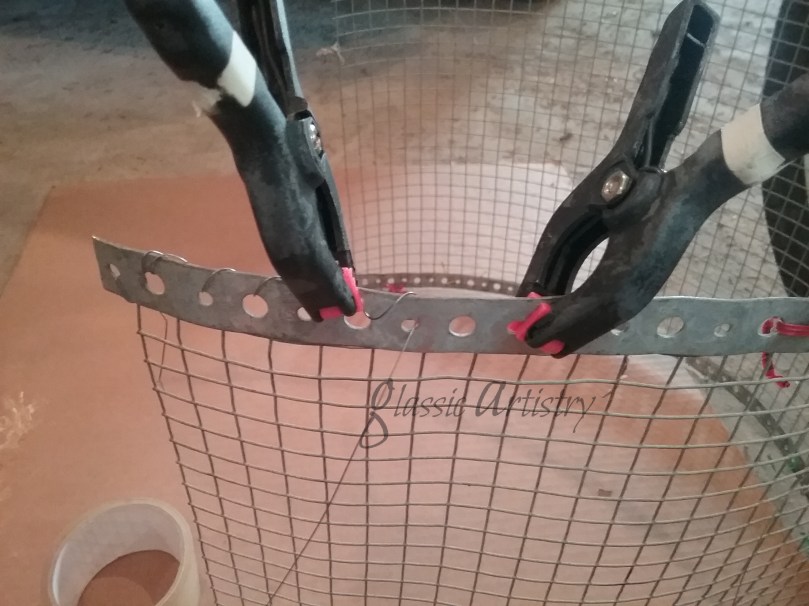
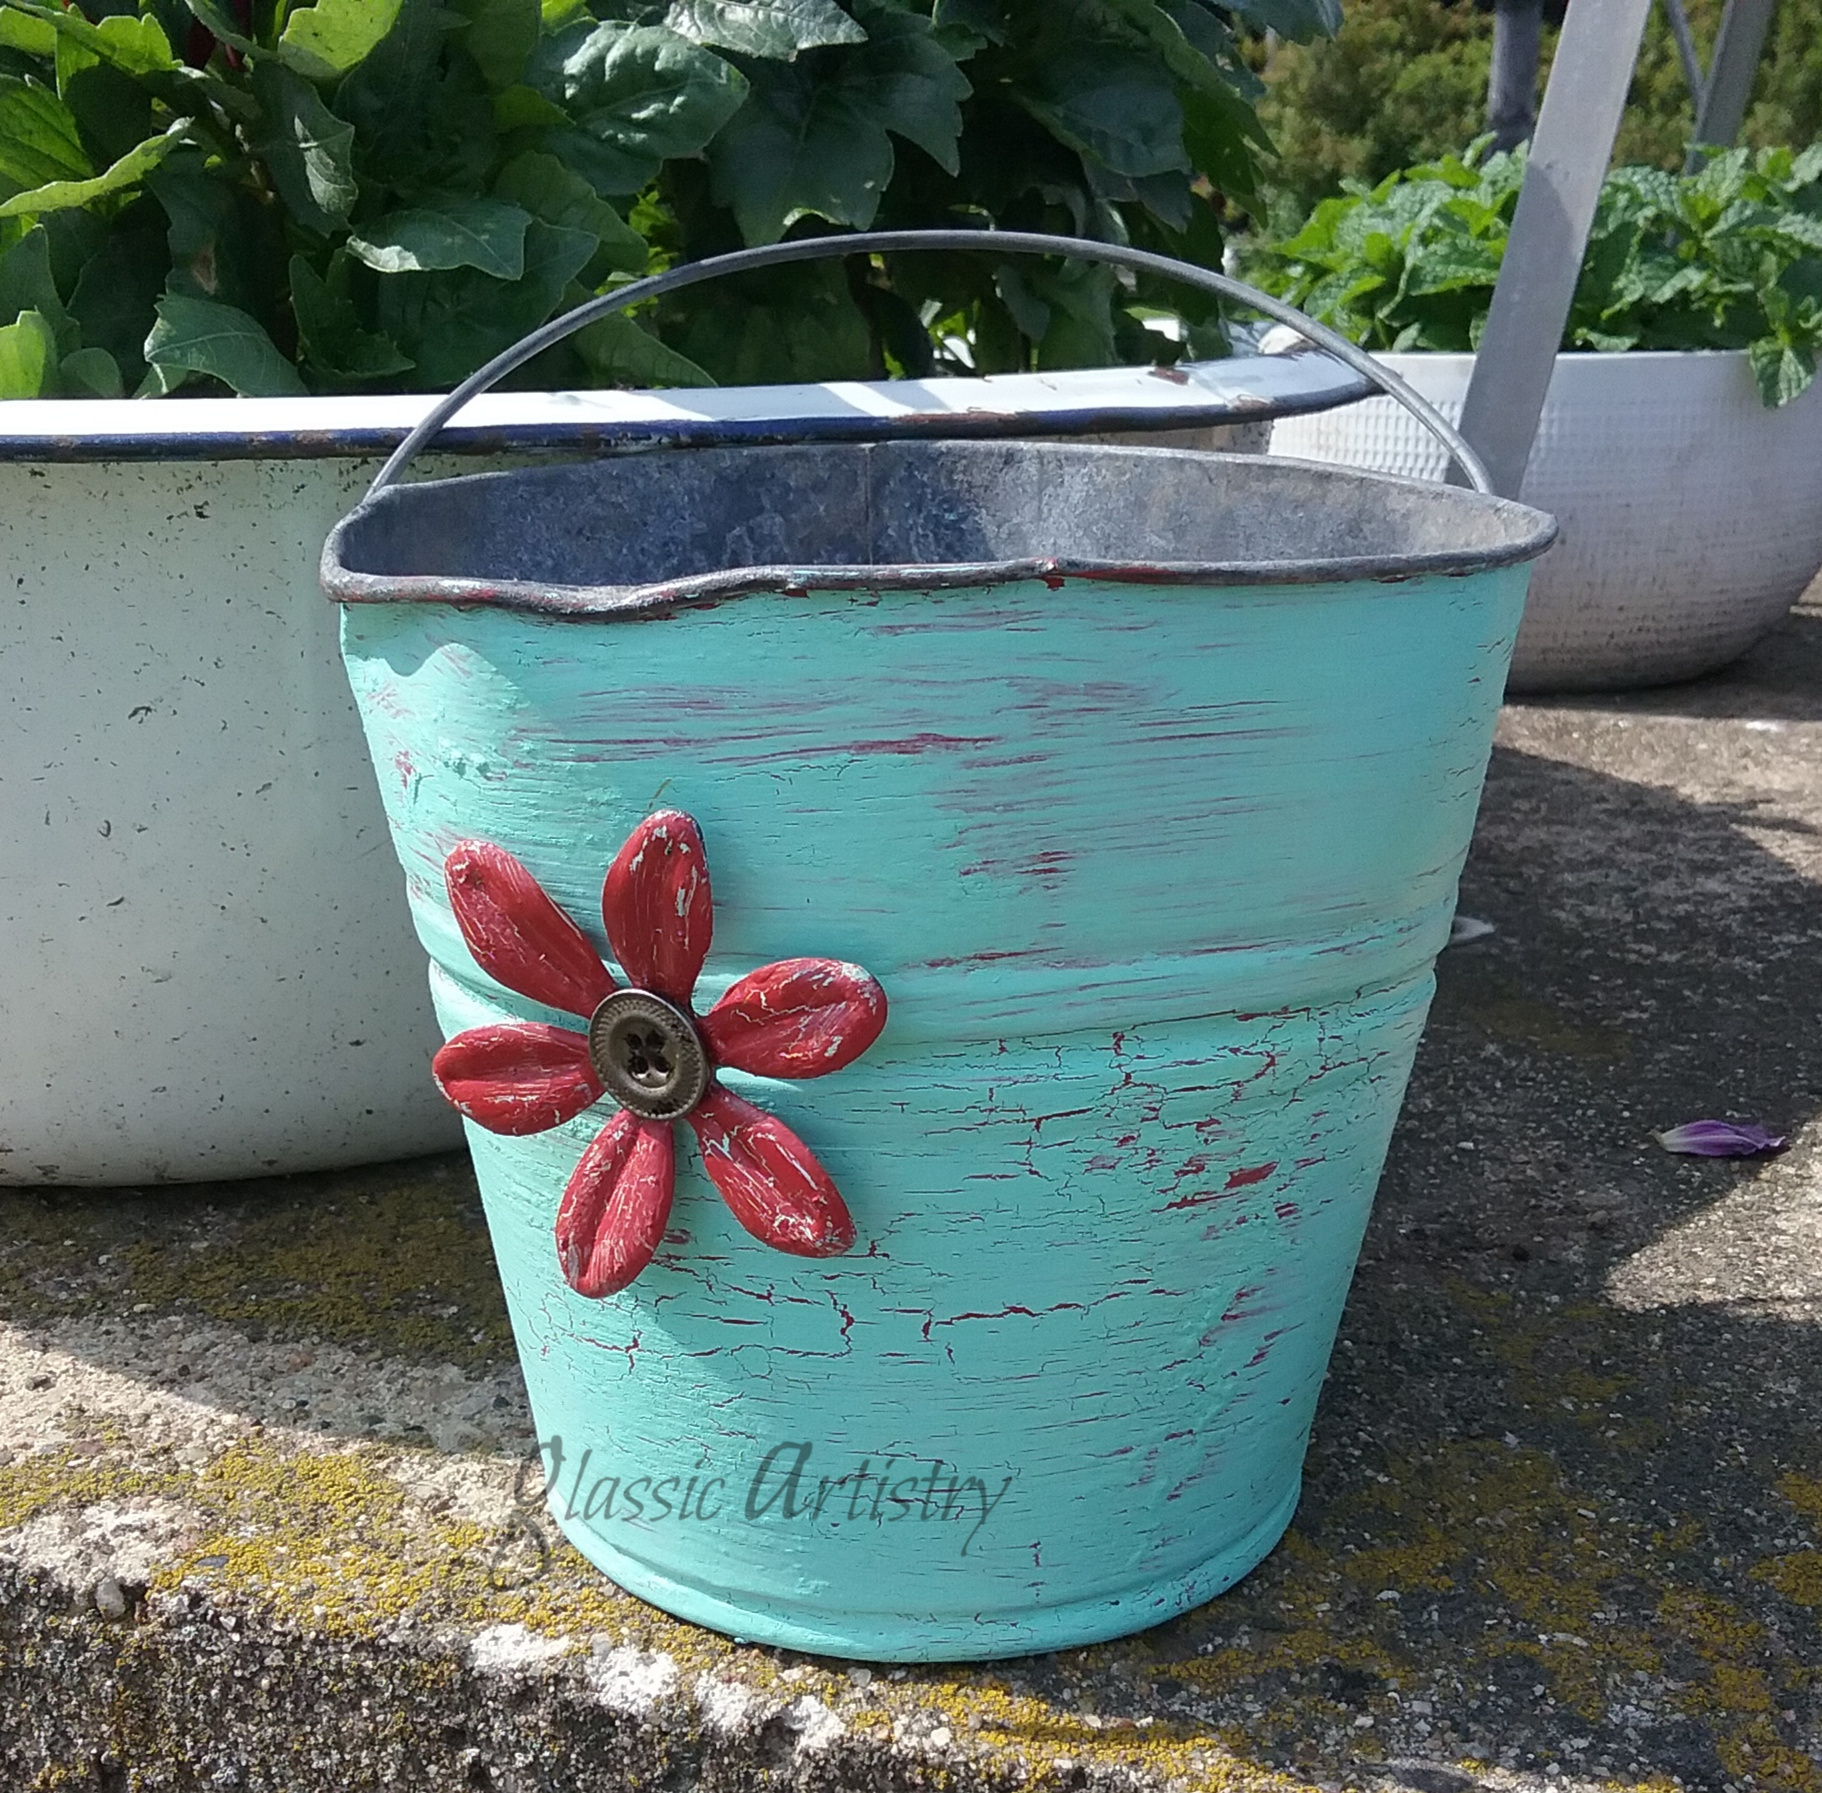
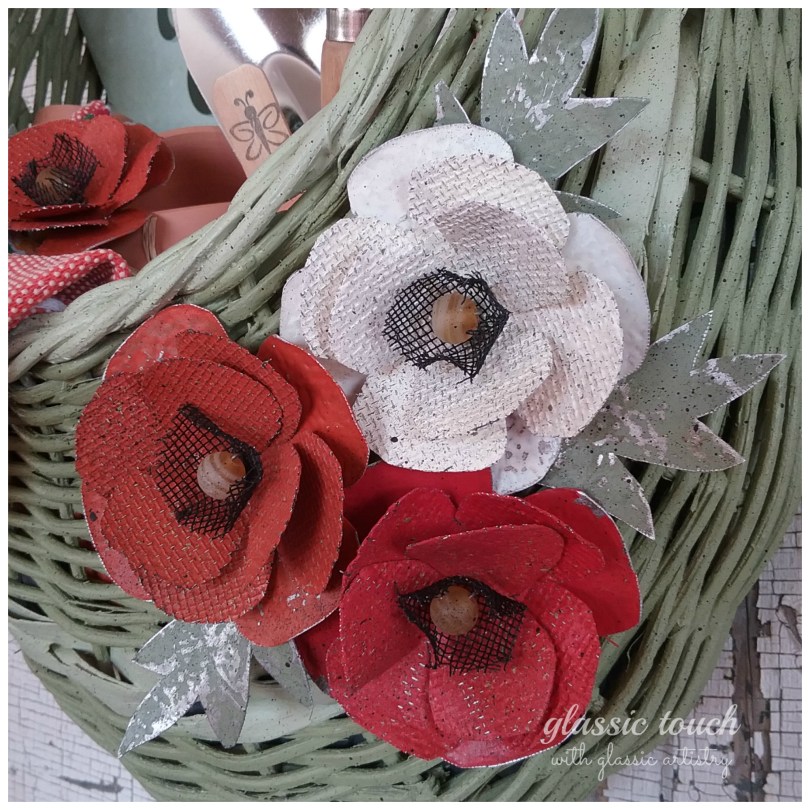
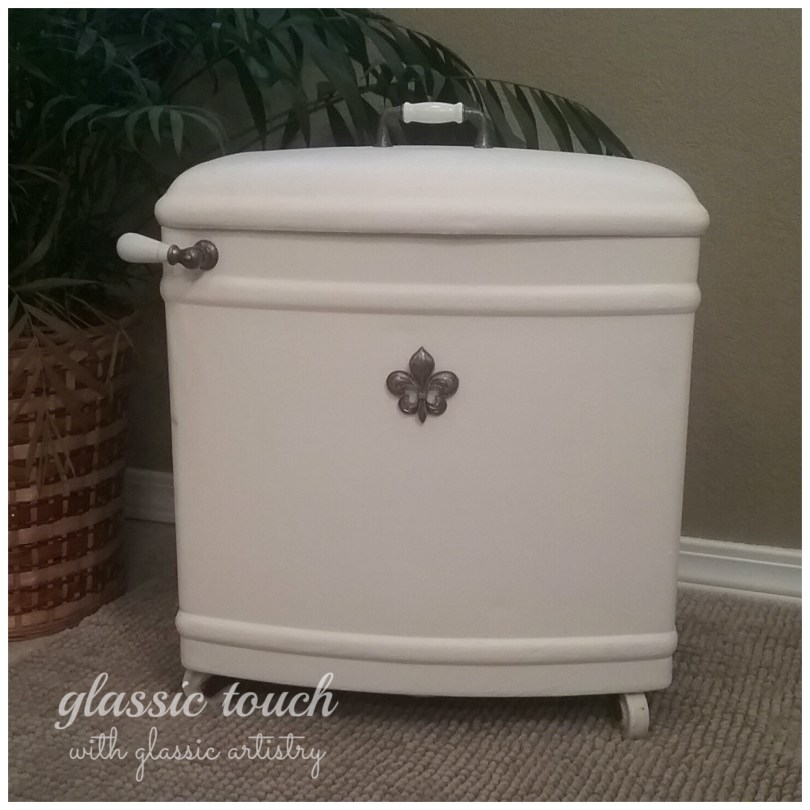
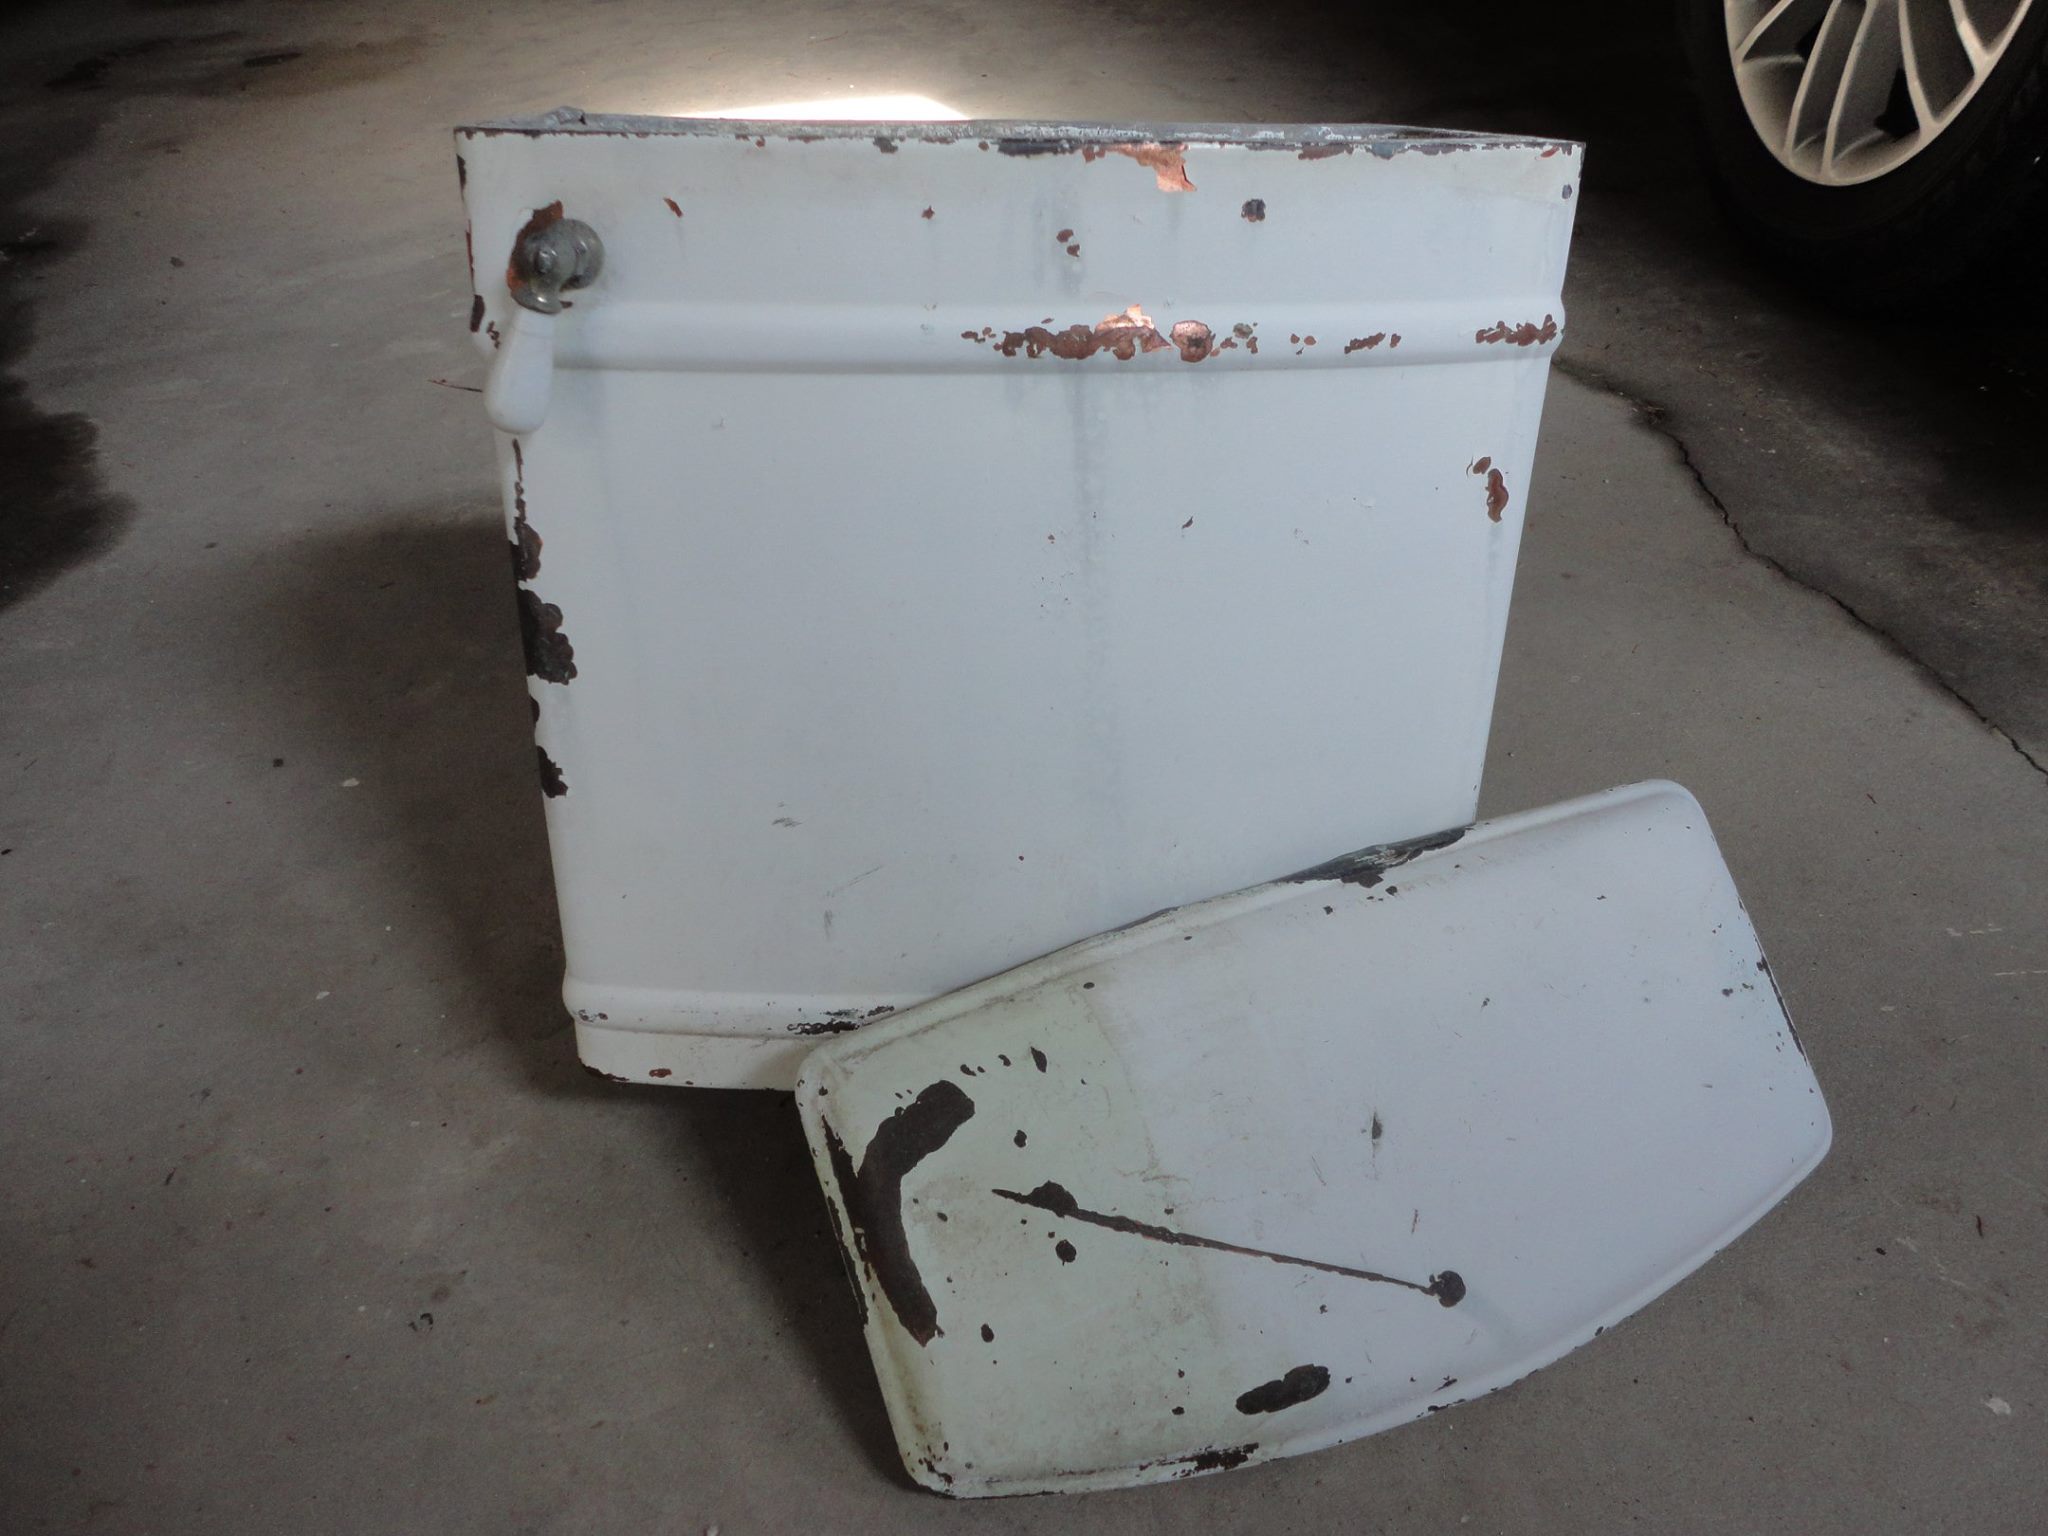
Several new pieces were made for the market we participated in.  I’ll post some pictures of them later, but first, I’d like to begin by sharing a favorite … an upcycled, little, bent galvanized bucket that was almost headed to the scrap yard.  I’ve just fallen in love with it, and it was so easy.  All it took was two sample sized colors of exterior water based paint, hide glue or crackle medium, J-B Weld, a small metal flower, one button, and a fan (opt).  I’m impatient, the fan speeds up drying times.

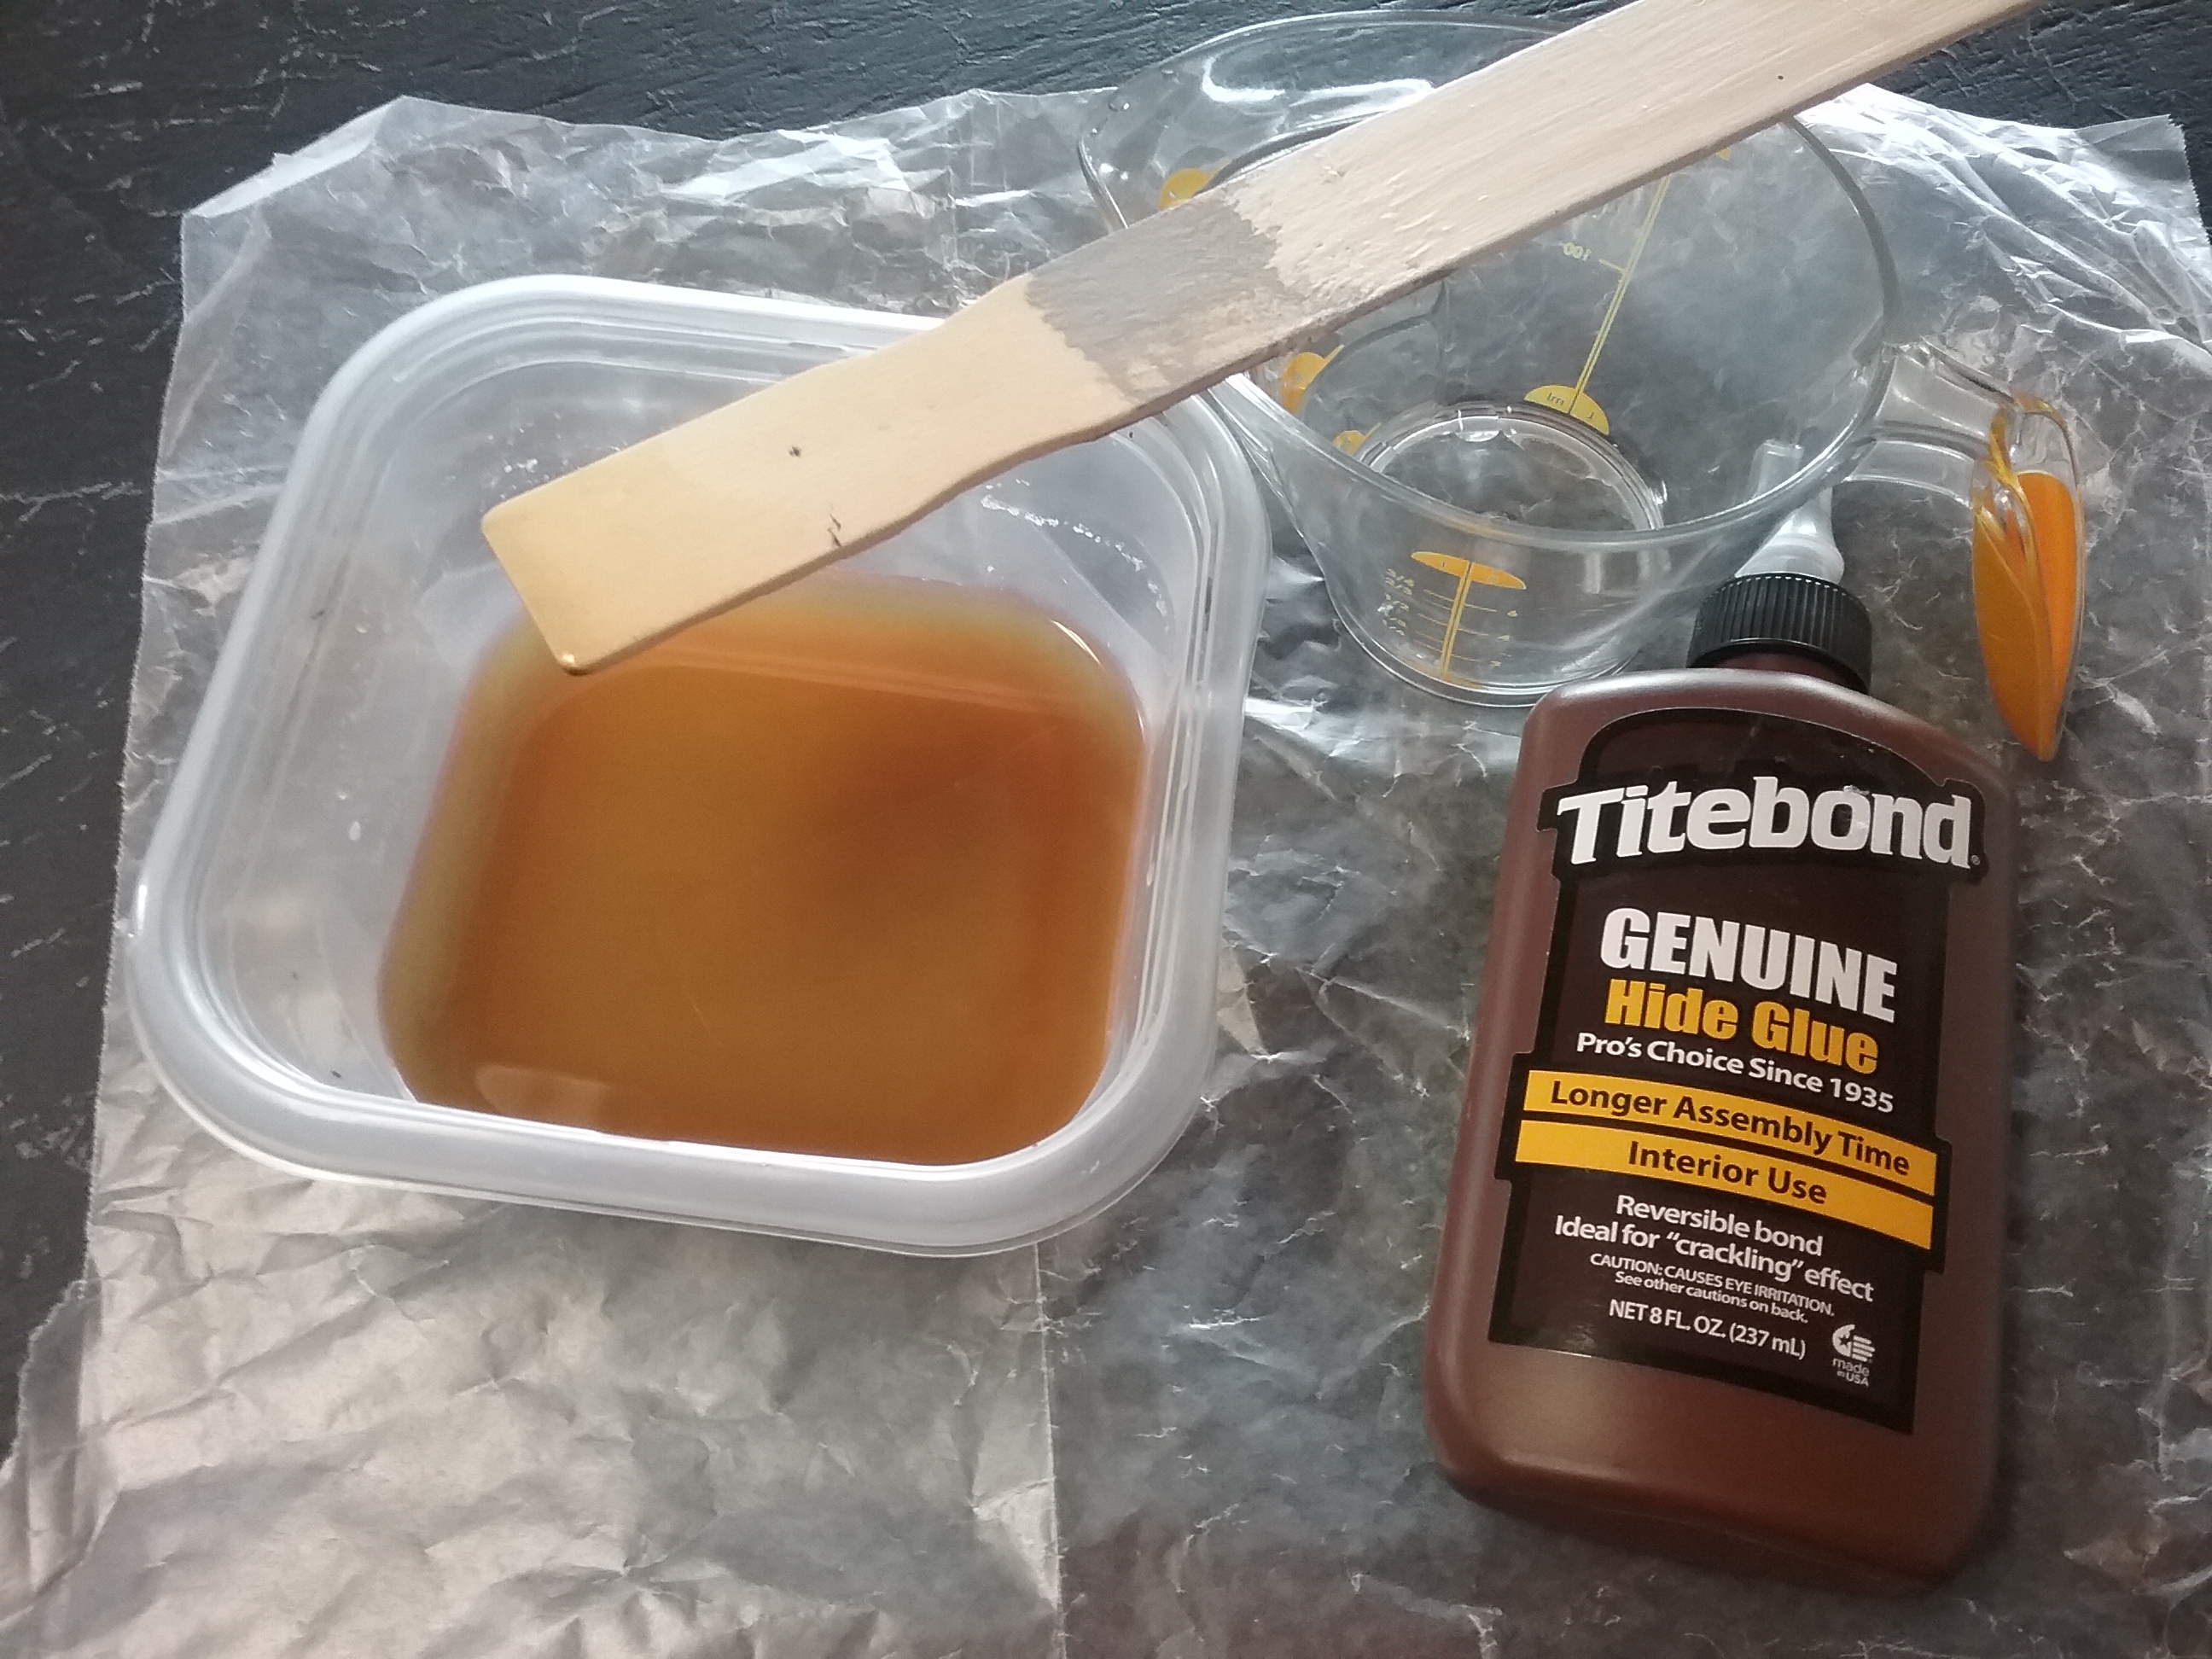
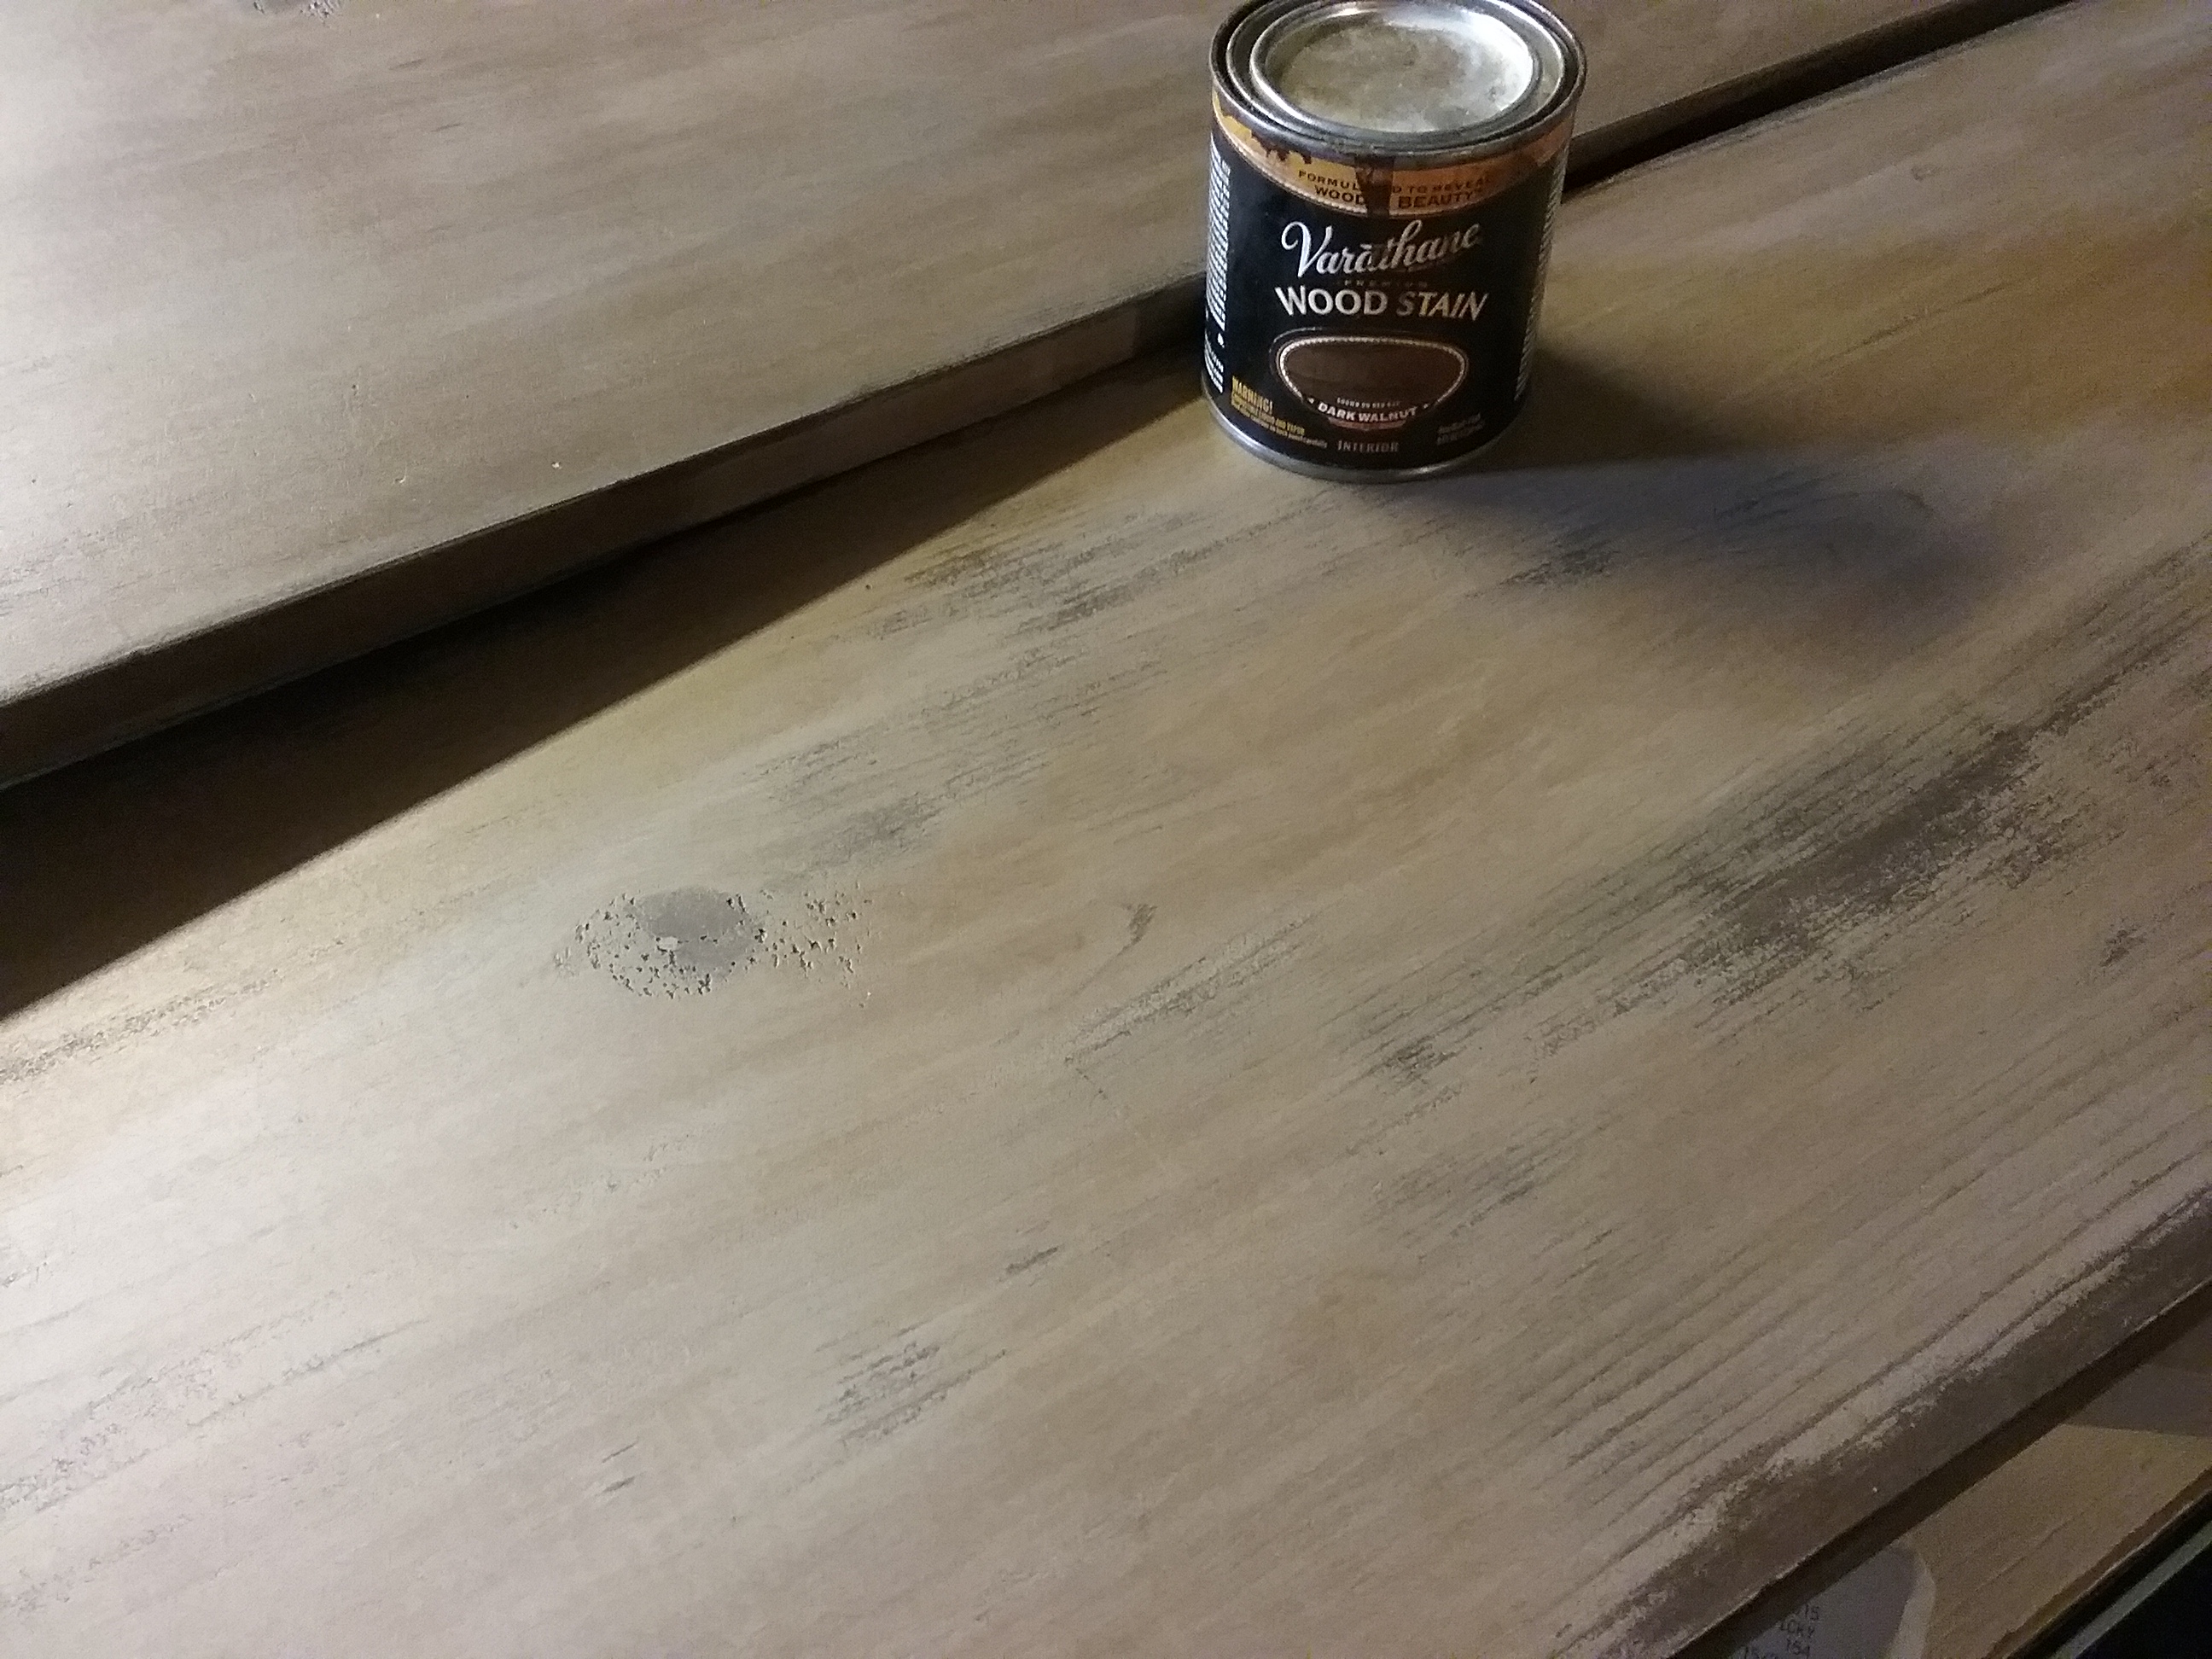
Just a little note about crackle mediums before we get started.  They are readily available in just about all home improvement and craft stores, and easy to use.  Hide glue is my choice for crackling.  You can find it in hardware stores for around $9.  Always painting something, I usually have some mixed and ready to use.

For a crackle medium, mix 1/2 C hide glue with 1/3 C of very hot water, stirring well.  Store unused medium in an airtight container.  As a rule, the thinner the crackle medium, the thinner the cracks.  If bigger cracks are wanted, use less hot water.  Regardless, the mixture will be watery thin, and splatter easily.  Make sure your floor and work area are protected well.  Crackling is a lot of fun, but can be touchy.  It doesn’t like to be re-brushed as you put it on, single strokes are needed. If you’ve never tried it before, you may want to play around with it on scrap wood first to get the feel for it, or catch a video on YouTube.

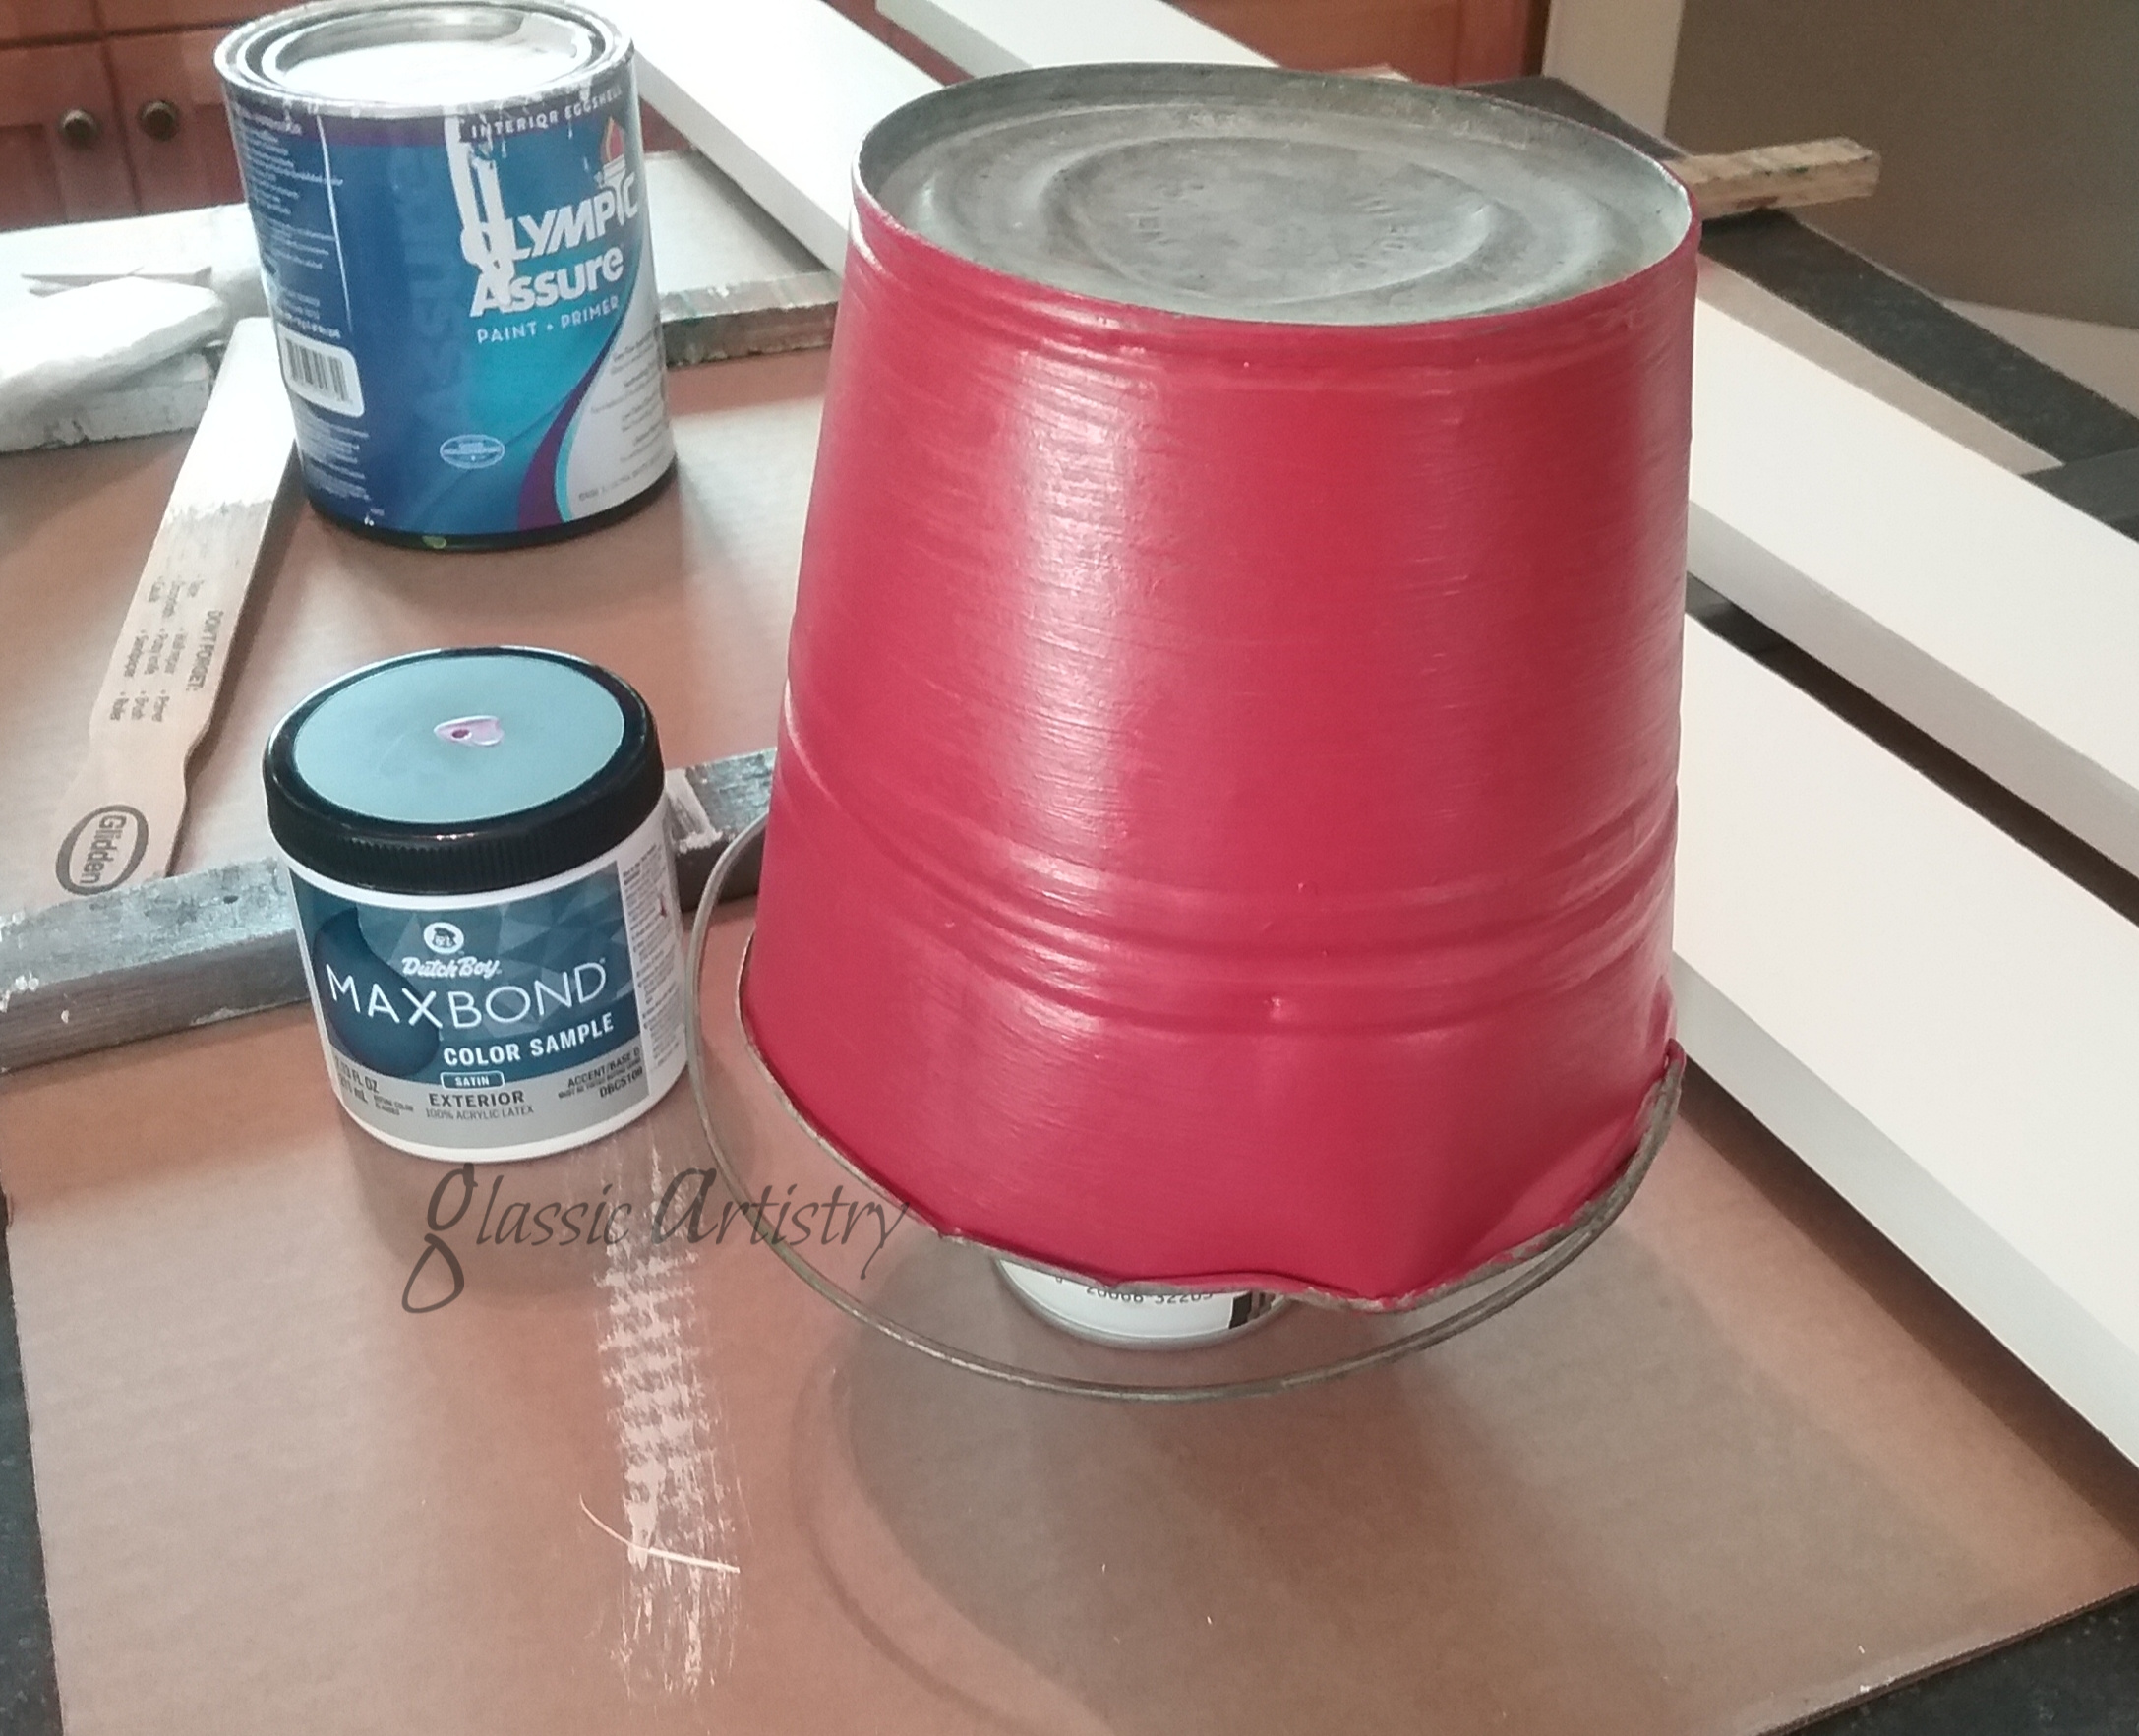
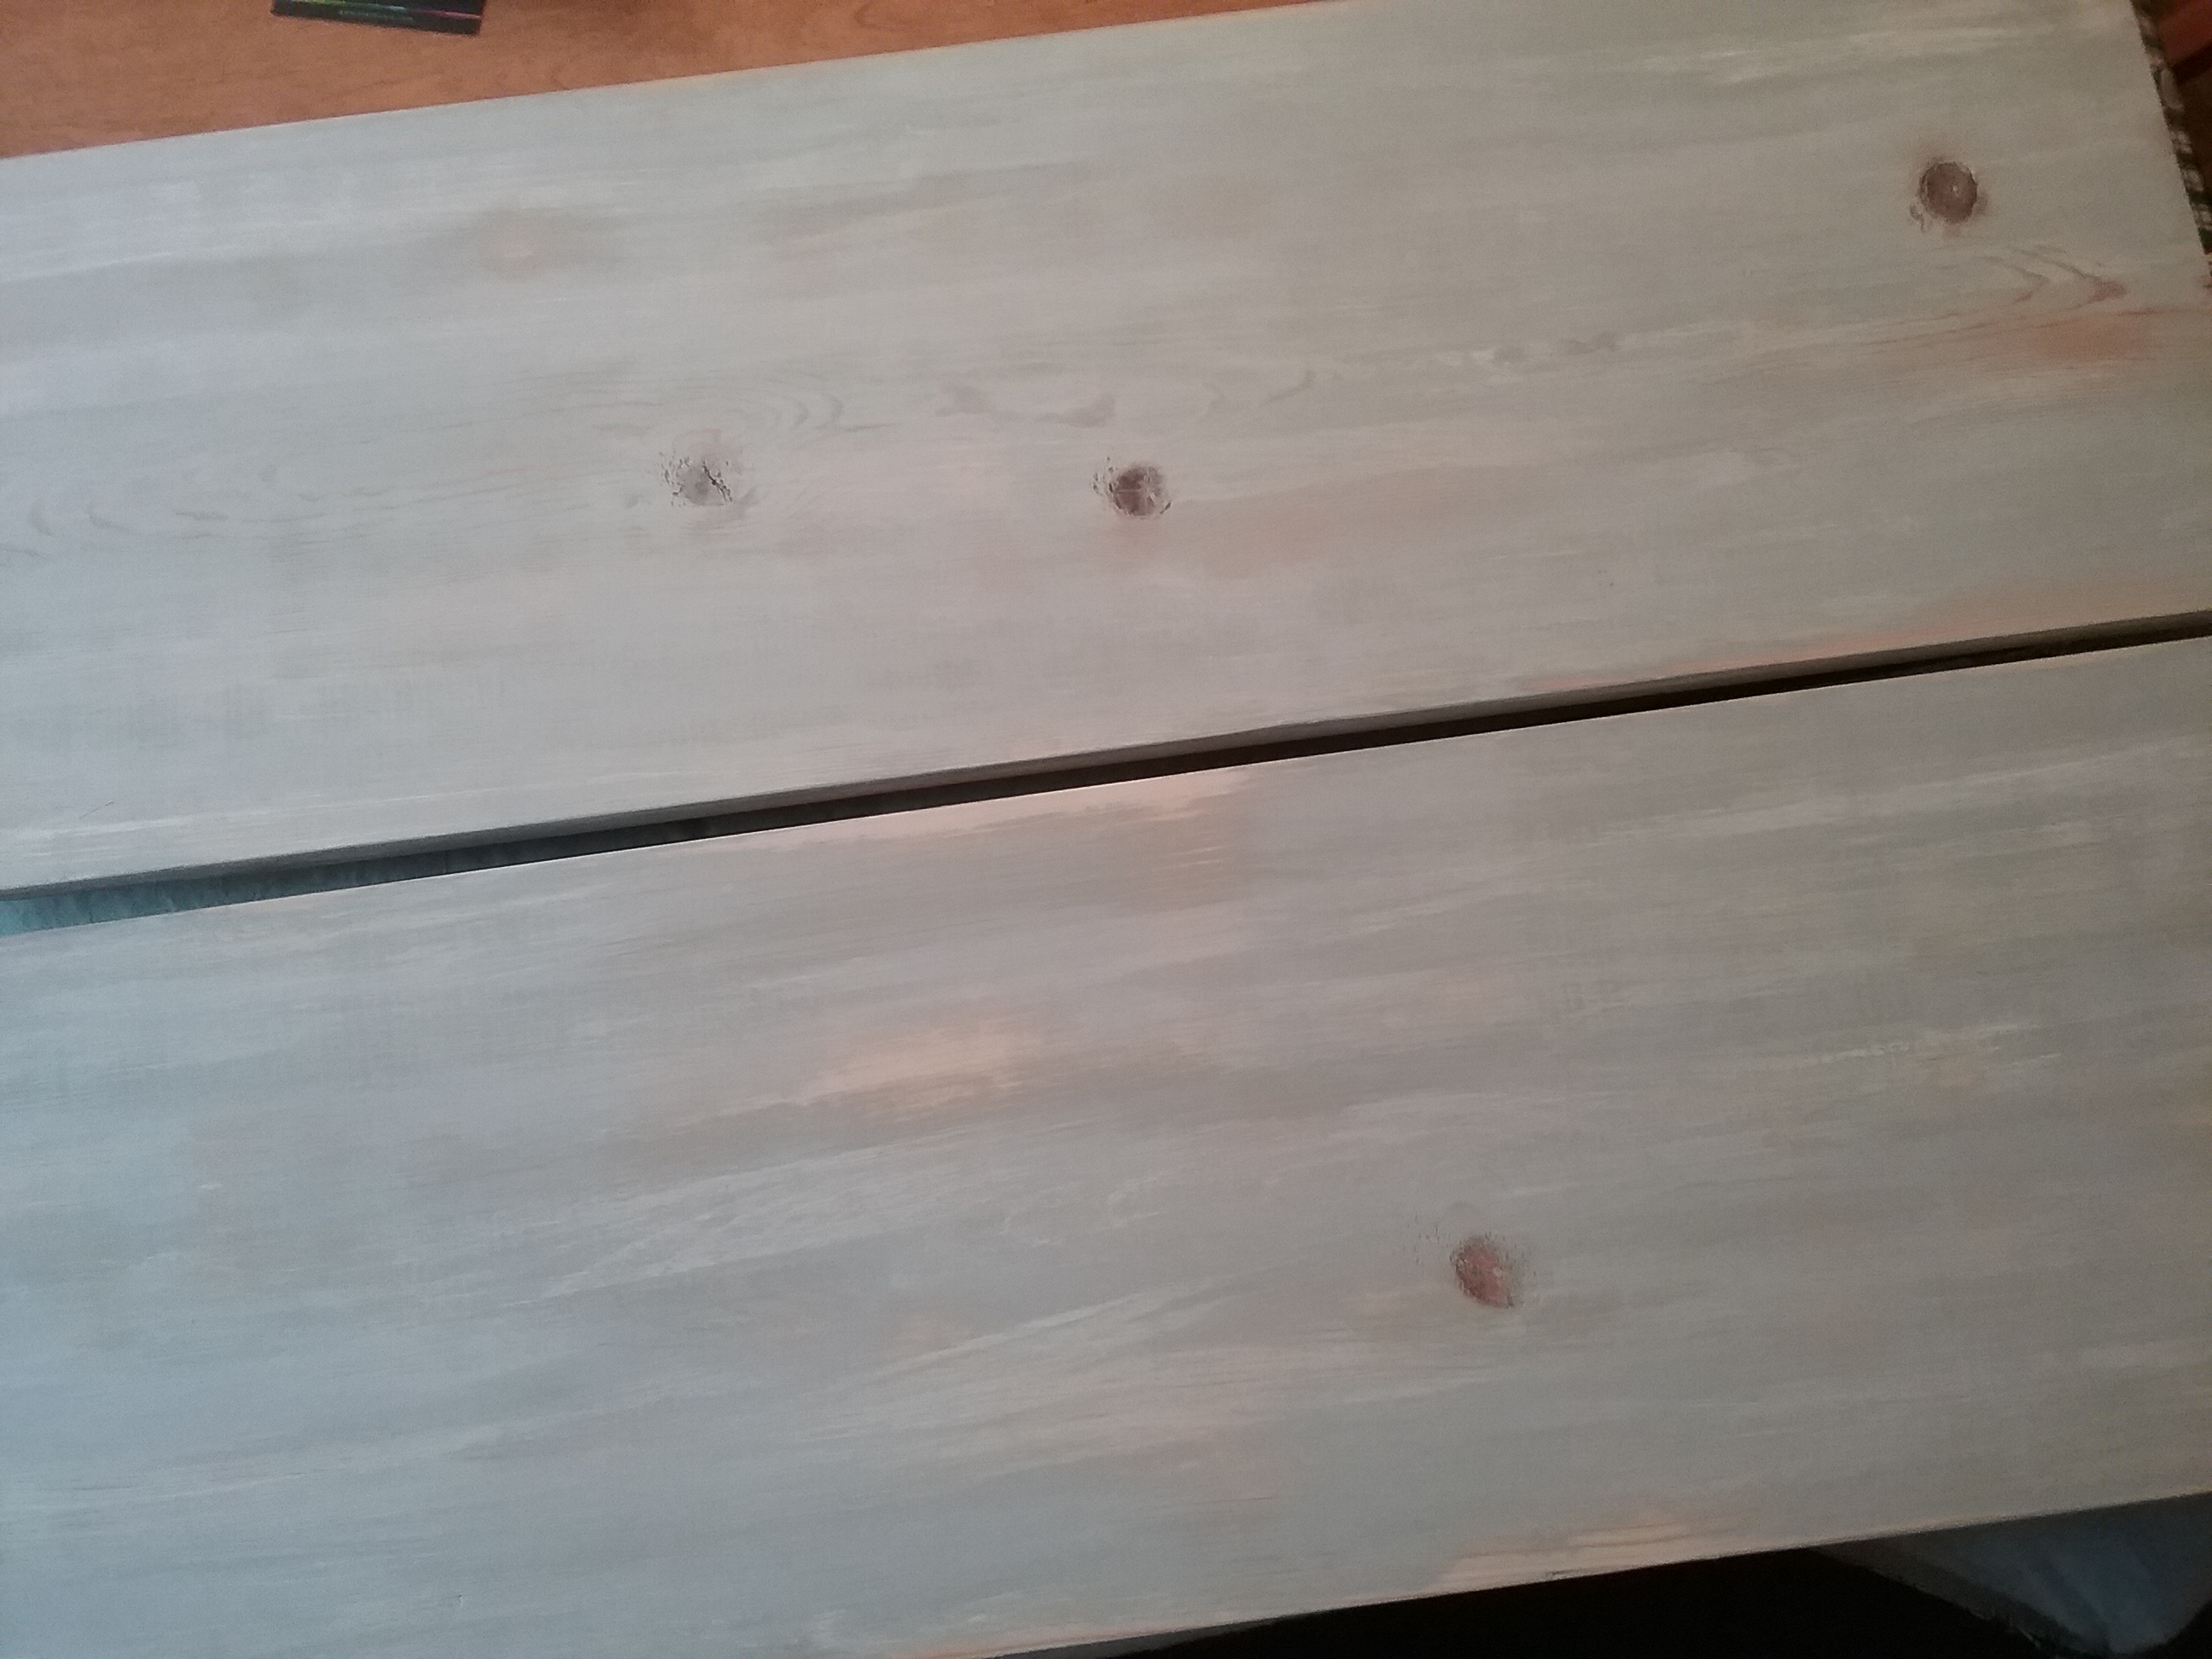
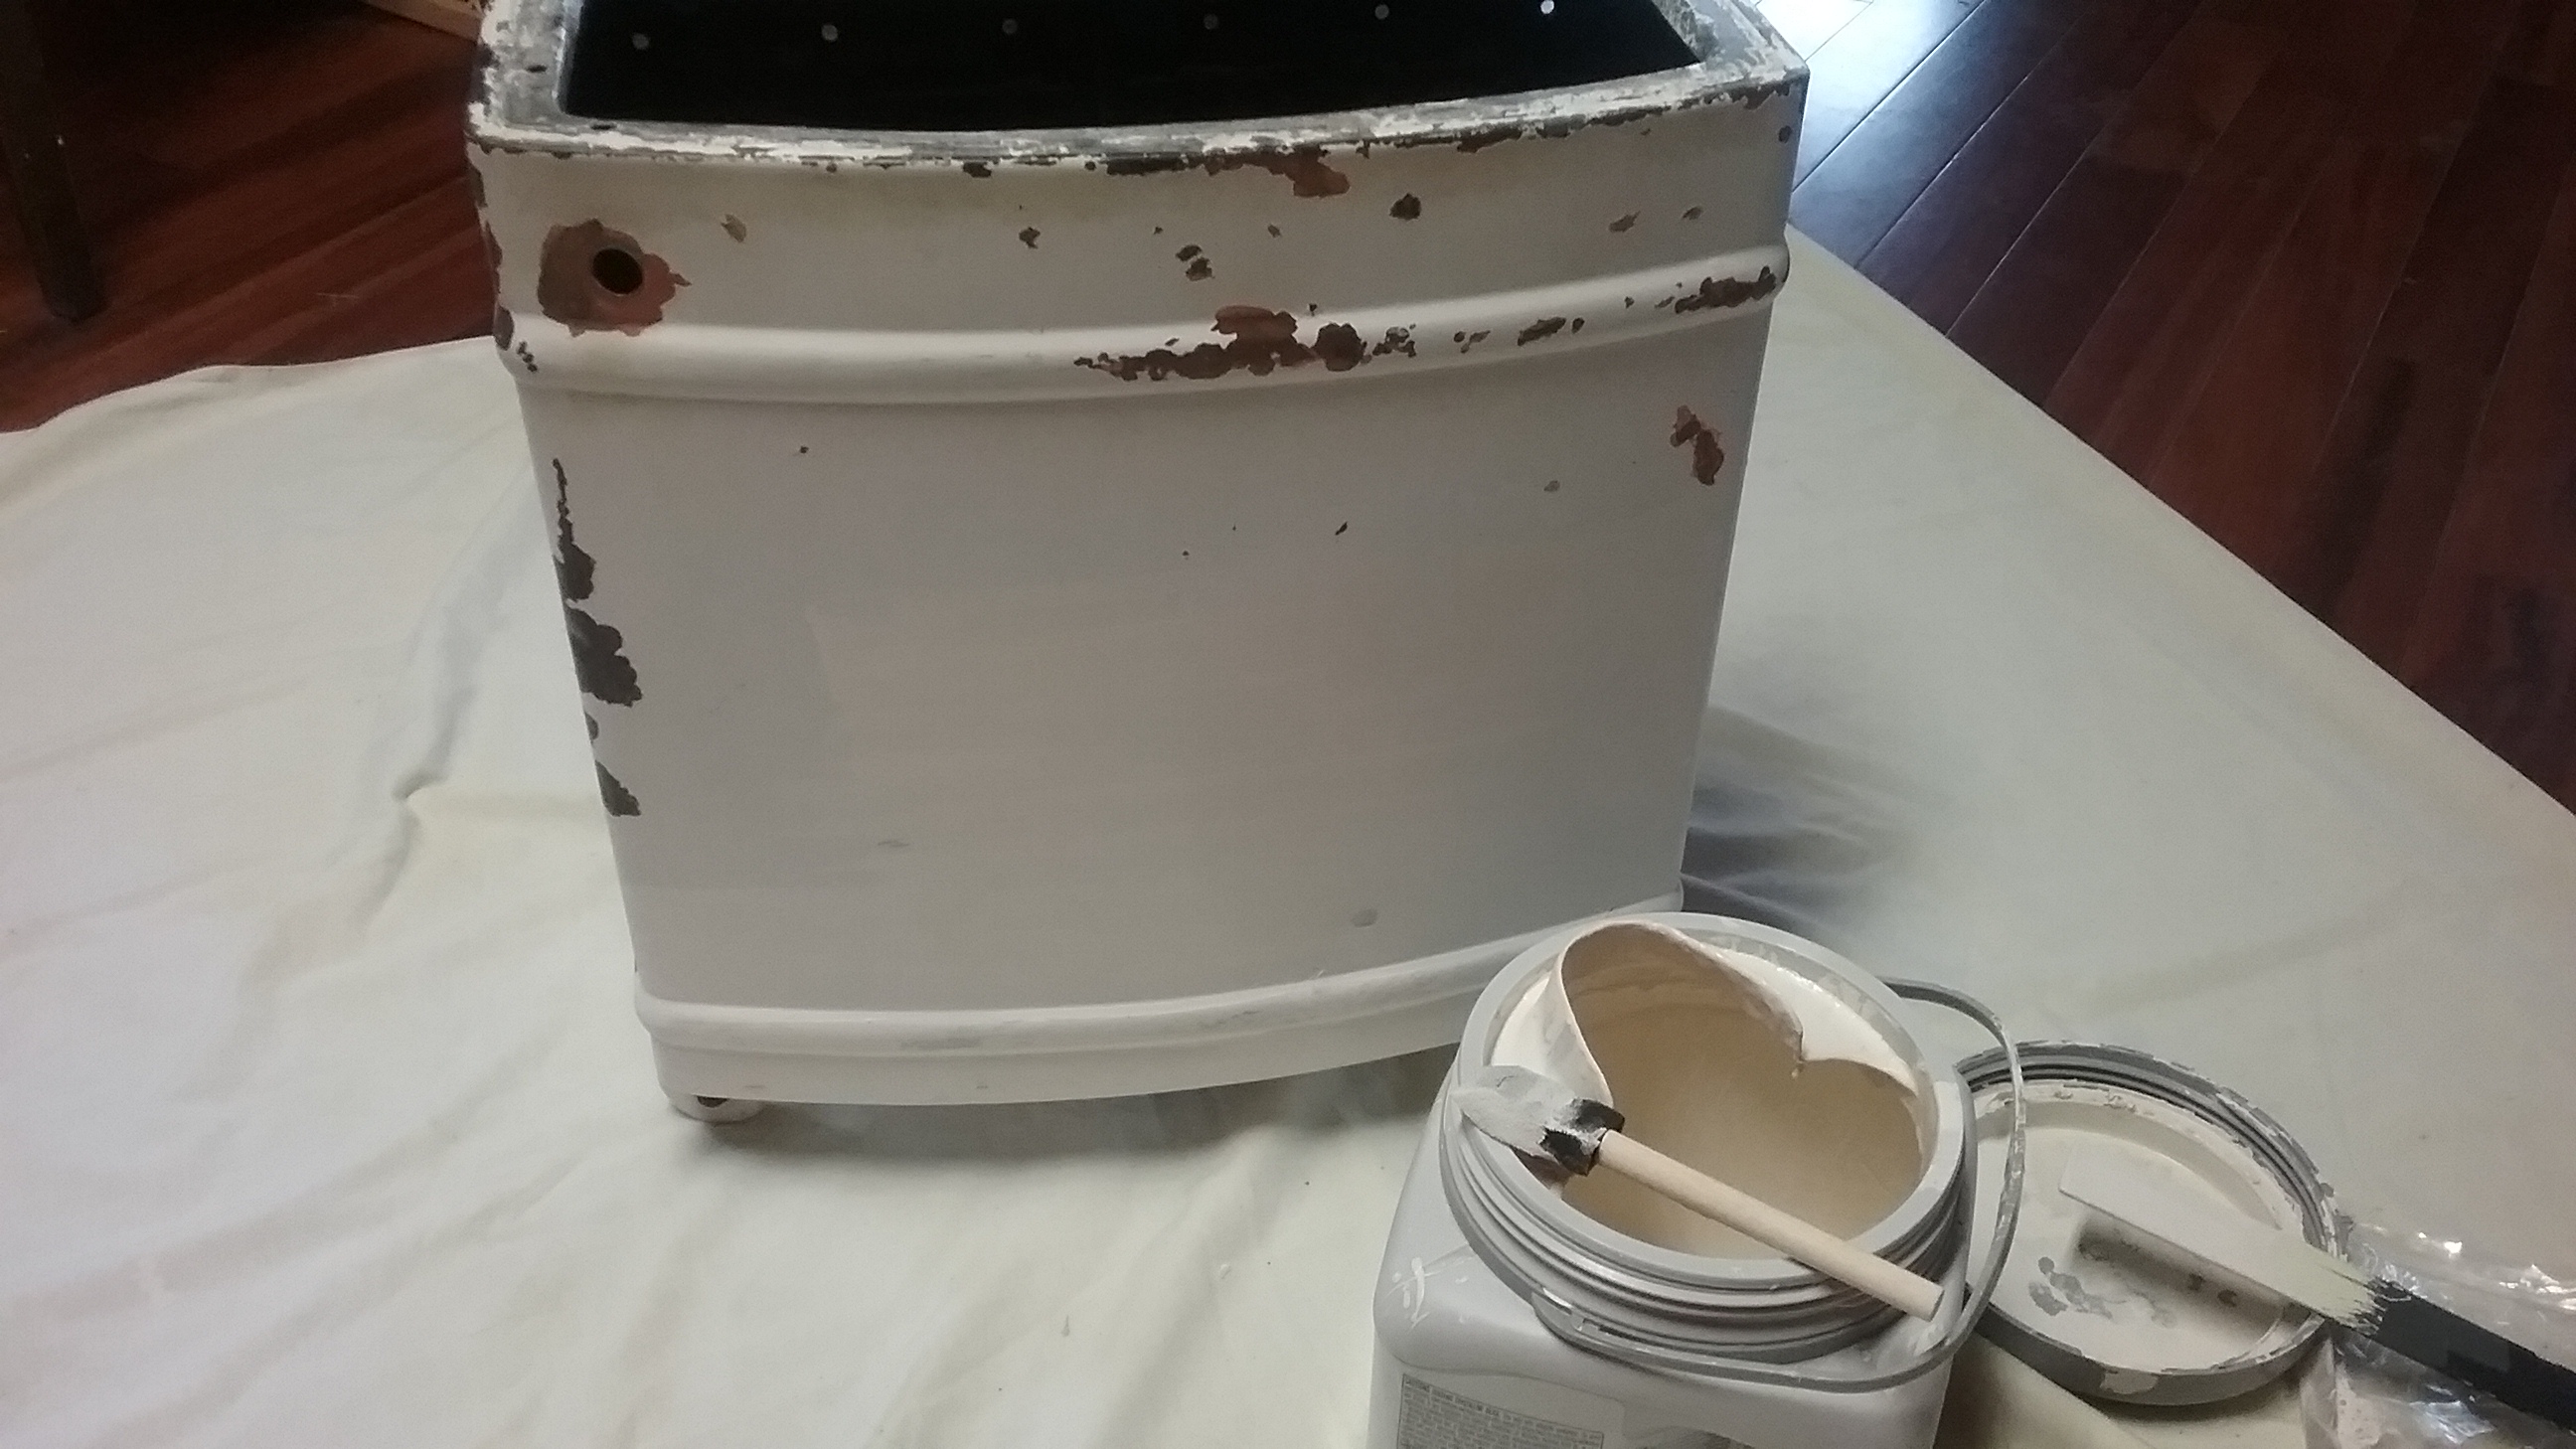
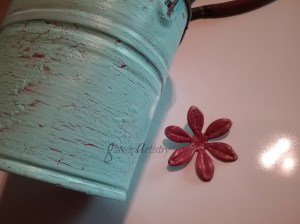
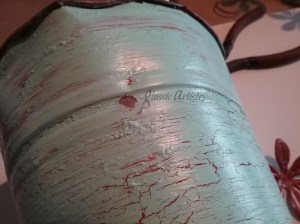
After giving the bucket a good wash, it was wiped down with a little rubbing alcohol to remove any oils left on it’s surface.  I began with a base coat of red, let dry.

Next, the crackle glue.  Let the crackle glue dry until it is still slightly sticky to the touch, approximately 45 minutes, sooner with a fan.  Top with light blue paint, let dry completely.

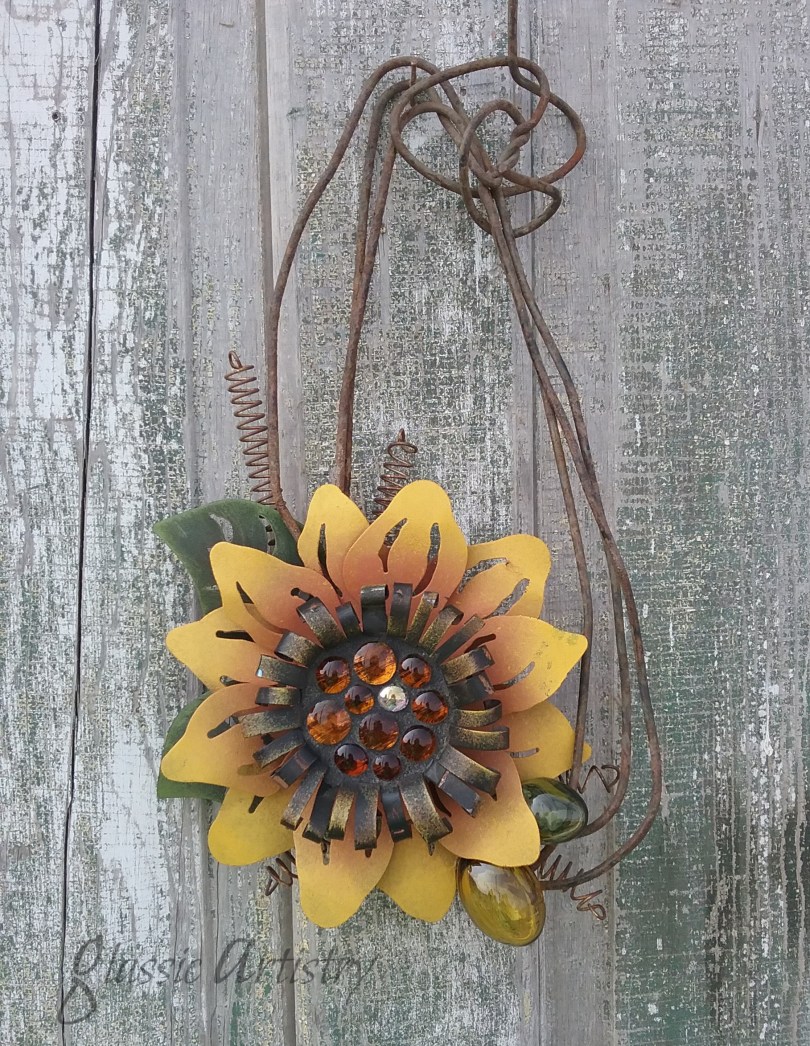
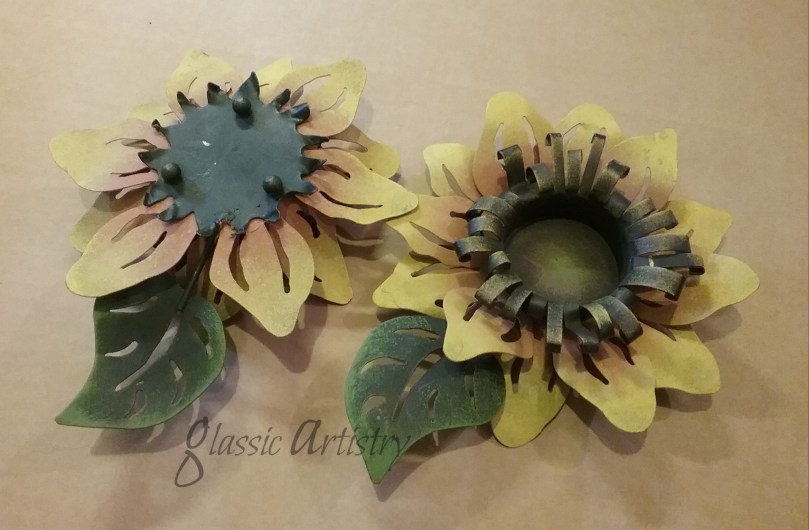
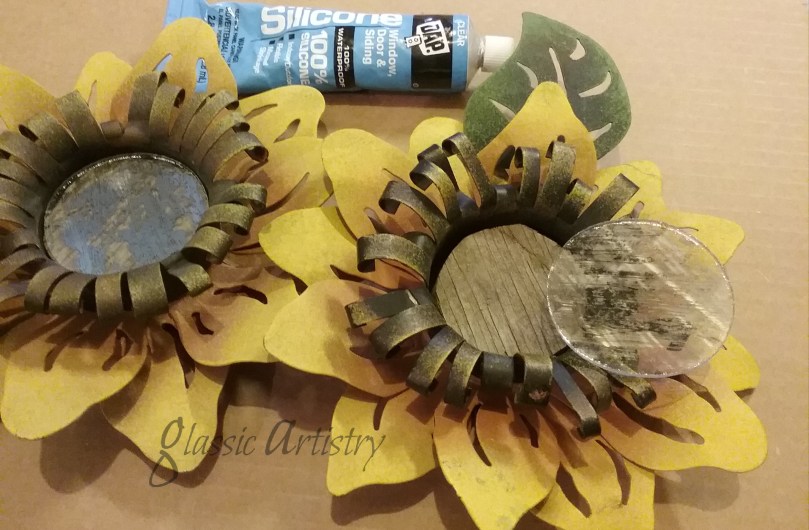
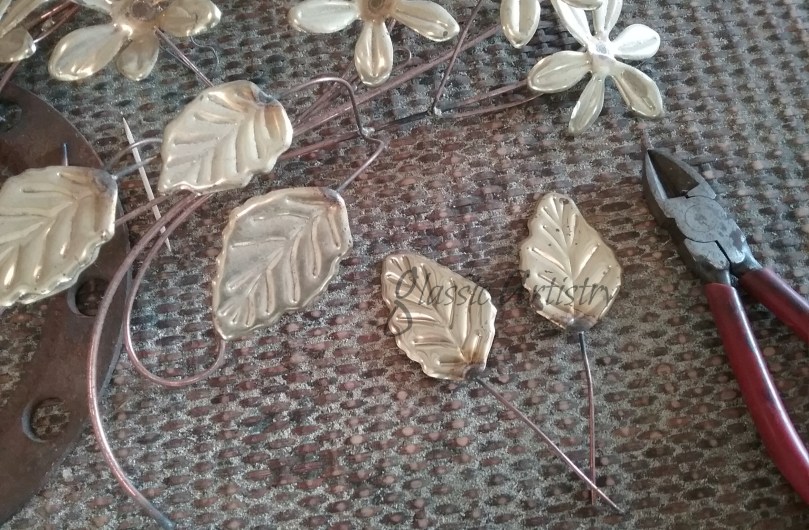
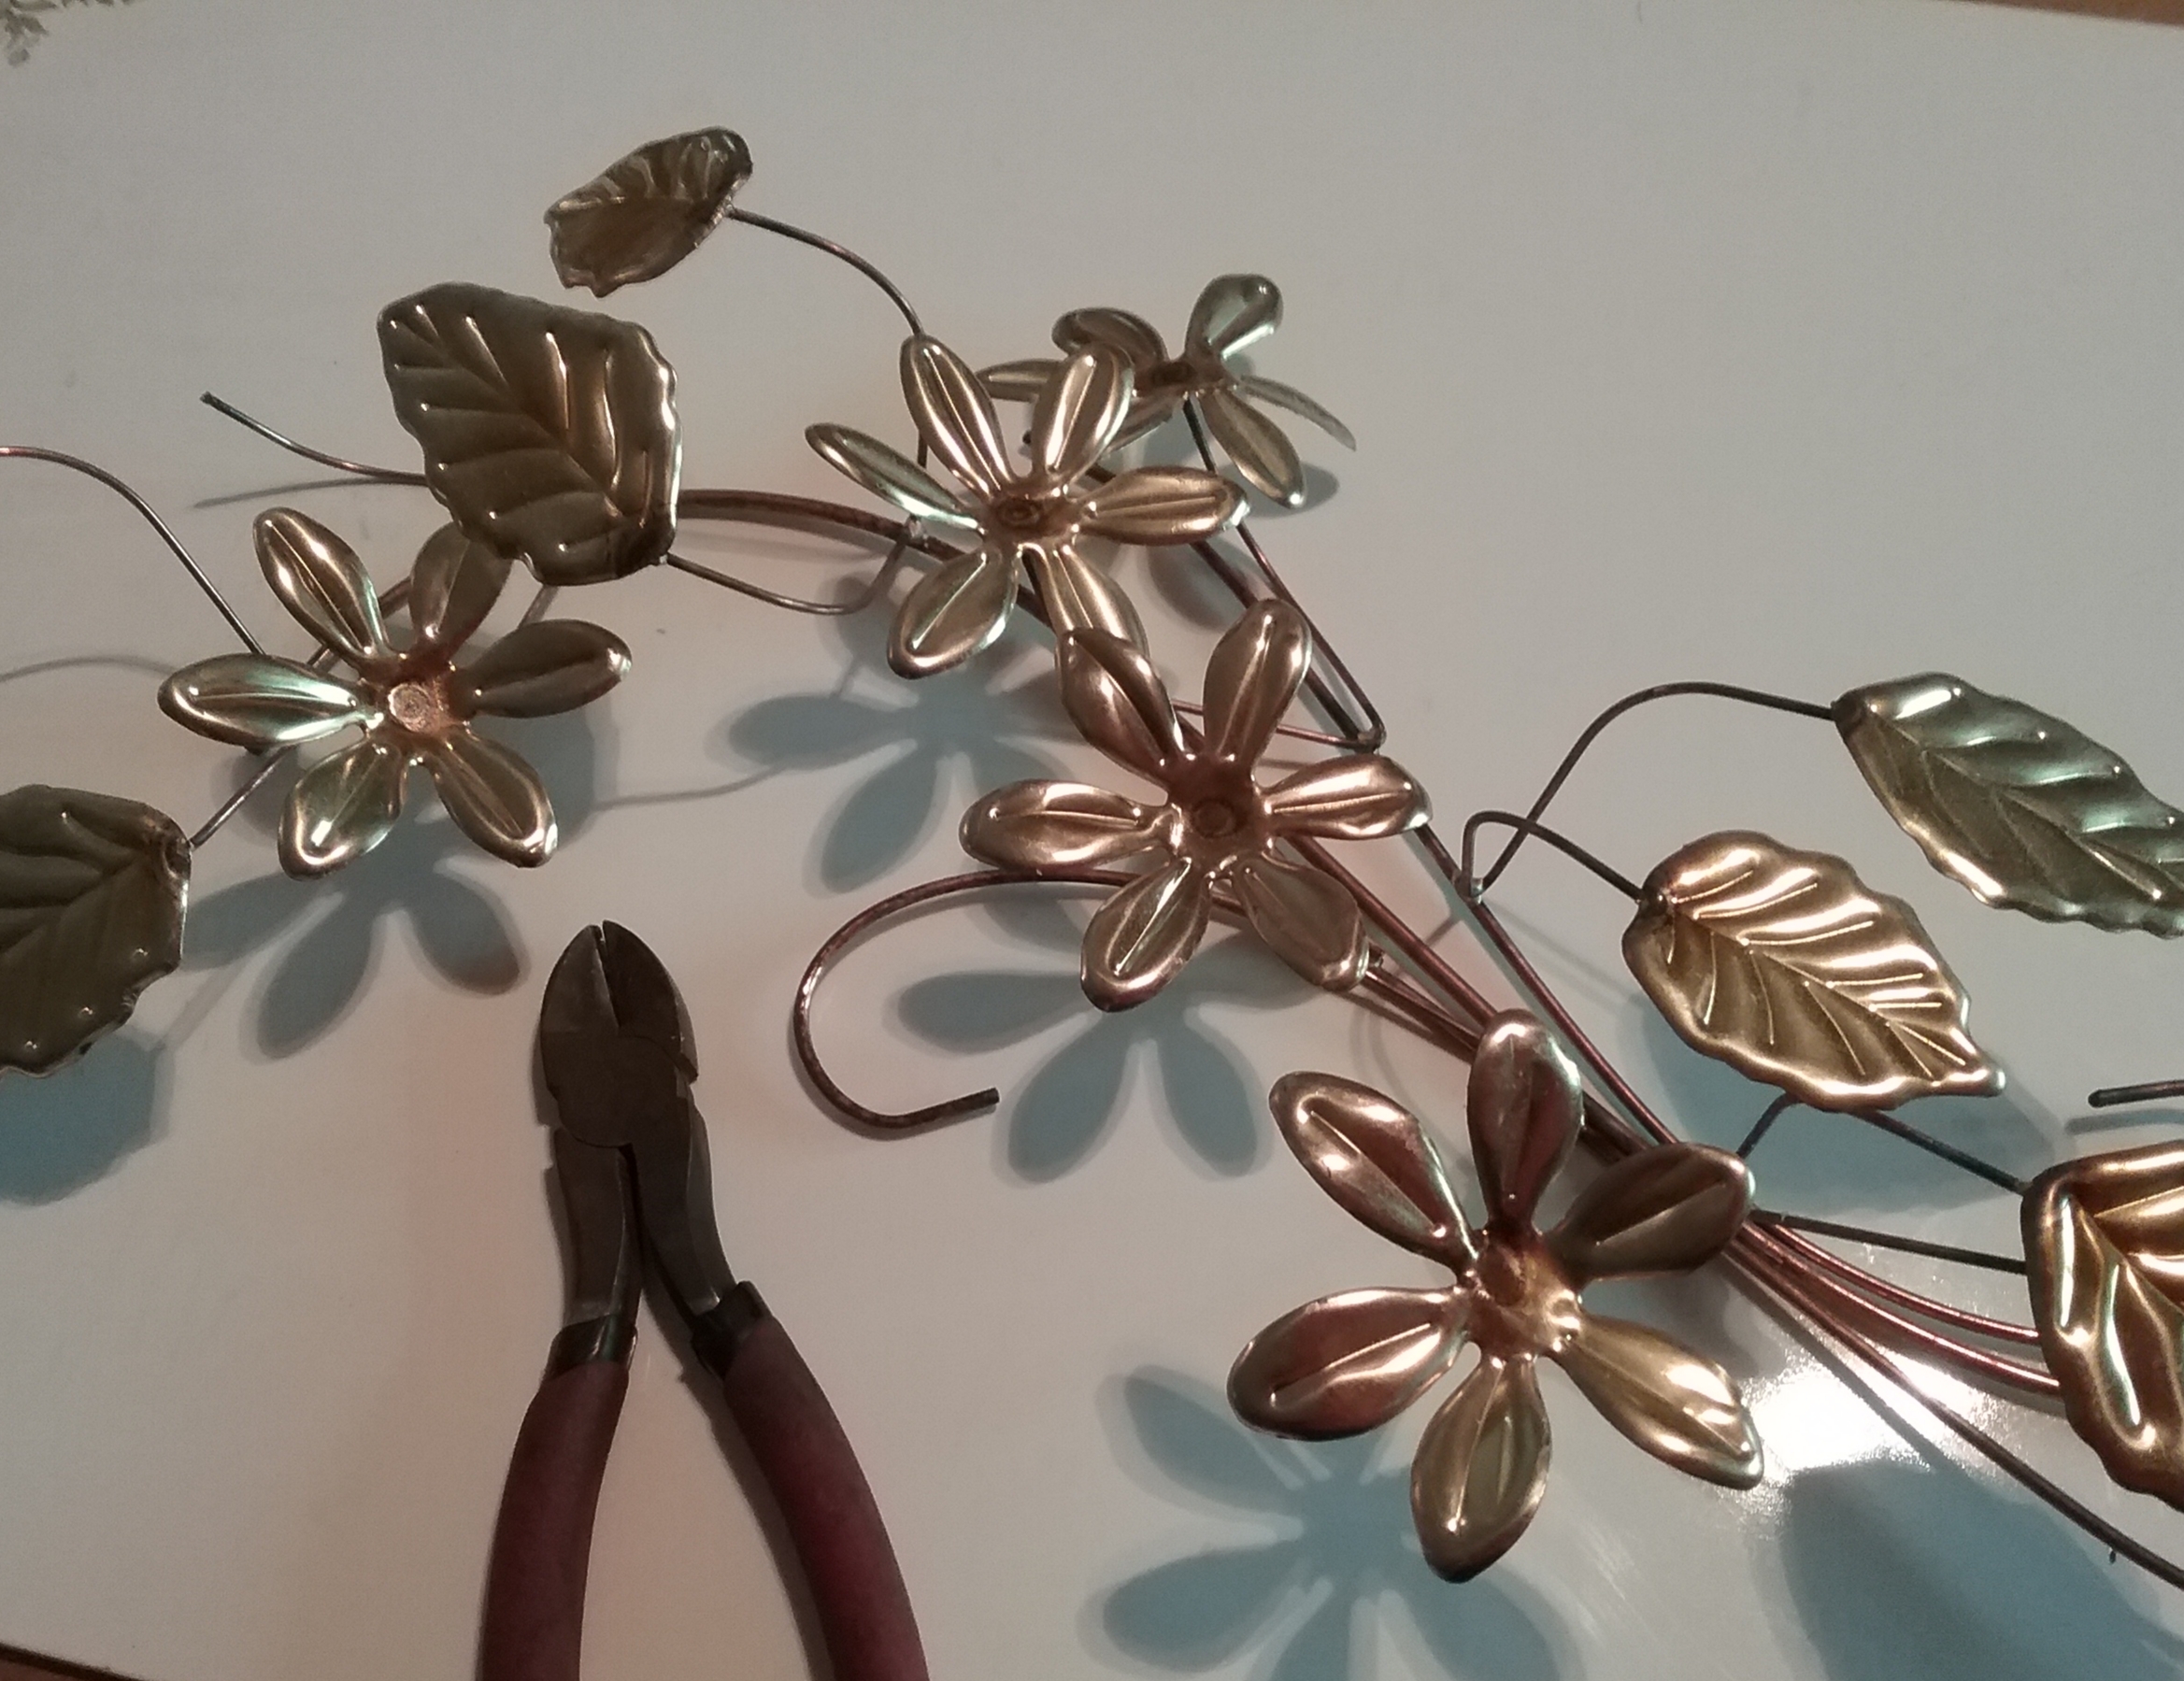
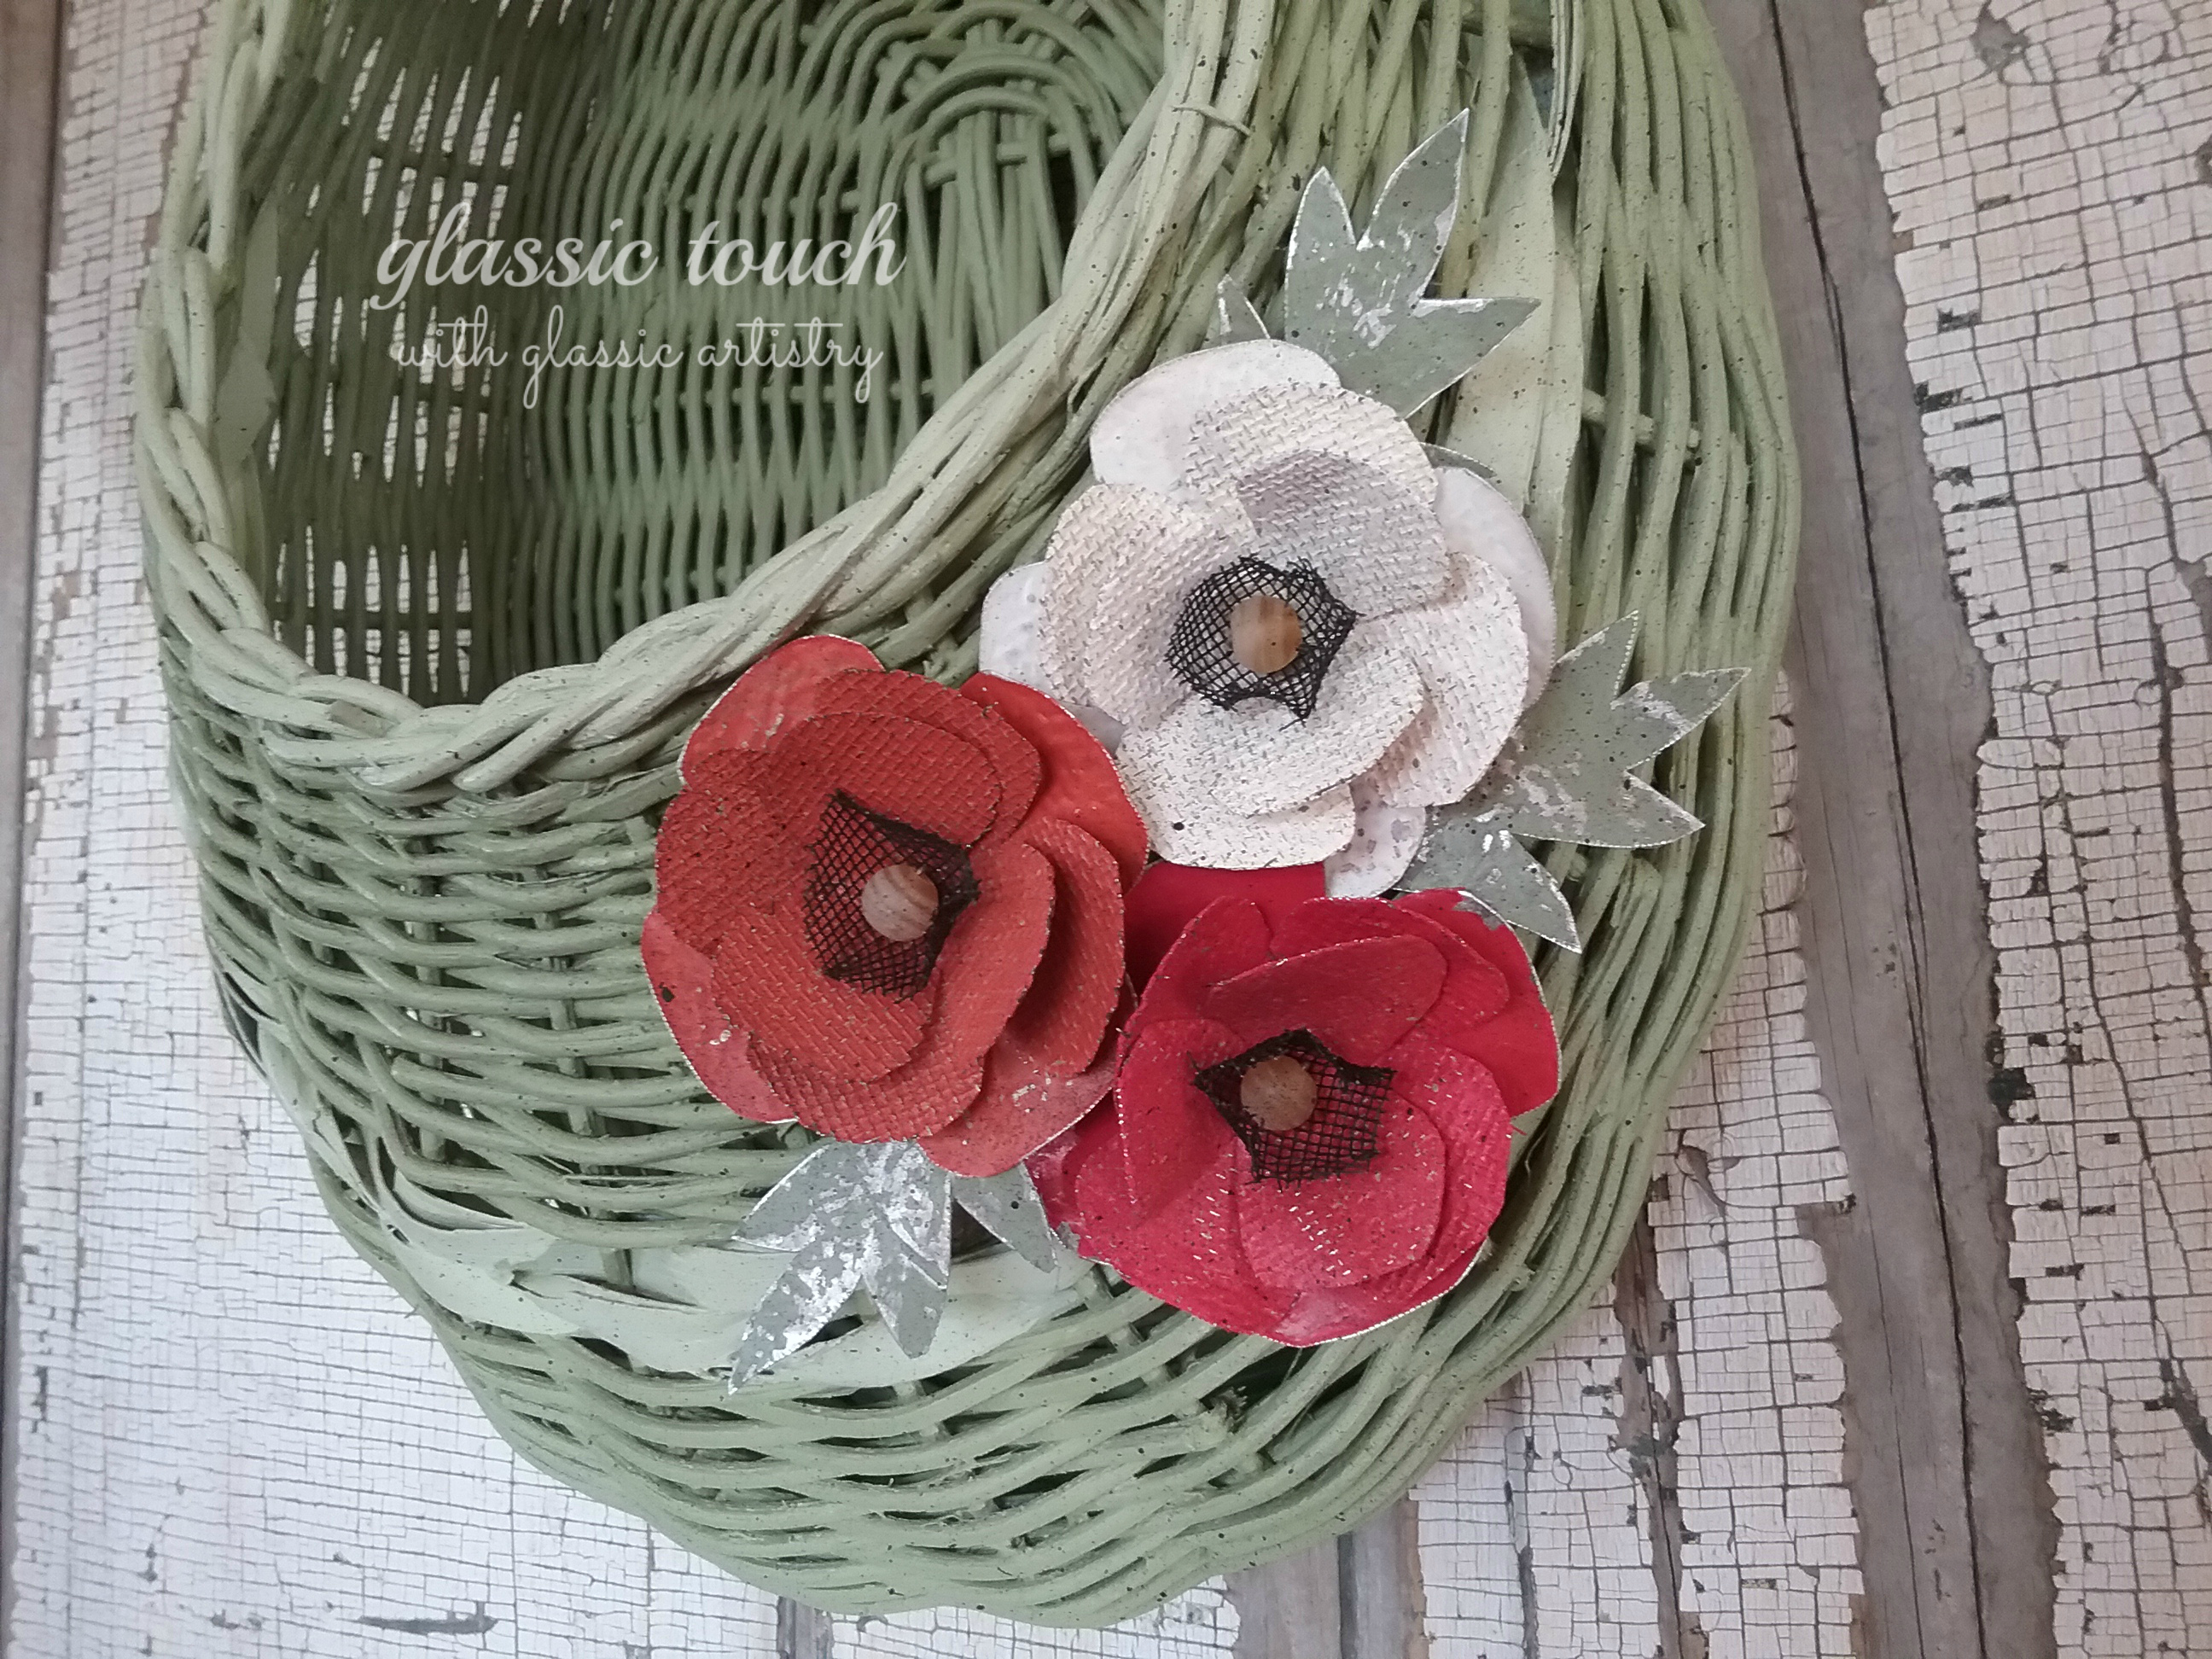
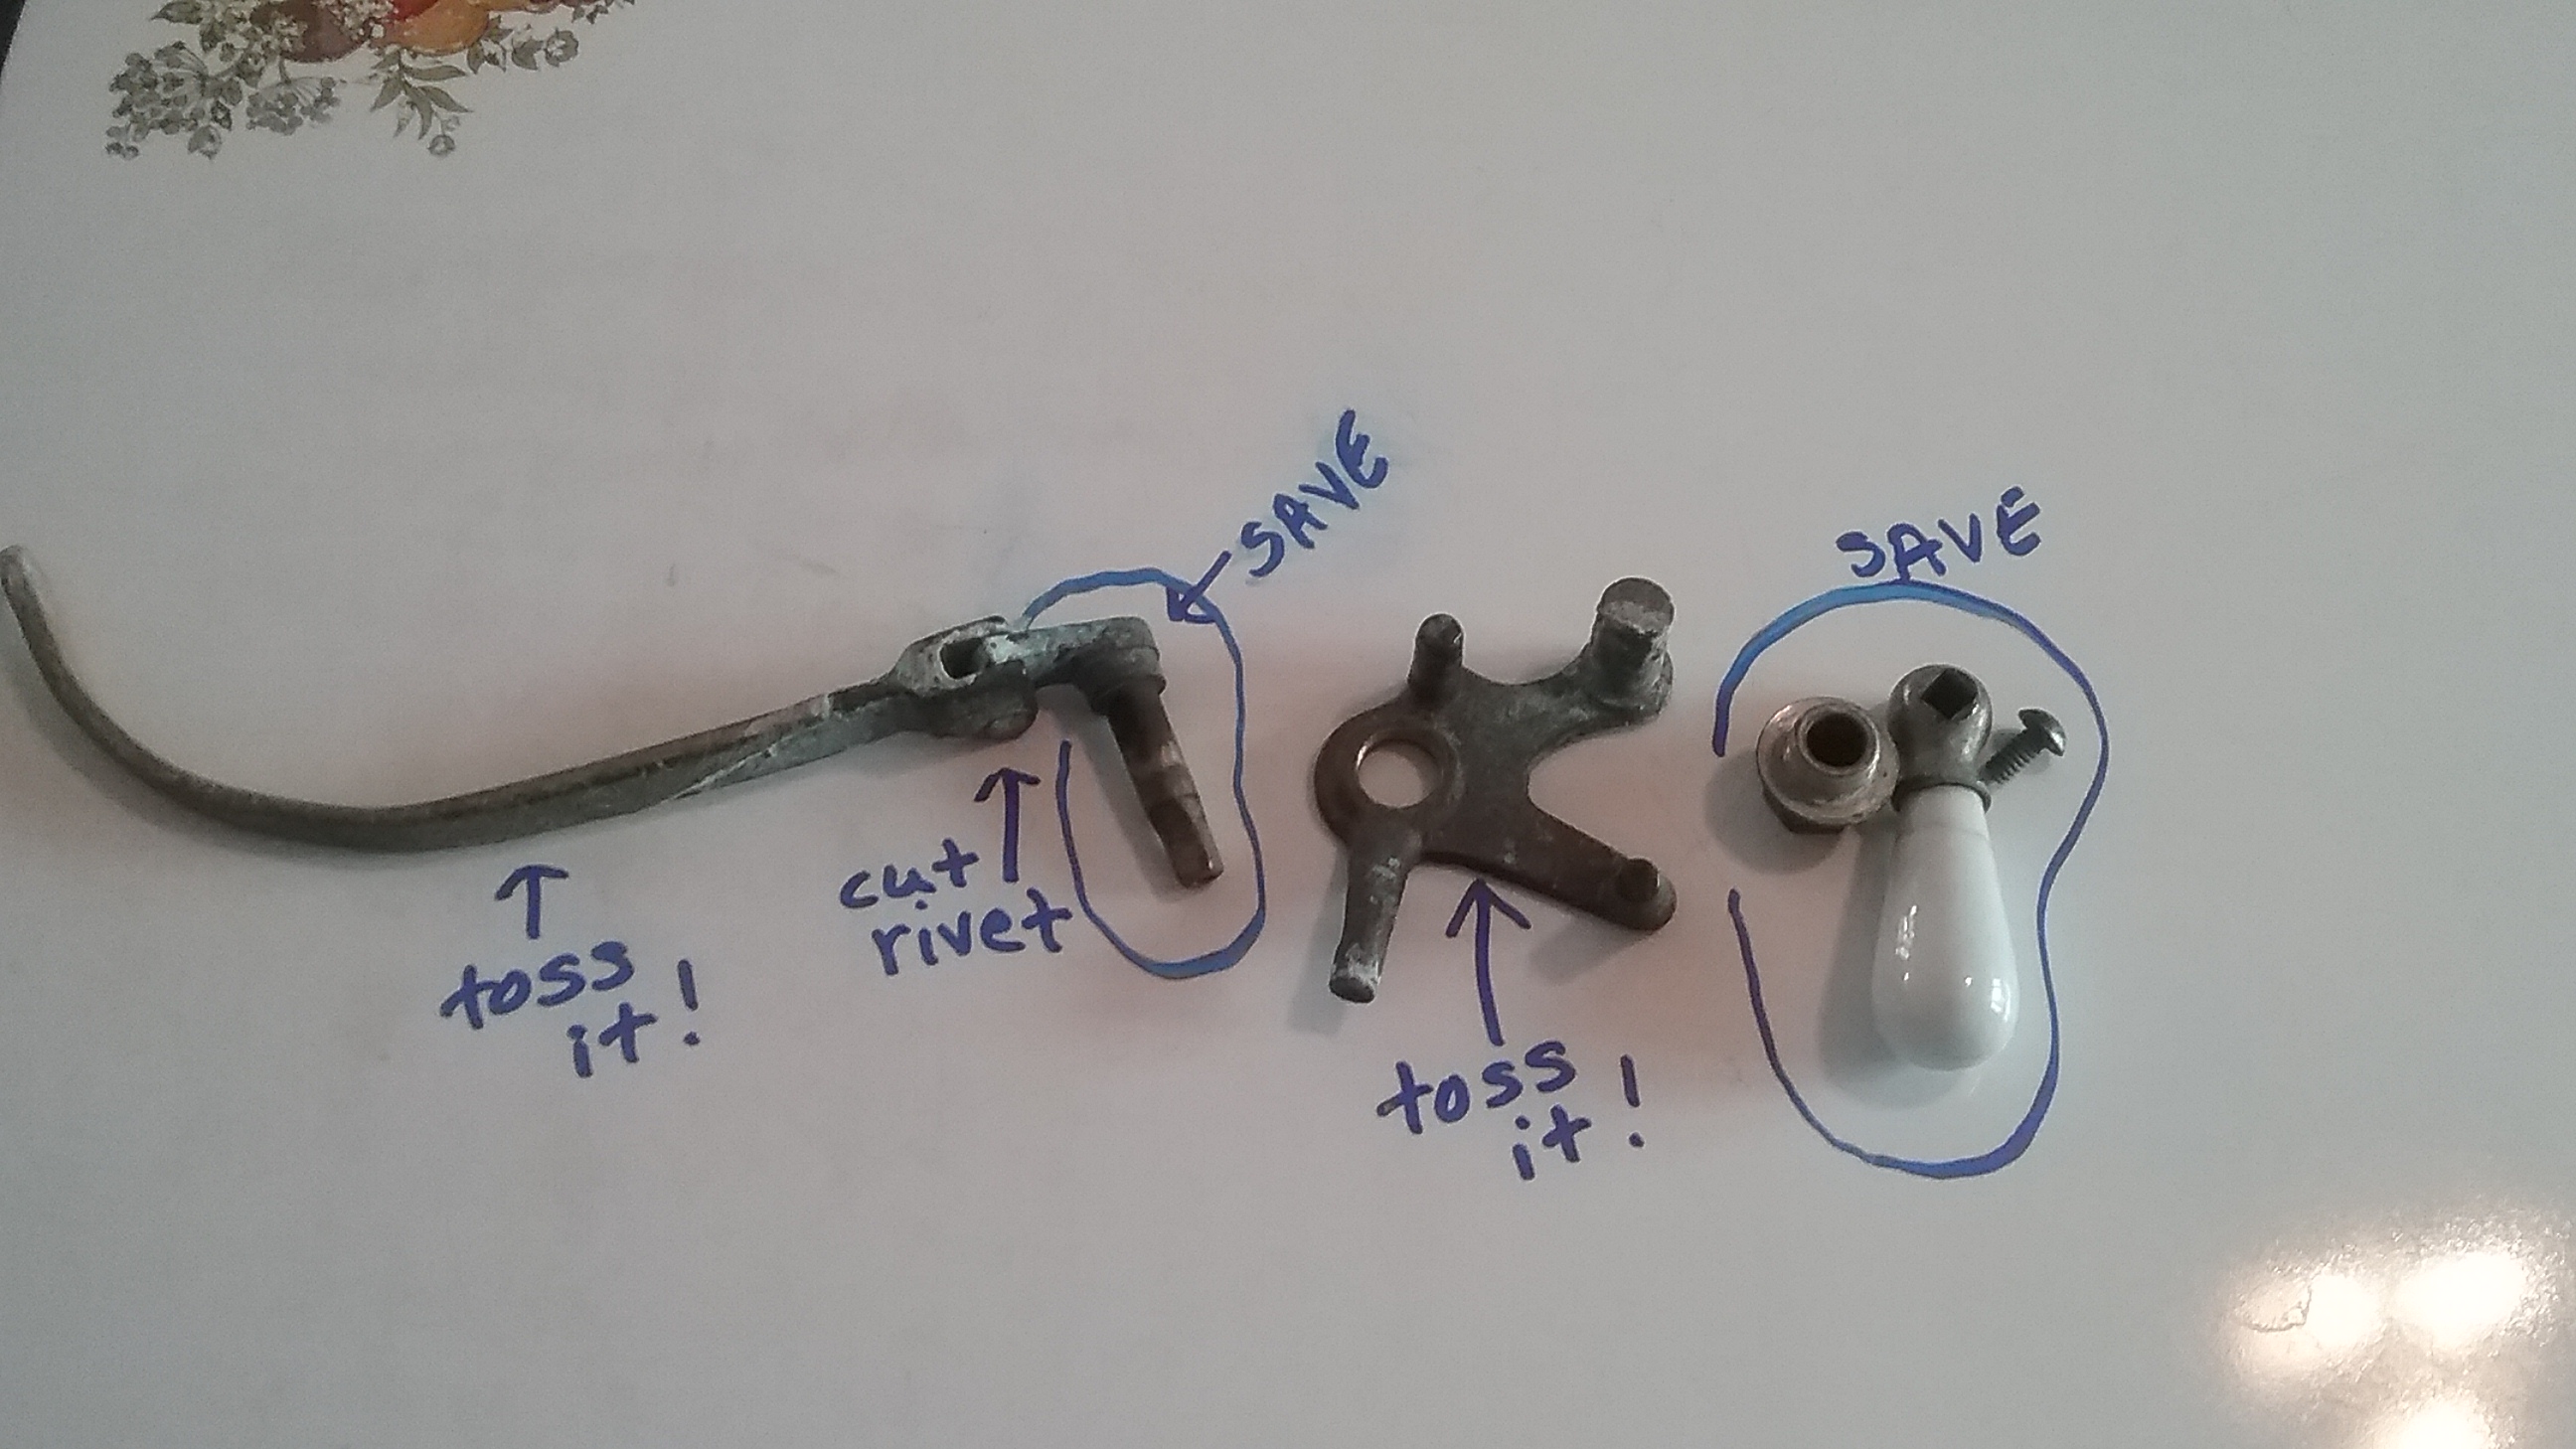
Sprigs of metal flowers are something I keep my eye out for at garage sales and flea markets.  Their flowers and leaves are easily snipped off to incorporate in crafting projects.

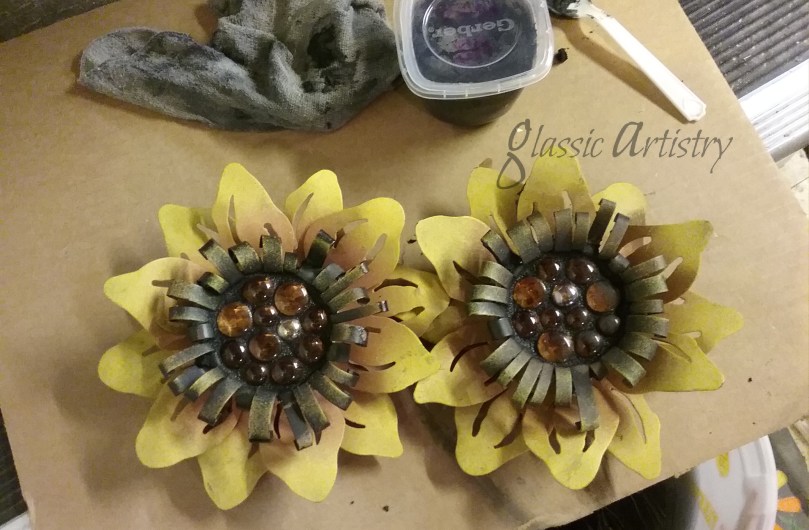
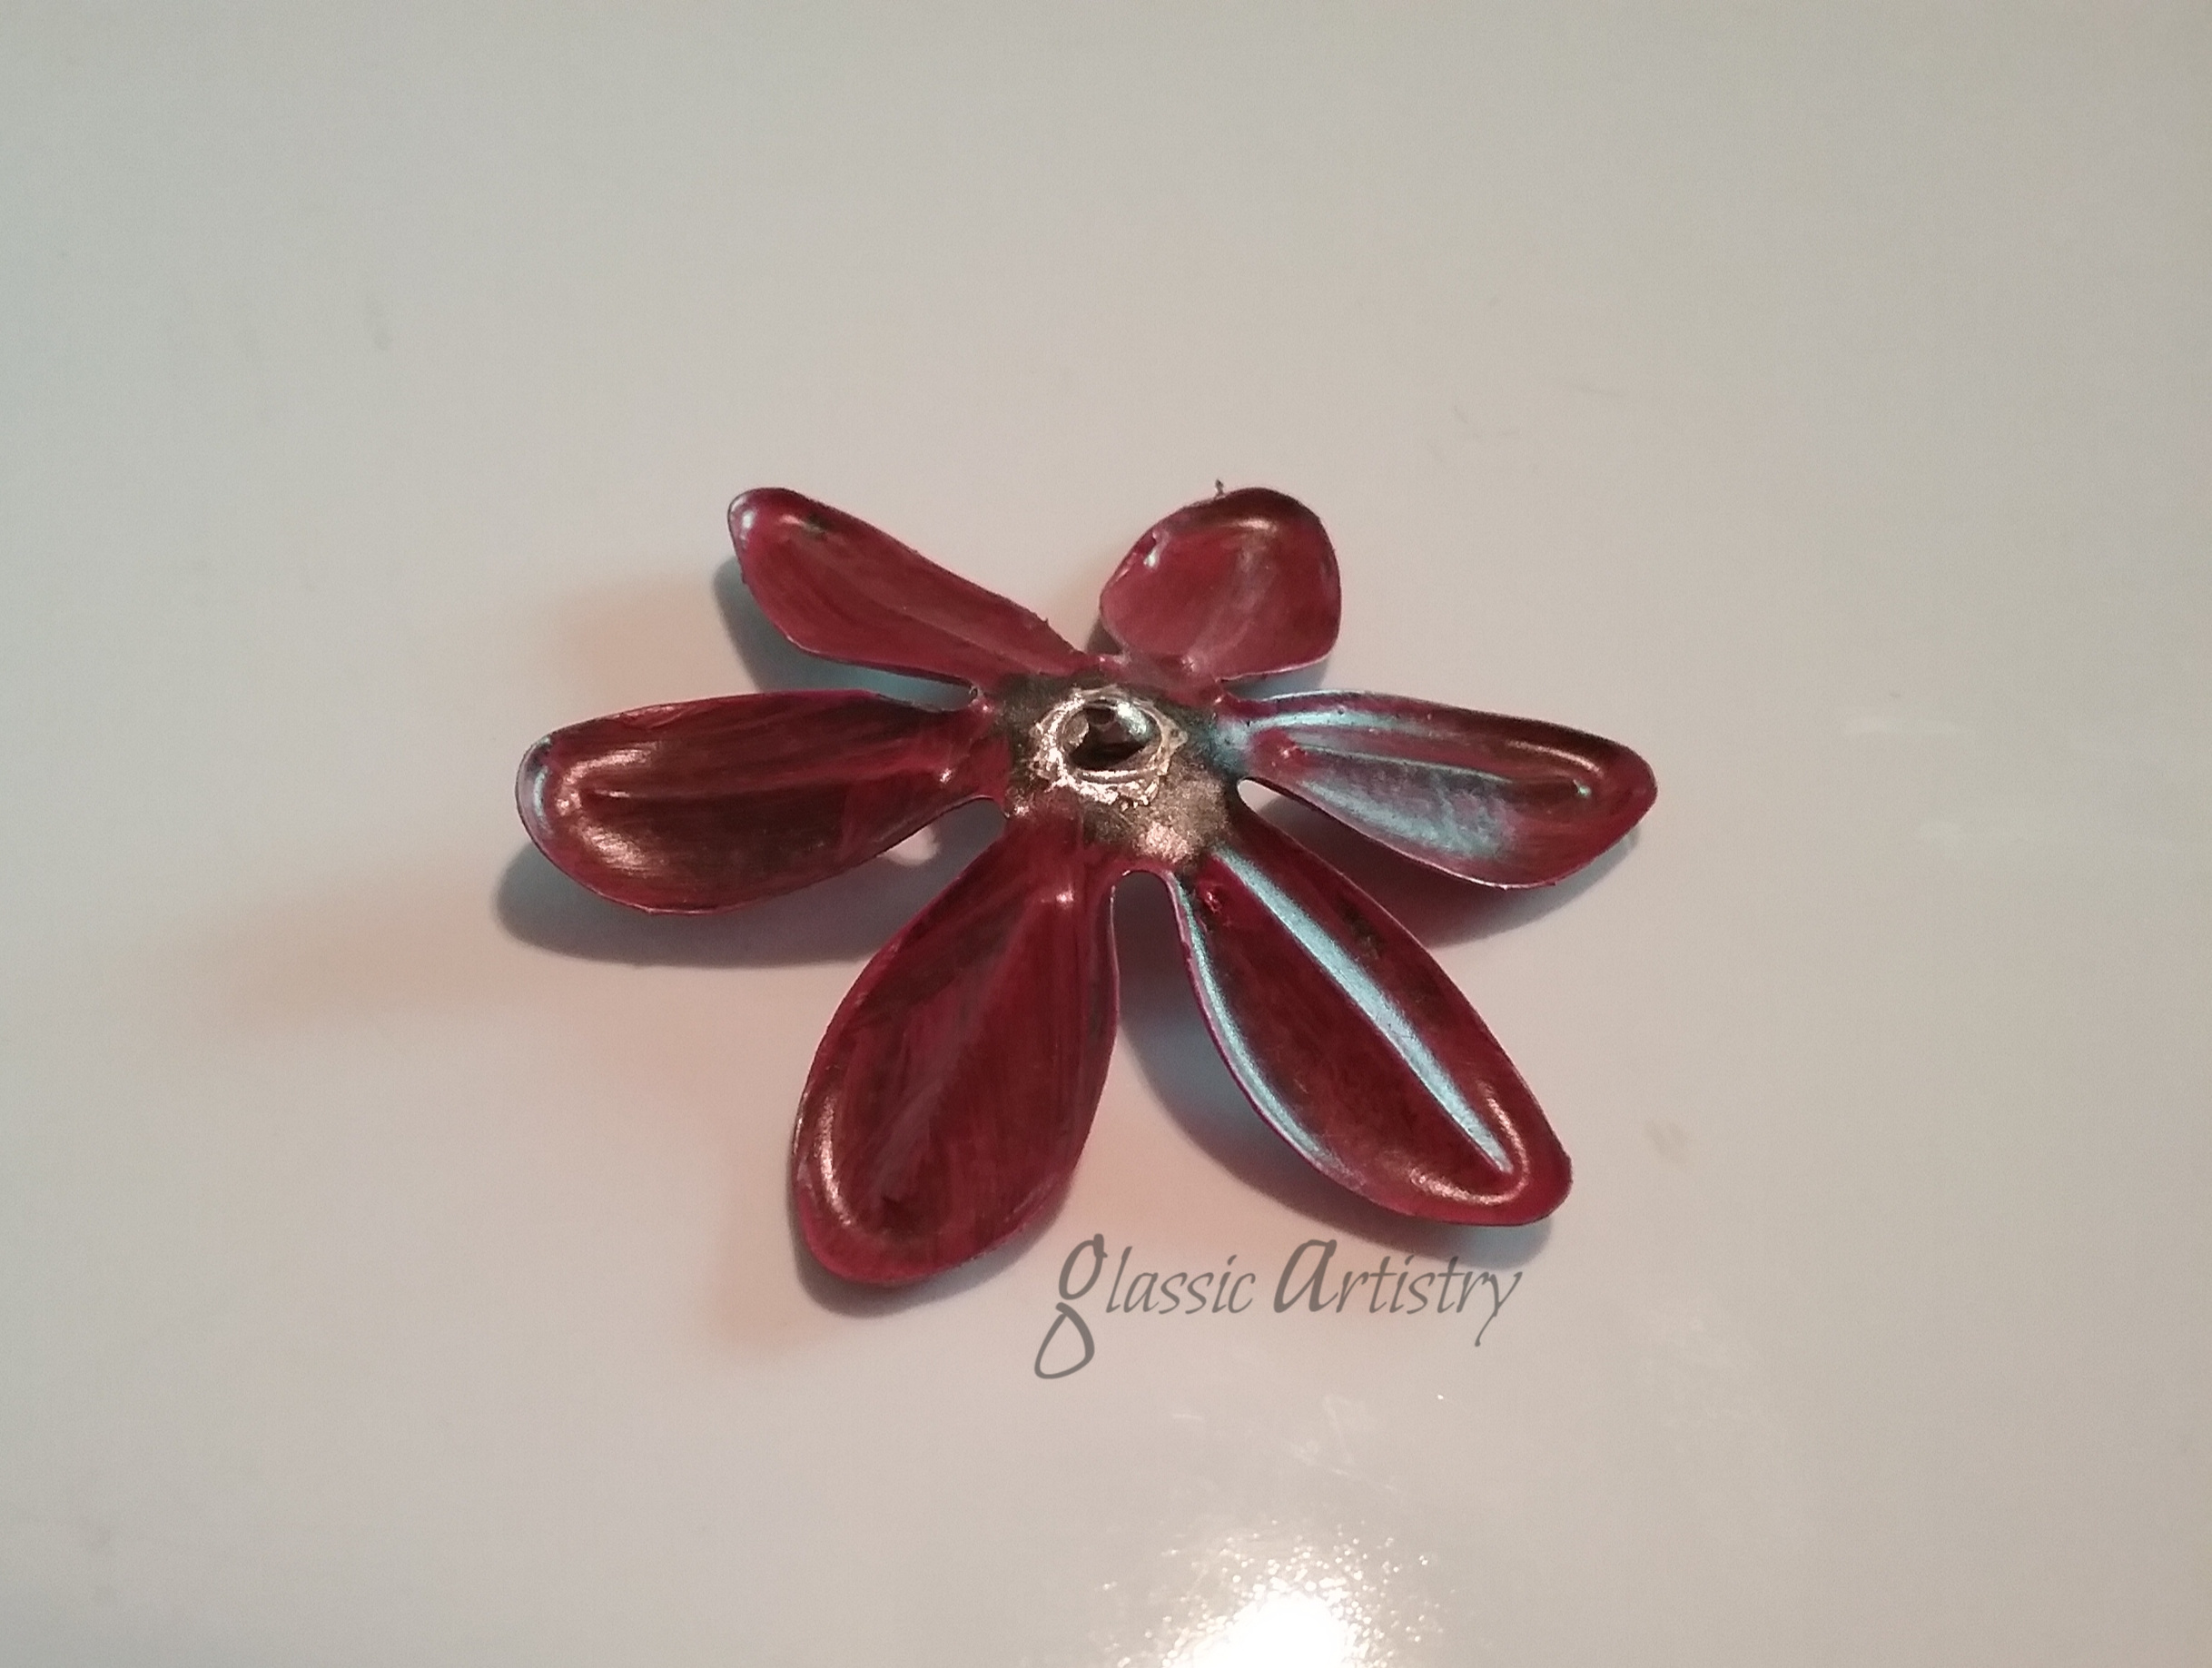
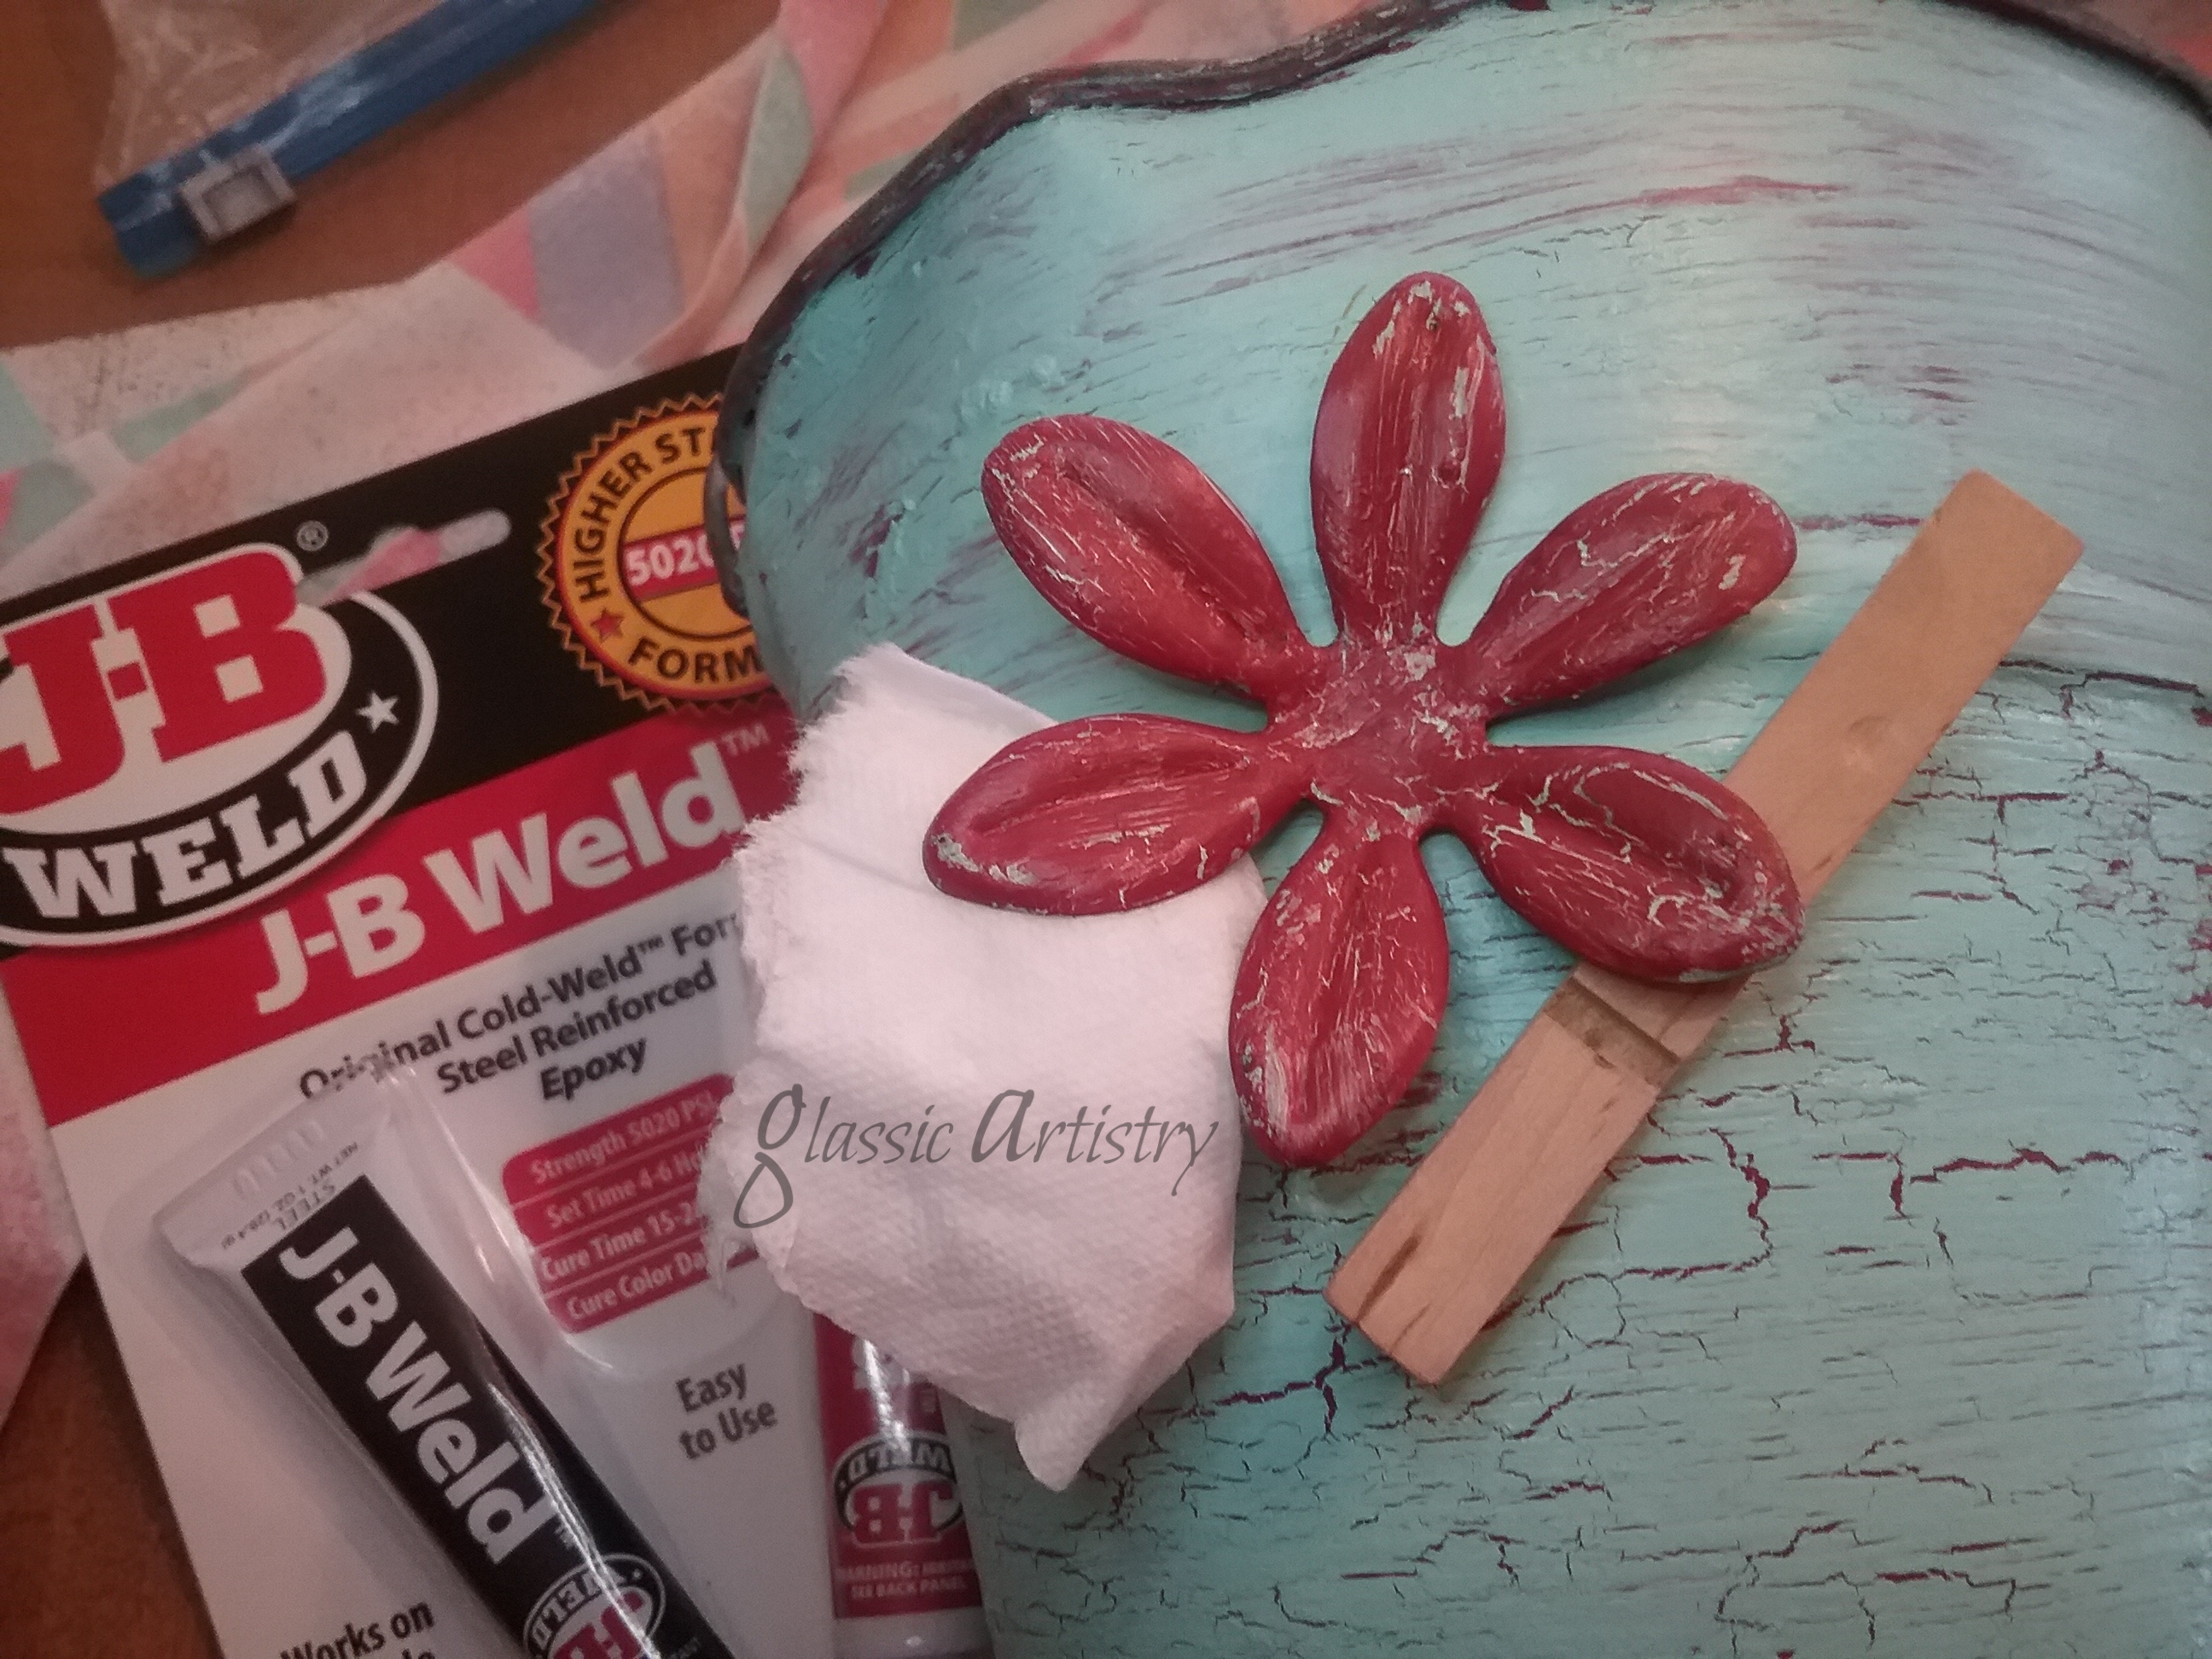
Lightly burnish the metal flower with steel wool before painting.  I used the light blue as a base color, and the red as the top coat, with crackle in between.

J-B Weld is a two part epoxy, and a wonderful product.  Please read and follow the manufacturer’s directions on the package.  Per directions, the surfaces to be glued must be free of paint.

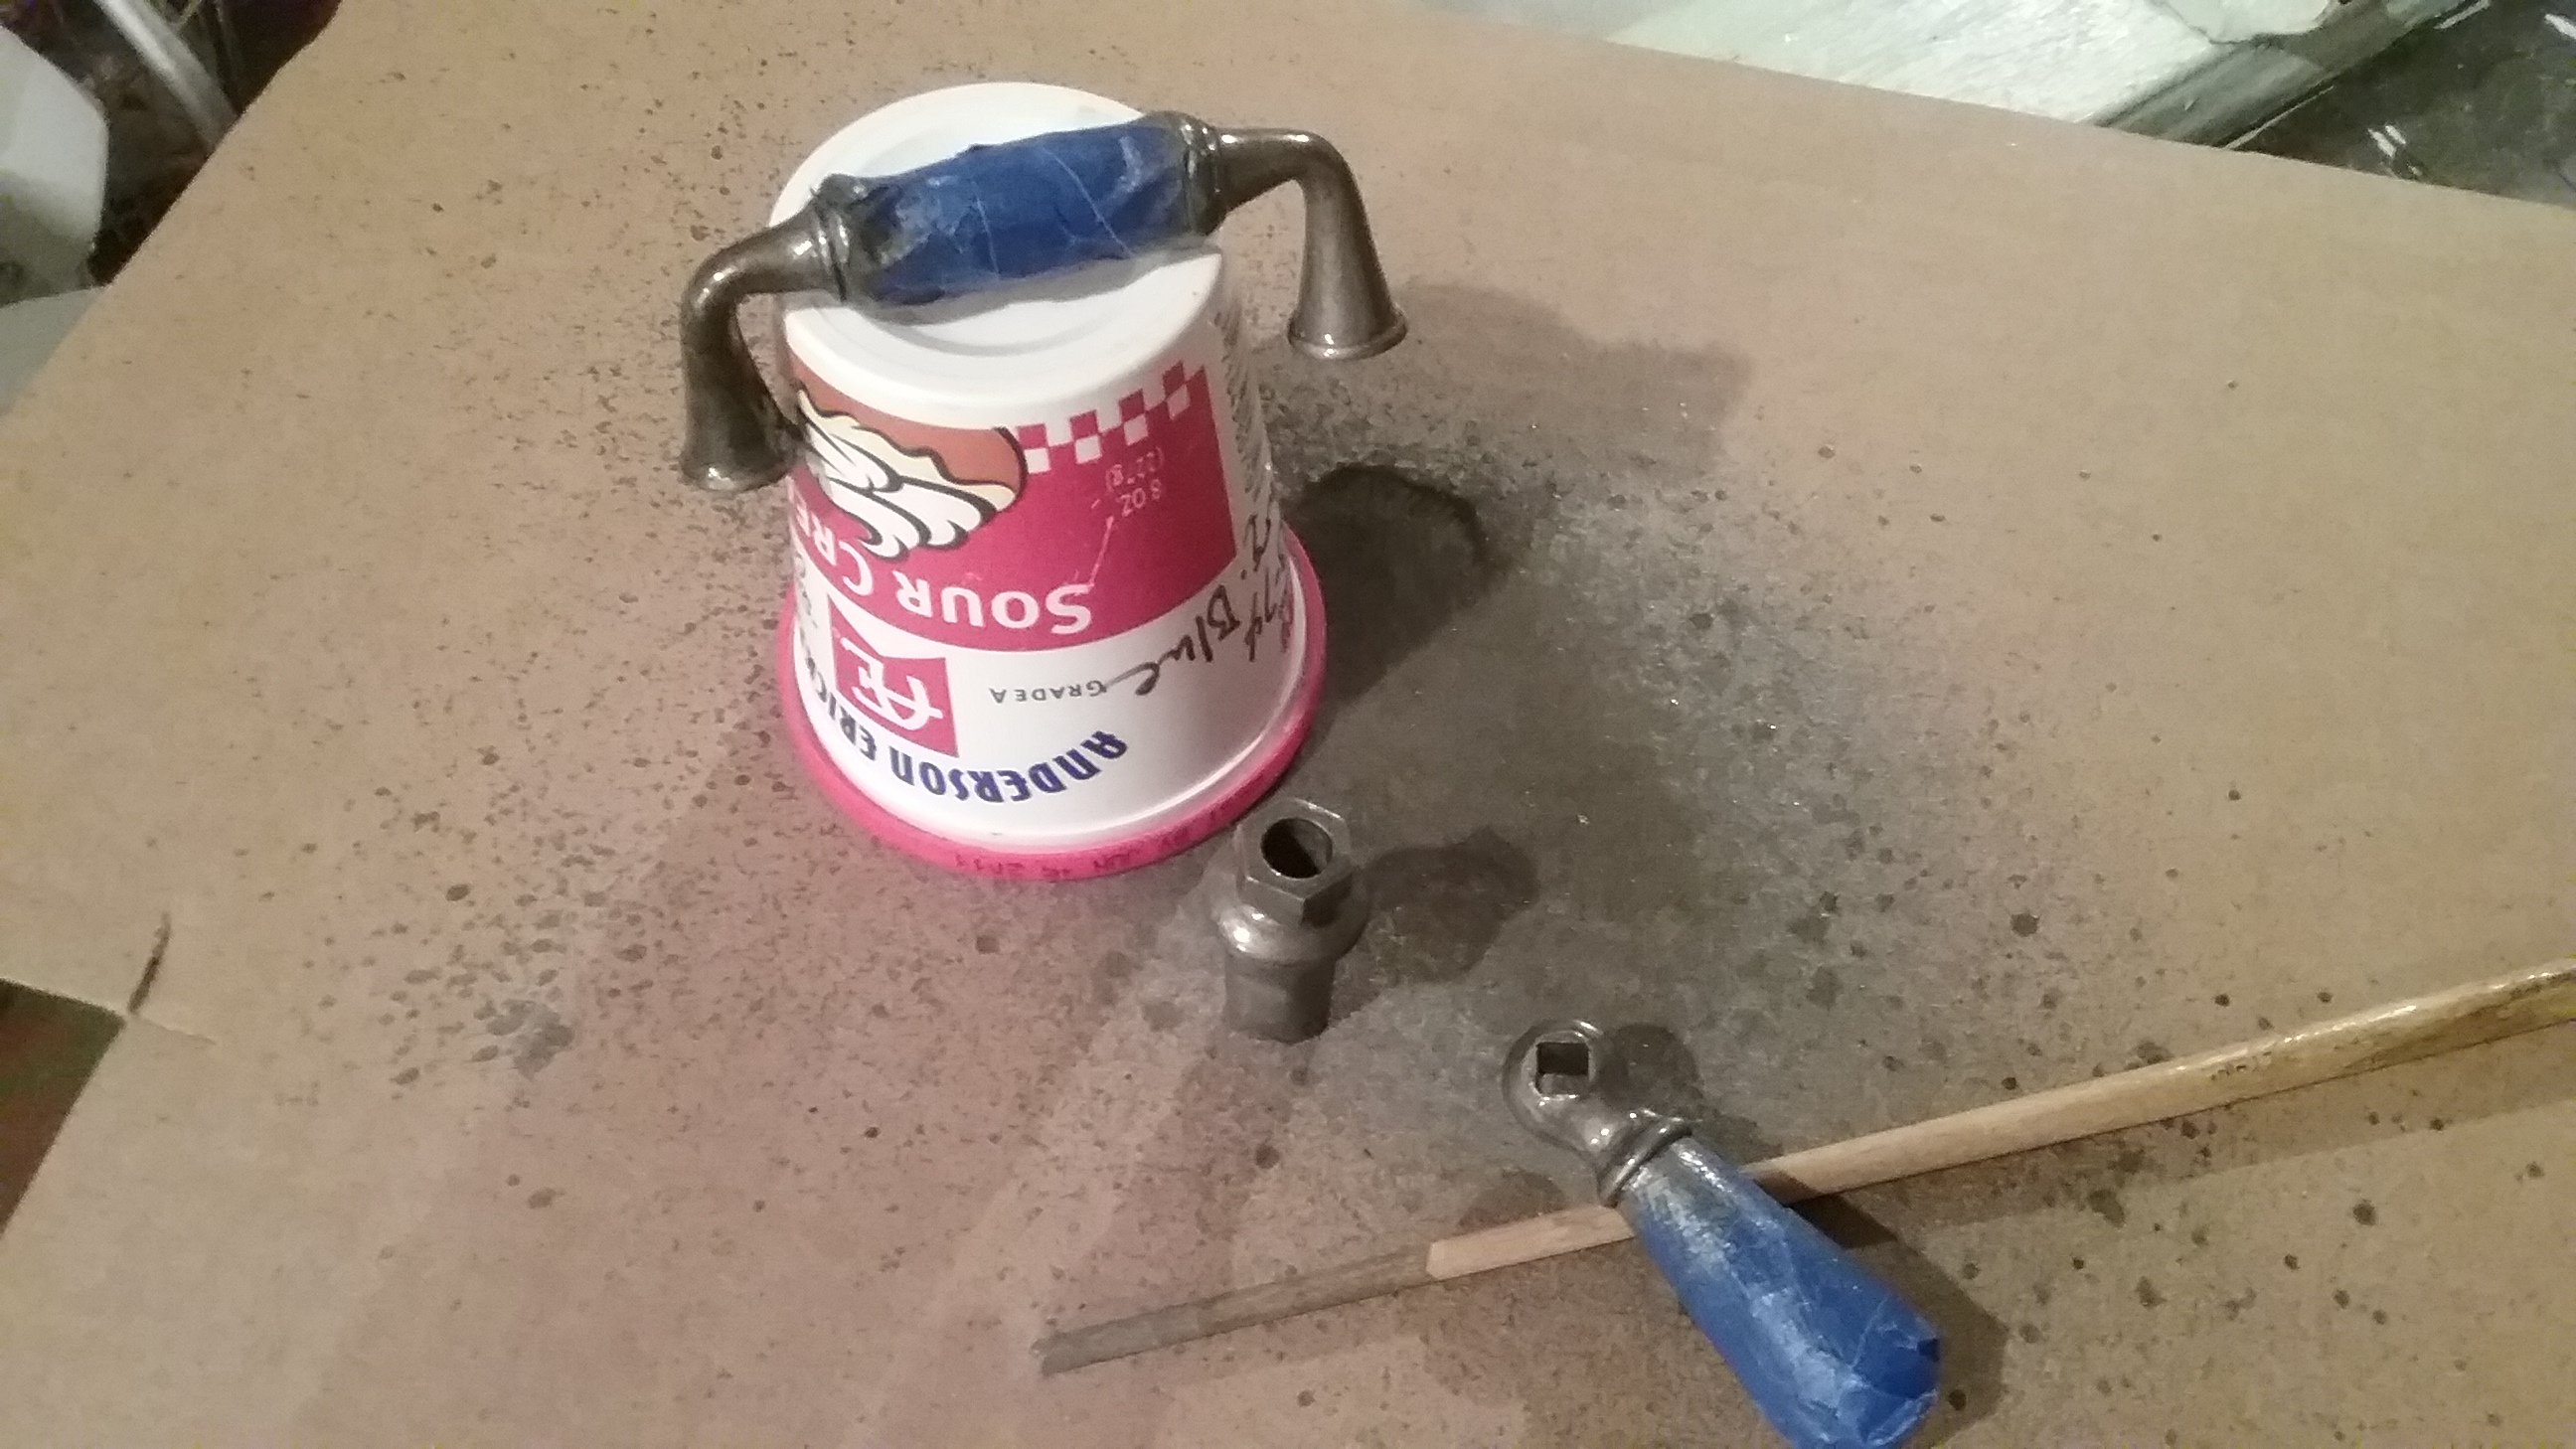
After deciding the placement of the flower, I scratched a small circle of paint off of the bucket, and also made sure the bottom of the flower was paint free.  I used a wooden skewer to stir a small amount of epoxy together on wax paper, and let it rest about five minutes to set up a little.

With the bucket on it’s side, I laid a small mound of epoxy over the cleared area, then sit the flower on, propping it in place to dry for 24 hours.

  jb weld

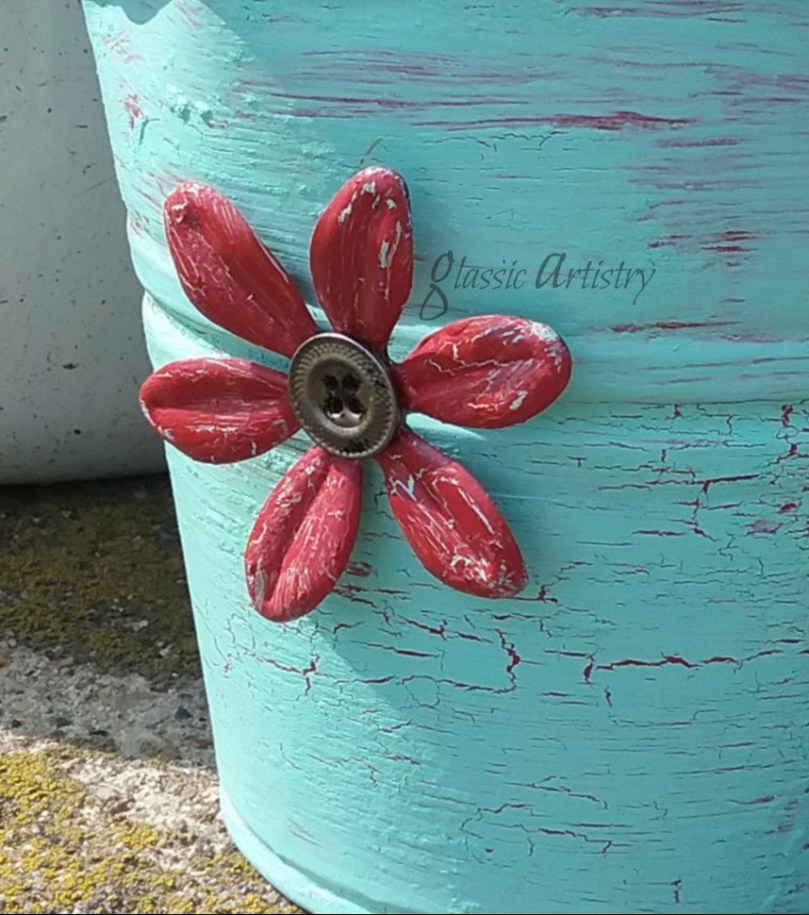
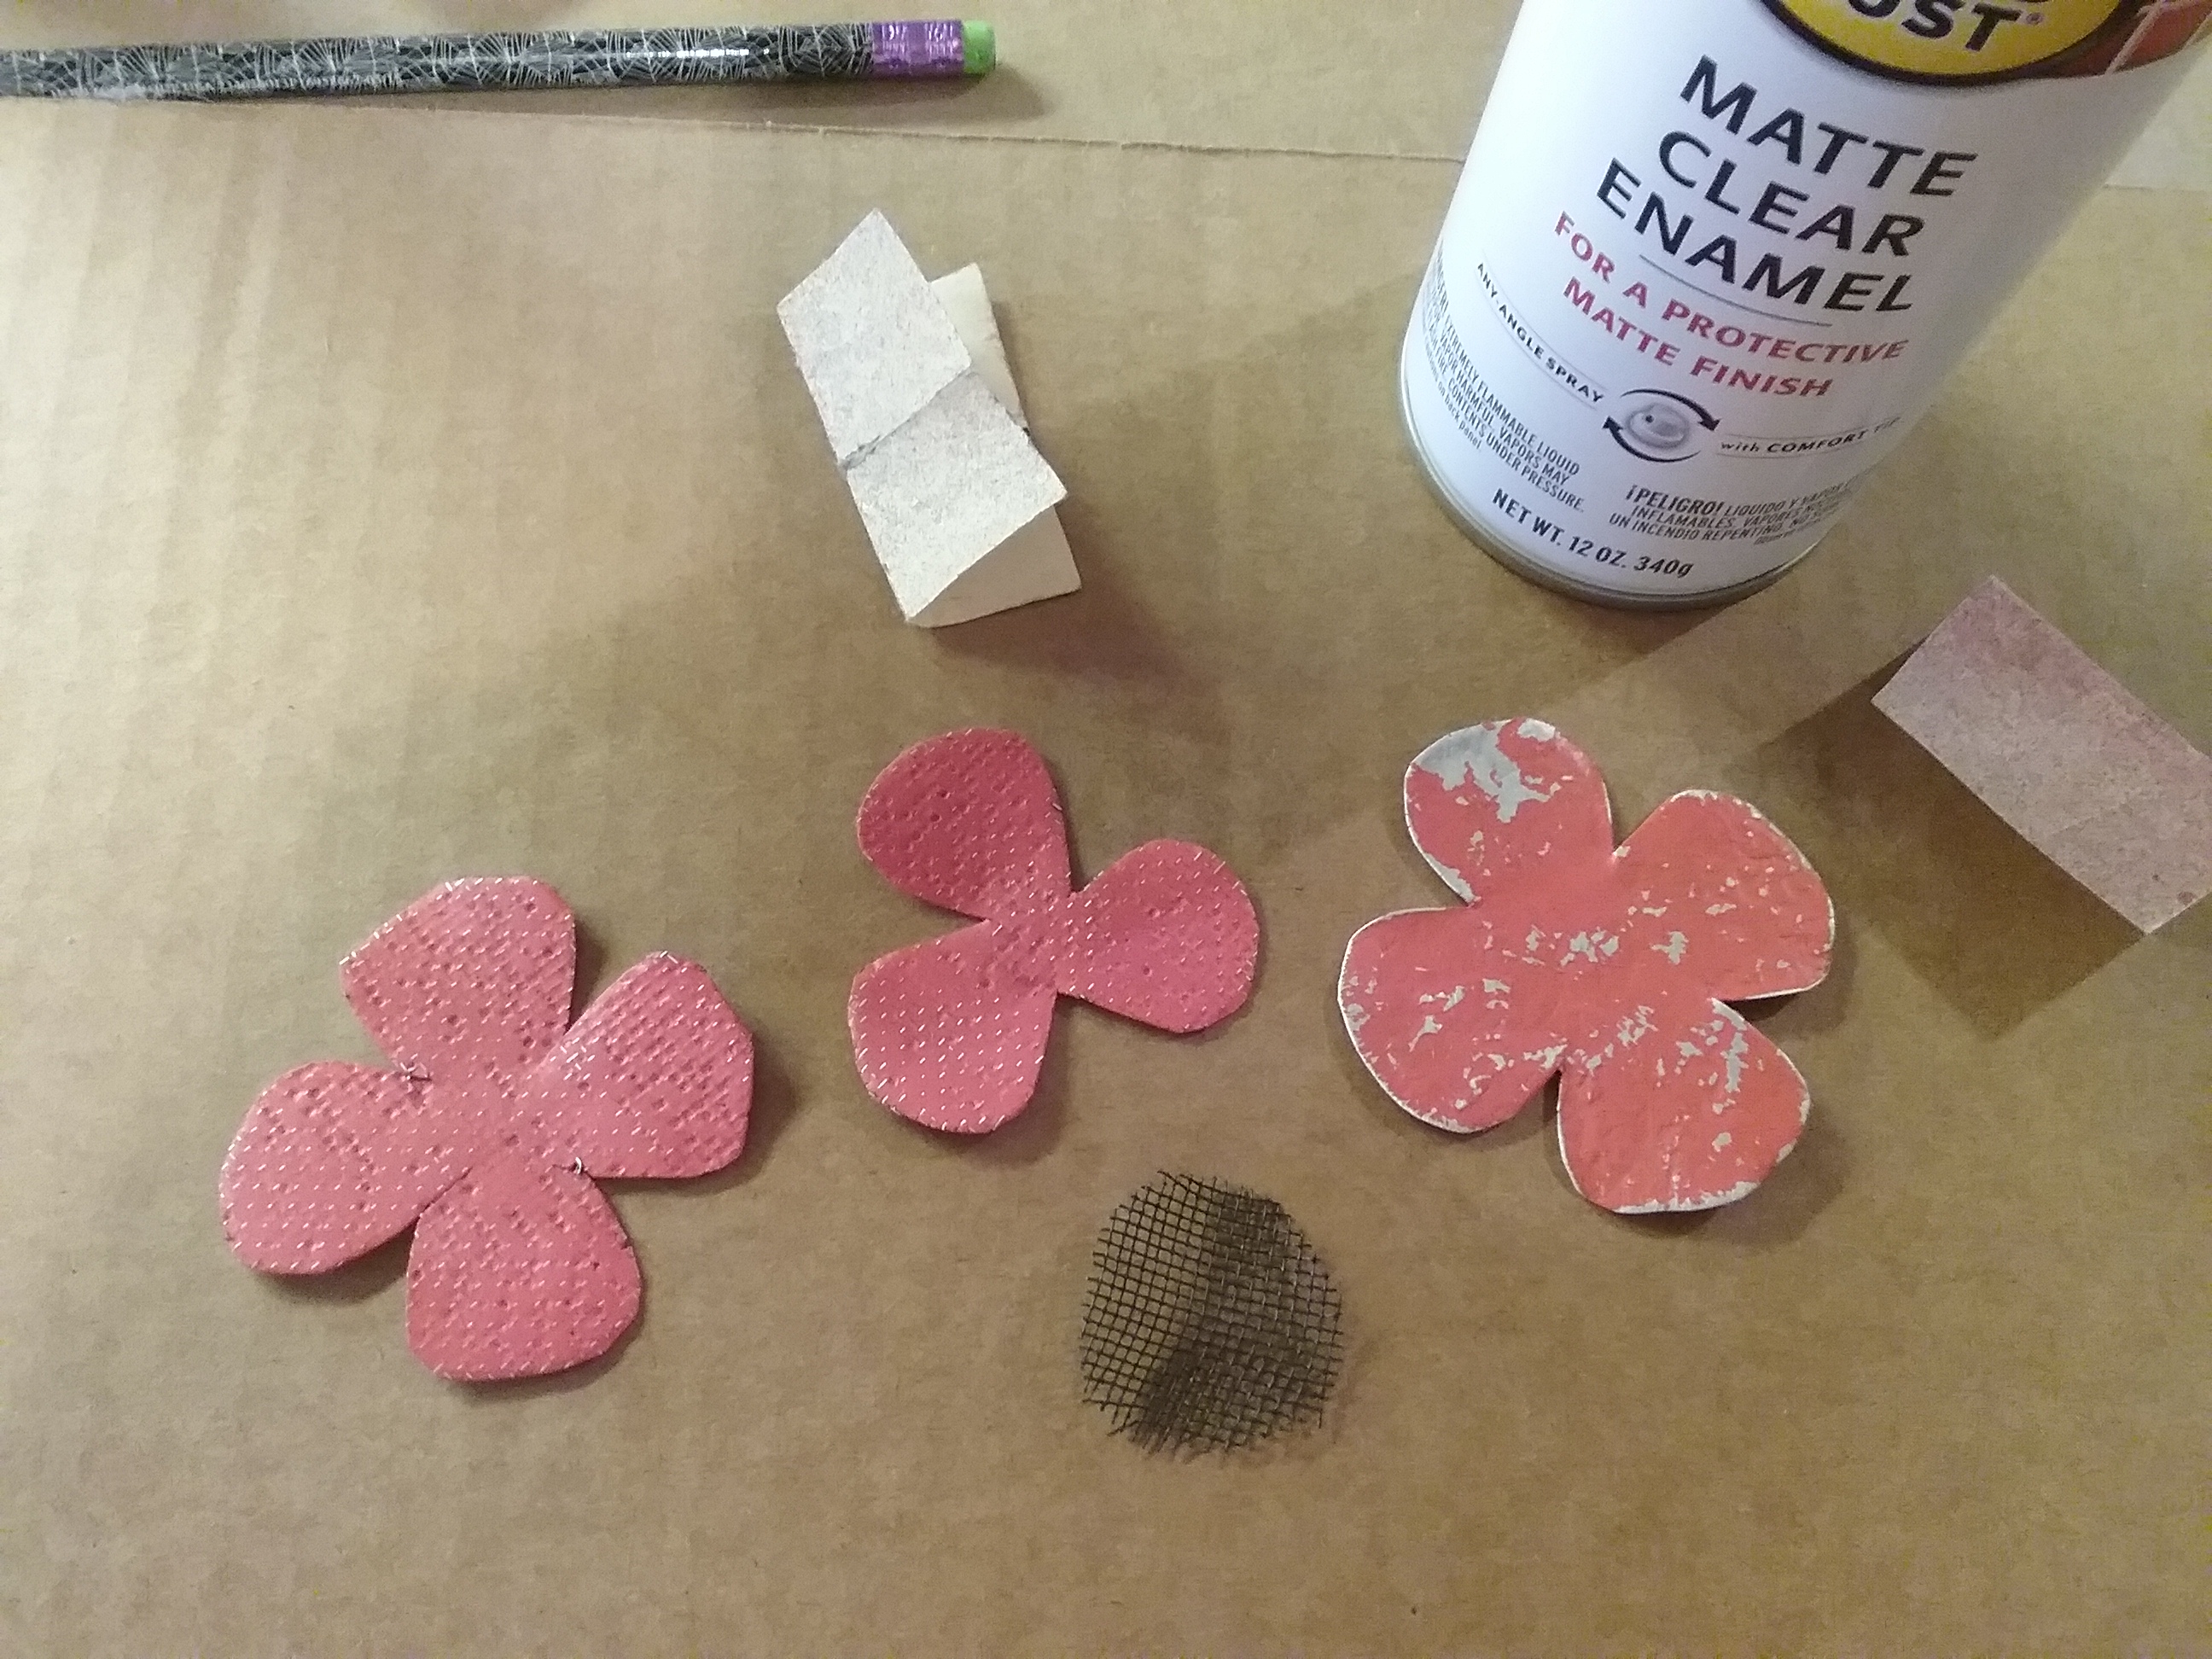
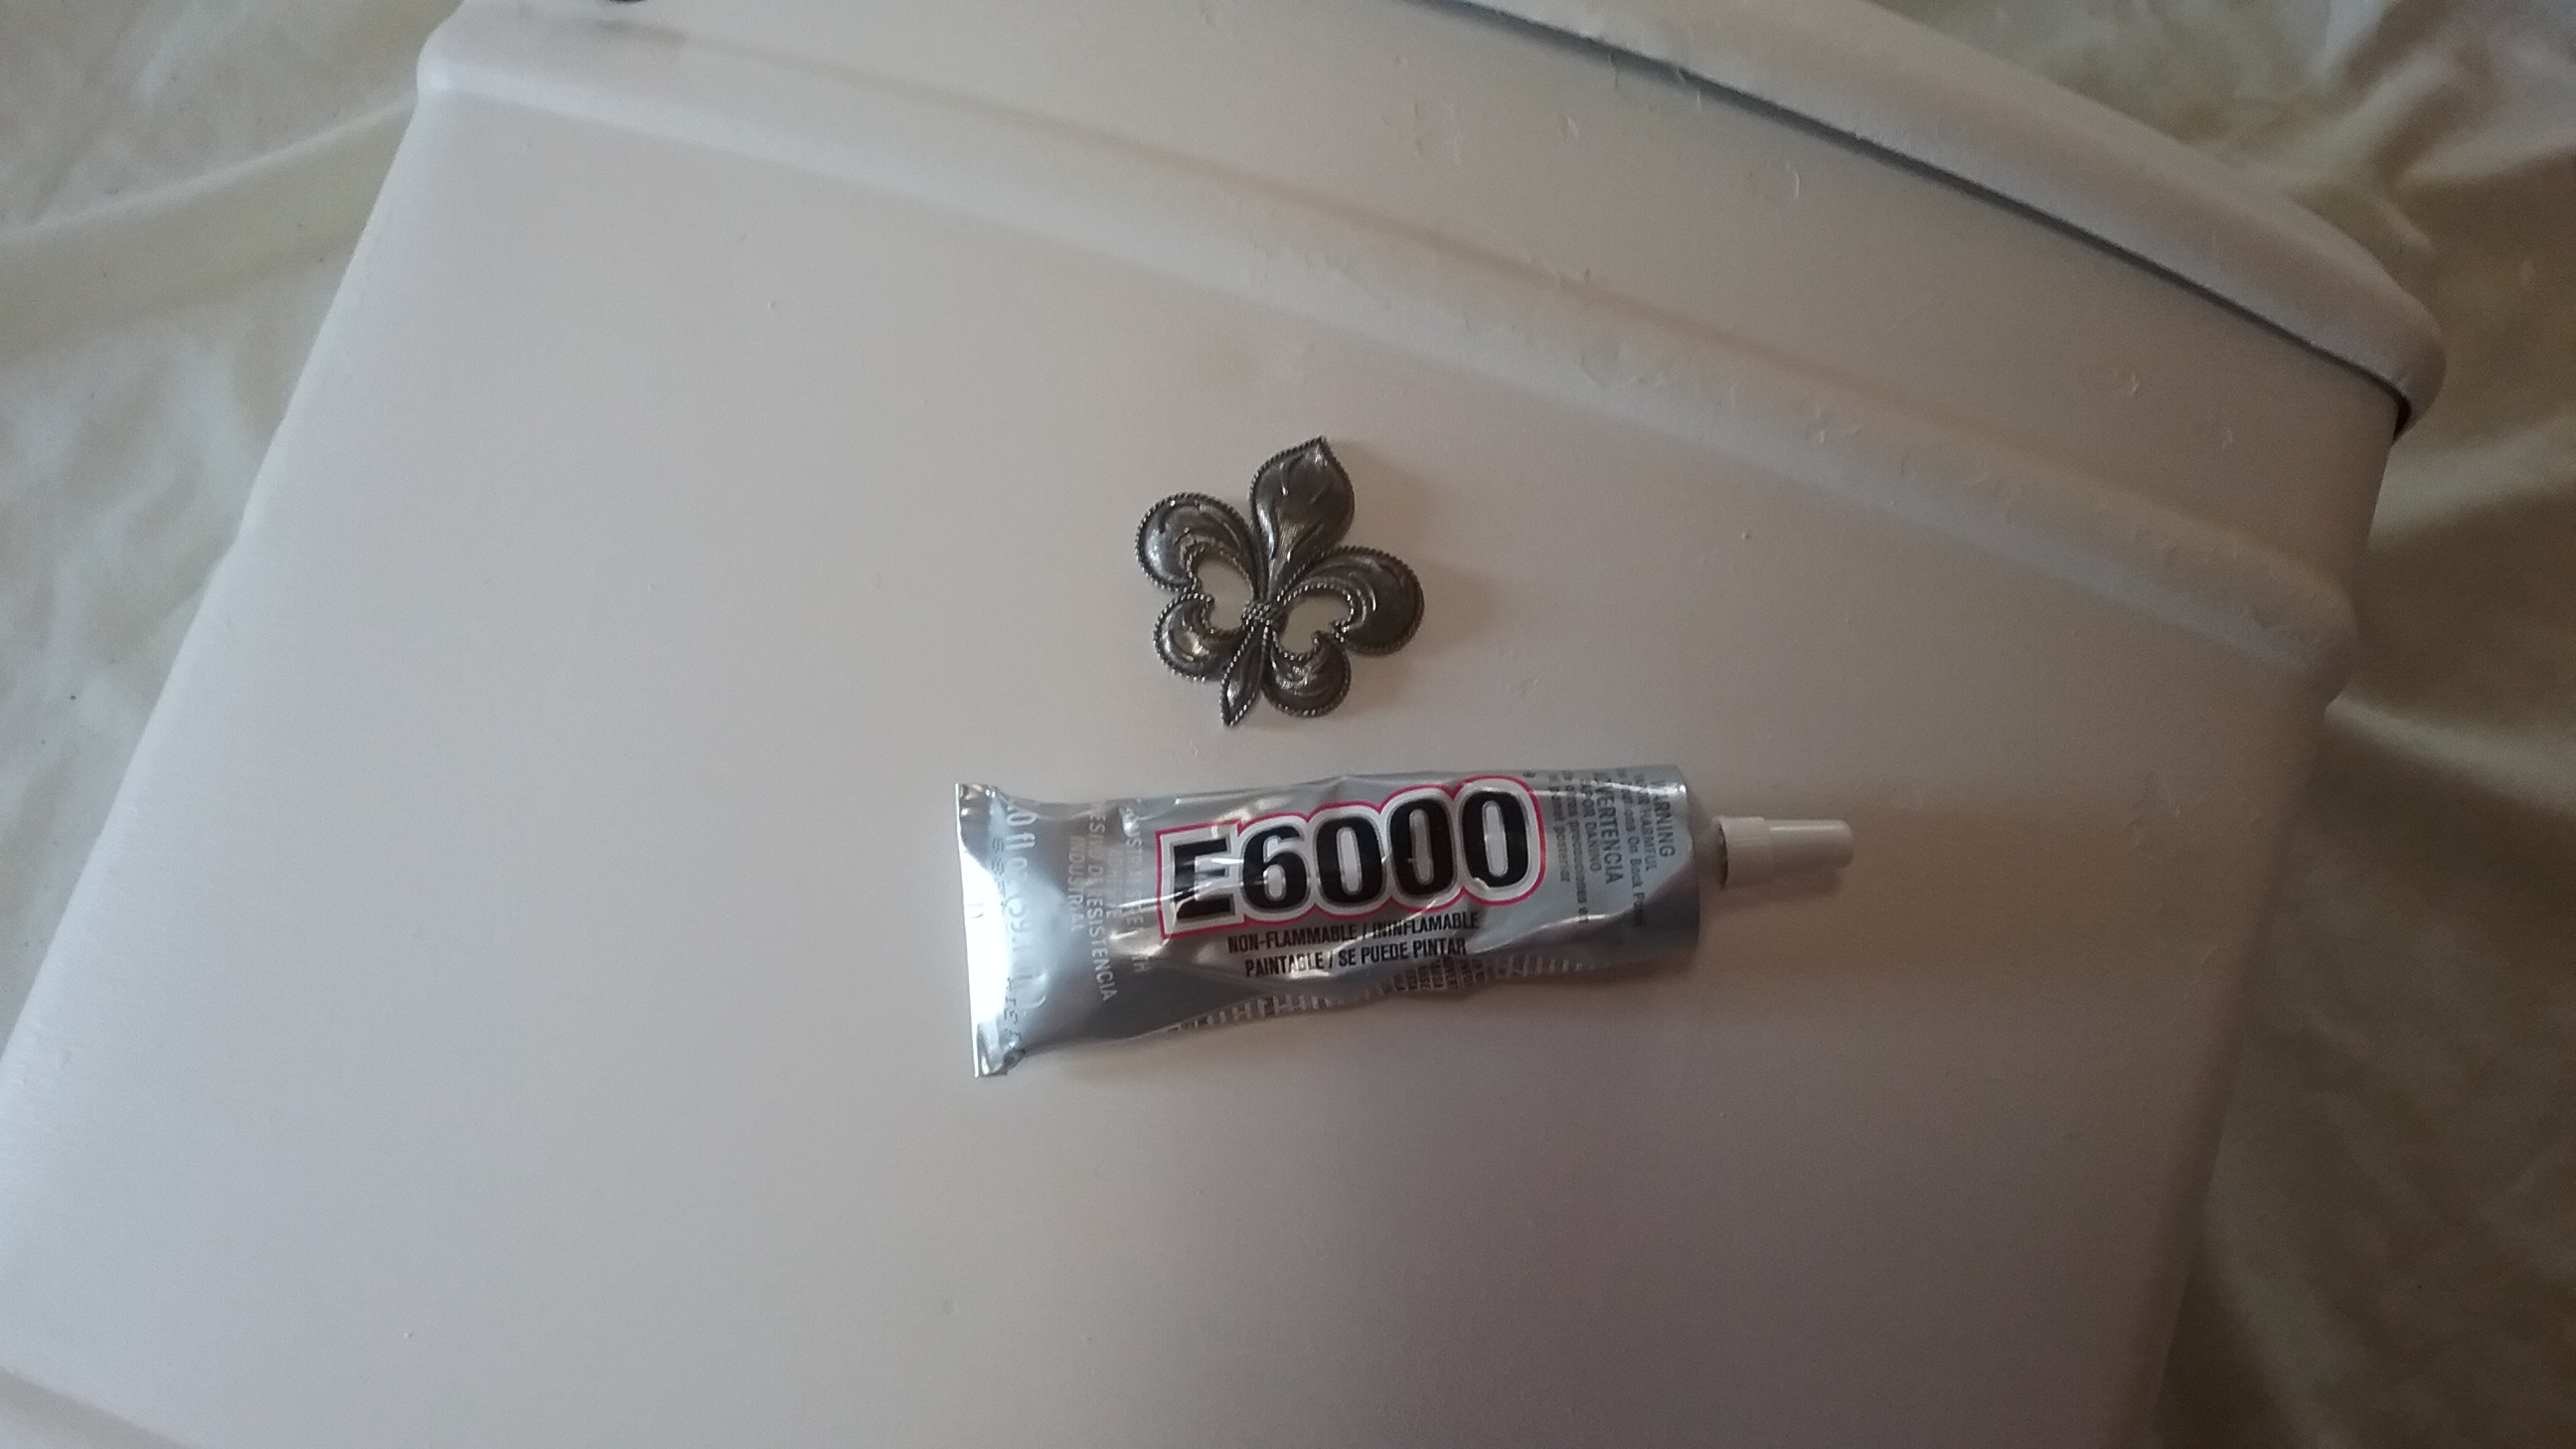
After the epoxy was completely dry, a metal button was added to the center of the flower with a small dab of E6000.  I finished with a spray of clear sealer, which is optional.

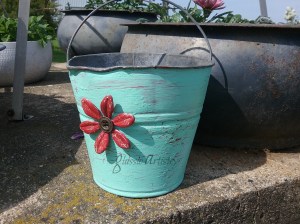
What do you think?  I had garden art in mind as it was being made, but now, I think it would be cuter than the dickens lined with a red and white checkered napkin and holding tableware at a barbecue!

Hope we are all blessed with sunshine and beautiful weather for the upcoming holiday.  Have a safe and Happy 4th of July!


Vintage Style Wooden Decorative Brackets DIY Tutorial

I’m still working like mad to get ready for the upcoming June 2nd Vintage Market. It’s been crazy around here trying get ready in such a short period of time. I’m very excited to go though, and hope all the hard work pays off.
I came up with a new bracket idea to take to the market, and also offer in varied sizes and designs, in my shop “out behind the house” this summer. Chicken wire inserts were added to give them just the right touch for some fun vintage farmstyle/country decorating. They take a little time, but I think they are worth the effort.
I traced my bracket pattern on to 1/2″ plywood. The plywood was only finished on one side, so the pattern was traced 2 face up, 2 face down, making sure the grain was running the same direction on all, then cut out with a scroll or band saw.


The insert pattern was centered and traced on each bracket.

Drill several large holes inside the drawn lines of the insert tracing. Cut the insert openings out with a scroll saw. I found it easier to connect some of the holes first, removing small chunks of wood from the center, then get a clean cut on the traced lines.

Sand to smooth all the rough edges before painting with exterior primer and paint so they can be used indoors or out.
Cut two pieces of chicken wire to extend over and cover the insert area, matching the pattern in the wire.
With a bracket finished side down, place the wire over the insert opening. Brush a little paint on the wire that extends on to the wood. Flatten the painted wire with a hammer. Staple the wire to the wood. Flatten the staples with a hammer so they are as flat as possible.


Apply some wood glue, and cover it with a matching bracket, finished side up. Clamp together tightly to dry. My brackets were large. I ended up using twice the amount of clamps that are shown in the picture below. It looked like some sort of a torture device when I sit it down to dry. Make sure to wipe away any glue that squeezes out when tightening the clamps.


After the brackets are dry, they can be sanded to smooth any uneven edges, and touched up with paint.

The brackets are done and can be used at this point, or, the outside edge can be trimmed with 1/4″ thick wood strips, which is how I choose to finish this pair before repainting.


So, what do you think? Think they’ll catch someone’s eye at the market?

Making Poppies DIY Tutorial

A quick post to share a new rustic poppy design.
Not too many supplies are needed for these fun flowers; salvaged thin metal sheeting, fiberglass window screening, thin wire, small flat bead, 8 to 10 mm glass bead, and paint. I went back to Lowe’s and bought one of those cute 8 oz Valspar paints again, this time “Oh So Red”.
Like many faux poppy patterns, stacking three layers of petal pieces makes this easy. The base piece is the largest and the other two get smaller in diameter as you go up. My base was about 2 3/4″ diameter.

Before getting started, some fiberglass window screen had to be painted.   This was my first experience painting screen and it took me some time applying the paint and getting all those itty bitty squares to stay filled in; when you brush over them, they open back up. I painted in layers, drying with a fan, and discovered laying the paint on was more productive than brushing most of the time. If anyone out there has a secret or helpful hints for painting screen please do chime in.

Flatten a piece of scrap metal sheeting (as in The Spirit of Christmas). Trace and cut out the base petal piece. Paint it red. Dry. Sand lightly with fine grit sandpaper to reveal some of the metal.

Hold the top two petal pattern pieces in place on the painted screen and cut around them.

Cut a small circle, a little larger than a quarter, from the window screening.  Darken it with black paint.

Sand the screen petal pieces with fine sandpaper to reveal the texture of the screen. Do not sand the black center piece. This is a good time to put a light black speckling on your pieces, and let it dry before spraying all the pieces with a clear matte sealer, front and back. I forgot, and didn’t speckle until my flowers were done, then had to respray them.

Trace three poppy leaves on the thin metal, flipping your pattern to trace one face down. Cut, paint green, sand, speckle, and seal.

On a board, drive a finishing nail through the stacked flower petal arrangement.  You can shape and bend the flowers first, or keep the petals flattened and shape after. Remove the nail.

Center and twist a glass bead on a length of straightened thin wire. Thread the black screen circle on to the wire stem and shape it around the bead. Add a small flat bead with a dab of E6000. Slide the other petal pieces in place, applying a small amount of glue between layers near the wire. Arrange and form the flower to your liking before pushing firmly into a piece of thick foam to dry. You can do more gentle bending, shaping, or trimming on the petals after the flowers are dry if needed.


I think this makes a cute, versatile little flower to have some fun with. Change the shape of the petal a bit, the color, and the bead, and you’ll have a whole new look.  Another layer of petals could be added for a larger flower.

I wired my poppies to a basket for a pop of color, then glued on the leaves, but they could easily be wired, or glued, to wreaths, canvas art, frames, or wood.


It makes me feel good to find uses for salvaged, and reclaimed materials.  Keeping anything out of the landfill is a plus.  Hearing from my readers makes me feel good too, please leave me a comment and let me know your thoughts.  Enjoy your week!


A Console Table Upcycle DIY Tutorial

We are blessed! 2018 finds my family all healthy and happy. Although we are all still temporarily under one roof, it’s an exciting time. Many remodeling plans were slowed or halted by frigid winter weather, but now, everyone’s plans and projects are ready to move forward again. For some, there’s career advancements on the horizon, and for me, a little more free time to do what I like best; make stuff, and go gather things to make more stuff.
With more free time also comes the opportunity for me to lay claim to the old chicken shed behind our house. It has served as storage and even an extra pet kennel when needed, but now it’s vacant. I’ve long yearned for a space to store found treasures and set up a small shop to sell my wares, maybe host some garden art classes. I’m still kicking some ideas around, but after repairs and a hot power washing, I’d like to have something going in the very near future.
My sister has recently retired. Like me, she enjoys a good hunt and repurposing her finds too. We’re looking forward to meeting a bunch of fun, like minded people on June 2nd when we participate in the 6th Annual Back Roads Vintage Market in Dysart, Iowa. I’ve often heard good things about this event, but have never been free to go. The pictures shared on their Facebook page are impressive, can’t wait to get there. https://www.facebook.com/BackRoadsVintageMarket/

Thinking of wares, and with the market only 3 months away, I needed to kick it in gear and get busy. I took a poke around my garage to see what could be started right away. Holy Cow, there’s a lot out there. I was happy to find quite a few things I already had a plan for. Yep, one was the console table, a perfect upcycle piece. It was purchased at Hobby Lobby originally. It held a pencil lamp behind our living room couch for several years, but wasn’t much good for anything else because it tipped easily. It was moved out over a year ago when the kids needed more room to play.

If you’re a Facebook follower, you’ll know I’ve been working on the table, in spurts, for the last couple of weeks. Basically, it was just flipped end for end, making the top the bottom, and the bottom the top. It could have gone together much quicker, but, well, you know, life’s little interruptions. I’ll need to start working more diligently though. I hope you stay tuned, I think you’ll like some of the projects that will be coming.
I replenished my favorite Stowe White paint at Lowe’s recently, and found a few new Valspar colors I thought would work well together. The small 8 oz size paints are perfect for projects like this.

The original size of the table was 33″T x 35″W x 9 3/4″D.
Two pieces of 1″ pine were cut for a new top and bottom, each 36″L x 11 1/4″W. Sanded smooth.
Three screws holding the metal table top were removed. The screws were too short to be used again. The metal top was centered on one of the boards, flush on the back edge.  Holes were drilled down through the existing screw holes, through the metal and into the wood. Flip the metal top over so the finished side is up. Check to see if the holes line up nicely, if not make adjustments. This stacked piece will be the base of the table when finished.

All surfaces of the boards were brushed very lightly with streaks of Granite Dust, Gravity, and Stowe White in a random pattern. Let dry completely, repeat. Let dry completely again, then sand to see the grain. Wipe with a tacky cloth to remove any dust before staining with a Dark Walnut wood stain. Let dry overnight. To finish, following the directions on the can, wipe on two light coats of low gloss Tung Oil Finish. Dry completely.


Four corner, or “L” brackets, will be needed to attach the new top board to the legs. There are fancy ones available but I used ones I had.
A slot was marked on the inside of the legs, on each end of the table, to accommodate a 1/2″ wide bracket. Cut the metal with a cutting wheel on a die grinder. Position the brackets so the tops are flush the the top of the legs, screw into place.


The metal table frame was painted with two coats of Brisk Olive green paint, drying completely between coats. Distress the edges by rubbing the paint off with a dampened cloth.

Position gliders and nail them into place on the bottom of the base board.  If needed, clip the end of the nails so they don’t protrude through the wood.


To add weight, scrap plywood pieces were glued on the underside of the metal top. Weighted down and dried overnight.

On an even surface, stack the base board, weighted metal table top piece, and the upturned green table frame. Line up the pre-drilled holes and screw solidly into place. I used small washers on 1 1/4″ wood screws. The tips were cut off of the screws so they wouldn’t protrude.
Turn the table base over and center it on the newly finished top board. Keep the back flush like the base. Mark the bracket holes. Drill starter holes before screwing into place, again, making sure the screws don’t protrude through the top.
        

And, there we go. Finished and ready for a new home.  I really like how this shade of green looks with the dark stain. But then again, I like almost anything green.  I’m sure you’ll be seeing this color again real soon.


Vintage Style Toilet Paper Storage

I finally thought of a useful purpose for the curious little copper piece I picked up at @gypsyalleyus last year. Some of you may remember seeing it on my Facebook page. I definitely remember the dumbfounded look on my husband’s face when I unloaded it from the back of my car. Once again, I didn’t have a clue as to what I was going to do with it either, but, recently, as I was looking for a cute way to store spare rolls of TP in the bathroom, the answer seemed obvious.

12604771_1068090996546224_4132676436179310669_o

Before I could get started, all the plumbing was removed from the inside of the tank and it was given a disinfecting scrub. I had to find a set of four 1 1/2″ dia. vintage porcelain casters, eight large flat washers, and four cotter pins. I tried looking around locally for the casters, then got impatient and ordered some off of Ebay. A toothbrush and some Comet cream cleanser cleaned them right up.

20170216_105459

A piece of 1/2″ plywood had to fit in the bottom of the tank to help hold the wheels firmly. There was a lip on the edge of the tank opening, so, after tracing the top edge of the tank on cardboard, I reduced the template by 1/2″ all the way around, before transferring it to the wood. Cut and sanded the rough edges.20170106_150135  20170113_084338  20170113_085429

I used four of the large washers to determine and mark the placement of the casters.  For ease of drilling through the copper, a pilot hole was drilled first, then a 7/16″ hole to accommodate the size of the caster stem.

20170114_170546  20170114_171131  20170114_171442

Hold the plywood firmly in the bottom of the tank to mark through the holes.  Drill 7/16″ holes in the wood and replace in the tank.

Put one washer on each caster stem and insert them through the holes on the bottom of the tank, up through the wood. Turn tank upright so its resting on the casters. Put another washer on each caster stem. Use a white paint pen to reach inside the tank and mark the caster stems at the top of the washer. These marks will be used to drill holes for the cotter pins.

20170114_172213  20170114_174311  20170114_174523

Center punch the caster stems on the white marking. At the drill press, hold the caster firmly with vise grips and drill an 1/8″ hole, on the center punch, through the stem.

20170114_180003  20170114_180846

Paint the plywood black. Paint the bottom of the tank. Let dry.

20170119_191534  20170119_163714

Put the plywood back in bottom of the tank and insert the casters again. Push the cotter pins through the drilled holes of the caster stem.

20170120_133710  20170120_134412

Paint the tank and lid. I beat a small dent out of the lid before painting. Lightly sand dried paint with a piece of wrinkled brown paper to smooth the finish.

20170123_125118  20170123_131654  20170216_143733

The porcelain handle was taken apart.

20170126_101515  20170126_102620

My husband helped me figure out a way to twist the handle back on firmly by customizing a 3/8″ coupling fitting.

20170128_090631  20170128_091432

I found the perfect lid handle at the Habitat store for 50 cents. After taping off the porcelain parts, I sprayed the handles, and the handle pieces that would show, with a hammered metal paint. I used a q-tip with a little fingernail polish remover and a ceramic tool to clean up some paint bleeds before attaching the handles.

20170119_164820  20170126_182455

I’ve been saving an old necklace from my high school years because I liked the fleur-de-lis (never thought I’d be using it for something like this). The link at the top of the fleur-de-lis was pretty weak and bent right off without leaving any sharp edges. I sprayed it to match the handles and let it dry.

For good adhesion, I scrapped off a small bit of paint where I wanted to place the fleur-de-lis, then glued it on with a small dab of E6000.

20170205_113836  20170205_115514  20170206_093753  20170216_130715
This is a fun piece, I love it!  It’s sure to add a bit of vintage charm to my bathroom.


Show Stopper Shadow Box DIY

This project actually began last November when I was looking for a storage box for the pear gourd wreath shown in my October 2015 blog post. The dried flowers were pretty fragile and I was a little leary about packing it away. That’s when I thought of a shadow box. Why not frame it as wall art?  I could make a box .. something eclectic… maybe a combination of scrapbook paper and aged mirror.

The biggest dilemma was finding a suitable box. Who knew finding a 10 x 10 x 2.5 inch box, with a lid, would be so hard?  I was even willing to buy a fancy box of chocolates, had the box been right. Sometimes, I get a bit antsy when I’m itching to do a project and can’t find just that certain thing I think I need. But, I’ve learned that a little patience goes a long way, and if I just wait, something always seems to show up.

My daughter and I were checking out the clearance aisles at Burlington Coat Factory last month. I wasn’t really shopping for anything, just entertaining my toddler granddaughter in the cart, when I saw a pile of magnetic clasped boxes on the shelf.  So unexpected, and more than PERFECT!  A clasp option would make the box easily accessible to switch out whenever you wanted.   I was reenergized, this was going to be fun!

DSC09455

With the clasp at the bottom, I measured in 5/8″ from the top and bottom of the lid, and 3/4″ on each side, to cut out a frame opening. Cut nice straight lines by running a sharp utility knife along a ruler’s edge. Seal the box with gesso. Let dry.

DSC00251  DSC00263

A 1/4″ sq. craft stick was mitered for the frame opening.

DSC00271

Trace the box on a piece of foam core board, and draw an arch at the top. Lie flat, on padding or cardboard, and cut out with a utility knife. Fill in rough edges of foam board with lightweight spackling. When dry, sand lightly to smooth. Seal board with gesso. Let dry well.

DSC00295  DSC00300  DSC00289

Paint the box, frame pieces, and foam board with black primer or craft paint. No need to paint where the box and foam board will be glued together. The second picture, below, may look a little strange, but the foam board will curl when painted.  I laid mine over a container, weighing each end down, past center, to dry. Once dry, I turned it over, laid it flat on my worktable, and weighed it down to flatten again. Trust me, please, it works.

DSC00316  DSC00368

I knew I had been saving a cool, striped C.J. Banks clothing sack for a reason. After smoothing it out with a warm iron, it covered the long foam board with no seams.

Place the foam board on top of the striped paper to center the stripes, and trace it with a pencil. Hold the paper up to a bright window, face down, and retrace your line on the back of the paper. This pattern line will help keep your stripes centered when gluing. Cut your pattern out larger, away from the line about 1 1/2″. Do not cut on the traced line.

DSC00389  DSC00394

Paper may stretch when wet. Wanting to achieve the smoothest surface possible, I glued and dried small sections at a time, using a plastic gift card and brayer to work out air bubbles.

Lay foam board face up. Beginning at the bottom, brush on a light, even coat of thinned white glue, going up about 3 or 4 inches. Turn the glued foam board over, and position it face down on the backside of the striped paper, within the retraced pattern line. Press it firmly in place, turn it back over, face up, and smooth out air bubbles. Weigh down to dry. Continue to glue until covered.

DSC00395  DSC00397  DSC00402

Use a fid, or paper folding tool, to wrap paper tightly around edges before gluing. Trim away excess paper for neat corners, and cut some darts around the arch. Glue and weigh down to dry. Glue may seep at edges, as a precaution lay a sheet of wax paper over the glued area before weighing down. A piece of light weight brown paper was added for a finished look.

DSC00415    DSC00424 DSC00437  DSC00452

Fortunately for me, my youngest daughter downsized recently, and stored a treasure trove of scrapbooking paper in my basement. I chose three patterns I felt would compliment each other and my wreath. Pieces were cut to the appropriate sizes to cover the surfaces of the box.

A little black and metallic gold craft paint was mixed together to match the papers. The mixture over the black base paint almost created an olive green tinge, an added plus!  I painted the front and back of the lid, the folds of the lid, all corners, edges, and frame pieces.

DSC00512  DSC00476  DSC00487

I love the look of aged mirror. I had a few pieces I had aged, with some of the backing completely gone, and thought bits of the decorative paper would look awesome peeking through them. I cut two pieces for the outer sides and a square for the inside.

The paper pieces were glued on with a thin layer of white glue. After they were smoothed and air bubble free, I clamped the mirror pieces and spare foam board pieces over them to ensure they would dry flat and stay smooth. Glue the paper accent on the arch and weigh down to dry.

DSC00523  DSC00538  DSC00537

Cut a thin piece of clear glass for the frame opening. Stand the box on it’s top and fold lid down flat. Position the glass on the inside of the lid, covering the opening. Slowly, lower the box down over the glass to make sure it fits inside the box and doesn’t hinder closing. Use small dabs of E6000 to glue the glass in place. Be careful not to use too much glue or it will seep to the front and you’ll have some cleaning to do. For cushion, and to help even out weight, lay a couple pieces of foam board across the glass before weighing with books to dry.  I squeezed small dabs of E6000 on the backside corners and edges of my mirror pieces, and clamped them on the papered sides while the glass was drying.

DSC00549  DSC00552  DSC00564

Gorilla Glue was used to adhere the foam board to the back of the box. Gorilla Glue swells as it dries, be careful not to apply it too close to the edge, it will seep out and get ugly.  Apply it to the backside of the box, in a thin line, at least 1/2″ away from the edge, and a few swirls in the center. Remembering to keep the clasp at the bottom, position the box very near the bottom of the striped foam board piece, leaving about 1/16″ of the stripes showing.

Squeeze small dabs of E6000, on the backside corners and edges of the square mirror piece and glue it to the inside of the box. Weigh it all down to dry. I found a smaller box that fit in, on top of the mirror, then weighed the box down. Let dry overnight.

DSC00589

I’m going to rely heavily on Gorilla Glue to hold prong hooks for hanging.  I bent the tops of the hangers out a little, before gluing, to accommodate a nail head. A sheet of wax paper was laid over the glued areas, before weighing it down to dry, so nothing got stuck and damaged the brown paper.

The frame pieces were held in place with painter’s tape. I removed them, one at a time, brushed on thinned glue, and clamped them down to dry. They shifted easily, so I waited until one was secure before moving to the next. You may have to touch up a little paint where you used painter’s tape.

DSC00596  DSC00606

To complete the look, an old drawer pull was added to snazzy up the arch.

The wreath was laid in the box, with small dabs of E6000 in a few places on it’s backside, where it touched the mirror, and left to dry overnight.

860 watermark   771 watermark   DSC00682 DSC00687

I’m pretty sure that shadow box making has just nudged it’s way onto my favorites list. I think the hanging element can be improved with a little more forethought, but, I am so pleased with the way this project turned out.  Although it was time consuming with all the gluing and drying, I believe it was worth it. Any time you can learn a little, have fun, and have something to show for it, is time well spent!  Don’t you agree?


A Little Something For Fall!

We’ve had a couple very windy days, but, there’s no complaining about the excellent Iowa harvest weather we’ve been enjoying so far this month.

Windy conditions can play havoc on seasonal yard decorations, however.  With the exception of pumpkins and gourds, I’ve wired and tied things down, to still see them blown across the yard, or disappear all together.  So now, I opt to add a bit more seasonal flair with small wreaths inside my home.

An abundant crop of egg gourds, dried, and stored in my basement, has been on my mind a lot since summer.  I’ve been wanting to make something with them for a long time.  I got to thinking that, some of them, a few of my favorite things, and what Mother Nature had to offer, would make for some pretty fall décor.  Simple and inexpensive, just my style!

8284 watermark8235 watermark8204 watermark

I’ve never been able to decorate a wreath when its lying on a flat surface.  I like to hang a prepared wreath on a paper covered board, and work on it at eye level.

Gourd Wreath – Choose seven egg gourds of similar size and shape.  Soak overnight in bleach water and scrub clean.  (A small plastic basket, used for holding baby bottle rings and nipples in a dishwasher, works great for this step.  It will hold the gourds and its easy to weigh down under the water).  Dry gourds. Wax and buff with Briwax or any furniture wax. On a non-skid surface, arrange the gourds in a circle, and secure together with painter’s tape.  Gently turn them over and mark with pencil where they meet each other.  Remove the gourds from the tape, one at a time, drill holes with a Dremel and 3/32″ bit, then replace gourd on tape.  When done drilling, turn gourds face up and remove tape.

DSC07859 DSC07863 DSC07871

Measure and estimate the diameter of the wire ring you will need.  Pre-shape a length of 16 gauge wire around a container of the same diameter.   Mine was about 3 1/2″.

String gourds on to the wire.  Cut off excess wire and twist ends together.  Turn over, face down, and attach a push-in hanger with Gorilla Glue.  Let dry.

DSC07887 DSC07934 DSC07940

With side-cutters, cut a few long, bleached pinecones, to form flowers.  Spray pinecone pieces and False Baptisia pods with Clear Matte Sealer.  Attach the prettiest pinecone pieces with hot glue.  Embellish with pods.

DSC080508285 watermark

Pear Wreath – I like pears and couldn’t resist when I found smaller egg gourds that resembled their shape.  Always remember to soak and scrub the gourds.

I mixed a small amount of white and green wall paints for the palest of green color.  For a special touch, I used a small slender glass leaf I had, but, you could trim down an artificial leaf, or use no leaf.

After soaking a 6″ grapevine wreath overnight, slide two thick rubber bands around it’s center to form a more oval shape.  Let dry 24 hours. While the wreath dries, give the gourds 2 or 3 coats of paint, one side at a time, and sanding lightly between coats.  Be careful, they like to roll!

DSC07924 DSC08004

Cut the rubber bands from the dry wreath and lay it on a wire rack, over a bowl.  Water down a small amount of dark brown craft paint and lightly brush it over the wreath.  Let dry.  Speckle the wreath, lightly, with black craft paint.  Let dry and seal with Clear Matt Spray.

DSC07969 DSC08163

Using a Dremel, I drilled a small hole to accommodate the base of my leaf, and glued it in with a small dot of hot glue. Spackling was used to fill in around the leaf.  Once dry, it was sanded smooth and repainted.  Small indentations were drilled in the top of the gourds to hot glue apple stems in place.  Touch up paint around the stems.

After gluing the pears on the wreath, two leaves and some berries, saved from past projects, were added.  The pretty green, dried Astilbe, tucked in and around, was cut from the bush outside my backdoor.

8237 watermark

Egg Basket Wreath – I have a thing for collapsible wire egg baskets, they’re cute!  And, so easy to decorate!  I found a flower sprig and feather sprigs for 50% off last month … a total of $3.00, YEAH!  I cut and reconfigured my flower sprig a little, but you needn’t.  Simply arrange your sprigs the way you like them, cutting off the long stems if needed, and add a raffia bow for a quick colorful wreath!

DSC08155 8204 watermark