
“May abundance and joy fill your home this Thanksgiving Day”.

“May abundance and joy fill your home this Thanksgiving Day”.

A garden gate was nowhere in my radar this fall. But, after pulling some beautiful rusty sunflowers from a pile of junk someone dropped off at our house, I had to use them. Having a husband in the salvage business does have its rewards. Anyway, they were on tall stems and looked like they had held a candle or solar light of some sort.

I laid them on a rusty gate, along with a faded, metal flower. The materials looked good together, but the sunflowers were too small to use. The yellow flower would be the perfect size, but I only had one. What to do?

I left everything laying out, pondering over them as I piddled around with other things. I really wanted to use those rusty flowers, I just wished they were bigger. Could I do something to them to make them look bigger? Put something behind them, and make them the centers? That was it! Once I began looking at them as the centers of flowers, things started coming together.
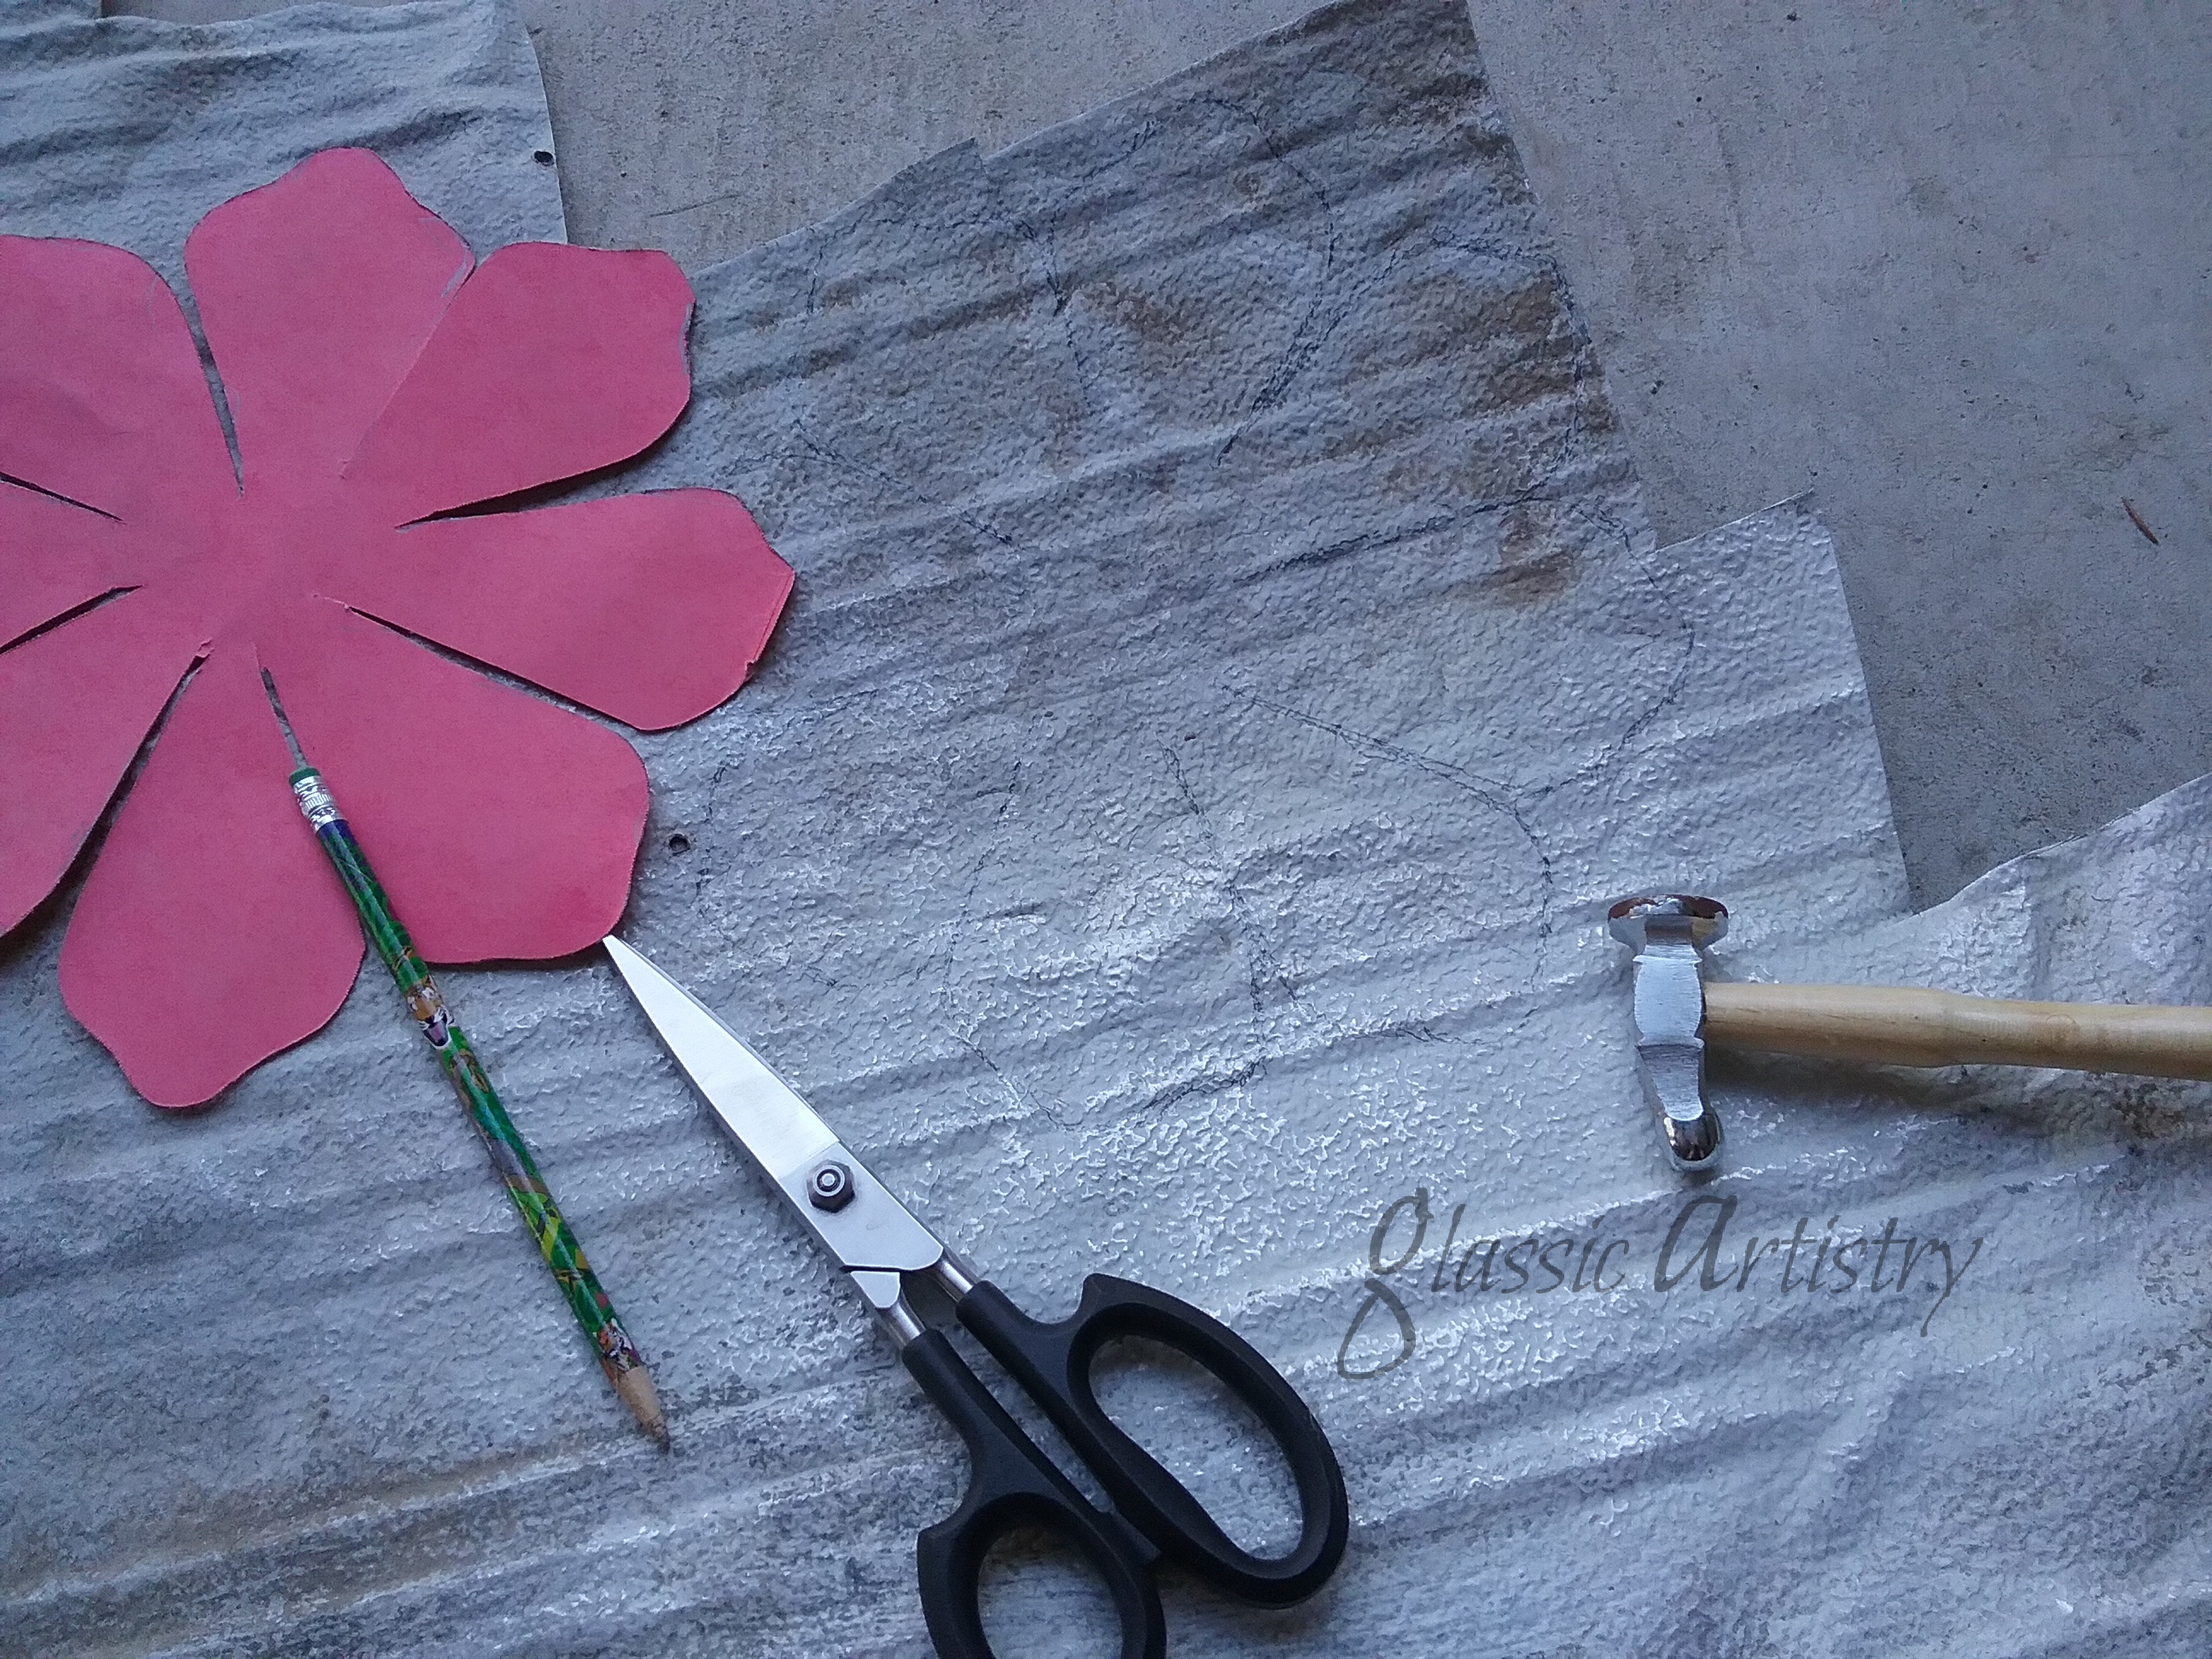
The plan – cut two new flowers from scrap aluminum, using the yellow flower and its leaves as a pattern, then give each a rusty flower center to pull them together.
First, the sunflowers had to be taken apart. With my husband’s help, the welded hinges and other small pieces were removed carefully with a low temp torch. I slowly pulled them off with pliers as he controlled the heat. The stems were saved for later.
Flower pieces and leaves were cut from thin aluminum.
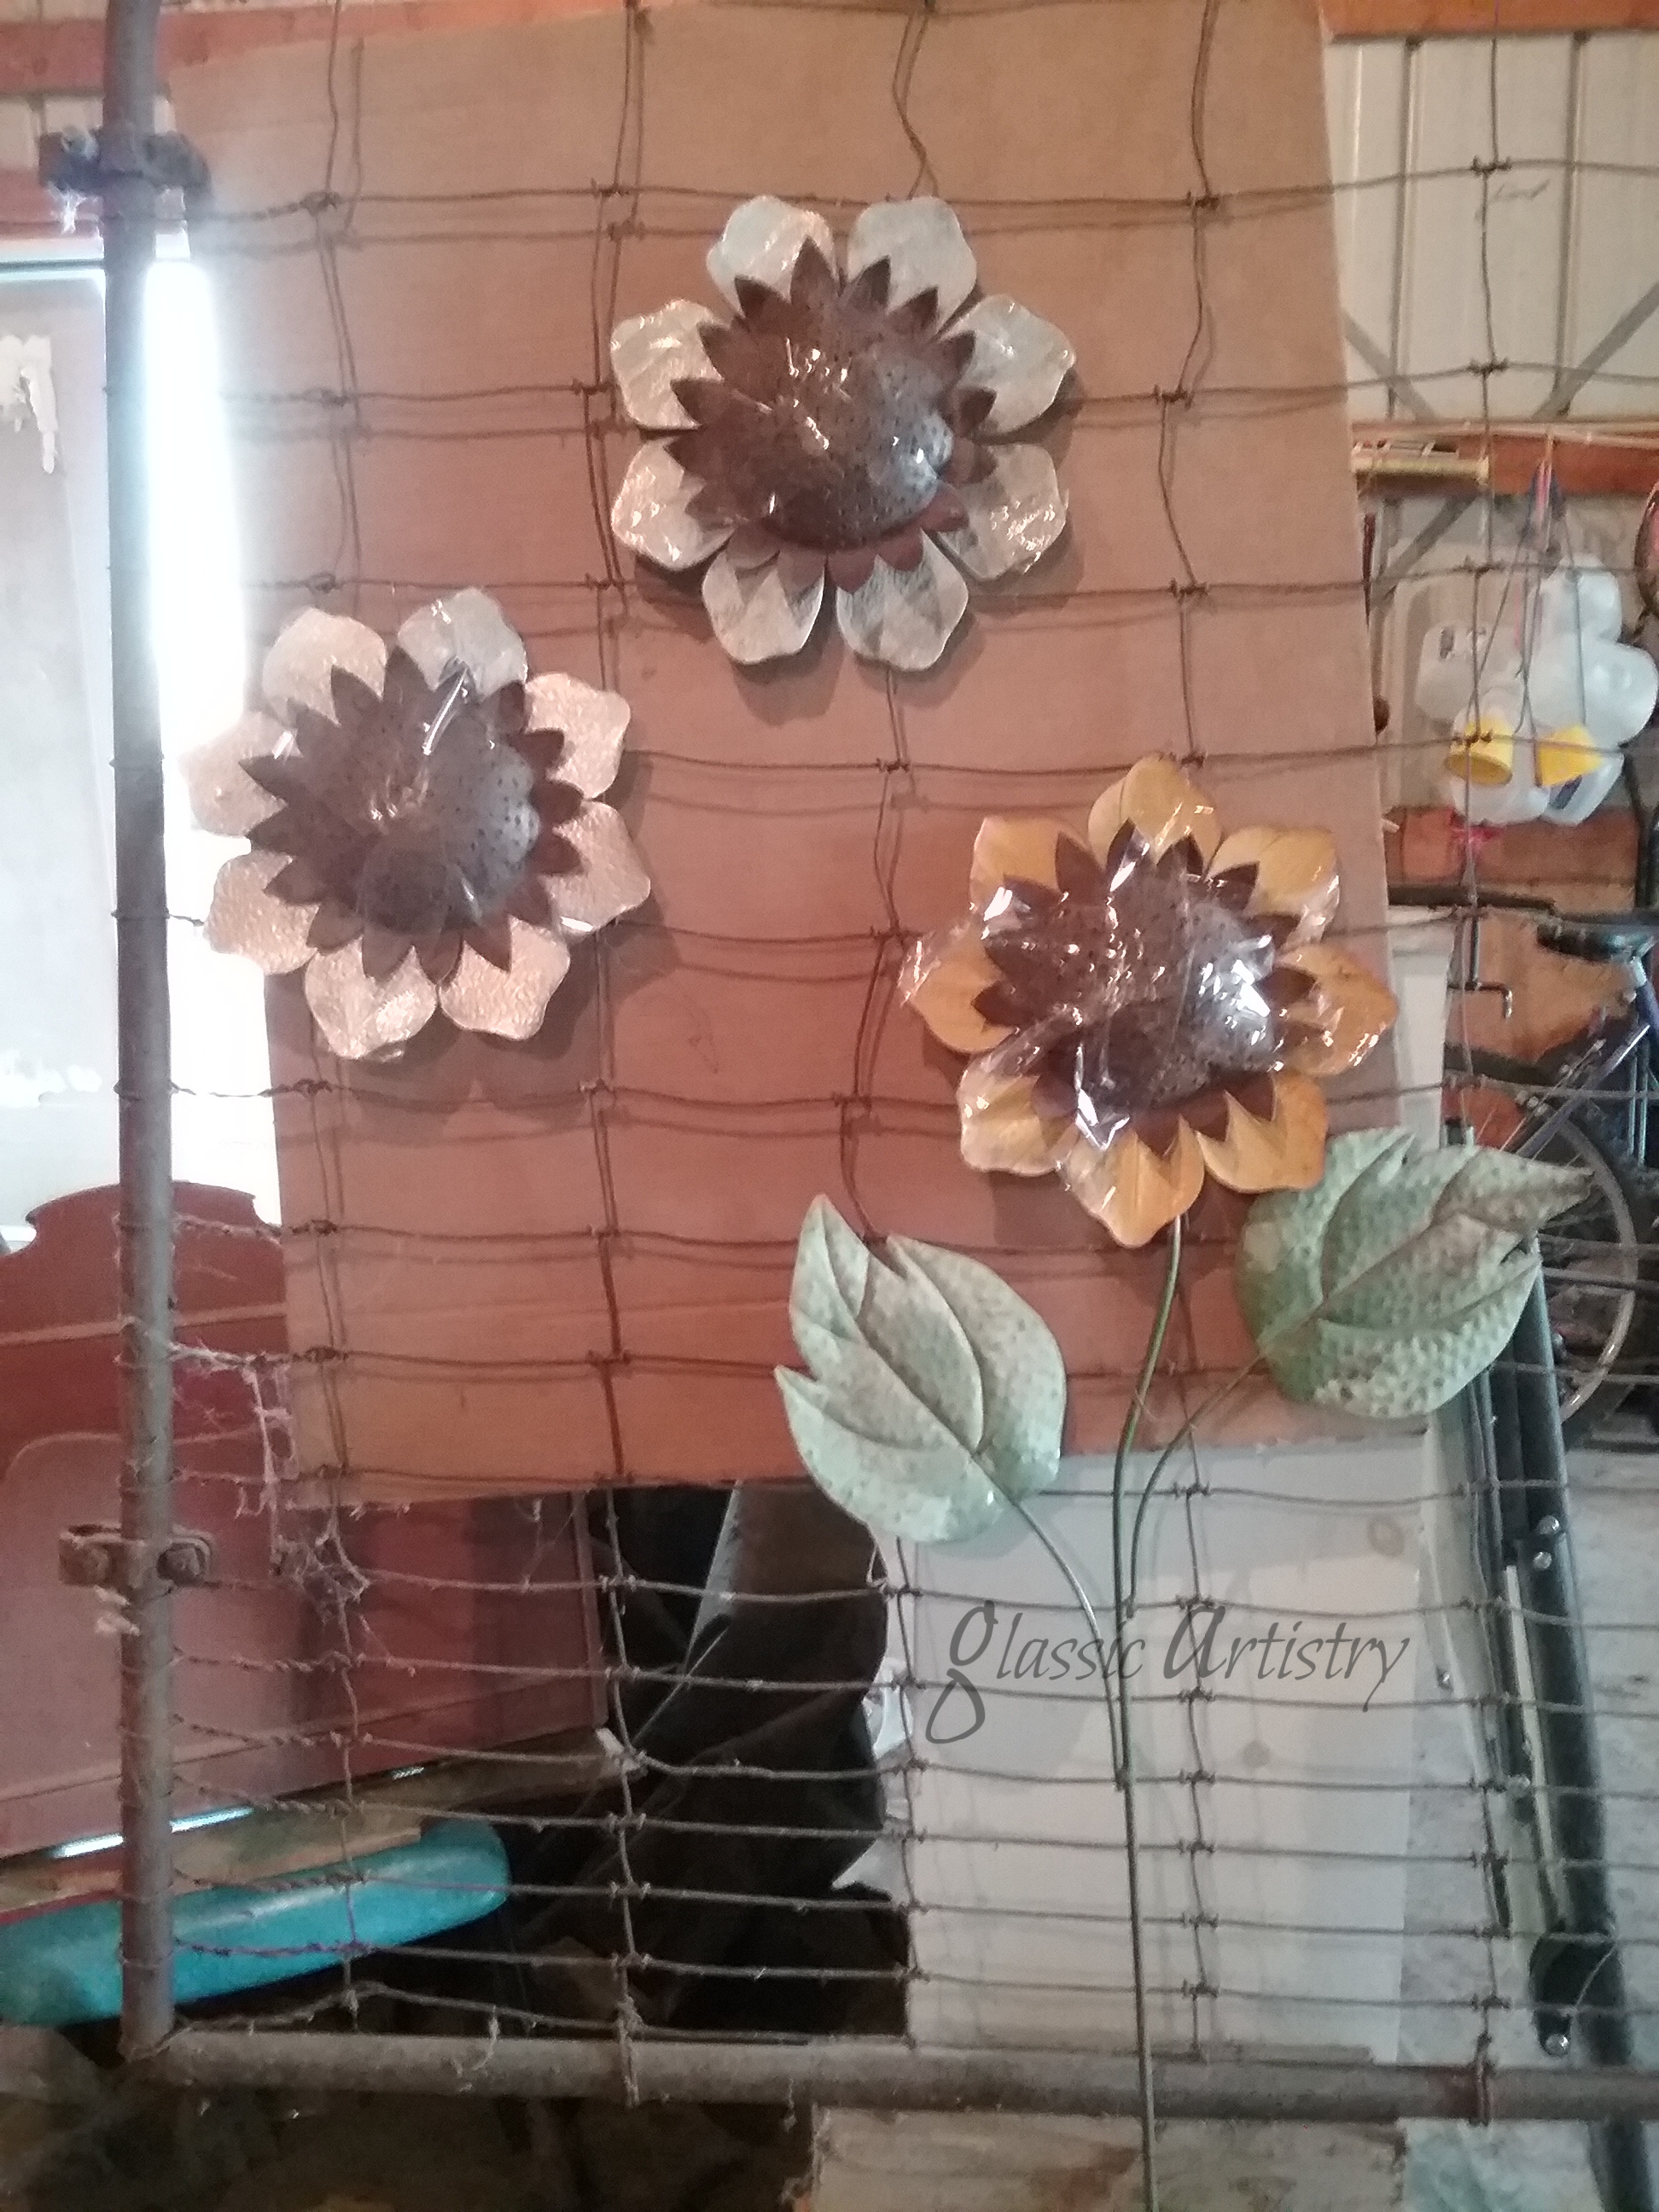
I taped the flower head pieces together and wired them to the gate to determine their placing. The leftover stem pieces were held up to the flowers and cut to the lengths needed, making sure they were long enough to go behind and be glued to the back of the flower. The placing of the leaves was determined the same way. Shorter leftover stem pieces were curved slightly and cut for the leaf stems.
File the sharp edges of the aluminum pieces. Buff them with steel wool before priming and painting.


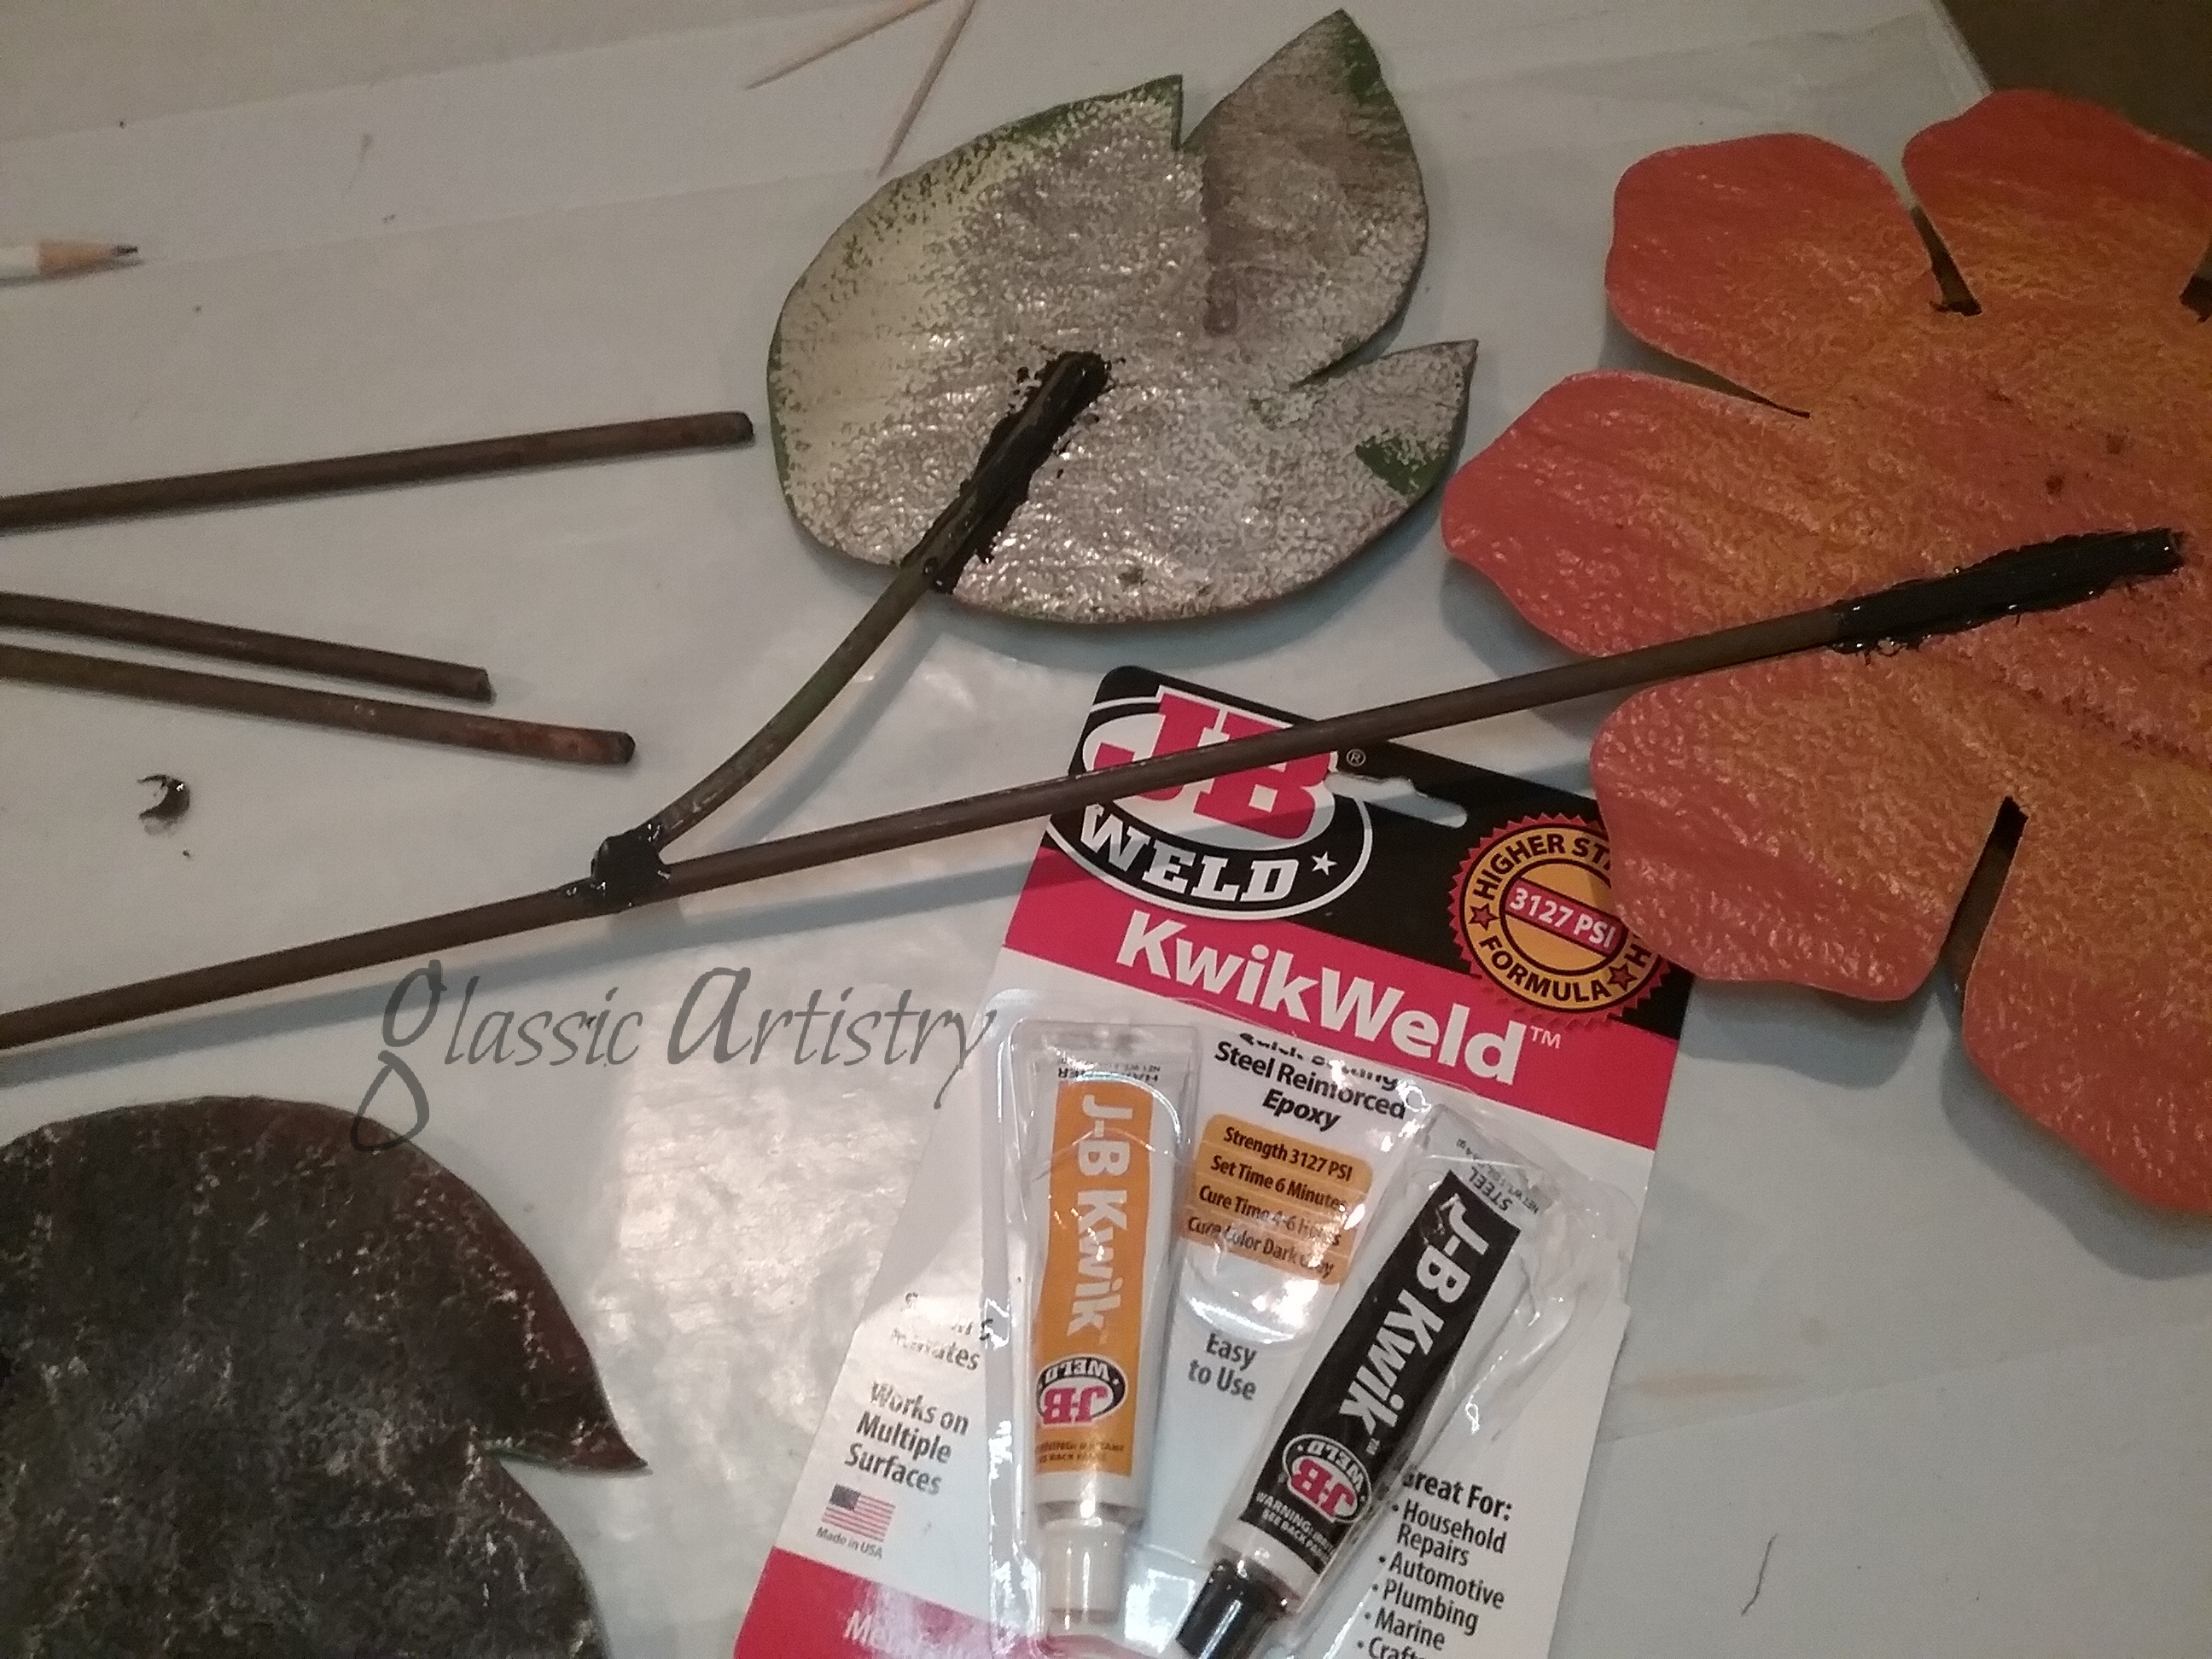
Glue the rusty sunflower centers to the front of the flowers. NOTE – Always when gluing, the paint must be scraped from the surfaces to be glued – both surfaces must be clean and paint free. Let dry.
The short curved stems were glued to the backs of the leaves. Let dry.
The flower was placed face down and propped level to glue the stem to the back of the flower. Let dry. Touch up paint, over the glue.
Glue leaves to the stem. Let dry. After the leaves were dry, the flower was turned over and glued on the front of the leaf stems too. Let dry. The stems and leaves were painted.
The gate was scrubbed clean and sprayed with clear sealer.
The flowers were wired to the gate in several places along the main stem and behind the flower. Because they were glued on, I avoided putting any pressure on the leaf stems. I painted a little green paint over wires that were showing. A small amount of white paint was lightly sponged on the rusty centers. The thin aluminum petals and leaves were curved and shaped to add dimension.
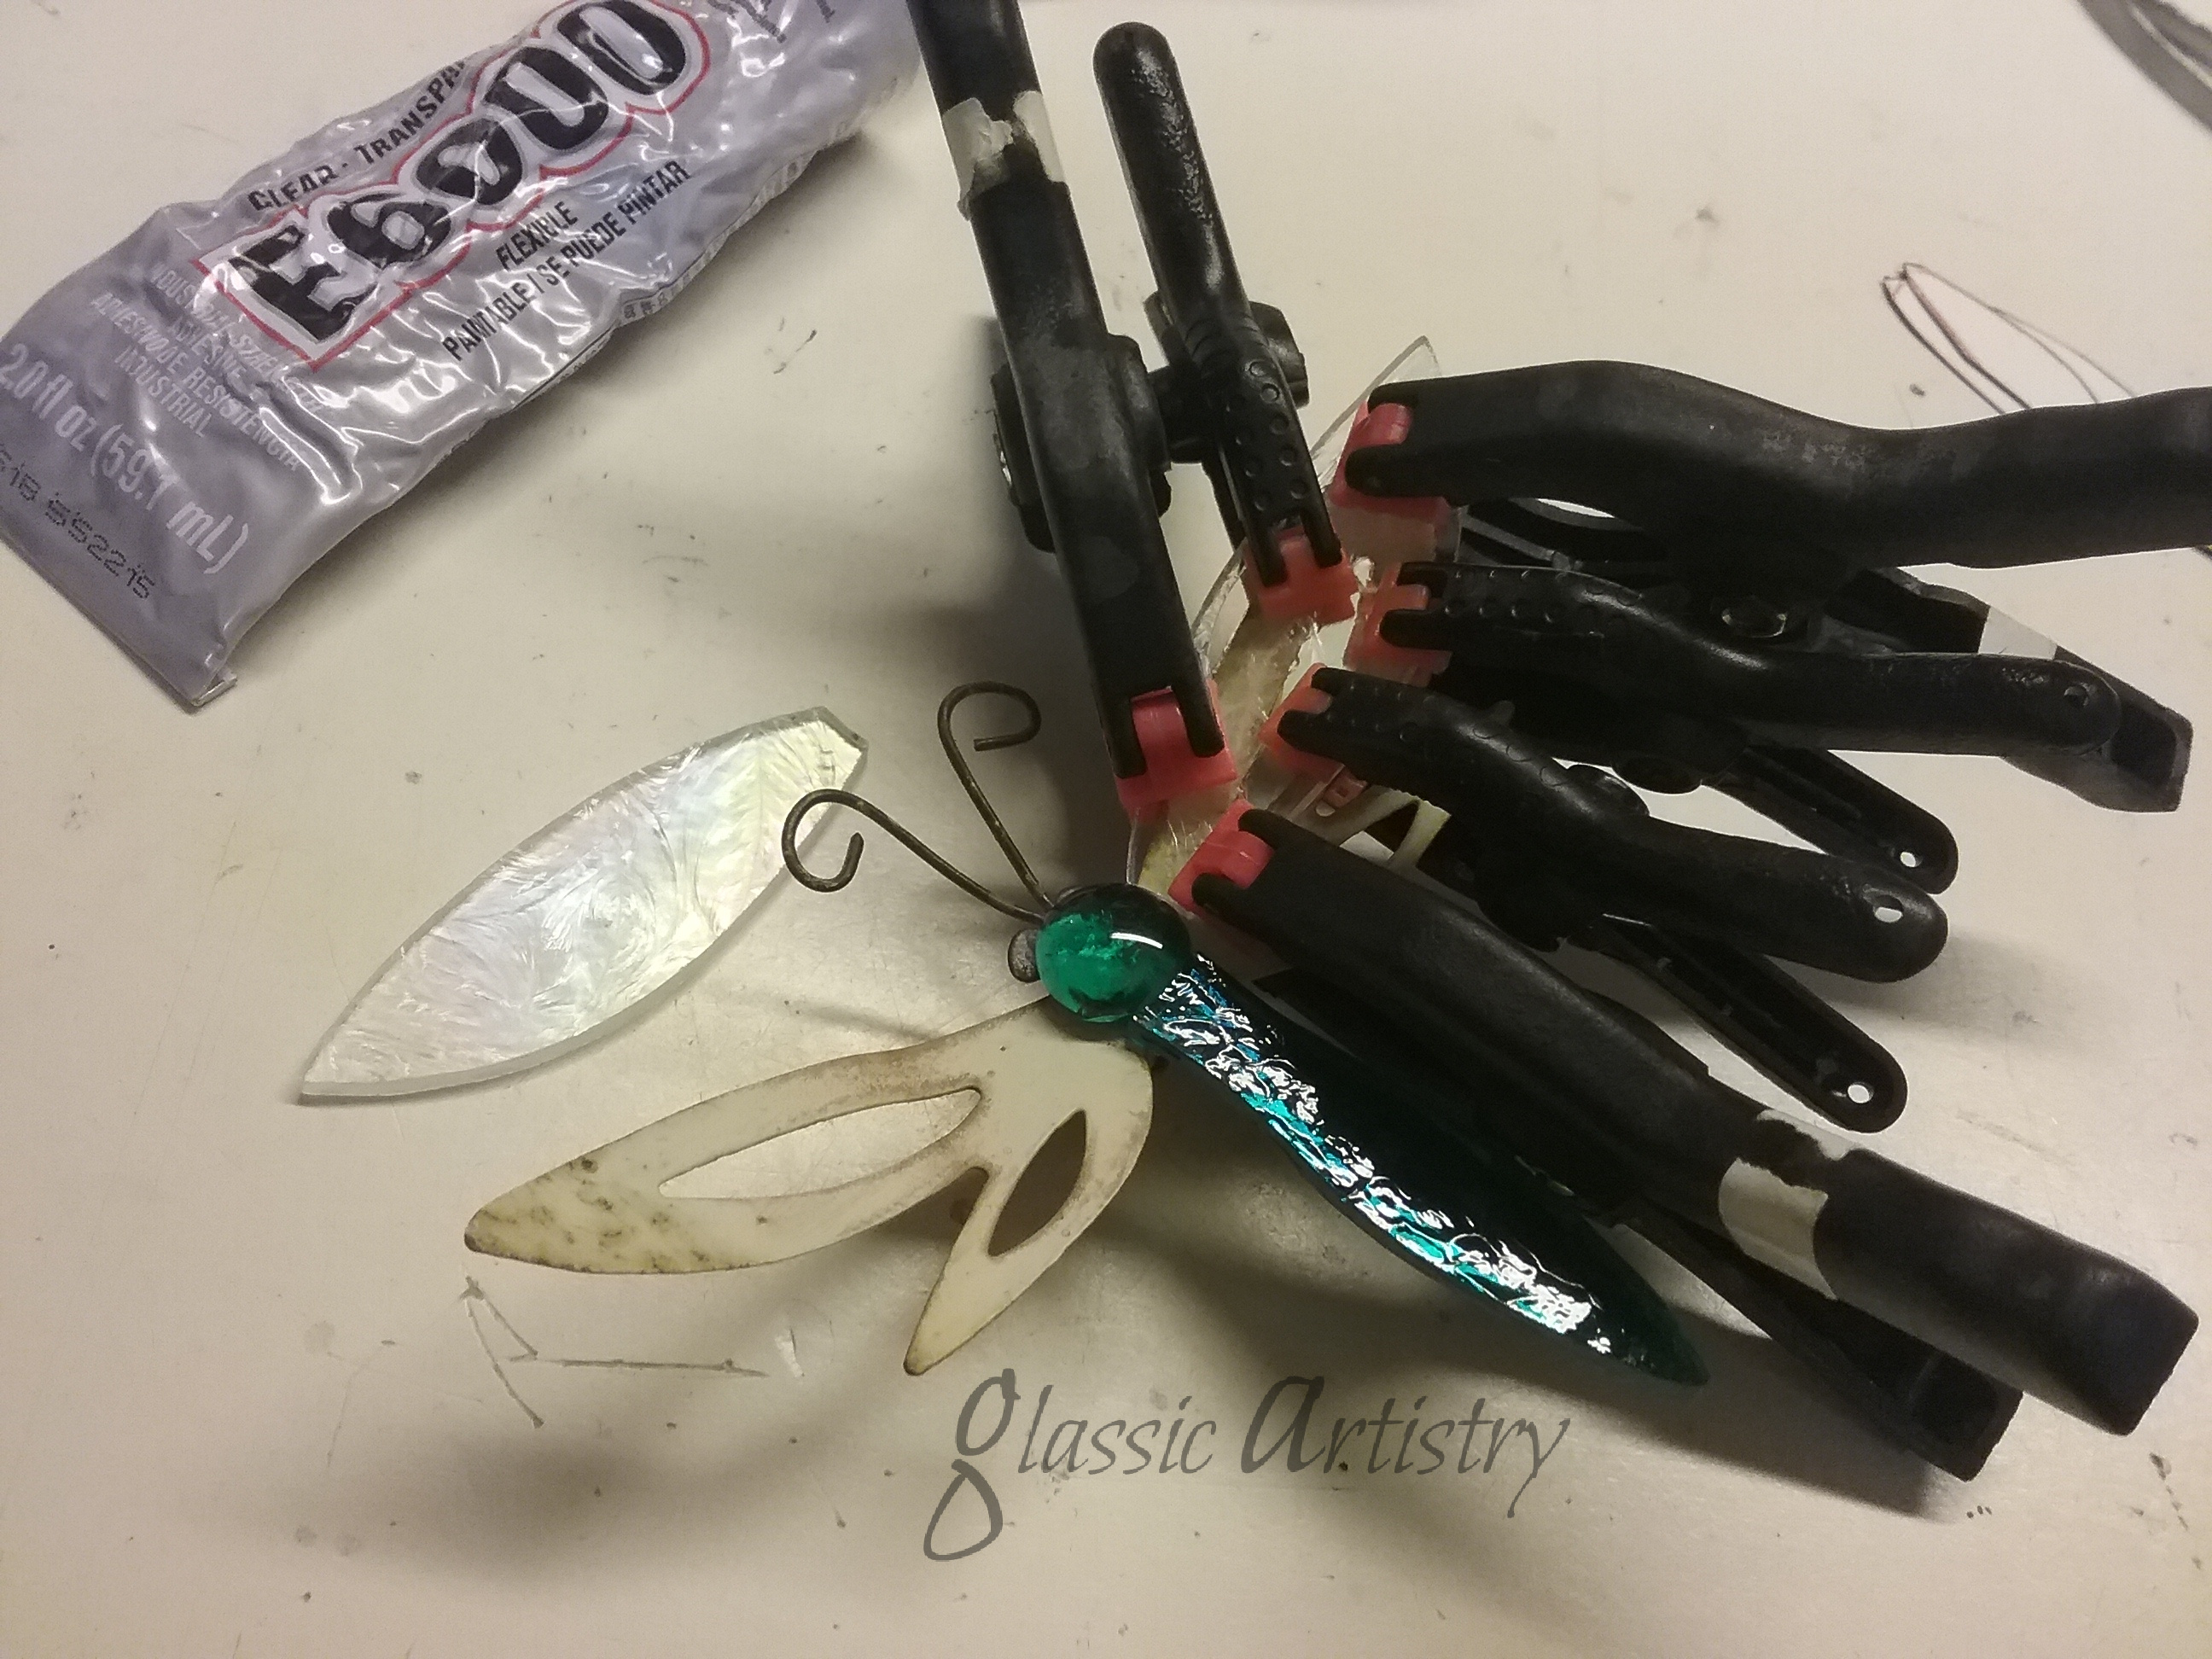
The little dragon fly from the yellow flower was wired on after it was brightened up with some glass wings and a nugget. I don’t know what I’d do without my squeeze clamps. 🙂

And there you have it! Now, let’s just hope winter doesn’t get here before Thanksgiving.


I’m stepping clear out of my comfort zone with my next post and will be attempting an easy Christmas sewing project. We’ll have to see how that goes …
Please, mask up, wash those hands, and stay healthy and safe my friends, I’ll be back soon.
Oh, how I love spending long, fun filled Fall days full of junk jaunts and tag sales with my daughters and sisters. With all the virus concerns, we’ve not been out to any all summer, but are hoping to get masked up and maybe squeeze one in next month. While poking around in my overloaded garage, sorting and tossing, I’m discovering a lot of treasures from our past outings, recalling the plans for them, and remembering some of the crazy times we had.
One such past find was a pair of metal sunflower candleholders; perfect for Fall decor. It really makes my day when I find a treasure like this to bring home, repurpose, and play with. When I found them, I knew right away I’d be filling the center with something.
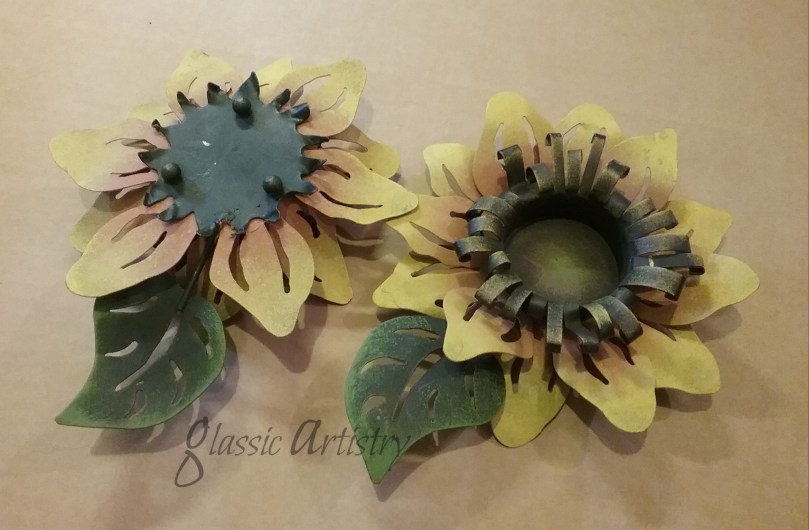
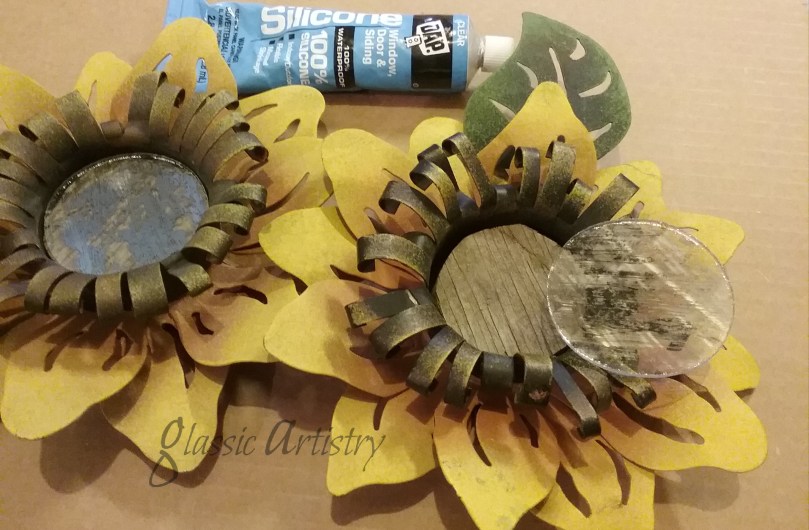
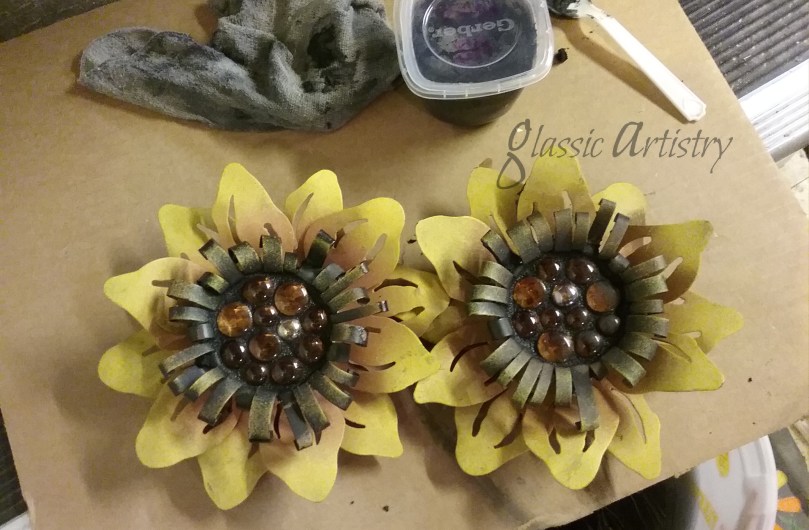
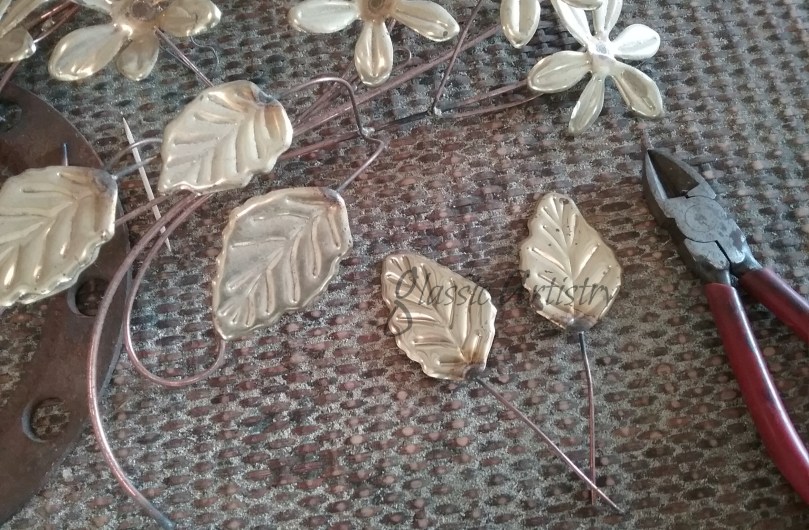
The small round legs popped off easily with pliers. The leaves were removed with bolt cutters, and saved. To build up height in the centers, a small circle of ½” plywood was glued into each one. I wanted some shine to show through the translucent glass nuggets I would be using, so I cut circles from a discarded piece of antiqued mirror to glue over the plywood. Small circles of thin metal could also be used in place of the mirror. Different sizes of amber, brown, and clear glass nuggets were glued to the mirror, leaving a small space around each one. After letting the glue dry 24 hours, the nuggets were grouted with sanded grout. I mixed a small amount of brown paint with my black grout to get the color I wanted. Let grout dry overnight before sealing.

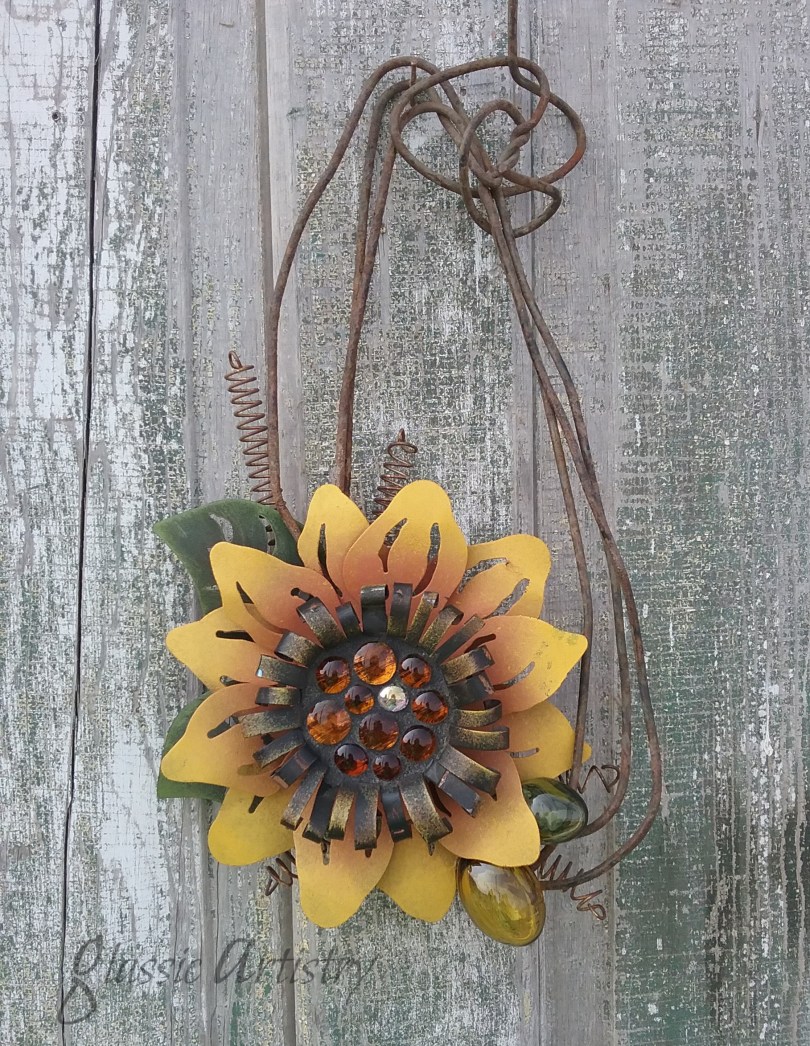
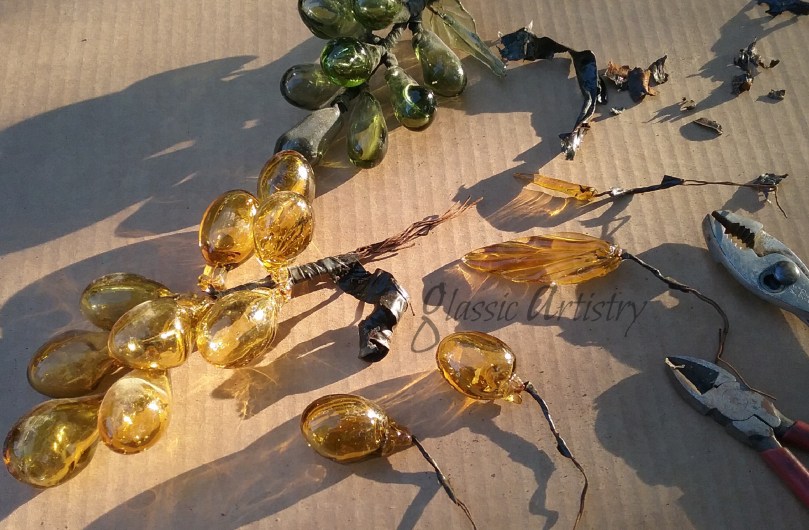
Searching through my stashes, I found an awesome piece of rusted steel wire and some beautiful green and gold blown glass grape bunches. The wire, I pulled from a salvage pile last year, and the grapes were found in an antique mall in Texas several years ago. They had broken leaves, and I paid a bit more than I would usually do, but they were so darned pretty. And now, I’m really glad I did.
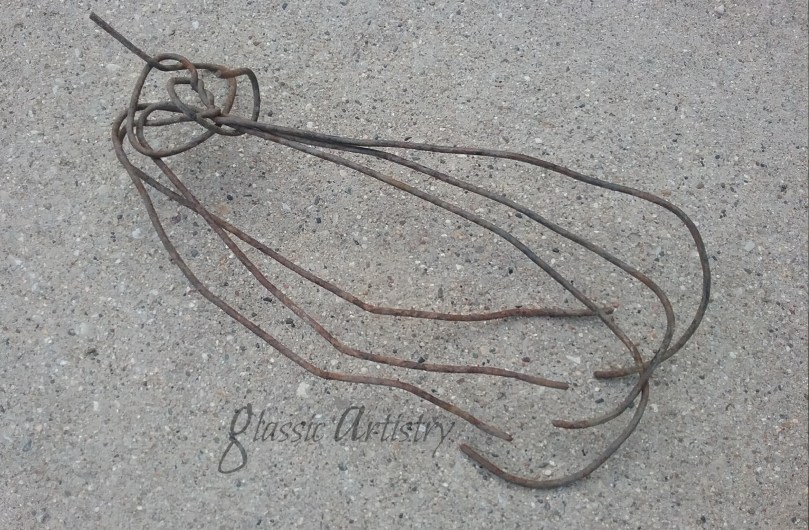
Not being one for flowery, frilly things, the wire piece worked perfectly for my taste; I could use the twisted wire knot to take the place of a bow.
With 22ga, thin black wire, the flower was wired on first, then the leaves, and grapes. I added some rusty springs to give it just a little bit more.

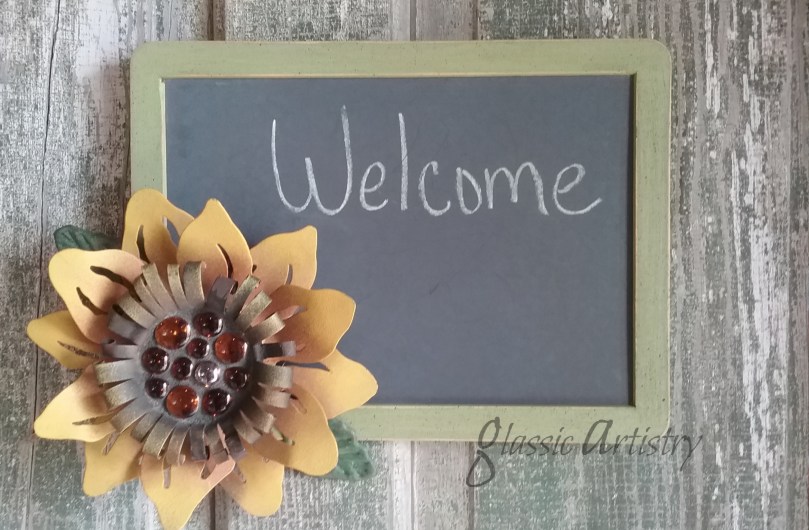
I love the versatility of projects like this. These sunflowers can be attached to just about anything, and used indoors, or out. I did a little playing around with some other ideas too, and thought I’d share them just for fun. You’ll have to let me know what you think ..
Keep it simple. Paint a couple metal leaves to add around a flower; attach it to a chalkboard, or a welcome sign.
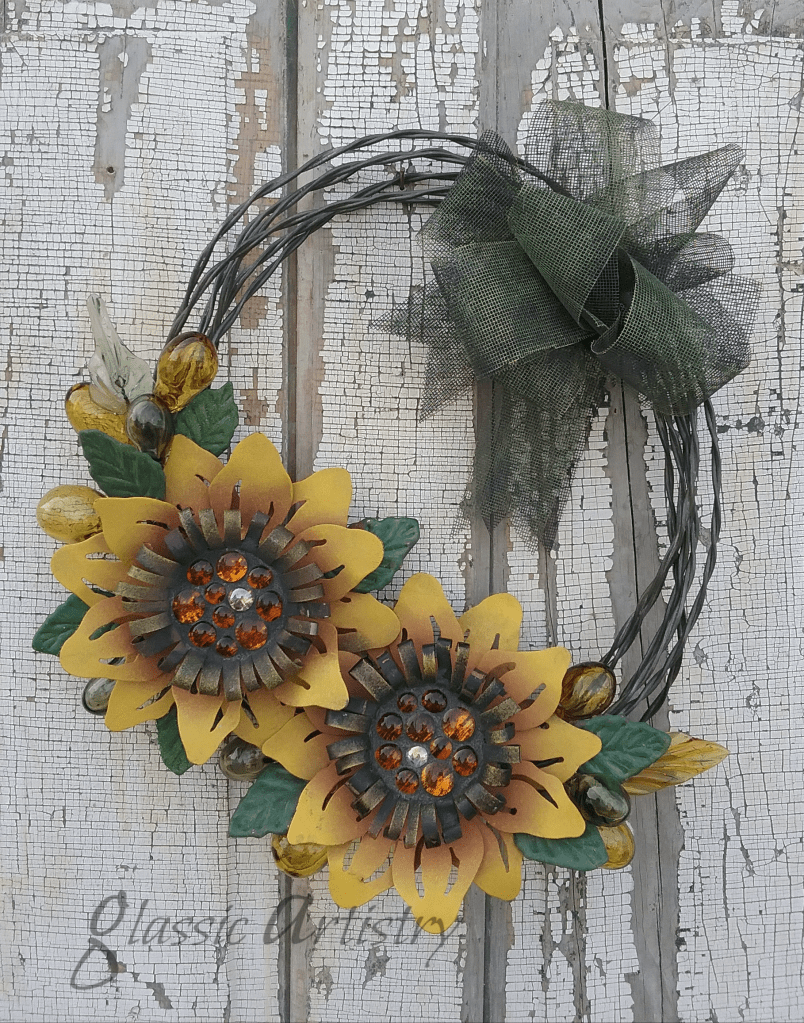
A wire wreath is big enough for the pair. No ribbon for a wreath bow? Cut strips of fiberglass window screening and loop one. There’s easy bow instructions on YouTube.
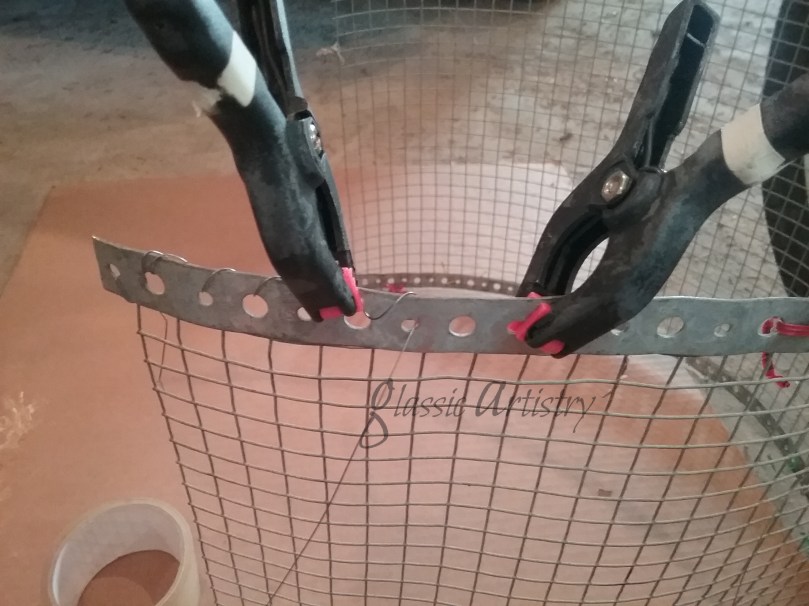
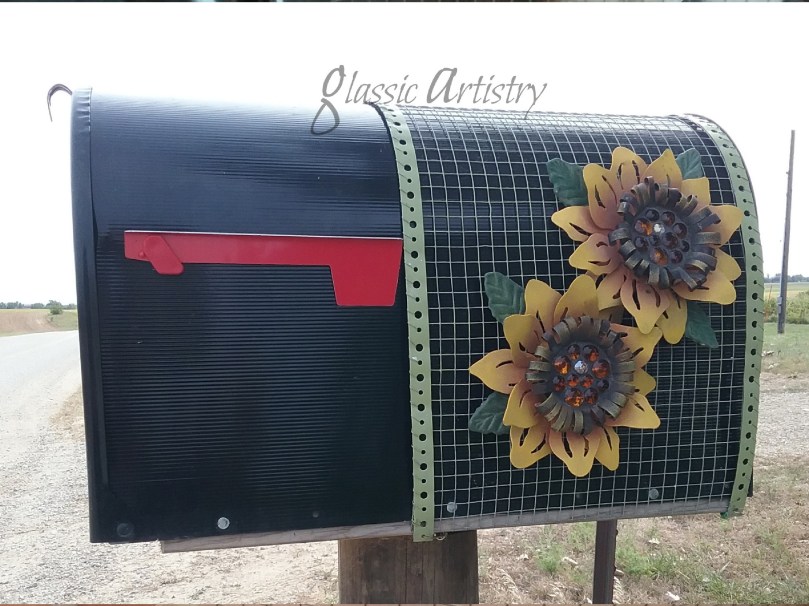
How about a mailbox cover? A metal nail strip was stitched to wire hardware cloth and shaped in an arch. Hold it in place underneath with mini bungee cords.
For an open porch, I think a small arrangement with a sunflower and raffia would look great too, tied around the neck of a milk can filled with tall florals, or ornamental grasses; but I didn’t have time, a porch, or florals to get that put together. 🙂
A wide variety of small, inexpensive metal and glass pieces can usually be found at garage sales, and tag sales, so keep an eye out if you like repurposing and working with salvaged materials. It’s good to get in the practice of looking at a piece and taking it apart in your mind to see how it’s parts can be used in other ways before carting it home.
Please feel free to comment, or share my post if you like. Take Care and Stay Healthy.

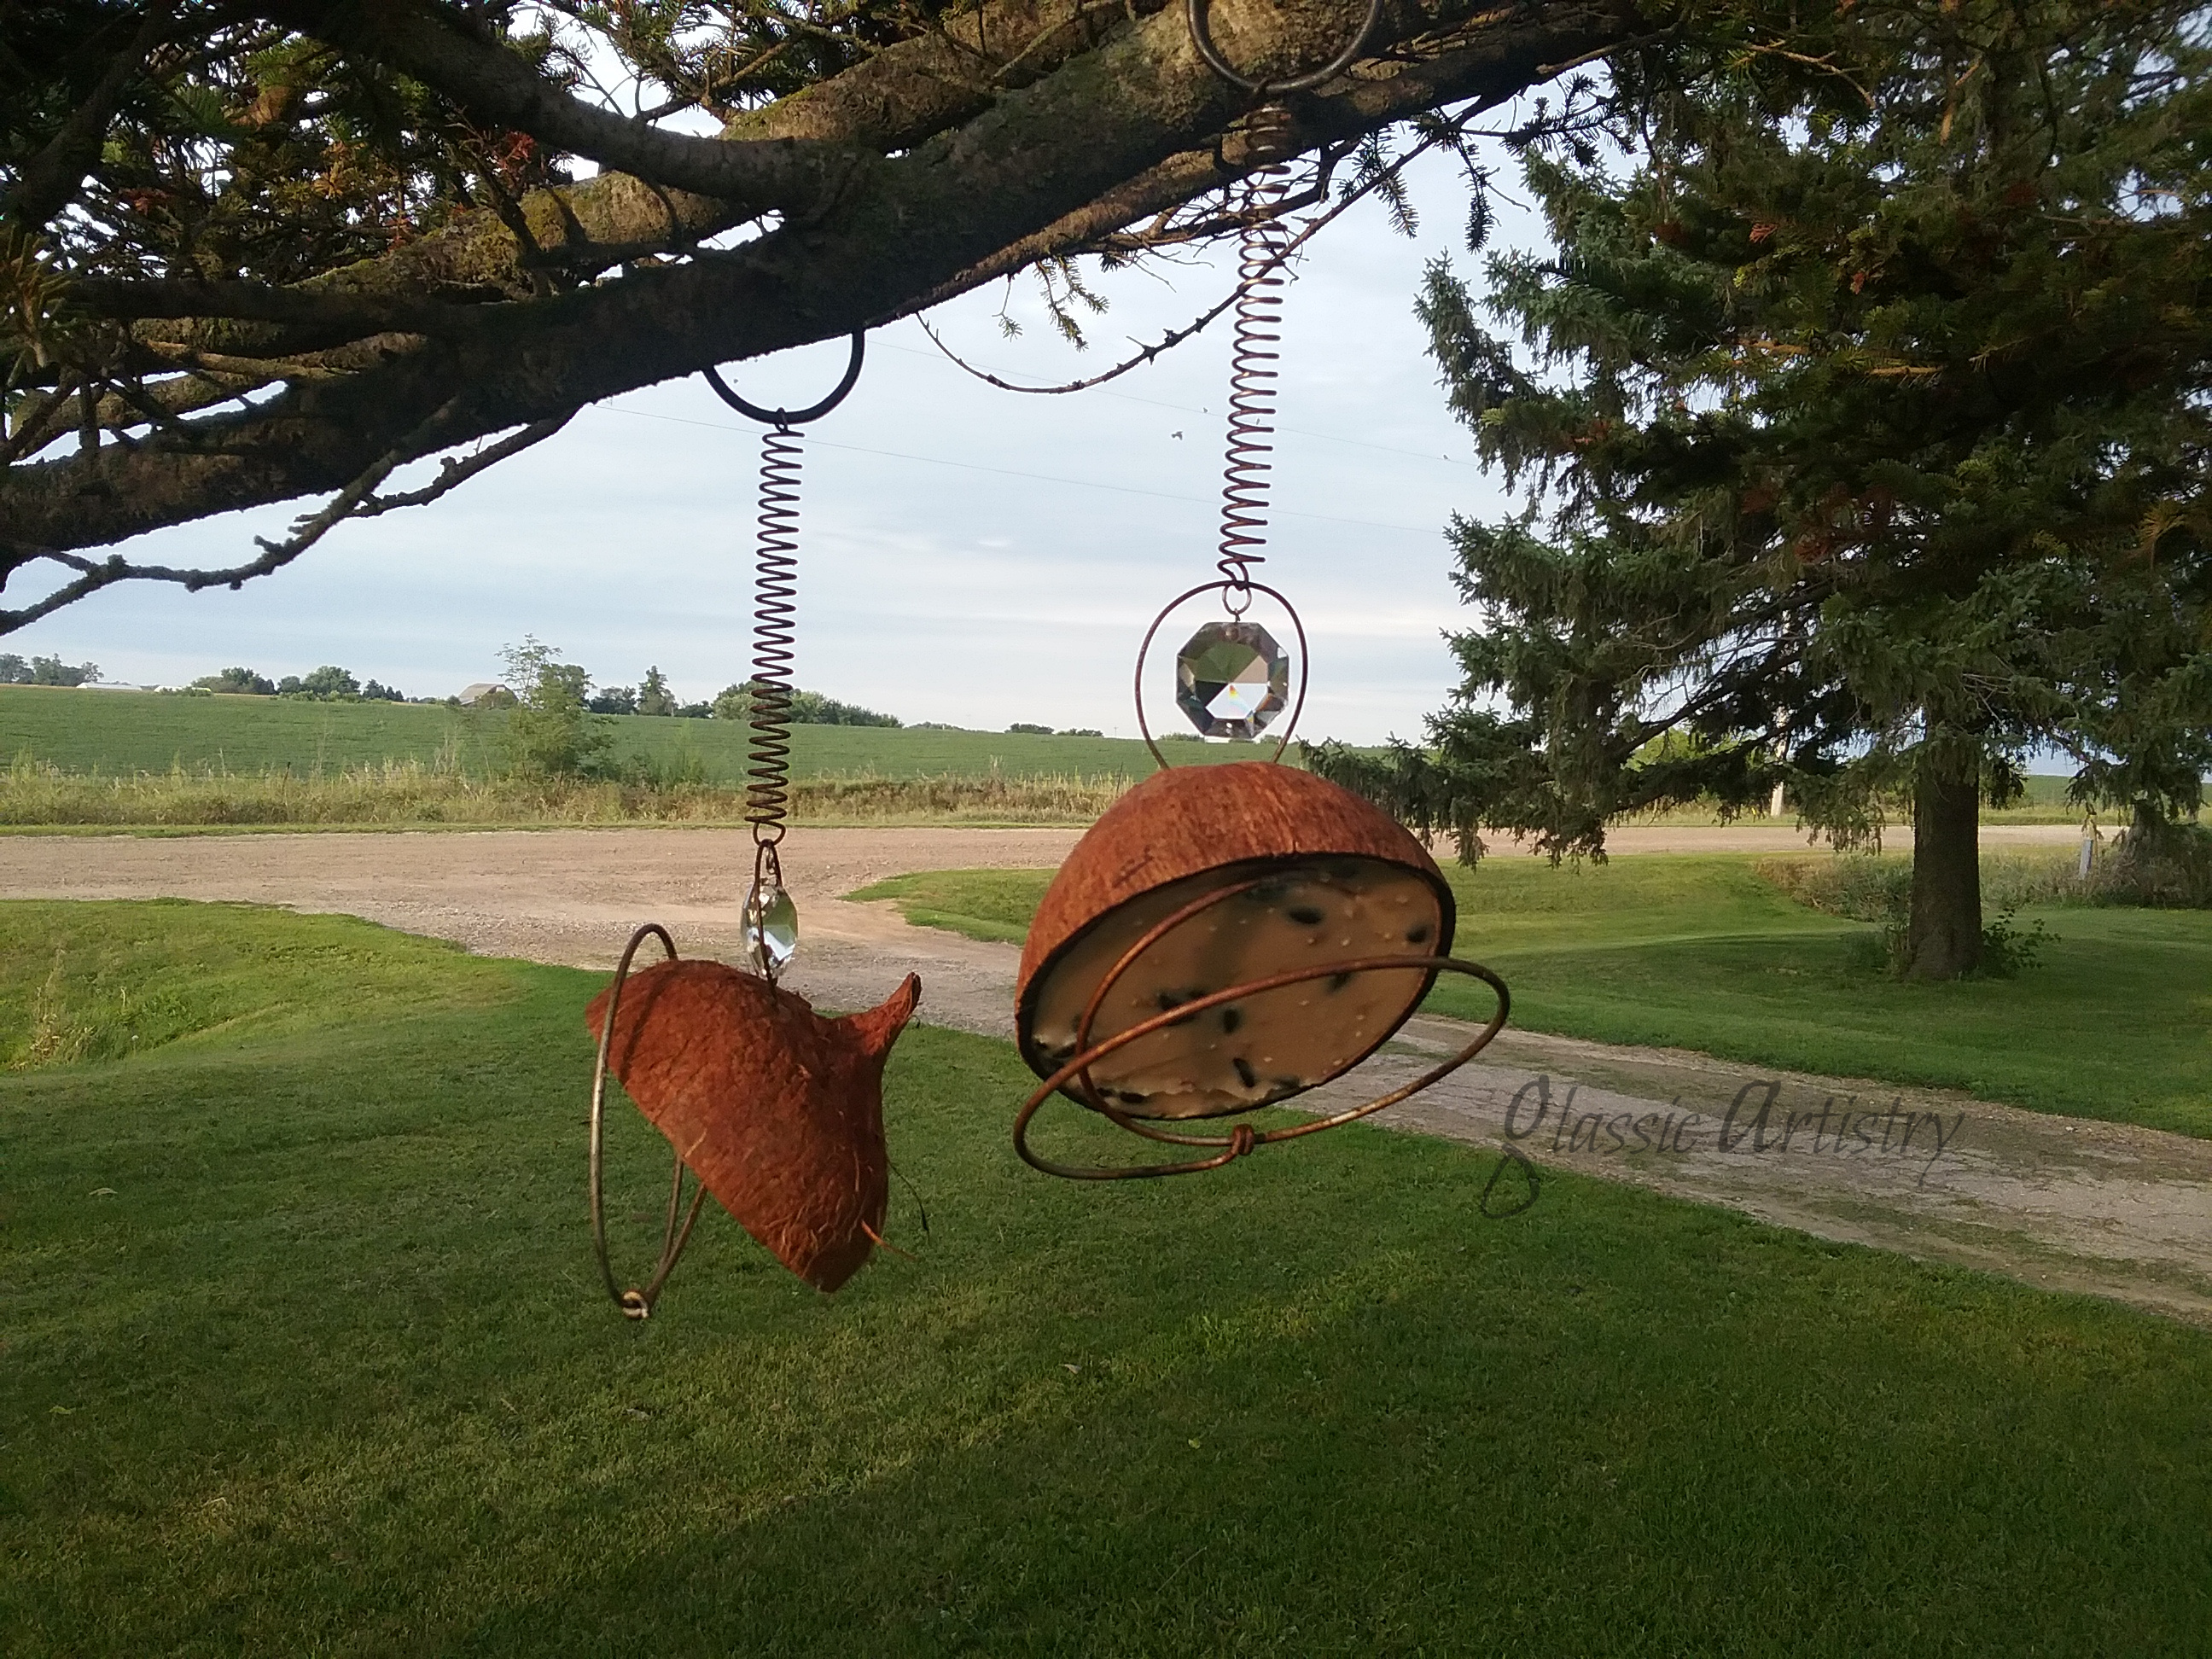
I knew I’d be making suet feeders someday after buying our curious grand kids a coconut to sample over a year ago.
I’d never made a coconut feeder, but thought it would be a lot of fun to play around with some scraps from my salvage stash and make something quirky to hang in our front yard tree.
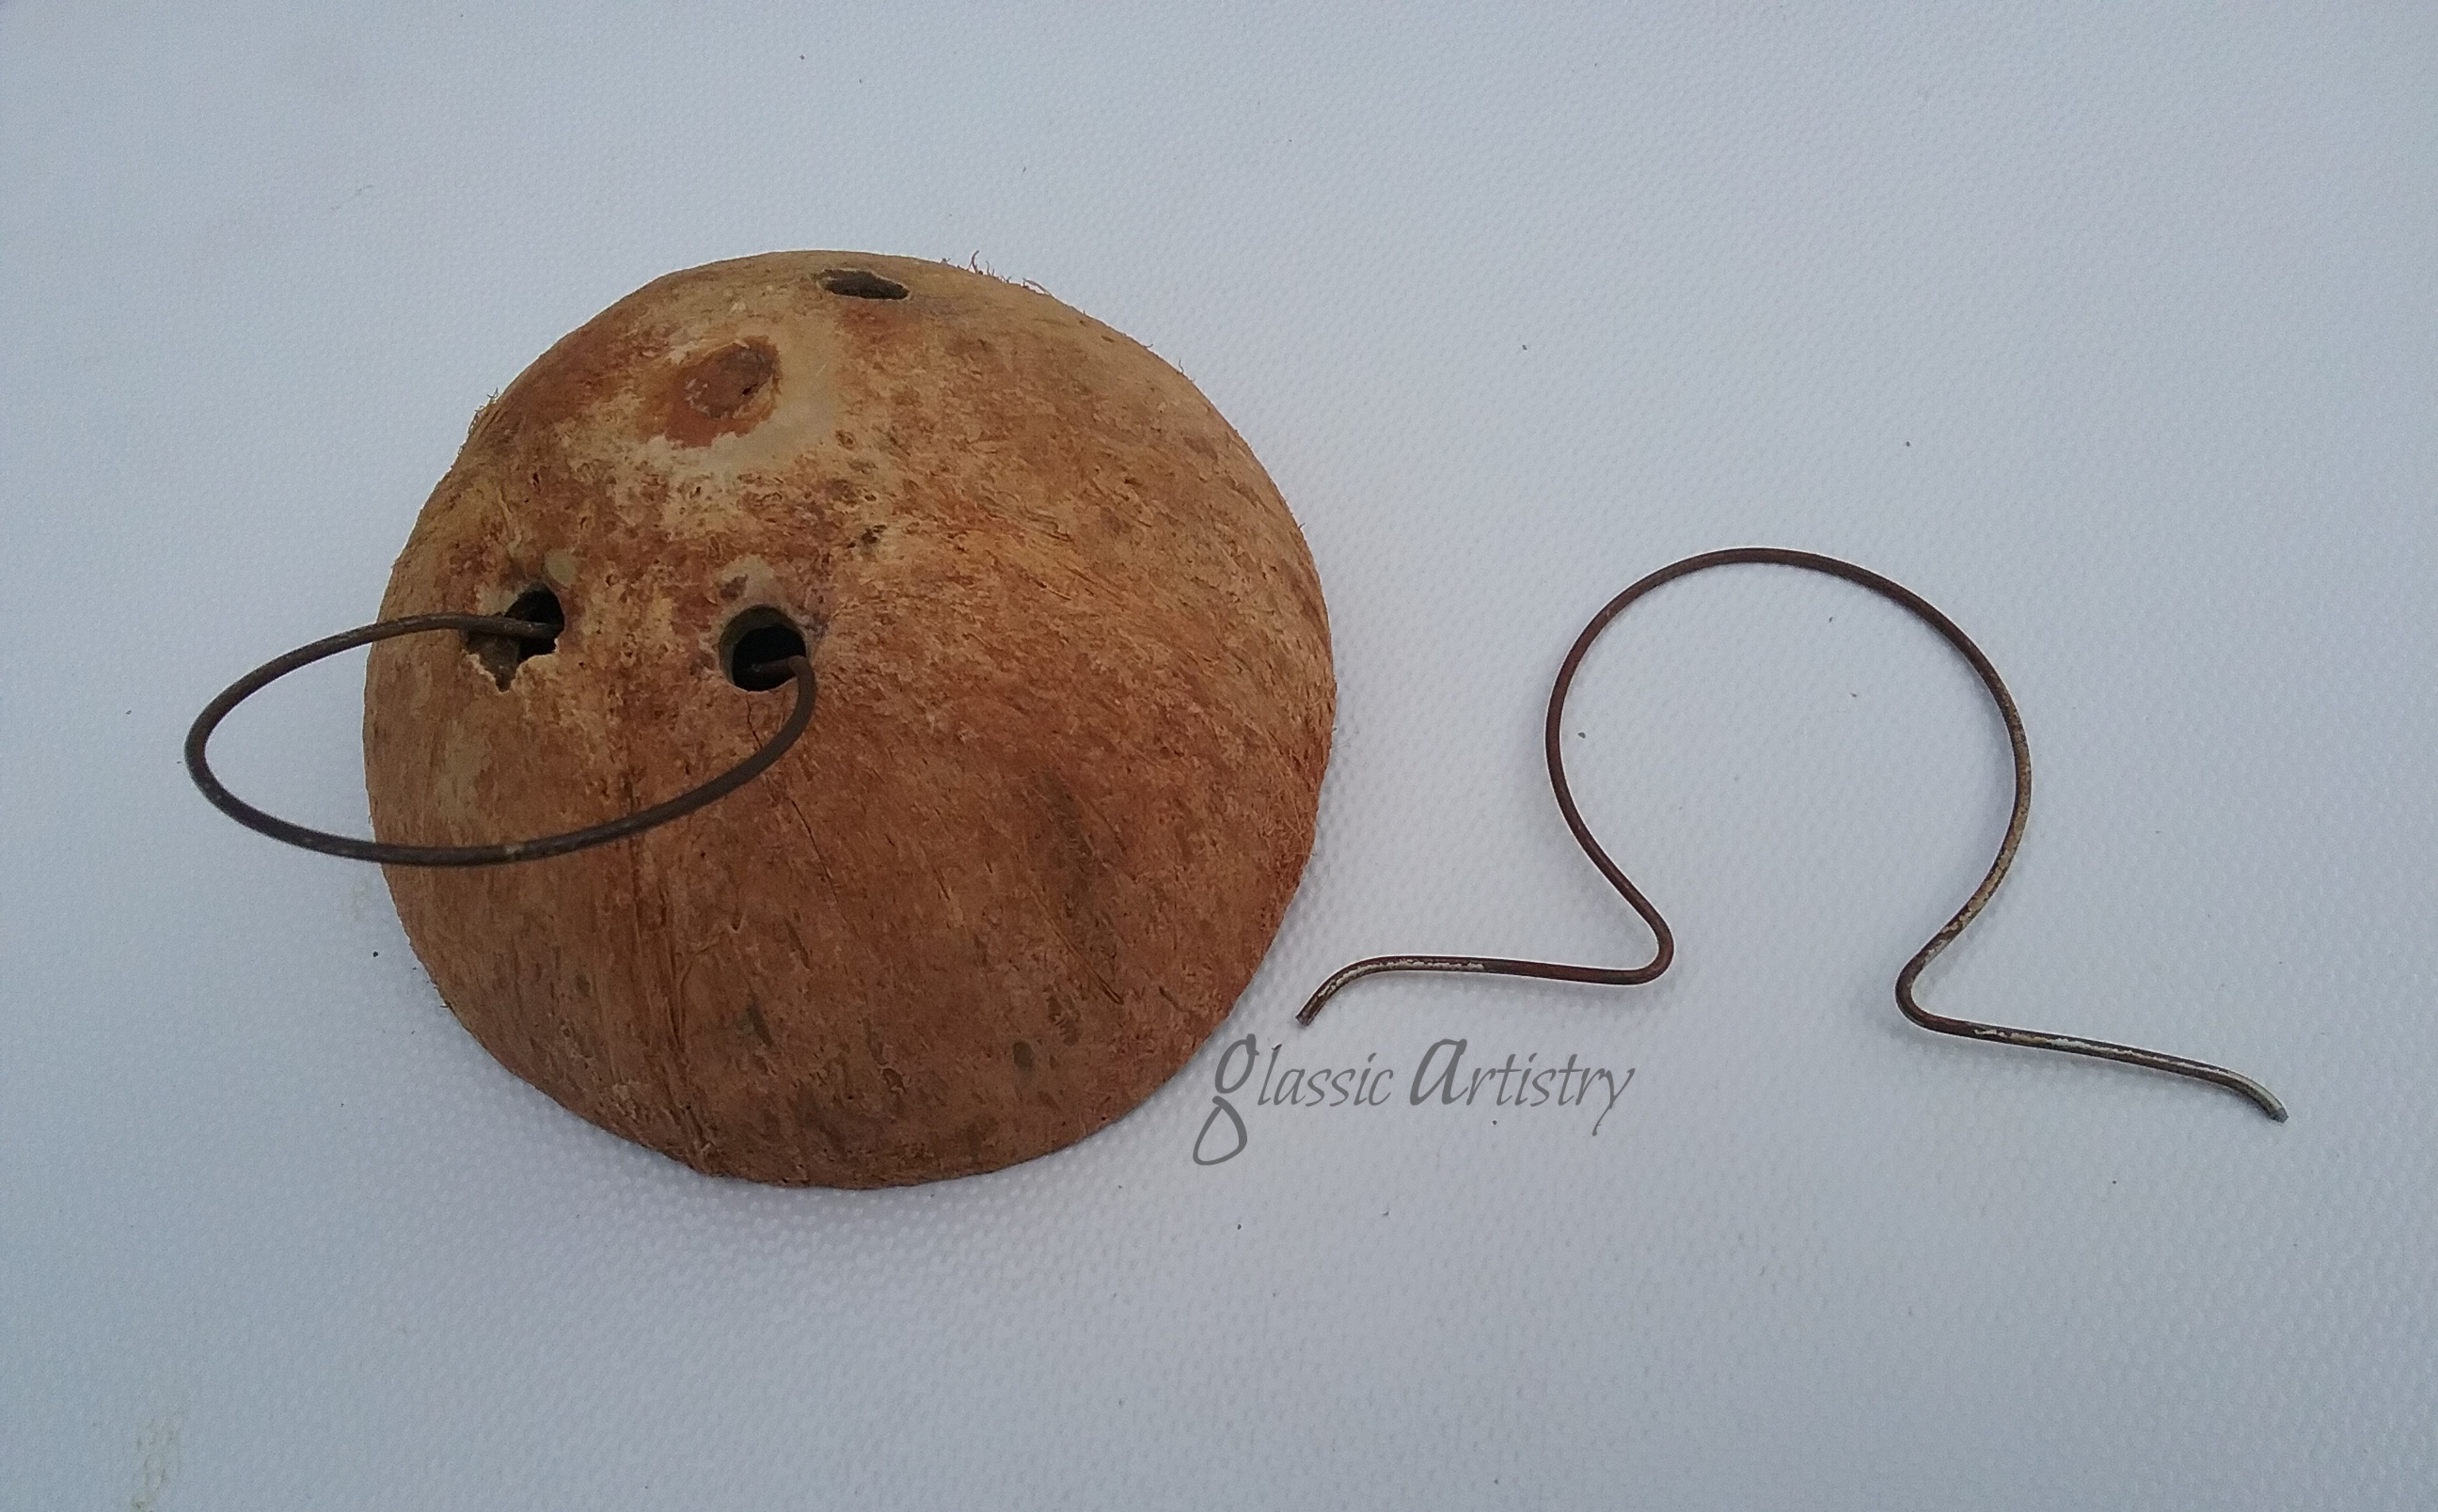
The shells were already dried and had holes, so once I gathered some old springs and wire pieces they went together pretty quick.
I had planned on shaping wire into hangers, but found two wire pieces that had been cut from the top of old lamp shades and popped them into the holes instead.
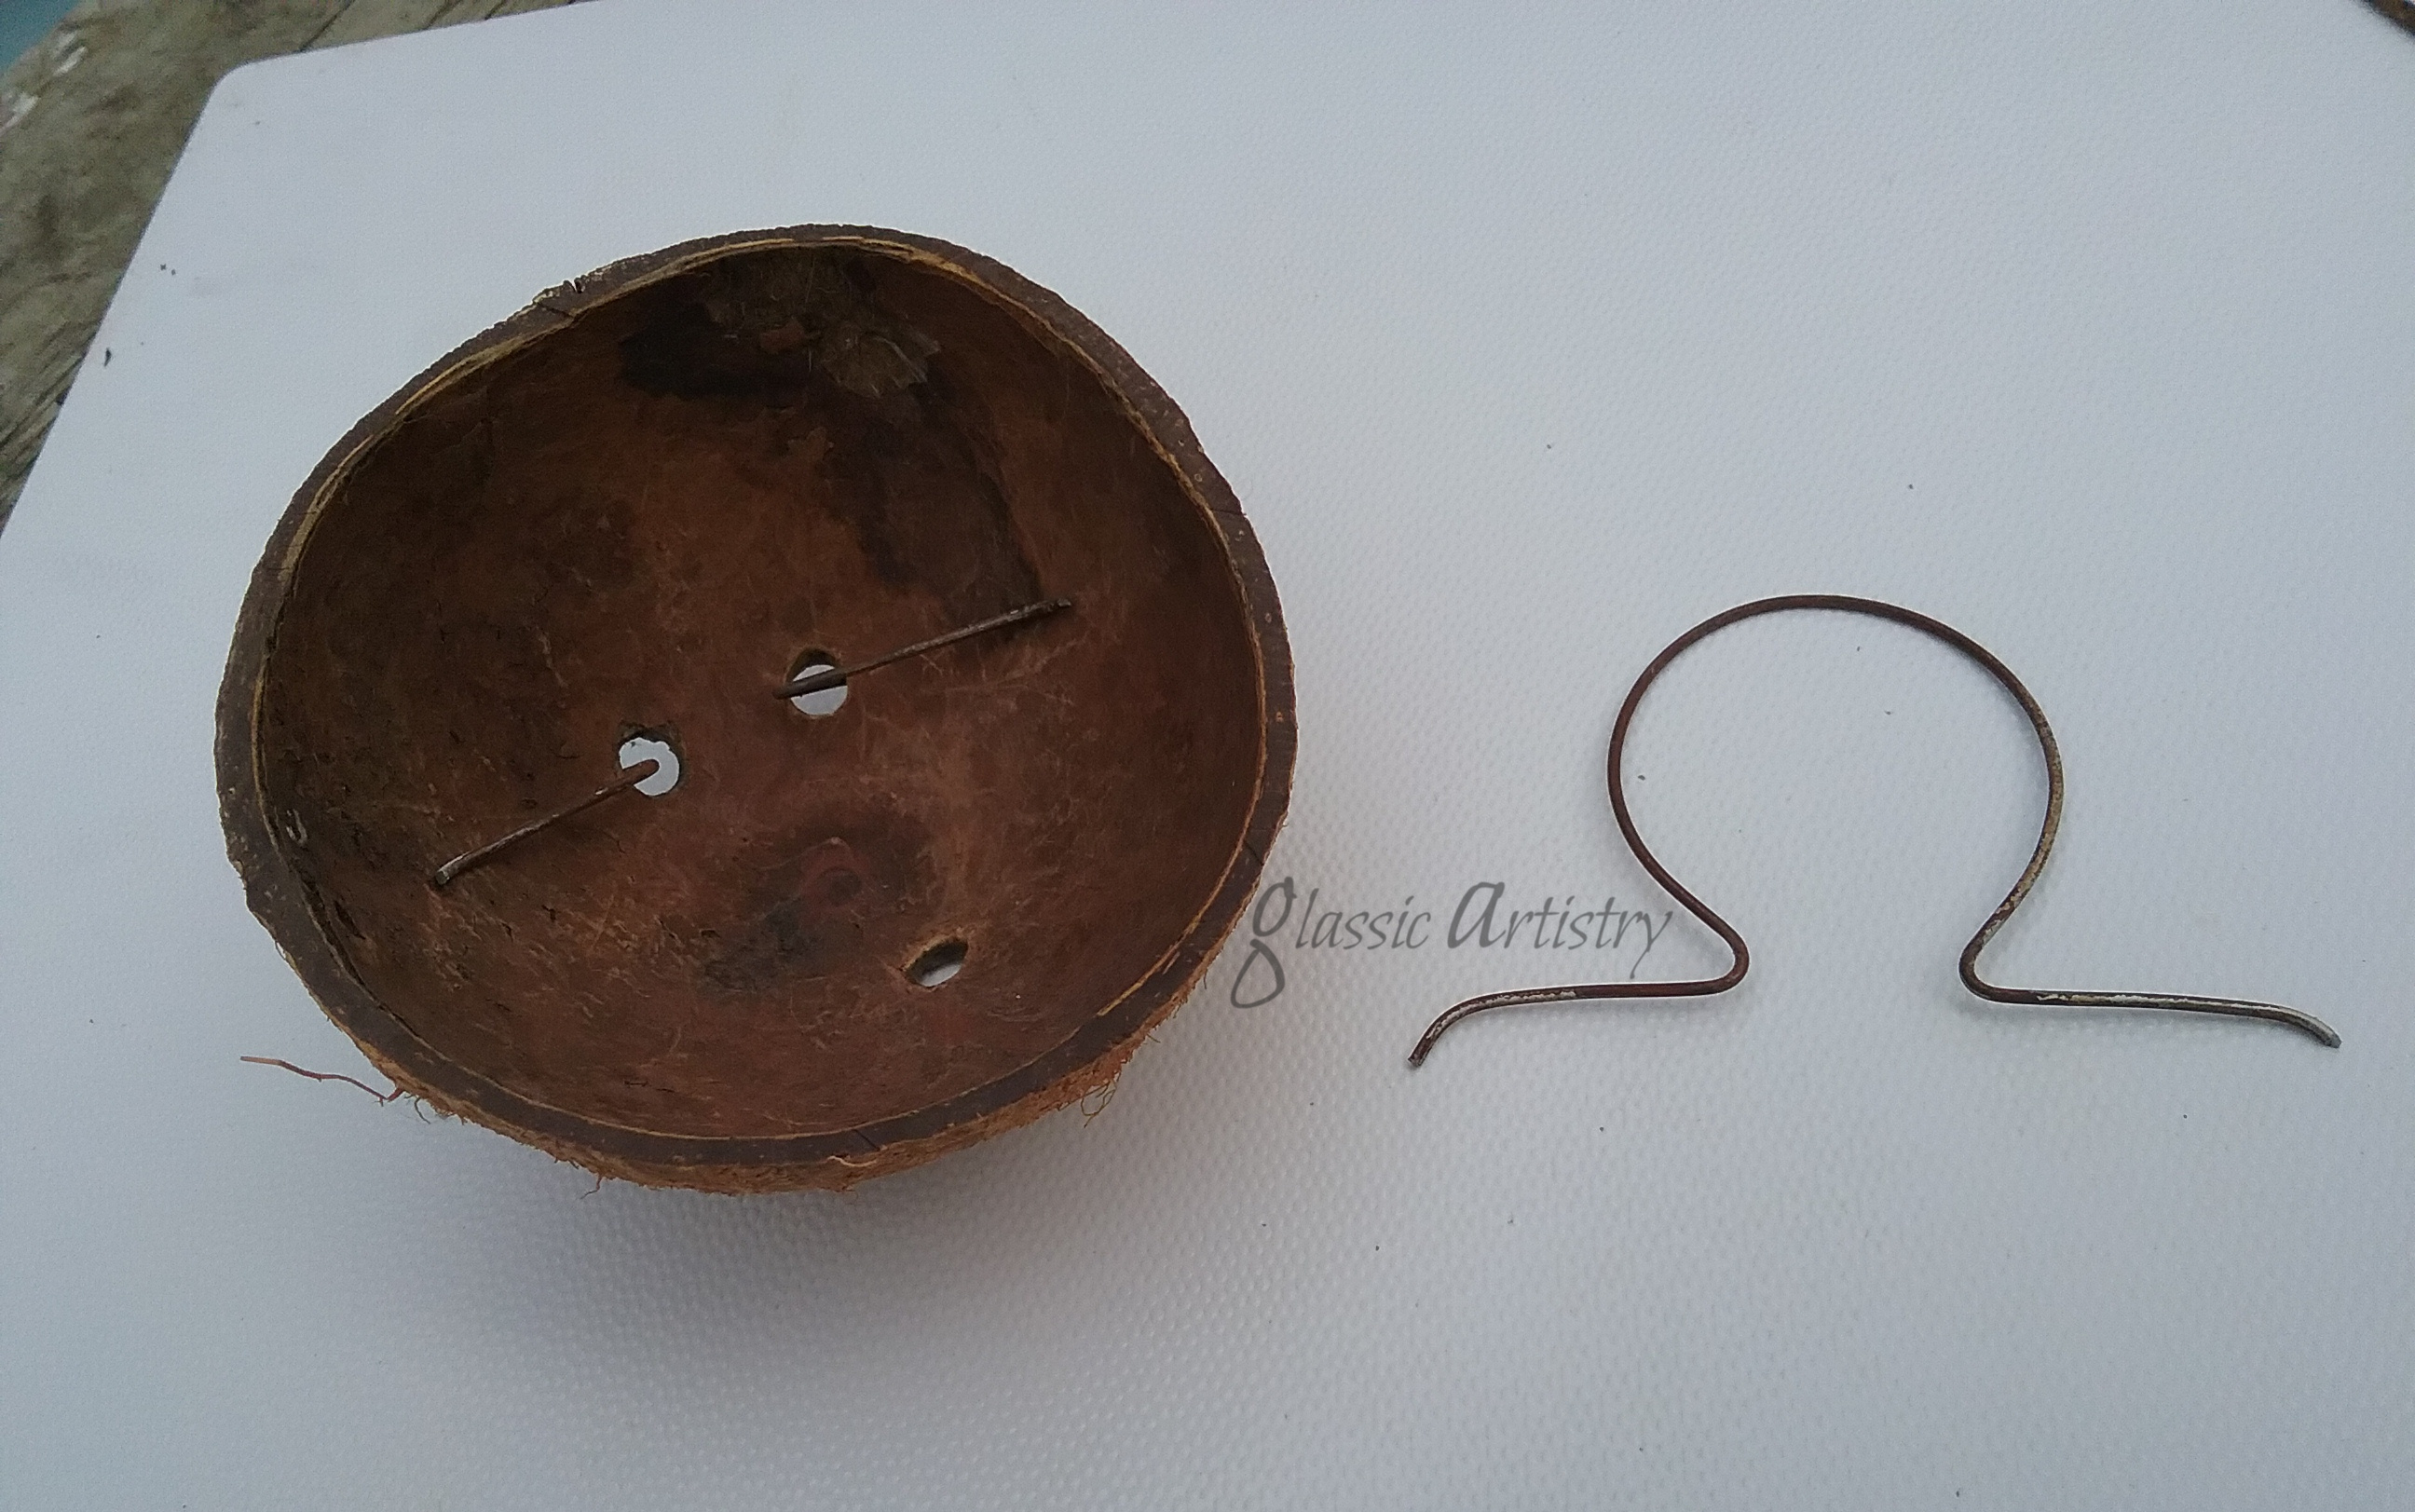
Wanting to provide some sort of a perch, I cut the small end off a bed spring, and wired it in with the wire arms of the hanger.


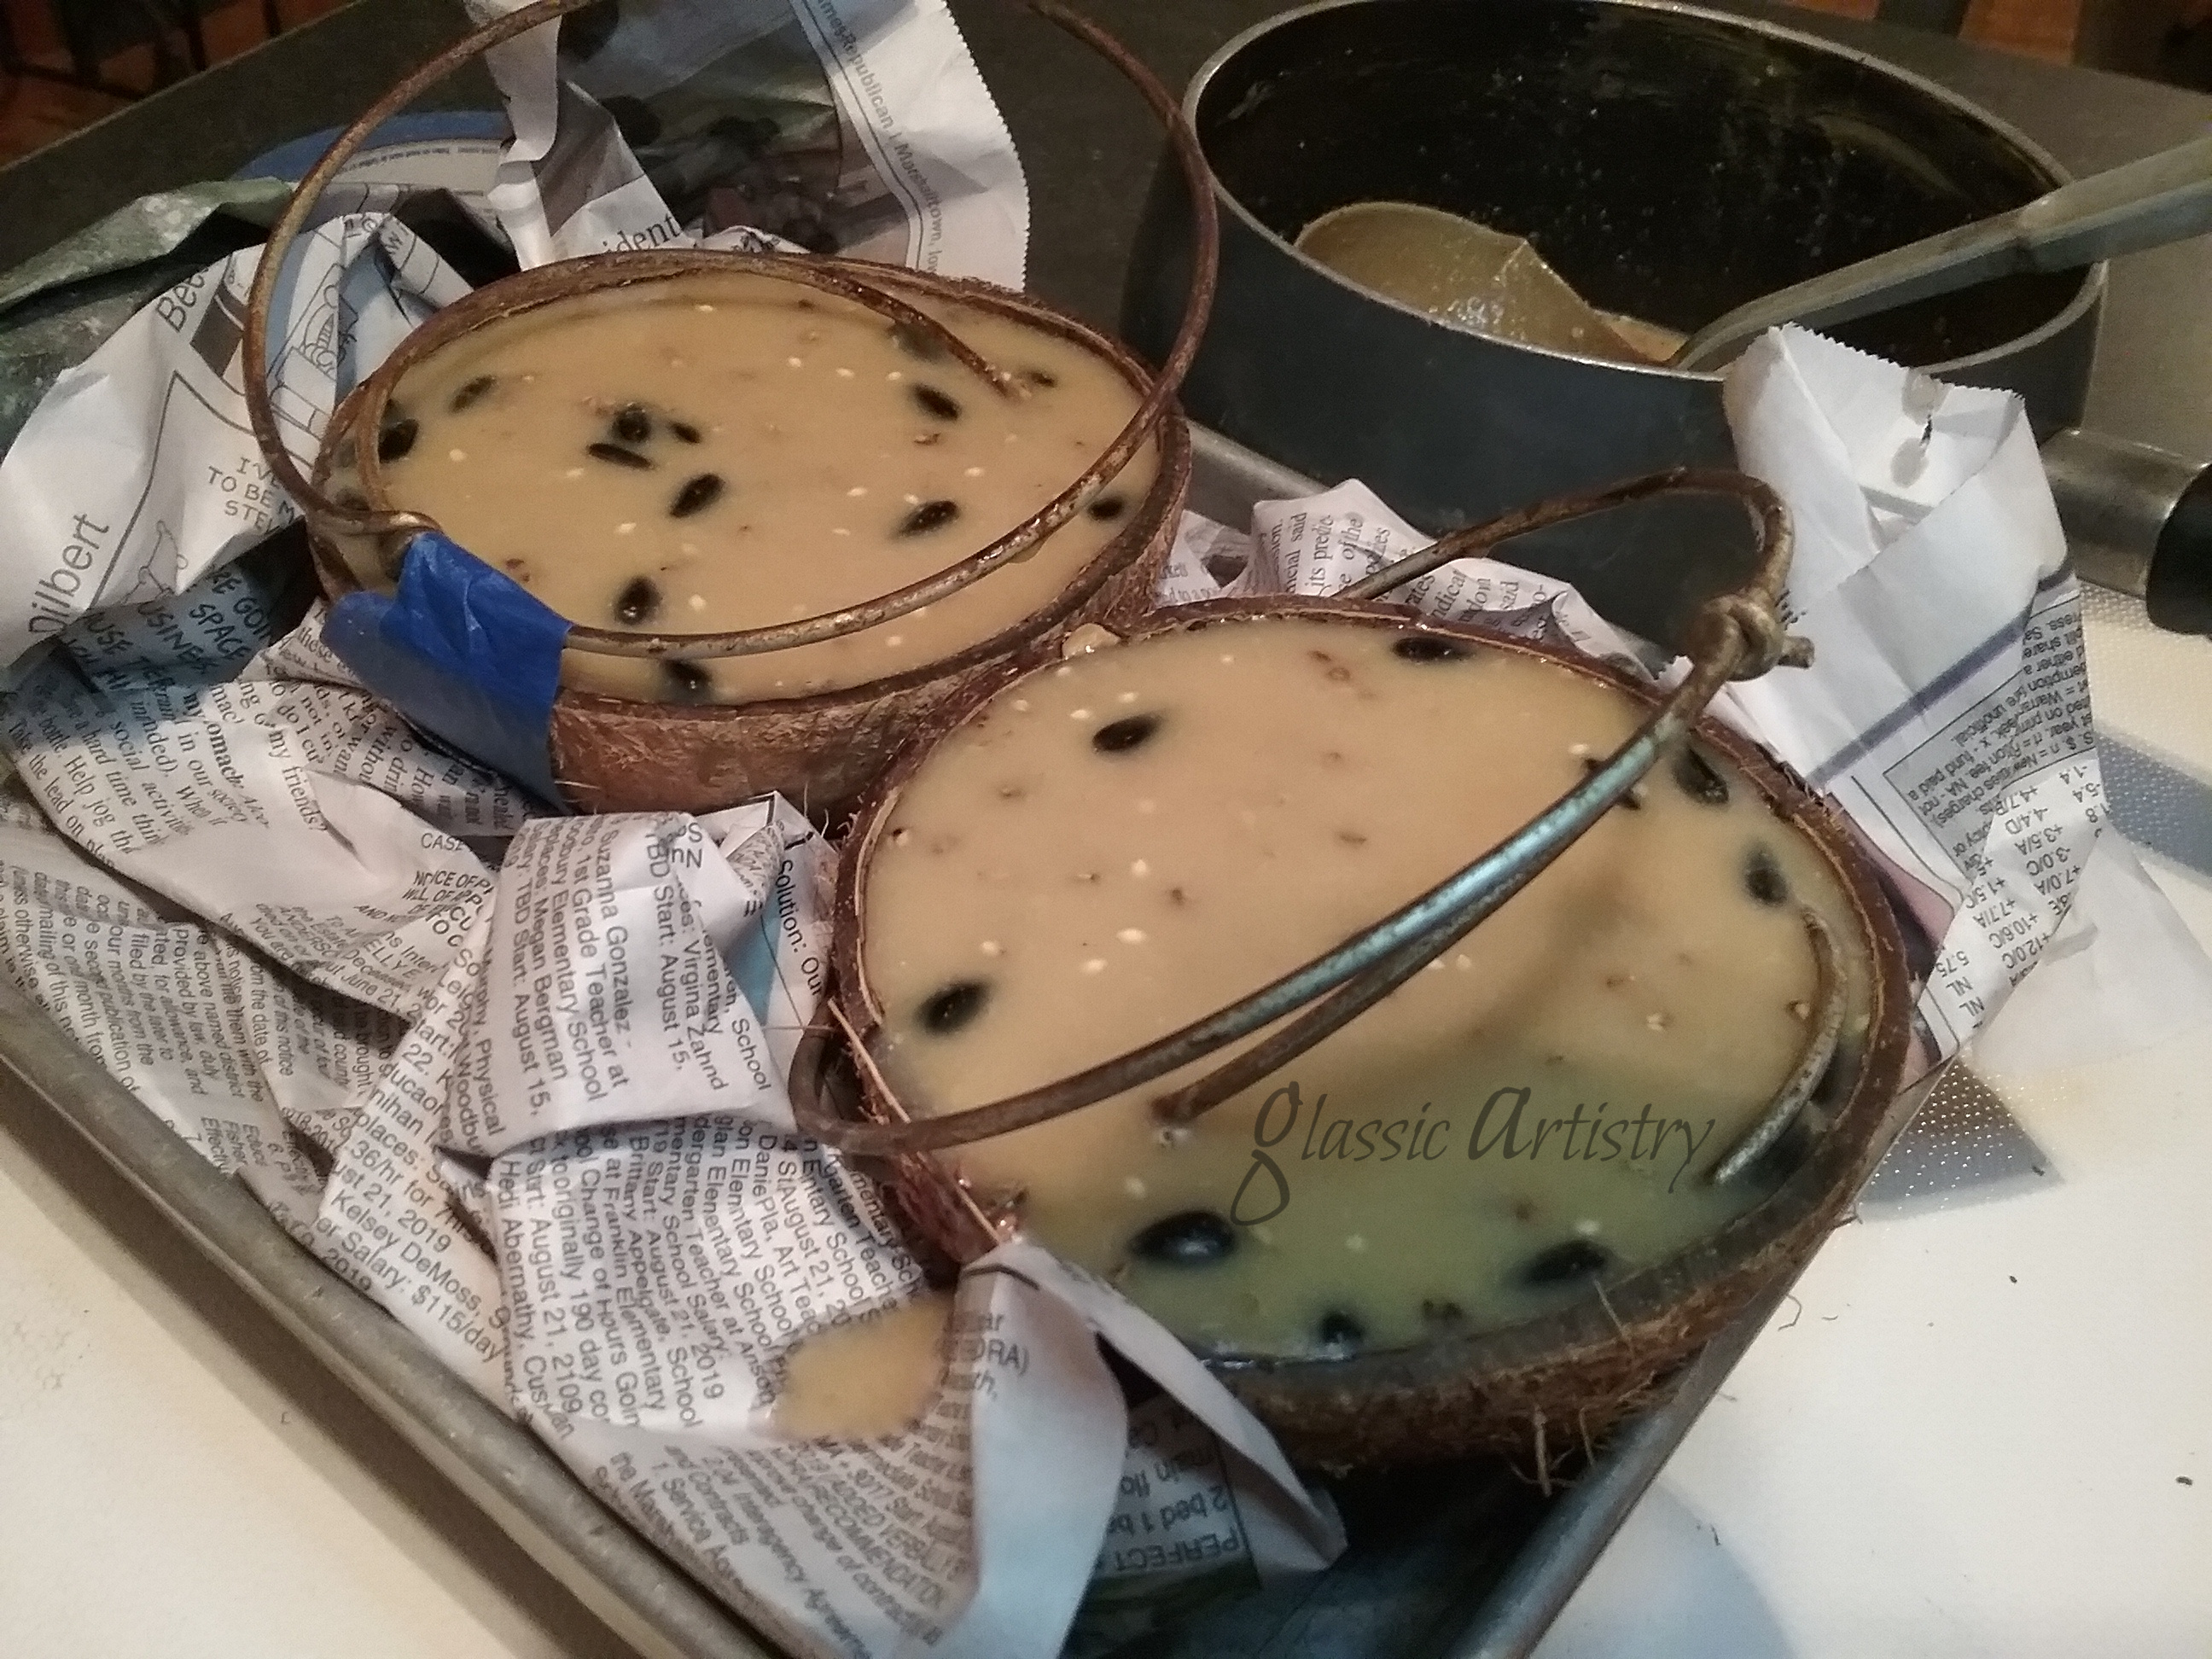
For suet, I melted a pound of lard (use lard/shortening or fat that will stay solid at room temp) in a saucepan over low heat. After the lard was melted, I removed it from the heat and stirred in 2 C birdseed, a handful of raisins, ½ C breadcrumbs, and ½ C unsalted peanuts. Let it cool.
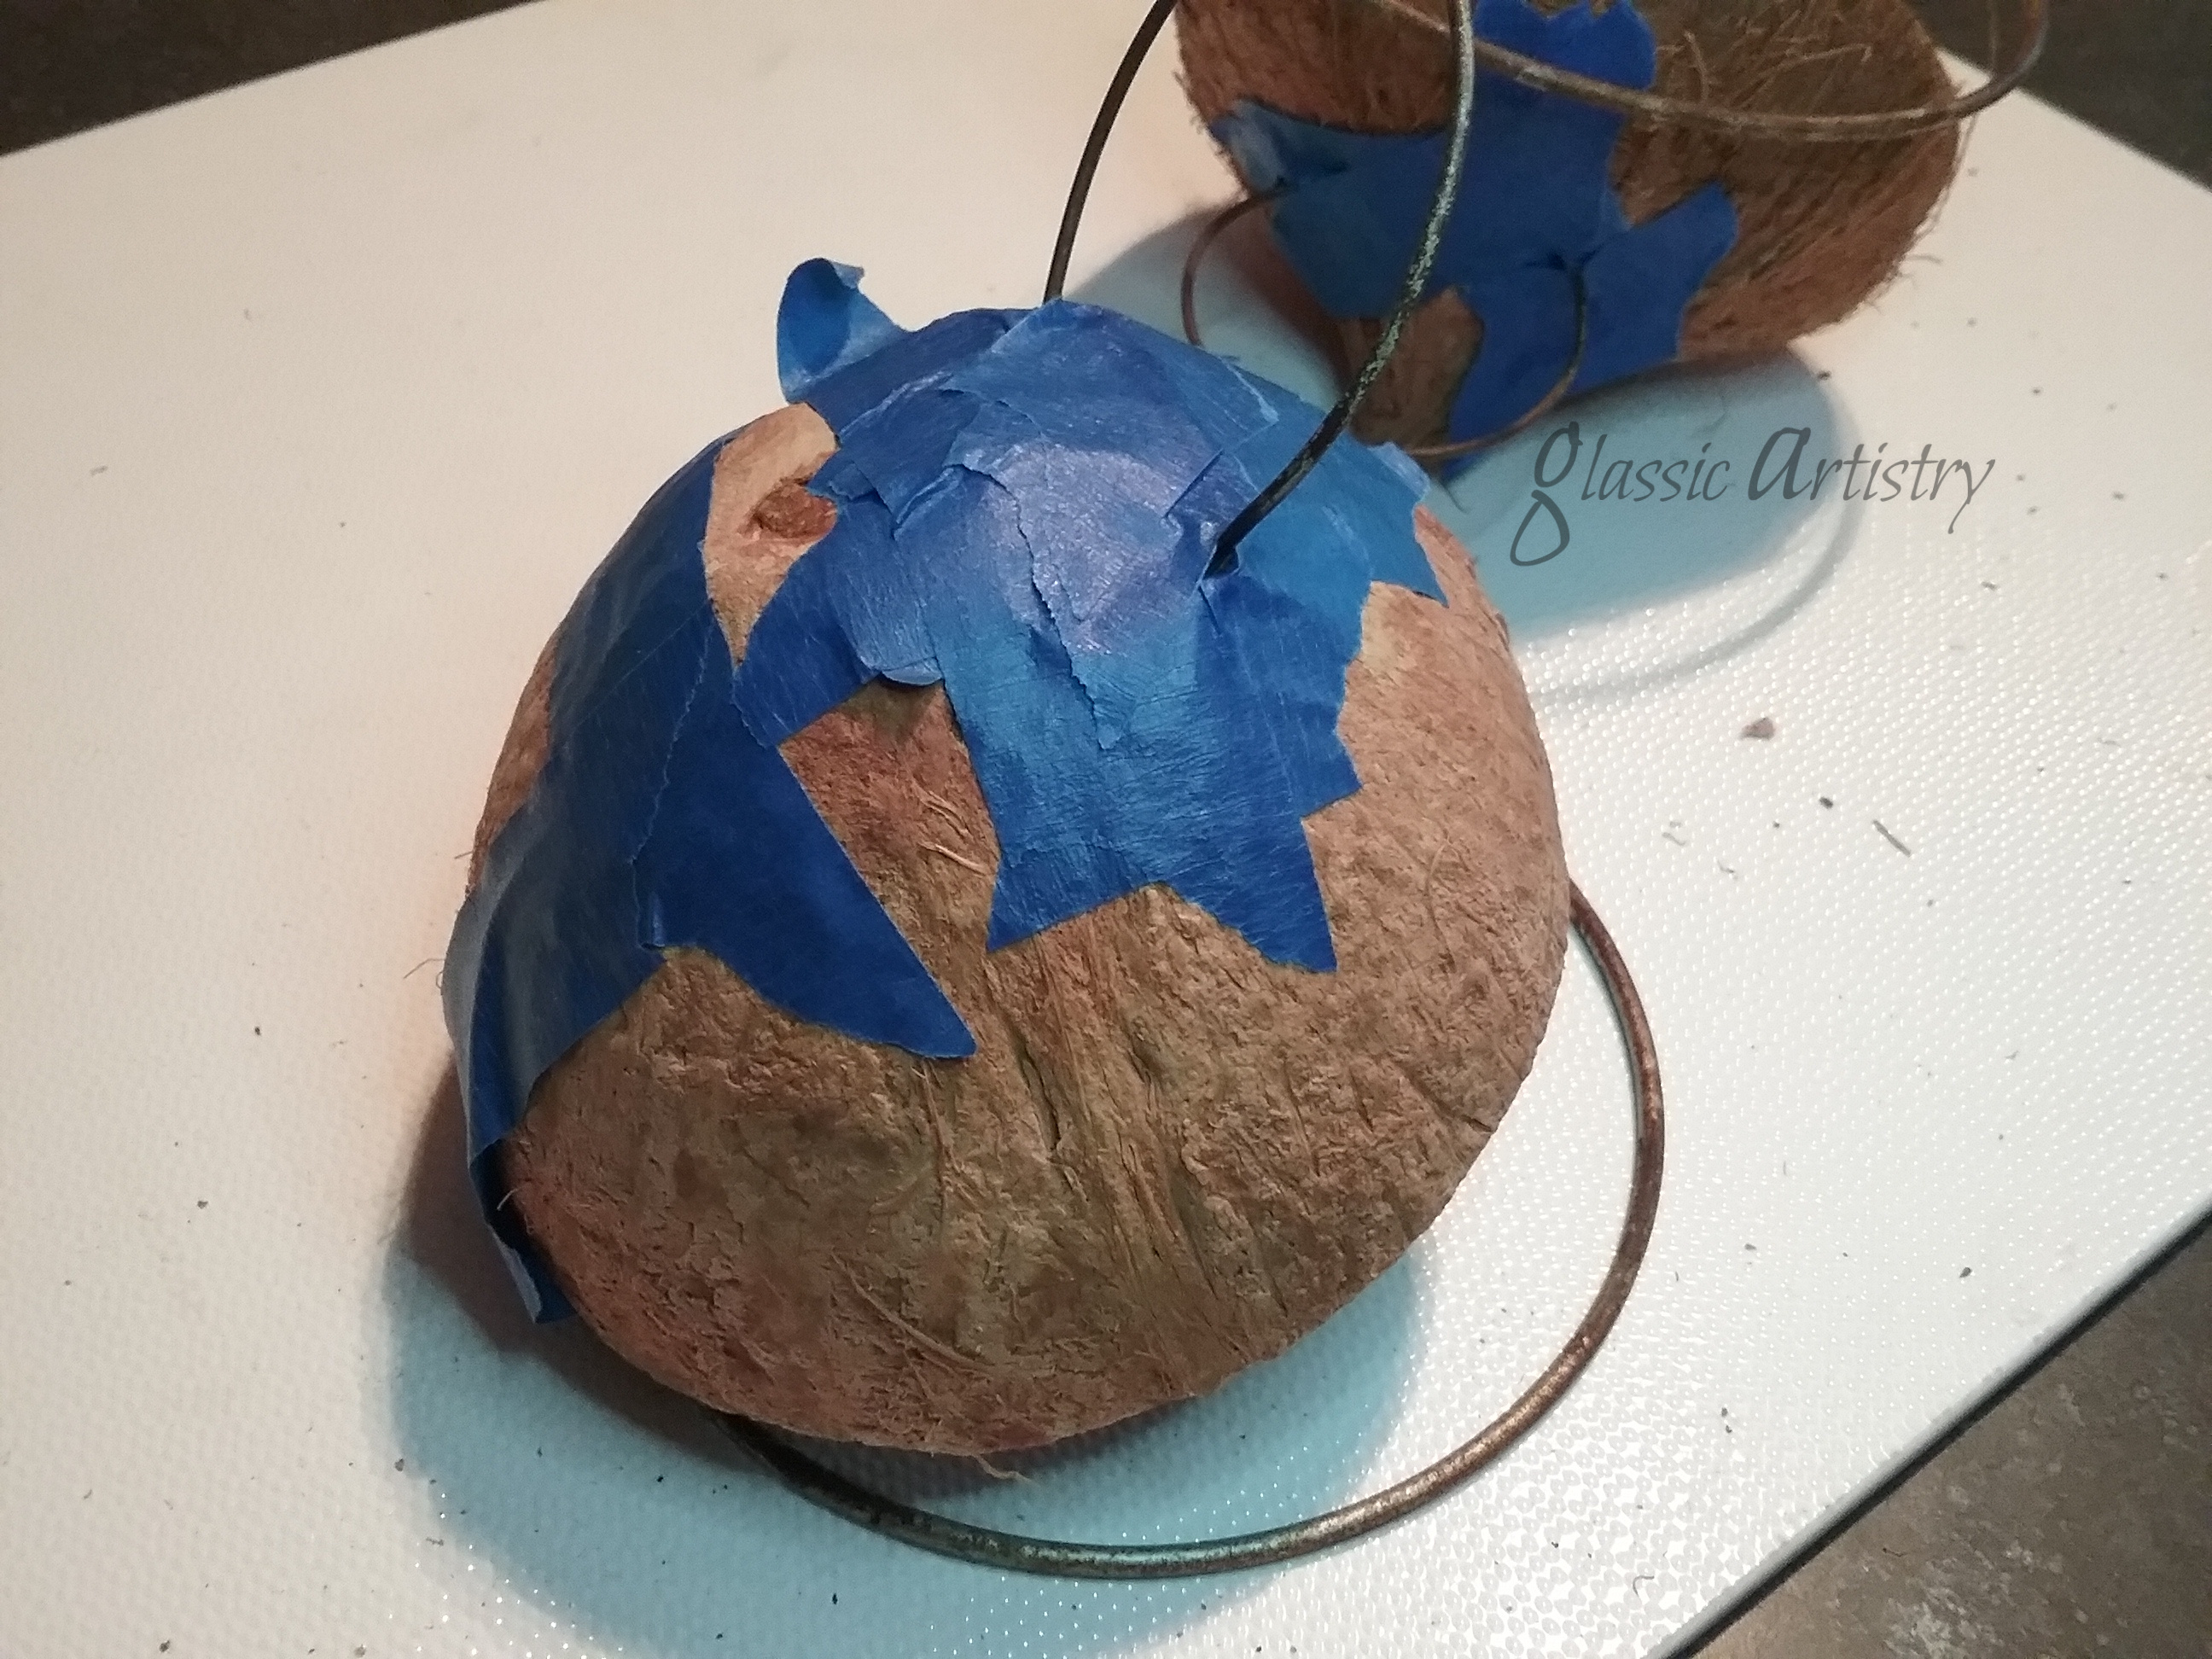
To ready the shells for suet, the outside hole openings were covered with tape, and for a little added measure, the inside holes were plugged with peanut butter.
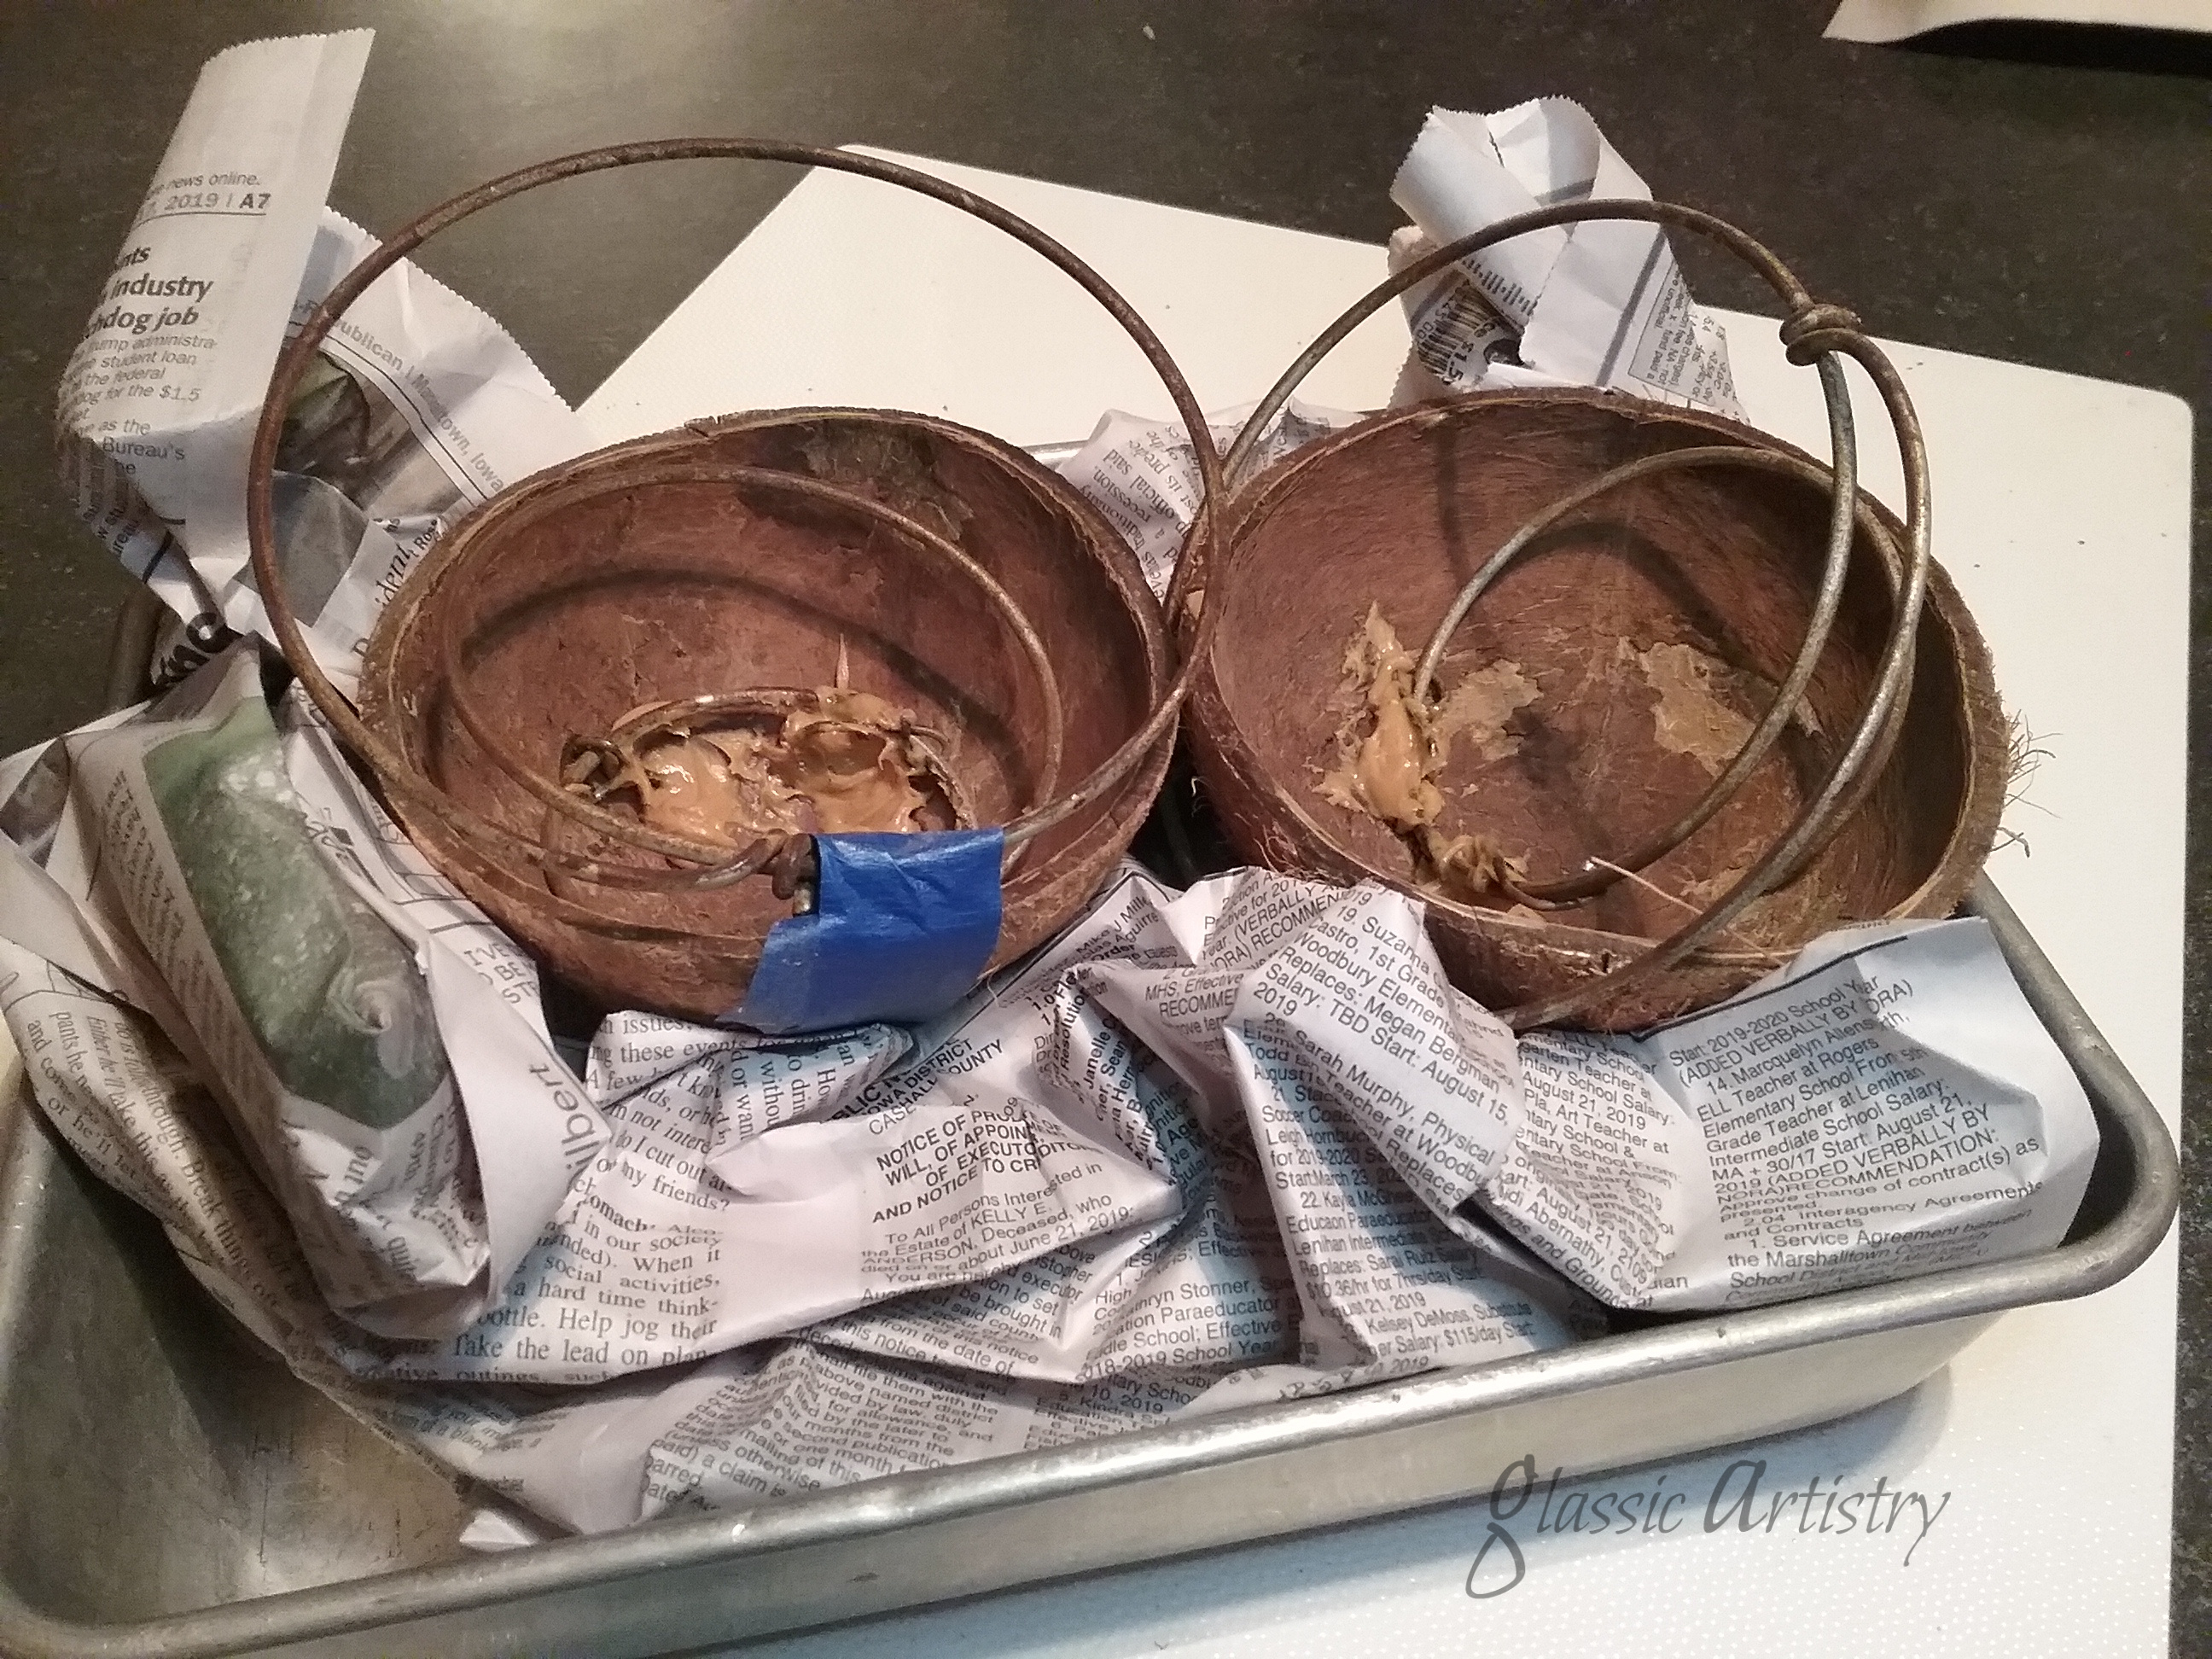
Wadded newspaper was used to keep the shell halves level in a shallow pan.
Fill the shells with cooled suet and let them sit until the suet solidifies.
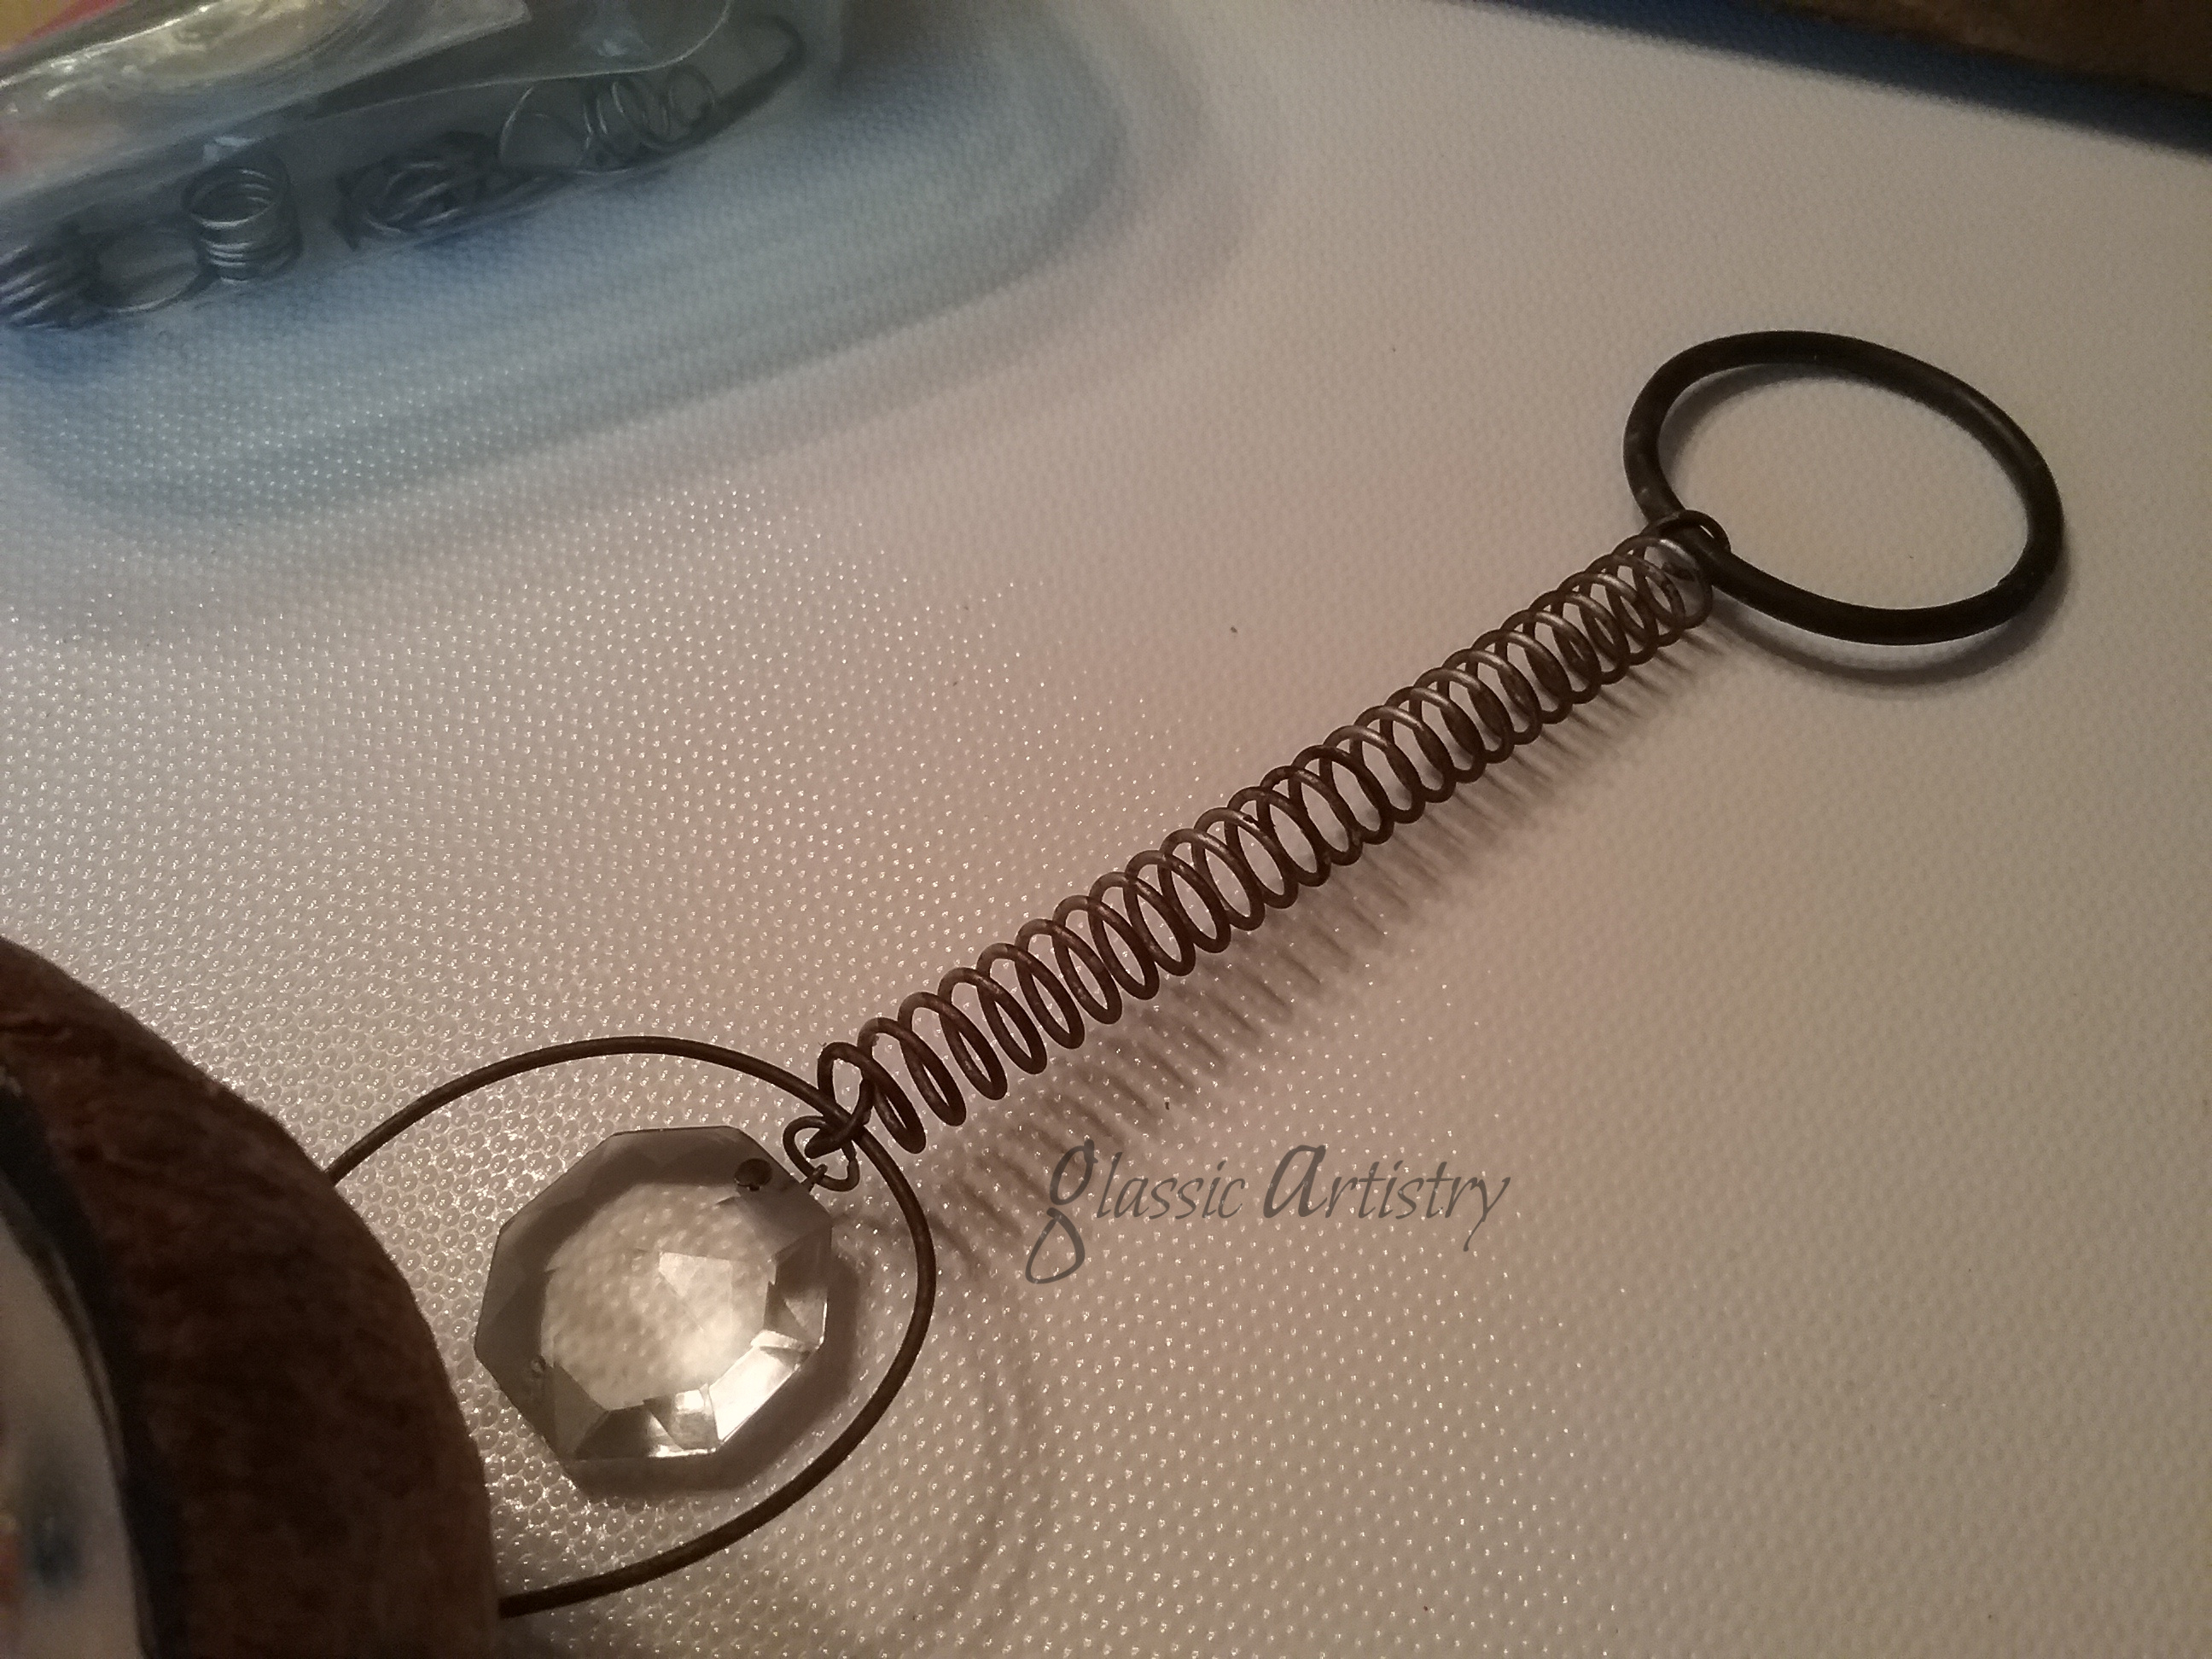
A super easy hanger was made by attaching a 2” metal ring to a 5” spring, and some bling on a jump ring to catch a little bird’s eye.

Bring on the birds!

I know, I’m really cutting it close with this post, only being 3 days out from Thanksgiving. It wasn’t really something I had planned, it just kind of happened.
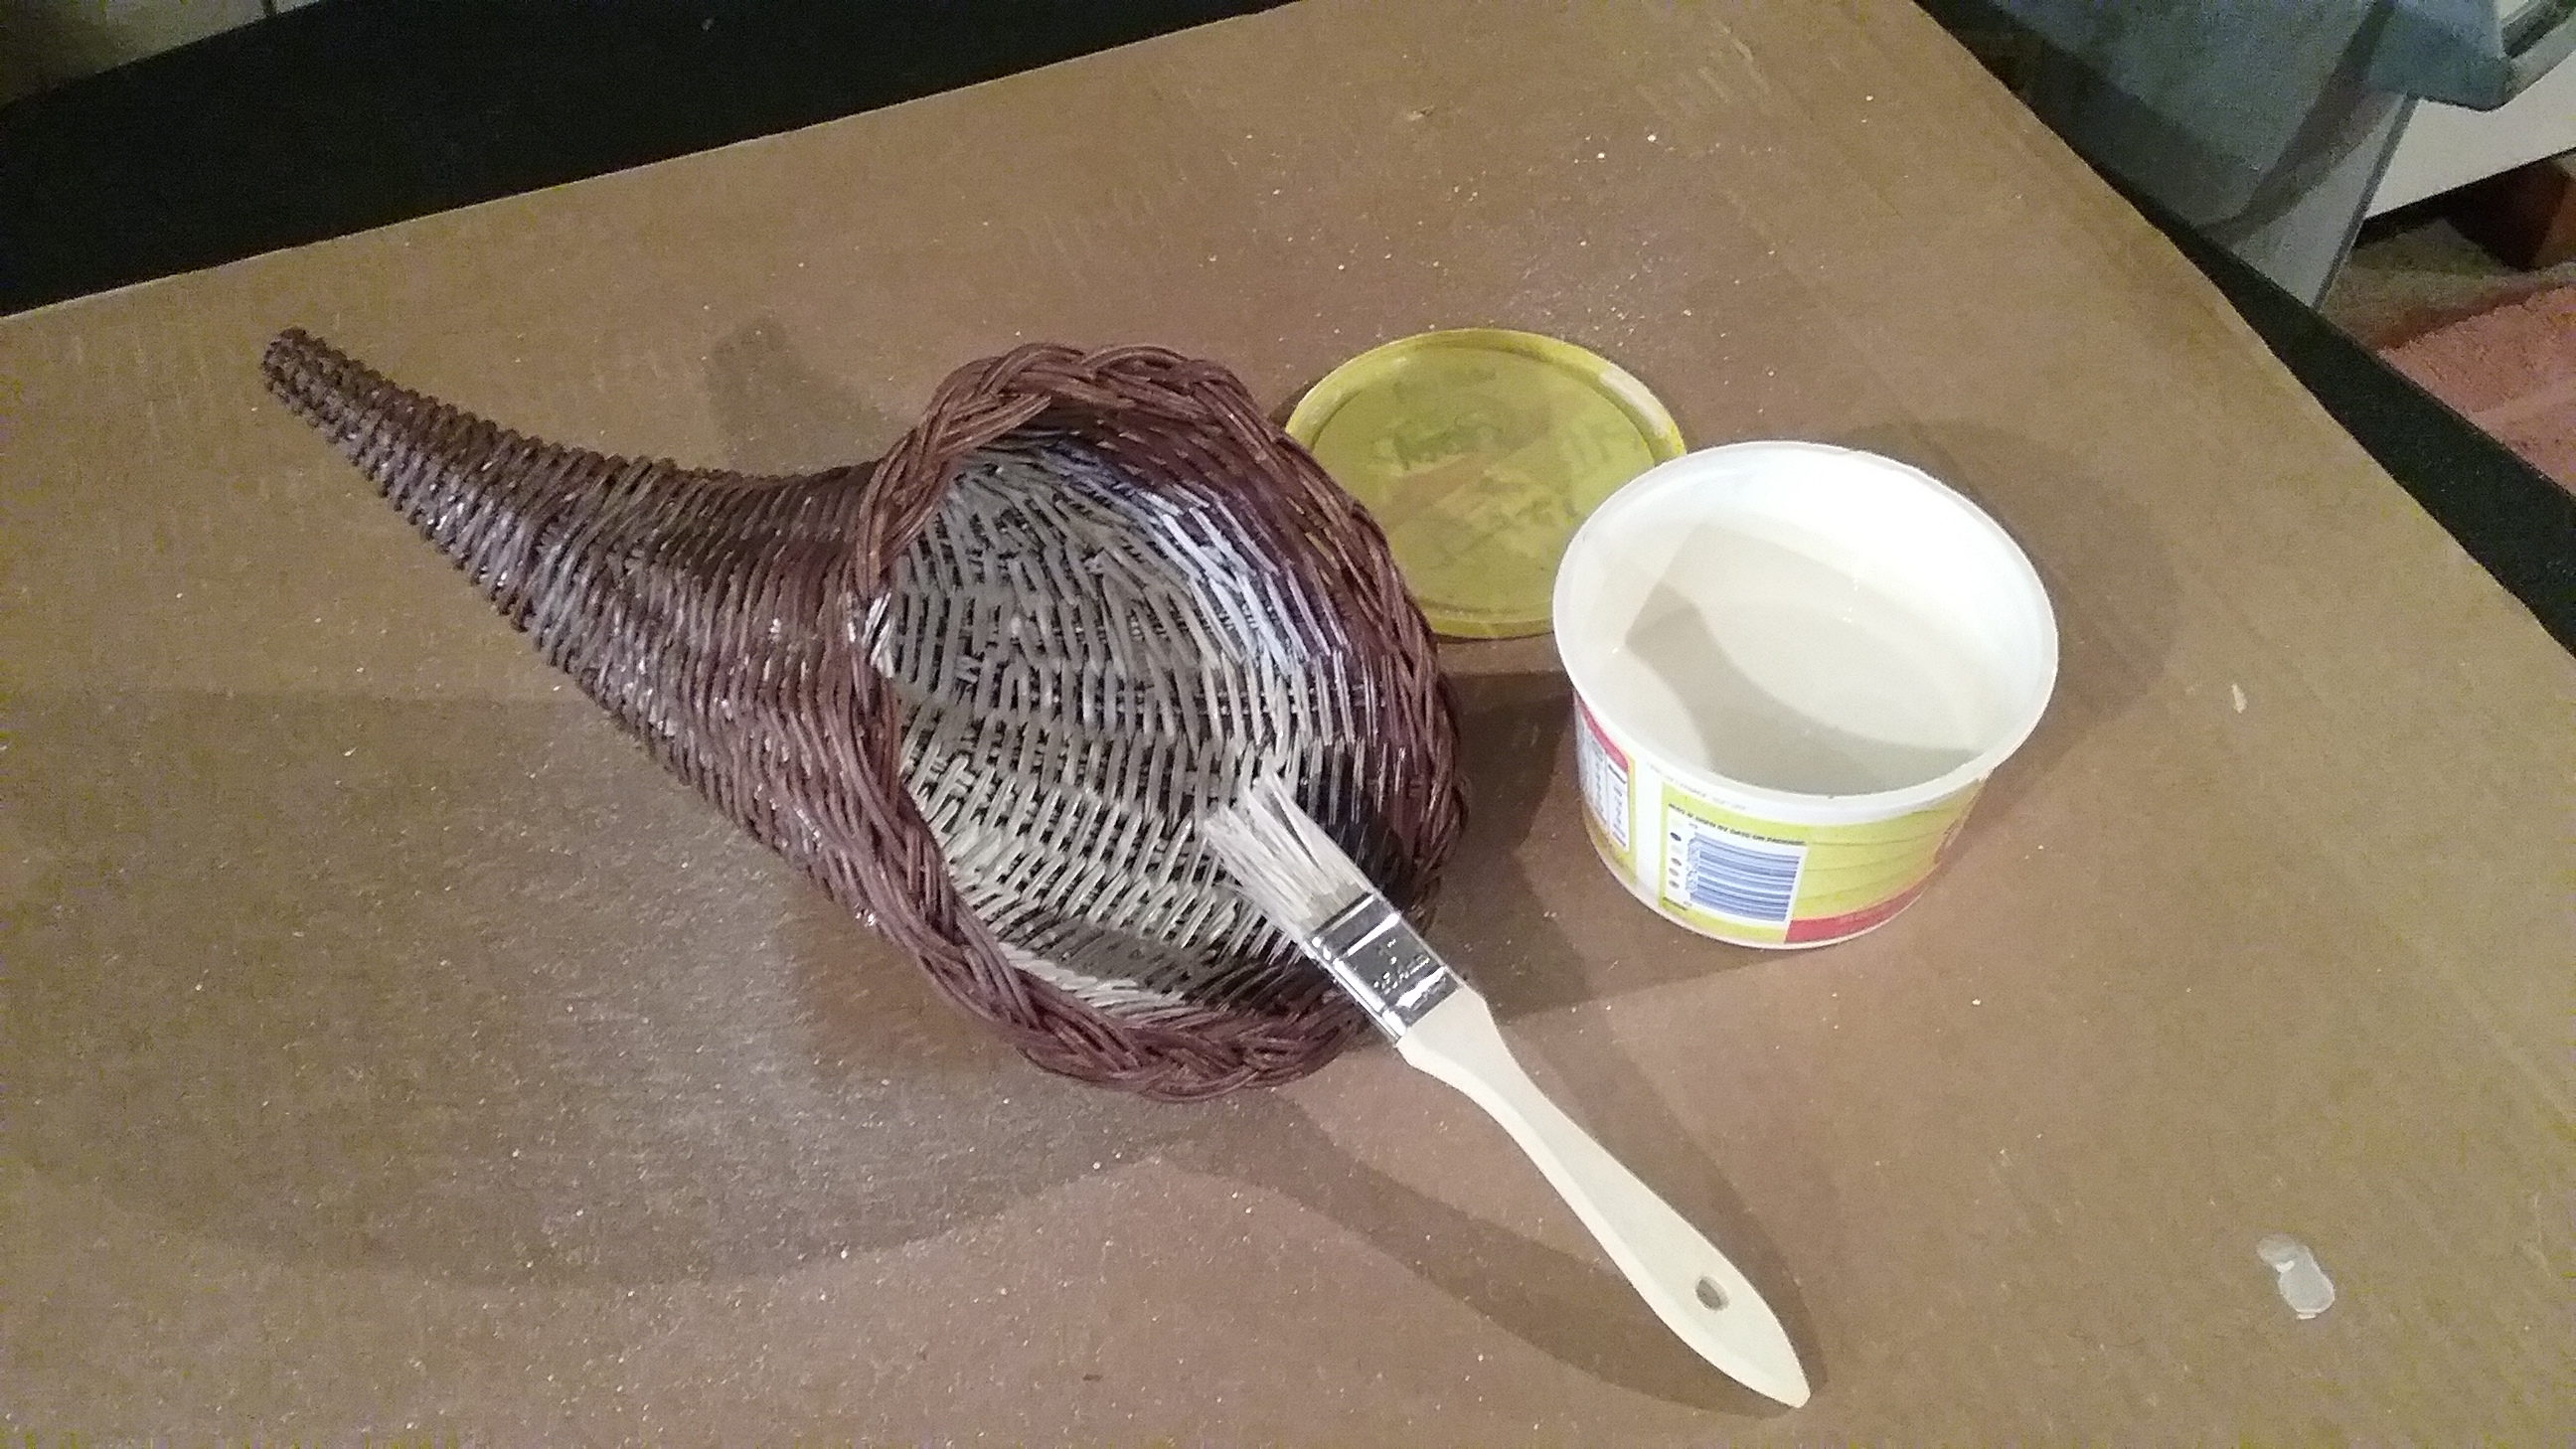
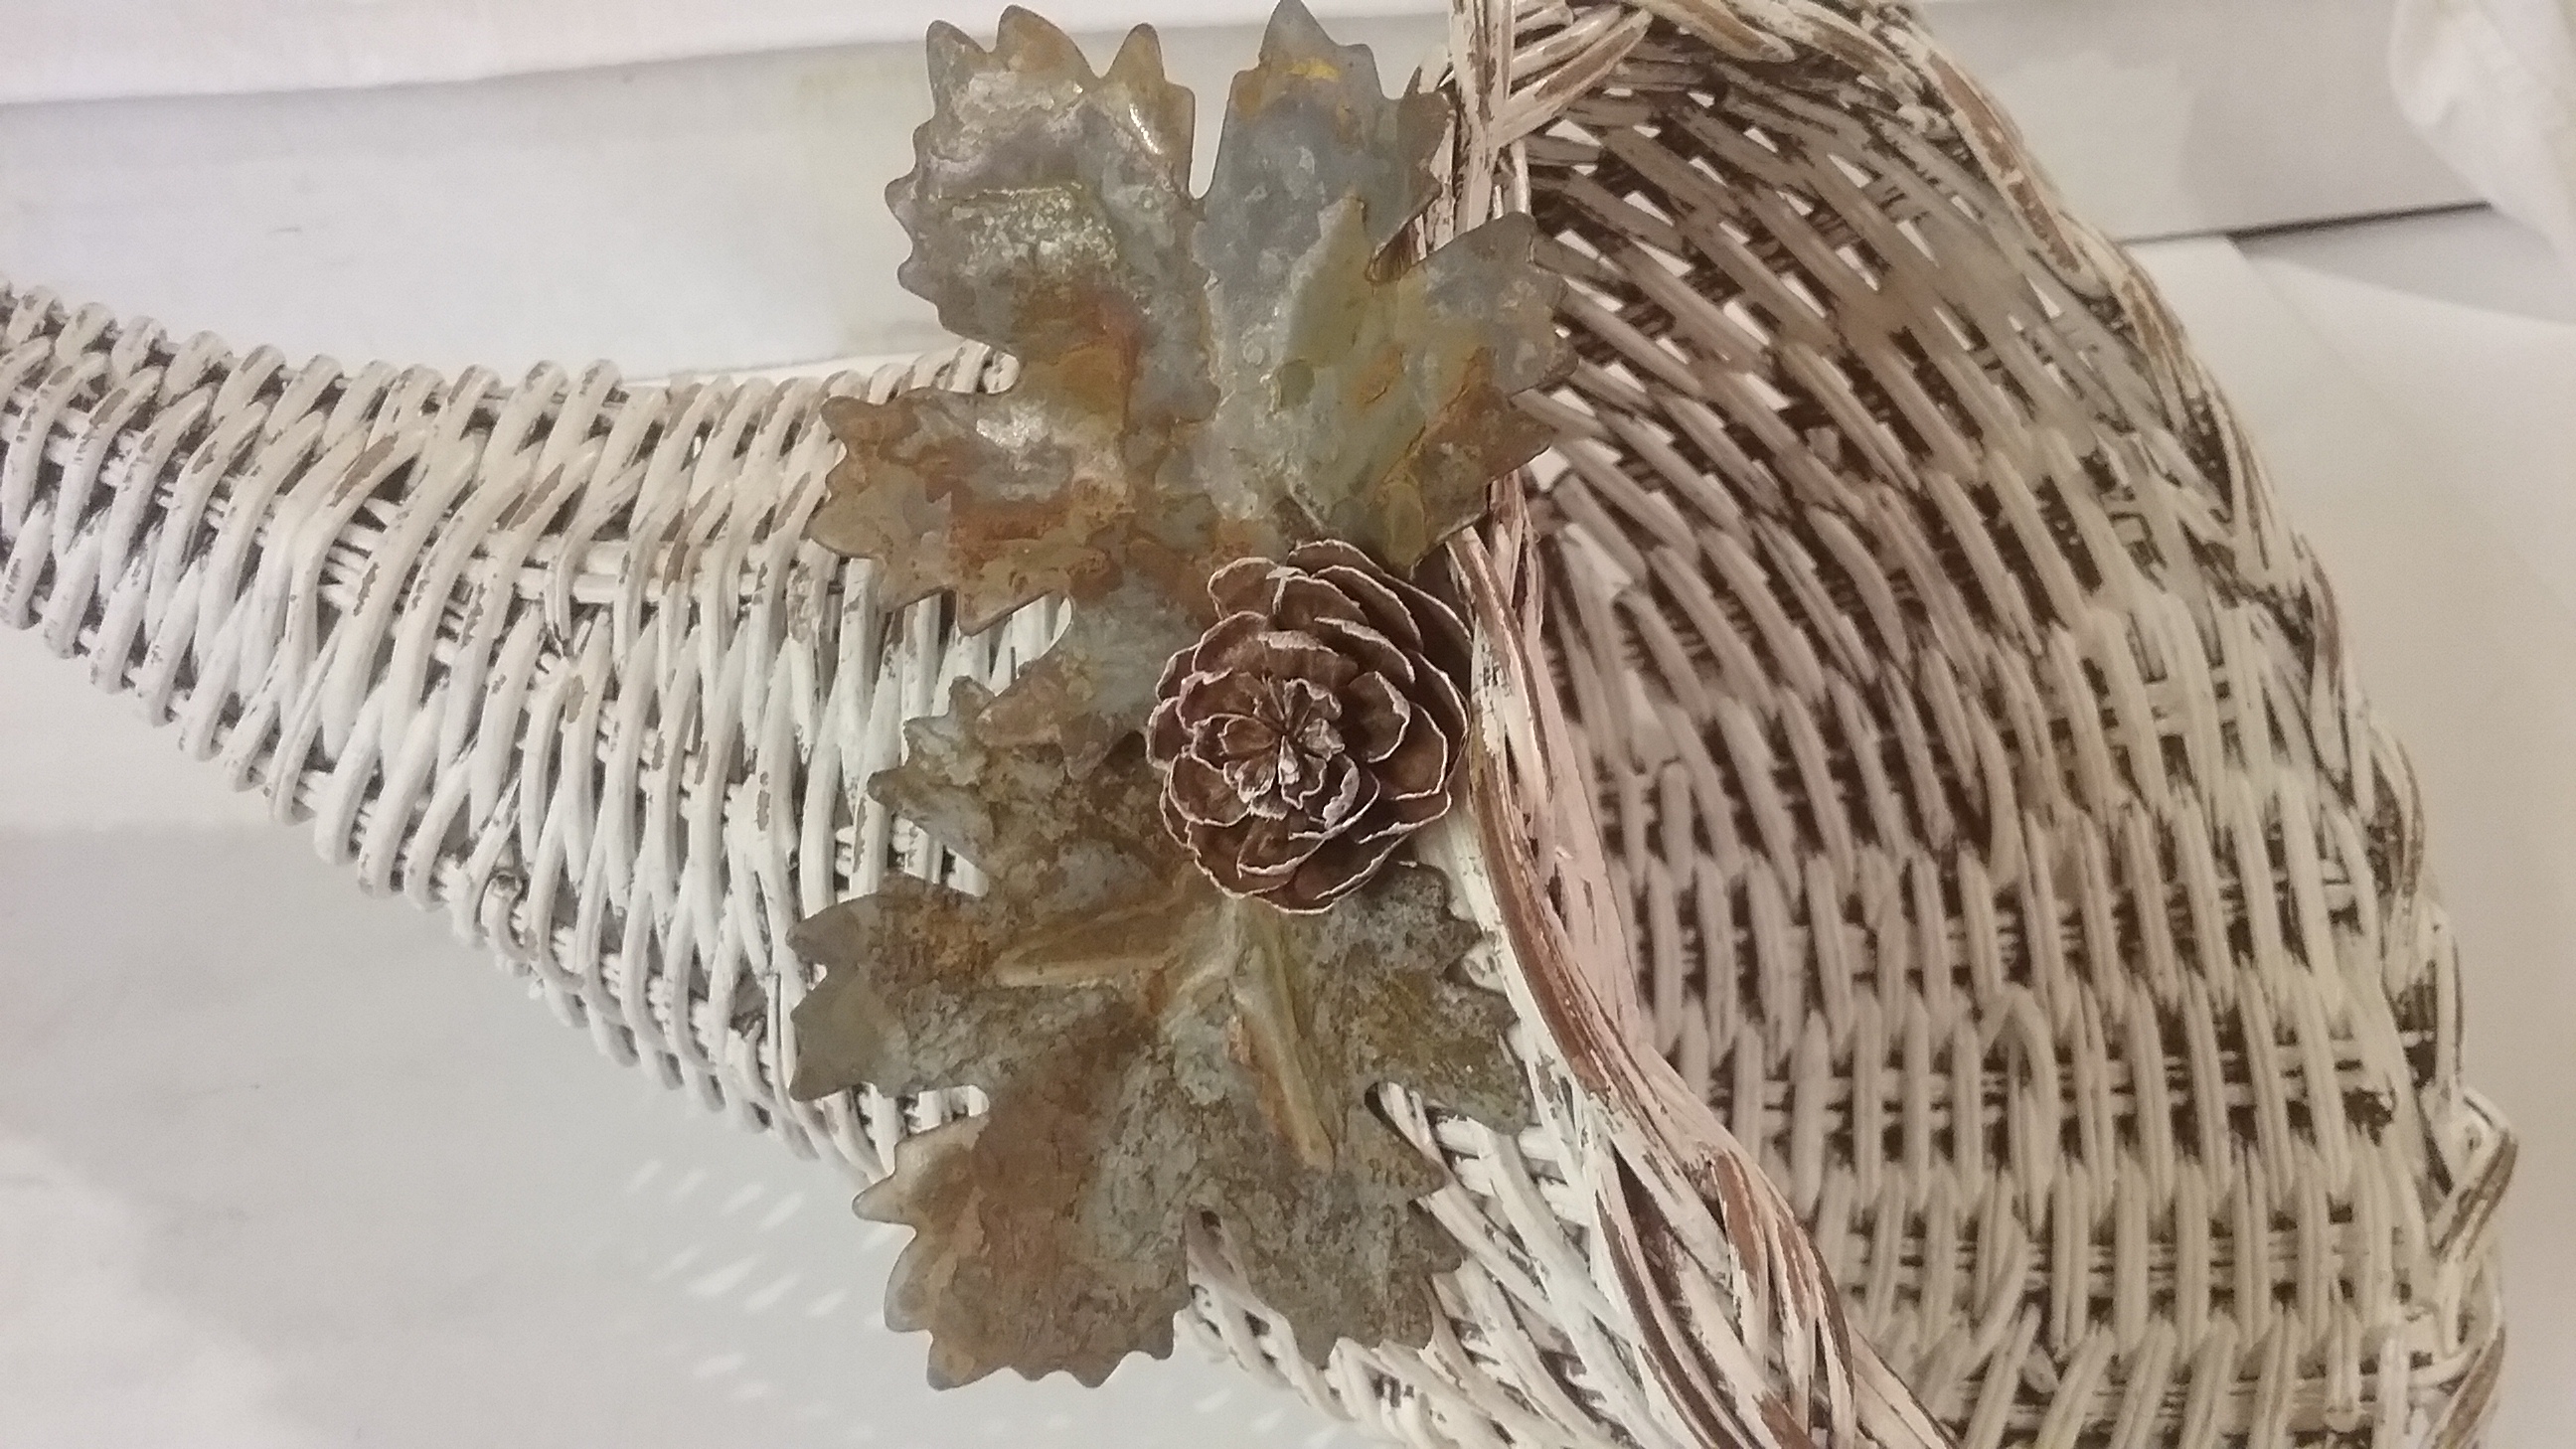
I was snooping around at my sister’s garage sale, last month, and found a wicker cornucopia in the “free” box. It made me smile as I remembered how excited my grandson, Kyle, was when he learned about them in preschool a couple years ago. He really got a kick out of saying the word and used it as many times as he could in conversations. We all got the biggest chuckle out it. Anyway, I grabbed it, with him in mind.
I was thinking I’d just fill it with some tiny gourds and a little fall sprig, but just couldn’t get enthused about it. Then, as I walked past it on Friday (2 days ago), I thought about how my daughter loves to decorate for all the holidays. I decided to make it a gift. I’d snazz it up for her and fill it with treats for the kids. Now it had my attention ..
Not worrying about getting into all the nooks and crannies, it got a quick white paint job. After it was dry, I sanded it lightly with some coarse sandpaper to remove a little paint for a worn look. Not wanting to use a floral sprig, I opted for metal leaves that have been around here for ages. Looks like they originally came from Walmart, but I don’t know if that’s where I got them. The leaves were too shiny, so I rusted them. I love the way they turned out. I sprayed them with a clear sealer to protect their new patina.

I clipped off the top of a pine cone to make a small pine cone flower, then highlighted the edges by dry brushing it with a little white paint.
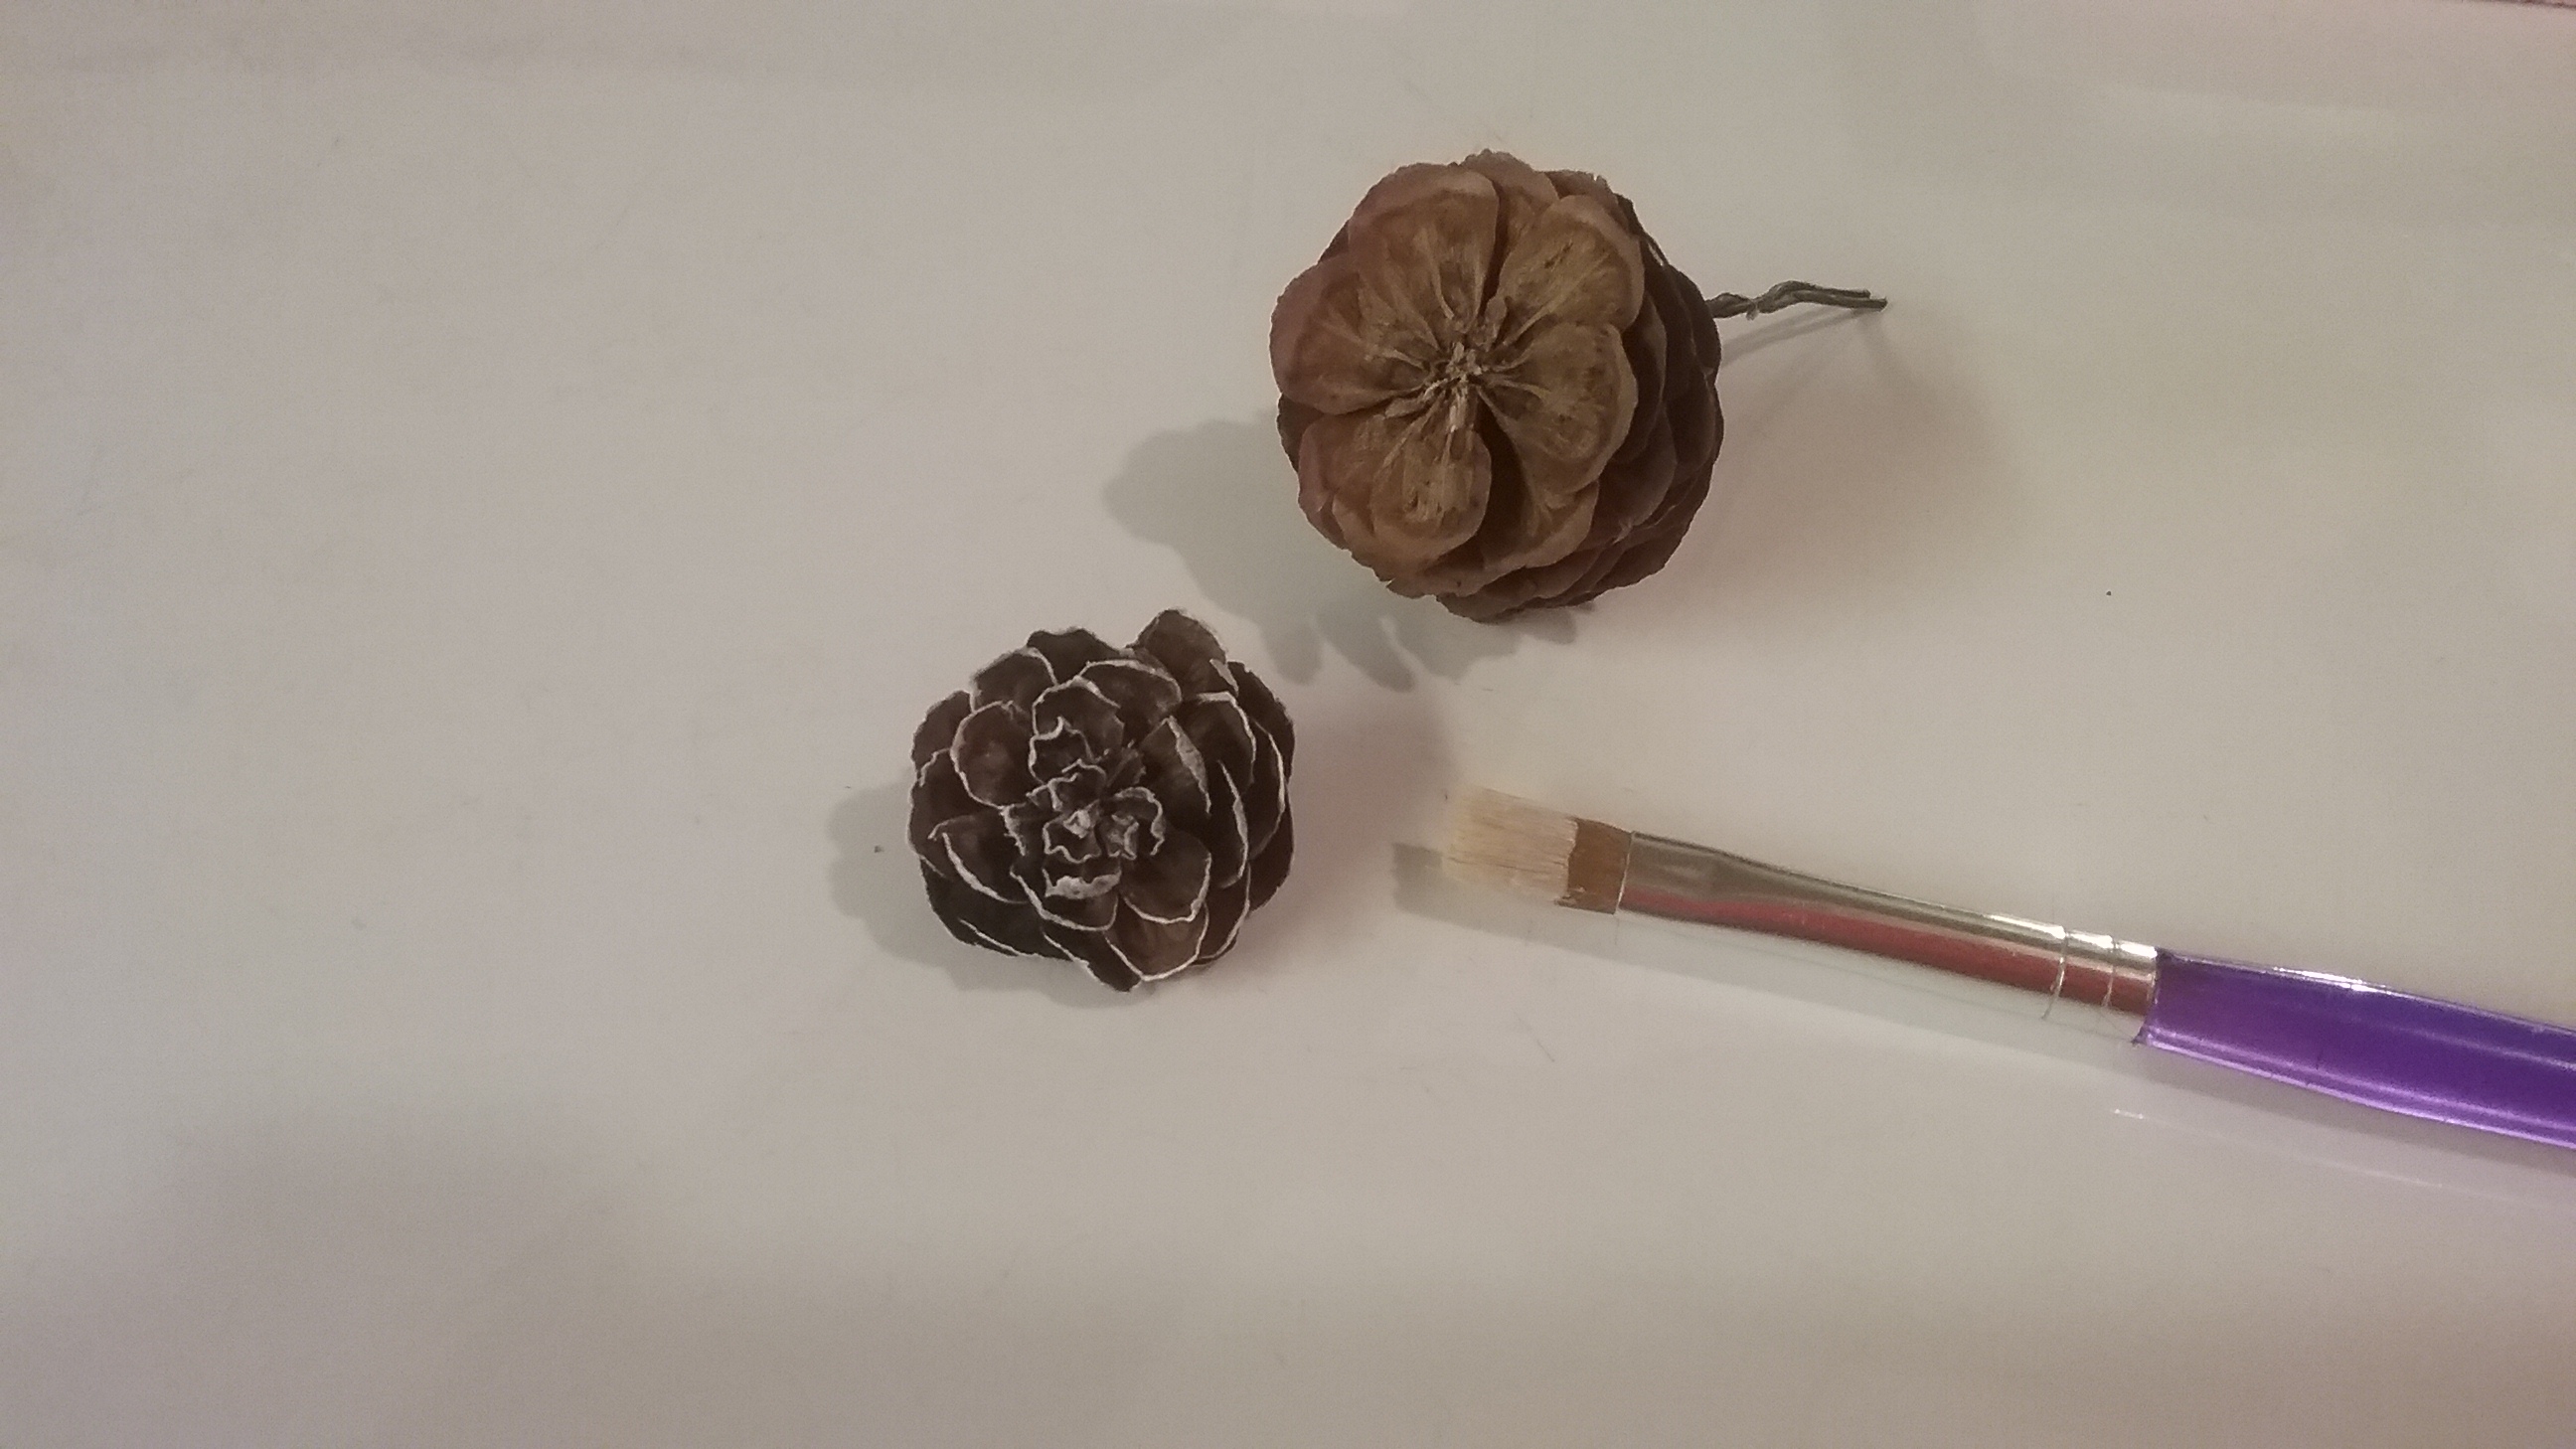
To keep it simple I only used 2 leaves. I trimmed back their wire stems, and wired them right to the wicker. A touch of hot glue holds the pine cone flower in place.

Yep, I think my daughter will be pleased with this, and I’m sure my two favorite little people are going to love the filling!
Happy Thanksgiving All!
I’m so excited! There’s a big 3 day happening in Central Iowa this week-end. If you like treasure huntin’ and junkin’, you won’t want to miss this one. Check out @Back Roads Junk-it Trail to print off a map of all the wonderful places to go, and join in the fun!!
My Thanks to @Gypsy’s Alley, in Nevada, Iowa, for graciously accepting me as a new consignee recently so I can participate in the event.
I have a few gourd projects to finish up, and some cool junk pieces to load up too, but, stained glass leaf sun catchers, garden stakes, and garden chandeliers have already been delivered. Its a good thing I was in a hurry when I stopped by to make a delivery the other day. The place was filled to the hilt with so many new things, and awesome displays, that I know I would have spent the whole morning there and surely brought home more than I took!
With re-purposed and painted Mason jars being so trendy these days, and with a little time to spare, I thought I’d make a little fun Fall decor to take too.
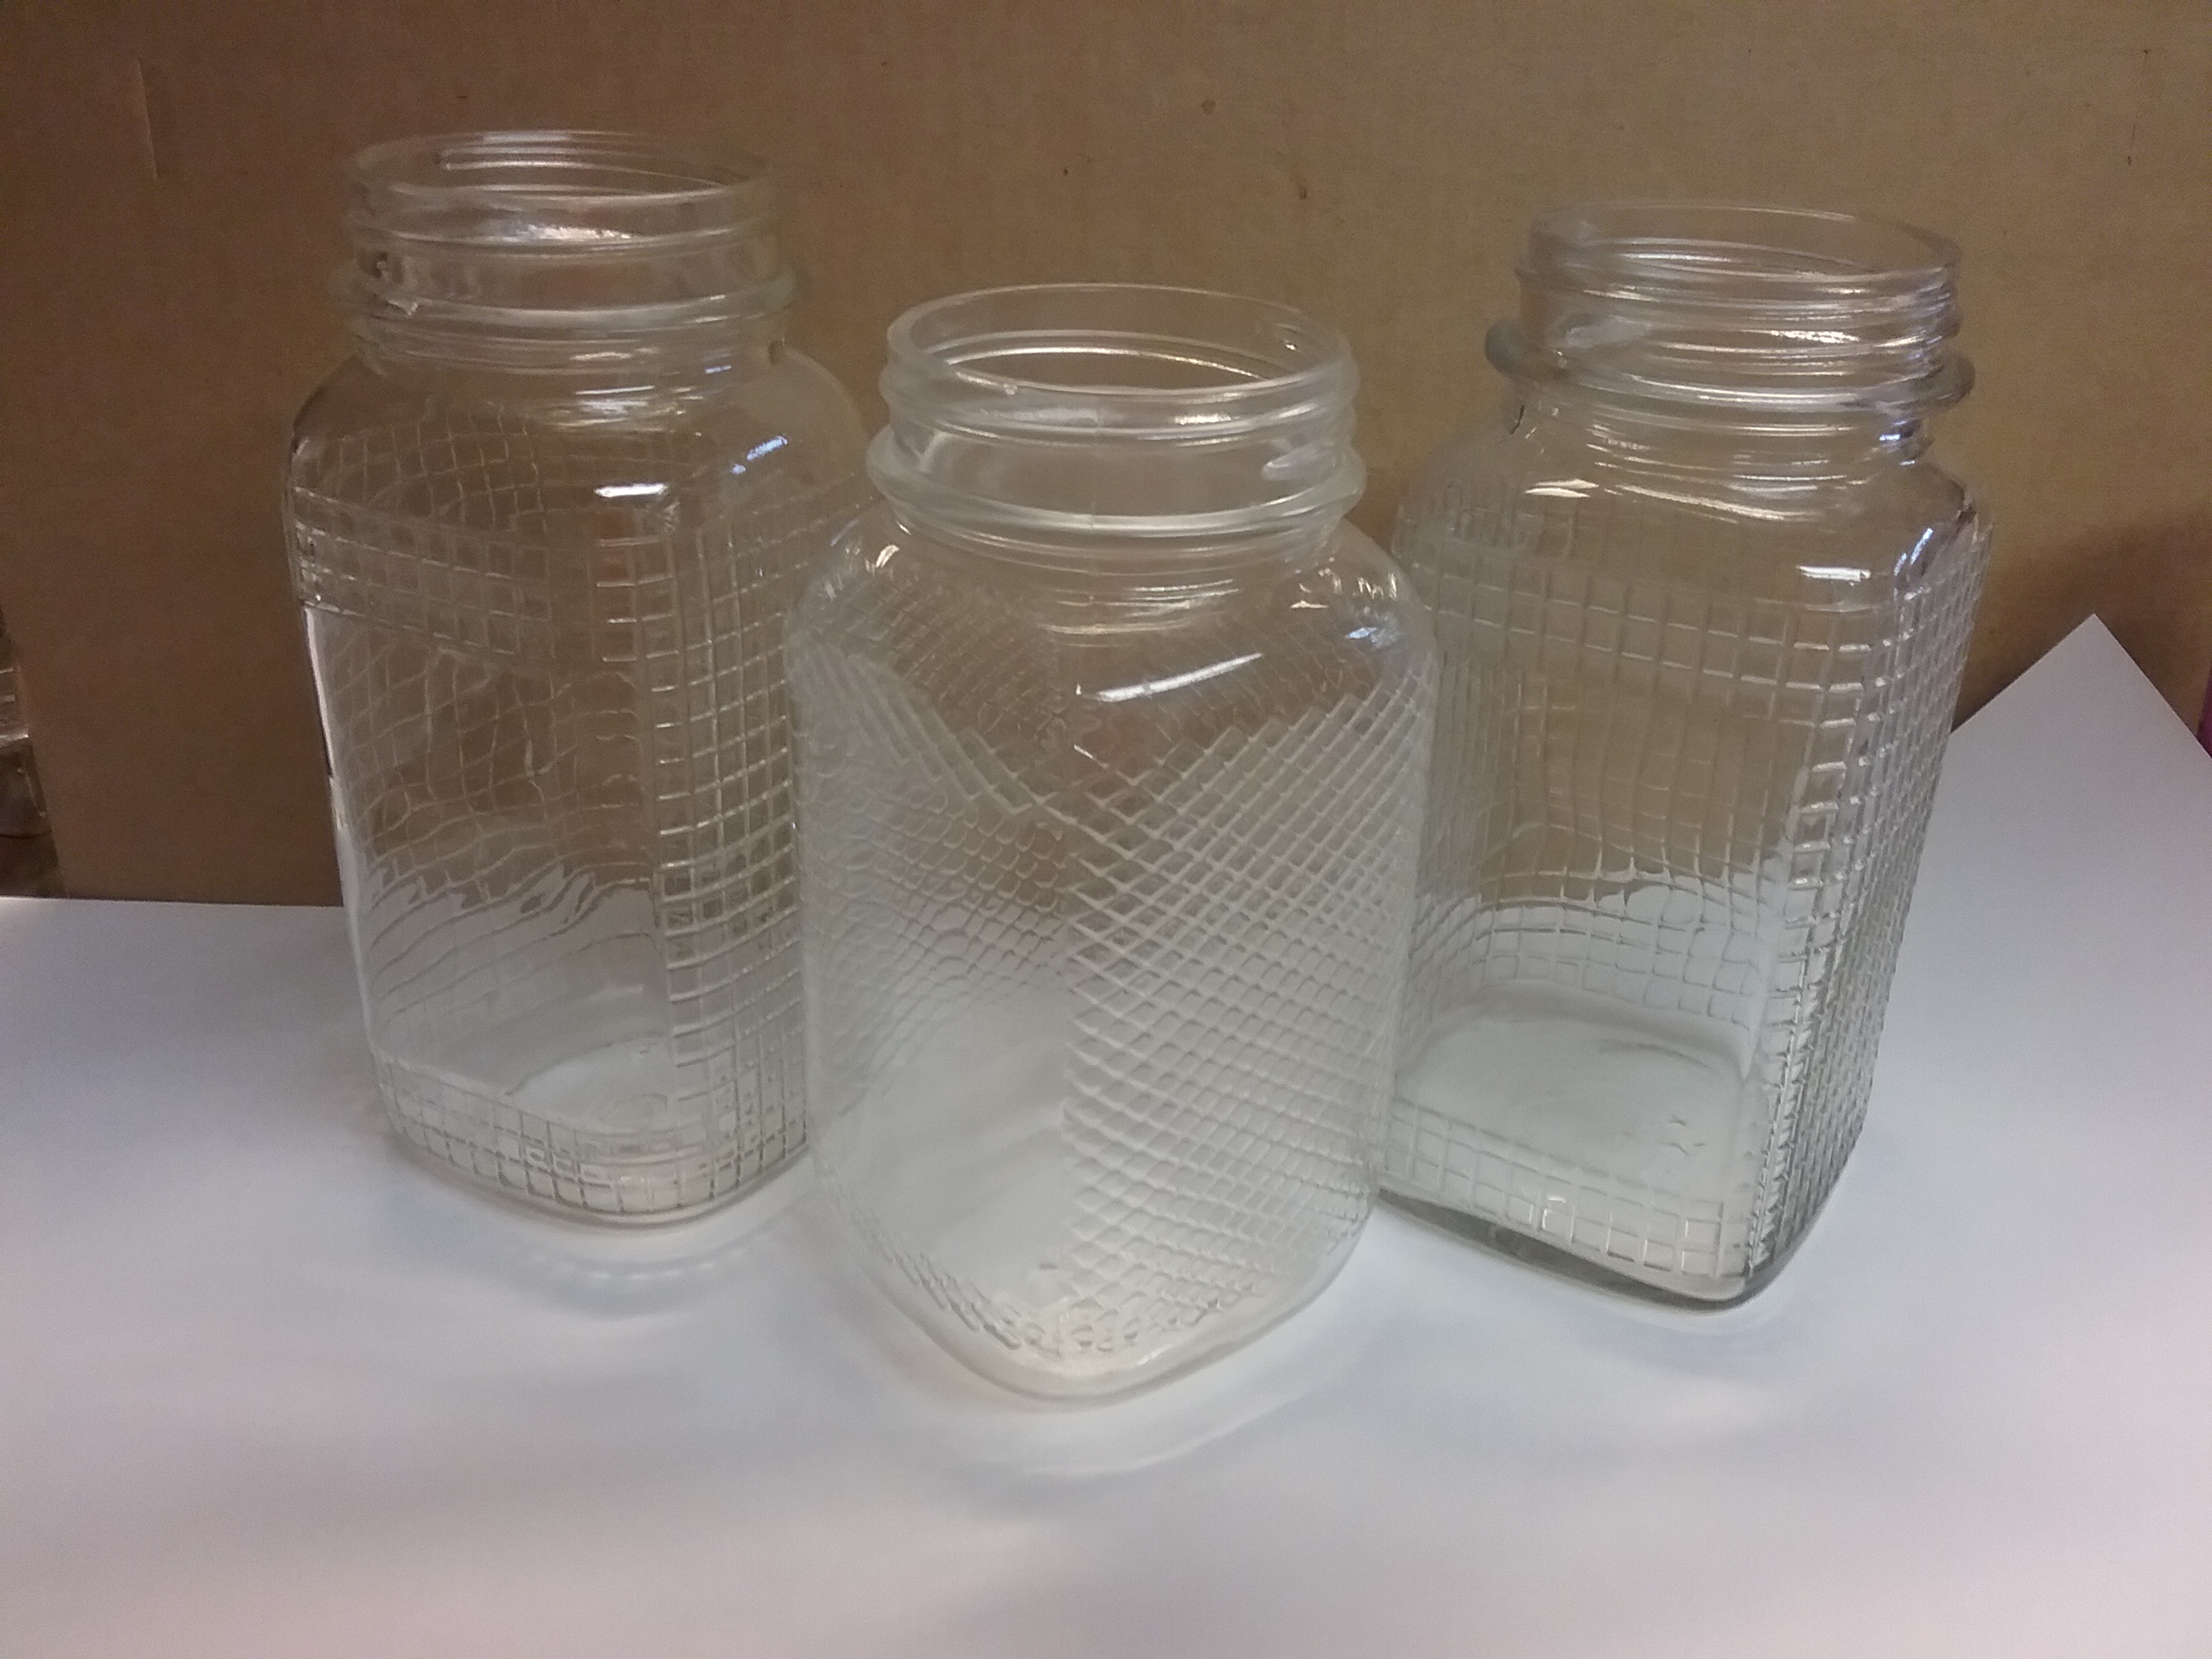
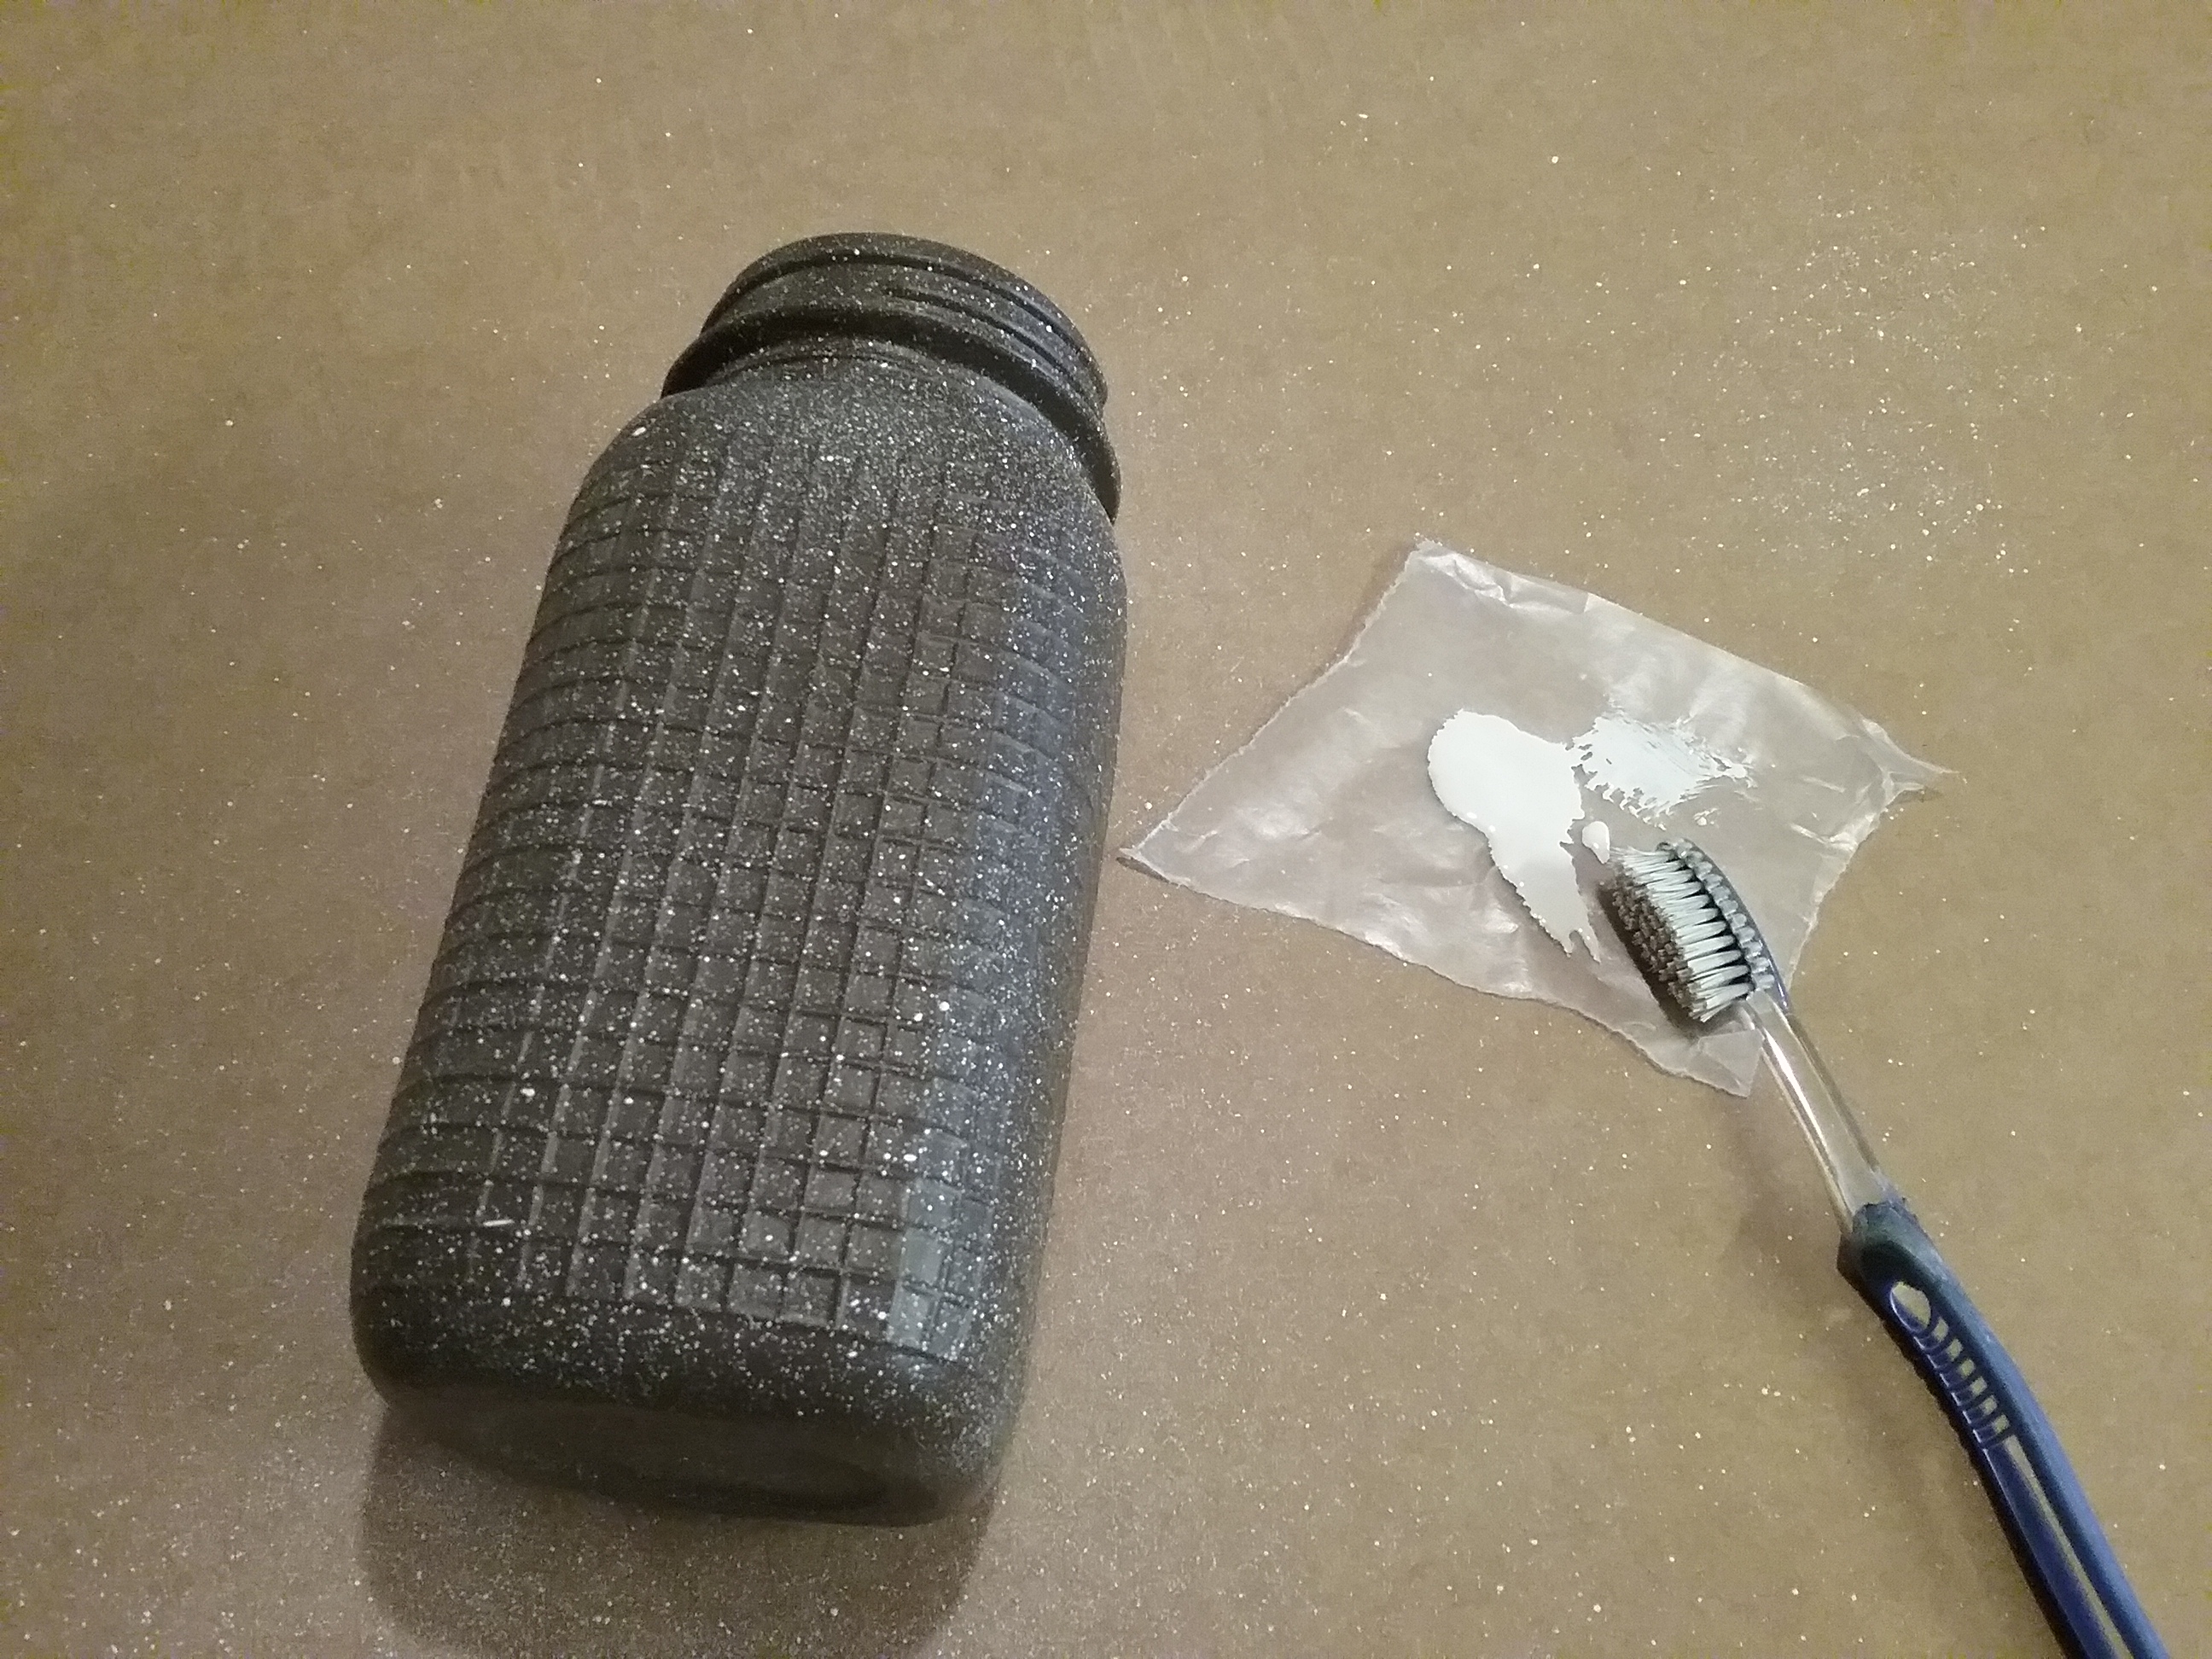
Last spring, I had saved some jars because they were embossed with a small checkered design on three sides, and had a smooth front, which I’m assuming was probably for a label. I wasn’t sure what I was going to do with them, but I liked the texture, and remember thinking the front might offer a nice surface for a tiny mosaic.
After rethinking it a bit, I still liked the idea of a design on the front, but scratched the idea of a mosaic with grout, and choose to go with a fused glass tile instead.
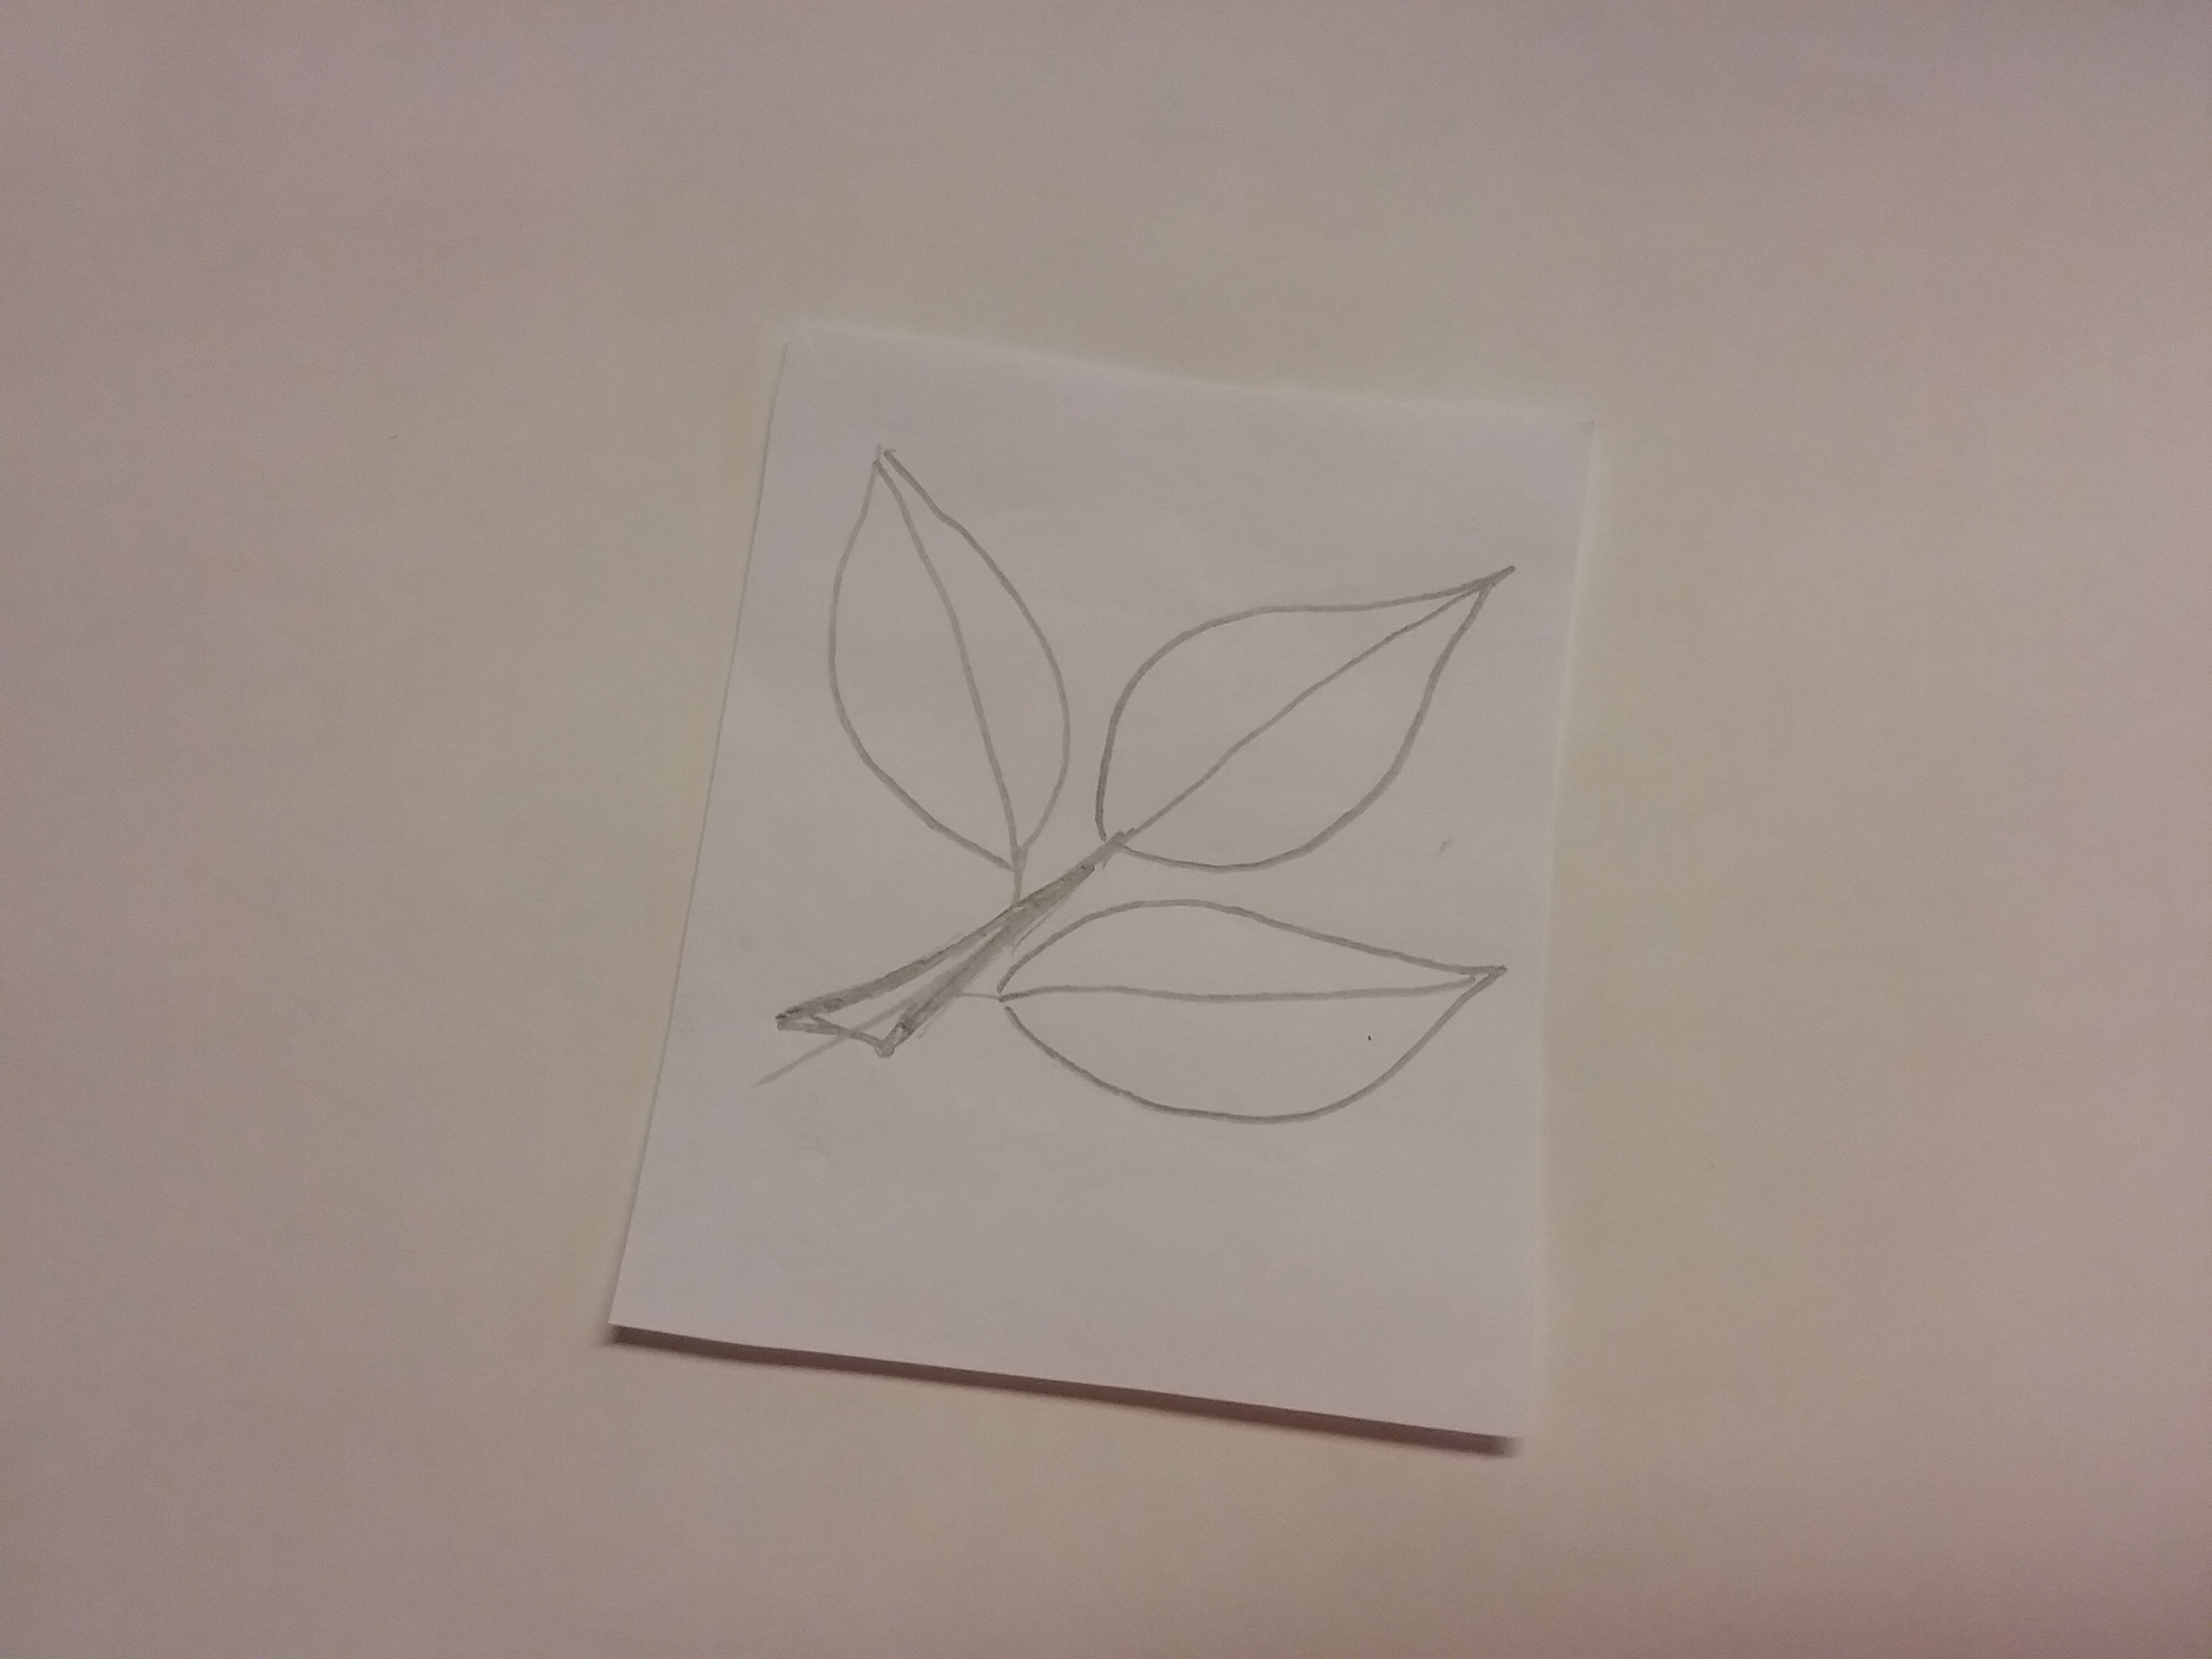
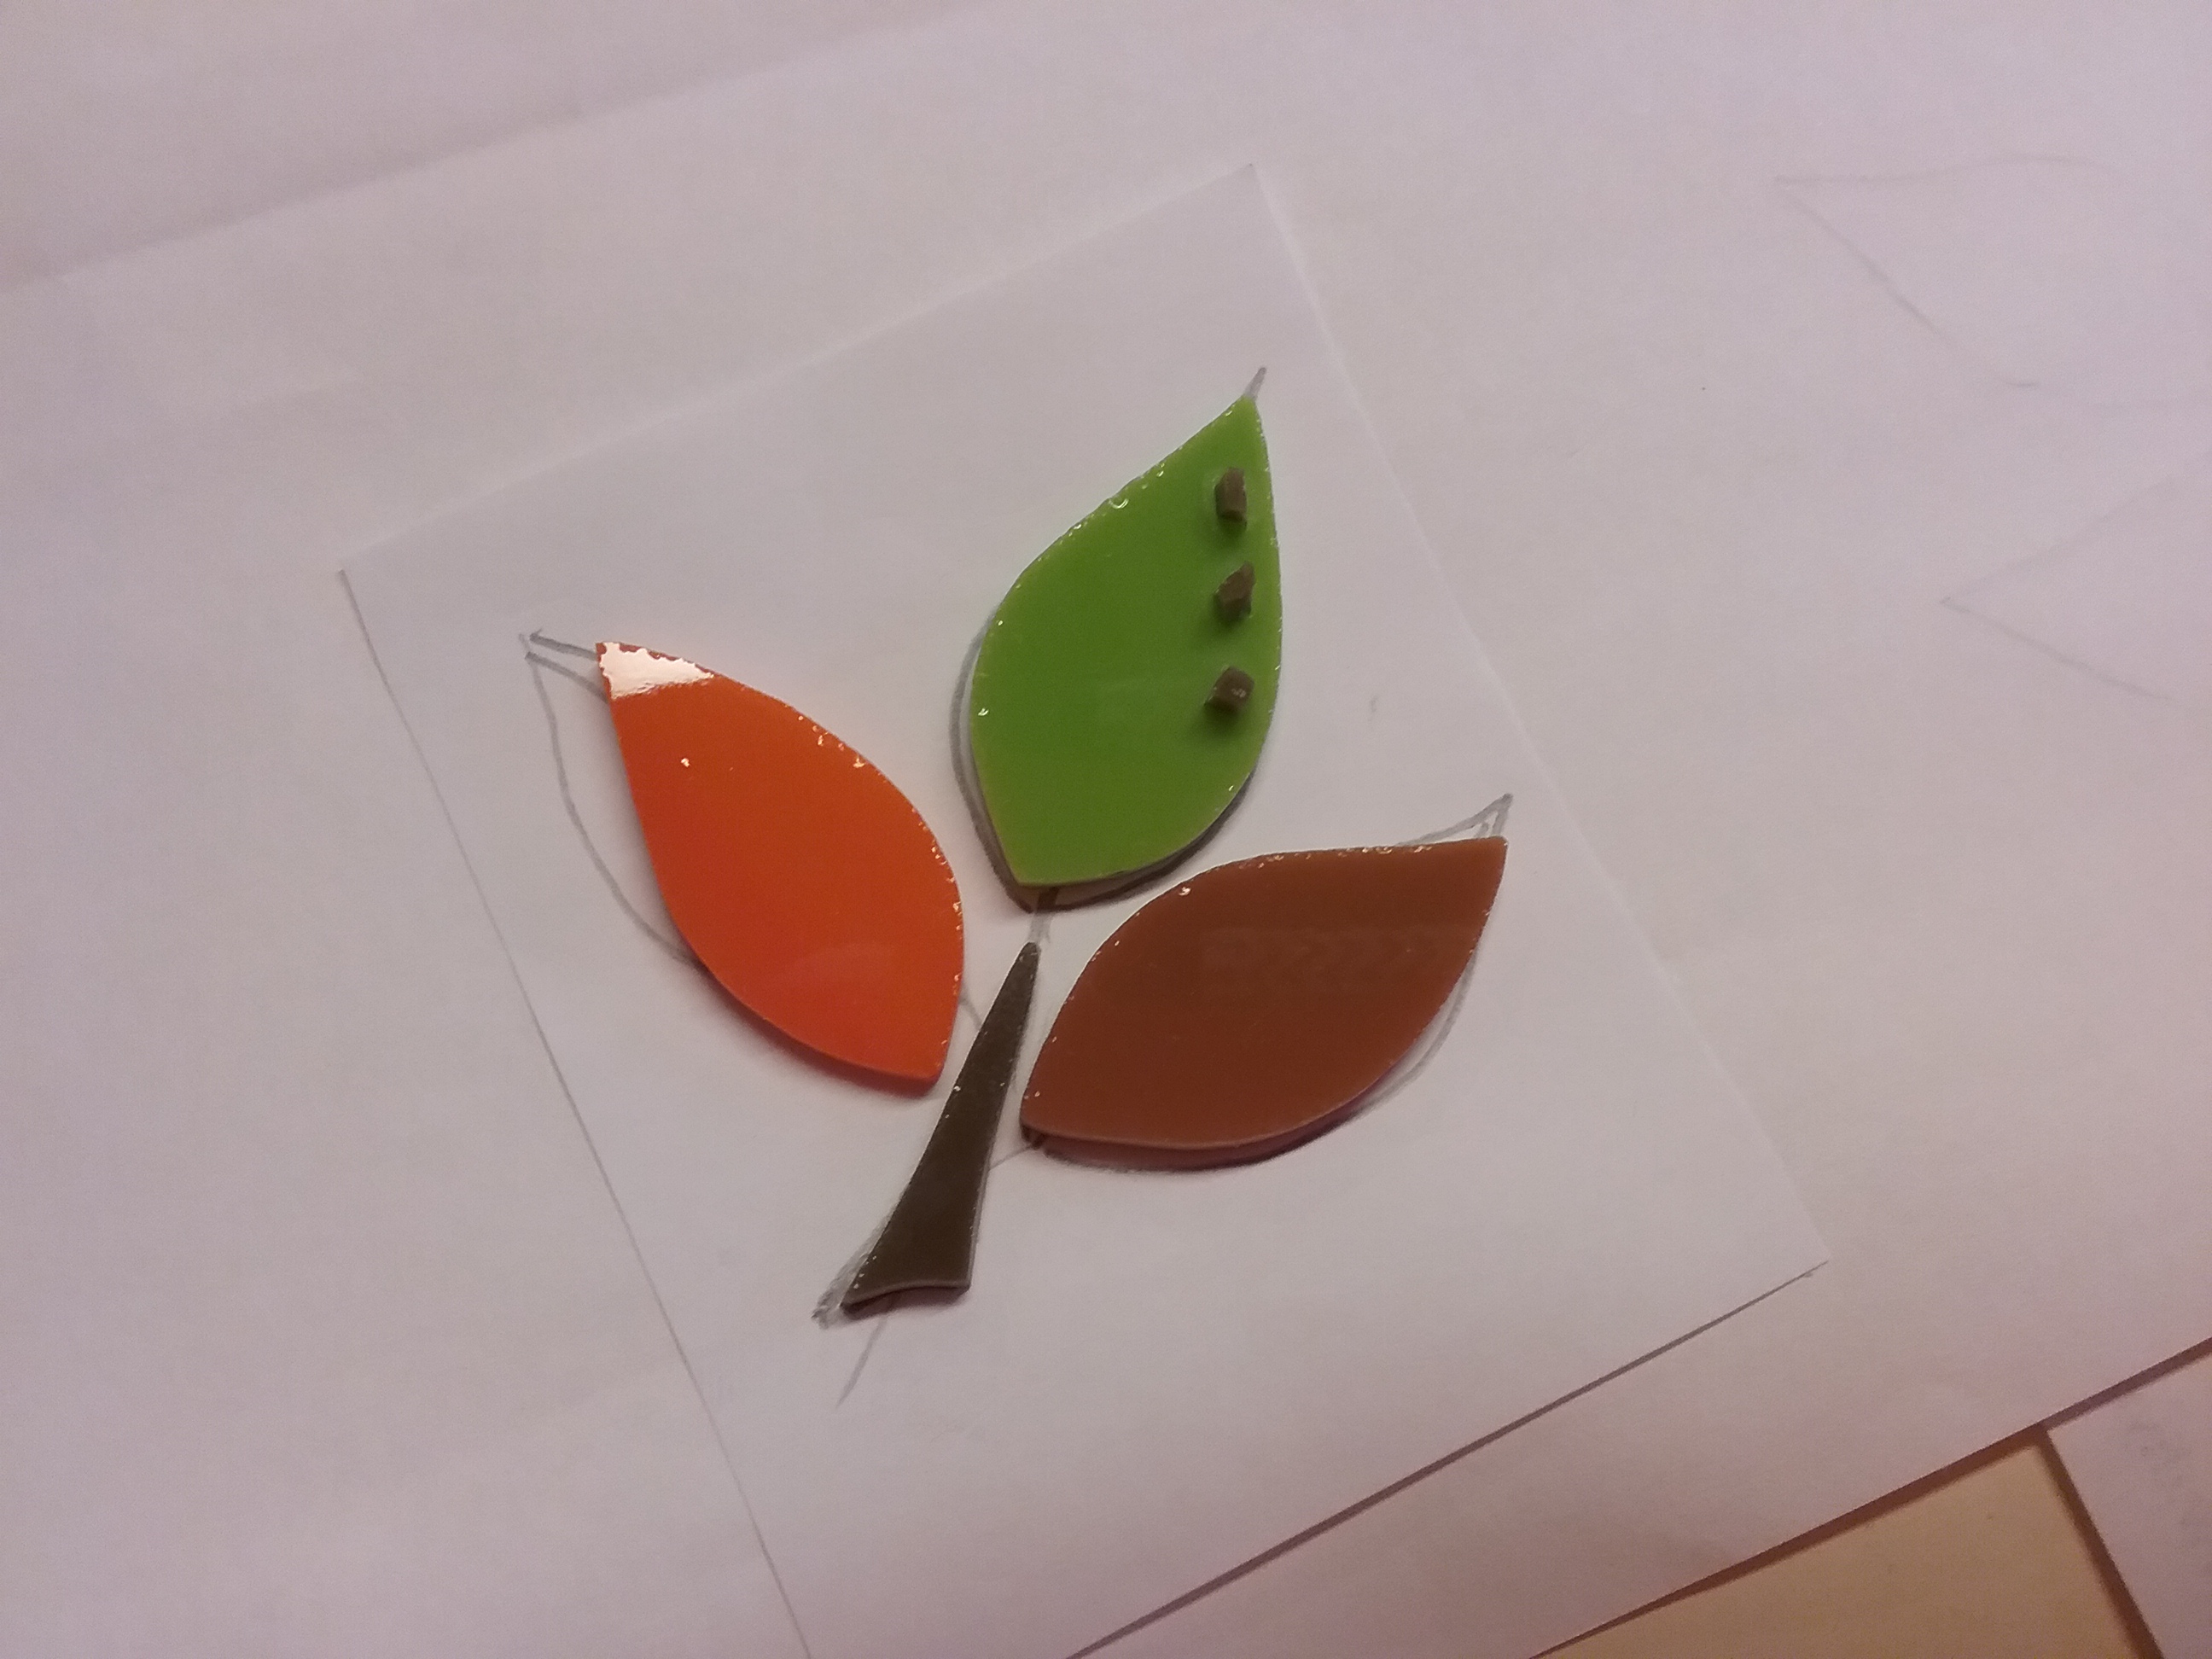
I measured the smooth surface on the front to determine the size of the clear glass tiles I wanted, then drew a simple leaf pattern to fit on top of the tile piece. My drawing skills are not what they used to be, so this was definitely the most difficult part of the project for me. You could also find a pattern to trace if you like.
I picked out some fall colors of glass, and cut and ground them to fit my pattern. I had three jars, so I changed the leaf colors around so they were not all the same. All of the pieces were cleaned, then fired in a tabletop kiln, up to 1700 – 1750 degrees, just until the edges were rounded. My glass was all 96COE, but it doesn’t have to be. The only pieces that need to be COE compatible would be the middle leaf and small brown dots, nothing else is fused together.


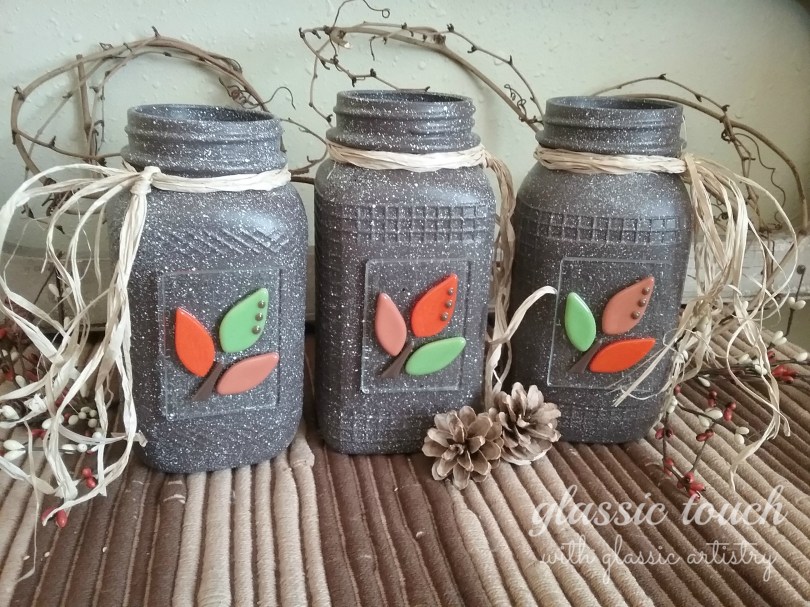
Wanting my jars to be dark brown, I waited until I could take a piece of fired brown glass to town to match it. A brown spray paint would work too, but I opted to have a small sample sized can mixed for about $3.00.
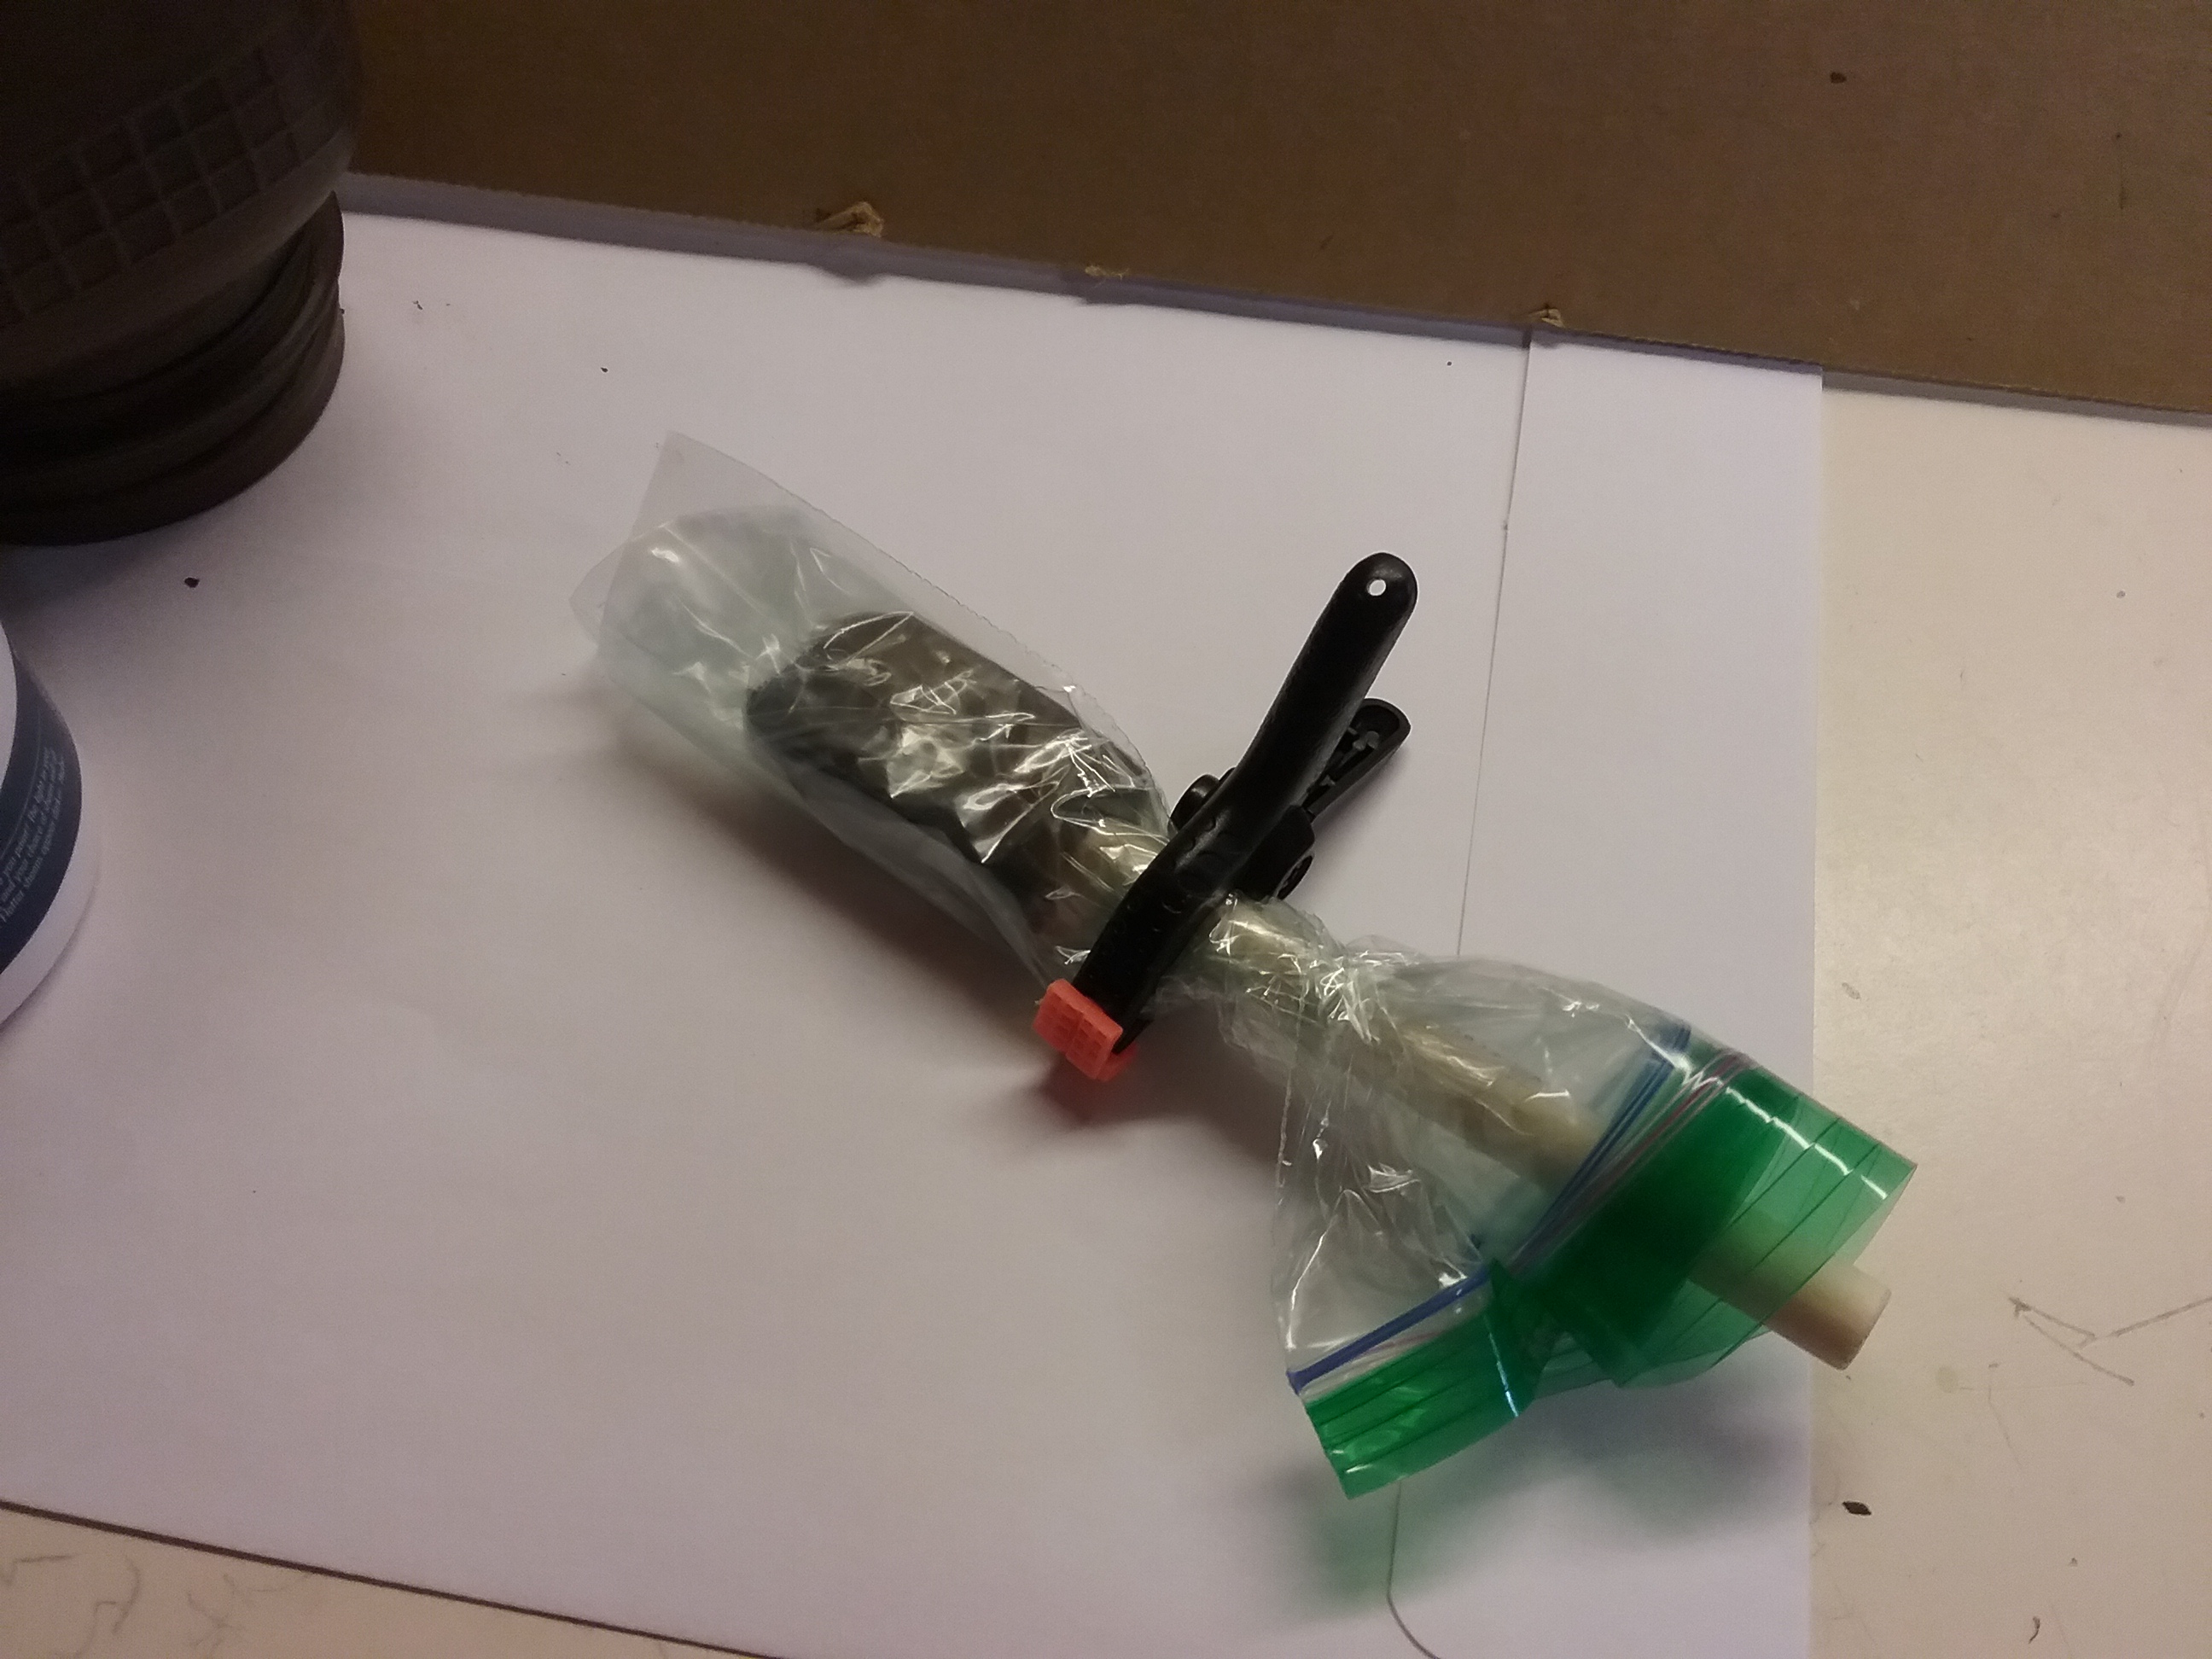
Each jar was washed and given a quick wipe of alcohol, then painted with a foam brush. I did 4 coats for nice coverage. In between coats, I wrapped the end of the brush in a baggie and clipped it closed, so I only had to use one brush. After the jars were completely dry, they were speckled white. Once the speckling was dry, they were sprayed with clear matte sealer. Even though the paint is sealed, they may still scratch easily, so handle gently.


A fired leaf arrangement was traced inside the traced shape of a clear glass tile. Remove the leaves and replace the clear tile in it’s place over the leaf tracing. Following the traced pattern, glue leaf pieces in place with E6000. Let dry completely.


Lay a dry tile on the front of the jar to determine where your leaves will be located before gluing. For the best adhesion, scratch off a very small amount of paint in the areas that the leaves will cover. Put a small dab of E6000 on the scratched areas, lay the tile in place, and press down very lightly, obscuring the glue. Be careful not to use too much glue or it will seep out beyond the leaf and be seen through the glass. Let dry overnight.


Knot a length of raffia around the neck of the jar. Fill with fall flowers, a pretty napkin and tableware for an informal fall gathering, anything you like!
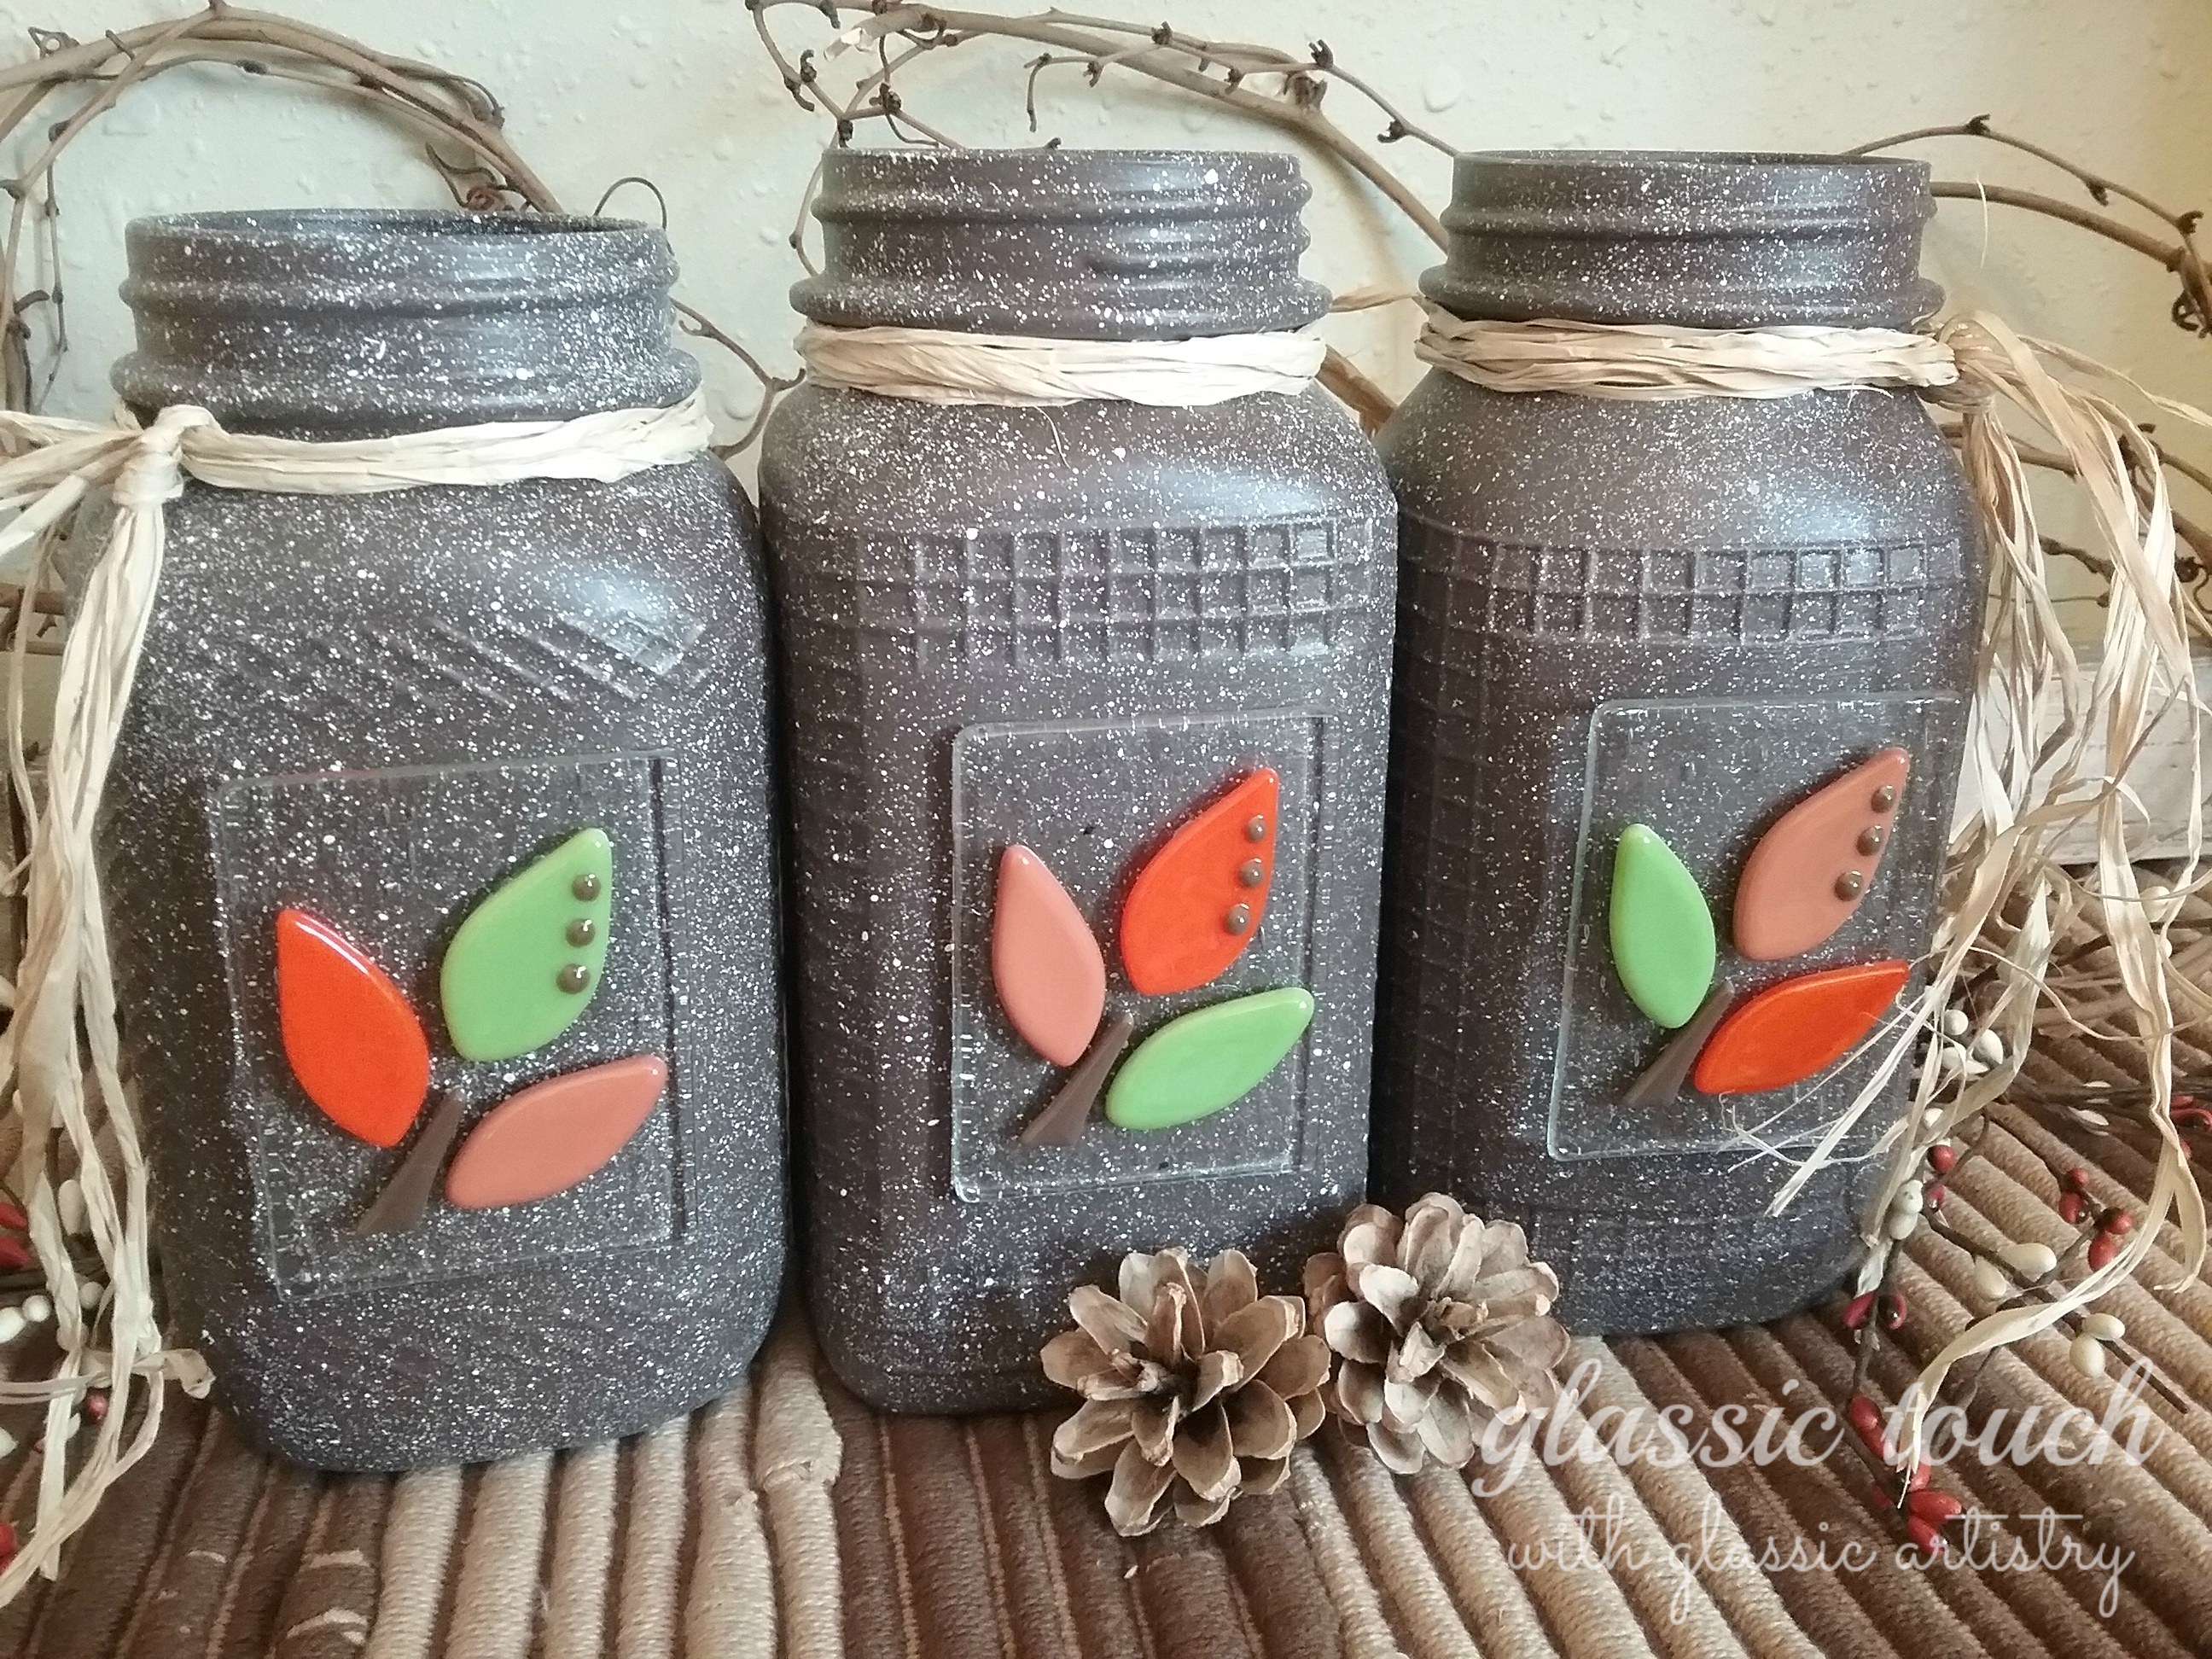
Gosh, I really like these colors … one of these may have to stay here … Happy Fall!


