Salt Shaker Decorative Plant Stake

Okay, I couldn’t help myself, just one more. I don’t want to run a good thing into the ground, but this one is just so quick and easy I had to do it! I promise to move on after this …. really!

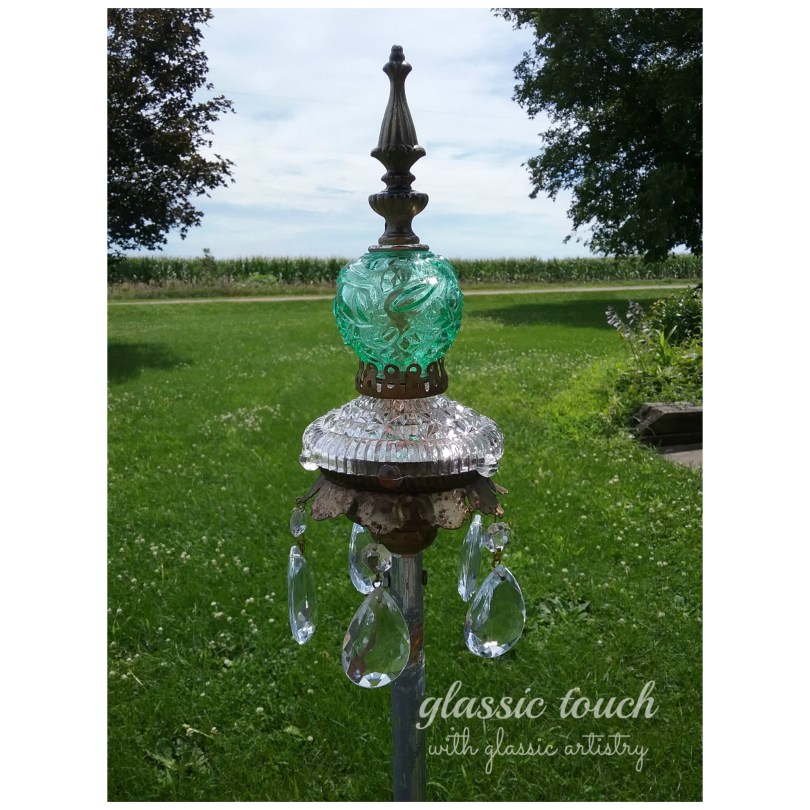
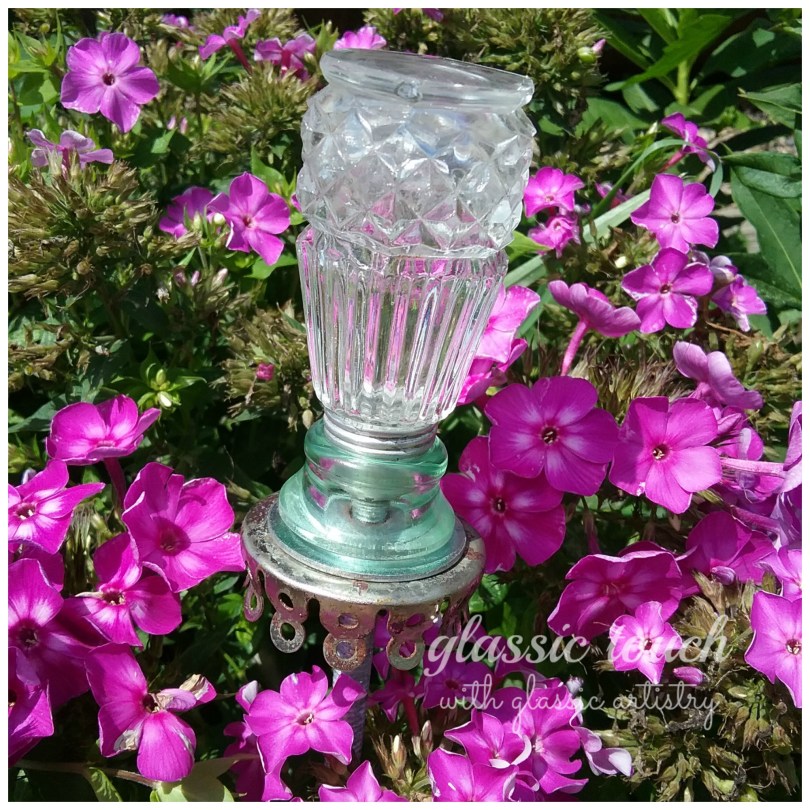
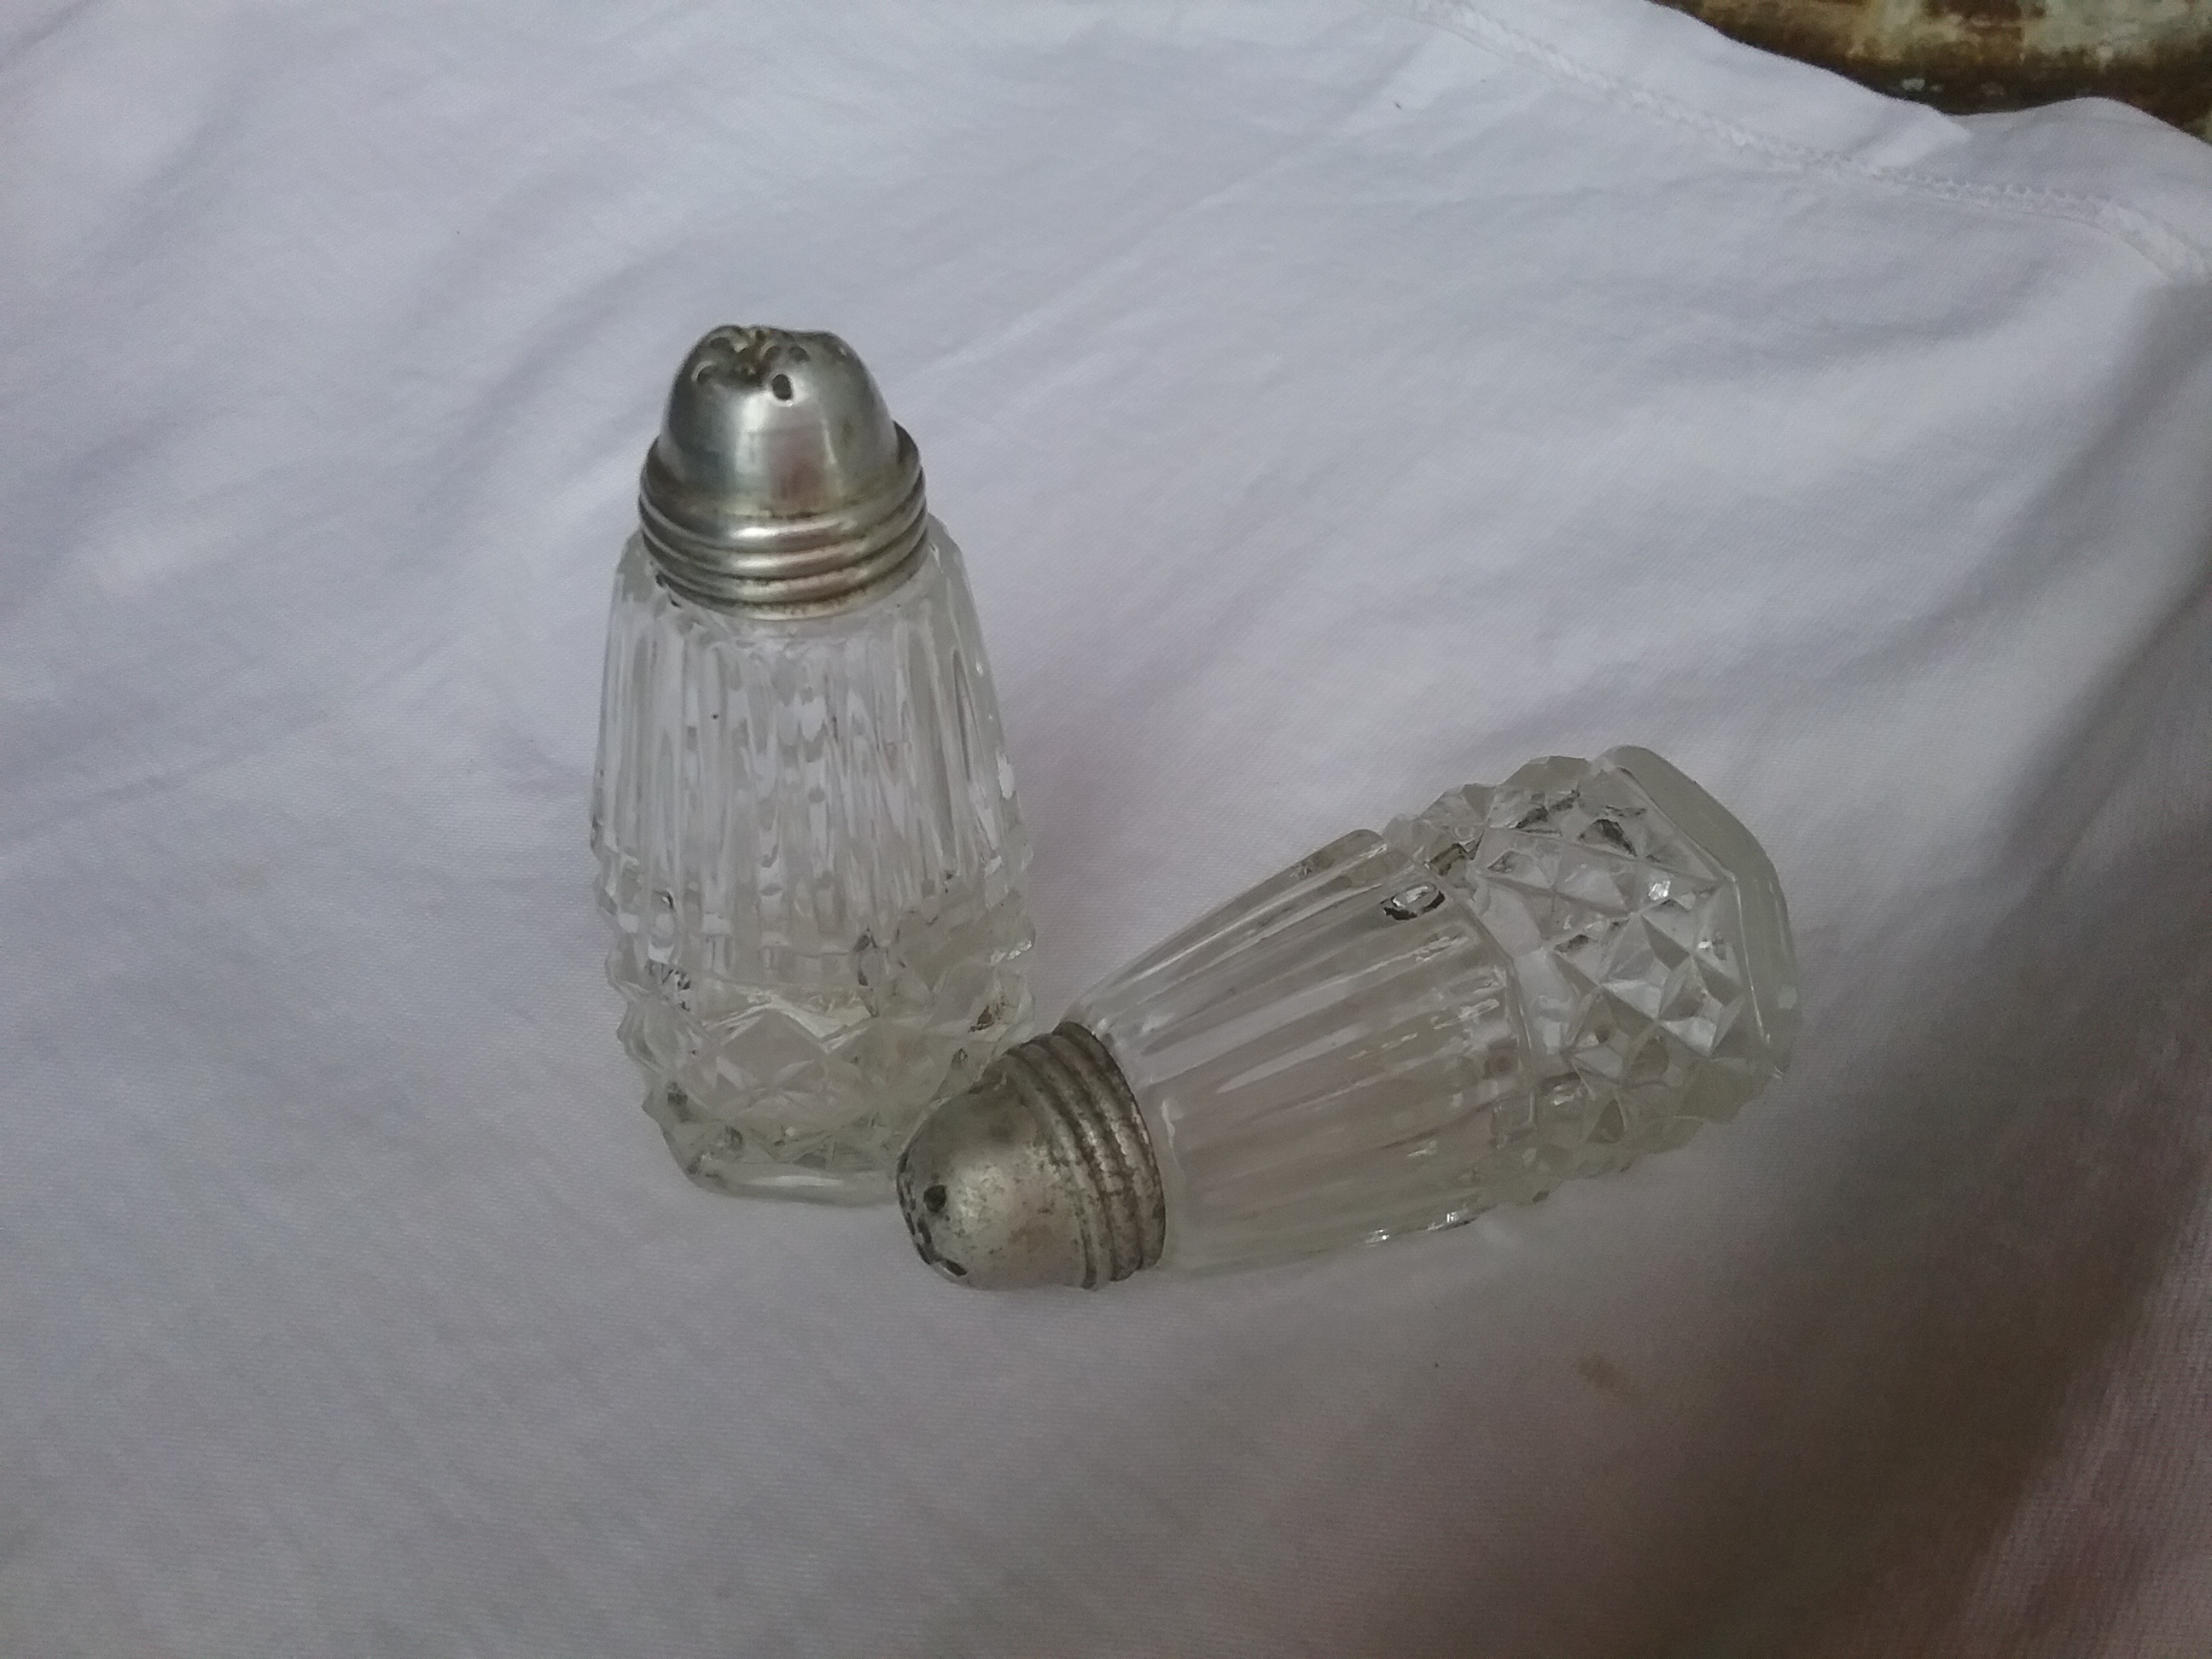
As I was cleaning up some of my latest messes, I came across this small pair of shakers. I picked them up at a garage sale somewhere along the way, thinking at the time that they would be cute on a small plant stake. So, since I had them in my hand, well, you know …..

20160719_160344

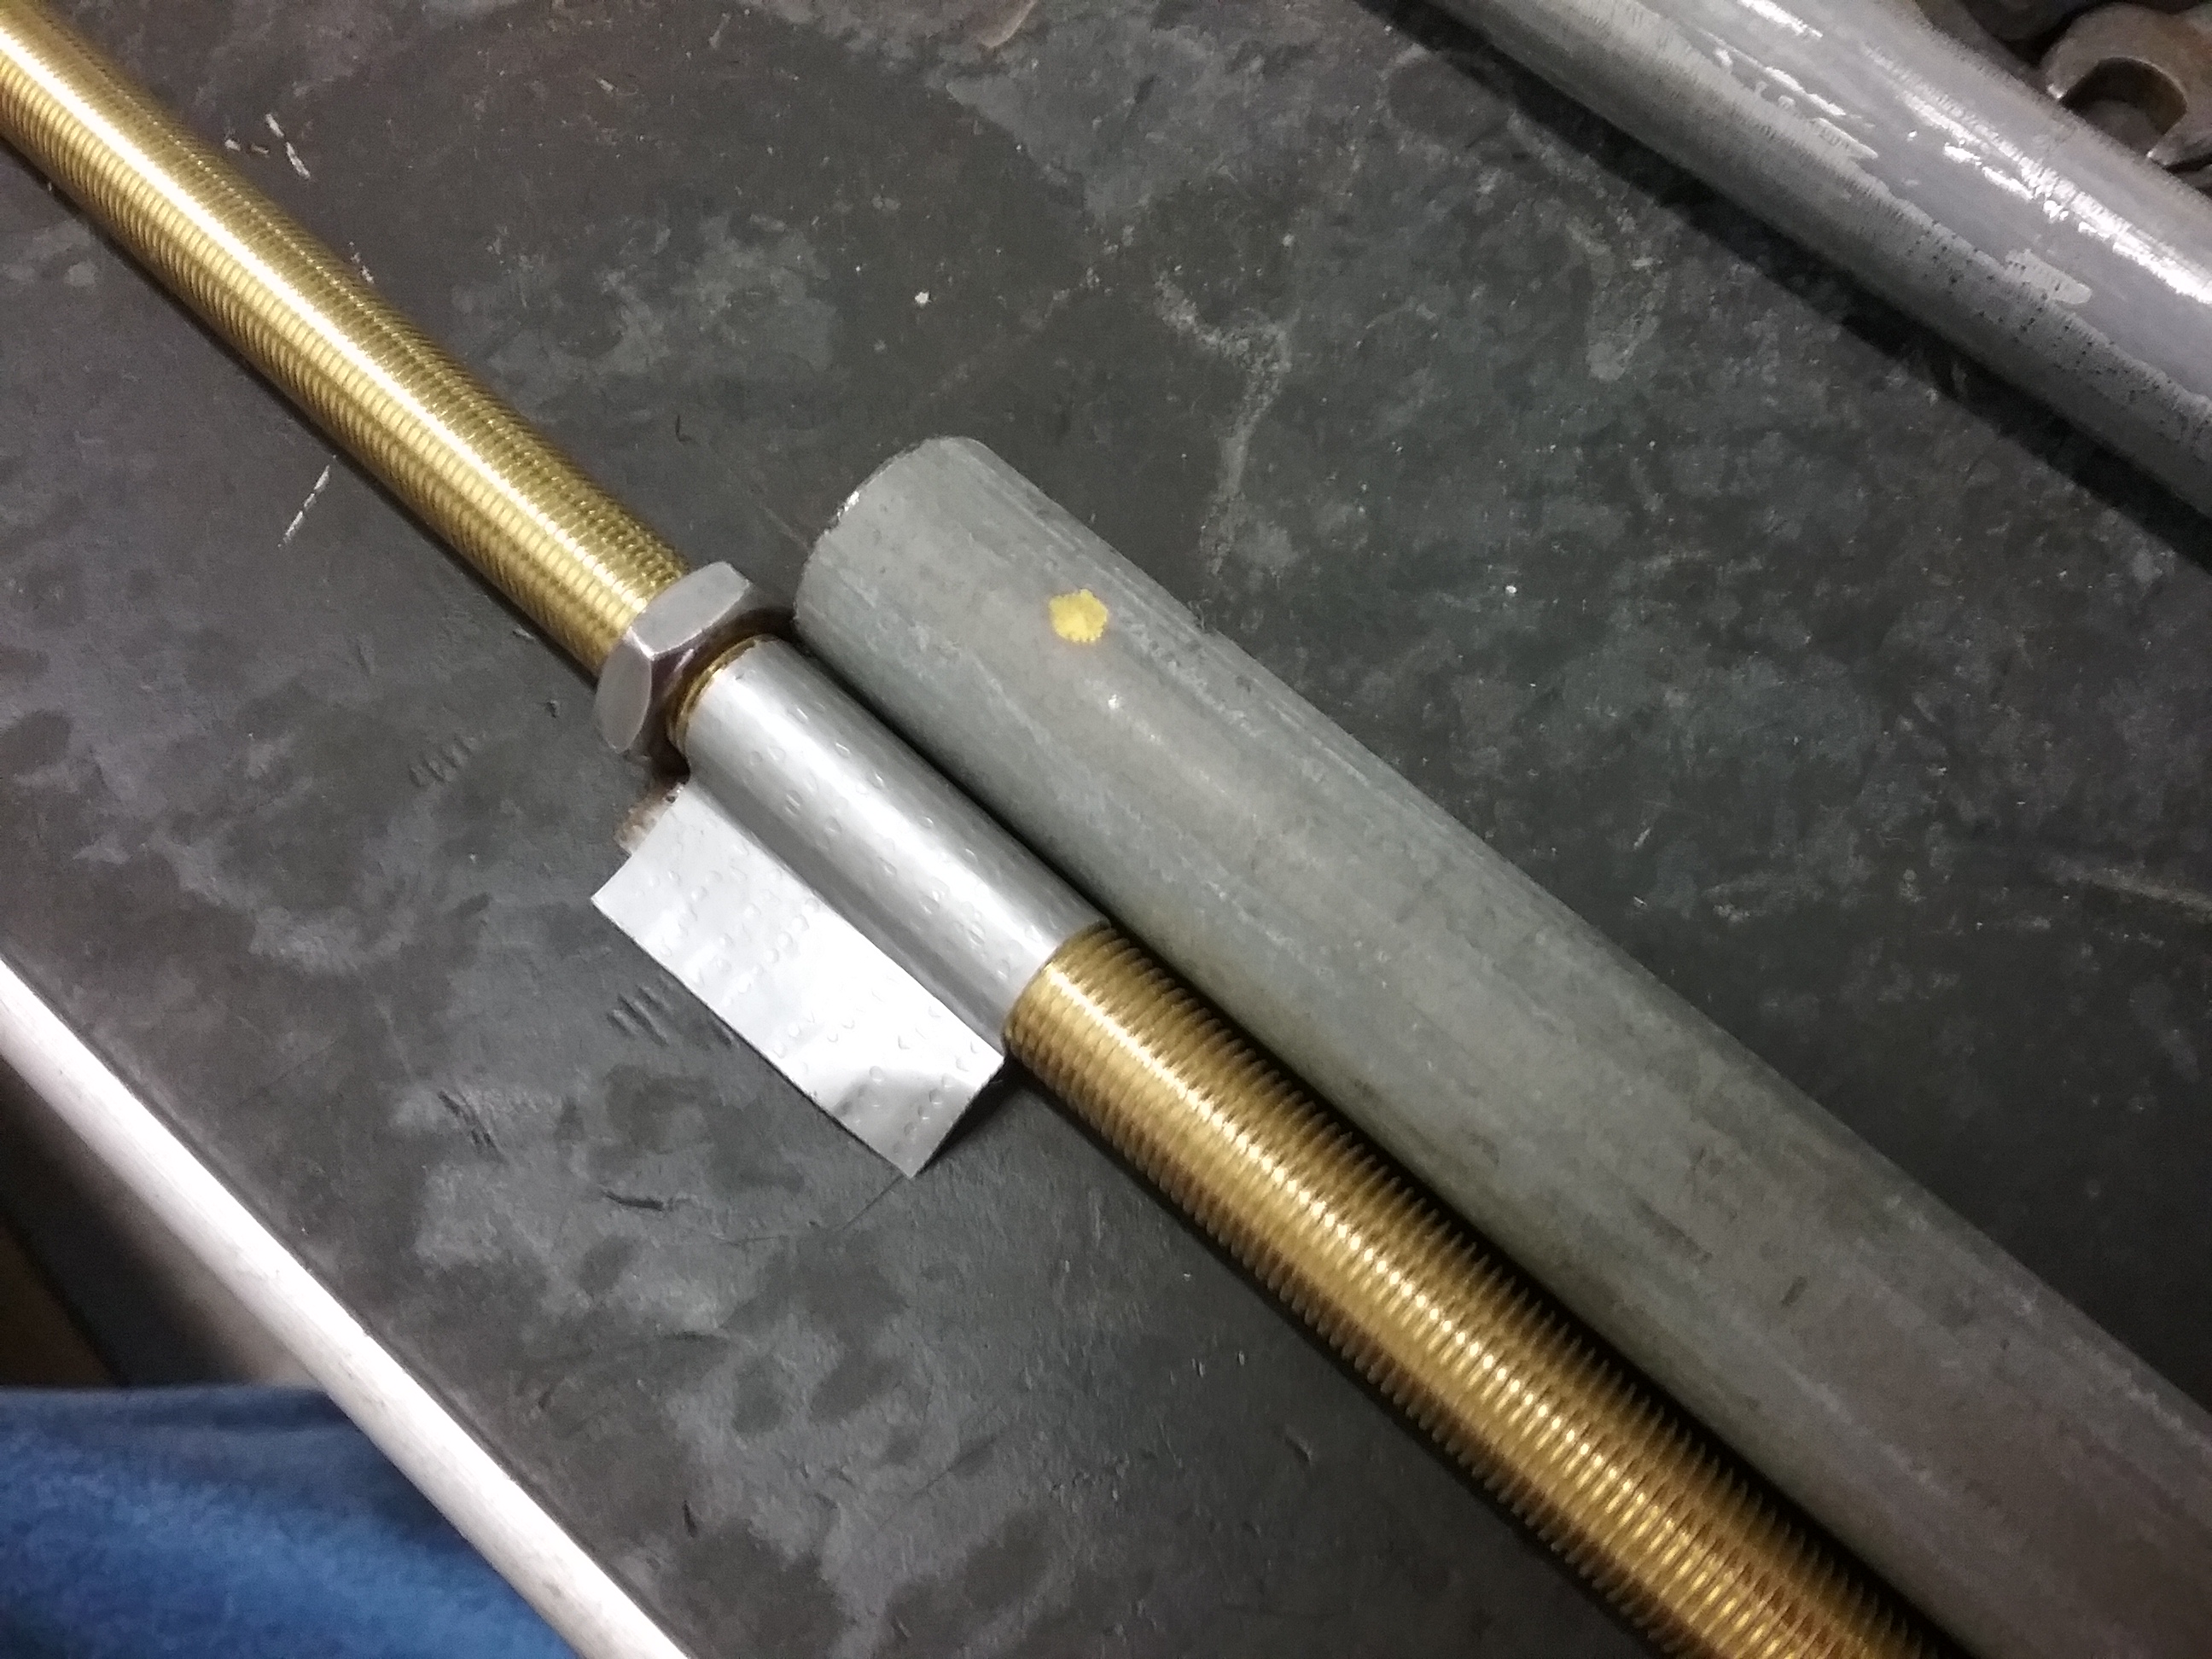
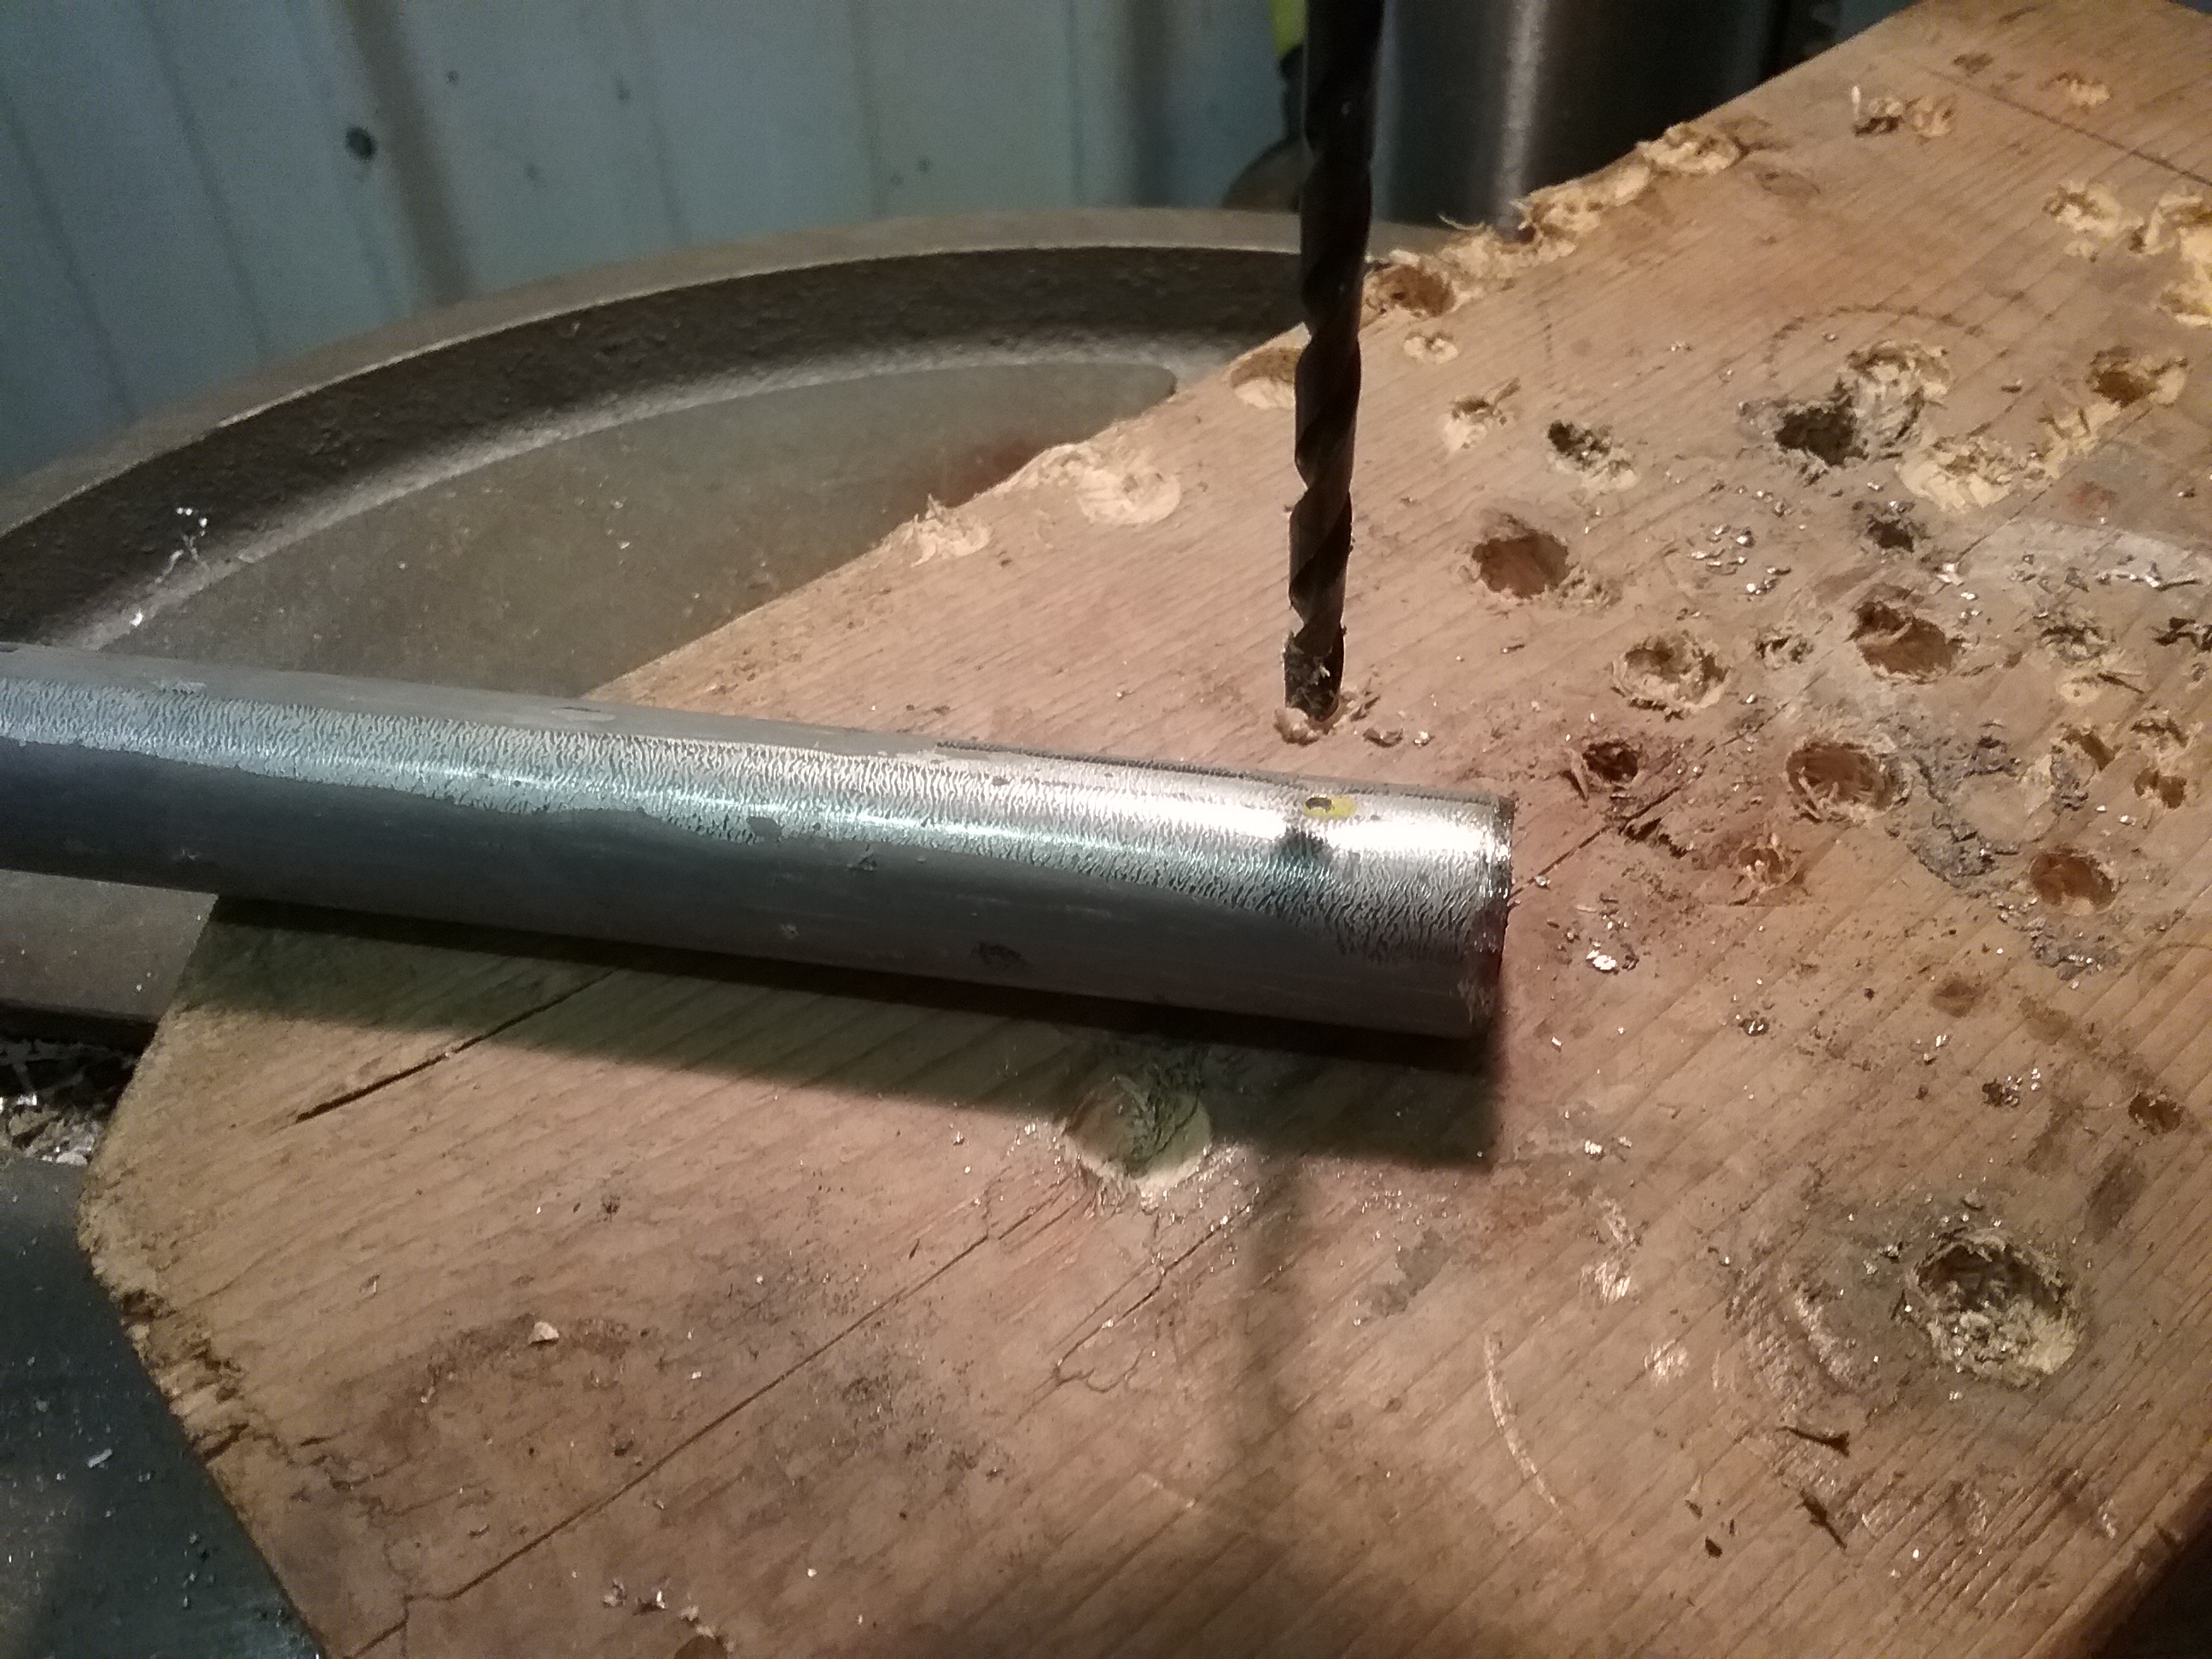
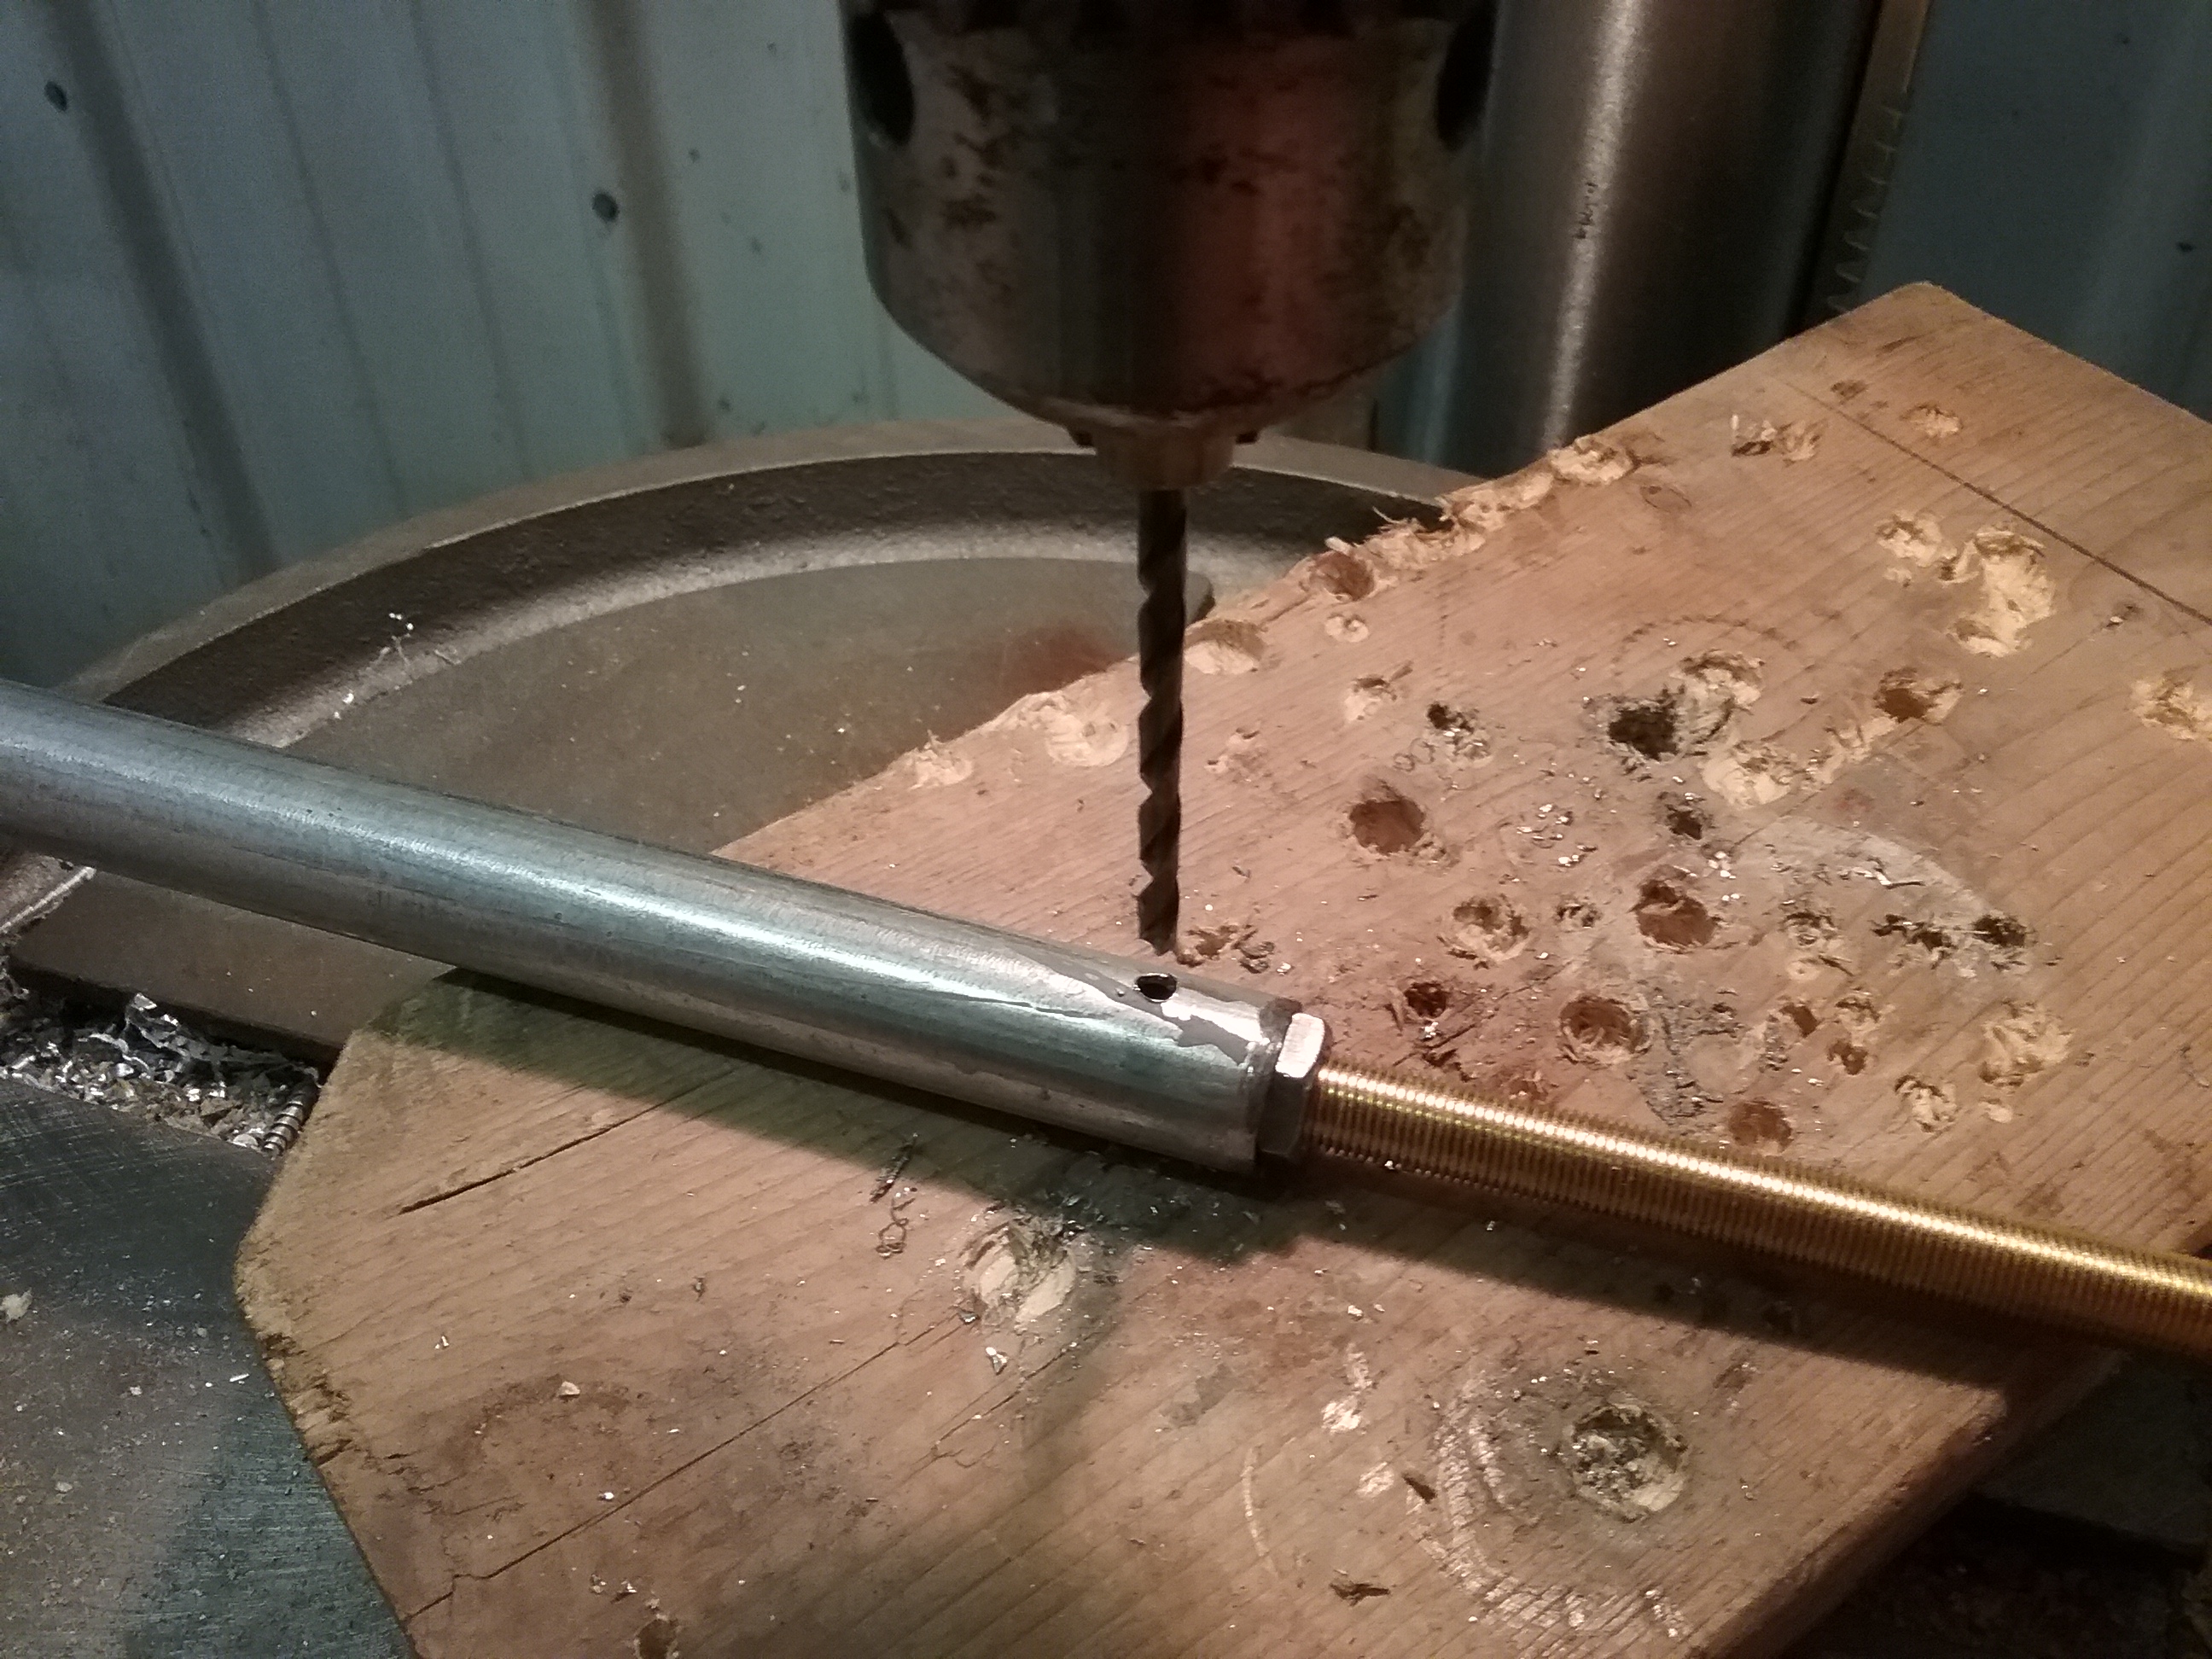
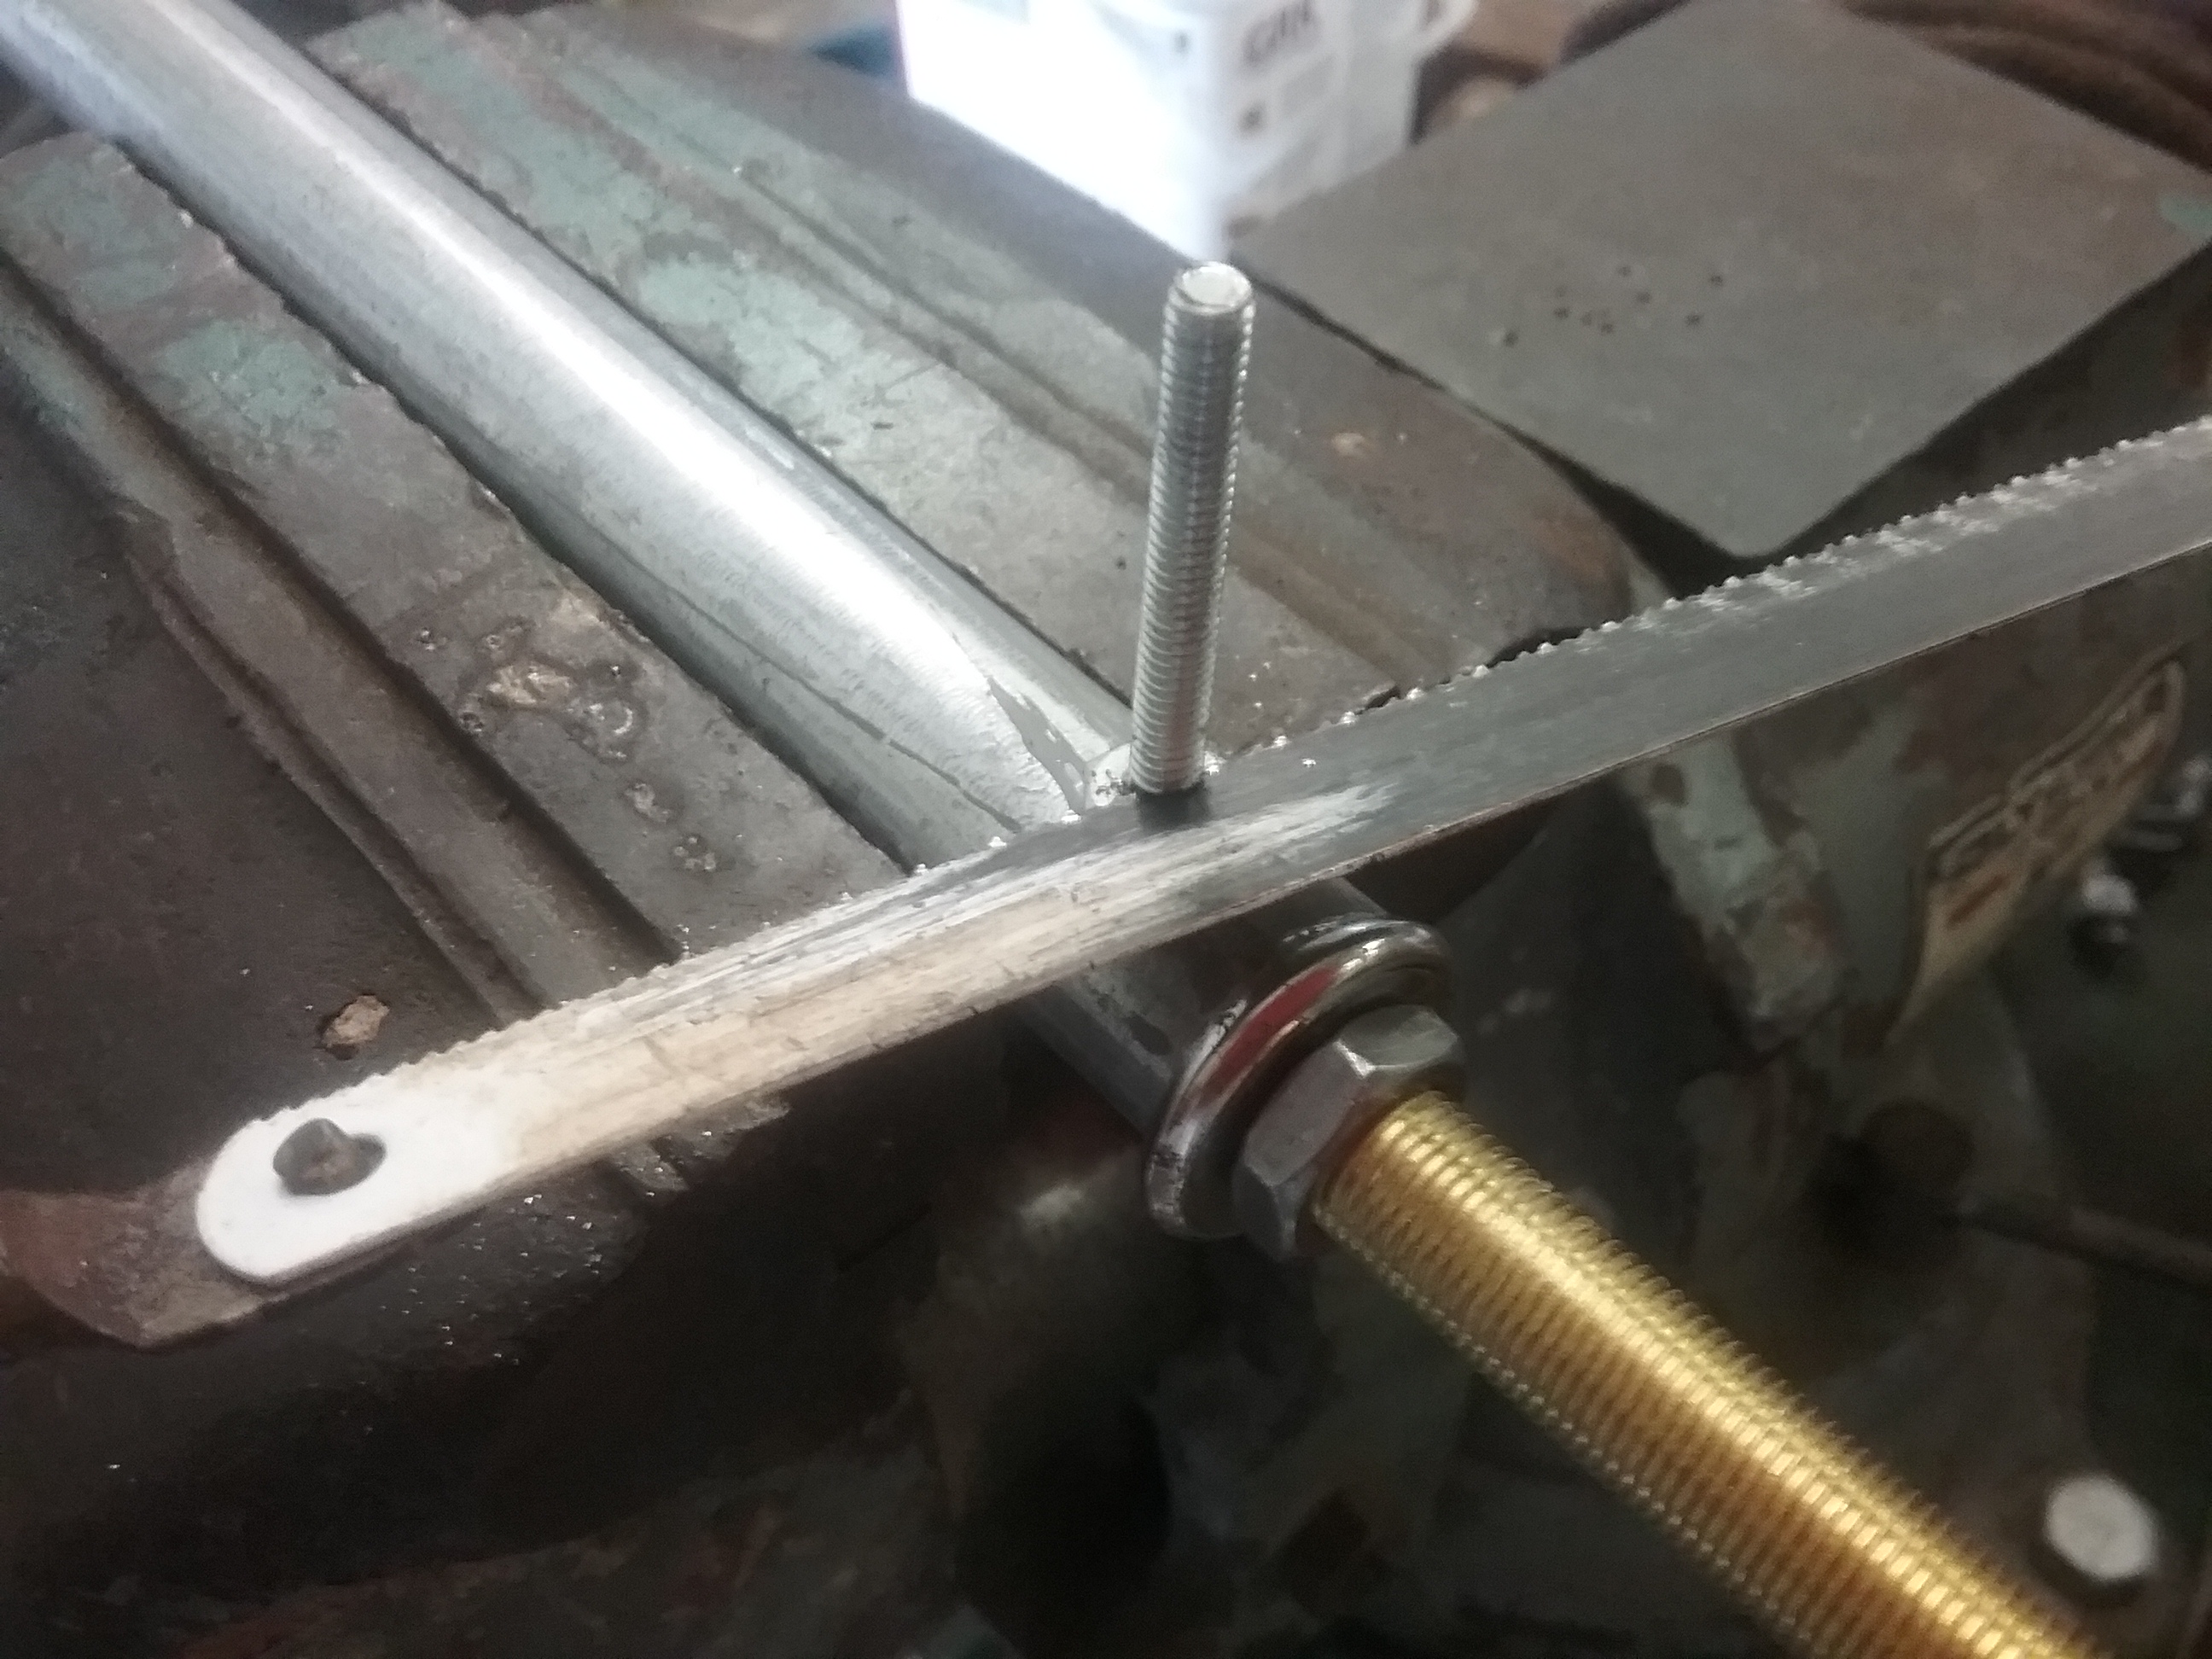
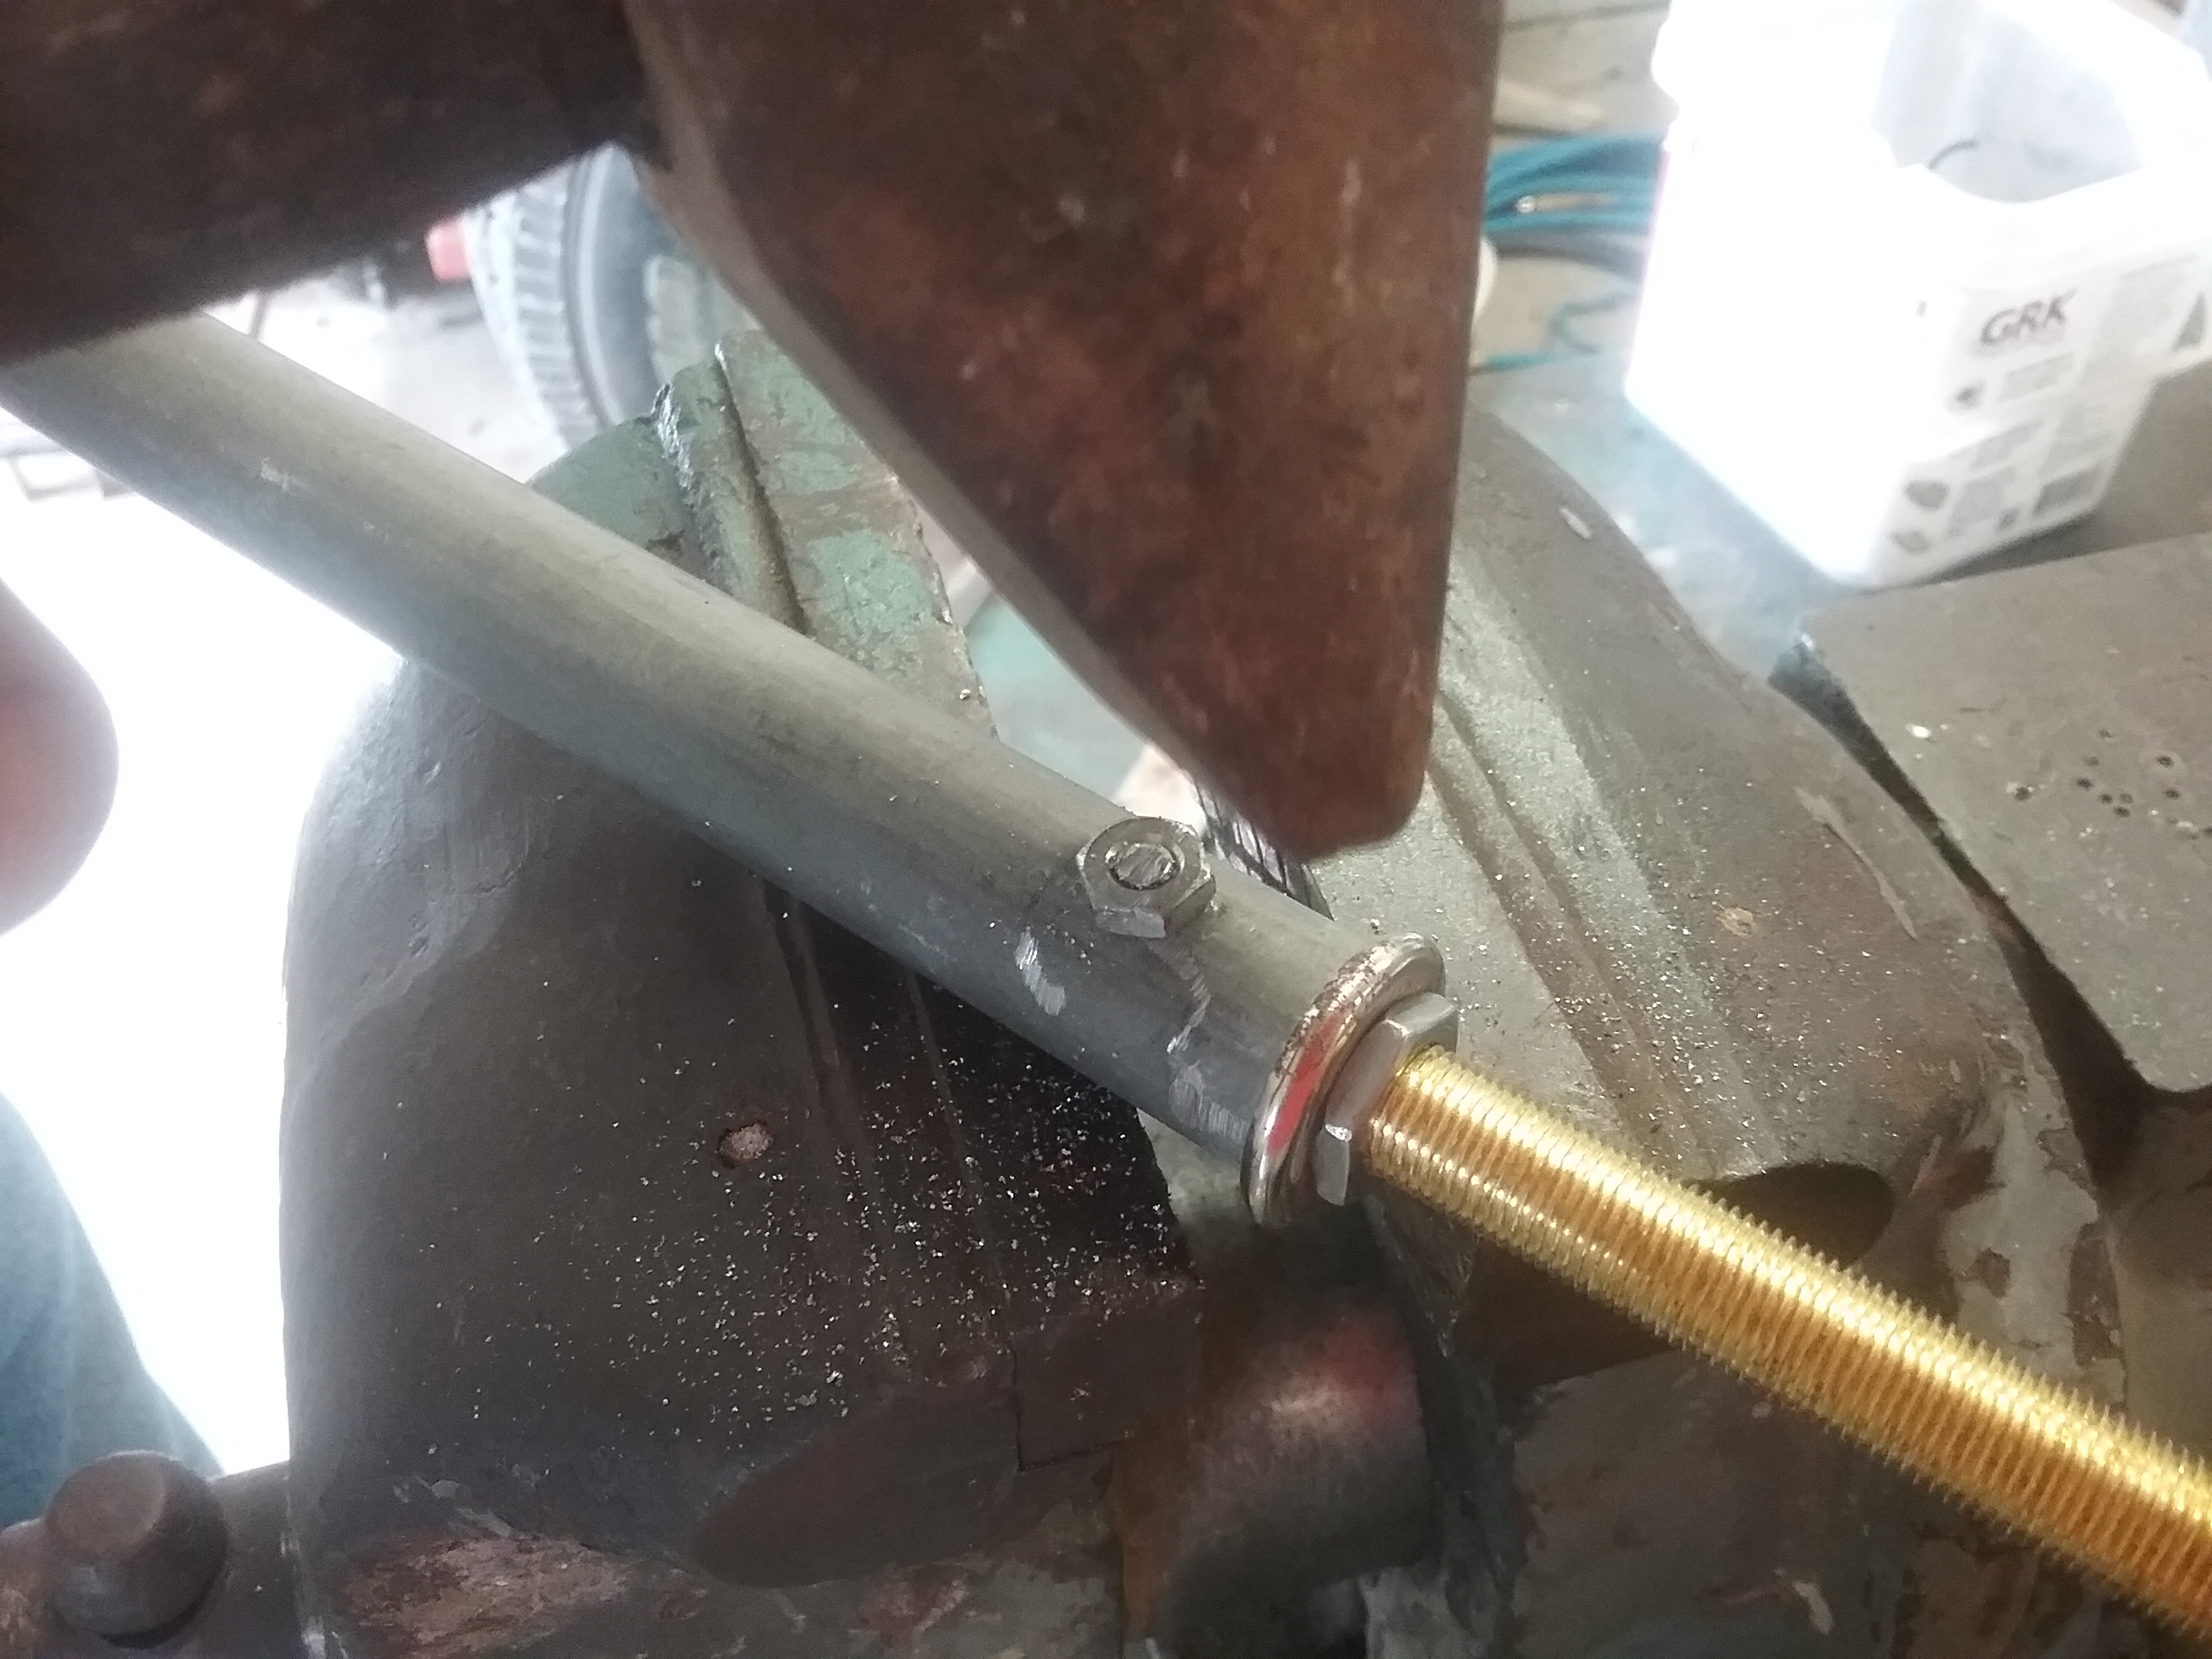
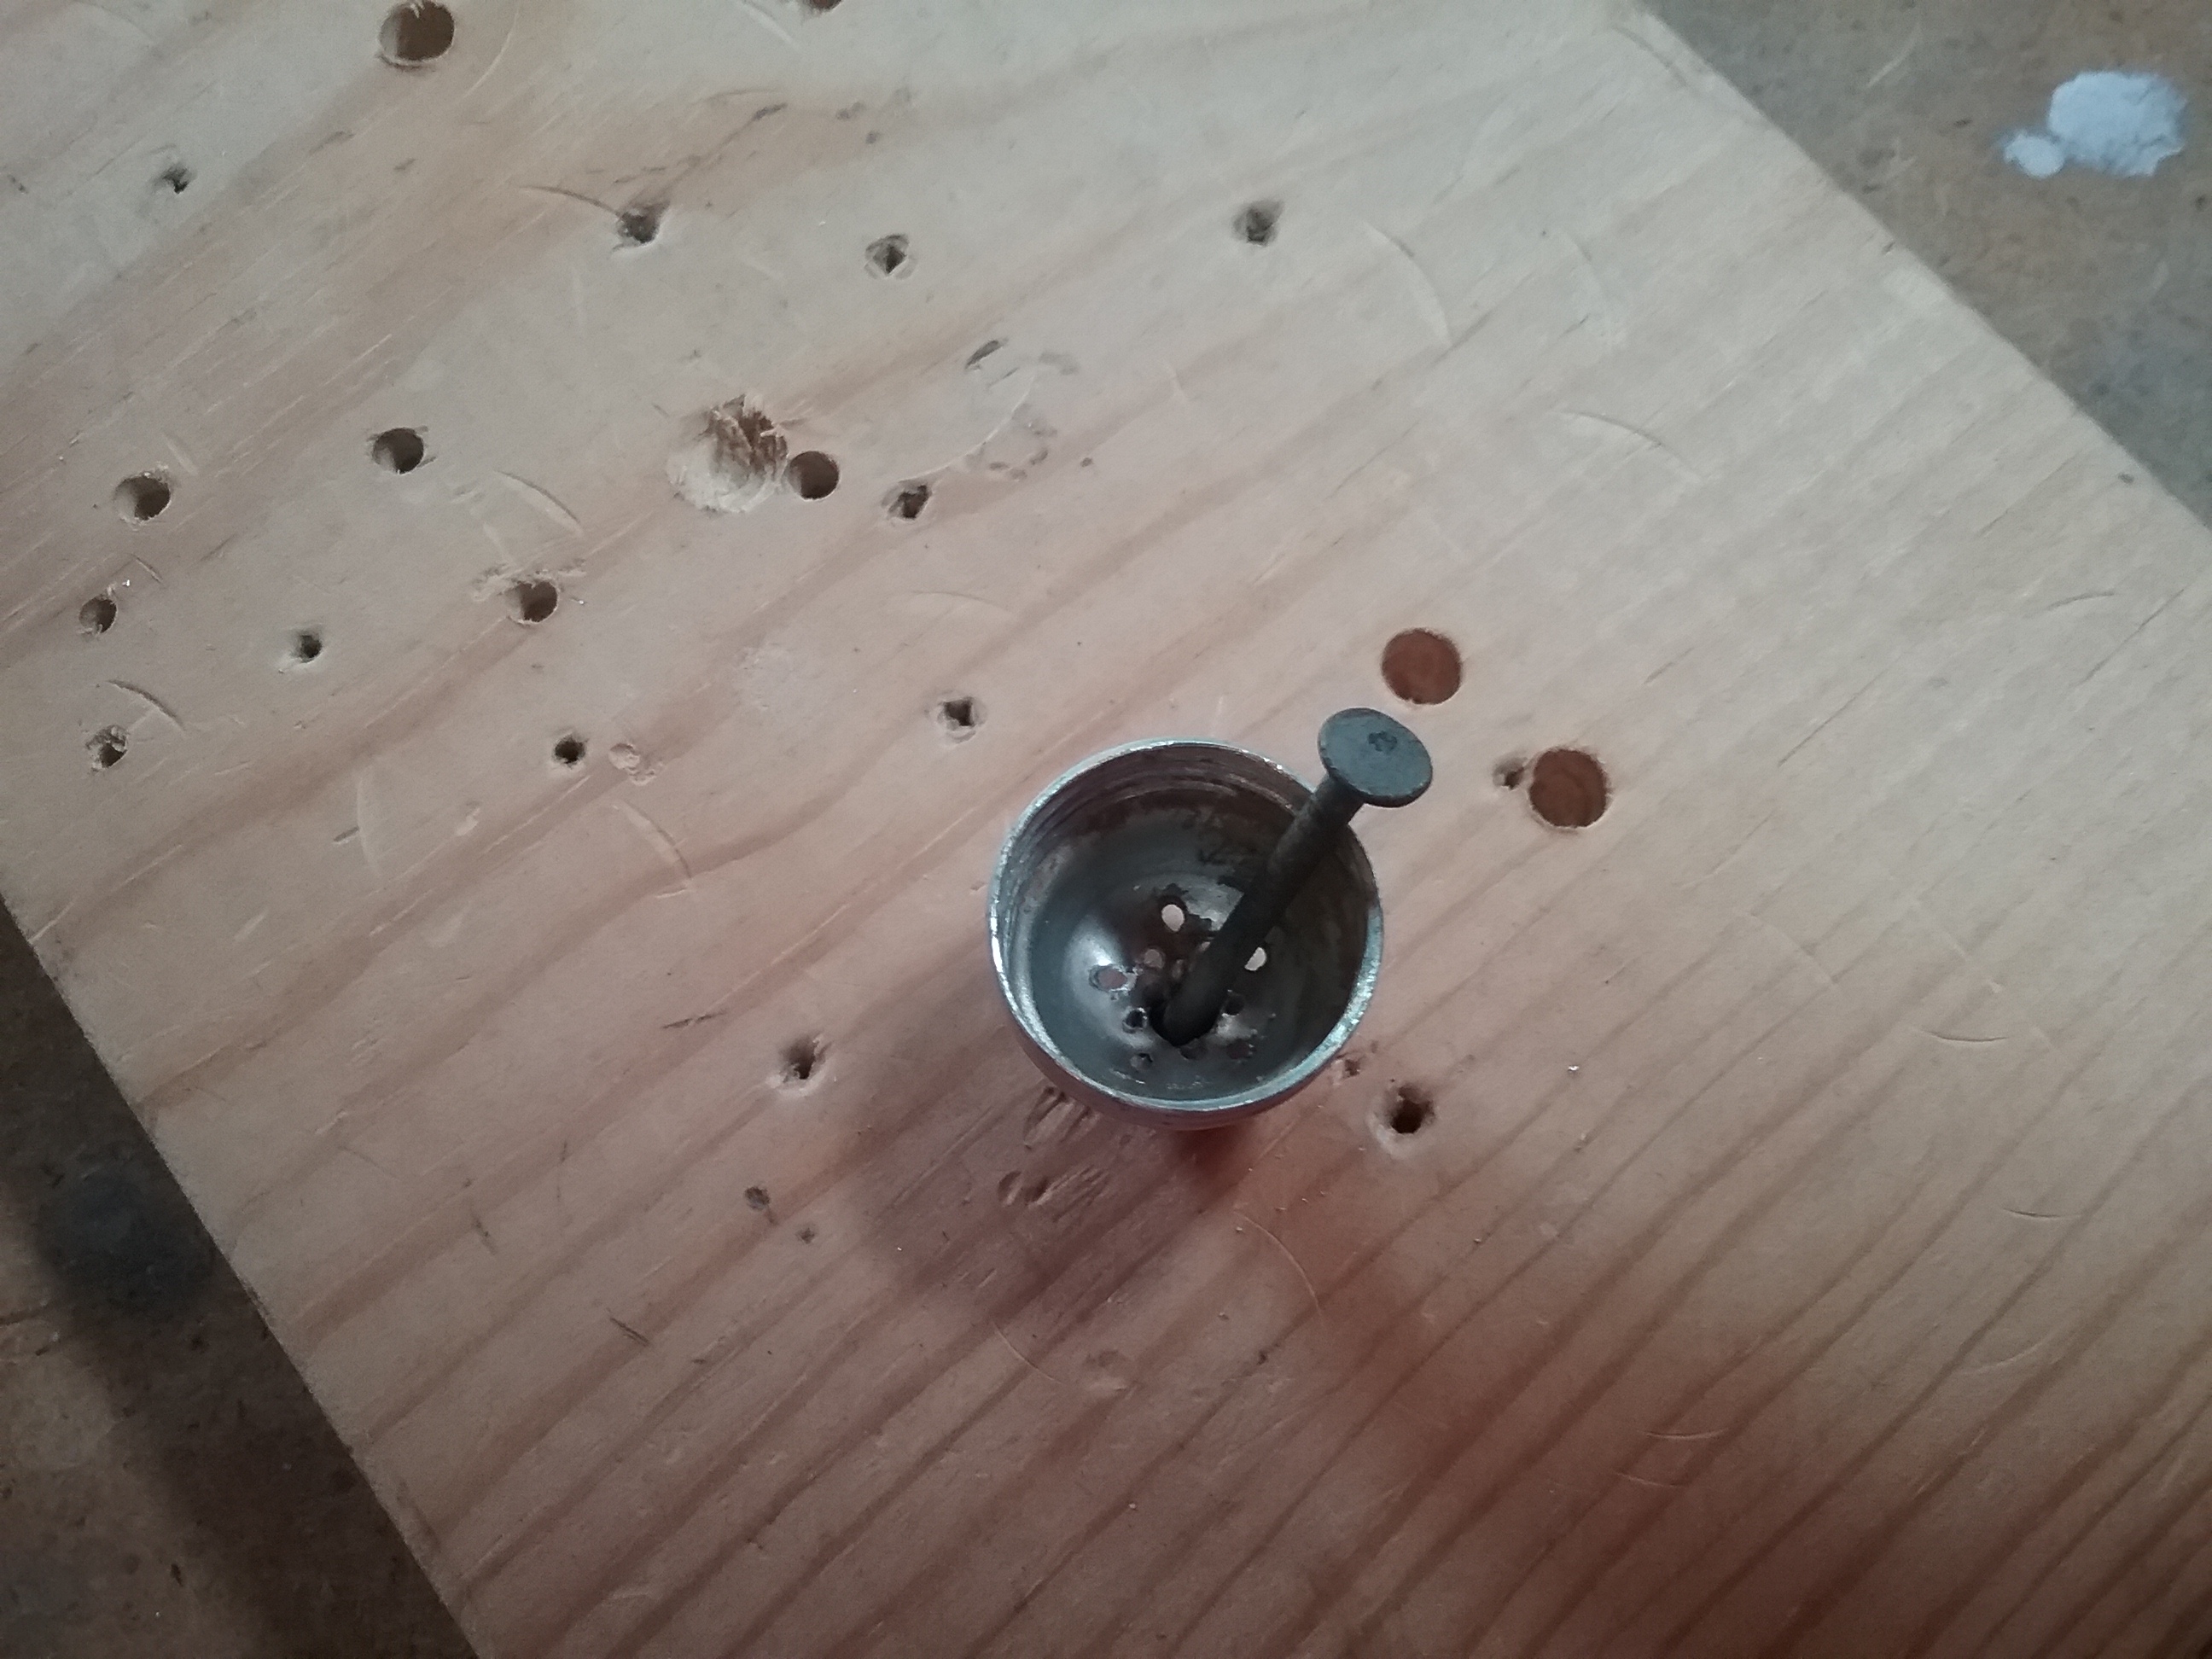
Nail a pilot hole in the lid. Drill a 1/4″ hole. Use small pliers to straighten out or bend jagged edges, just until a length of 5/16″ threaded rod will fit through it easily, you don’t want the hole any bigger than it has to be. My rod was a scrap piece, 20″ long, so I just left it that way.

20160719_161257  20160719_162116

20160719_162929  20160719_163039

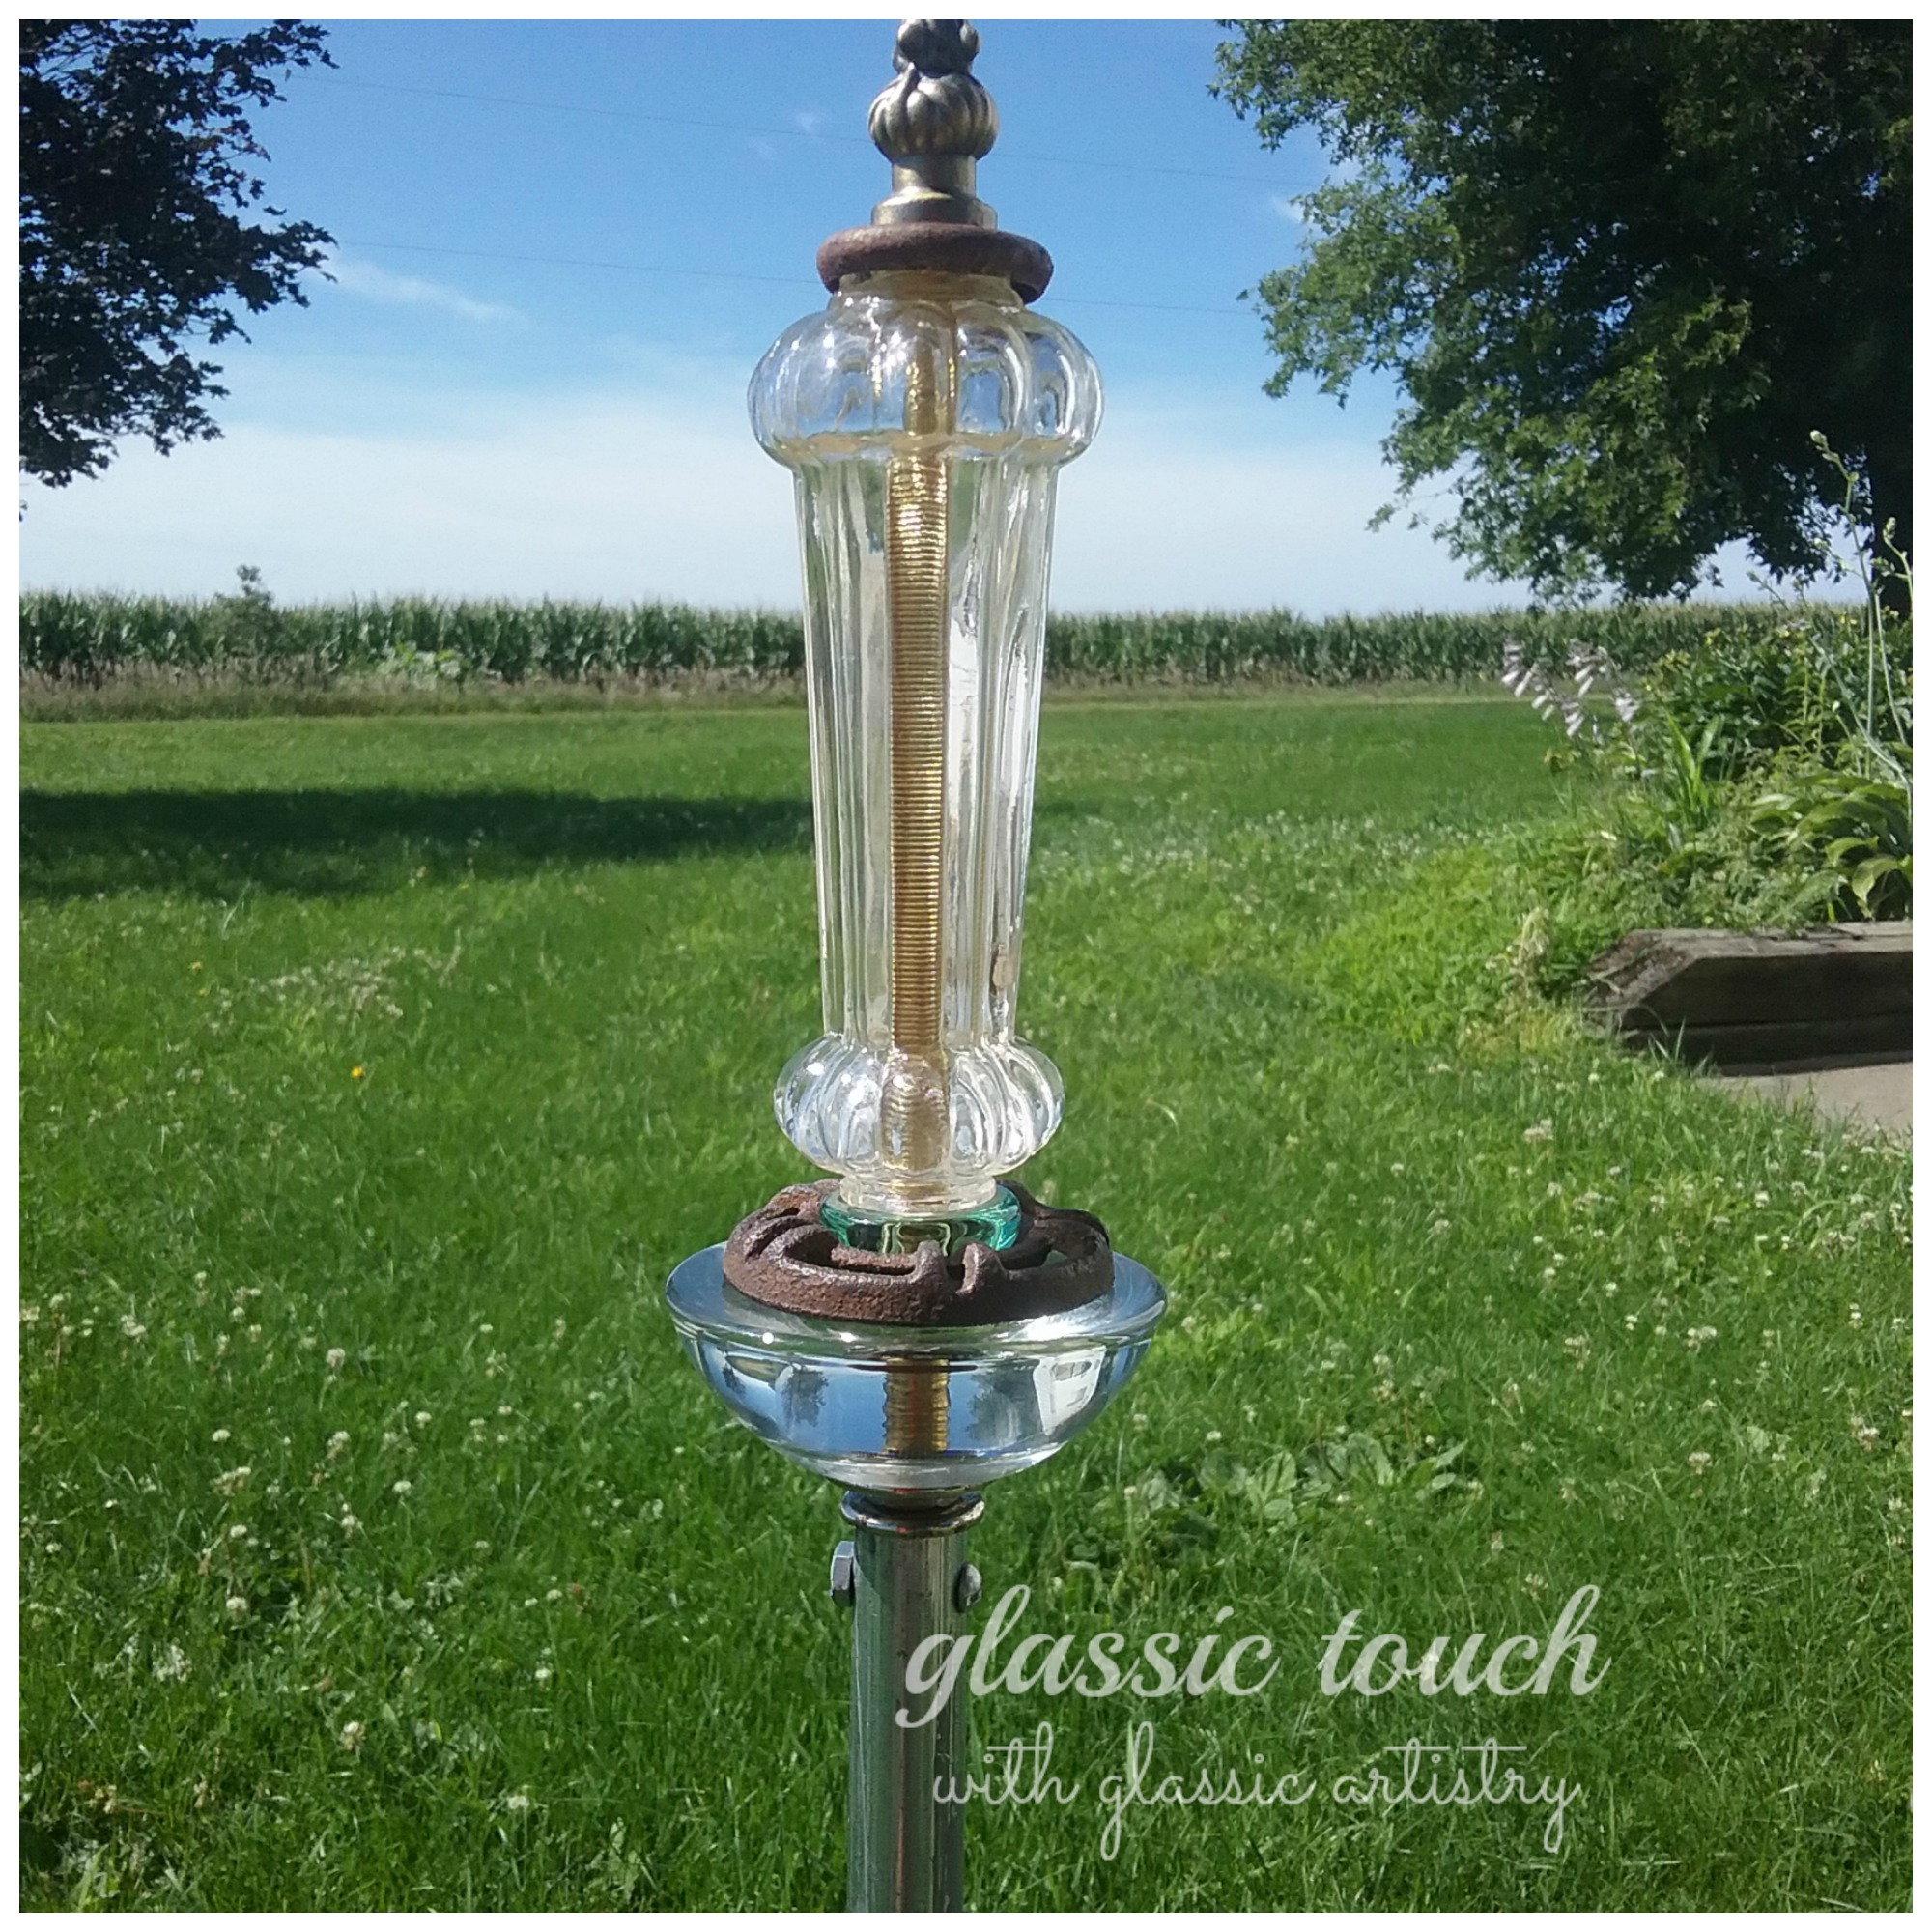
I like to experiment quite a bit, and have a habit of throwing odd little pieces of glass in a kiln to see what they will do. It was in some of my trials that I found a wonderful pale green bottle spout, PERFECT!  I got to thinking about all the bags of pretty round, resin napkin rings I often see at sales, they might work in something like this. Might have to start giving them a second look.
Find two nuts that fit the rod threads, and run one a couple inches down the rod. On the rod, stack and arrange your gathered pieces as we did in my last two posts, until you have something to your liking.

20160719_172605  20160719_183206

20160719_184126

I found an awesome new glue last week. It looked like it would work great on a lot of the projects I do, so I grabbed a tube to try. Otherwise I would have used E6000 or another silicone glue.
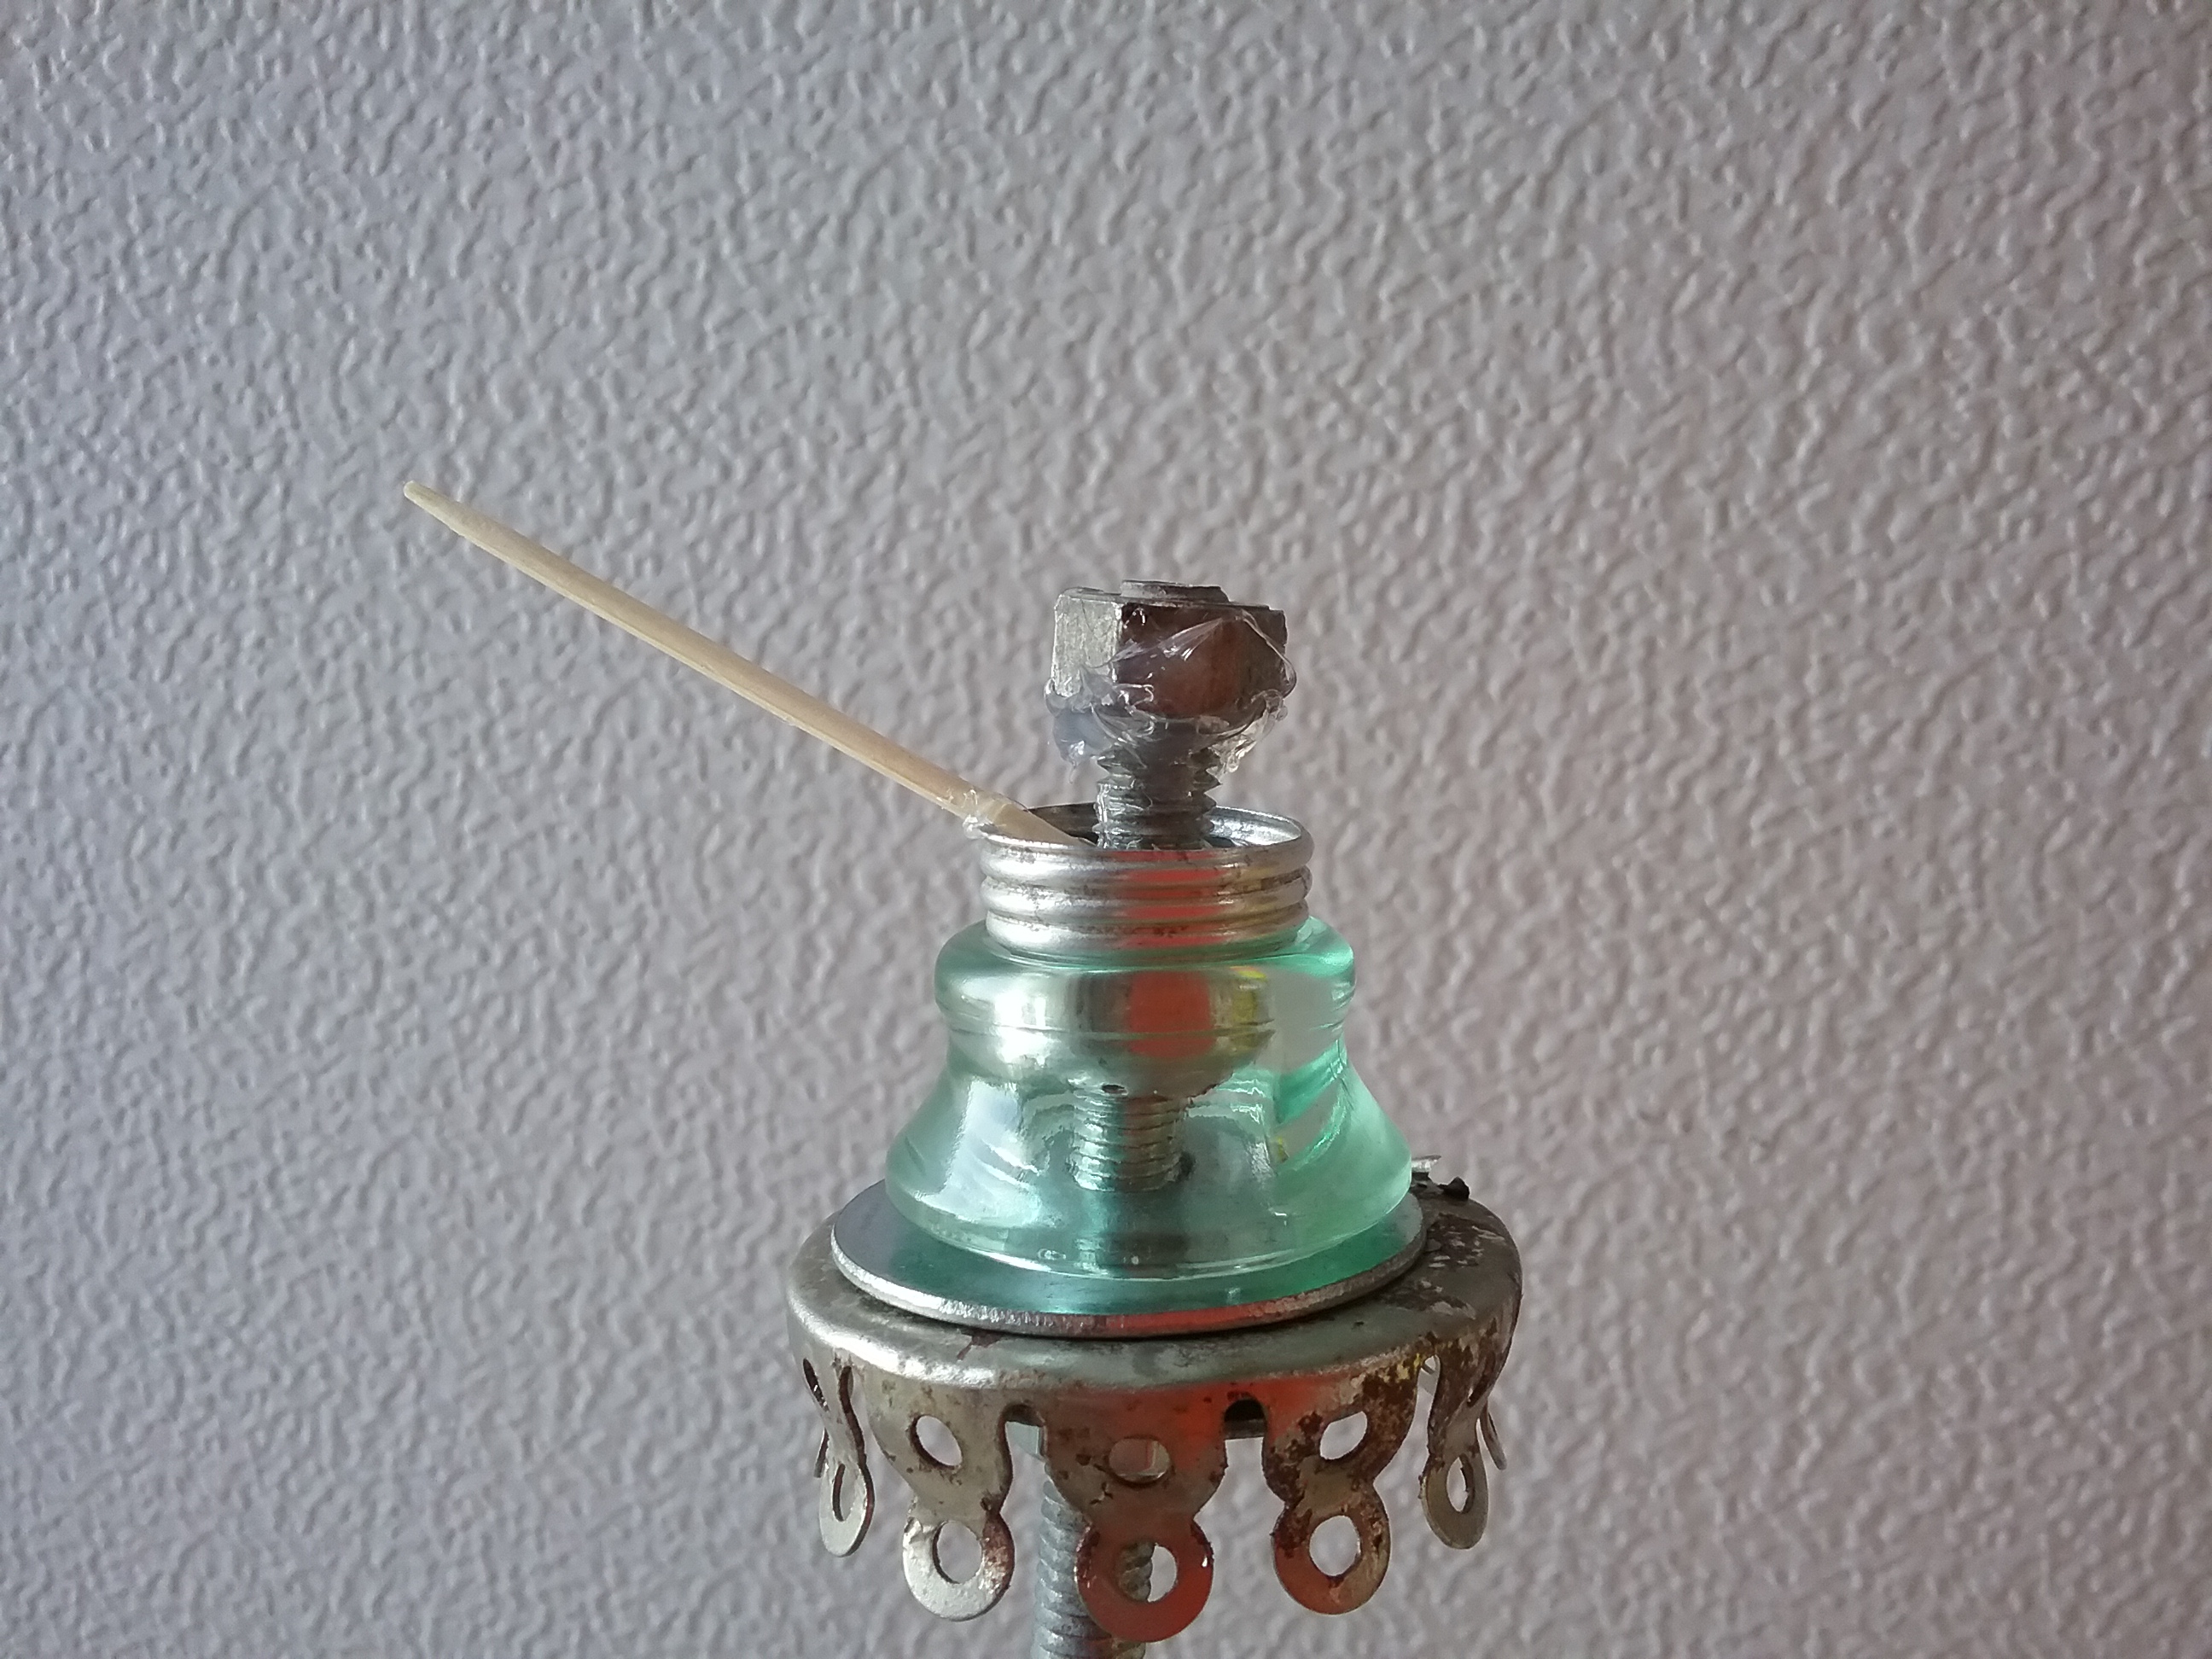
Stack your design loosely on the rod. Stand the rod in a heavy bottomed bottle or a bucket of sand. With a toothpick, apply a liberal amount of glue inside the shaker lid tip and around the nut. Push the shaker lid up firmly over the nut.
Apply more glue to the threads of the lid and screw the glass shaker on solidly. Gently push the rest of the pieces up to the shaker and tighten the nut. Leave to dry overnight. Don’t worry about getting everything lined up perfectly at this point, the important thing is for the glue to dry. After it’s dry, you can loosen the bottom nut a bit to center things up if needed.

20160719_183442 (1)  20160719_184325

20160719_184718  20160719_185219

20160719_185615

There! Enough of the garden stakes, for this year anyway. Thanks for bearing with me as I worked through my obsession.
Just a reminder, glass and metal expand and contract at different temperatures, so please store them indoors during cold winter months. I stand mine in a bucket of sand, in the garage, through the winter so they don’t get iced over.
Now, moving on …..


Chandelier Garden Stake

There’s no doubt about it, the old world charm of the crystal garden chandeliers has me totally captivated! I’m not sure if its the beautiful results or the fun of making something so unique and striking with reclaimed and repurposed materials, but whatever it is, I’m hooked.

stk5 mrk

After last month’s post, I was anxious to try a chandelier garden stake. After laying out all of my glass and lamp pieces to see what there was to work with, I noticed several glass pieces were votive/candle holders, small saucers, and odd pieces without a hole. Playing around with stacking the pieces is the funniest part of this project, so I decided to grab the drill and 1/2″ diamond core bit to drill holes in pieces before getting started.
There’s a bunch of videos readily available on You Tube or Pinterest about drilling holes in glass. It is pretty simple really, just a little time consuming. Besides being very mindful of safety issues with water and electricity, the most important thing to remember is to keep the glass wet and cool so it doesn’t overheat and break.

20160712_202611

Although the pieces are different, the garden stake is stacked and made on a lamp pipe following the same steps as in last month’s post, with one exception. Instead of marking it with tape and cutting it off, mark it with tape, add 8 inches, then mark it with tape again for cutting. The added length will fit into a piece of conduit.

20160724_150314

Because of the crystals dangling, I wanted the stake to have some height, so I cut a piece of scrap 1/2″ conduit, four foot long.
Approximately 1 inch from the top of the conduit, mark a spot for drilling. With a center punch, make an indentation on the spot. Drill a hole through the conduit with a 5/32″ bit.
Insert the 8 inch added length of lamp pipe into the conduit until you meet the hex nut. With the lamp pipe and conduit held firmly, drill through the conduit holes again. This step works best with two people, one to hold the conduit and one to hold the lamp pipe, as you drill through the second time. Run a small bolt through the holes and tighten on a nut.

20160724_151310  20160724_151532

20160724_151811  20160724_152105

I noticed the hex nut didn’t cover the opening of the conduit pipe completely. I could have left it, but, didn’t like the look, so I added a flat, rounded edged lamp piece between the hex nut and conduit opening.
While holding the conduit in a vise, cut off the excess bolt length. Remove it from the vise, lay on a solid surface, and hit the cut bolt end with a hammer a few times to rivet it on.

20160724_155949  20160724_160427

20160724_160734

Replace your stacked pieces to the top of the lamp pipe, tightening when you screw on the finial. Once together, I found it helpful to stand the stake in a bucket of sand when adding the crystals. Pretty! Pretty!
No crystals? No problem! Garden Stakes can have a character and style all their own without the bling!

stk 1 watermrk  stk2 wtrmrk

If you like this post or found it helpful, please click on the “like” button below, or leave a comment.  I love hear what readers are thinking.

Thanks for visiting glassic touch!