Welcome to glassic touch!
I’ve been eager to start my own blog for a long time, and to join the ranks of all those wonderful people who are willing to share their ideas and techniques with the world. My lack of computer savvy and a fear of not knowing what I’m doing has always held me back. Well, we can’t have anymore of that! They say “you learn by doing”, so I’m going to jump in with both feet and see how it goes!
I have a huge enthusiasm for using reclaimed items, recycled materials, glass, and wire to create unique pieces for the garden or home. For me, the most challenging and funnest step, in designing a piece, is figuring out that little touch of something special or unexpected to make it my own…. I like to call it the “glassic touch”.
We were completing a project when I decided to start my blog, and I’d like to share it with you as my first post. I hope you find it interesting and inspiring.
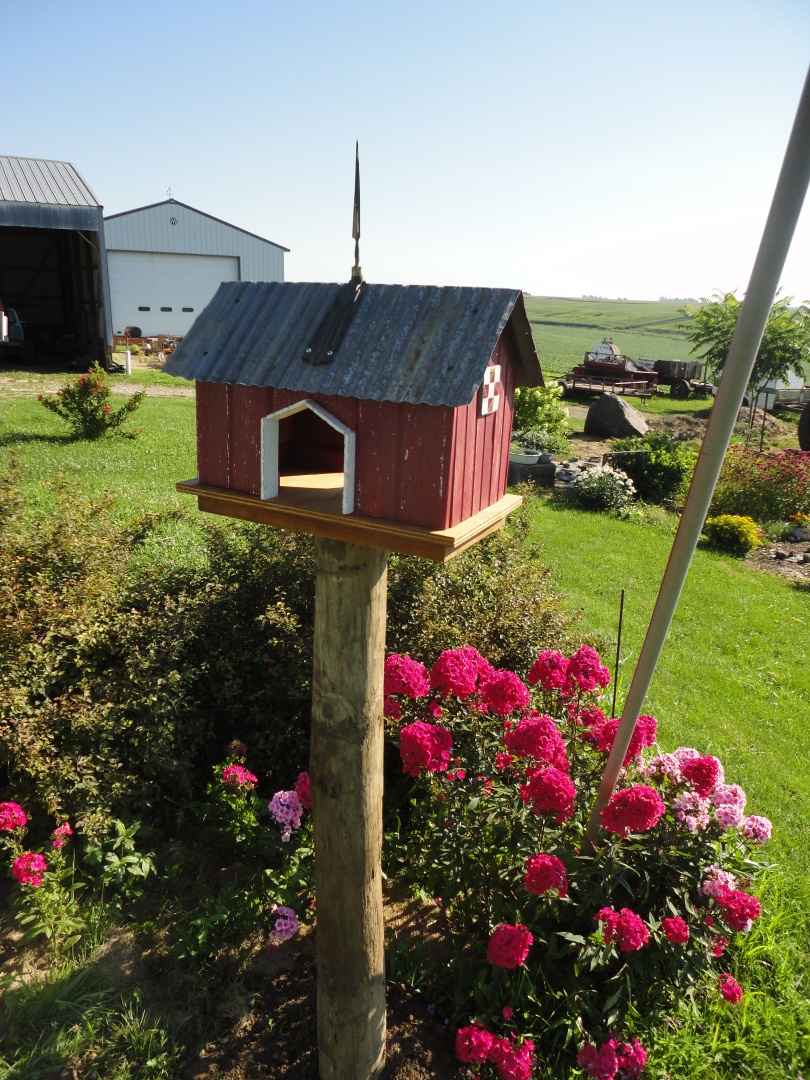
I came across a small pile of mismatched forgotten boards, while sorting through “my stuff” in the garage, and instantly recalled the image of an old rustic barn birdfeeder I had admired in a garden magazine several years ago. Although the boards were a mix of old narrow wainscoting and wide tongue and groove, it looked achieveable. After sketching out my idea and deciding the layout, my husband offered to help me build it.
The size of our feeder was determined by the boards we had available. We used the narrow wainscoting for the sides and the wide for the front and back. A simple frame was built from scrap lumber and the boards were attached with a brad nailer, painted red, then lightly sanded. I rescued a 1 1/2″W x 1/4″ thick piece of rough shipping crate lath from the trash bin to trim out the side entries. The trim pieces were cut, attached, and painted white. My completed barn measurements, without a base, are 20 1/2″L x 11 1/2″W. The side peaks are 14 1/2″H.
For the base, we used a piece of 3/4″plywood, cut 22 1/2″L x 13″W and a 1 1/2″thick plank cut 20 1/2″L x 11″W. Both were sanded and treated with Thompson’s Water Seal.
Please be careful with this next step, cut steel edges are very sharp and jagged! You may want to wear gloves. Using tin snips, cut a piece of corrugated steel, with furrows running lengthwise, 20″L x approximately 23 1/2″W. For a neater appearance, cut the steel so the sides are matching. For example, I needed the roof to be 23 1/2″W, but went a bit wider so I was at the top of a furrow on each side. I was lucky on this step and had a scrap of steel that was in very good condition on one end and I only had to make 2 cuts. Cutting up the side, along a furrow, may be difficult. We found it helpful to bend it back as we cut and take your time.
My husband clued me in on a very helpful tip for bending the steel. Once cut, lay it flat, topside down (we were working on concrete). Pencil mark in the middle where you want it to bend. Lay a steel rod on the mark and hold it down firmly.. I stood on one end while my husband held the other. Hammer on the rod to collaspe the furrows down. When done, keep the rod in place and slowly raise up one side of the steel, bending it evenly towards the rod. Easy Peasy!
Disappointingly, my bird feeder sit in pieces for the last two couple of months while I debated on what I wanted to add to the top. I remembered that the one in the magazine had something protruding from the top.. a little metal weathervane, I think. Regardless, I needed something and nothing I had was really clicking. My problem was solved a few weeks ago when my sister declared she was not leaving a 75% off junk booth until she found something. After digging around a bit she popped up with a mini lightning rod on an upside down v-shaped brass holder. TA-DAA! Six Dollars!! It was perfect! I’m so glad she didn’t want it, that could have been a problem.
So, finally, we were ready to set my feeder in place. We enjoy bird watching, so it was positioned close to the house, amid a patch of red garden phlox, and turned at an angle so there was a view through the sides.
Coming up from the bottom, so screws wouldn’t show, the feeder was attached to the plywood. Screw on roof and lightning rod. Set your post. Attach the plank to the wooden post with lag screws. Sit barn with plywood on the plank, and attach with long screws through the bottom of the plank, again so screws are hidden. Note – Screw tips may protrude through the plywood so place screws towards the side ends of the feeder so you maintain a clean view through the side entries.
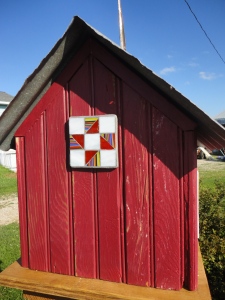
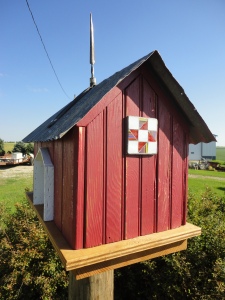
And for “the glassic touch“? What’s a barn without a barn quilt?!
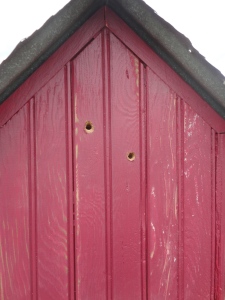
Before adding the roof, I drilled two holes, in one side, in preparation to hang a miniature mosaic glass barn quilt. The wooden frame was thick so reaming out the holes on the inside was necessary to accommodate the screws and nuts being used.
With bitter cold, icy Iowa winters, I make a habit of bringing my mosaics, glass chunks, and stepping stones inside for the winter. For this reason, I wanted my quilt removable. With a diamond head bit, I drilled 2 holes in a 3″ x 3″ square piece of glass. Then I used a coned shaped bit so the head of my screw would be inset. Always use water to cool the glass while drilling or it will break. I balanced my glass on an upturned plastic baby food container, that fit between the holes, and glued my screws in place with E6000, weighed them down with a rock, and let dry for 24 hours. With a glass marker, I drew lines from corner to corner and such so I would be able to center any design. Or, you can draw an actual design if you have one chosen.
After deciding on a simple Pinwheel pattern, I cut some scrap glass and glued it on, again with E6000, and let dry 24 hours. I grouted with Interior/Exterior Sanded Gray Grout. Wanting a darker gray grout line I added a few drops of Exterior Black Primer to my water before mixing. I’ve never added paint before, so it will be a good test I guess. Let the grout dry 24 hours then seal. Follow the directions on your sealer for drying time before subjecting it to wet weather. With no light source from behind, I recommend using opalescent glass for this project to make it highly noticeable. If you do choose to use transparent glass, remember to remove any pattern lines that may show through the glass.
When hanging the quilt, I added two thin rubber washers, cut from an old jar gripper, to prevent movement and add cushioning between the glass and wood. And – DONE! It’s time to toss in some bread crumbs and watch the birds while I ponder what my next project will be……
I hope you enjoyed my post and were able to pick up a few helpful tips while visiting here. I welcome and look forward to your thoughts, questions, or suggestions. Thanks for stopping by!


Such a cool design! Love the addition of the barn quilt! Can’t wait to see the next project!!!
LikeLiked by 1 person
Thank You Alison. Already have another project in mind. Hope to post soon.
LikeLike
Everything looks really Great!!
LikeLiked by 1 person
Wonderful project! My creative juices are flowing…. where can I incorporate this in my garden??? Looking forward to more.
LikeLiked by 1 person
Happy to hear from you Calie! Please share a picture of your project with us when its completed!
LikeLike
Thanks for following my blog! Very impressive bird feeder you’ve made.
LikeLike