
I don’t know the author of this Irish blessing, but its perfect for today!
“For each petal on the shamrock
This brings a wish your way
Good health, good luck and happiness
For today and every day”


I don’t know the author of this Irish blessing, but its perfect for today!
“For each petal on the shamrock
This brings a wish your way
Good health, good luck and happiness
For today and every day”
Thought I’d hop on to check in and wish everyone a very early spring greeting although it’s hard to feel springish while there’s blizzard conditions blowing and snowing in our part of Iowa today. A few days ago robins were hopping around our yard and today I’m worried about where all those poor little things went to stay safe and warm.
I’ve been in a bit of a funky mood since Christmas and haven’t done much creatively. But, with winter on its way out, I think I’m getting my mojo back.
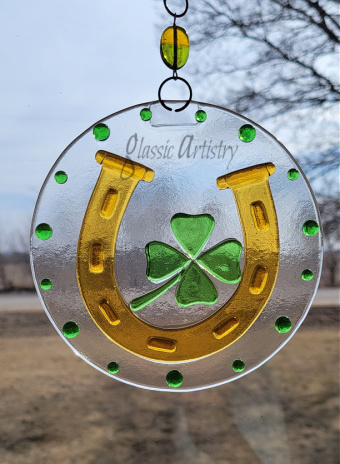
I started getting back in the groove last week with a new St.Patrick’s Day suncatcher (shown above), and there’s a shamrock piece waiting on my workbench to be finished.
Last summer I cut a lot of vintage glassware into interesting pieces to create something special with but didn’t follow through. They are next on the agenda along with 4 or 5 other unfinished crafting projects that are taking up space in my work area.
Every year I make quite a few stained glass, peace sign suncatchers. I’m ready to put those aside for a while and put my energy into more new pieces and ideas. The last of my peace sign suncatchers are listed in my Etsy shop https://www.etsy.com/shop/GlassicArtistry and pictured below if anyone has an interest.


Well, I guess that shamrock piece isn’t going to finish itself, I’d better get back to work. Stay well and stay safe friends, and Think Spring!

Playtime!
It was time to do something with a small bucket of AirWick bottles I had saved. I was tempted to toss them, but couldn’t do it without at least experimenting with a few in the kiln.
I’ve only had time to play with two, but I like what’s happening so far. I thought it would be fun to share just in case it could spur imagination or interest with other warm glass or recycled glass friends out there somewhere.
I like to do my experimenting in a small tabletop kiln with a window in the lid. It’s not digital. It has a dial with high, medium, and low, so there is no firing schedule; I just go slow. I use the same type of kiln for all my Christmas ornaments too.
I didn’t expect anything earth shattering, but wanted to see how the bottle flattened before doing anything else. A high temp wire hanger was propped in the opening of the bottle before firing it to about 1600 degrees, just in case it would miraculously round up as a nice glob and the wording melted away. It didn’t, lol. I flipped it over and fired it again the same way and the wording was still there.
The wording finally disappeared after I flipped and fired it a third time. Surprising, it ended up as an uneven clear glob that I plan to use in a rustic Christmas decoration later.
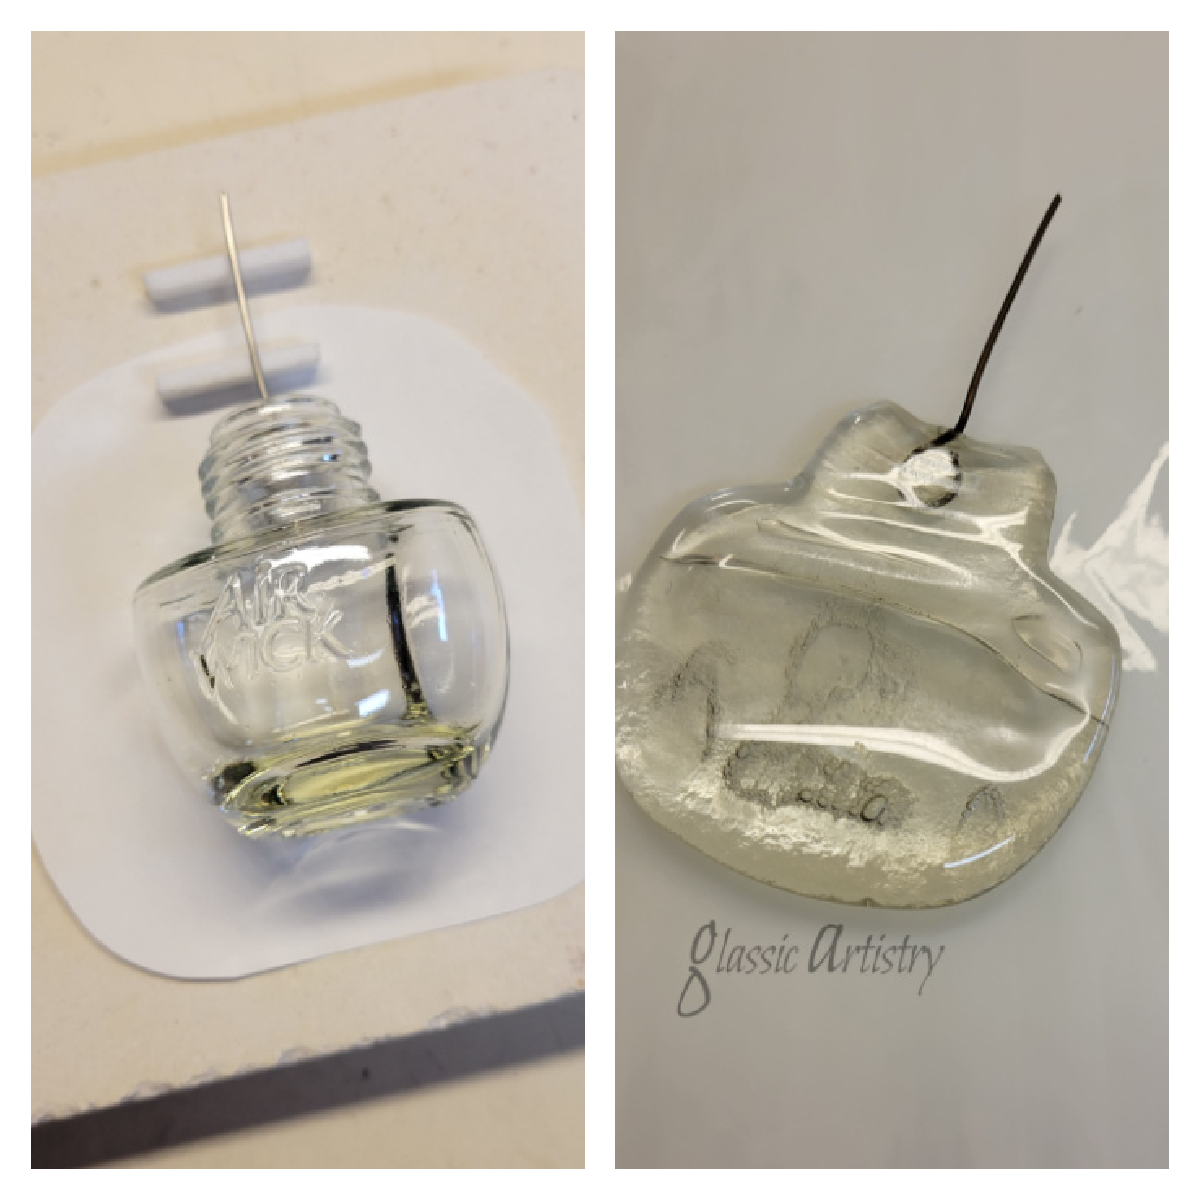
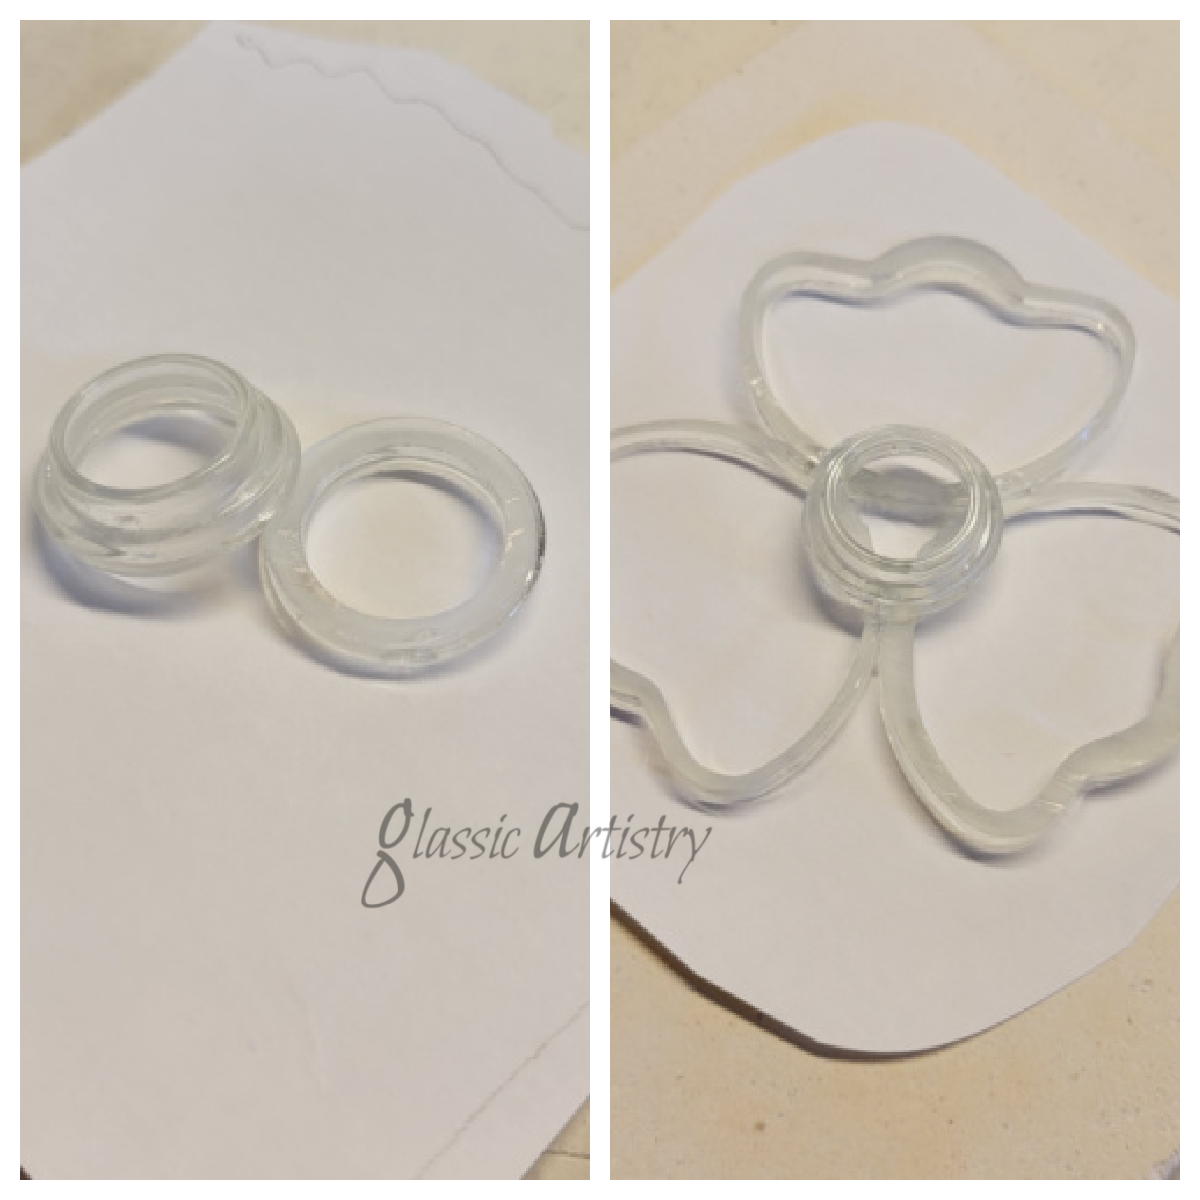
The second bottle was cut into slices with a glass saw to see what could be arranged with them.

Several pieces were laid out to resemble a flower. I thought the bottle opening slice was too tall for the flower center, so it was sliced again.
Wanting to maintain its shape and texture, I watched it closely and shut the kiln off at about 1650 – 1700 degrees. I did a quick flash to 1100 degrees, then let it cool completely.

So, what do you think? You can be honest, I have thick skin, lol.
It’s a bit unusual, thin, fragile, and almost weightless, but I like the results. I think it has great possibilities for mixed media or wall art projects. Add some wire, color with glass paints, or even use it as a base and layer over it. I better make a couple more just to be prepared if an idea strikes me. You never know.
I’ll keep experimenting though, there’s extra pieces and more bottles. Stay Well and Be Happy Friends!
Christmas orders have been keepin’ me busy, busy, this last month, and delayed progress on my other crafting projects. Every year I tell myself I’m going to get a jump on things and get started in August, but, yeah, it never seems to work out that way. I guess maybe I’m just not disciplined enough to do it.
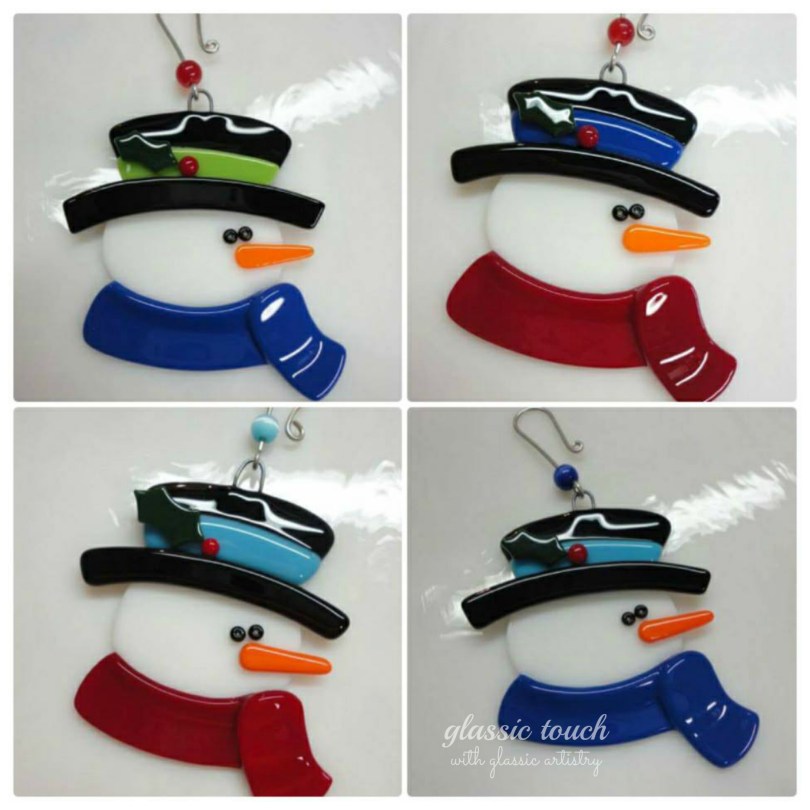
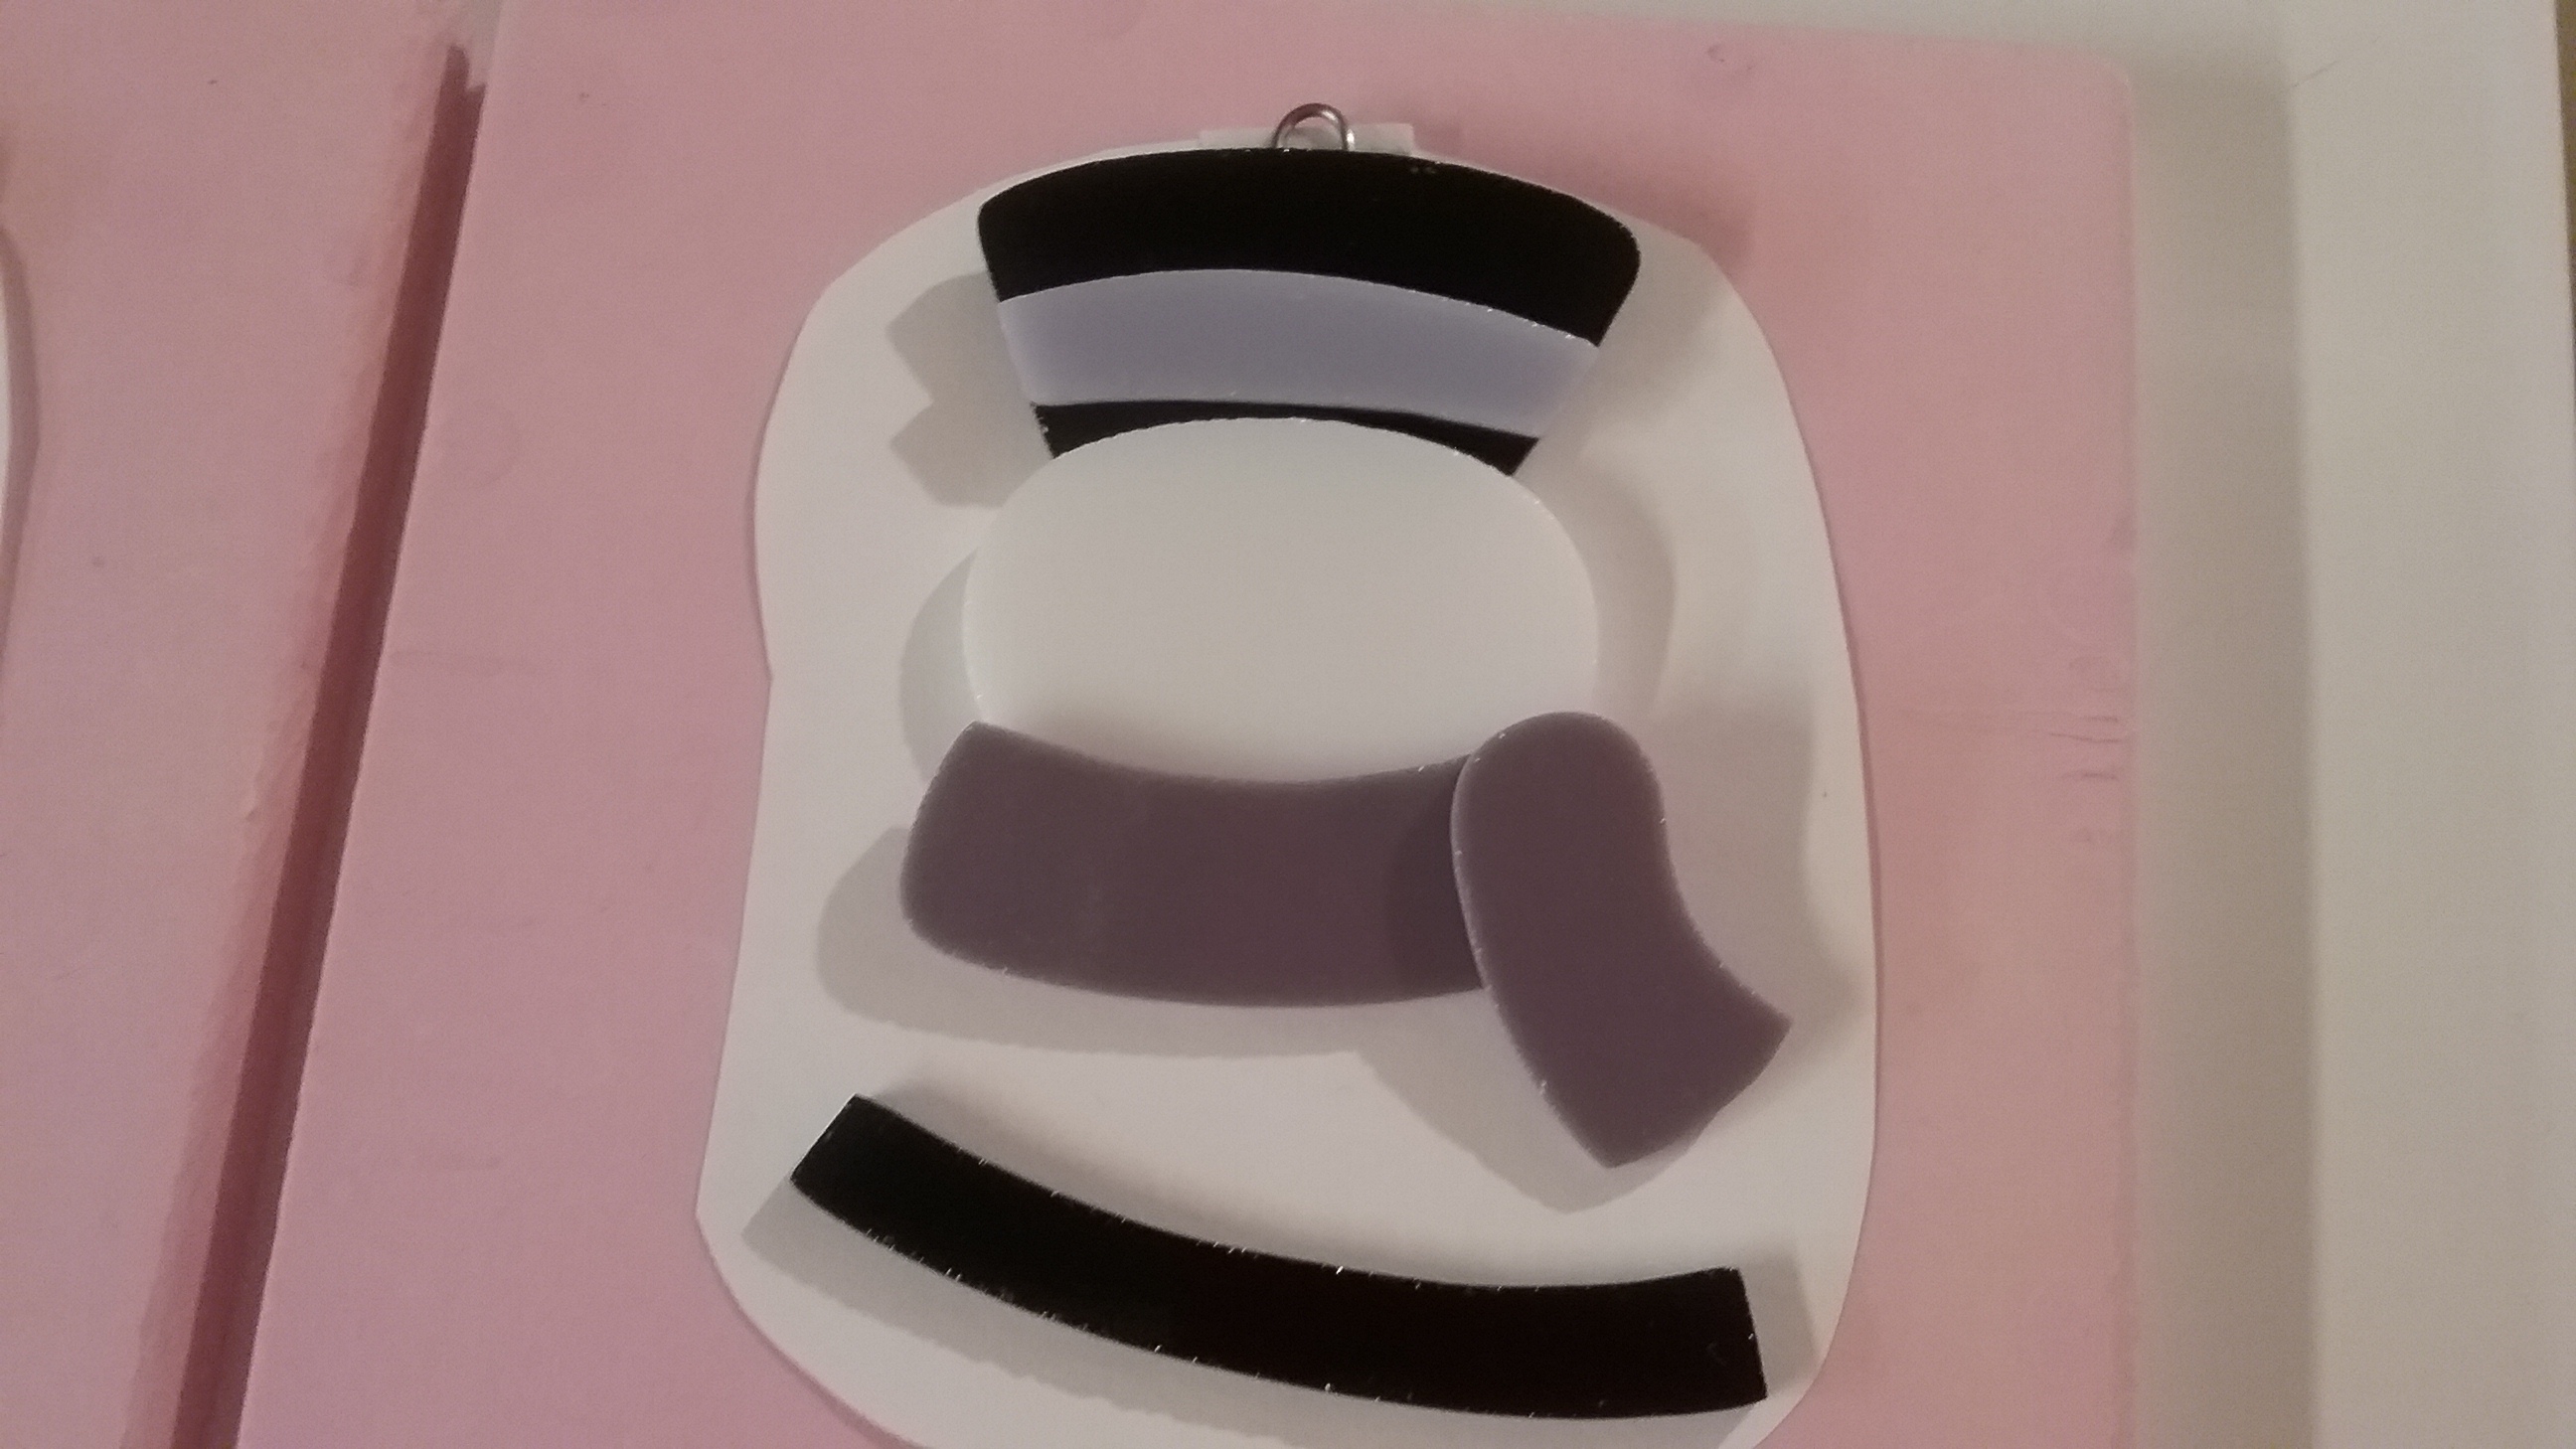
But, wanting to share something in the spirit of Christmas, I thought I’d show how I make my snowman ornament. This little guy was my first ornament design. He’s been a good seller for me and I still offer him today. I know there’s not much time before Christmas, but he’s pretty simple to make. Please feel free to make him for gifts for your family or friends. He is my original design, so I do ask that you do not make him for sale or profit, Thank You.
I had a client request a few snowmen in purple, so you’ll see the purple colors in this post, but, I’ve used a variety of colors as you can see in the feature picture. I use Spectrum System 96 colors and a COE96 Uroboros 602502 red.
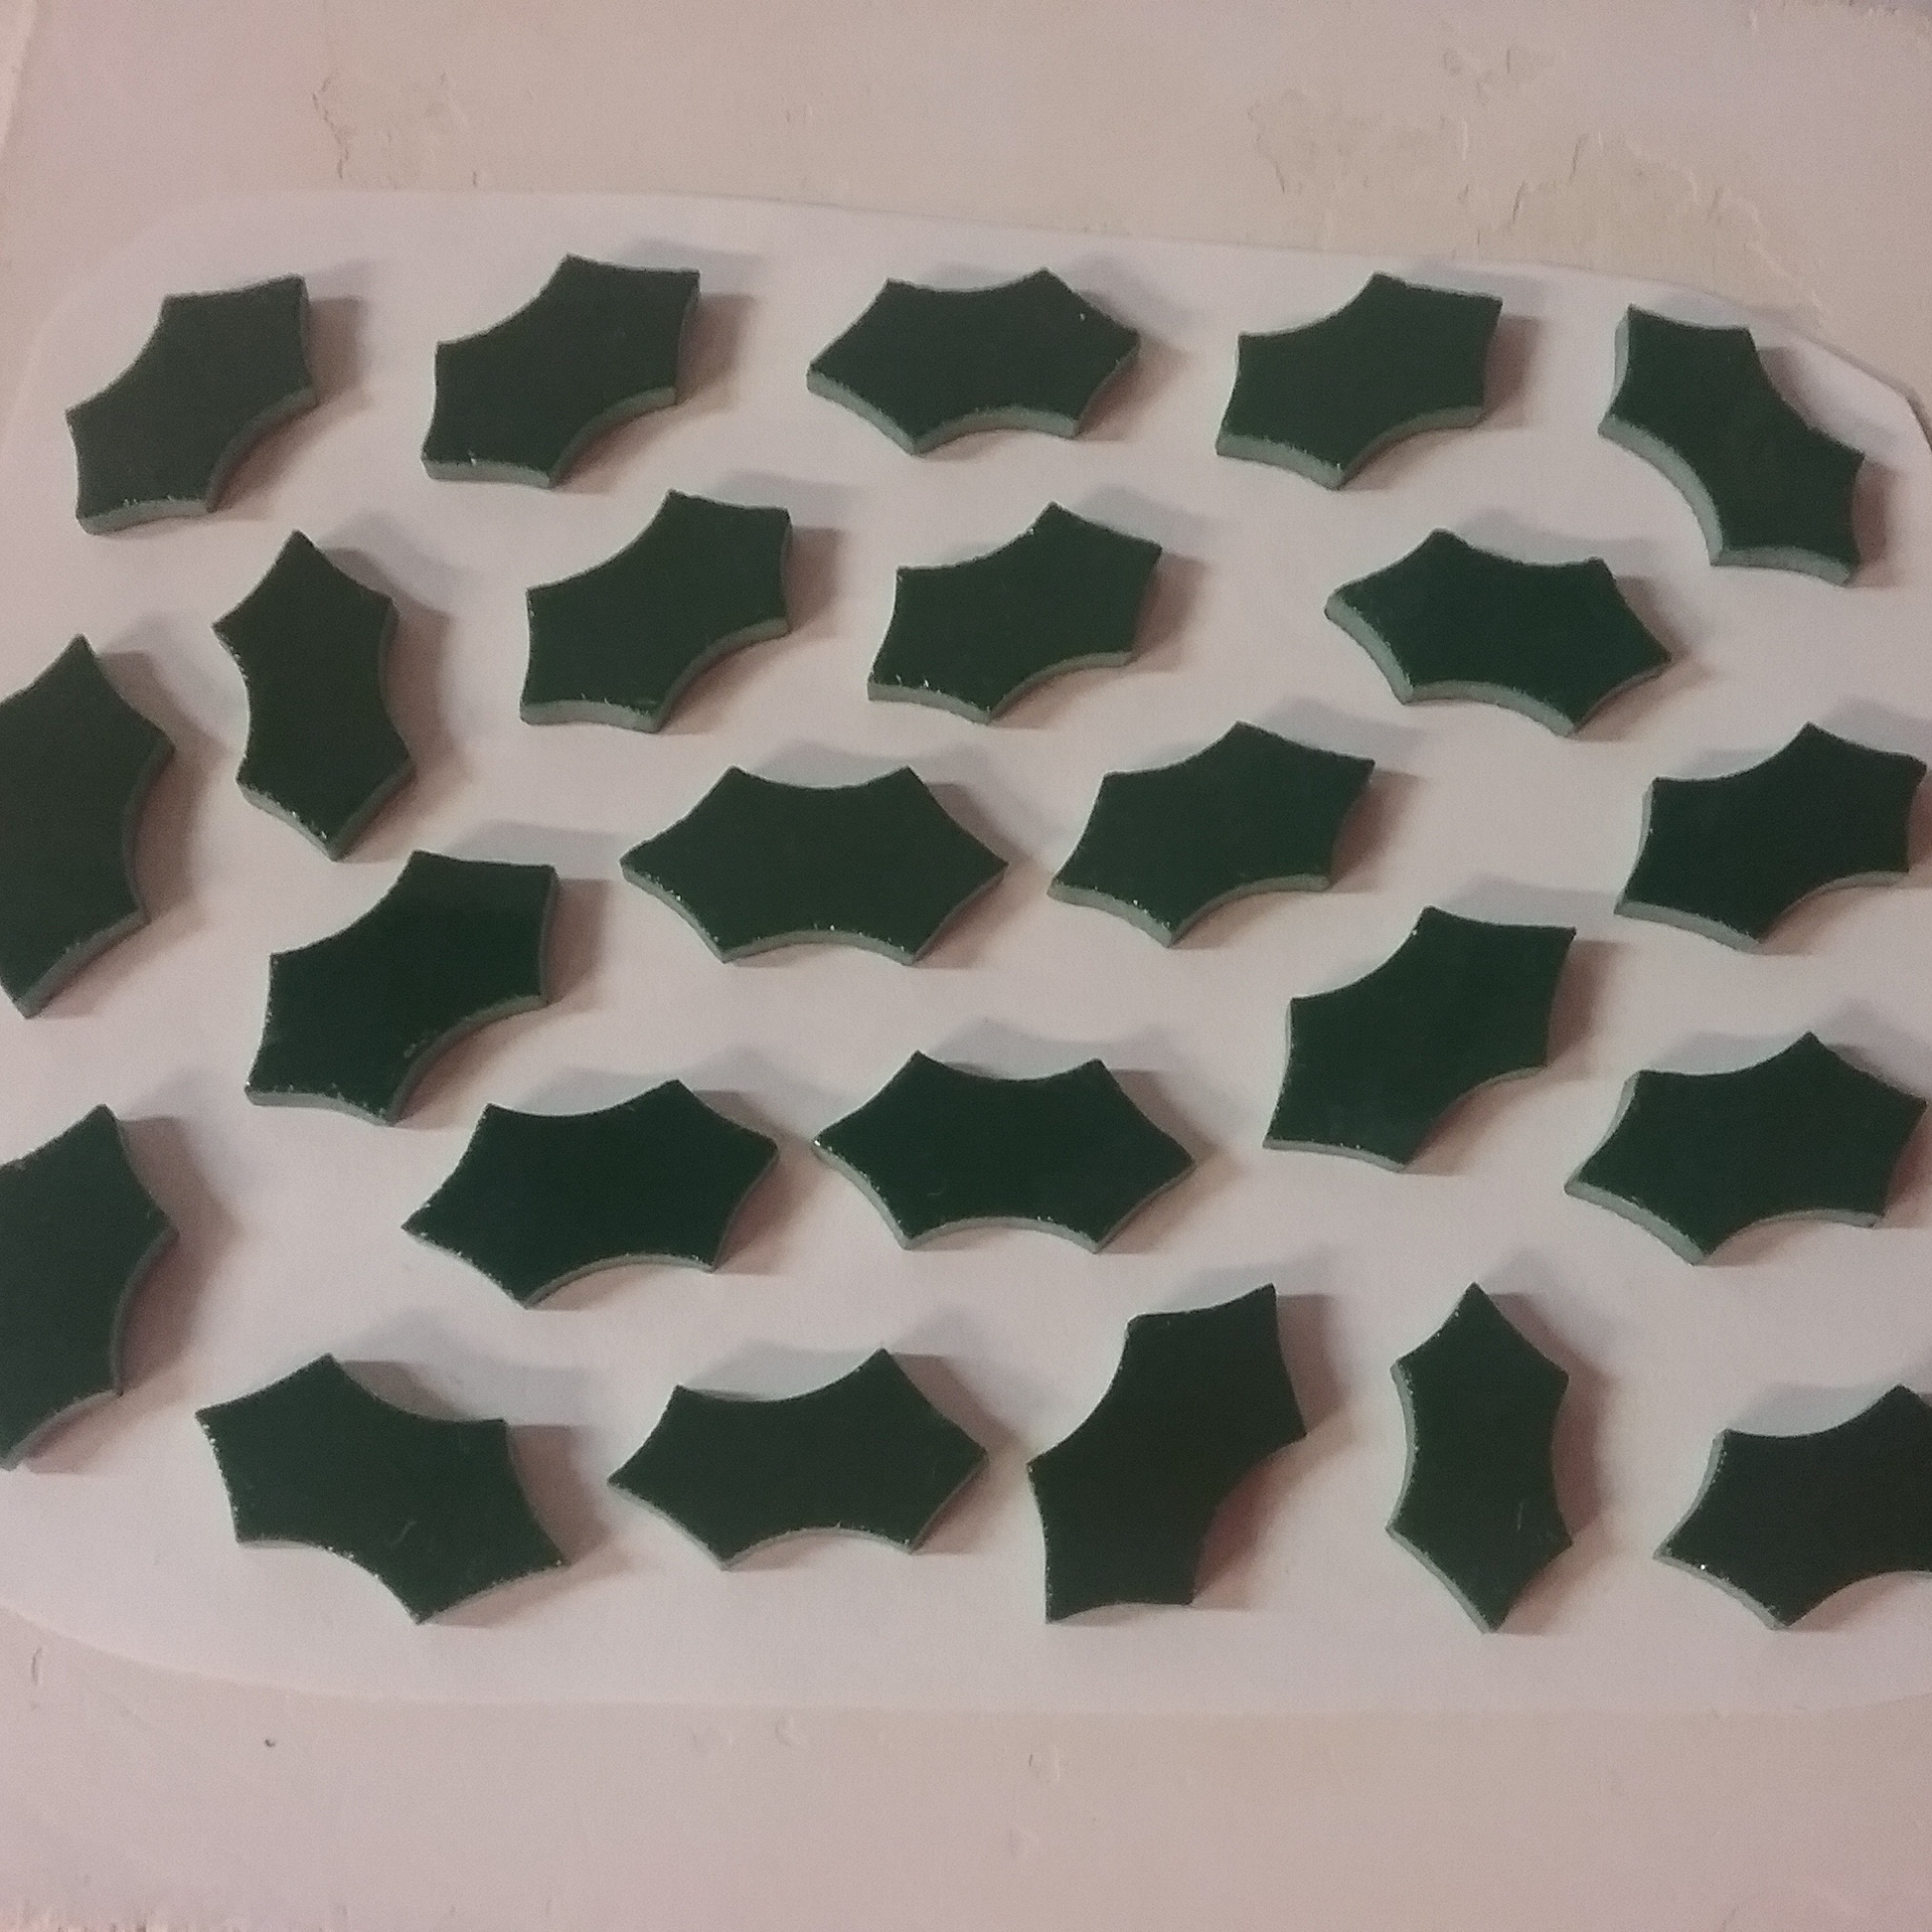
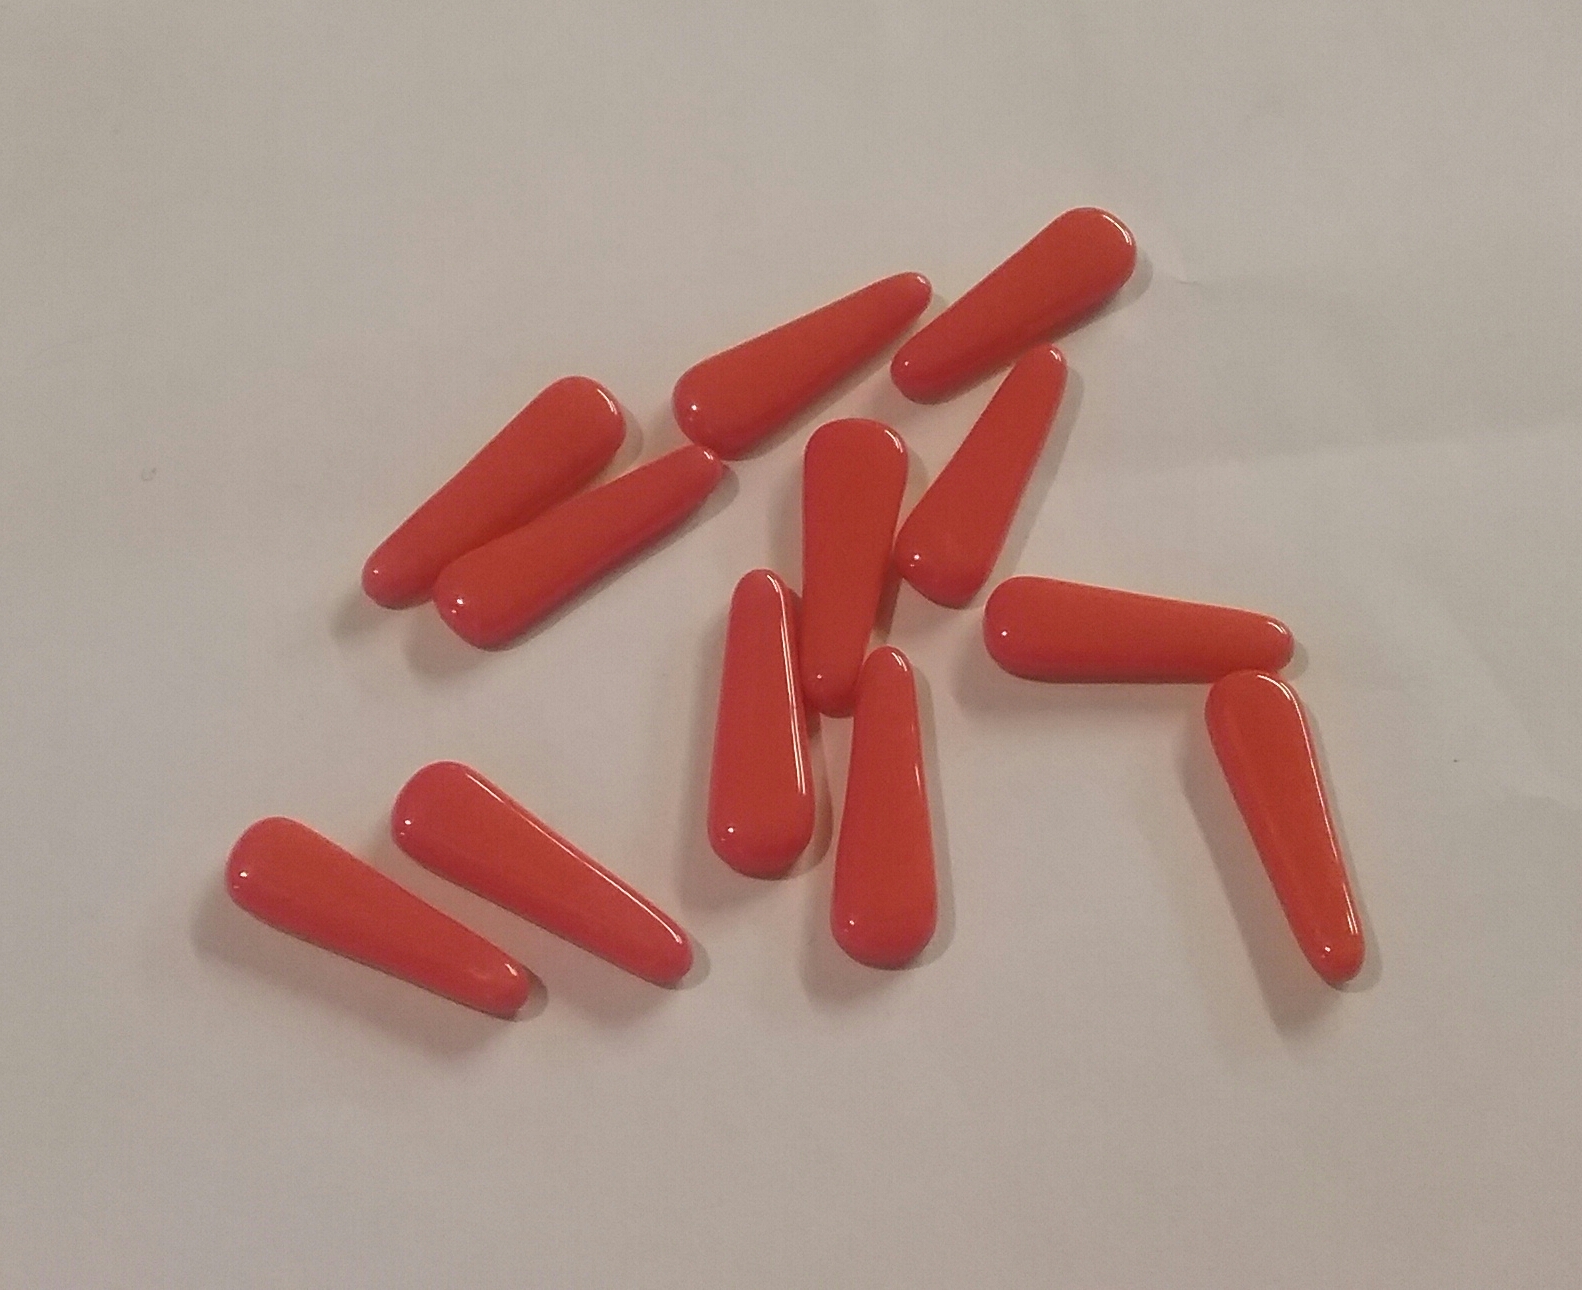
I like to get all my little embellishment pieces out of the way, so before I start ornaments, I make a batch of holly, carrot noses, and berries.

After using my pattern pieces to cut my glass –

there’s three steps I’m mindful of as I shape and grind –
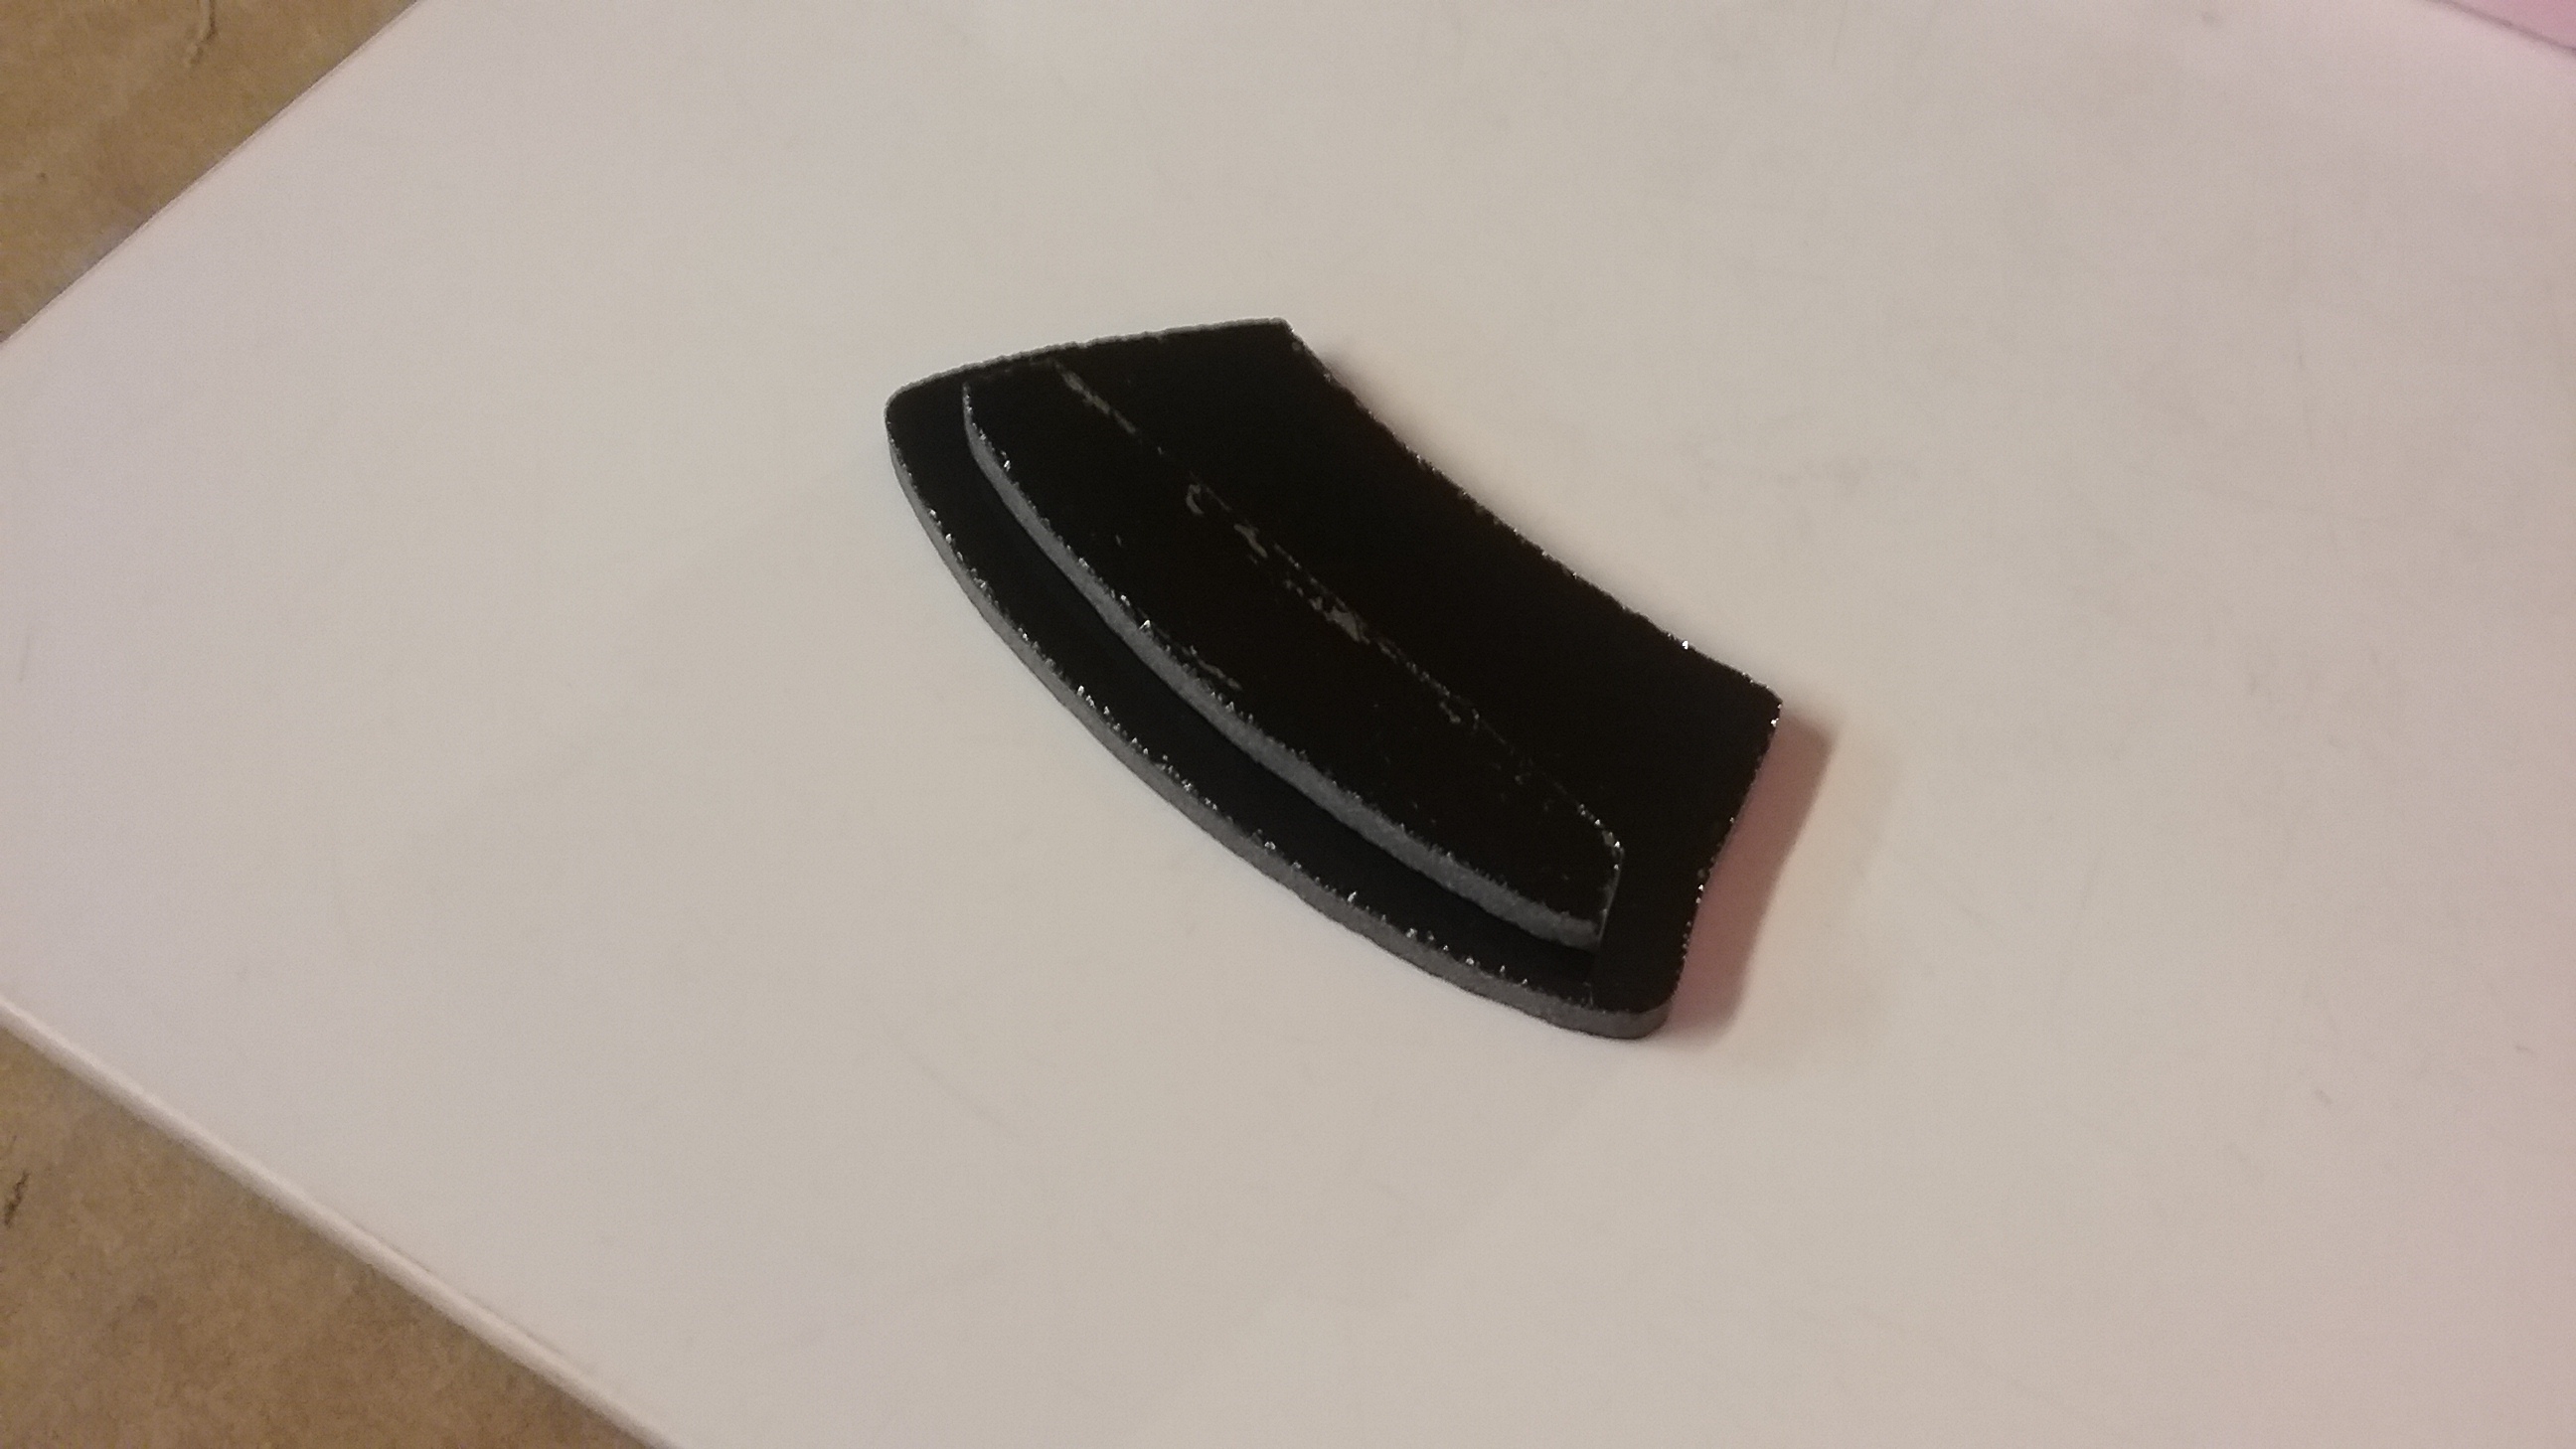
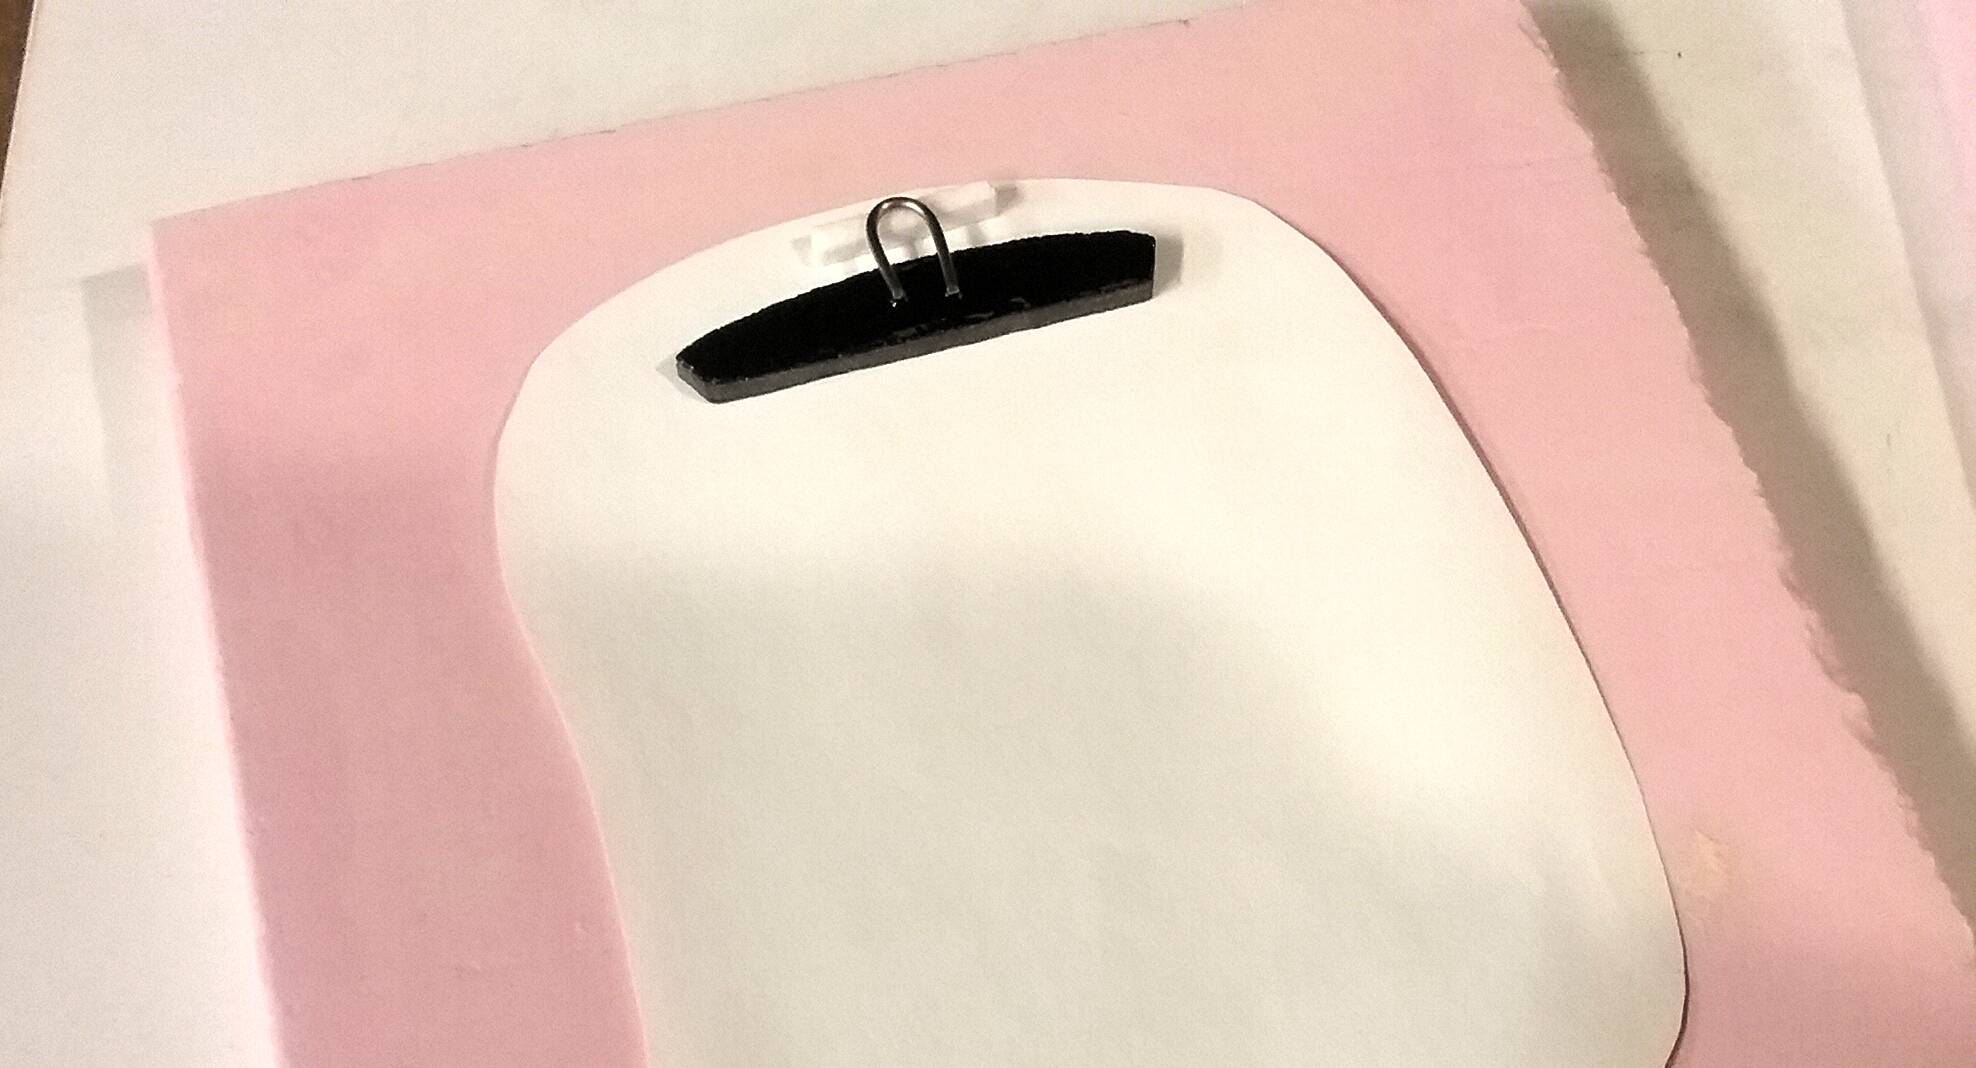
#1 – I lay the hat brace on the backside of the hat piece to make sure it mimics the top shape of the hat, and will fit neatly behind it.
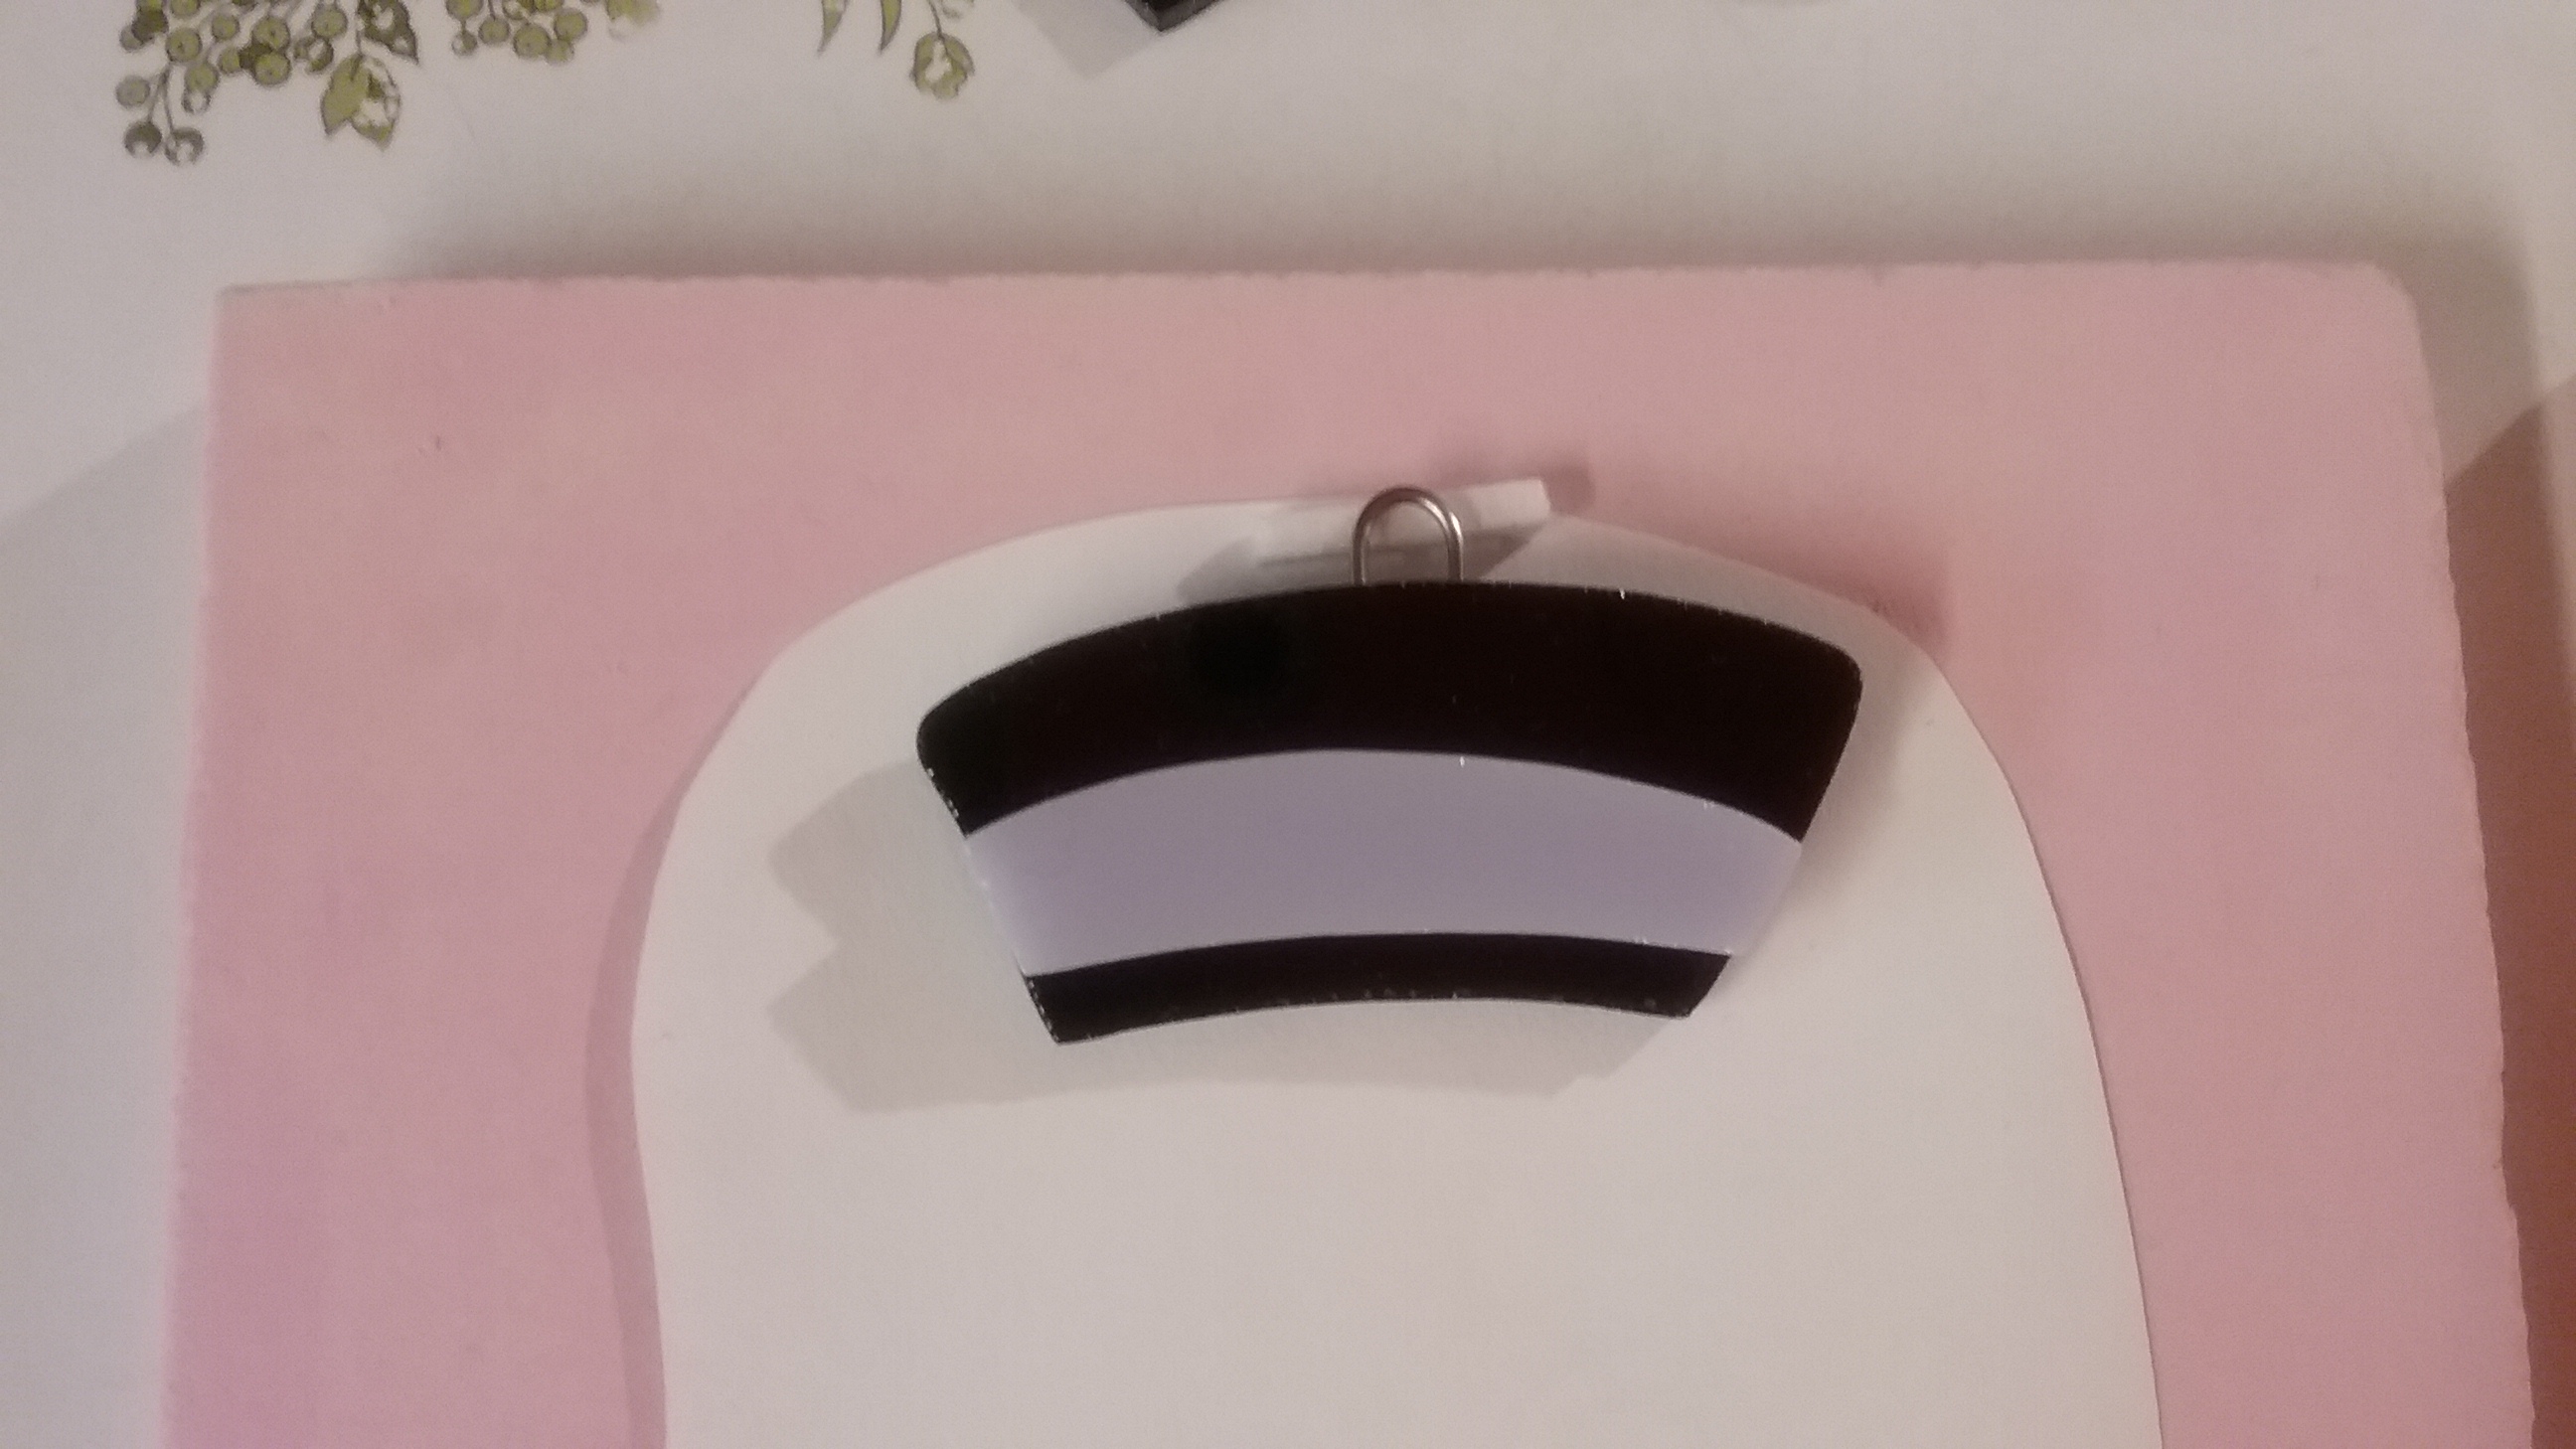
#2 – Make sure the hatband fits nicely about 1/8″ up from the bottom edge of the hat.
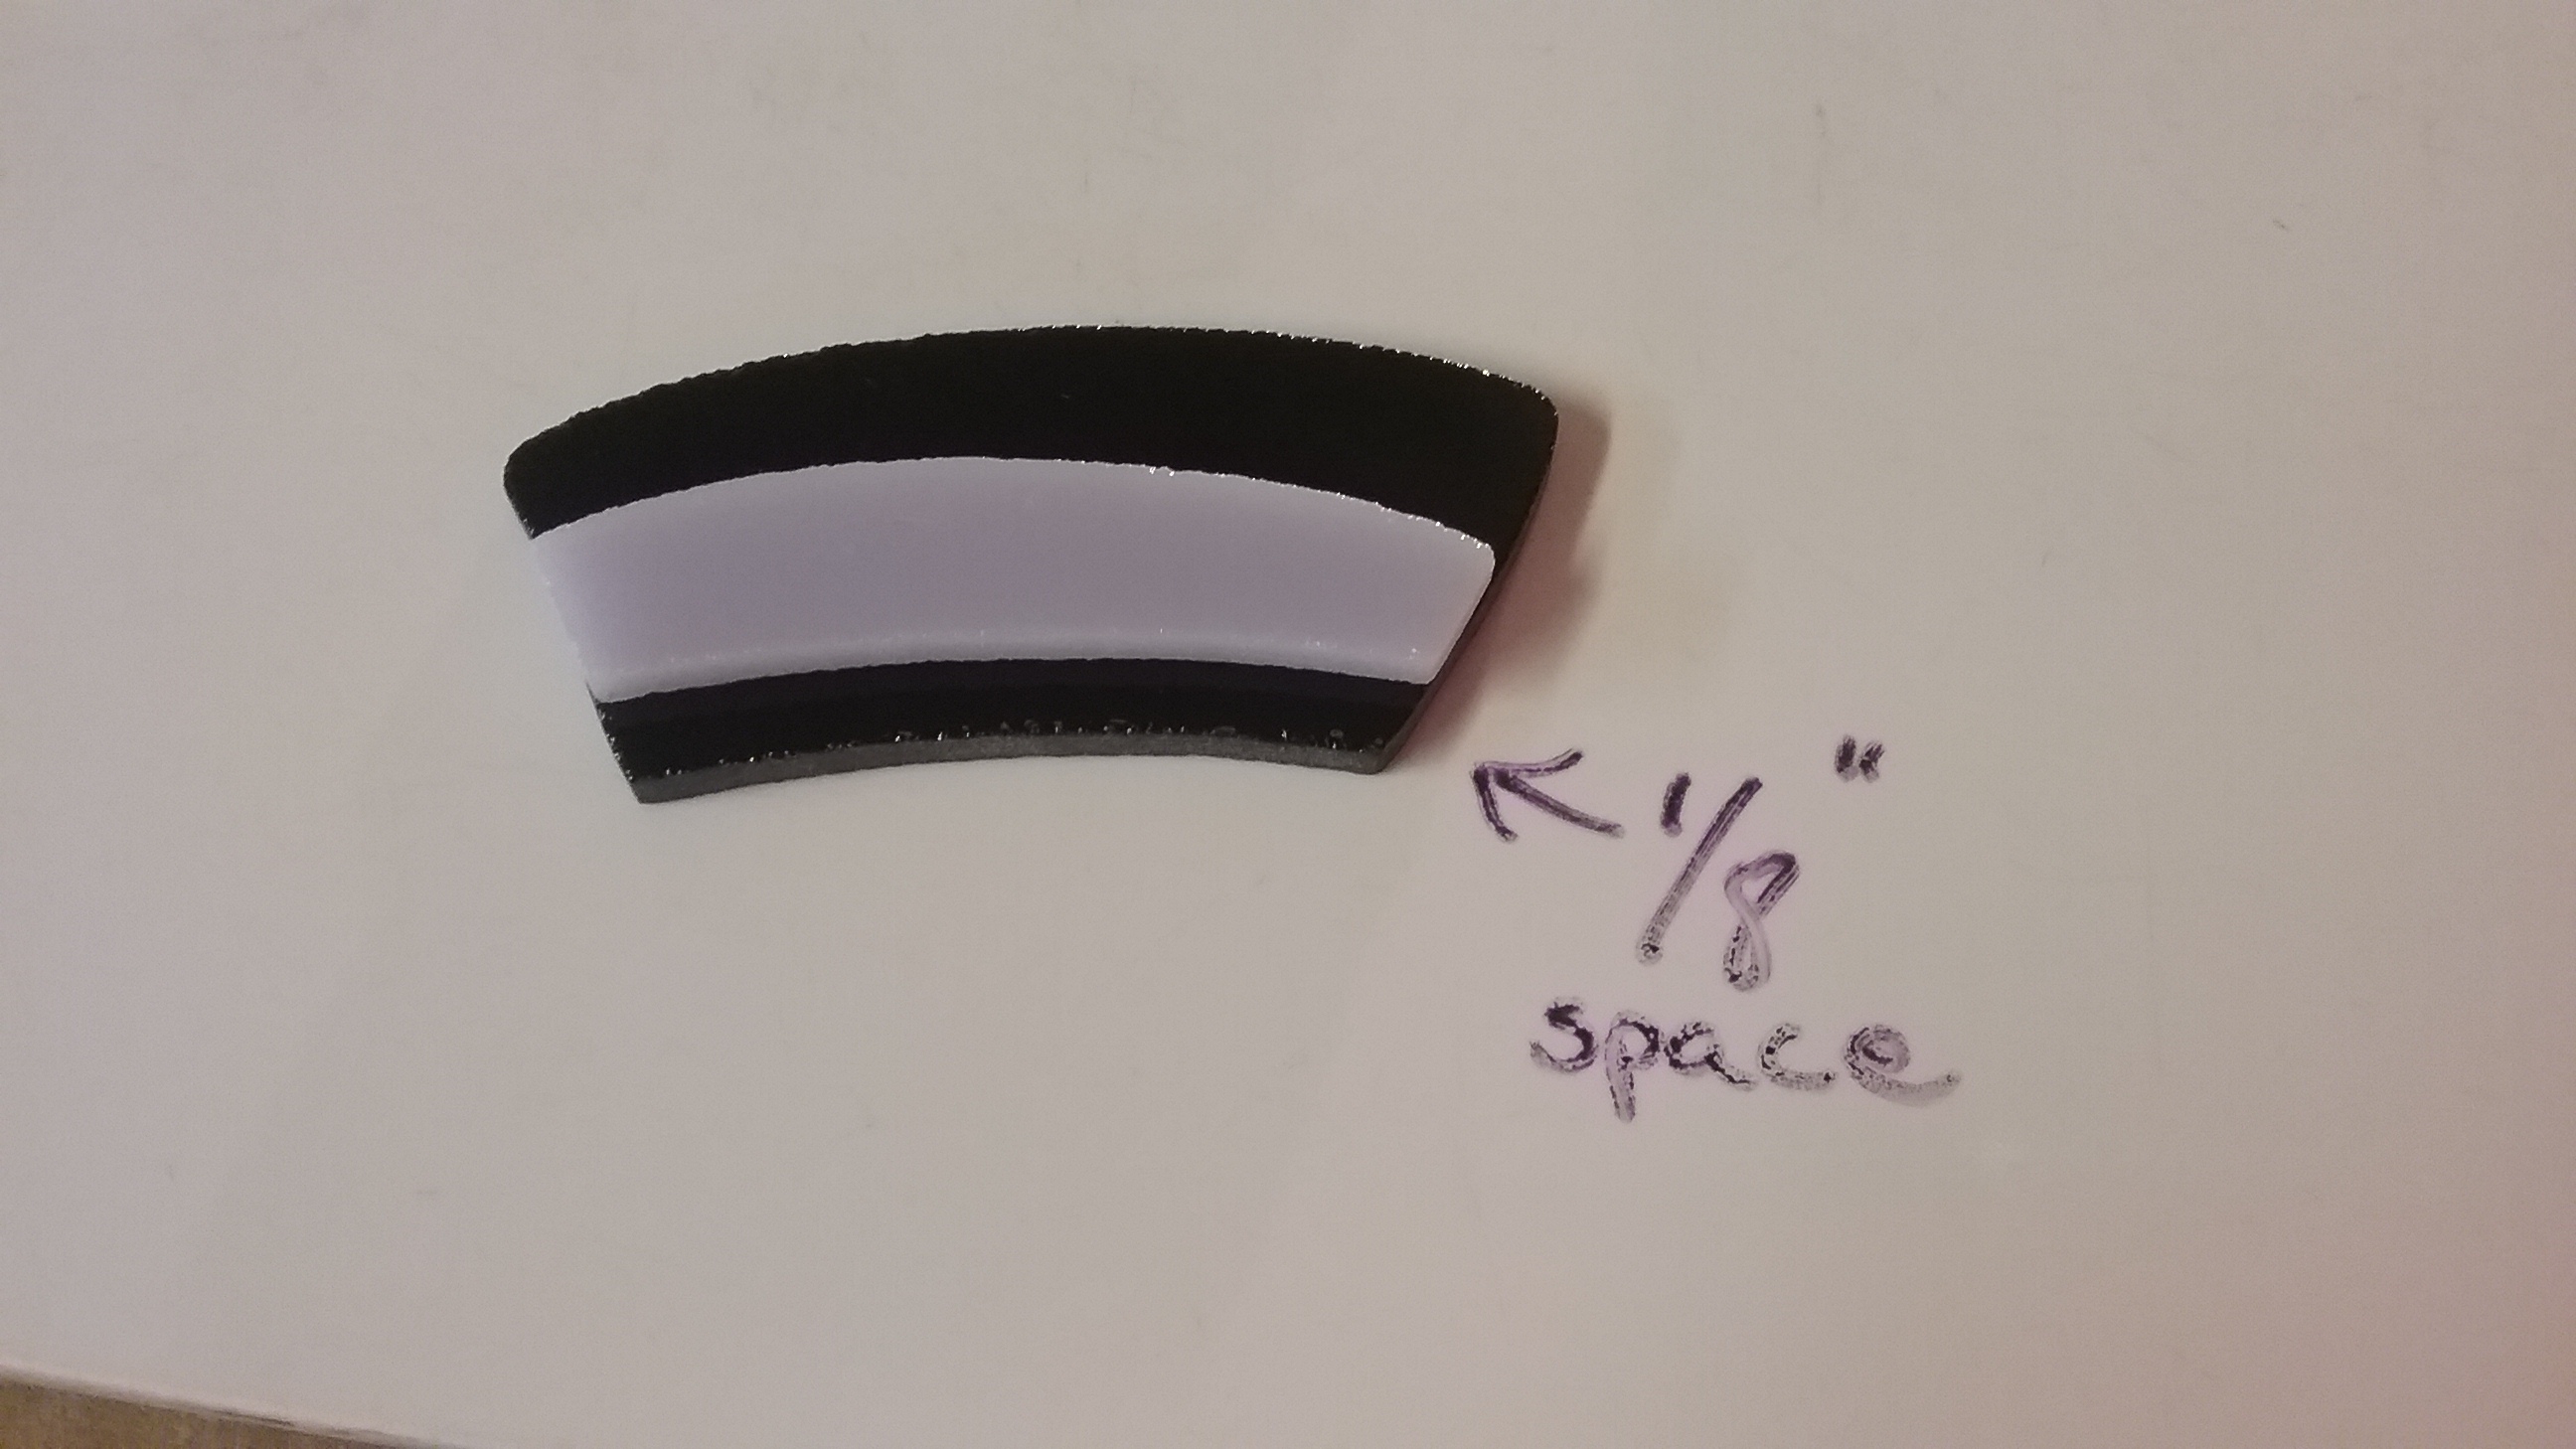
#3 – Shape the top curve of the hat brim to match the bottom curve of the hatband.

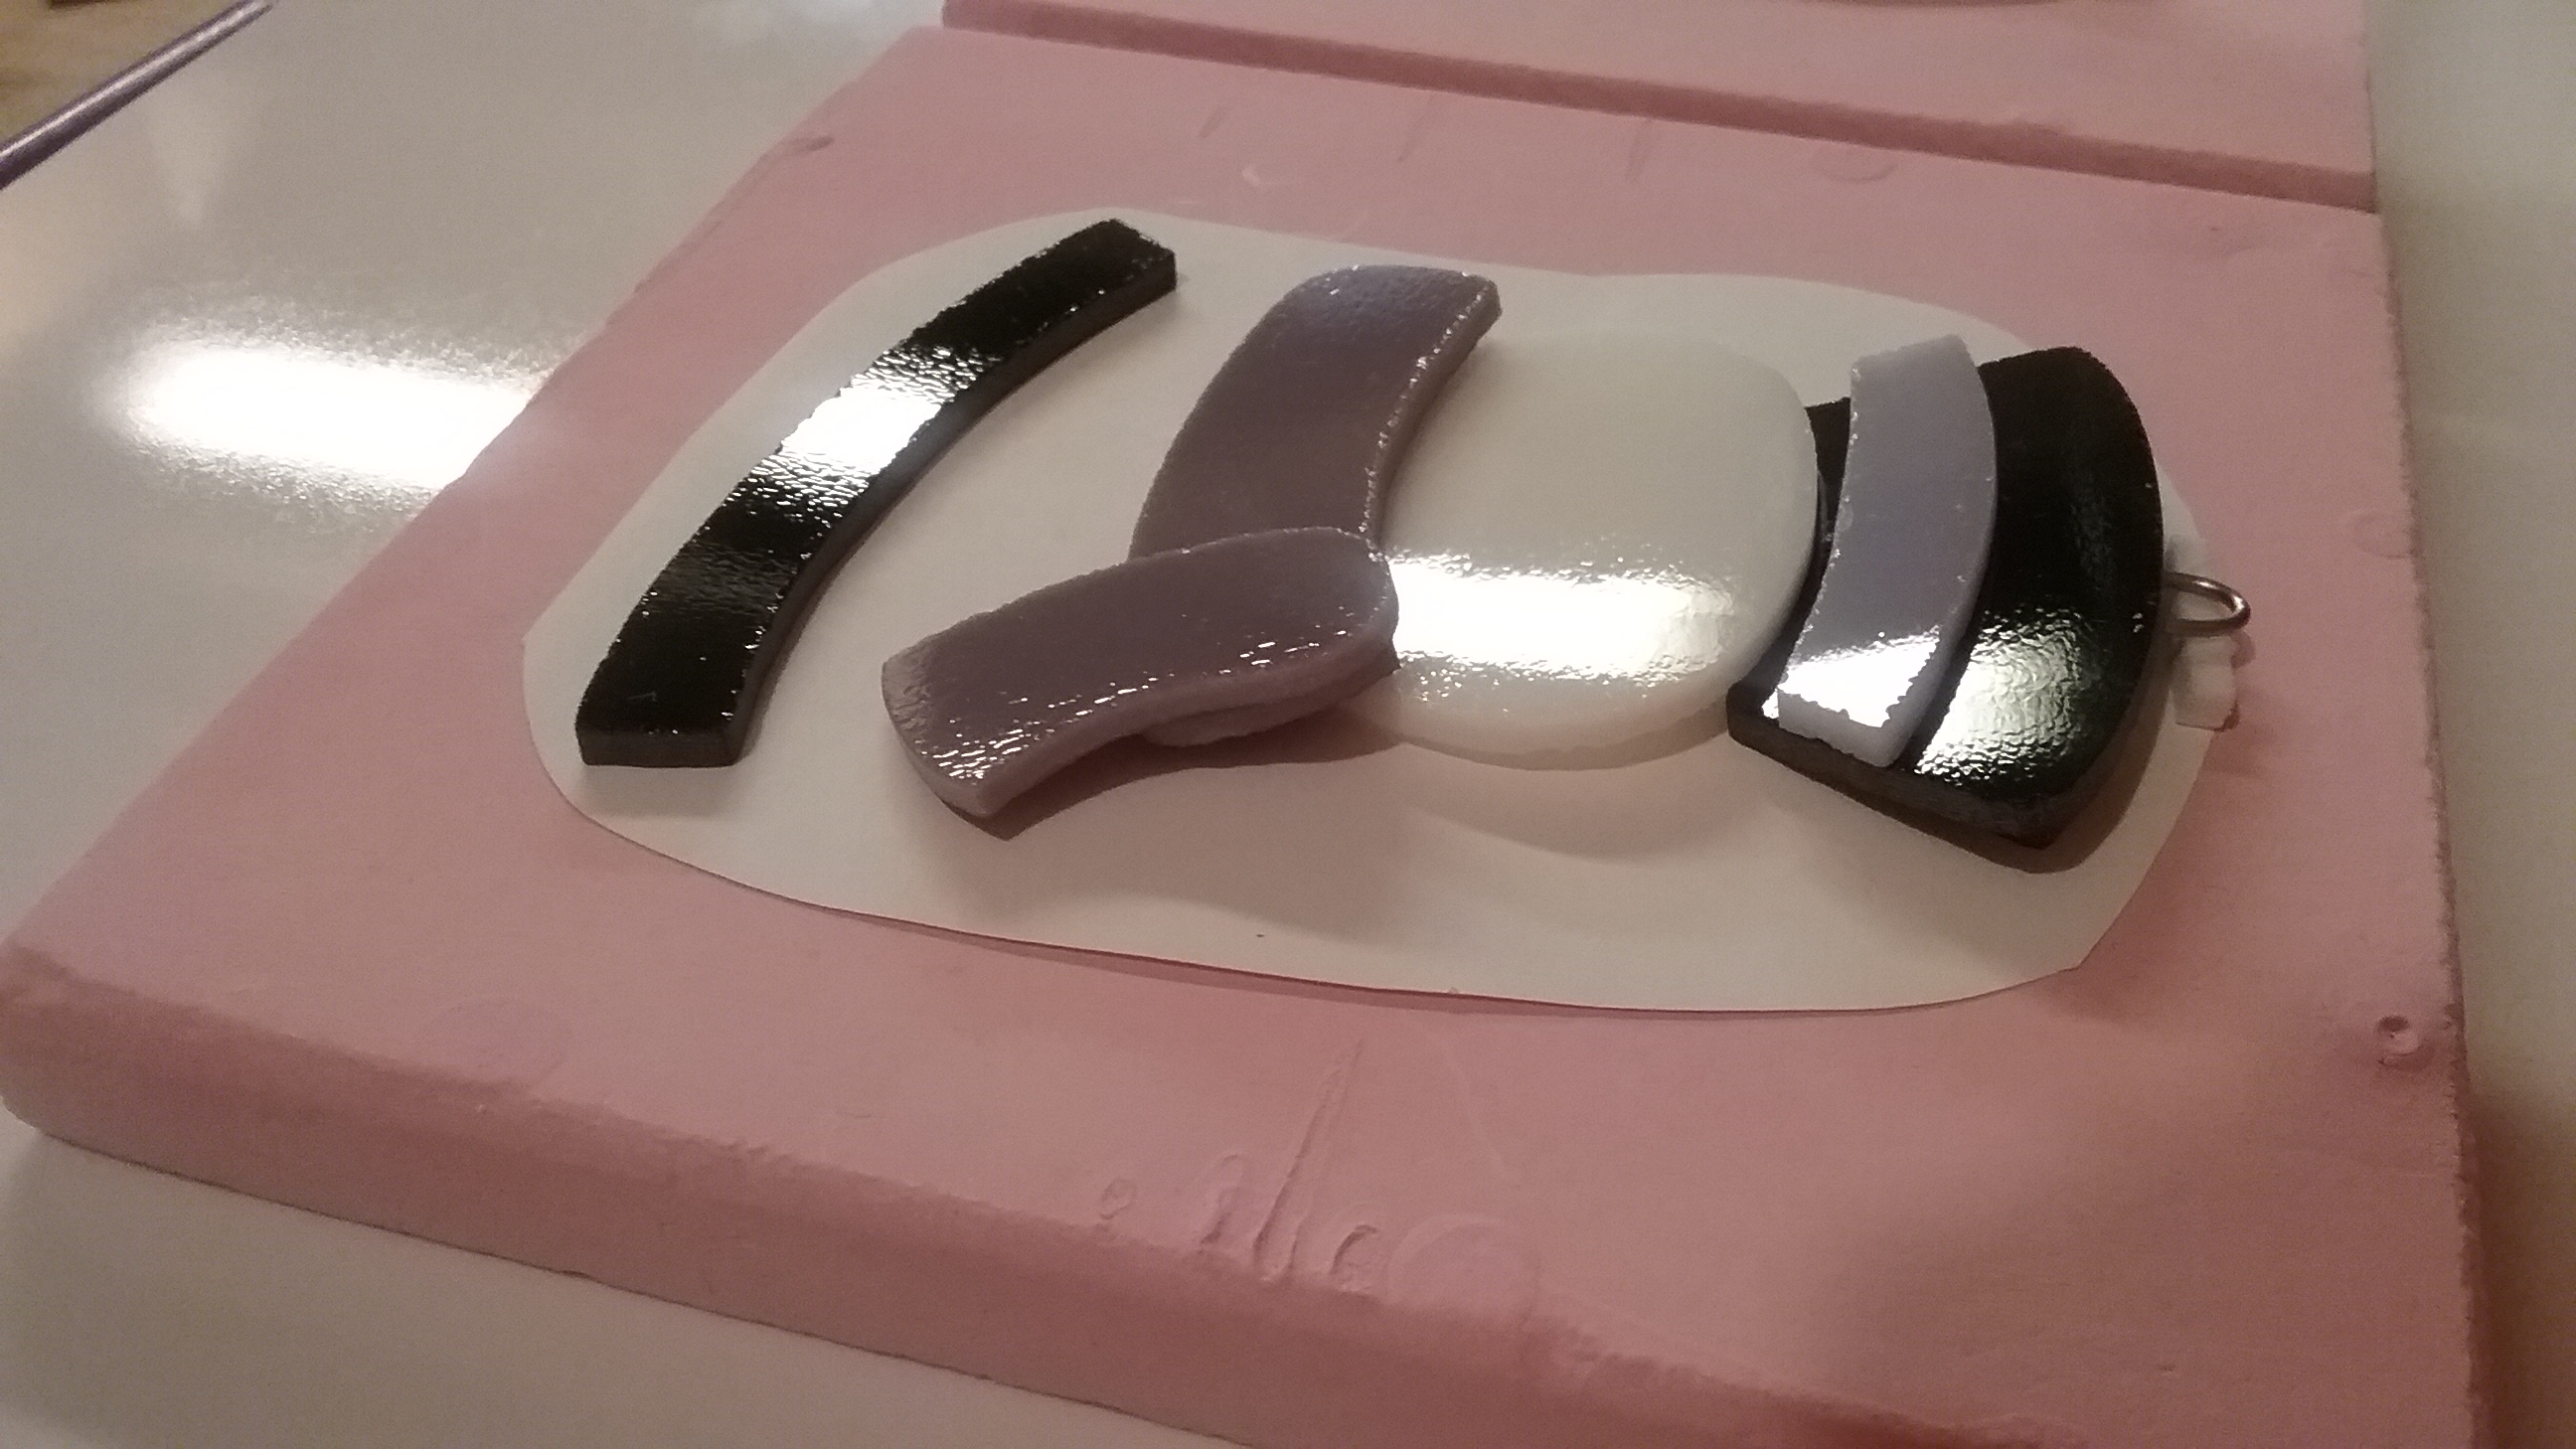
Clean glass pieces thoroughly. Bend a short length of 17 gauge high temp wire to form a loop. Glue it in place, in the center of the hat brace, propped on a small piece of kiln fiber, let dry. I always use kiln shelf paper for my ornaments, but, to each their own..

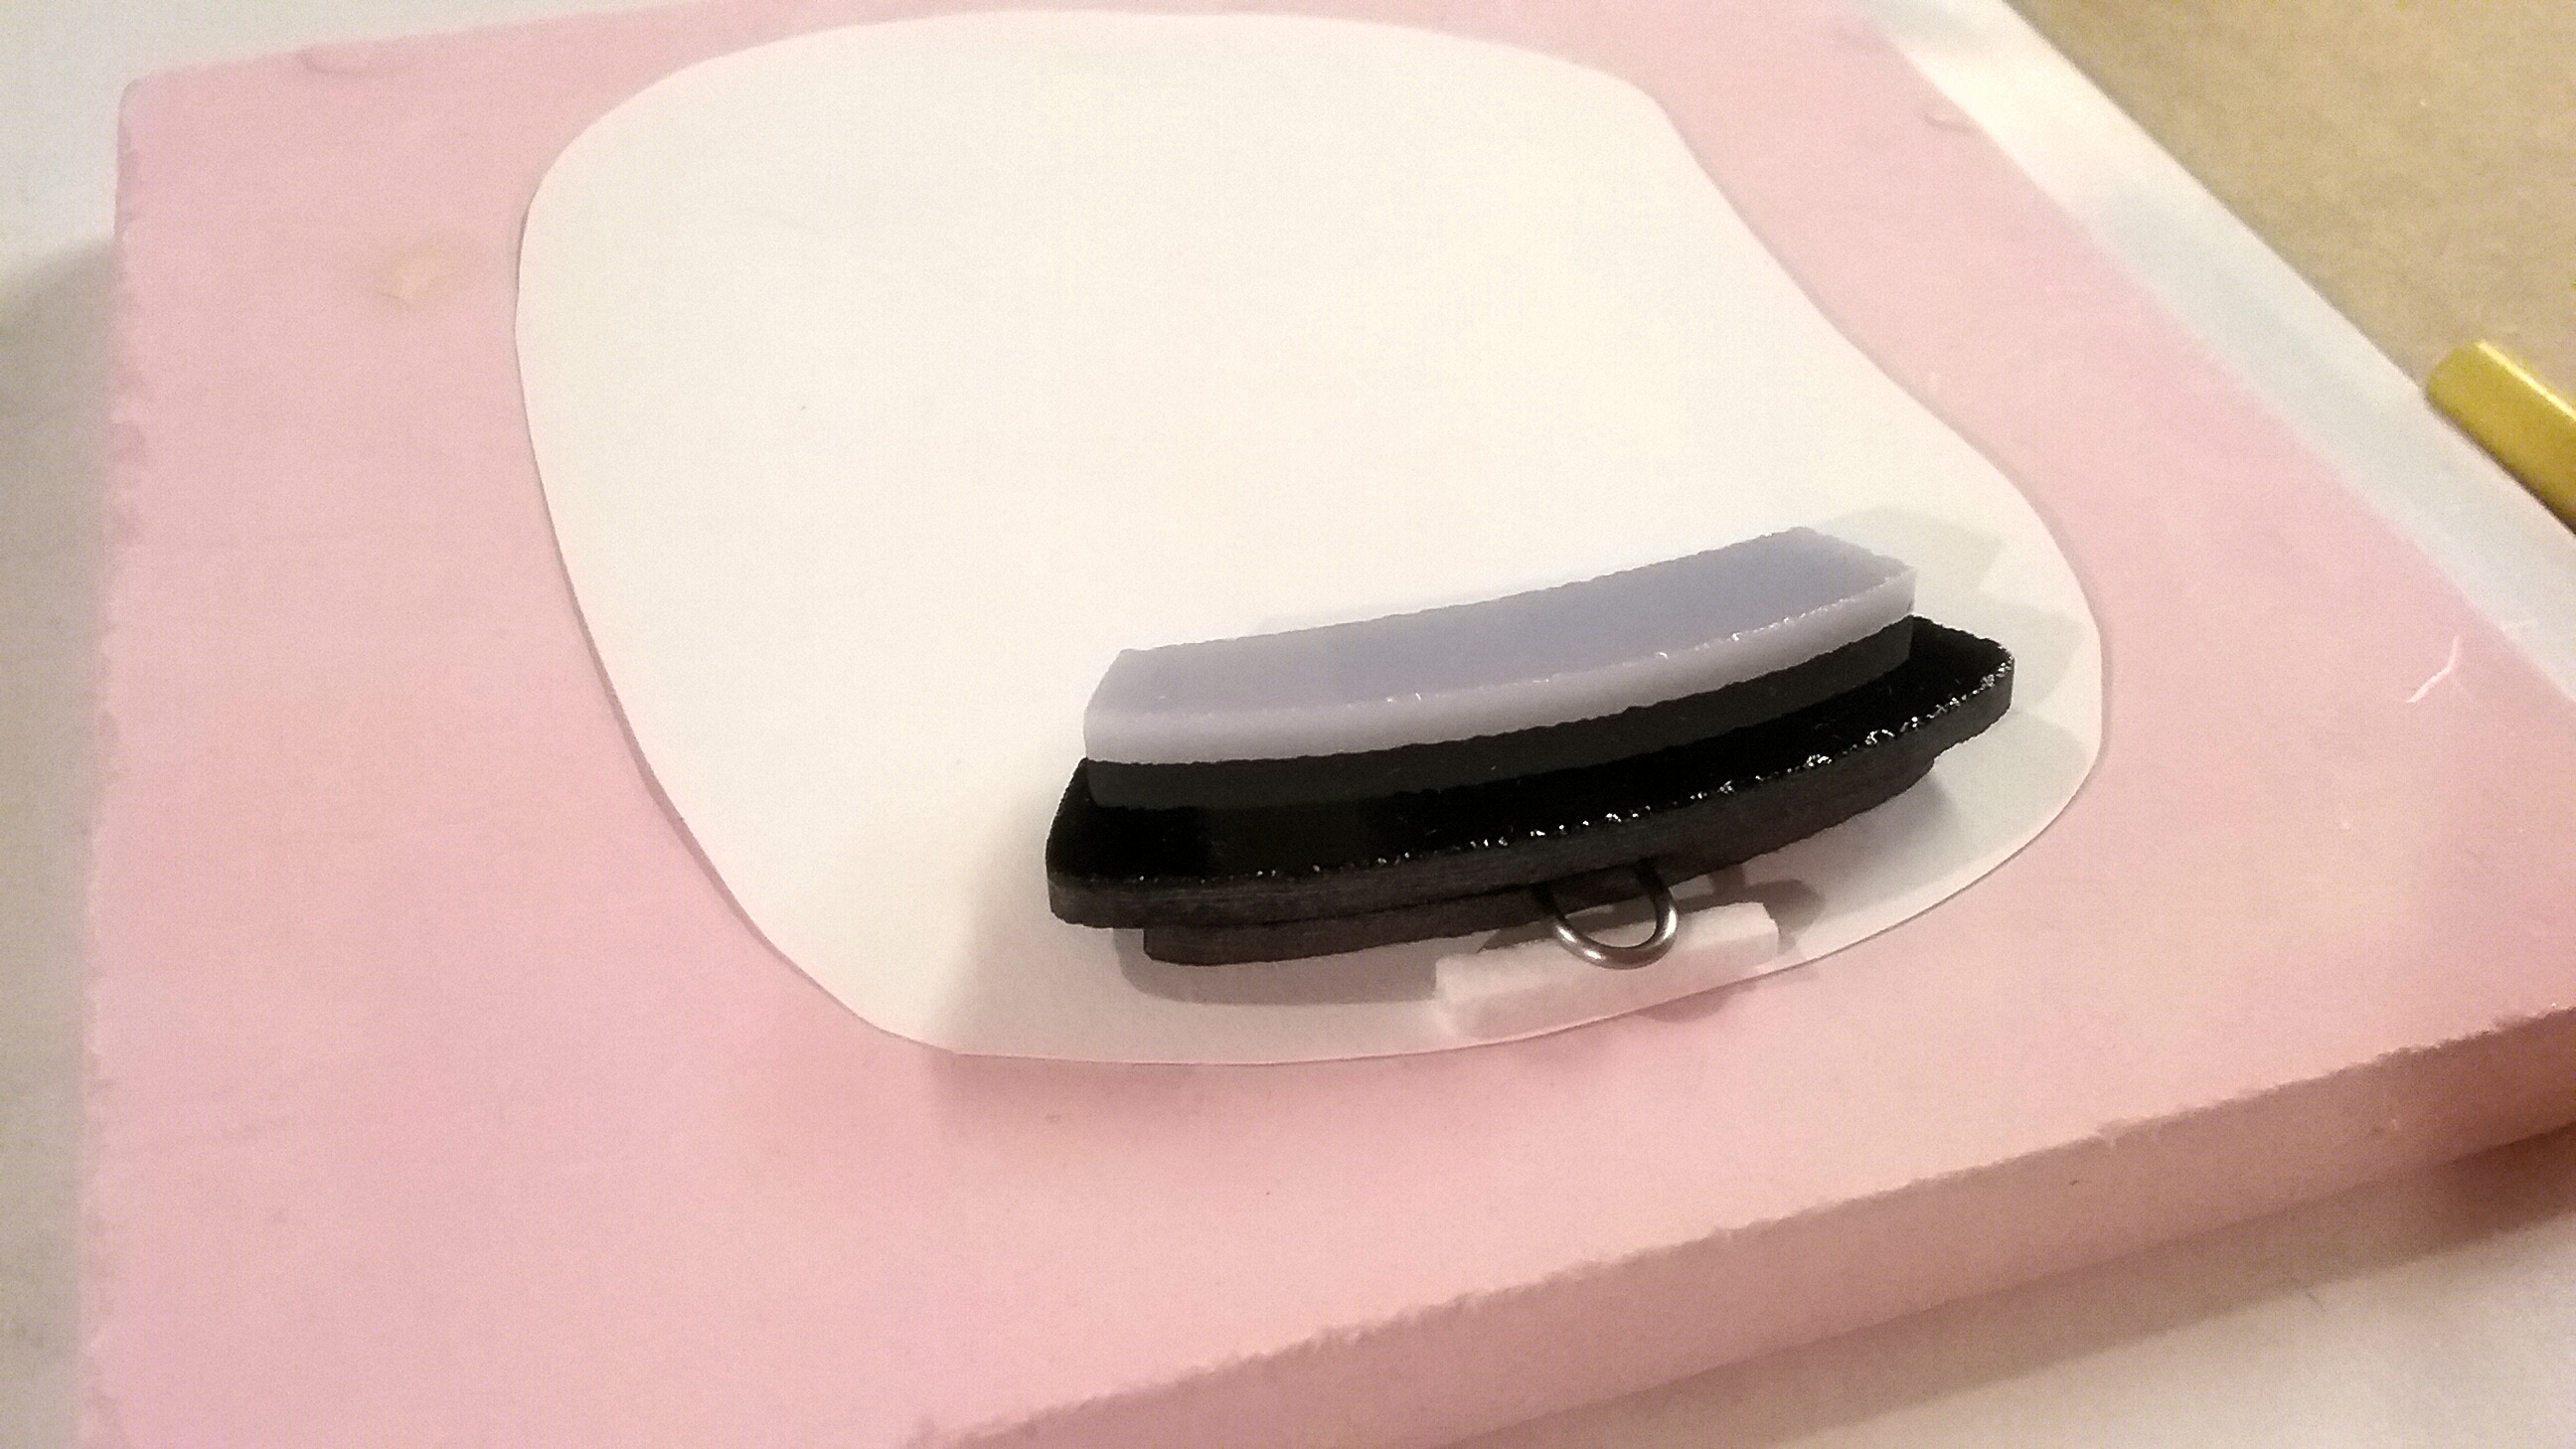
While you have the glue out, glue the hatband on the hat and the end on the scarf. Prop the scarf end with a scrap of glass until its dry.

Once everything is dry, brush a little fusers glue along the bottom edge of the hat brace, and carefully lay the hat piece over it, covering it completely. The hat will meld over it so its not seen after firing. Let glue dry well before brushing a little glue on the bottom edge of the hat, and laying the head in place, slightly overlapping. Let glue dry.
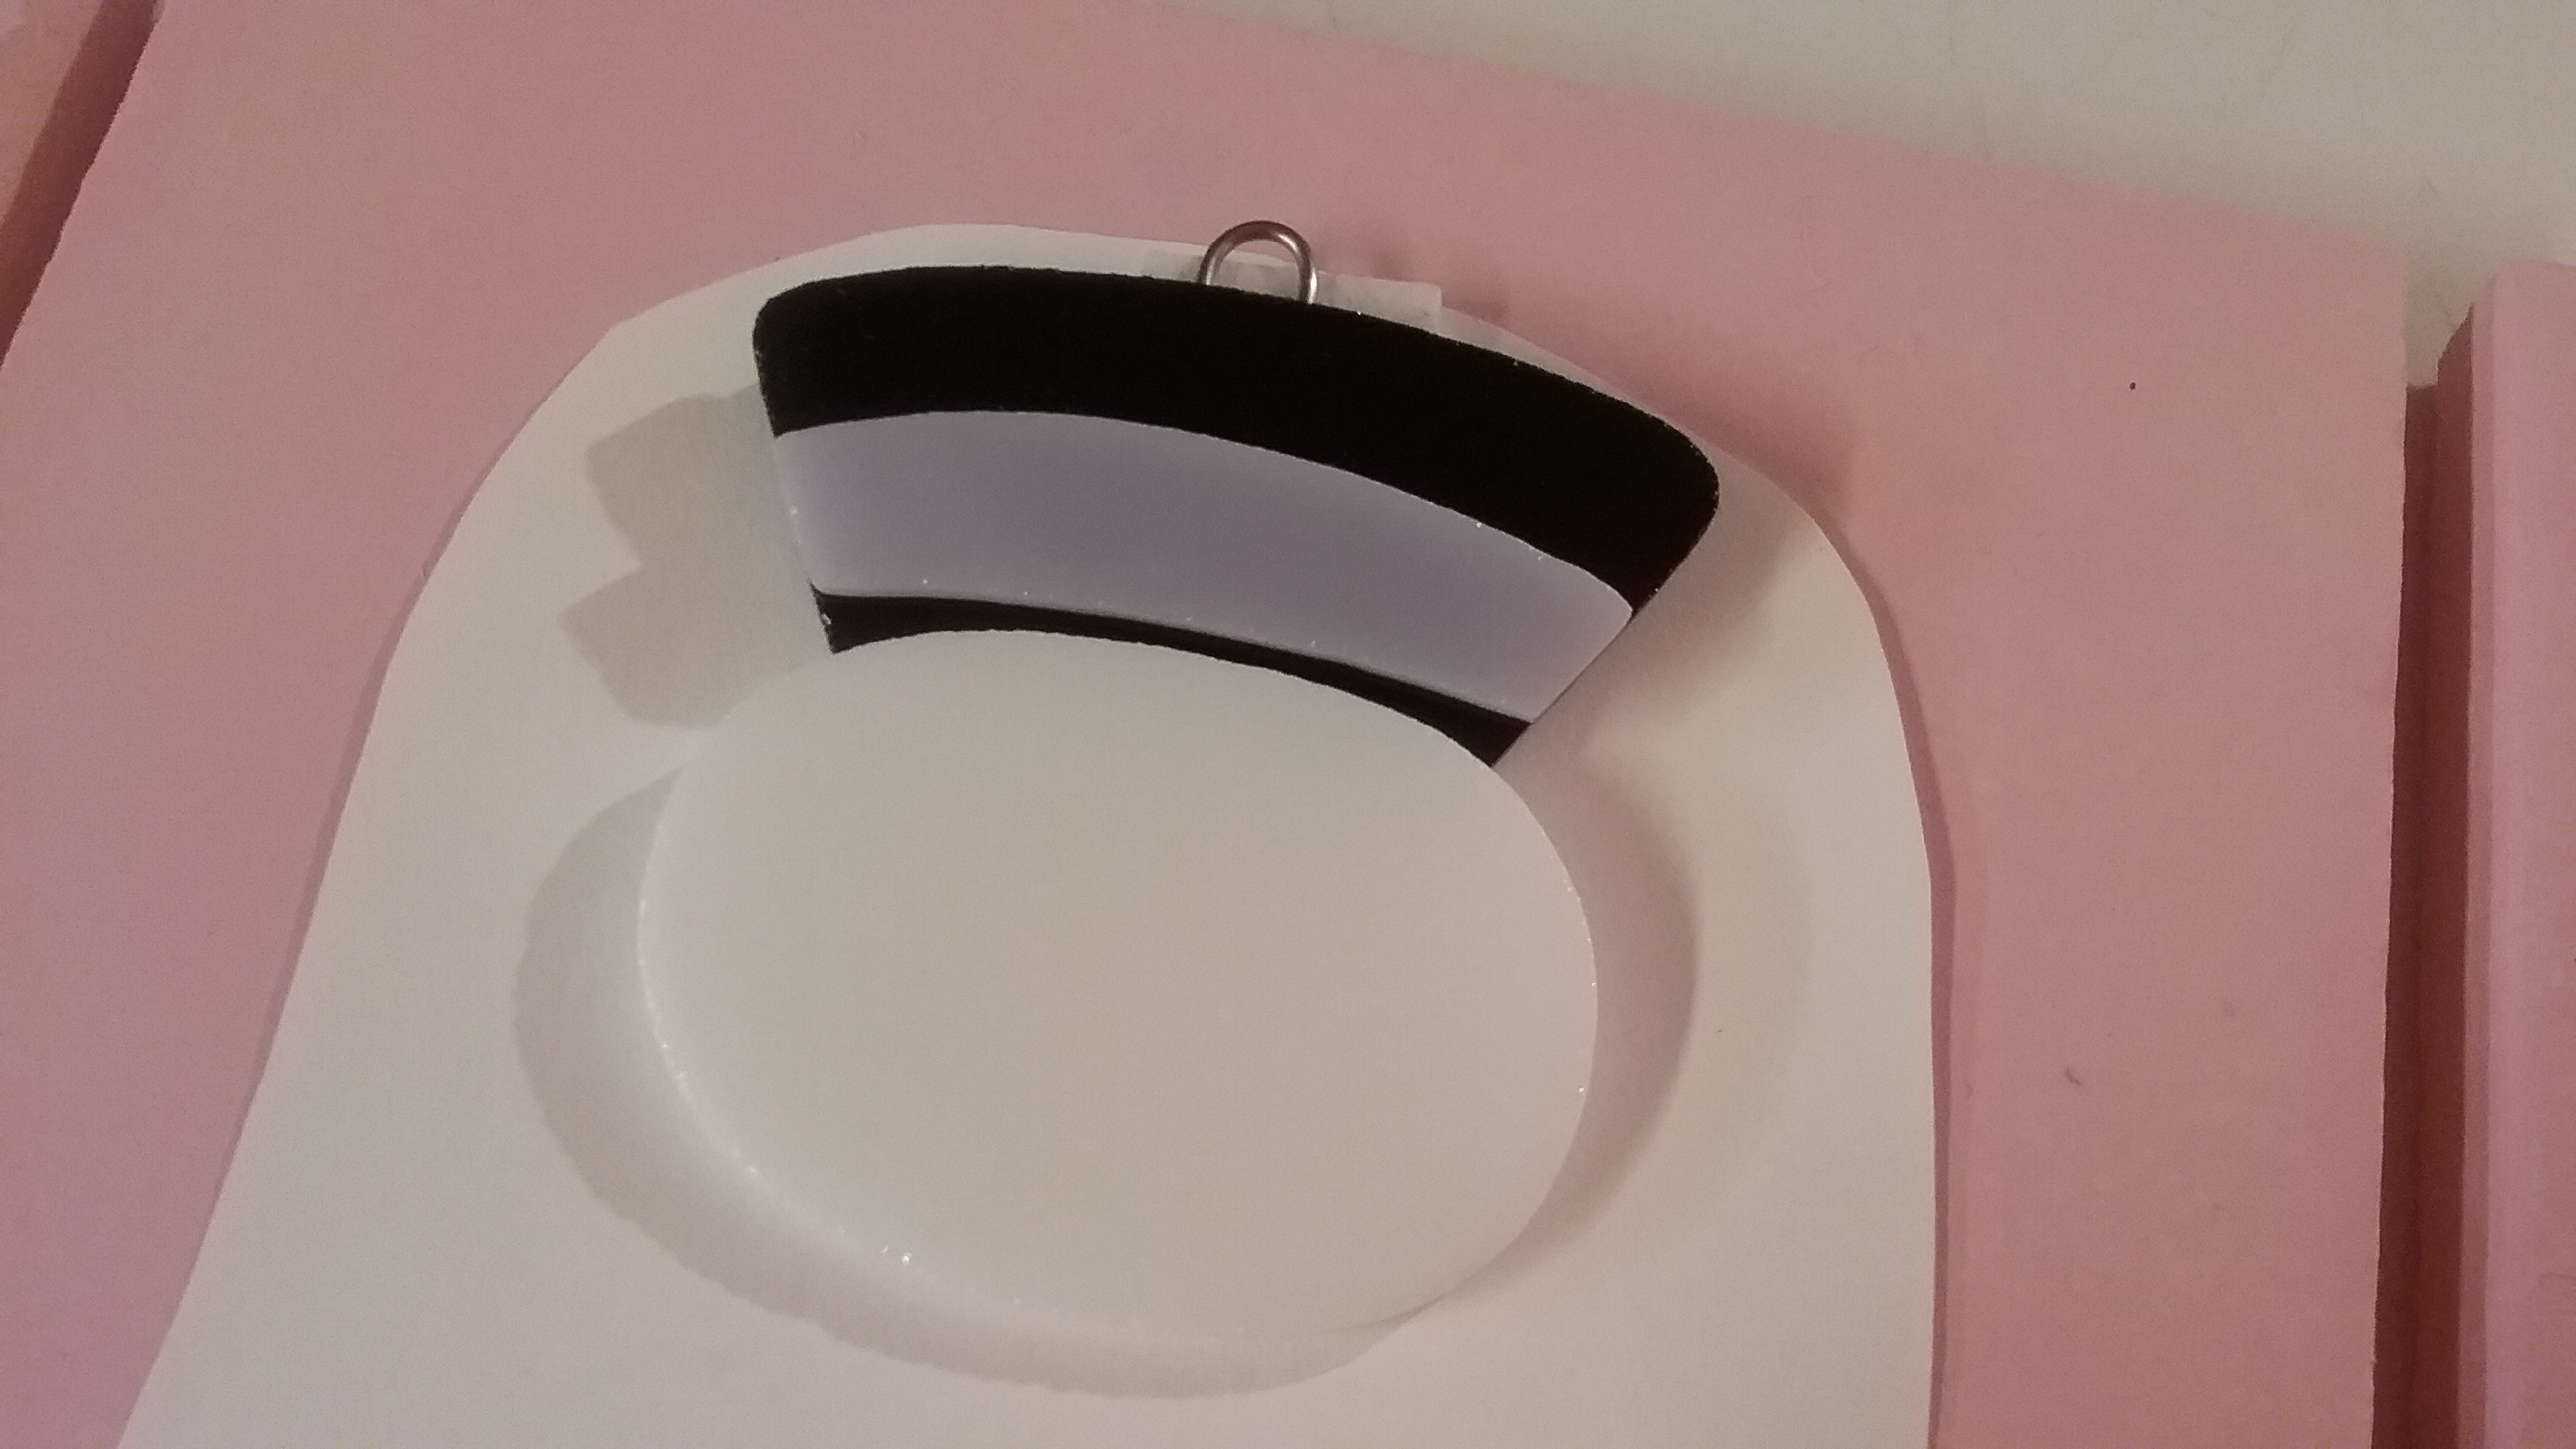
Brush small line of glue along bottom edge of head, and lay the scarf in place, slightly overlapping, at neck. Let dry. Place hat brim on the shelf, separately, to fire.
I use a small tabletop kiln to fire my ornaments. I start on medium, with the lid open a bit, until the temp reaches 1000 and the kiln paper is done burning, then close the lid and turn it to high. I like a sharp clean look, so I watch closely through the kiln lid window when the temp gets to around 1600 degrees, and shut the kiln off quickly once the glass edges have rounded smoothly .. most often at 1650 – 1700 degrees. After unplugging the kiln, flash vent to 1100 degrees, and shut the lid until the kiln is at room temp.
After completely cooled, glue the hat brim on with E6000. I always prop the hat brim and/or lay the rubber ends of my small pliers across it to hold in place until dry. Use a toothpick to help glue on nose, holly, and the berry. To add the glass seed bead eyes, squirt a small amount of glue on waxed paper. Hold the bead with tweezers, touch it in the glue, then put it on the glass. Let glue dry. Clean away any unwanted glue, that is showing, with a craft knife or small ceramic tool.
Hope you have fun with him! Please contact me if you have any questions. I’d love to see what you create if you’re willing to share!
I’m so excited! There’s a big 3 day happening in Central Iowa this week-end. If you like treasure huntin’ and junkin’, you won’t want to miss this one. Check out @Back Roads Junk-it Trail to print off a map of all the wonderful places to go, and join in the fun!!
My Thanks to @Gypsy’s Alley, in Nevada, Iowa, for graciously accepting me as a new consignee recently so I can participate in the event.
I have a few gourd projects to finish up, and some cool junk pieces to load up too, but, stained glass leaf sun catchers, garden stakes, and garden chandeliers have already been delivered. Its a good thing I was in a hurry when I stopped by to make a delivery the other day. The place was filled to the hilt with so many new things, and awesome displays, that I know I would have spent the whole morning there and surely brought home more than I took!
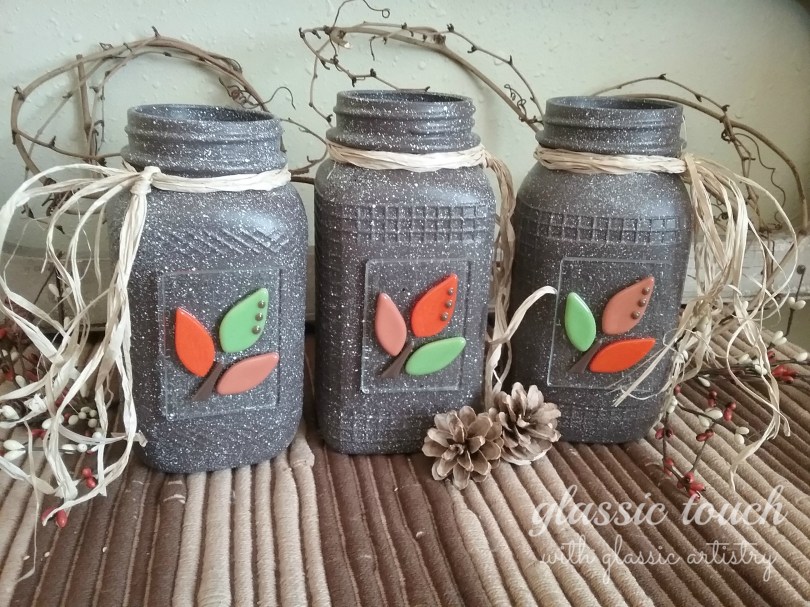
With re-purposed and painted Mason jars being so trendy these days, and with a little time to spare, I thought I’d make a little fun Fall decor to take too.
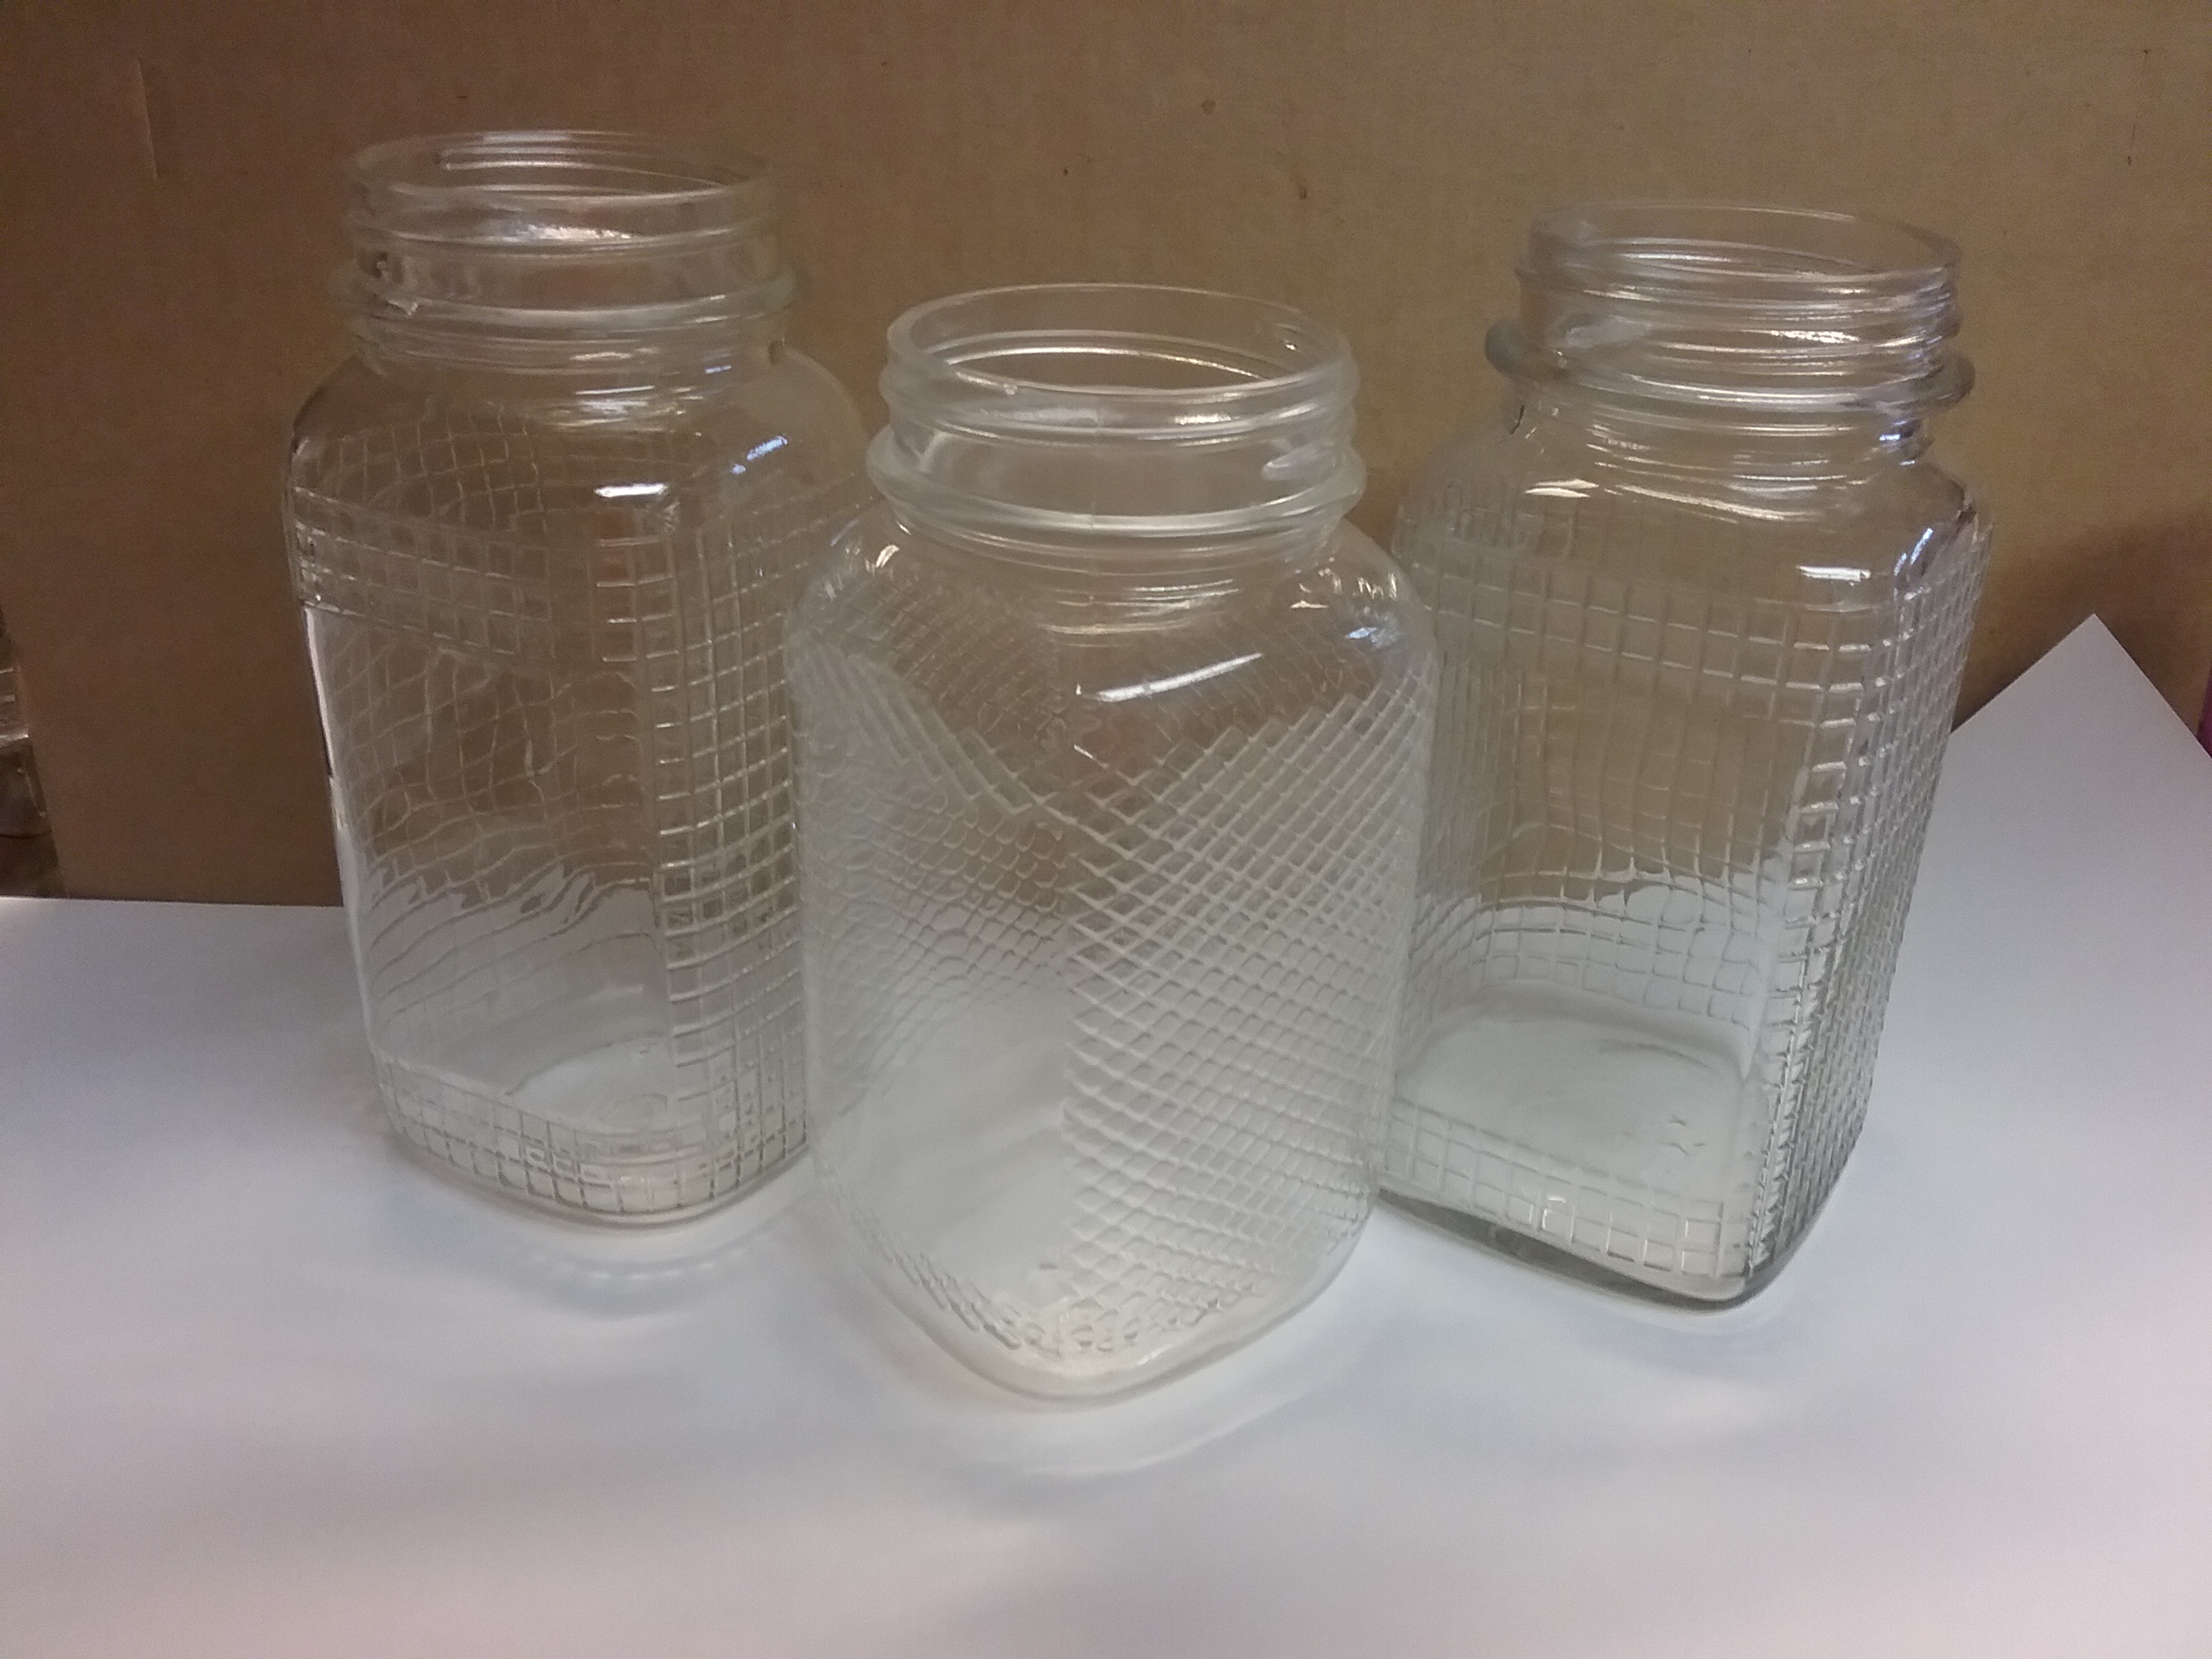
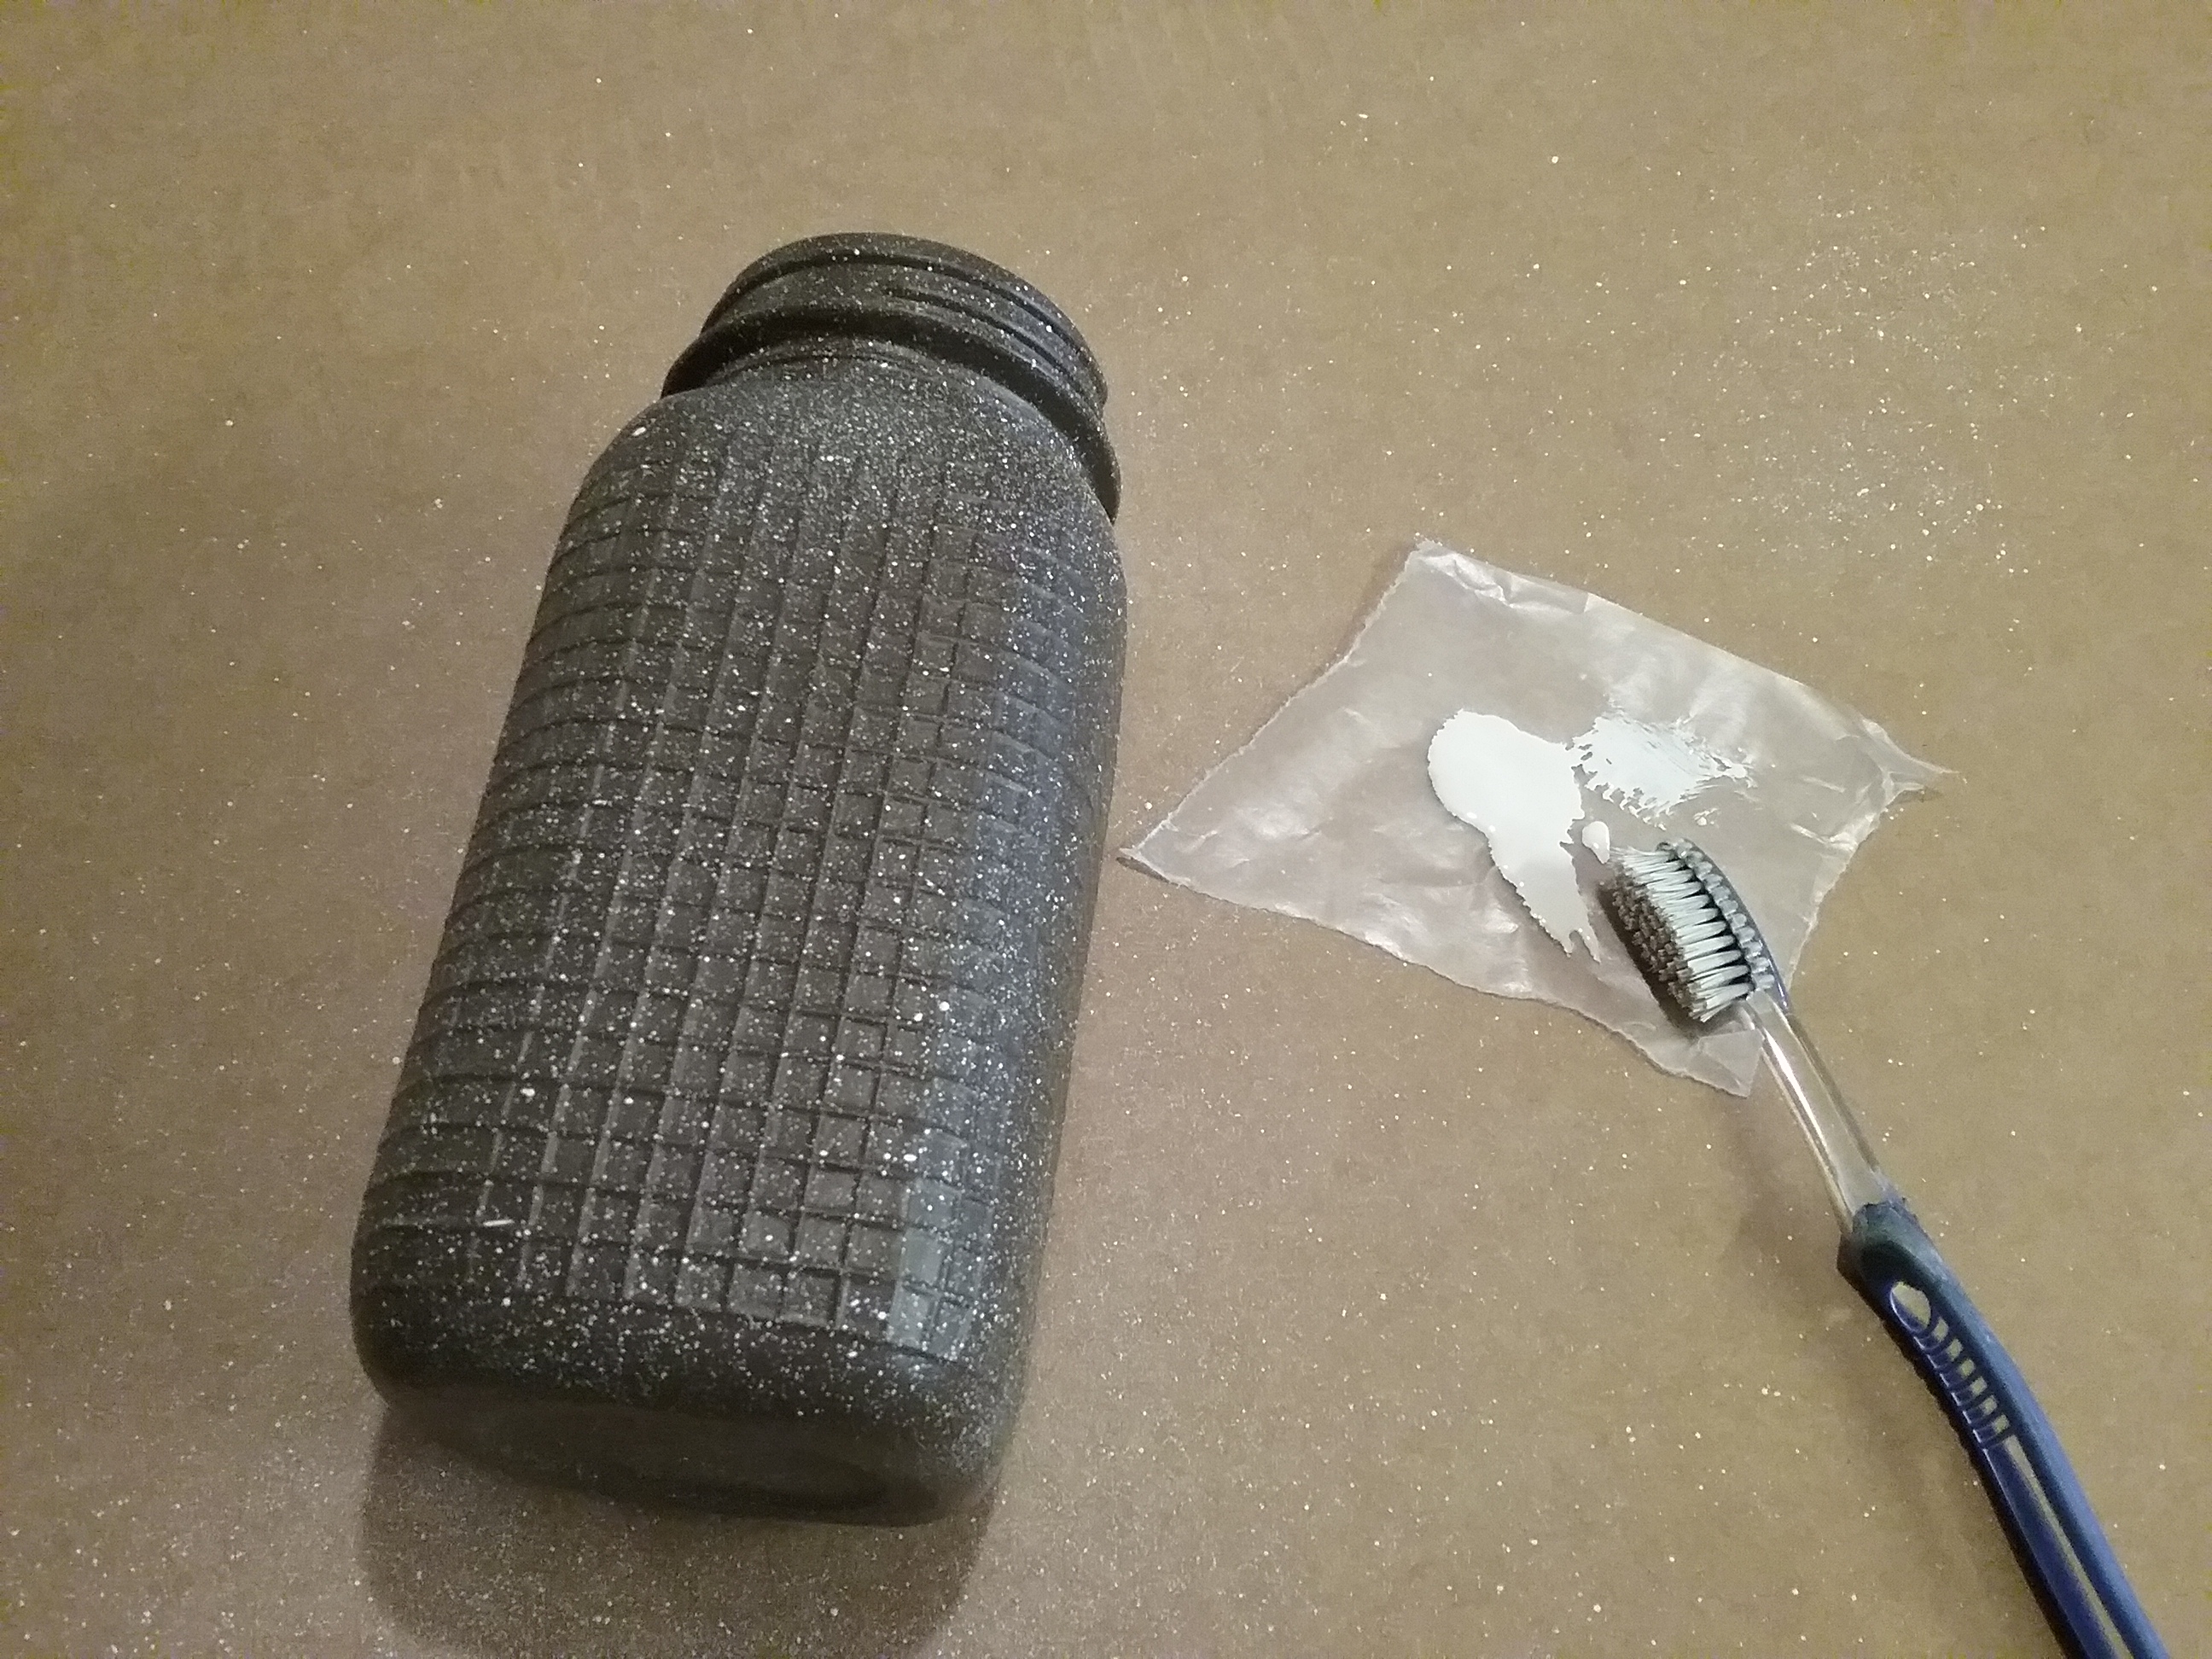
Last spring, I had saved some jars because they were embossed with a small checkered design on three sides, and had a smooth front, which I’m assuming was probably for a label. I wasn’t sure what I was going to do with them, but I liked the texture, and remember thinking the front might offer a nice surface for a tiny mosaic.
After rethinking it a bit, I still liked the idea of a design on the front, but scratched the idea of a mosaic with grout, and choose to go with a fused glass tile instead.
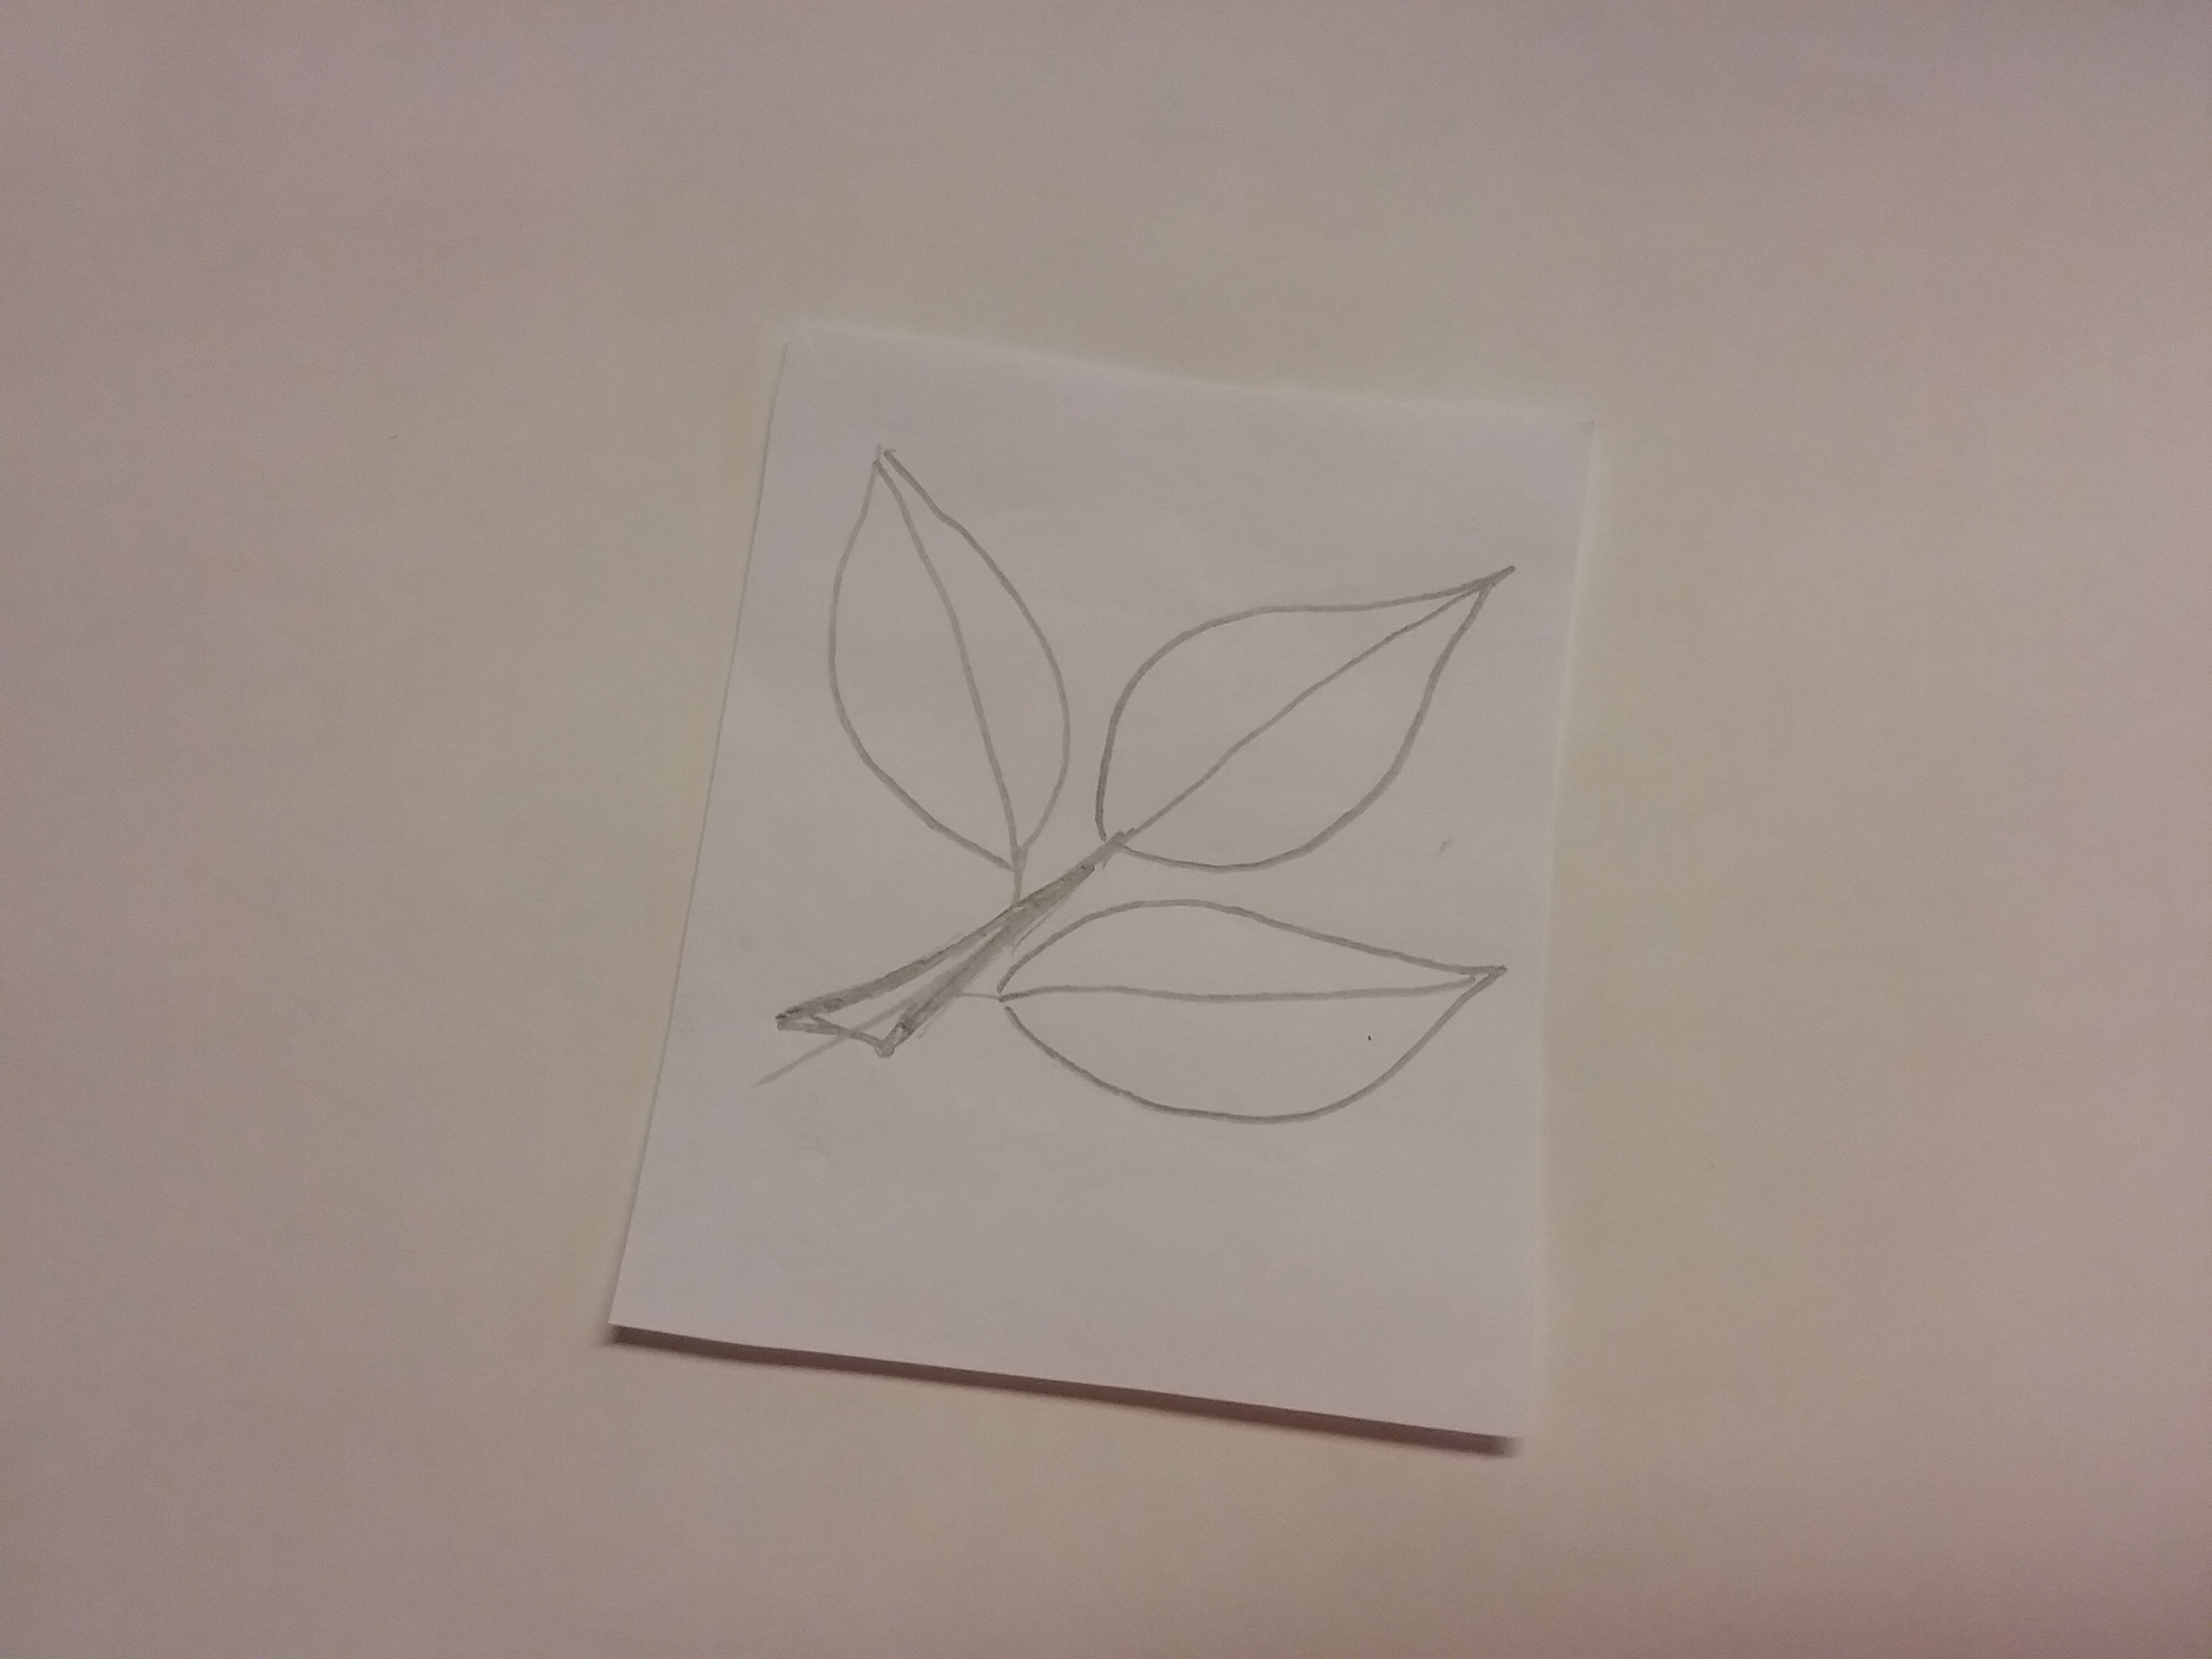
I measured the smooth surface on the front to determine the size of the clear glass tiles I wanted, then drew a simple leaf pattern to fit on top of the tile piece. My drawing skills are not what they used to be, so this was definitely the most difficult part of the project for me. You could also find a pattern to trace if you like.
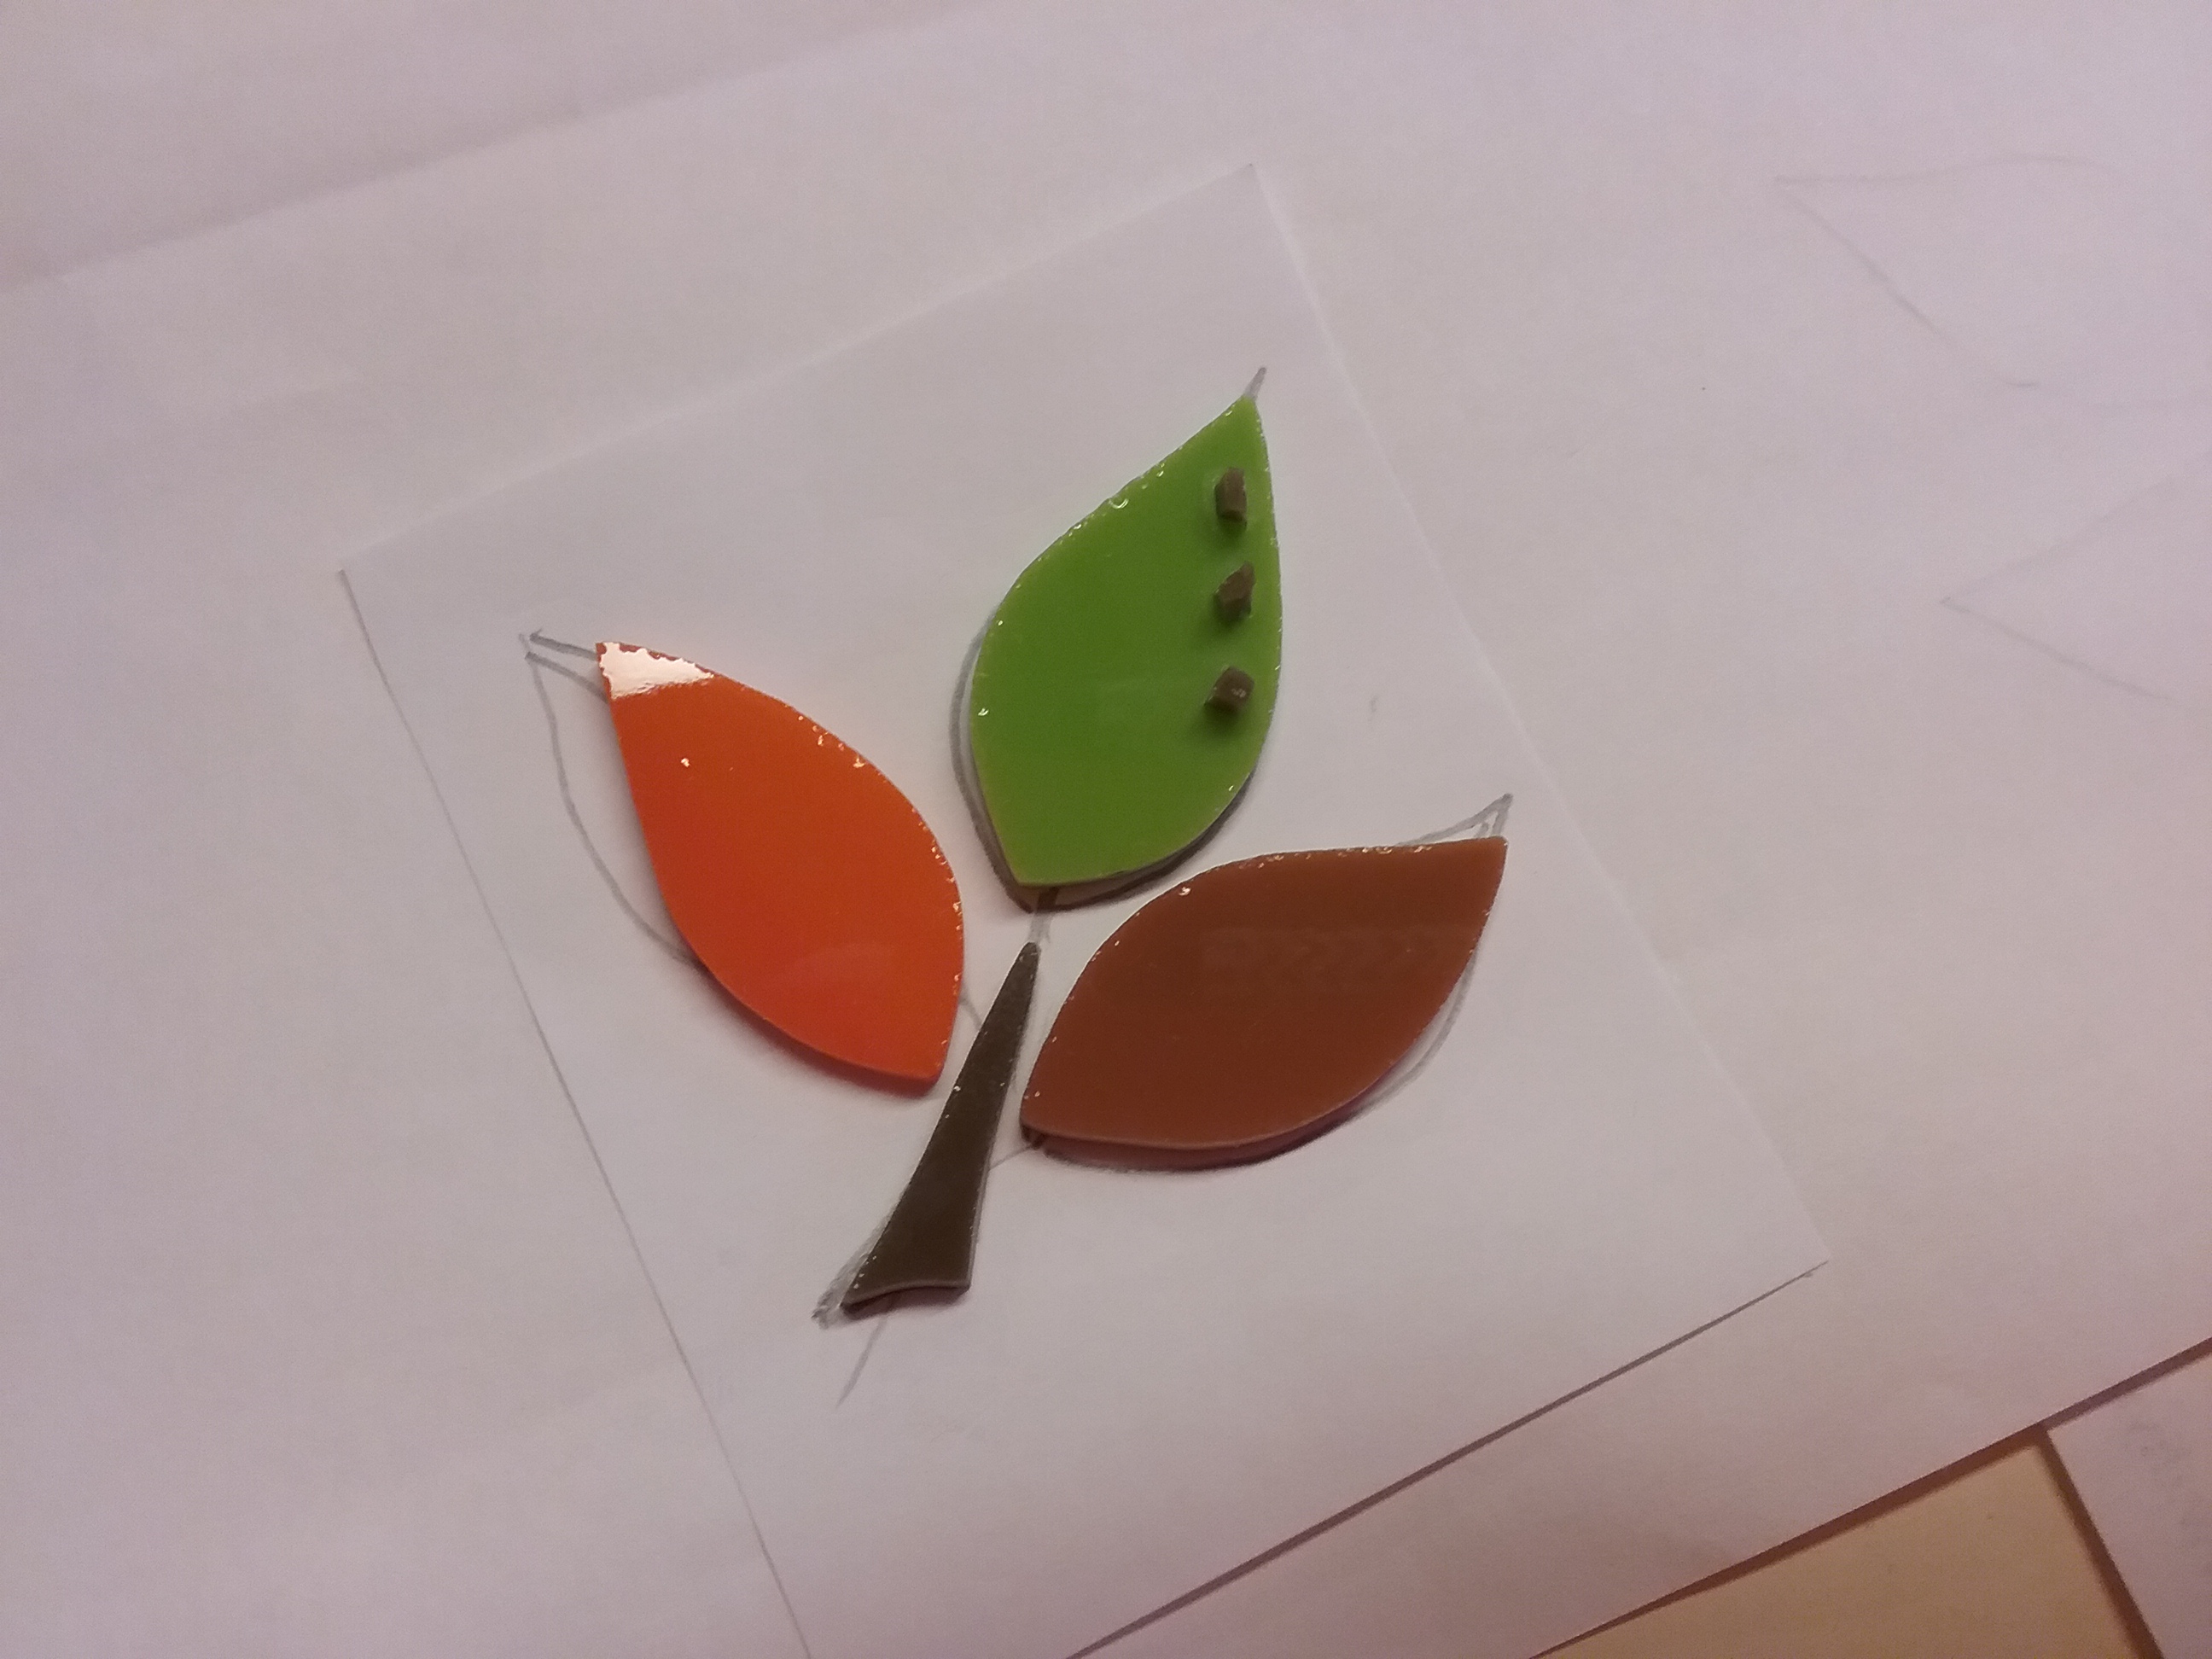
I picked out some fall colors of glass, and cut and ground them to fit my pattern. I had three jars, so I changed the leaf colors around so they were not all the same. All of the pieces were cleaned, then fired in a tabletop kiln, up to 1700 – 1750 degrees, just until the edges were rounded. My glass was all 96COE, but it doesn’t have to be. The only pieces that need to be COE compatible would be the middle leaf and small brown dots, nothing else is fused together.


Wanting my jars to be dark brown, I waited until I could take a piece of fired brown glass to town to match it. A brown spray paint would work too, but I opted to have a small sample sized can mixed for about $3.00.
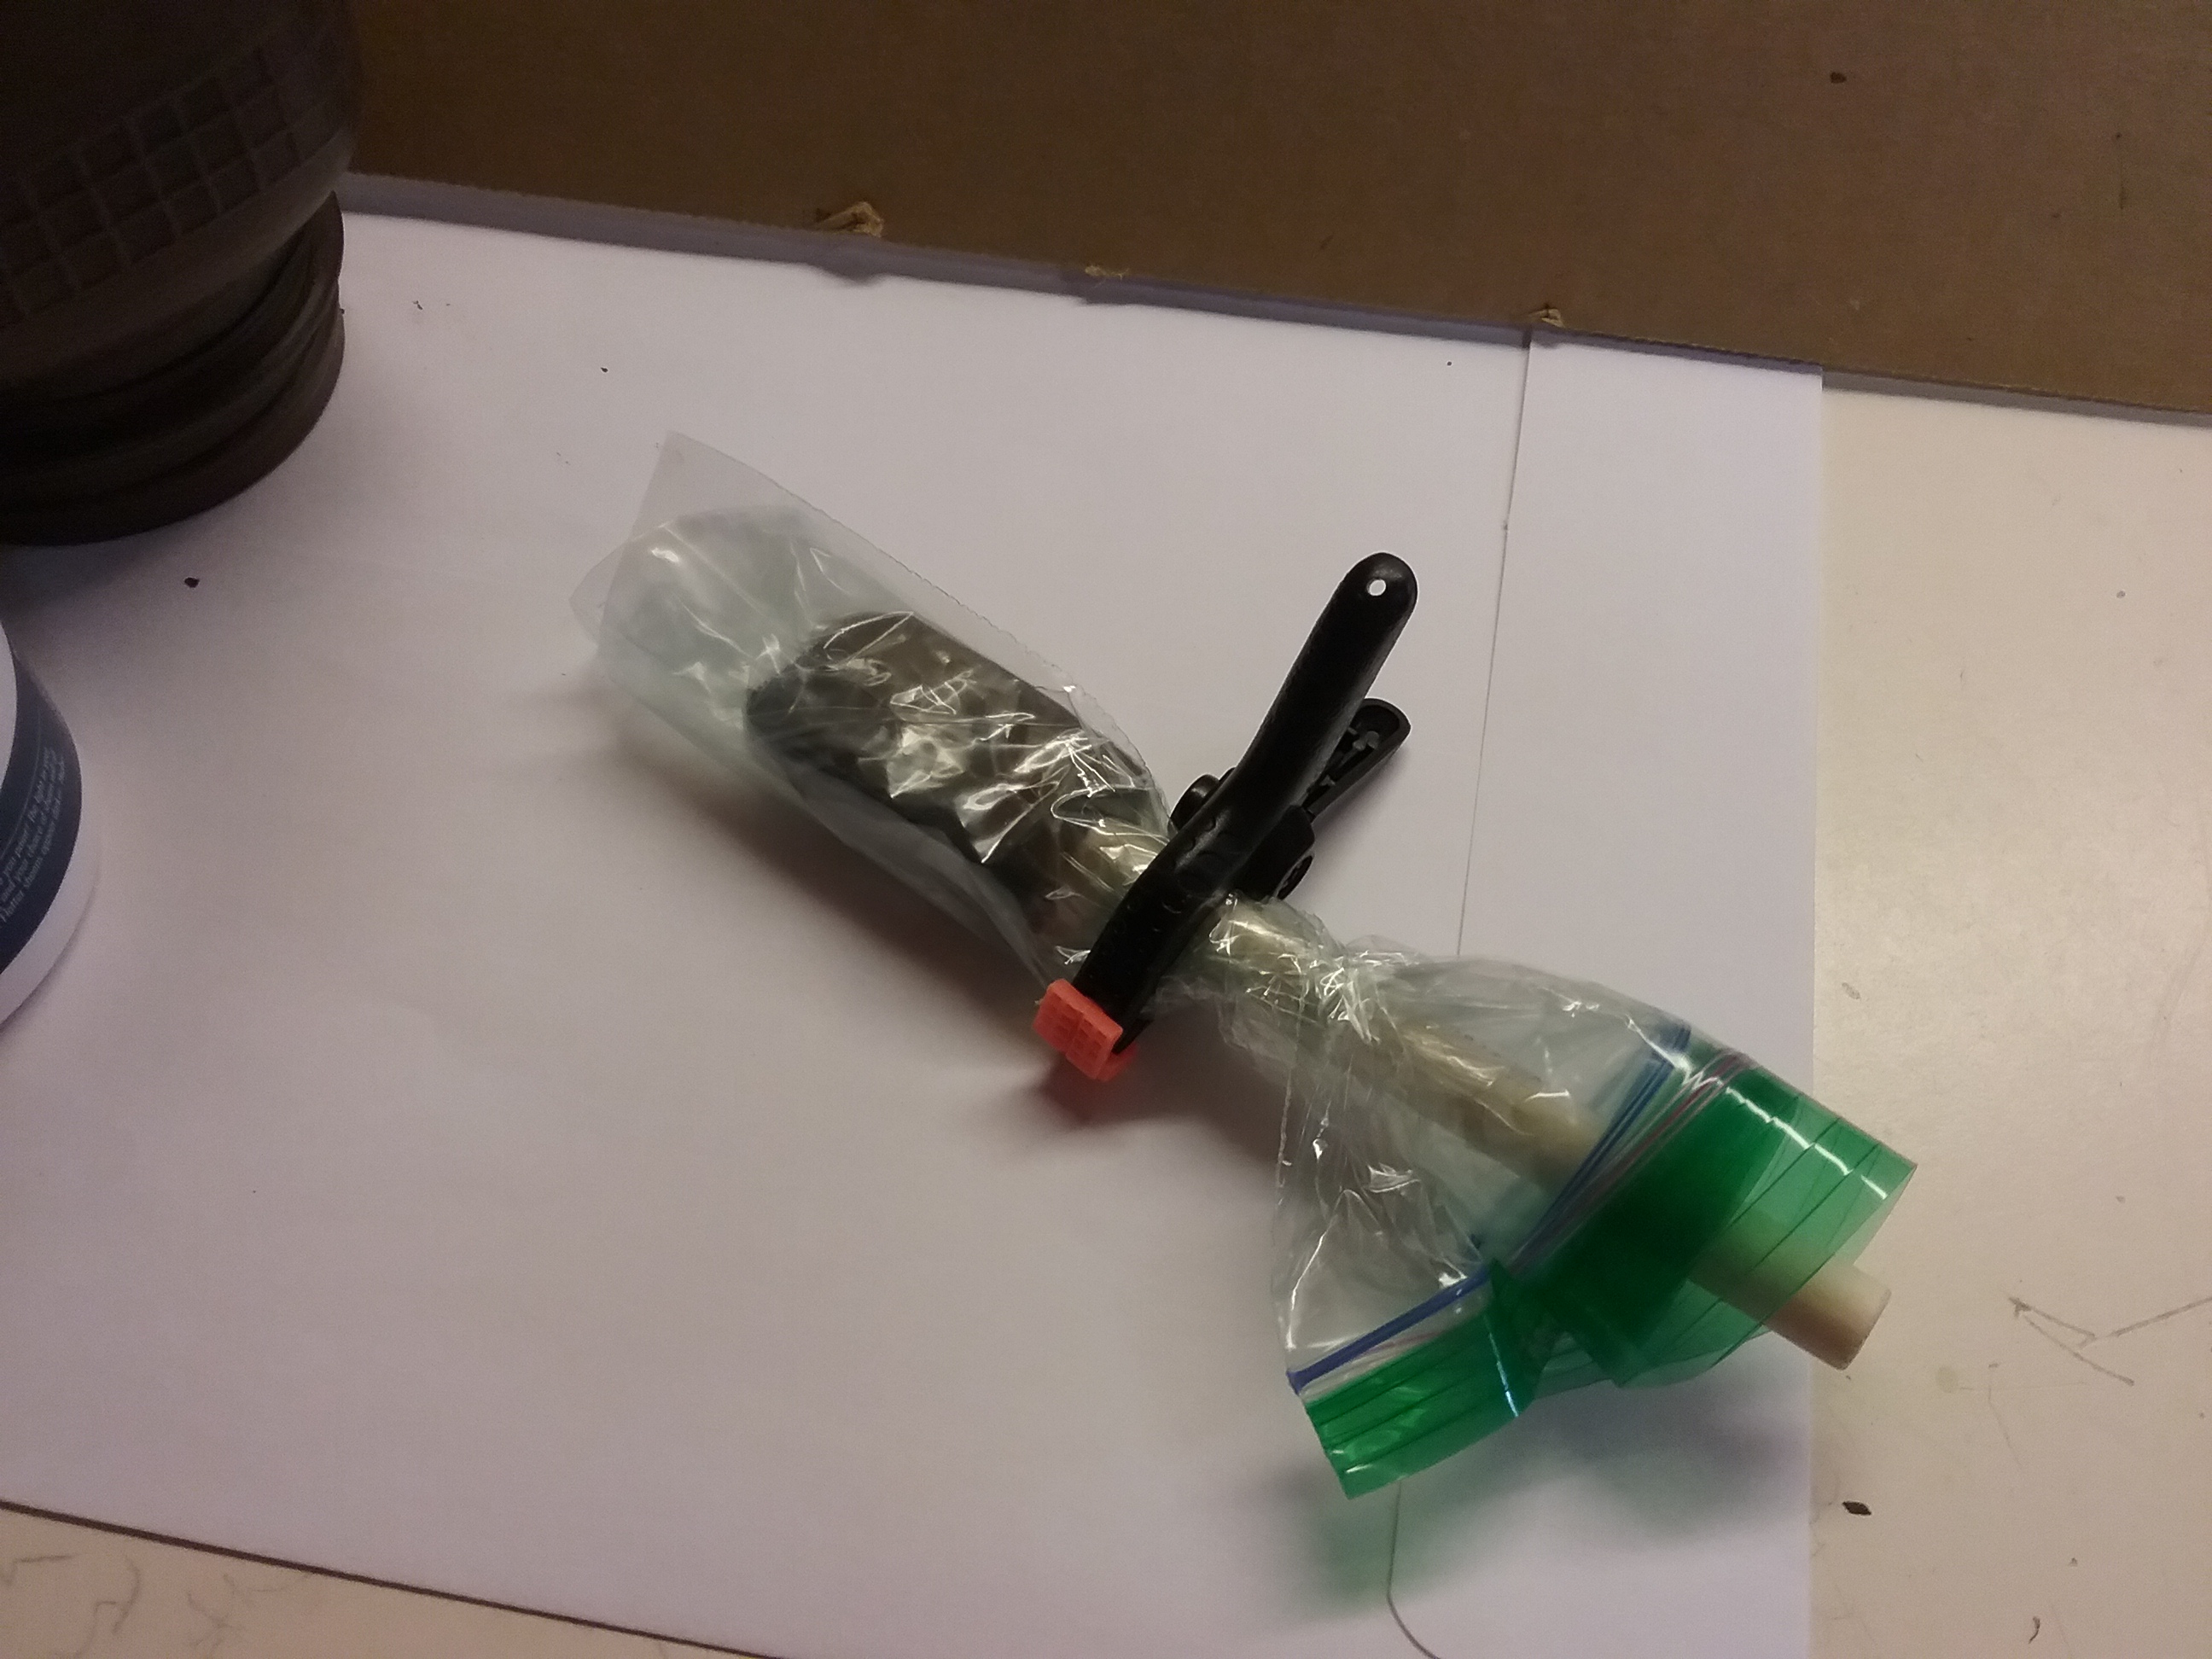
Each jar was washed and given a quick wipe of alcohol, then painted with a foam brush. I did 4 coats for nice coverage. In between coats, I wrapped the end of the brush in a baggie and clipped it closed, so I only had to use one brush. After the jars were completely dry, they were speckled white. Once the speckling was dry, they were sprayed with clear matte sealer. Even though the paint is sealed, they may still scratch easily, so handle gently.


A fired leaf arrangement was traced inside the traced shape of a clear glass tile. Remove the leaves and replace the clear tile in it’s place over the leaf tracing. Following the traced pattern, glue leaf pieces in place with E6000. Let dry completely.


Lay a dry tile on the front of the jar to determine where your leaves will be located before gluing. For the best adhesion, scratch off a very small amount of paint in the areas that the leaves will cover. Put a small dab of E6000 on the scratched areas, lay the tile in place, and press down very lightly, obscuring the glue. Be careful not to use too much glue or it will seep out beyond the leaf and be seen through the glass. Let dry overnight.


Knot a length of raffia around the neck of the jar. Fill with fall flowers, a pretty napkin and tableware for an informal fall gathering, anything you like!
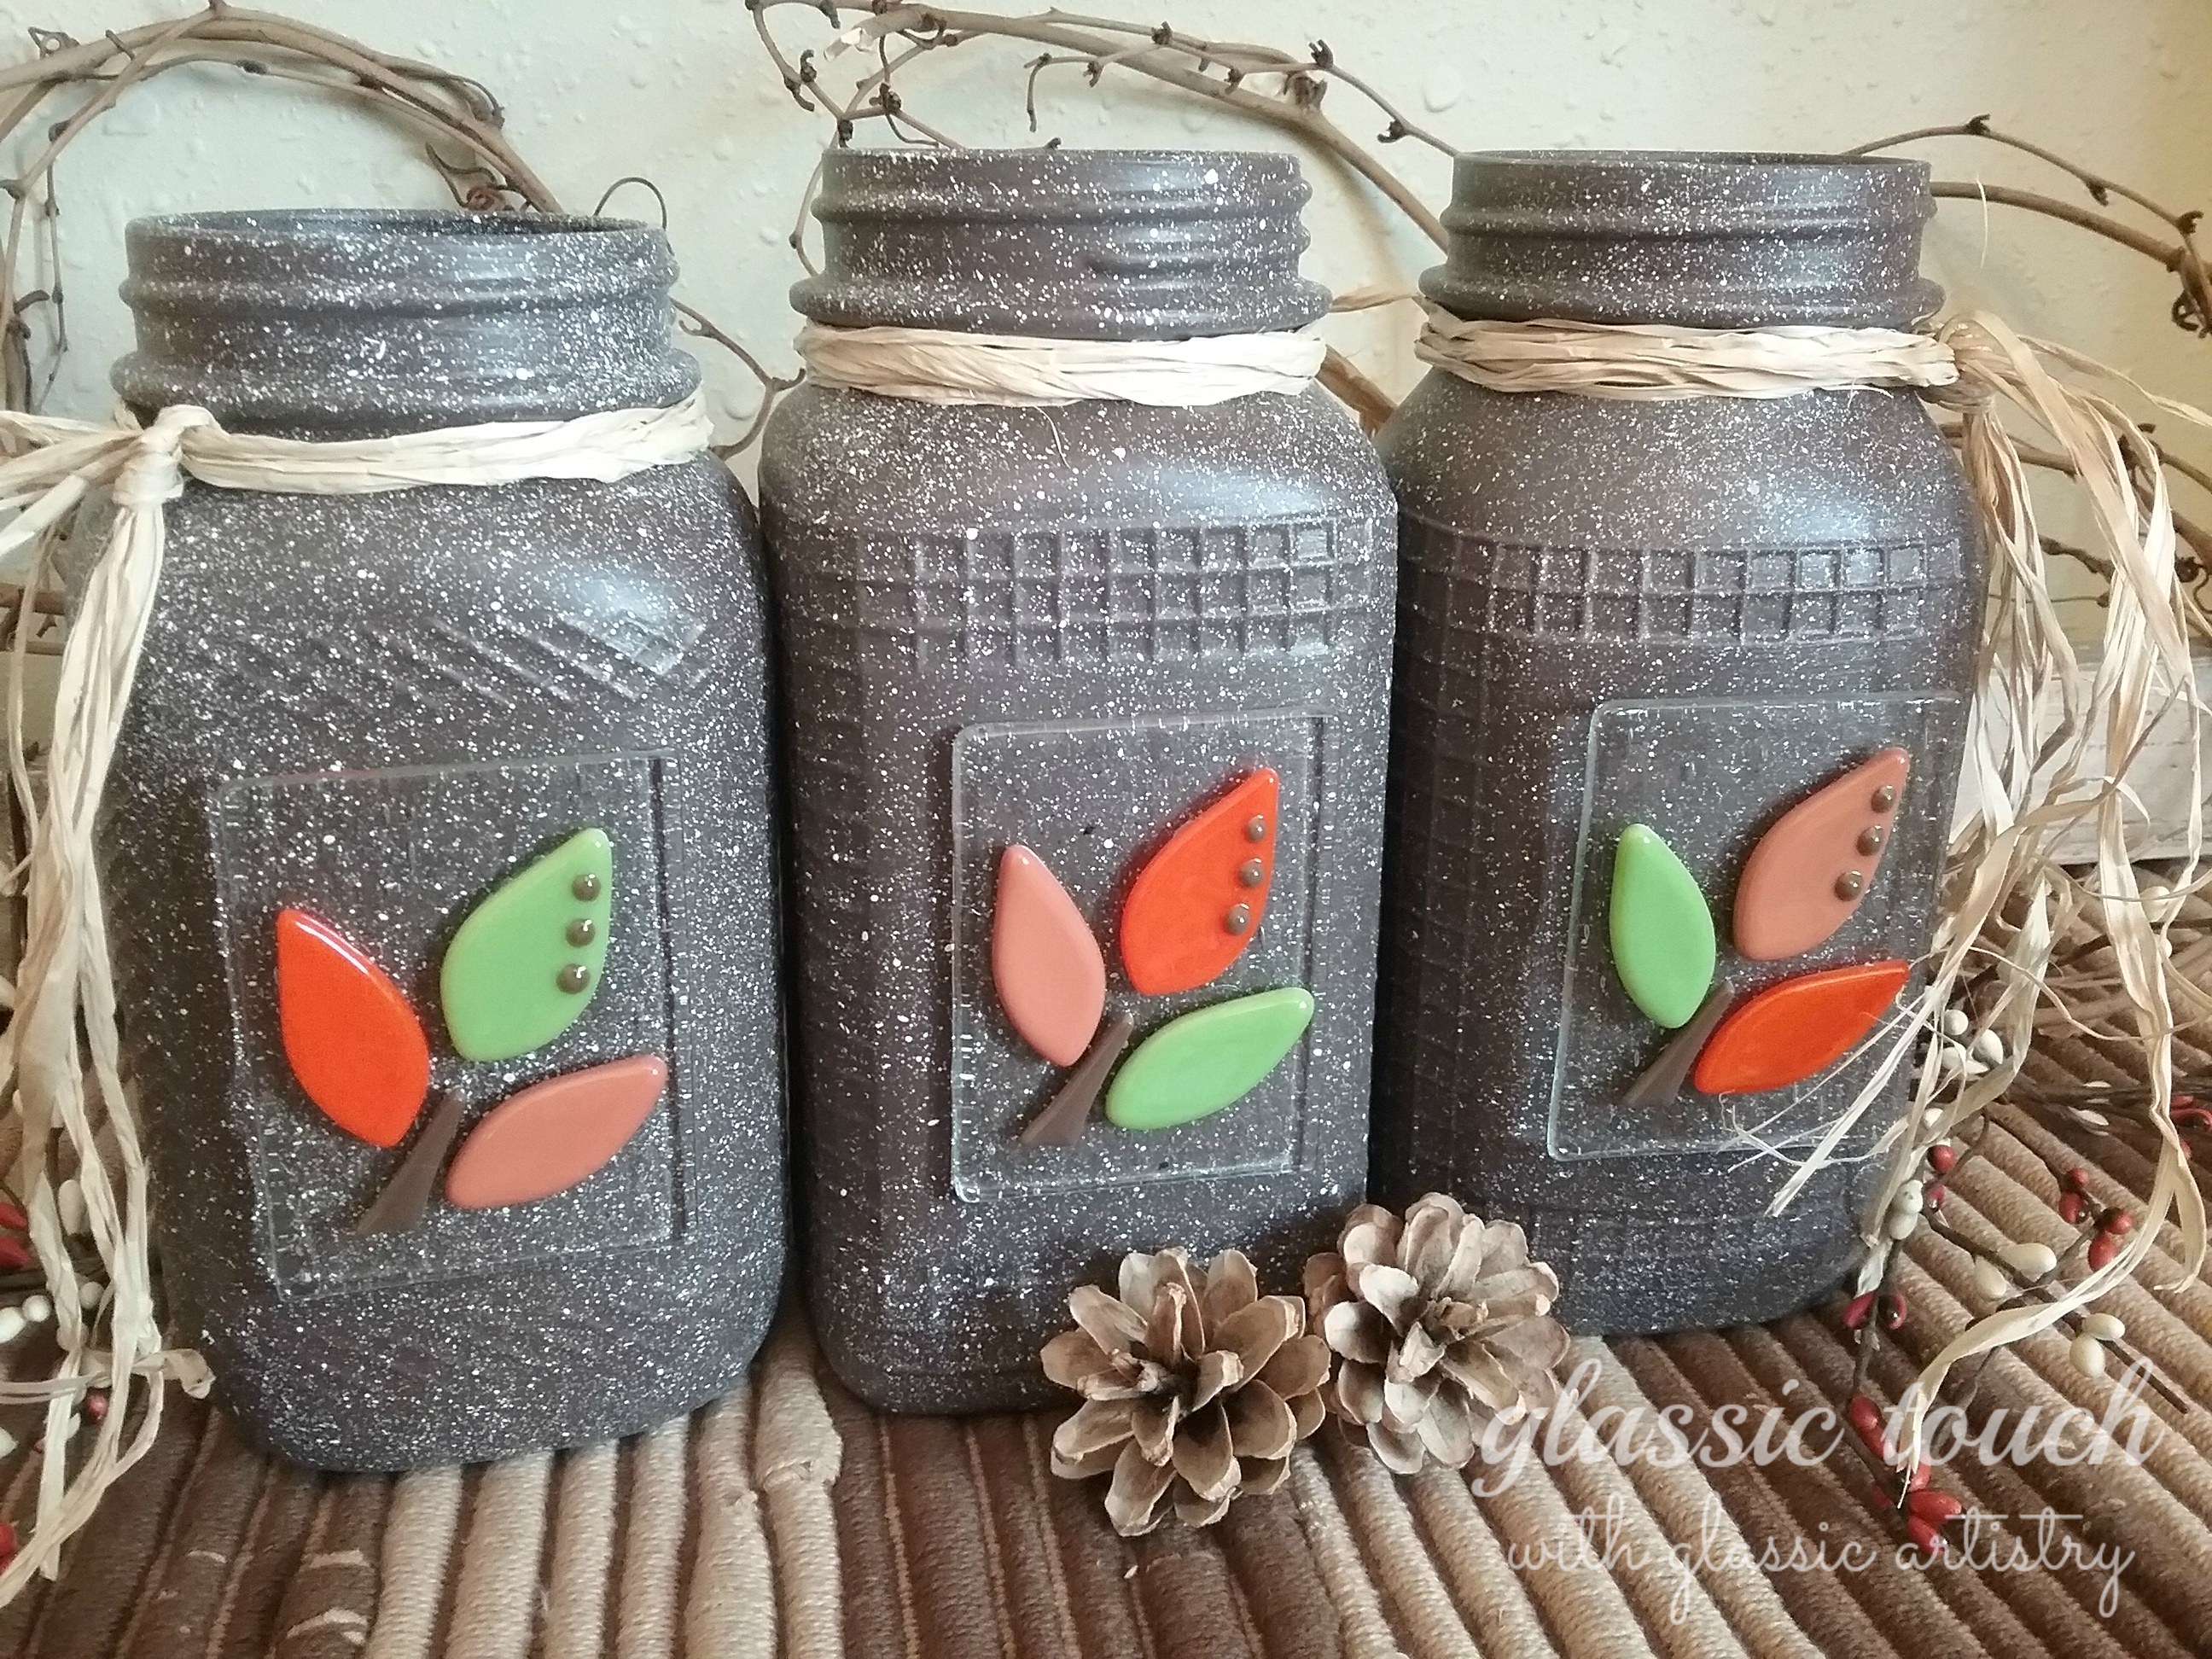
Gosh, I really like these colors … one of these may have to stay here … Happy Fall!

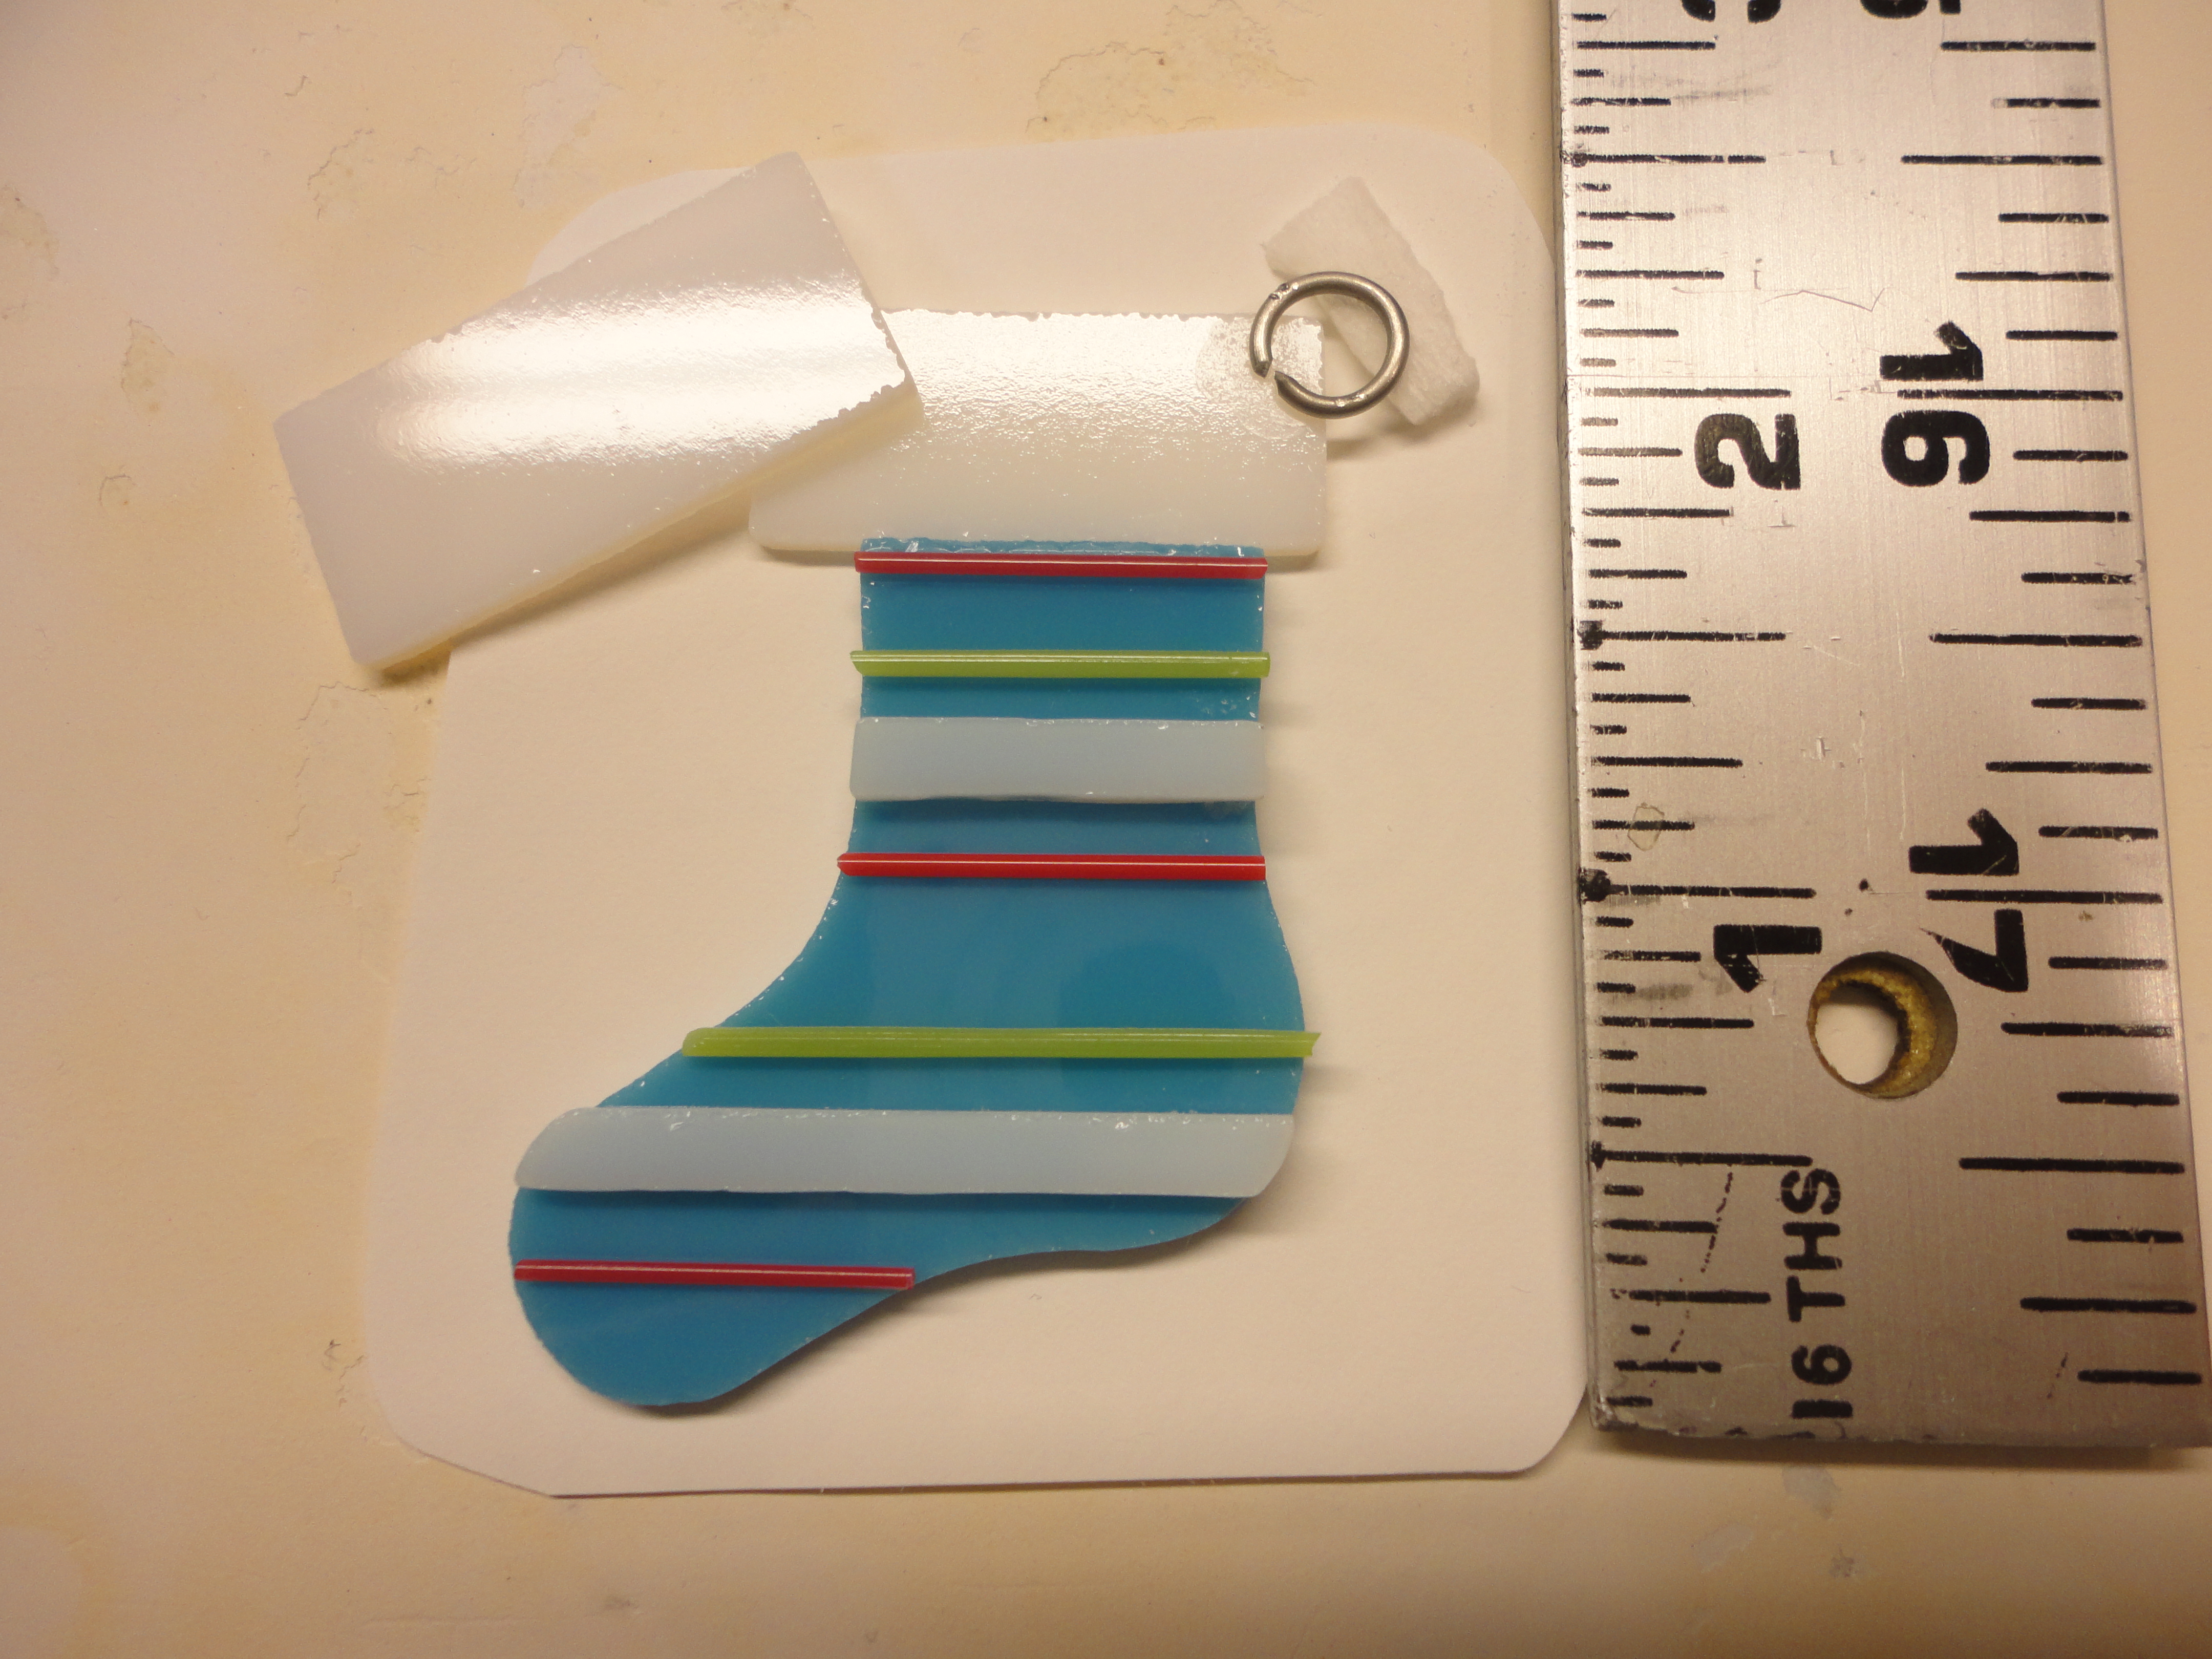
I thought it would be fun to make some colorful ornaments to brighten up my tree. They are all pretty simple … System 96 glass with some noodles and stringers. I fired everything in my small tabletop kiln, on kiln paper. All of these were taken to about 1700 degrees. I like to watch the action through the little window so I don’t over fuse and get that muddled look.
There had to be a stocking, of course! I used two pieces of thin white for the stocking top.
Something circular would be nice, but not just solid and plain. I’ve found the easist way for me to save some grinding time, on something like this, is to drill the hole first. Then center the hole under your clear plastic pattern, trace and cut out.


How to combine glass and metal had me stumped for a little bit, until I noticed a pile of little bells I had laid aside to rust .. hmm? Wouldn’t it be neat if they could dangle in an ornament somehow? I started with 1/4″ wide strips of glass, and laid them out as shown below … it worked! I may have to make some of these on a larger scale for my big tree!


The little candy canes are time consuming, but so stinkin’ cute! These are 2 1/8″ long, and made the same way I make larger ones for patchwork candy canes. I’ve read many tips for keeping marks on glass while using a glass saw, but using my scribe and marker has never failed me.
After tracing your pattern, go over your line with a pencil scribe. You could probably use an electric engraver for this too, but I haven’t tried it yet. Fill in the scribe line with black marker and let it dry a little bit. Lightly wipe the marker off, leaving a noticeable line for saw work.
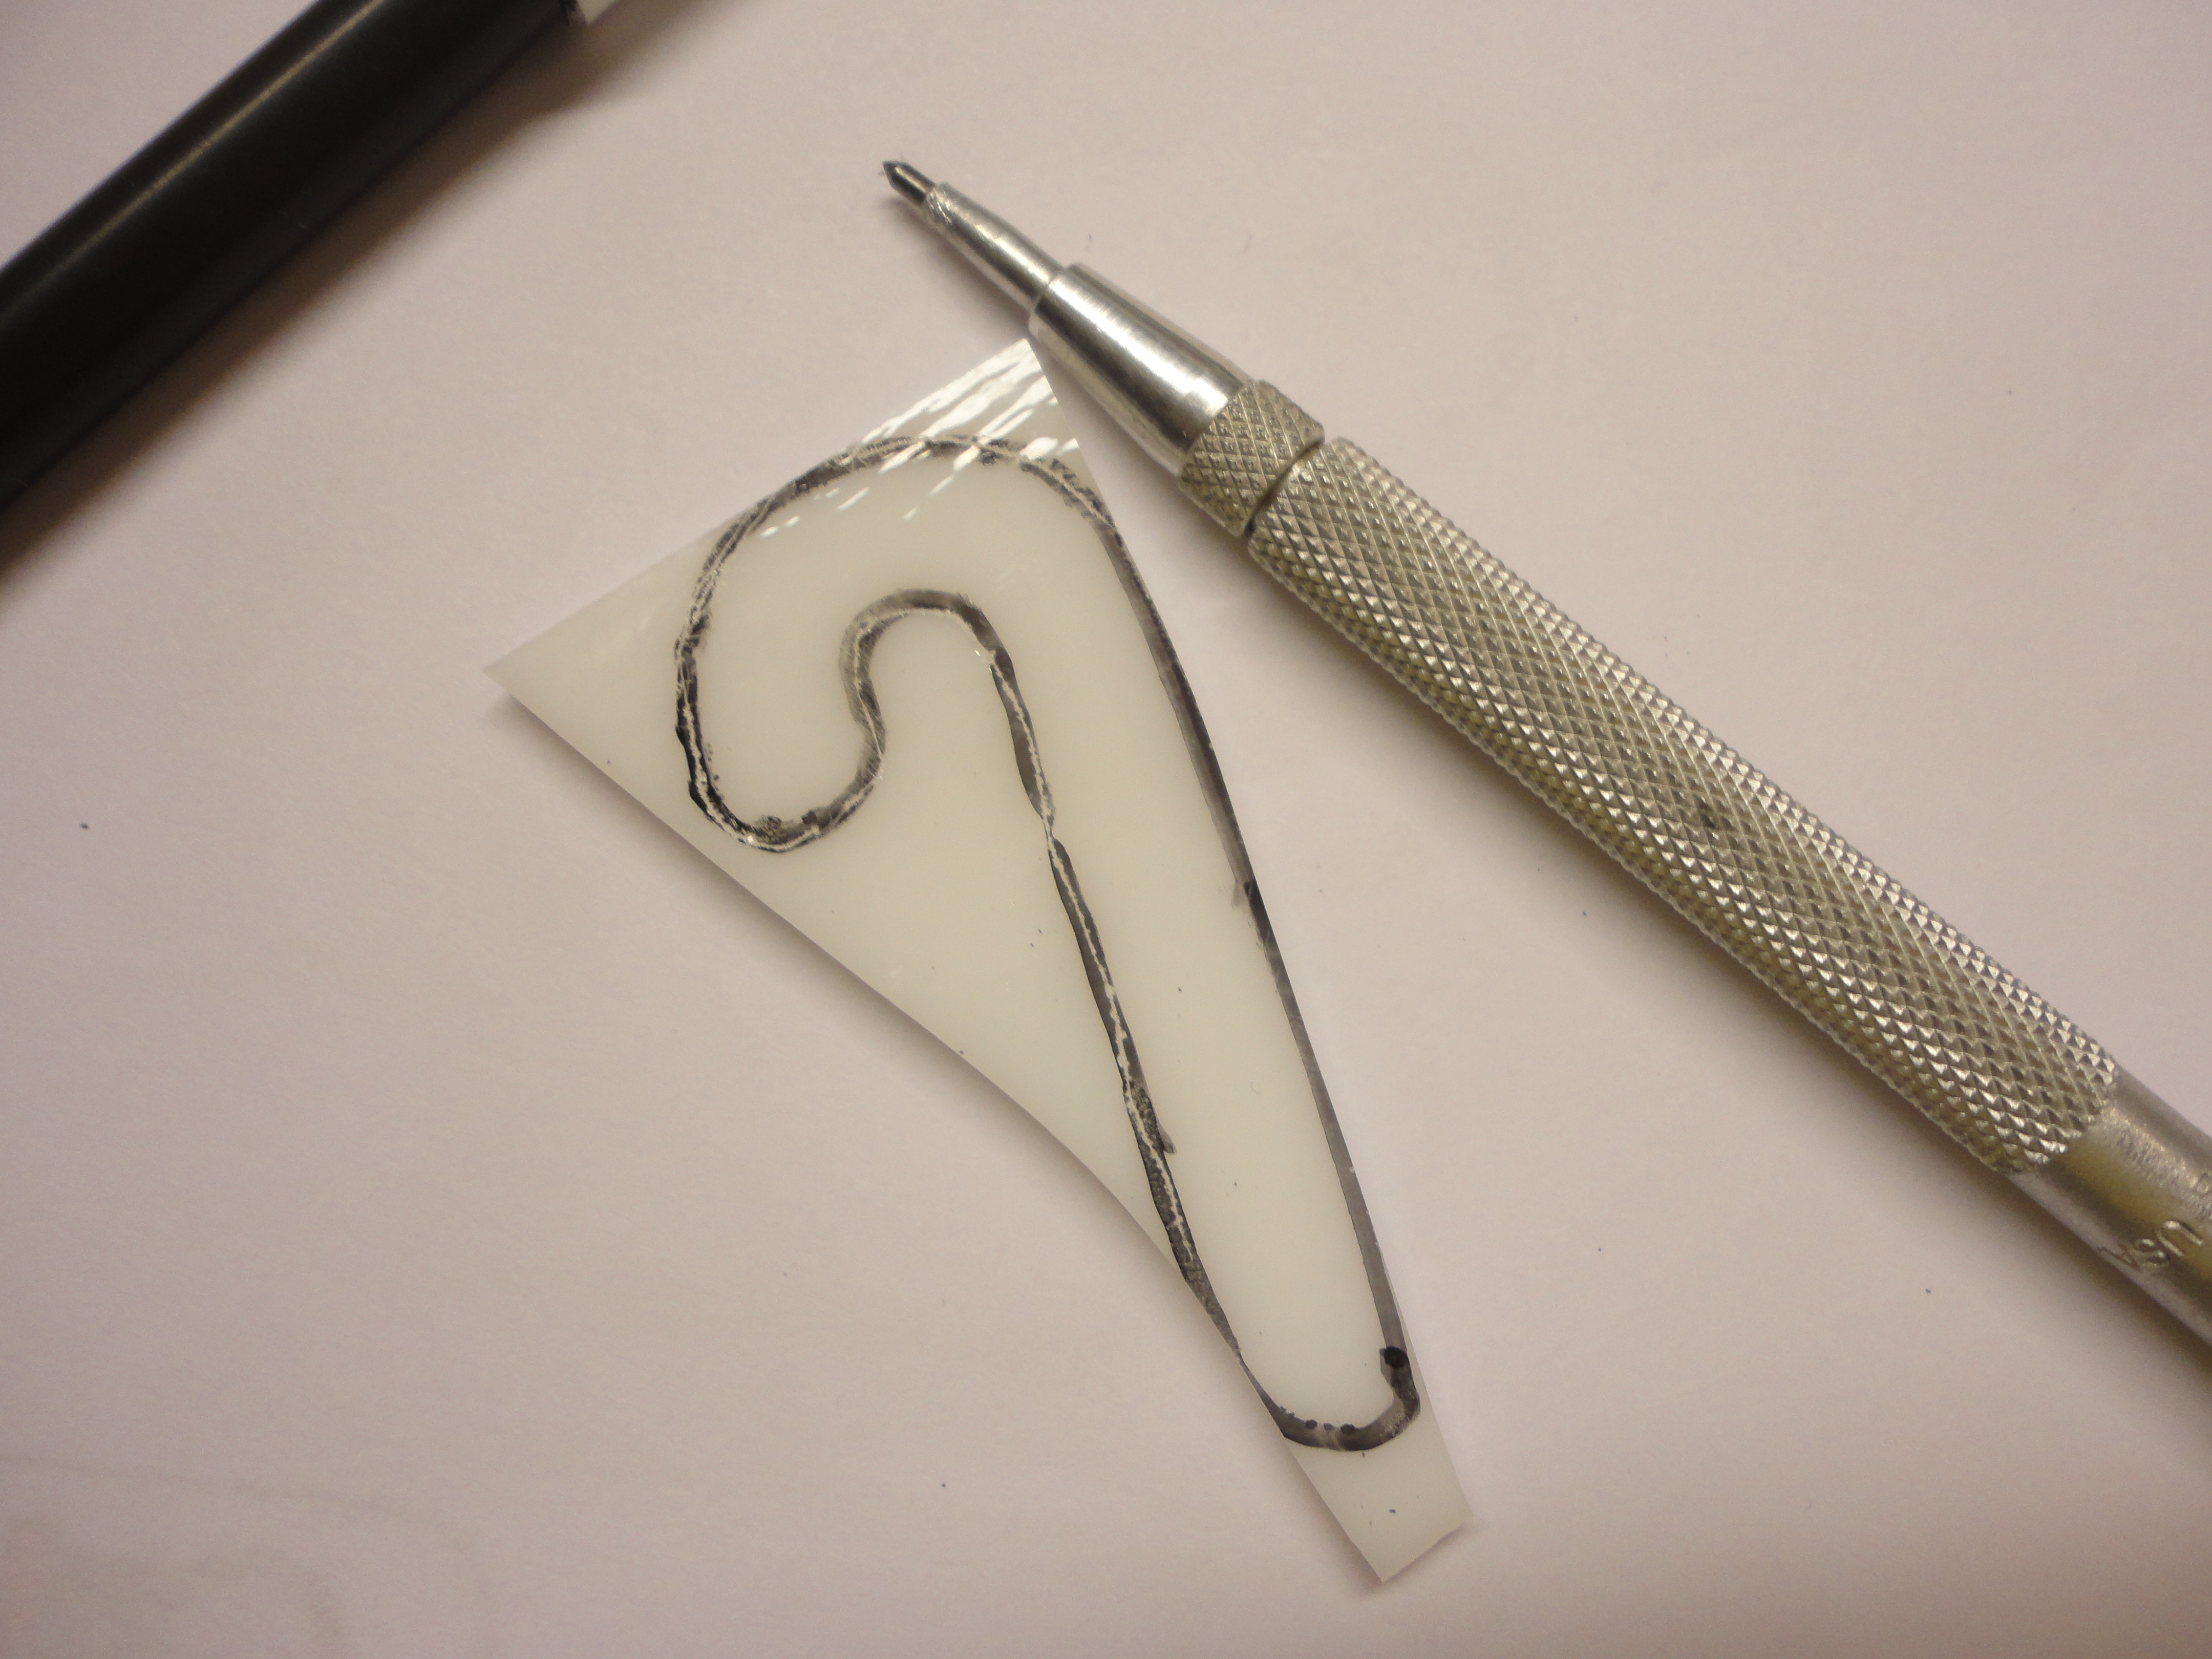
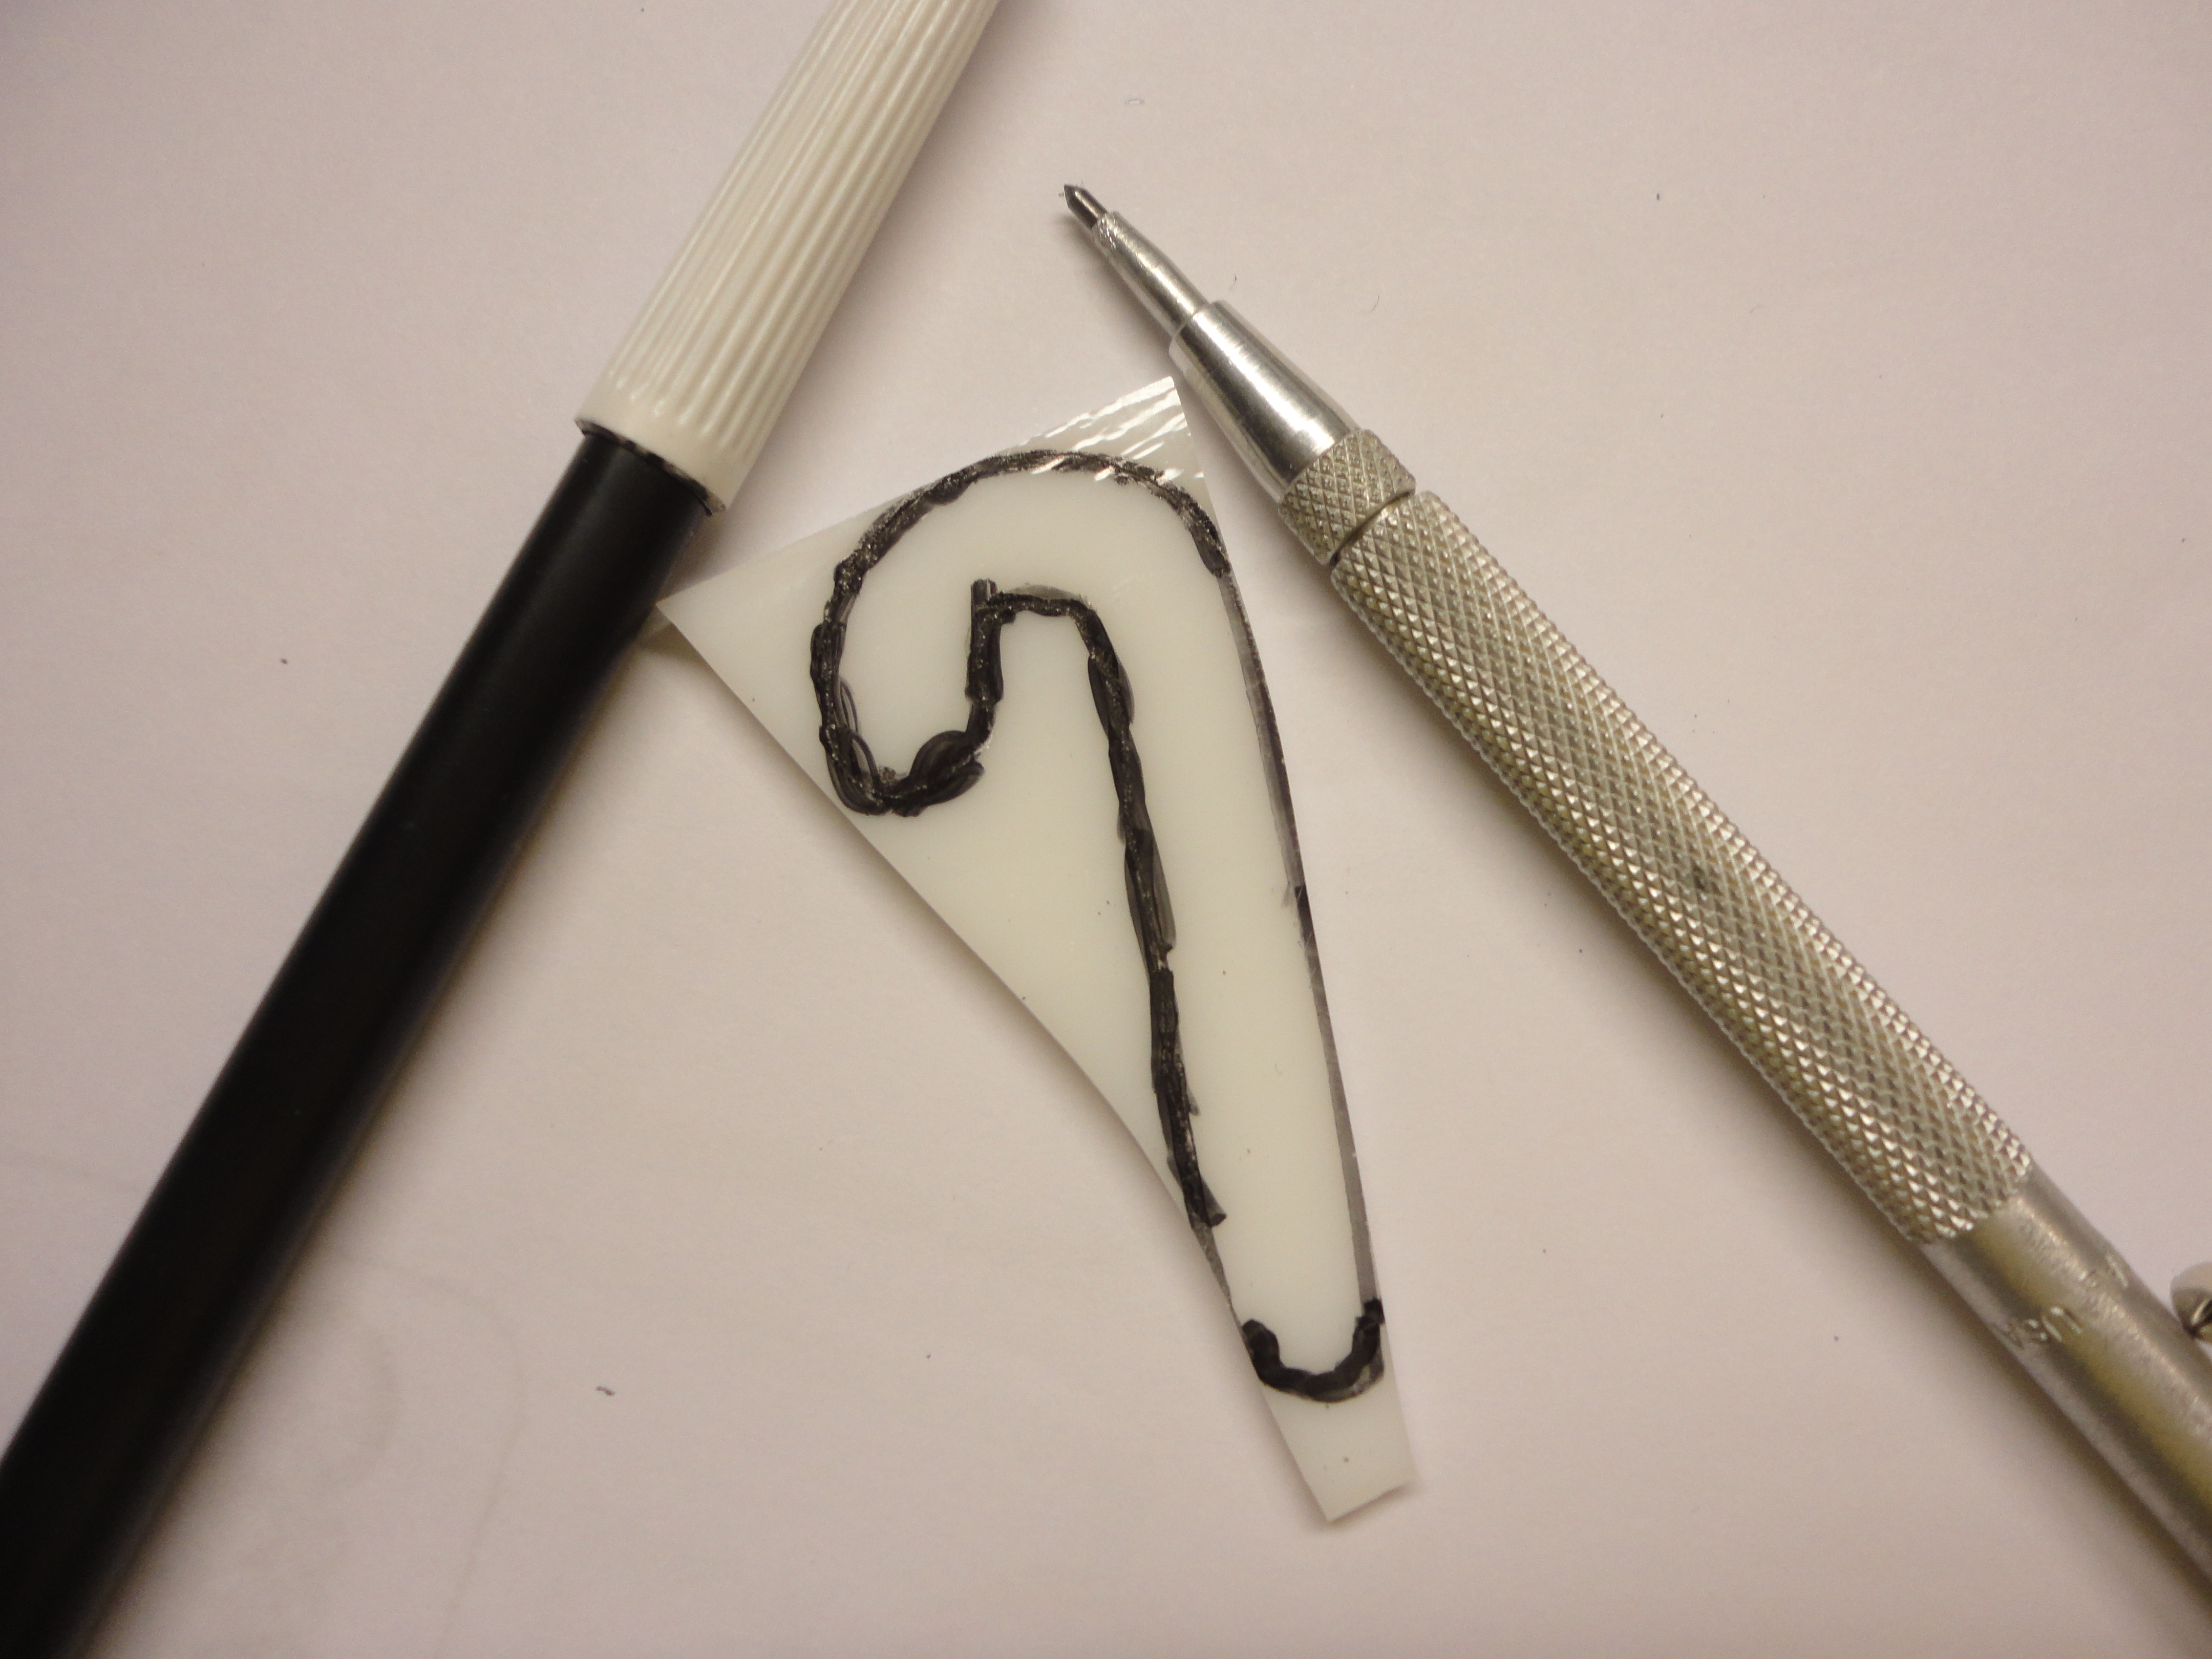

All of the cutting can be done on a ring saw, but I like to use a band saw to cut the inside line of the cane. Use a regular glass cutter to cut the outside line. On a ring saw, I shape and grind the inside arch and side of the cane first, then go to the glass grinder for the outside edge. Decorate and fire.


Joann Fabric had the perfect piece of fabric for my tree skirt. But, in all honesty, my sewing machine has not seen the light of day for probably two years. I don’t hate sewing, it’s just not in the list of my top 10 things I like to do. With that being said, I asked our close family friend Alison to make my tree skirt for me. Fantastic Job Alison!
My daughter graciously offered her collection of small glass vintage Christmas balls. They’re lovely, old and faded, and in all the right colors. I’m just guessing here, but I’ve seen her eyeing my garland .. She’ll probably want to borrow it next year to go with her Christmas balls. I know how these things work.
The bay window in my kitchen doesn’t offer much of beautiful view this time of year, just out buildings and empty fields. But it does offer a lot of light to shine through the beads and glass, and it will be safe from little curious hands.
I’ve never decorated one of these trees before. There’s a lot of empty spaces, and a little different with no lights, but I’m pleased with the way it turned out. It’s been raining here all day, really dreary. I’m looking forward to seeing it in a whole new light tomorrow.
It was not a good day to take pictures either, I’m afraid. I worked for hours trying to get a real clear shot of my tree. I added light from lamps, a snow blanket background over the window, nothing helped. I waited until dark and tried again. Sorry, they aren’t fantastic, but better than the earlier ones, and the best I have for now.


I invited some little elfish friends to play under the tree.


I hope you and yours enjoy a wondrous holiday season.
Merry Christmas & Happy New Year!


