
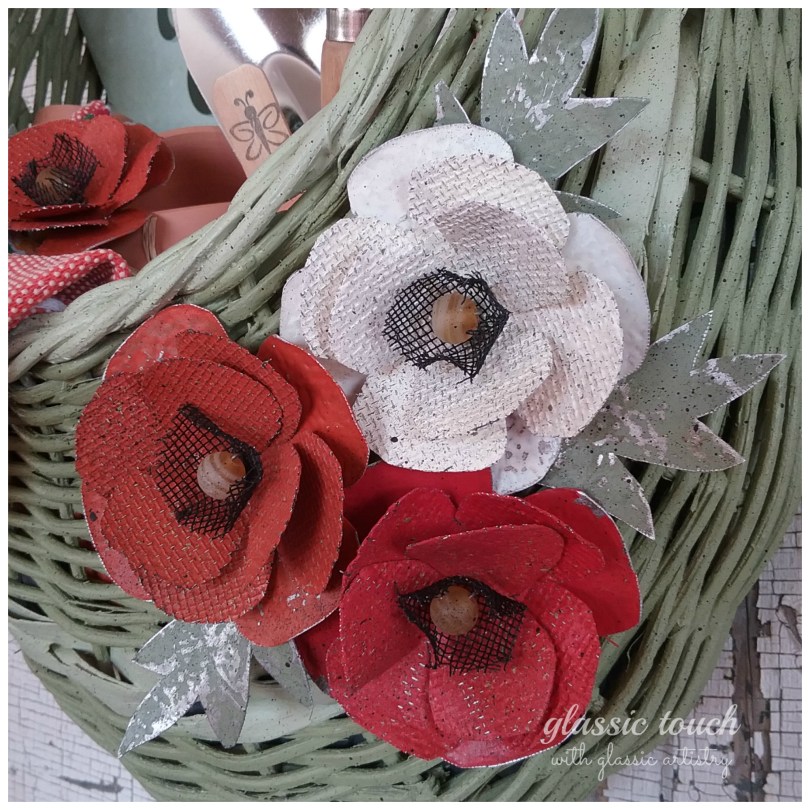
A quick post to share a new rustic poppy design.
Not too many supplies are needed for these fun flowers; salvaged thin metal sheeting, fiberglass window screening, thin wire, small flat bead, 8 to 10 mm glass bead, and paint. I went back to Lowe’s and bought one of those cute 8 oz Valspar paints again, this time “Oh So Red”.
Like many faux poppy patterns, stacking three layers of petal pieces makes this easy. The base piece is the largest and the other two get smaller in diameter as you go up. My base was about 2 3/4″ diameter.

Before getting started, some fiberglass window screen had to be painted. This was my first experience painting screen and it took me some time applying the paint and getting all those itty bitty squares to stay filled in; when you brush over them, they open back up. I painted in layers, drying with a fan, and discovered laying the paint on was more productive than brushing most of the time. If anyone out there has a secret or helpful hints for painting screen please do chime in.

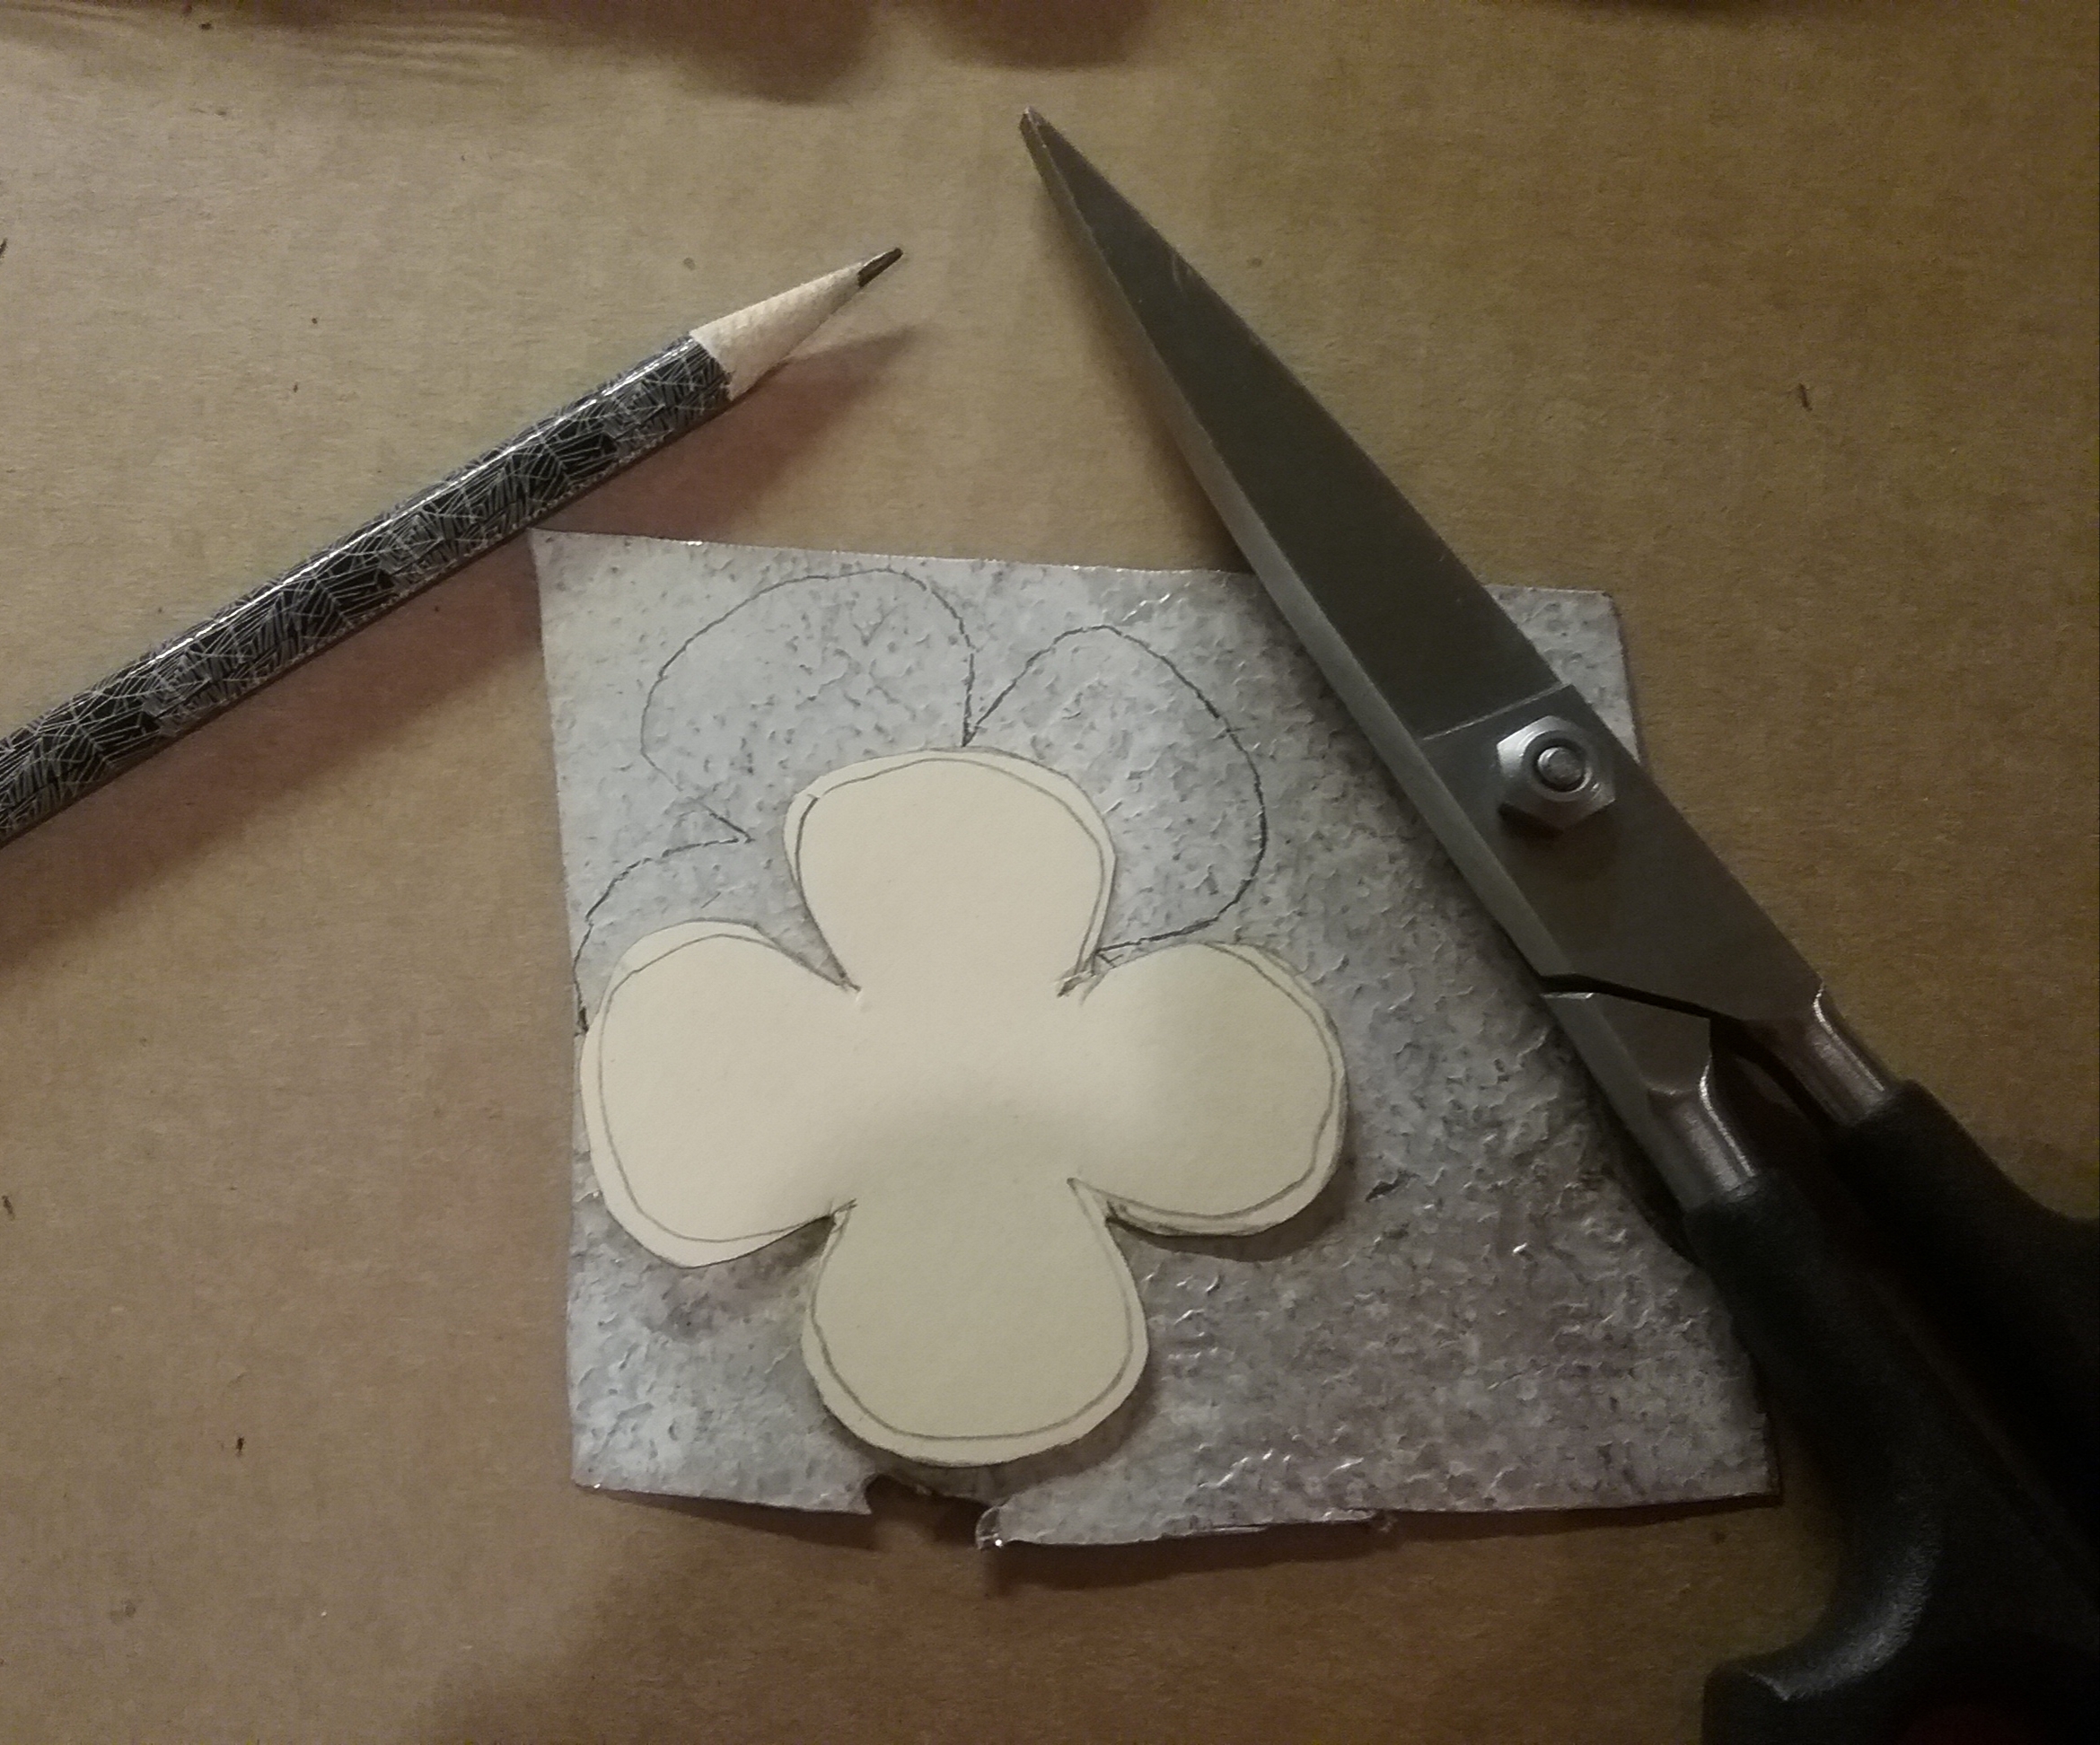
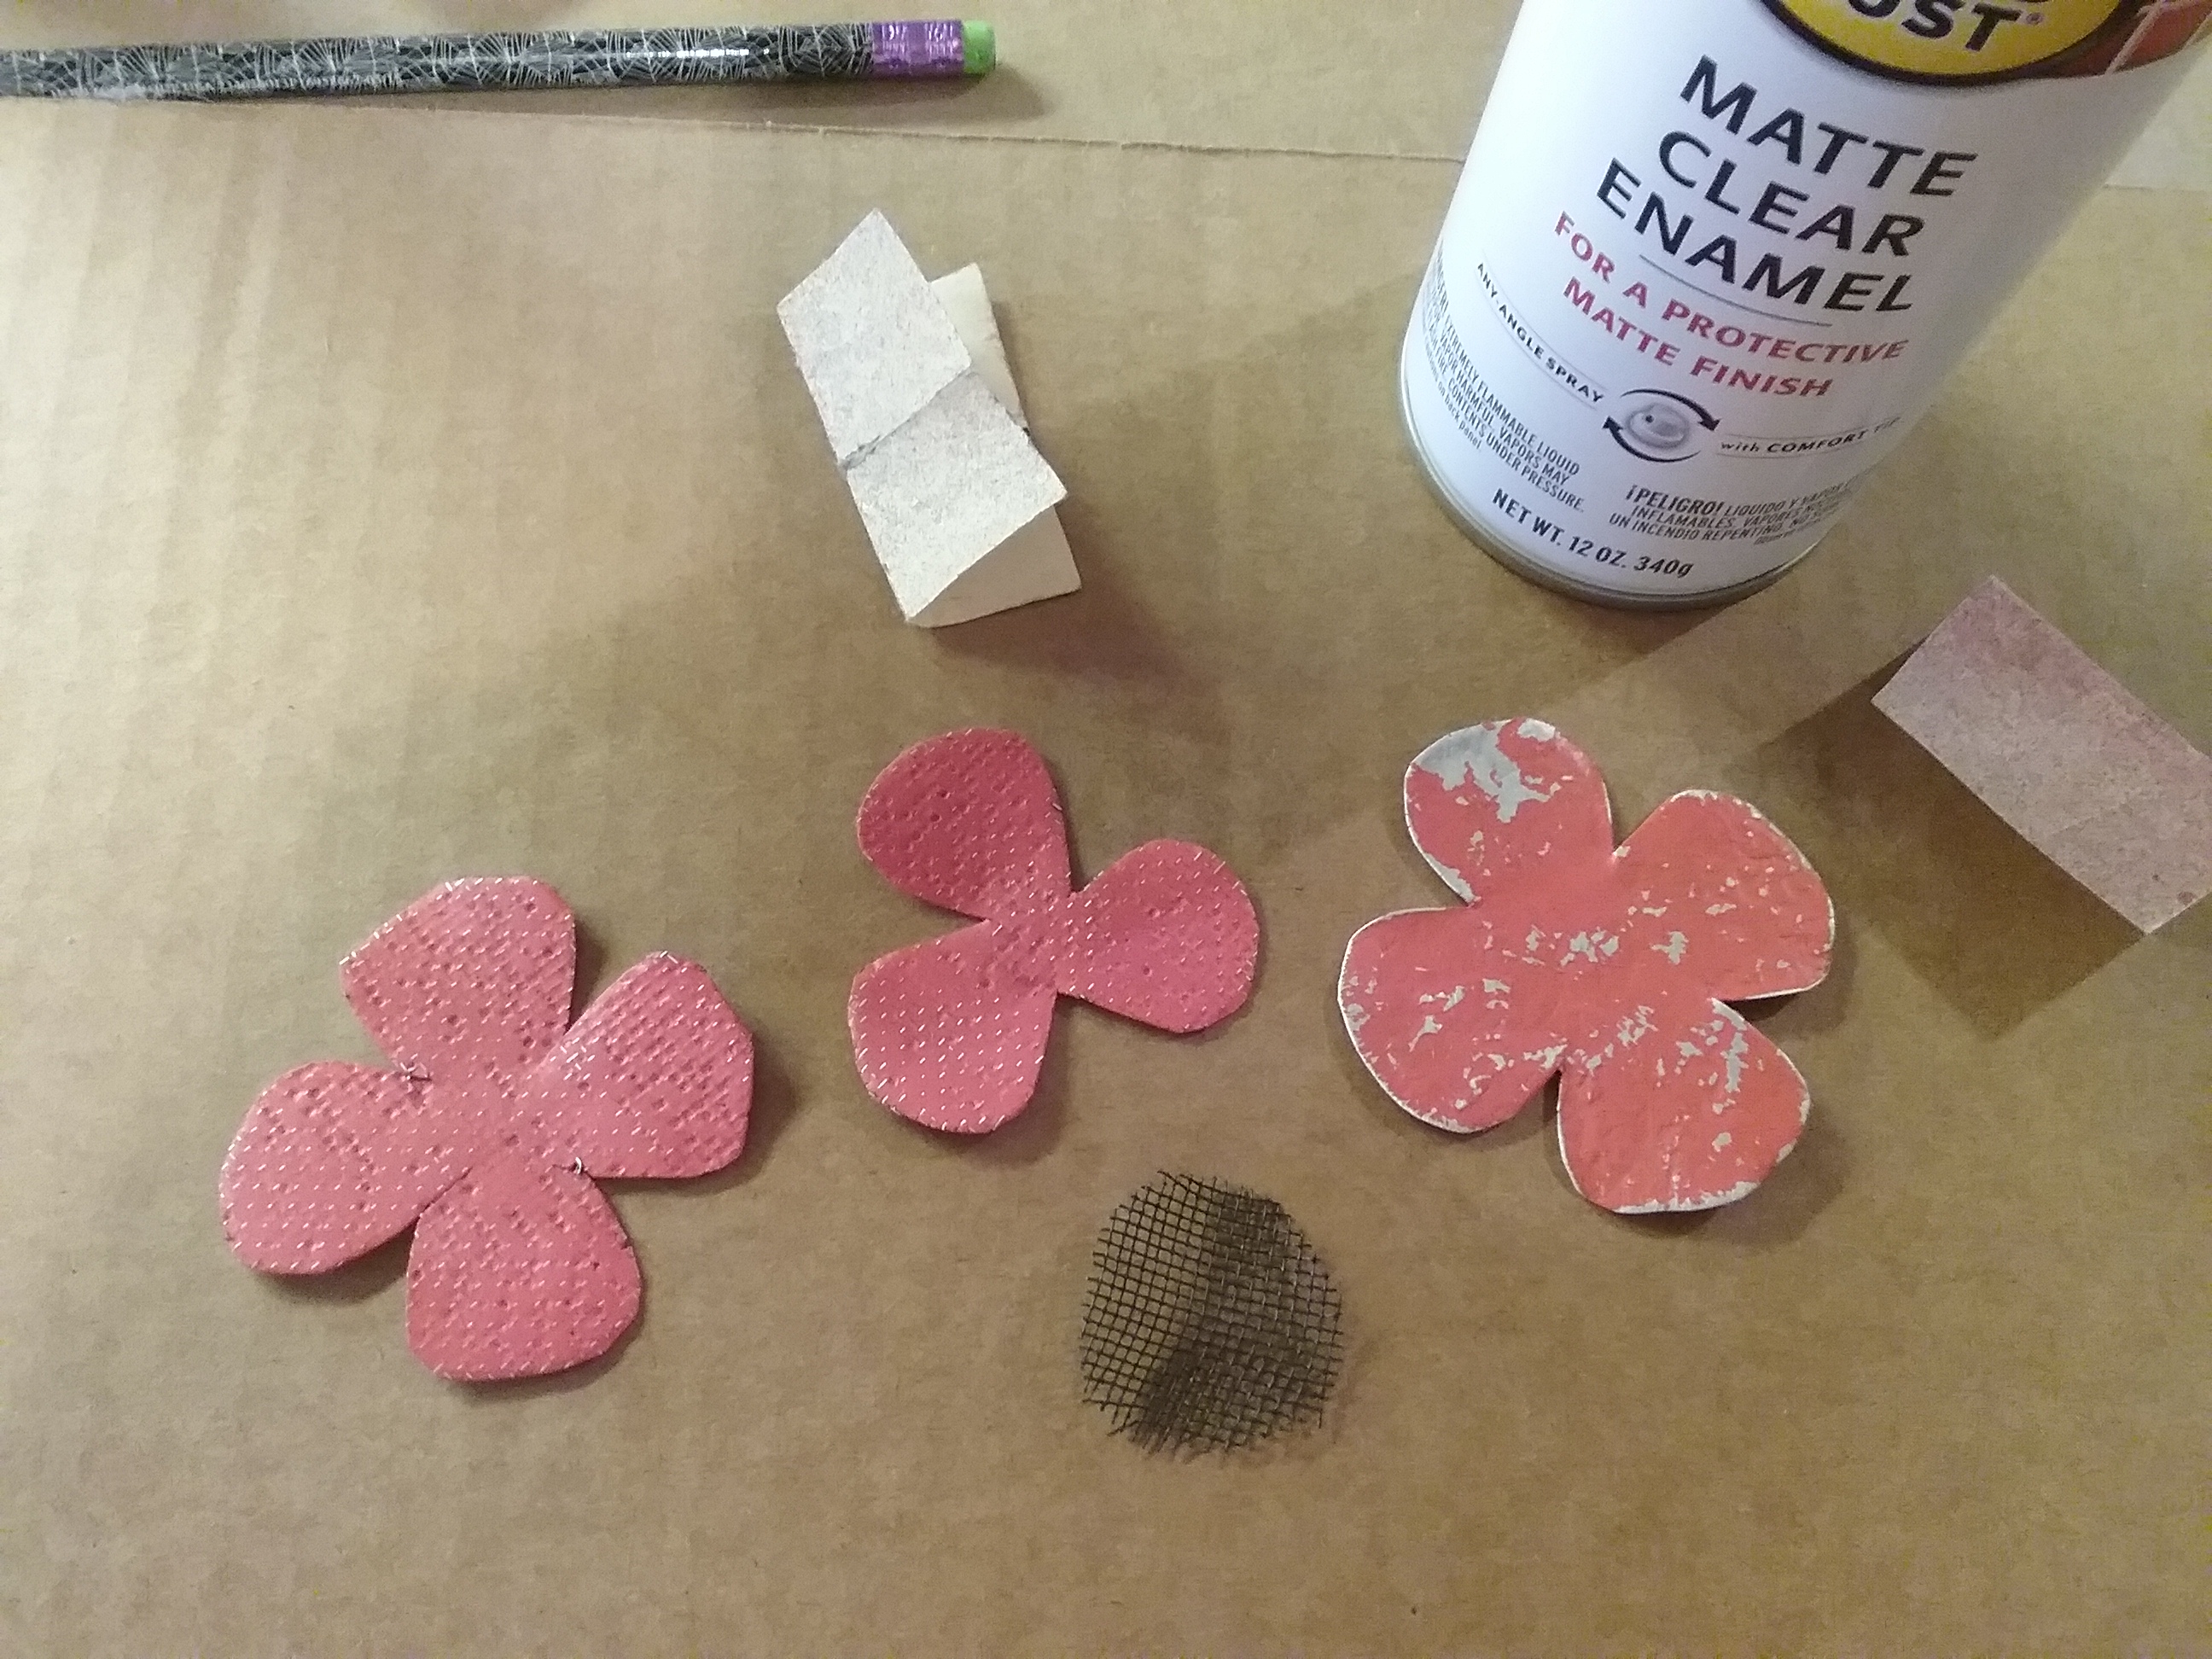
Flatten a piece of scrap metal sheeting (as in The Spirit of Christmas). Trace and cut out the base petal piece. Paint it red. Dry. Sand lightly with fine grit sandpaper to reveal some of the metal.
Hold the top two petal pattern pieces in place on the painted screen and cut around them.
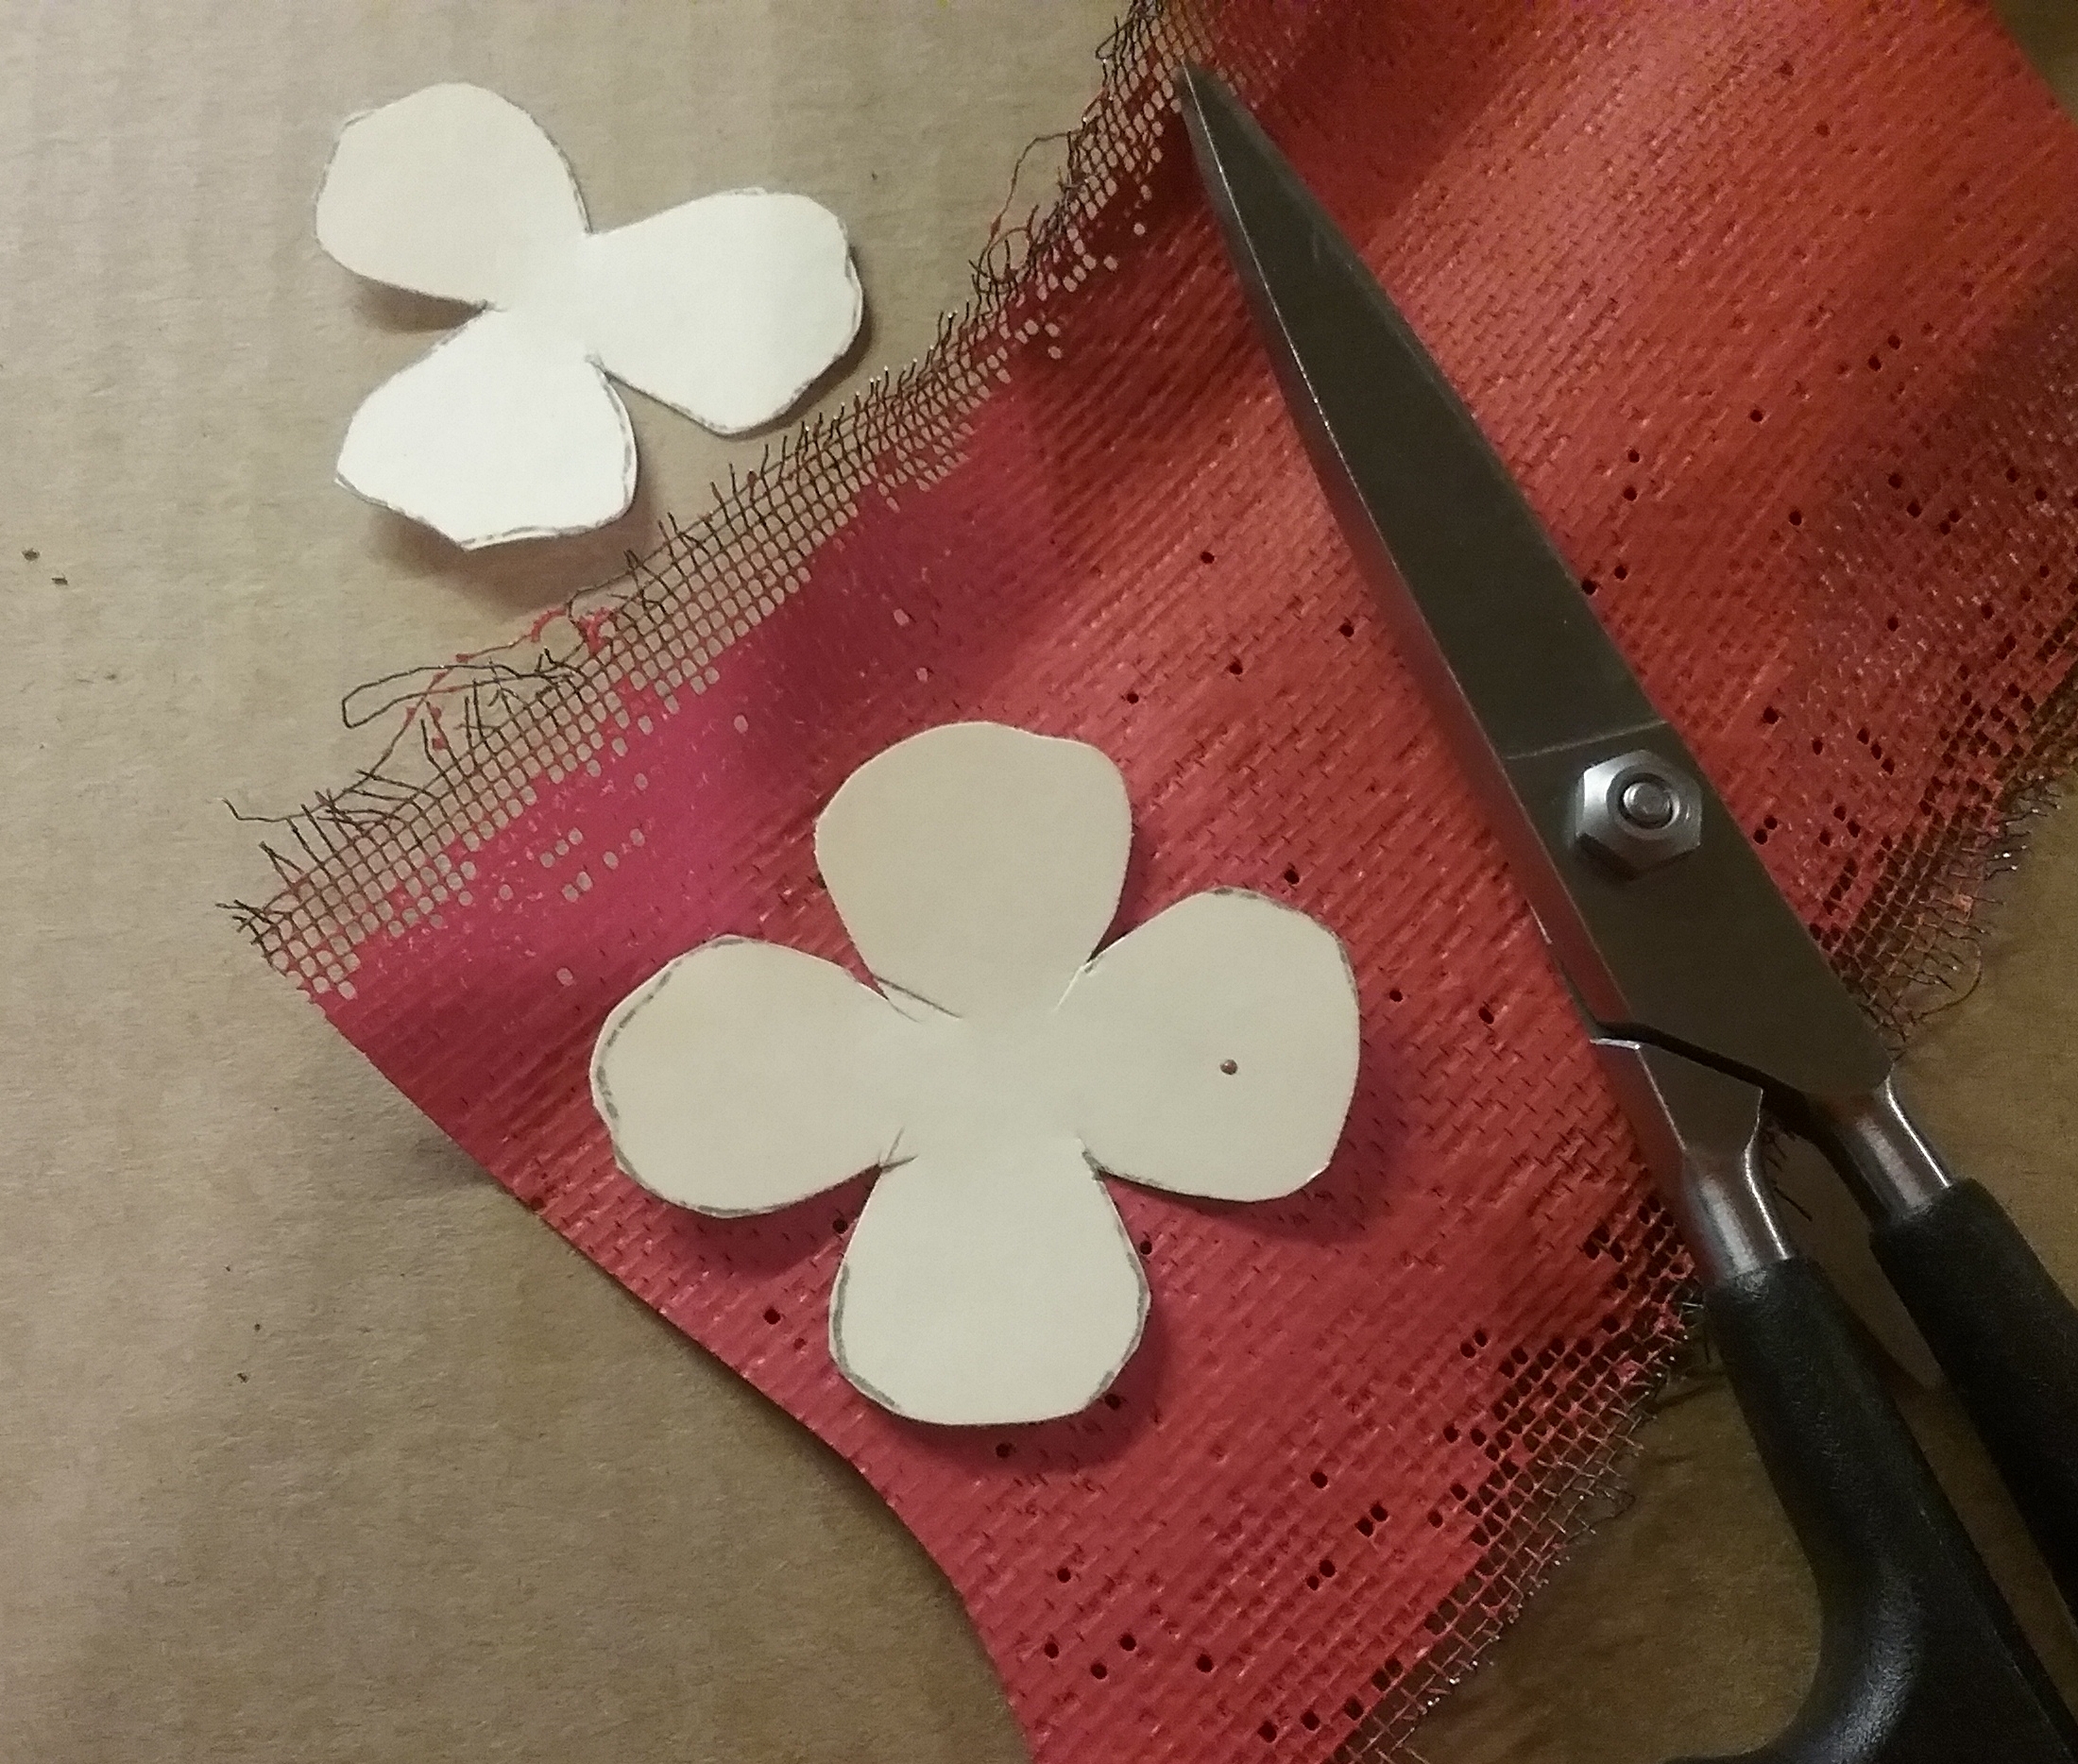
Cut a small circle, a little larger than a quarter, from the window screening. Darken it with black paint.

Sand the screen petal pieces with fine sandpaper to reveal the texture of the screen. Do not sand the black center piece. This is a good time to put a light black speckling on your pieces, and let it dry before spraying all the pieces with a clear matte sealer, front and back. I forgot, and didn’t speckle until my flowers were done, then had to respray them.
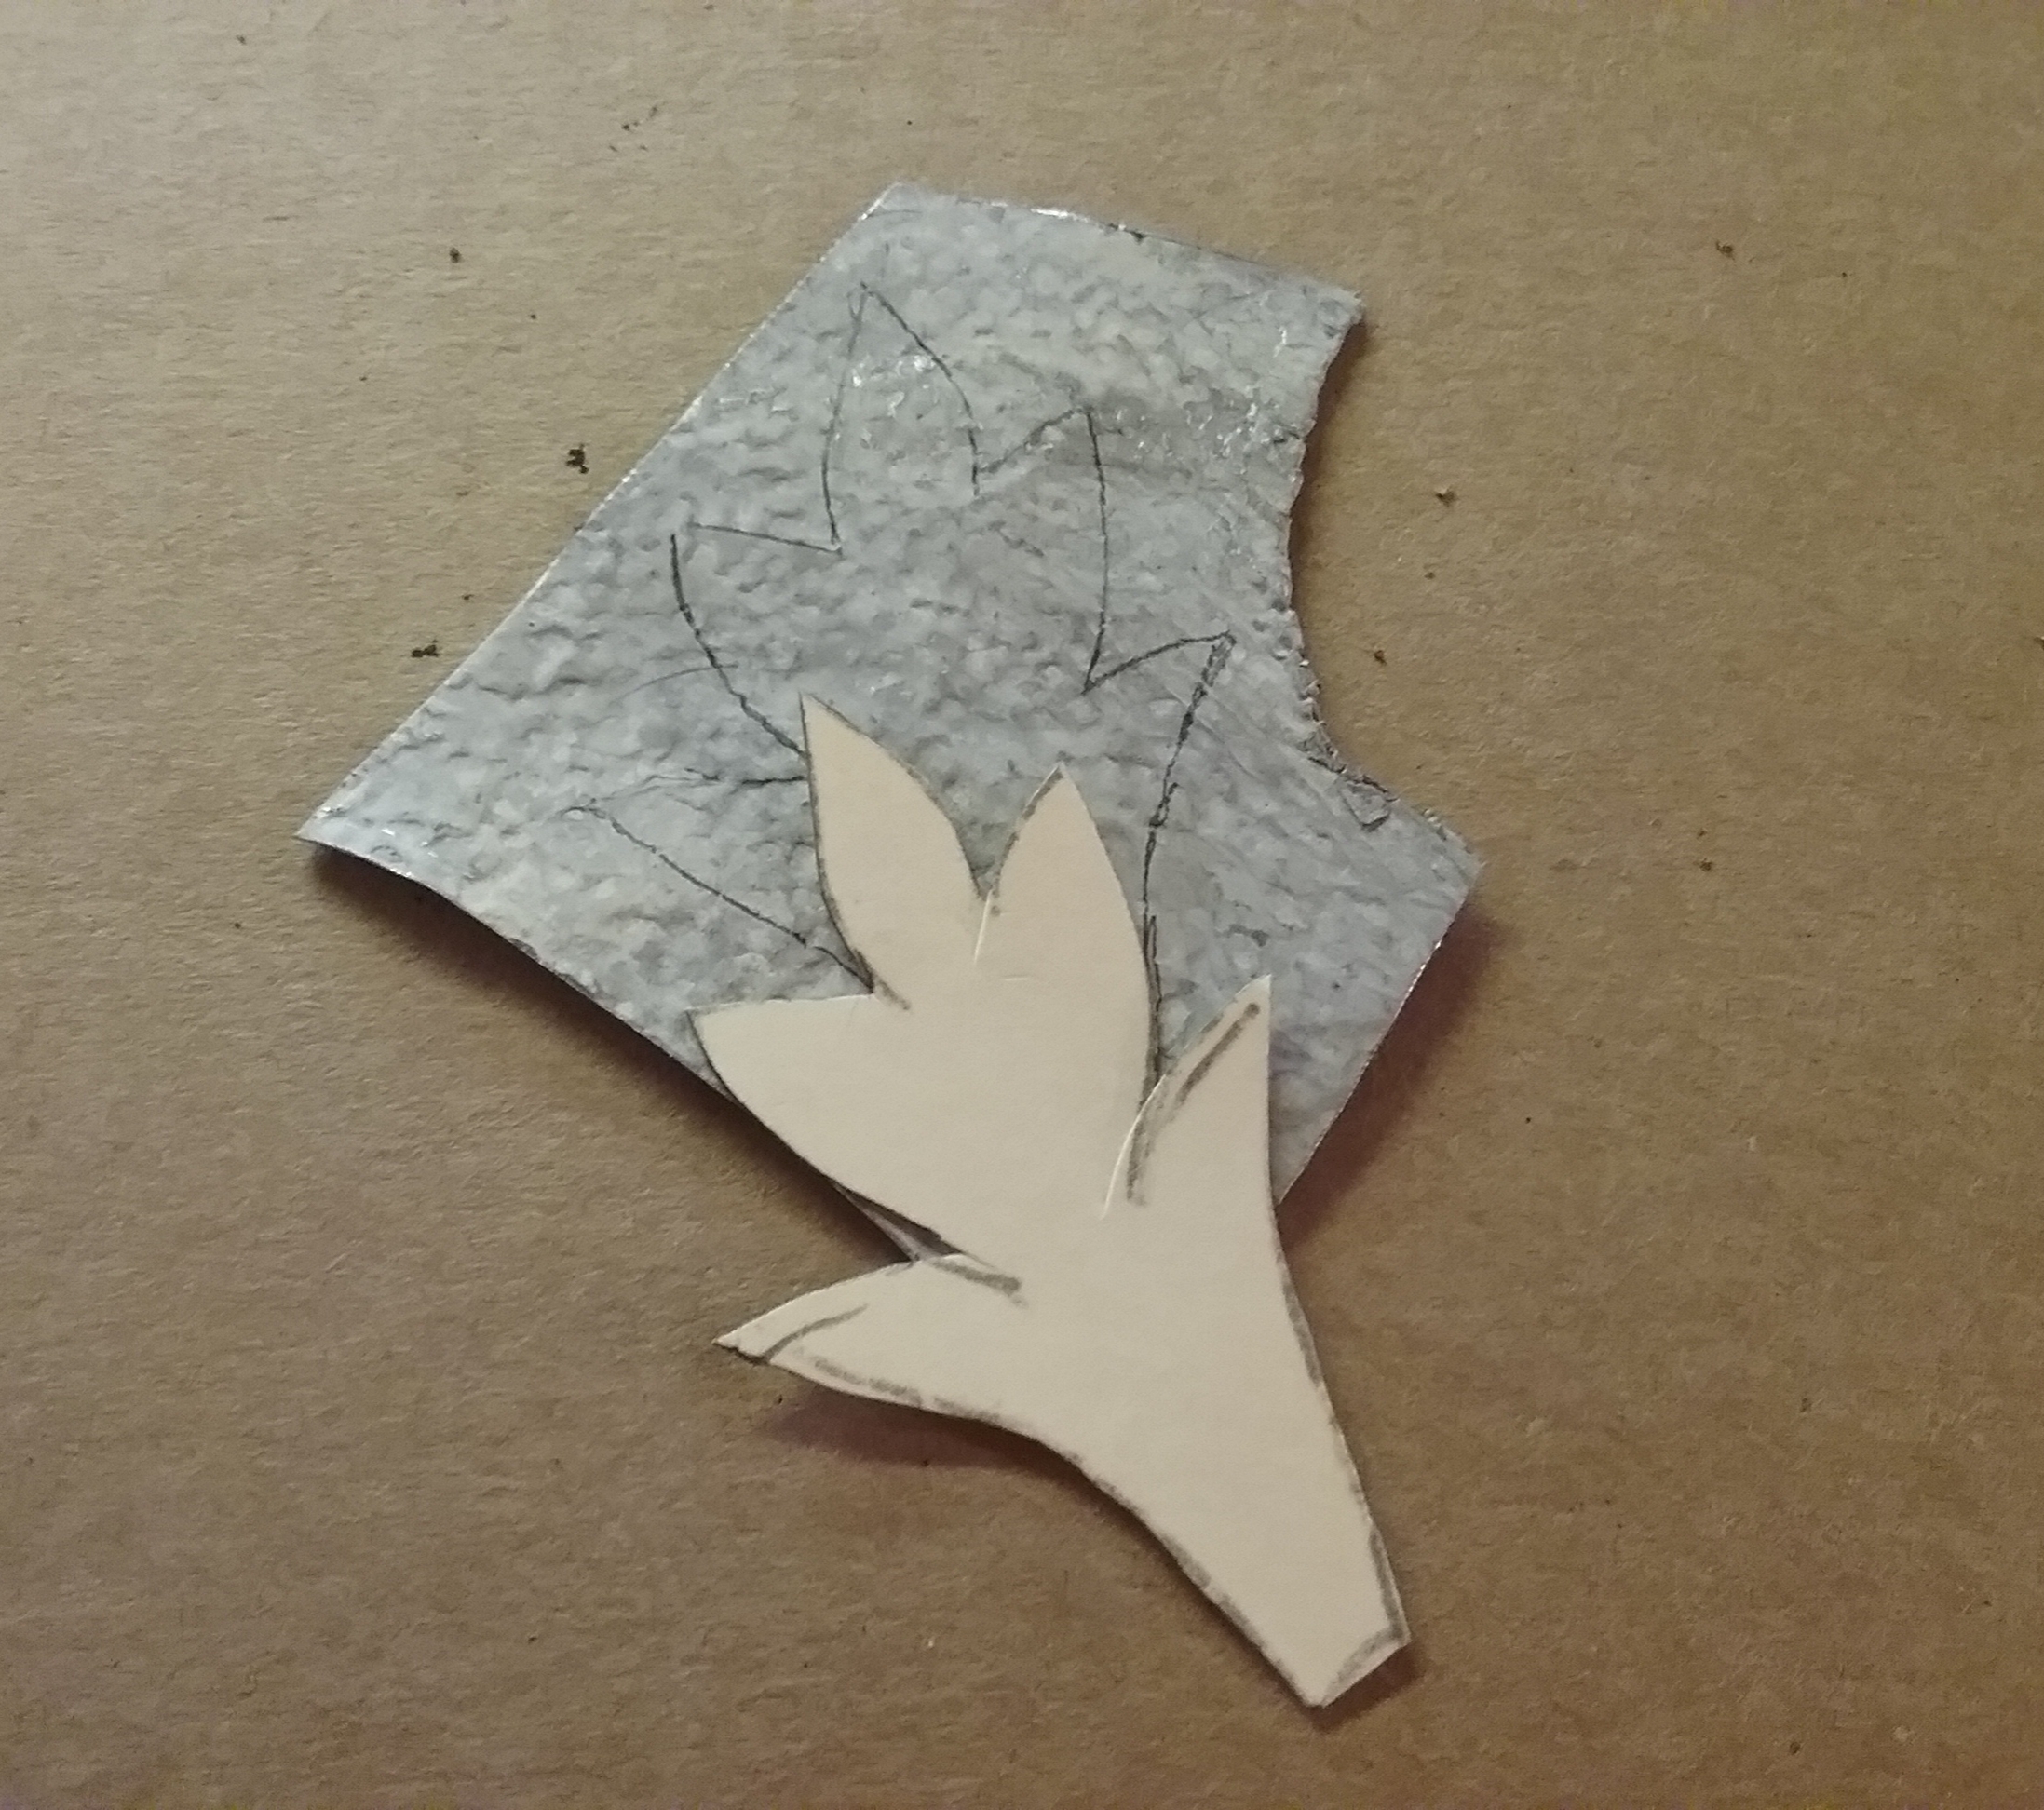
Trace three poppy leaves on the thin metal, flipping your pattern to trace one face down. Cut, paint green, sand, speckle, and seal.
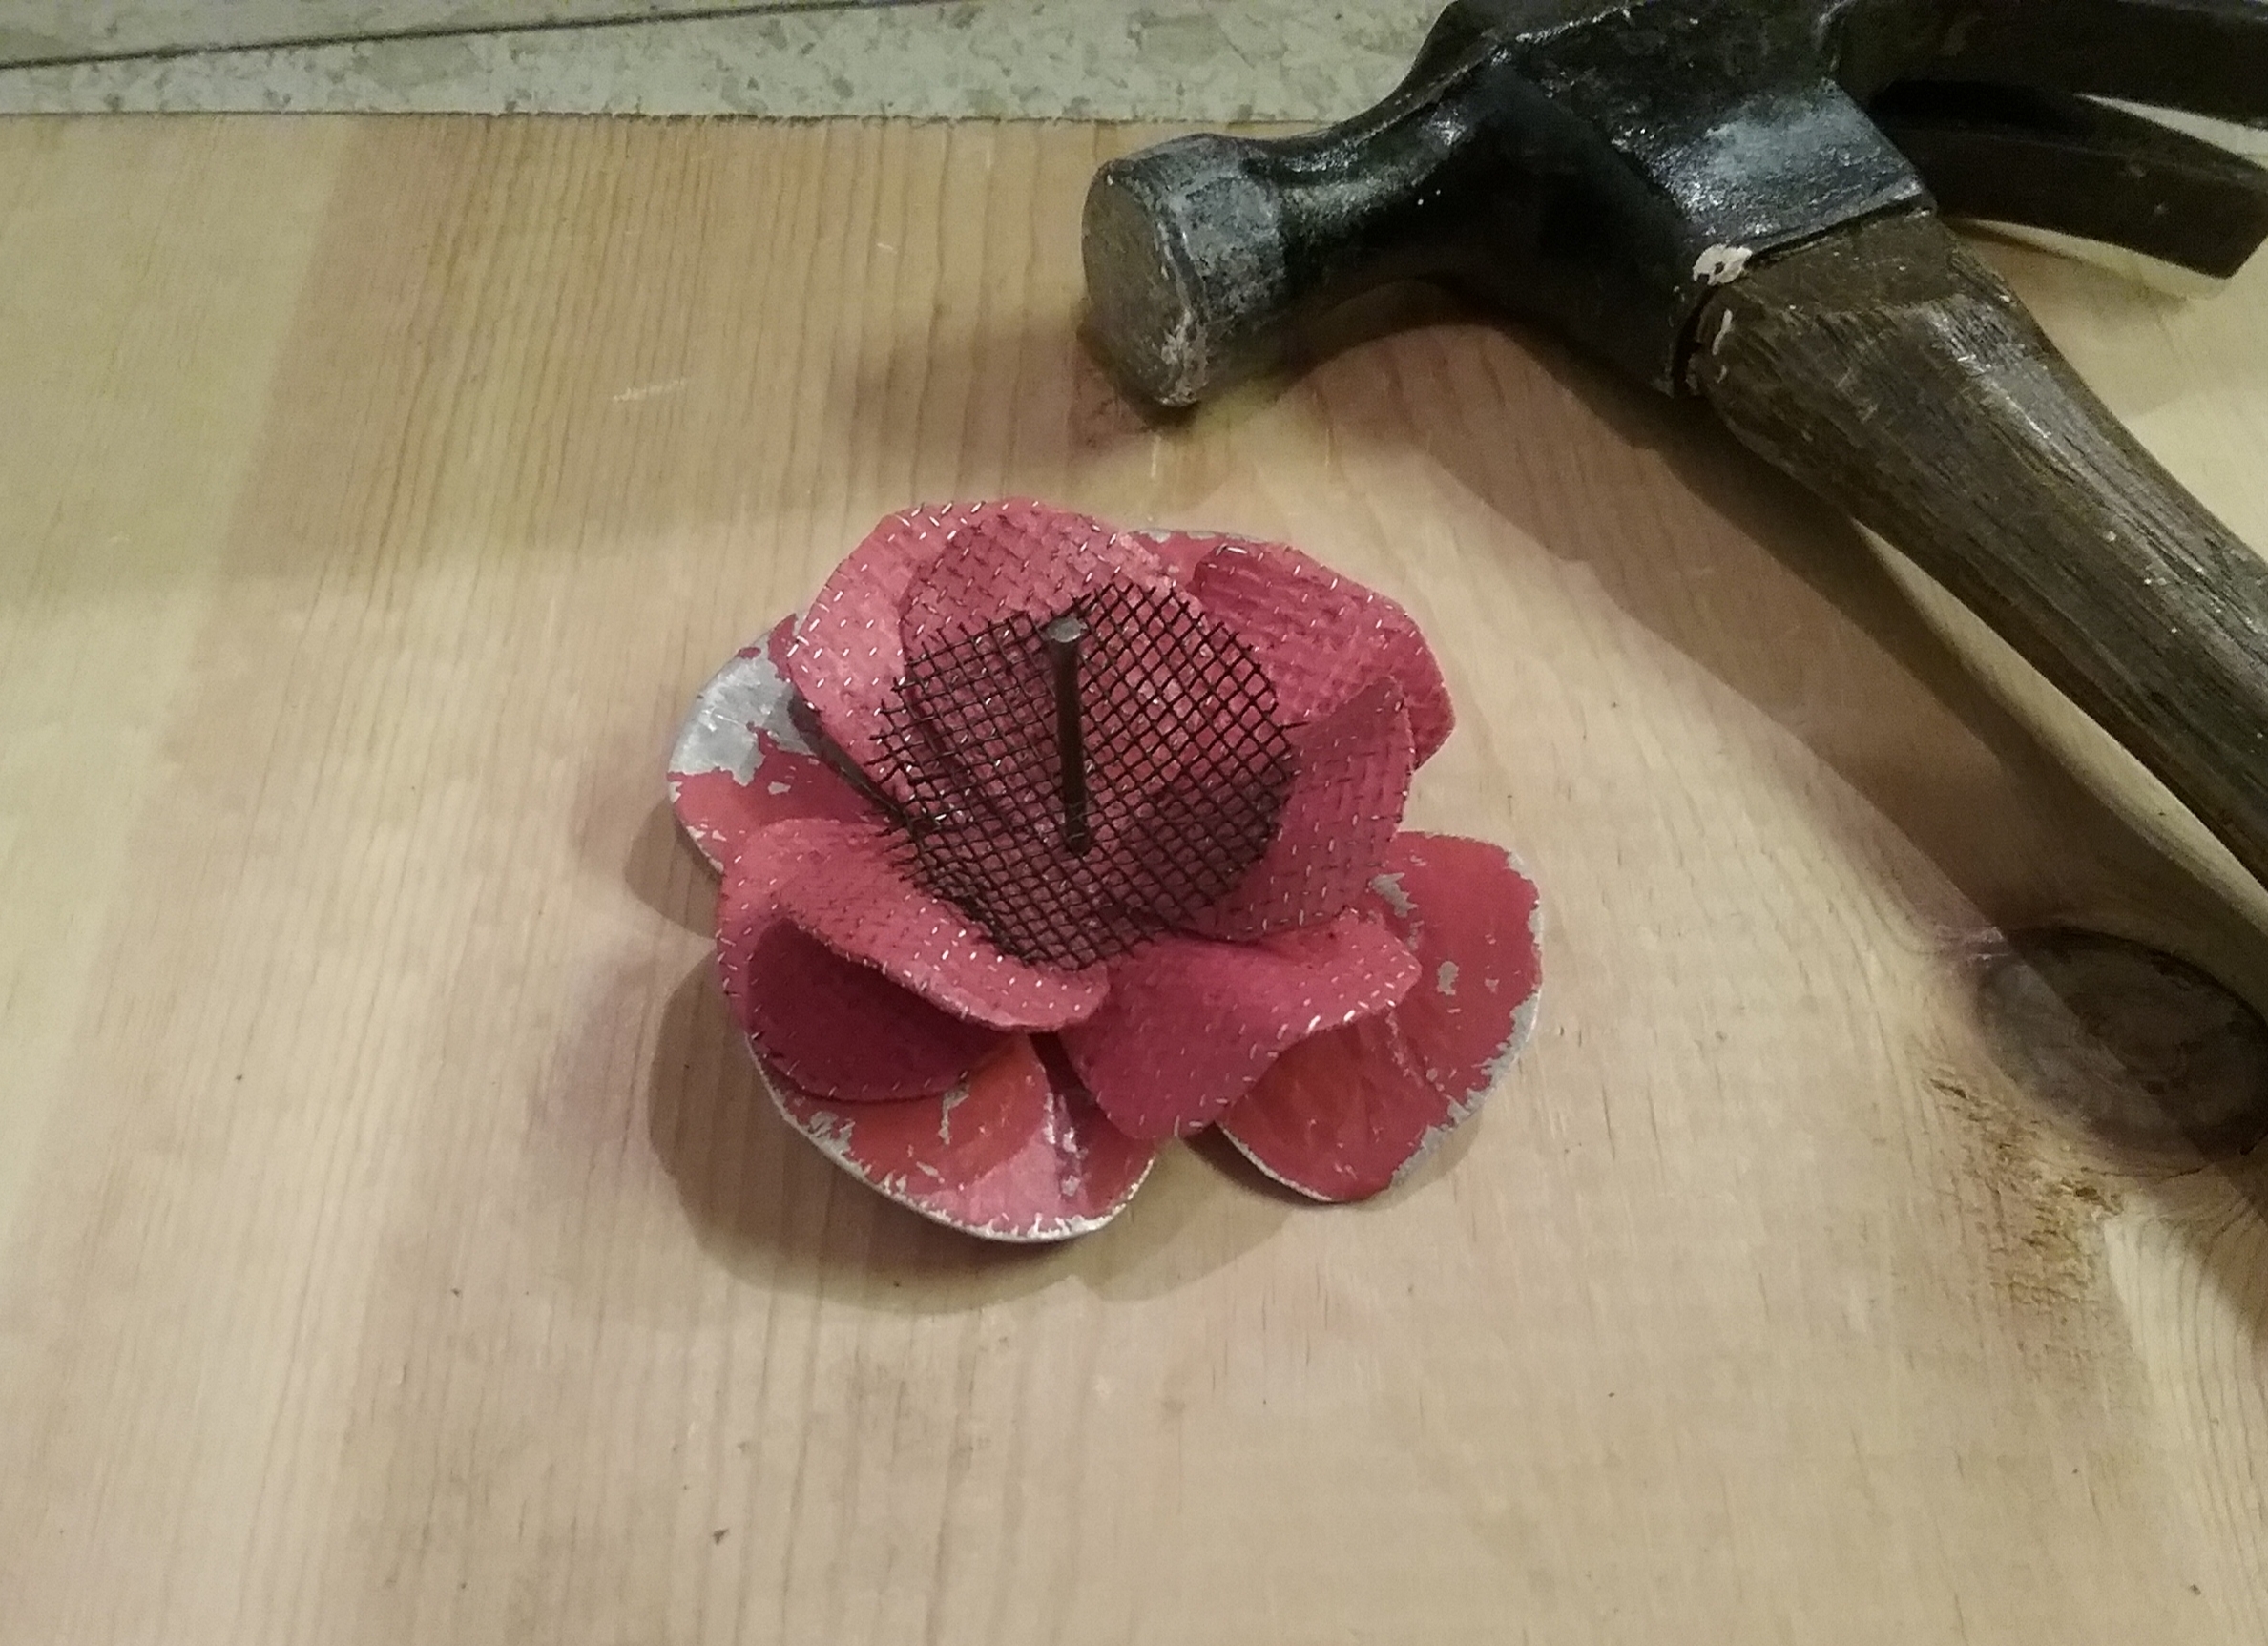
On a board, drive a finishing nail through the stacked flower petal arrangement. You can shape and bend the flowers first, or keep the petals flattened and shape after. Remove the nail.
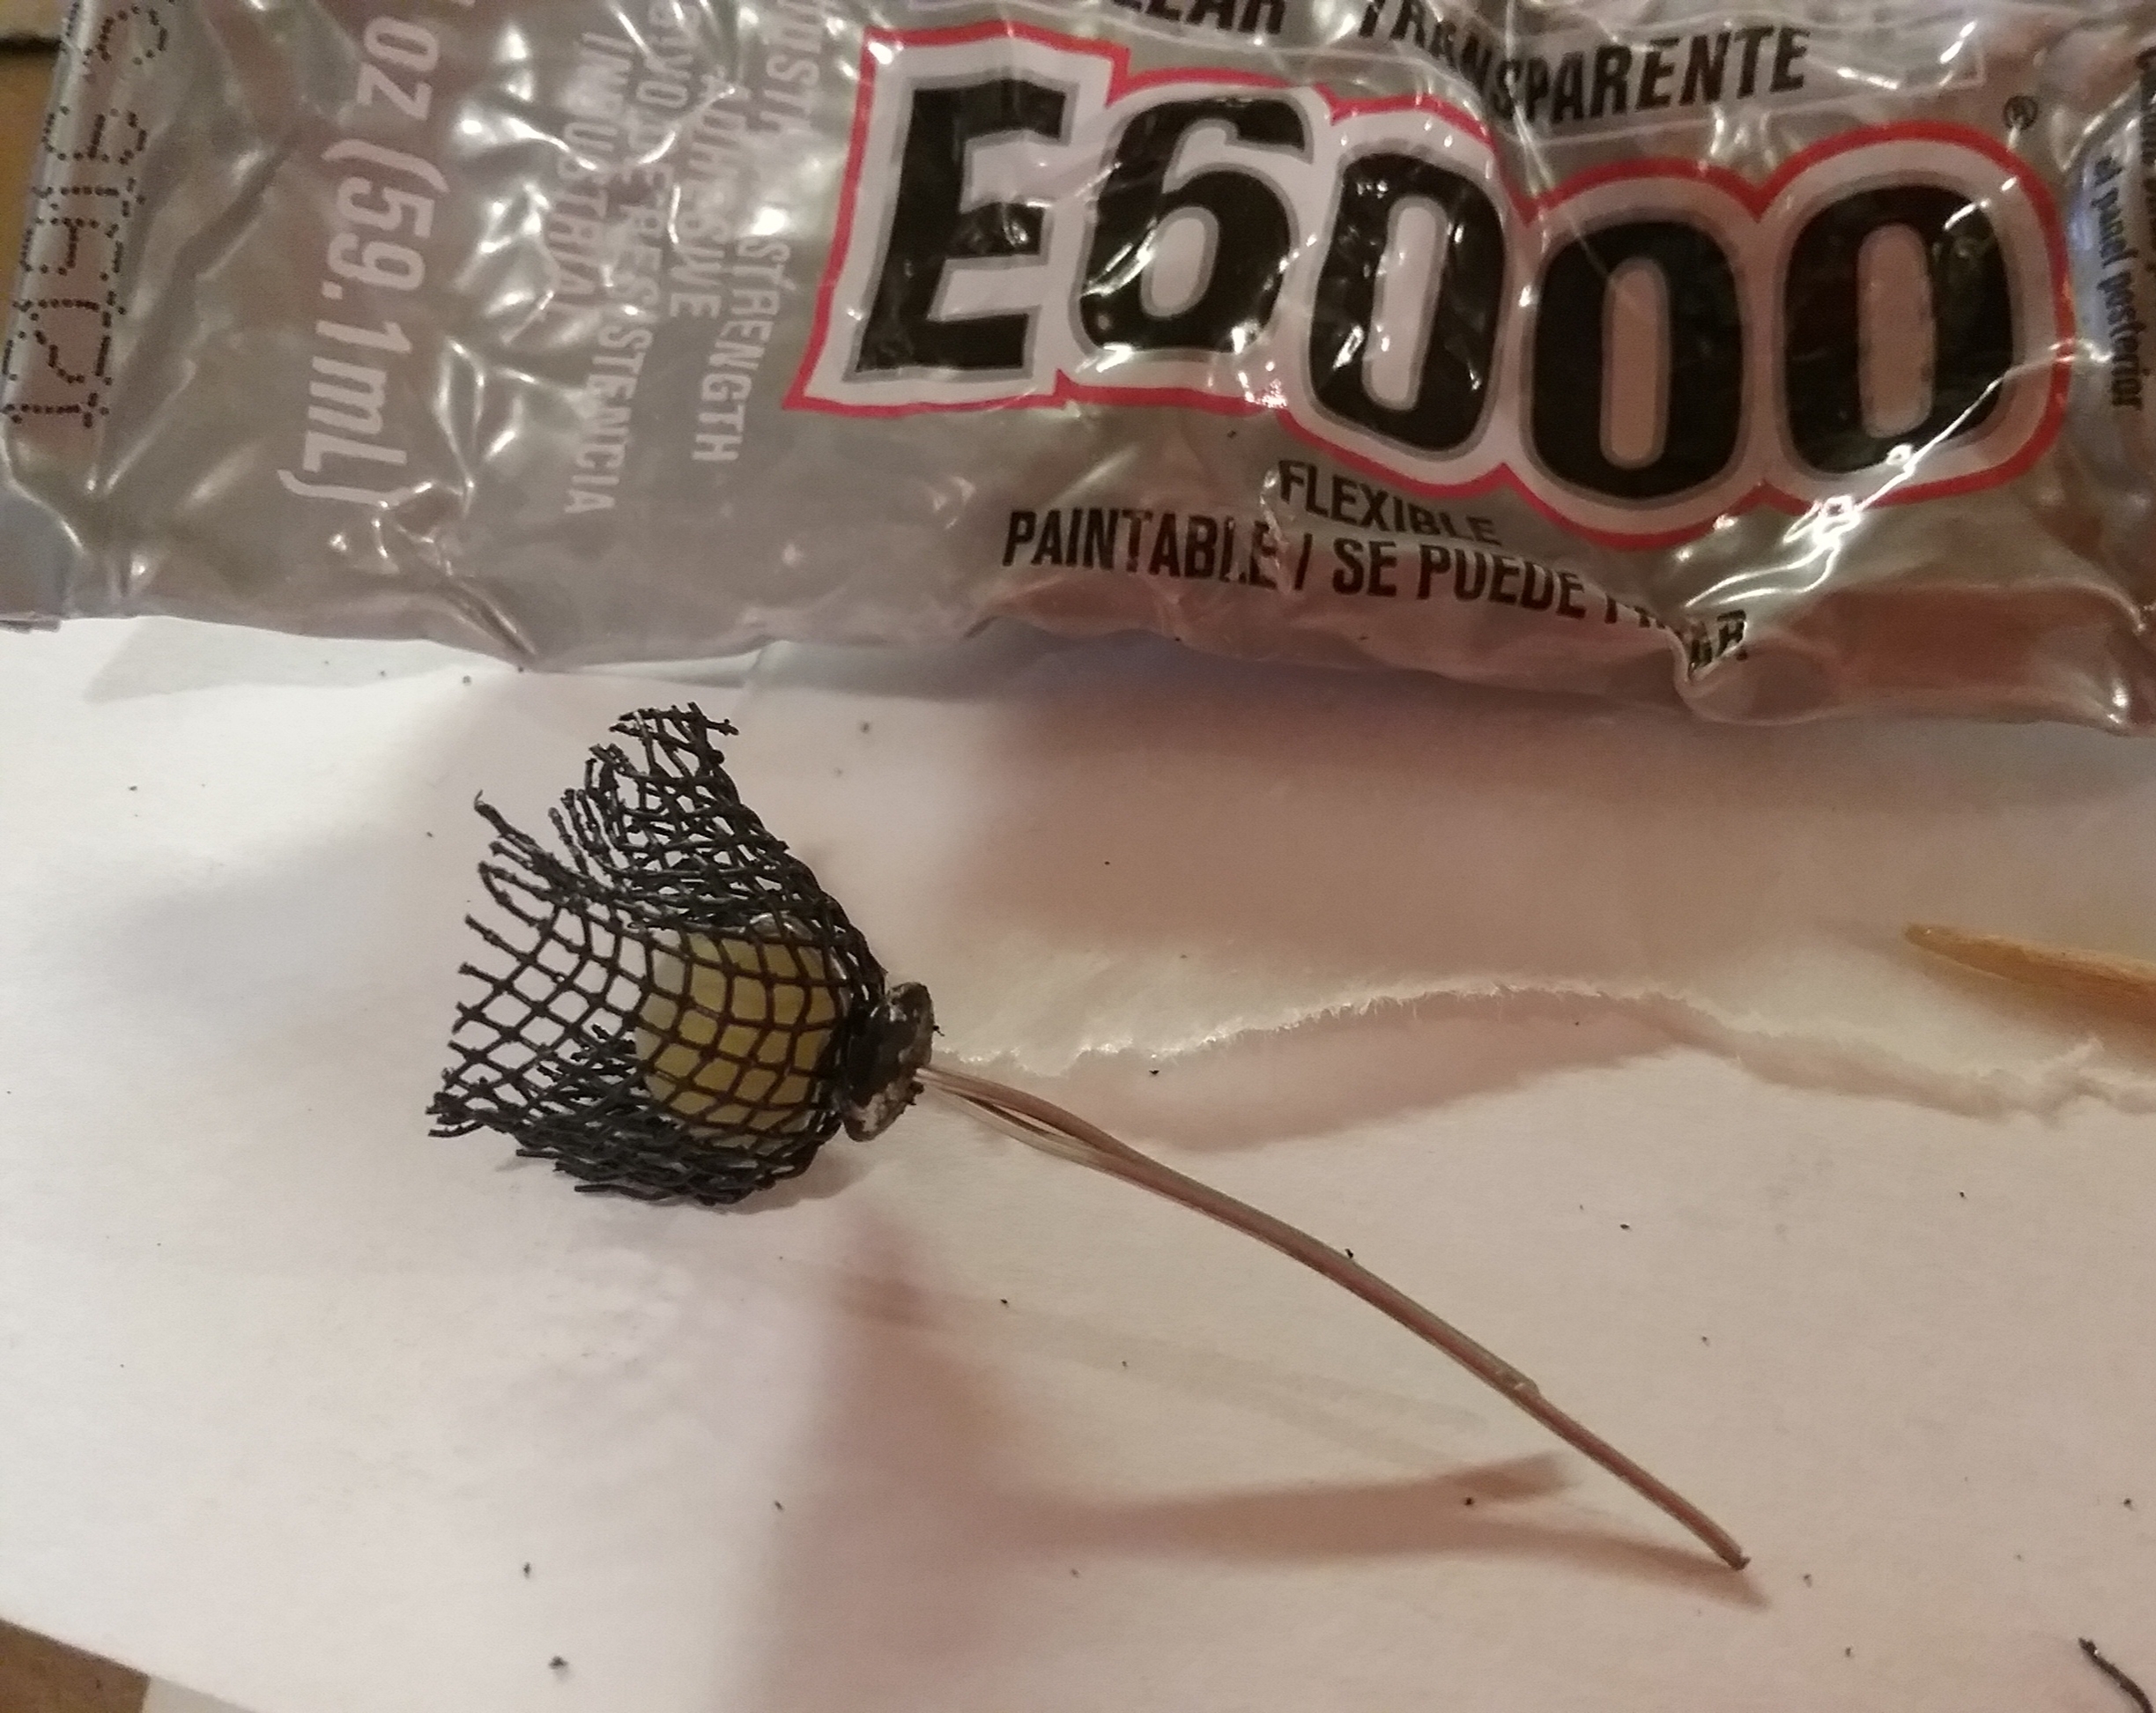
Center and twist a glass bead on a length of straightened thin wire. Thread the black screen circle on to the wire stem and shape it around the bead. Add a small flat bead with a dab of E6000. Slide the other petal pieces in place, applying a small amount of glue between layers near the wire. Arrange and form the flower to your liking before pushing firmly into a piece of thick foam to dry. You can do more gentle bending, shaping, or trimming on the petals after the flowers are dry if needed.

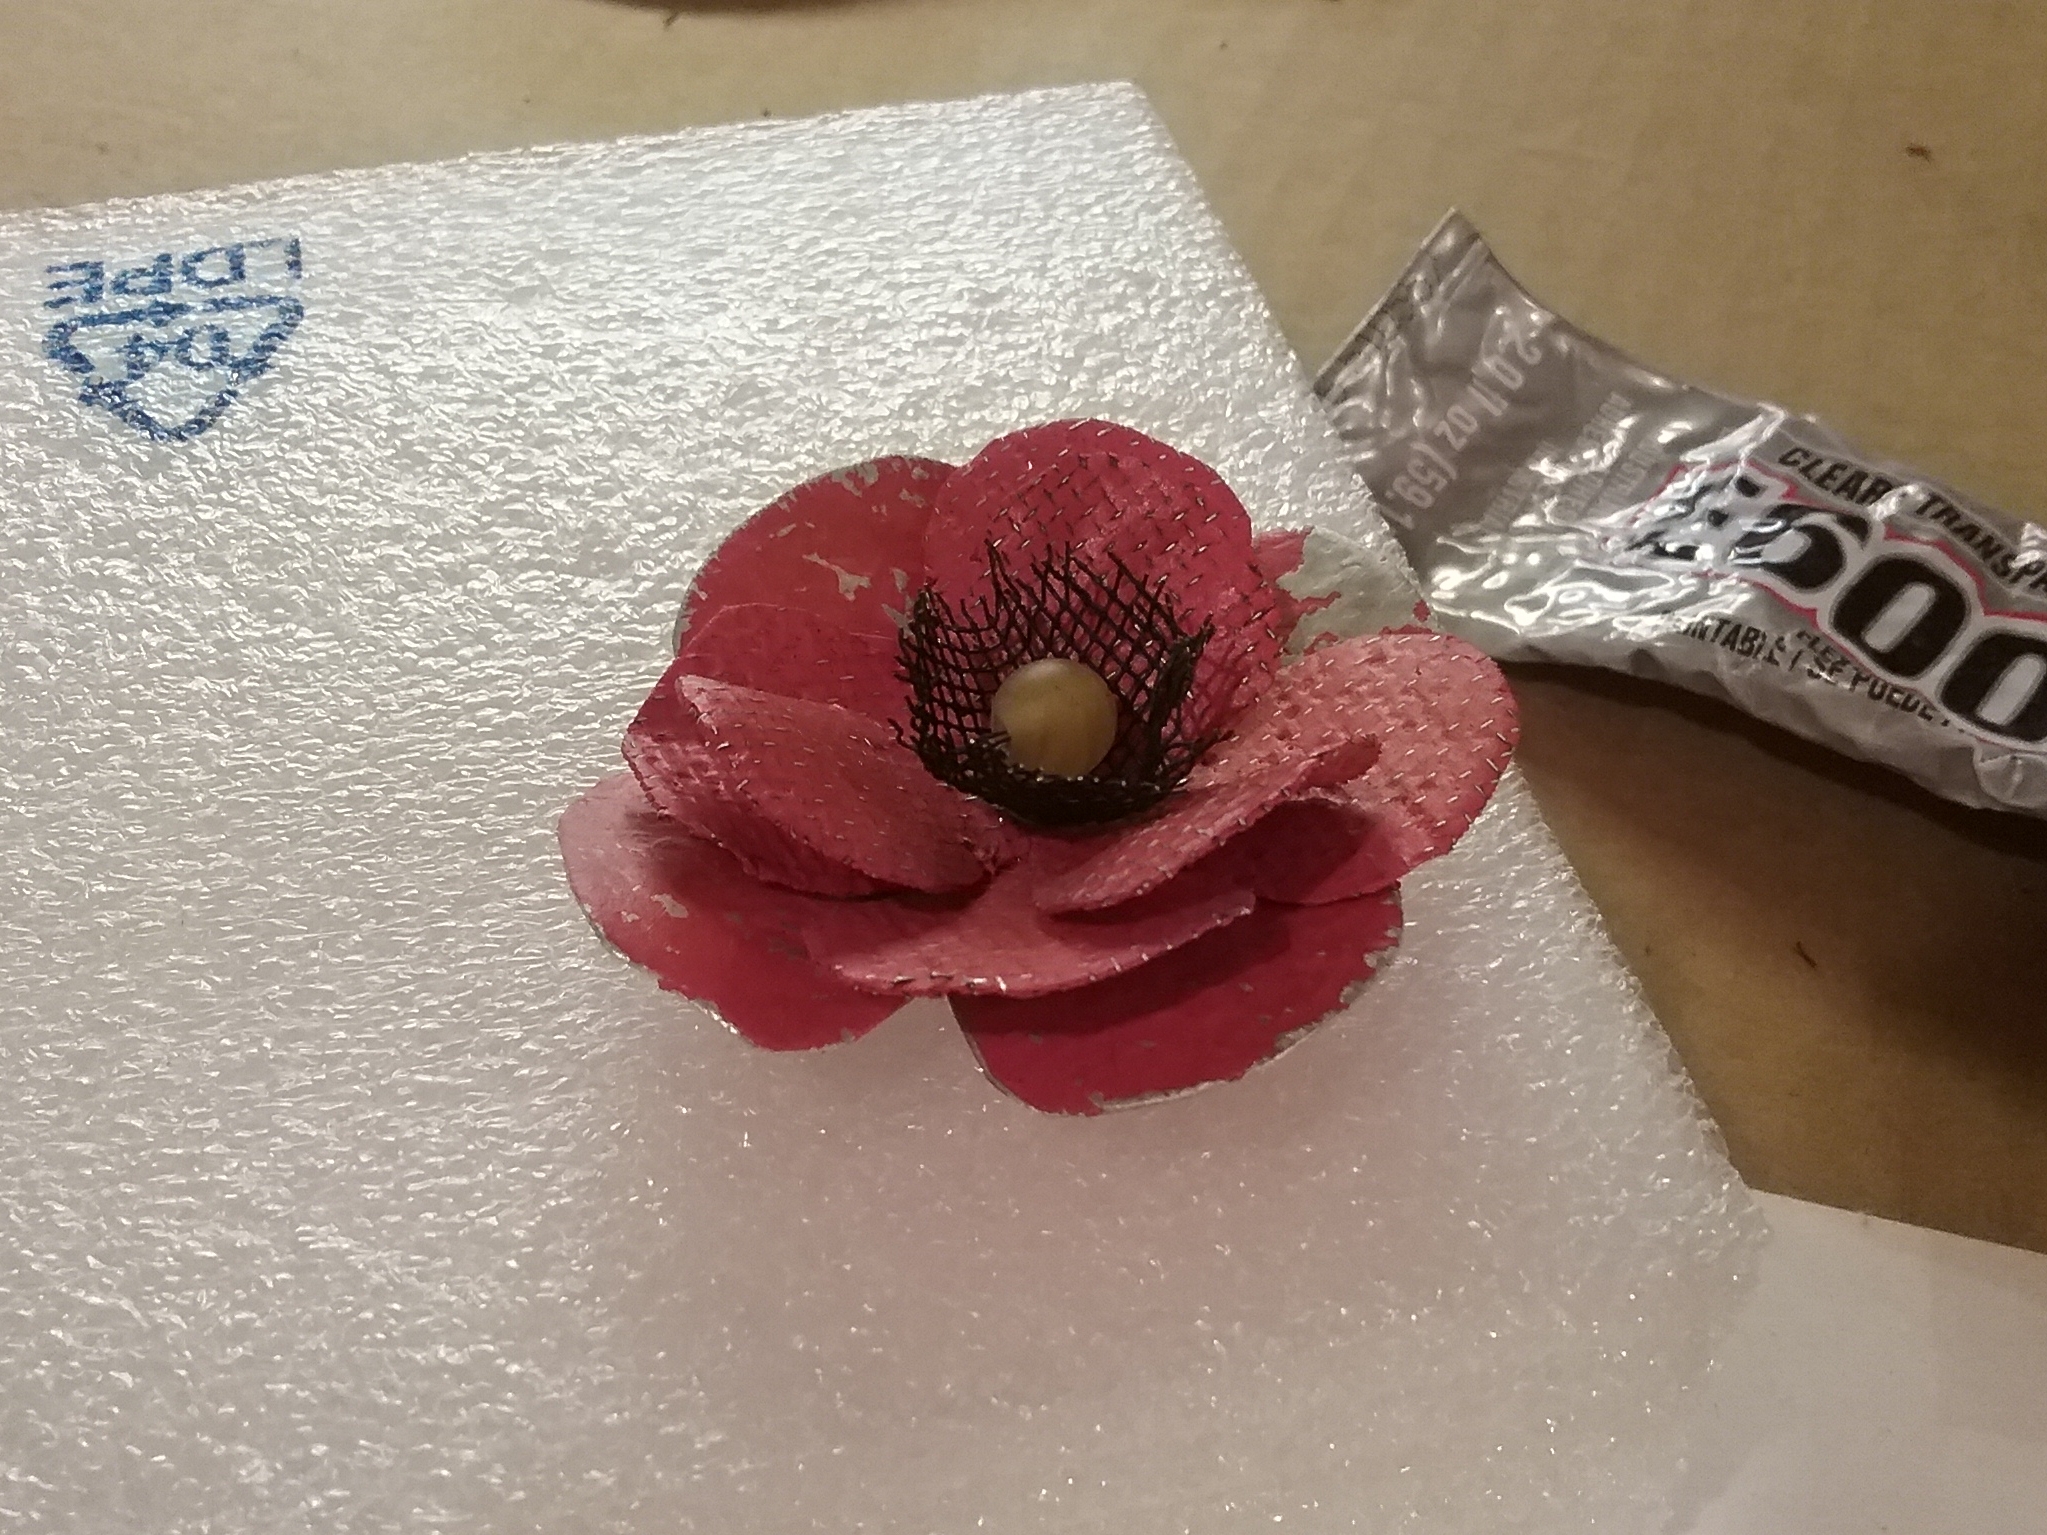
I think this makes a cute, versatile little flower to have some fun with. Change the shape of the petal a bit, the color, and the bead, and you’ll have a whole new look. Another layer of petals could be added for a larger flower.
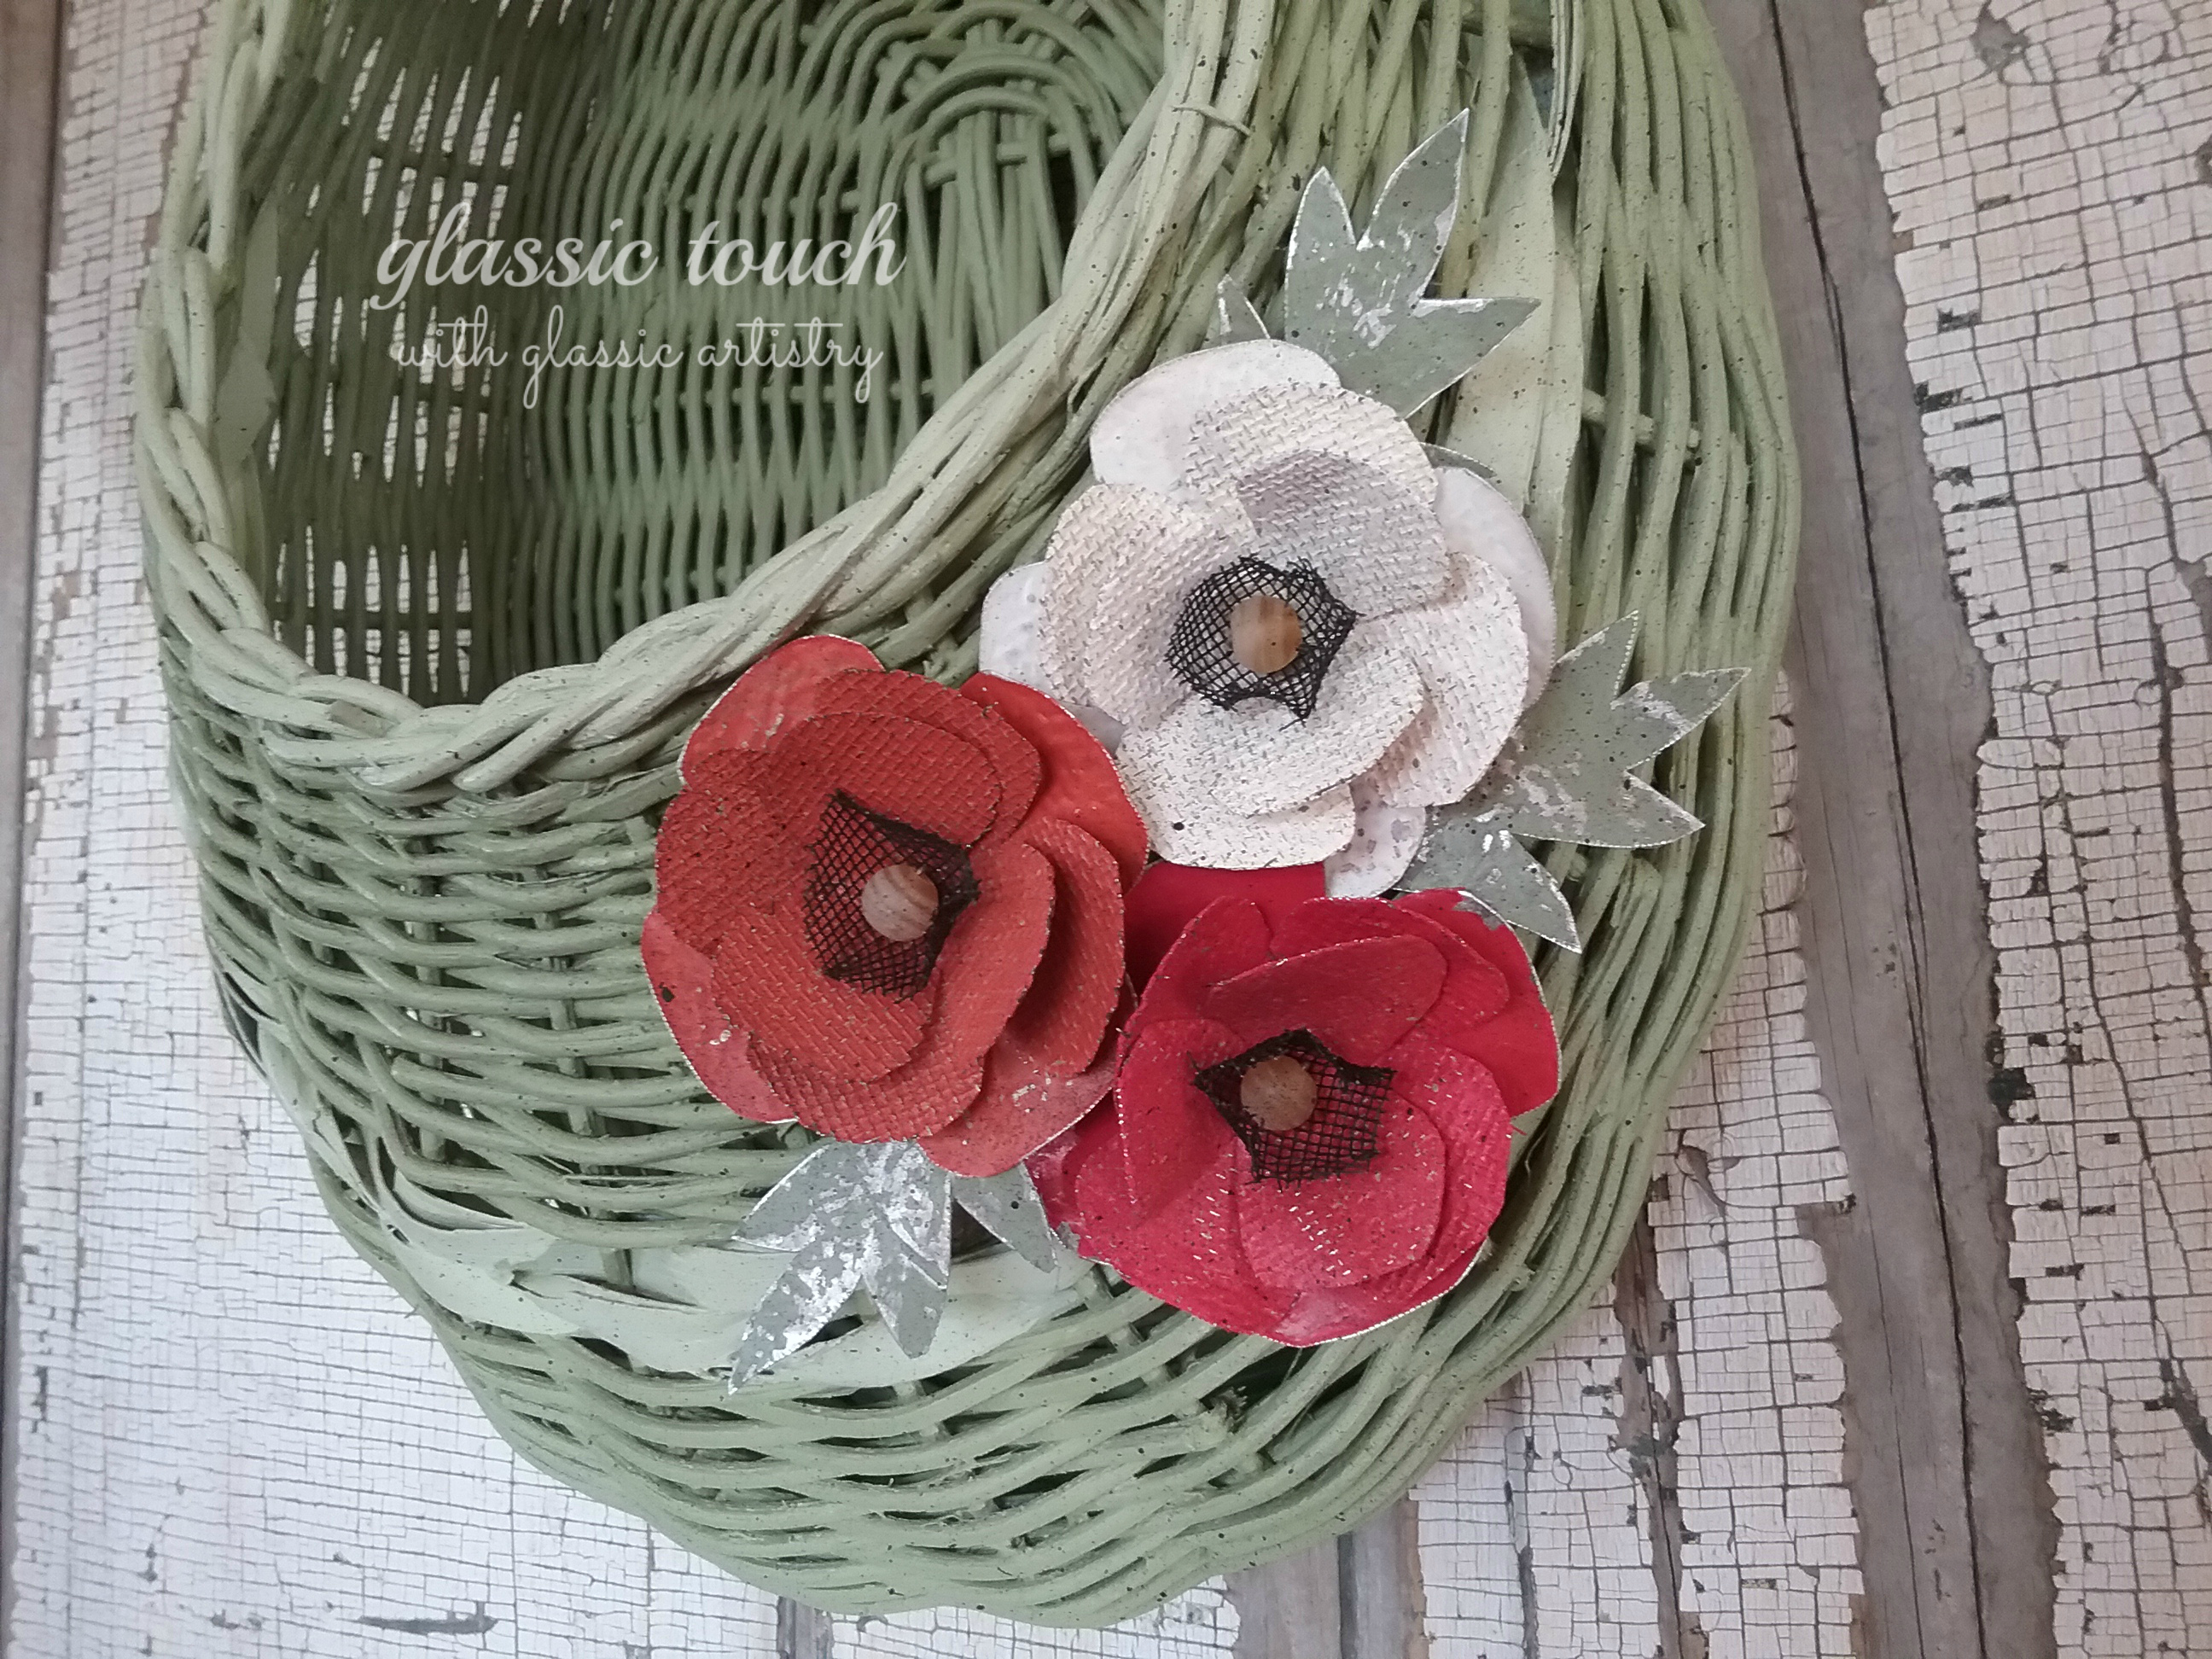
I wired my poppies to a basket for a pop of color, then glued on the leaves, but they could easily be wired, or glued, to wreaths, canvas art, frames, or wood.

It makes me feel good to find uses for salvaged, and reclaimed materials. Keeping anything out of the landfill is a plus. Hearing from my readers makes me feel good too, please leave me a comment and let me know your thoughts. Enjoy your week!

stopped by today from home talk post with that awesome garden cloche after just scrolling through a few archived post you got me I am adding myself to your mailing list
LikeLiked by 1 person
oh dang I forgot I love these poppies too xx
LikeLiked by 1 person
Thank You Chris, for all of your wonderful comments and the follow!
LikeLike